When you click on links to various merchants on this site and make a purchase, this can result in this site earning a commission. Affiliate programs and affiliations include, but are not limited to, the eBay Partner Network.
By AFM, you mean Throttle Body, correct? I'm not sure you can rebuild AFMs (?)
Dan Martinic you are right, I had a brain fart apparently.
Never seen belt cogs powder coated before, they are usually anodised or zinc plated. Are you sure that the coating won’t cause issues with the belts?
Some of the pulleys are painted or powder coated from the factory so I do not think it will cause issues. I really hope not because just did another round of PC
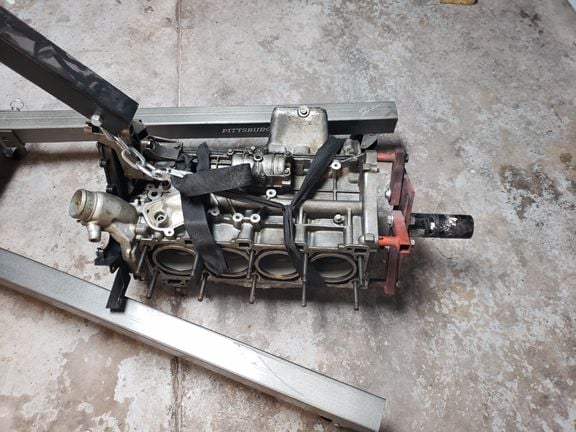
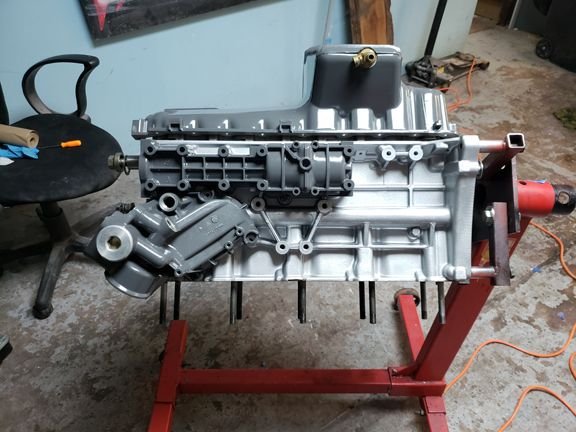
But the good news is I finally acquired another block -score free- so I can now start putting the engine back together, just need to order some OE gaskets to replace the VR gaskets I got.
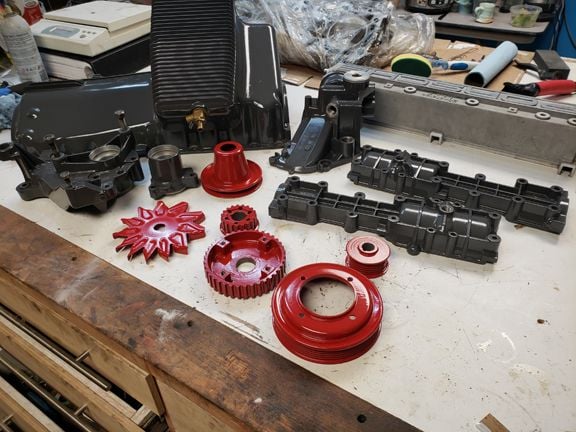
the new block cleaned up and a couple peices on it to see how it looks.
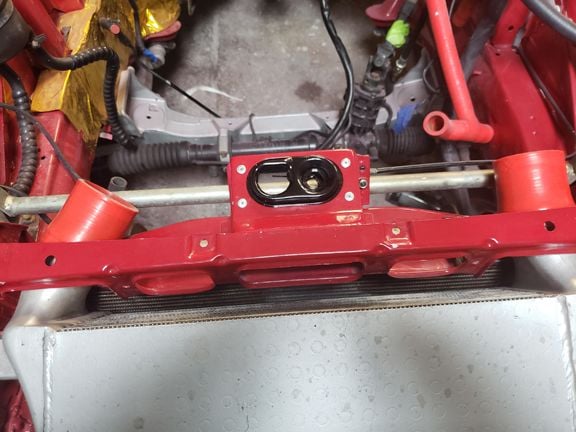
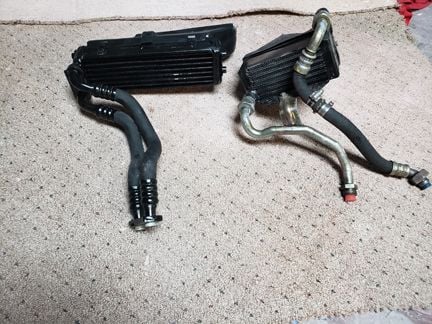
Since the 951 oil cooler had a cut and spliced line I also got a s2 oil cooler housing so I can use the s2 cooler.
Does the s2 have an external cooler like the 951 does? You will defenetely want the the external cooler for this engine.
Yes the S2 engine has an external cooler, folk actually fit it to the 951 engine as an upgrade as the housing, lines and fittings are of a superior design.
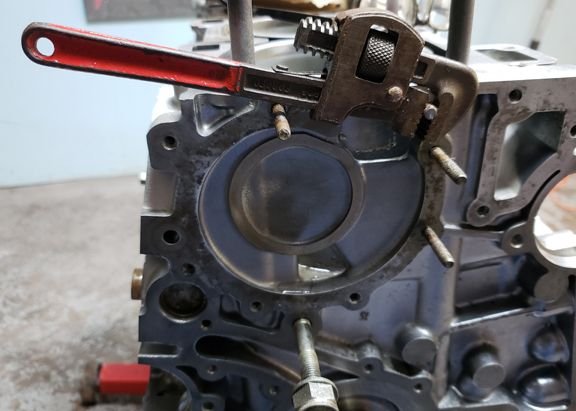
The last thing to take off the new block was the water pump studs. I found that a small pipe wrench, heat and patience were the key to removing them. Unfortunately I ran out of patience on two of the studs and broke them! I then preceded to break off the tip of the bolt extractor in one.
So I did what every sensible person does - moved on to bodywork. Maybe they will just fall out by themselves!
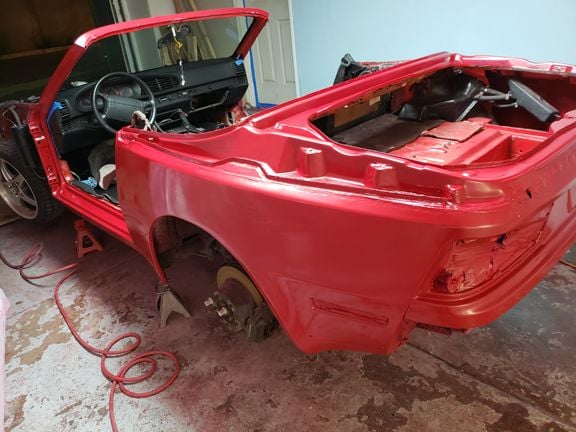
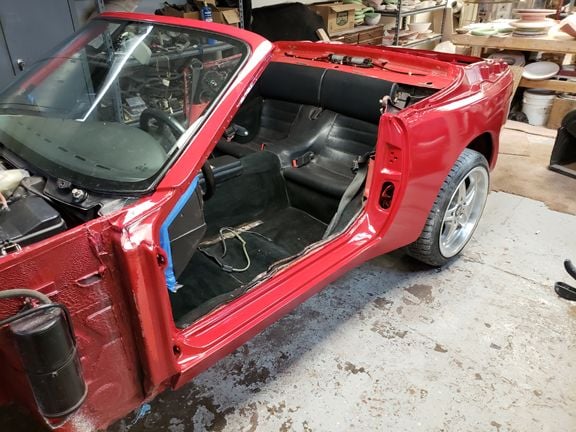
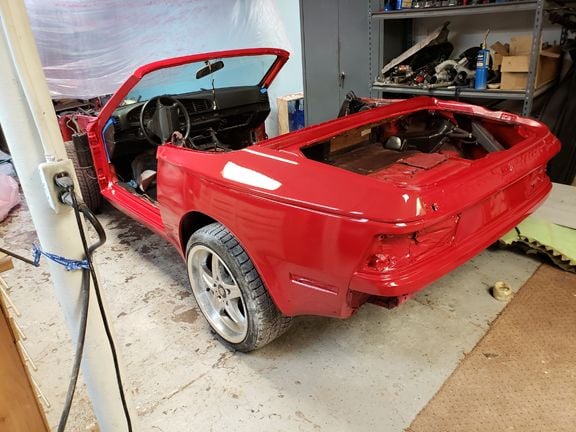
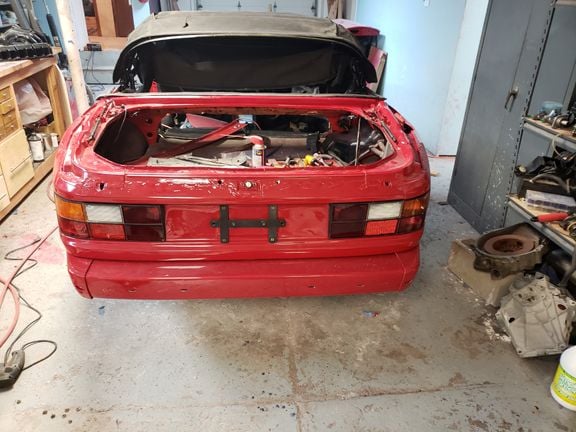
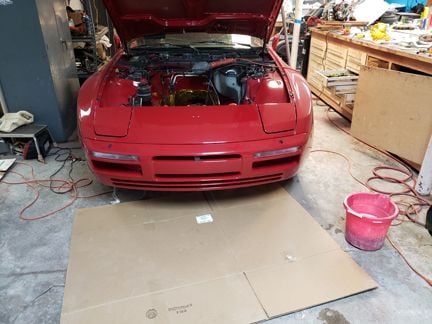
Started getting color on the car
Would be interested to know how you go about fitting the side panels back on. My 968 Cab had some sort of gasket/cushion material underneath that seemed to help fill out the area underneath, but it is not shown on the PET diagrams for either of the Cab models...
Would be interested to know how you go about fitting the side panels back on. My 968 Cab had some sort of gasket/cushion material underneath that seemed to help fill out the area underneath, but it is not shown on the PET diagrams for either of the Cab models...
I did not actually install the panel, I just placed it in place. When you go for a non stock color it is nerve racking to see if it will work on the car, and I was trying to see how the color looked.
When I removed the panels there was nothing under them, only sealant around the bolt holes. There was a non factory screw in there so they may have been off before and material removed if it was there?
Been very busy with life for awhile but starting to get some free time here and there to start putting this back together.
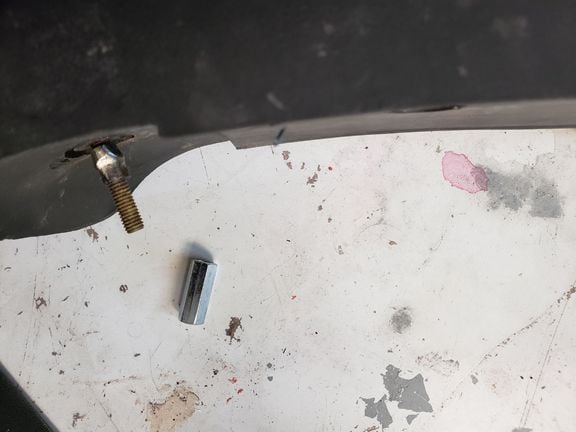
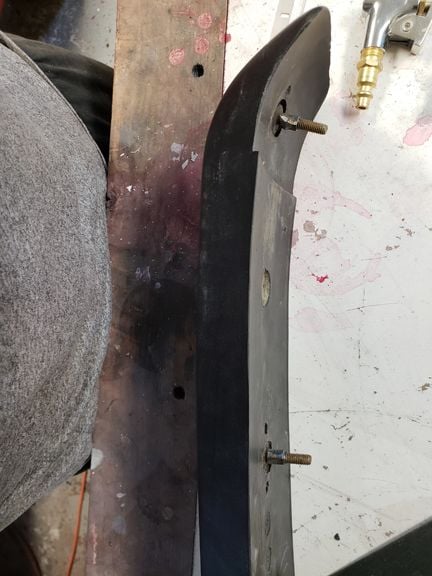
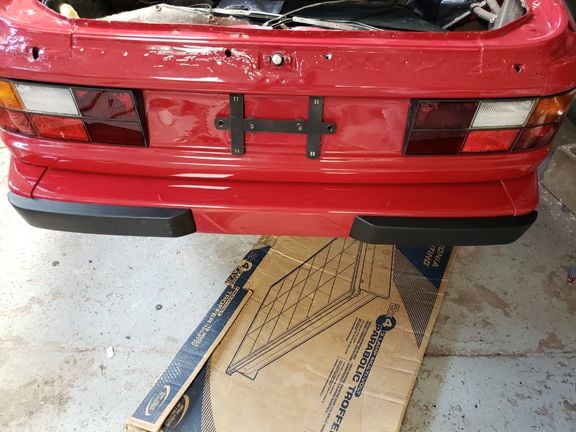
I broke a couple of the studs coming out of the rear bumper pads so I had to fix that.
I took a barrel connector (?), which is too big to fit through the hole, and ground it down to make it thinner. Then cut to size, trim broken stud to size, cut head off spare bolt and put it all together and install on car.
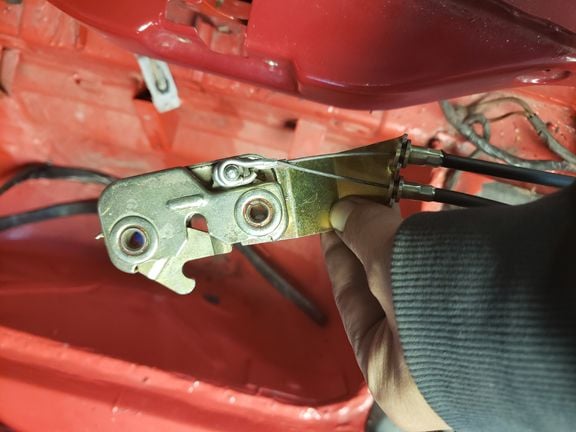
When I got the car the trunk would not open, the key would not turn, so time to figure out what is wrong. After much lubrication I finally got the lock barrel to work. Since I had to reach through the back seats to unscrew everything associated with the lock to open the trunk I did not know how it went back together. I also bought an emergency release cable from a 968 to hopefully never have this problem again. After figuring out how the rear latch worked I have to admit this is probably the most retarded piece of engineering I have seen in a car! OMG they must have designed this during Oktoberfest after a few too many.
The control cable goes to a bracket attached to the latch, so when activated it pulls the lever on the bracket. That lever goes to another arm, attached to the black bracket........WTF! Then I looked at the 968 way. They threw all that crap away too and attached the control line directly to the latch lever. They must have sobered up finally! Here is what I did.
Just attached the 968 bracket to the latch and attached both cables directly to the latch. Had to massage things a bit but it all fit.
Now to attach the lock cylinder to the latch. Are you kidding me? The lock cylinder does not attach to the latch, instead it just operates a micro switch with engages the electric motor. I imagined that they justified this because the latch is INCREDIBLY hard to disengage and would snap a key easily. When I first tried to get into the trunk I pulled HARD on the control wire to try and release the trunk and could not do it. That latch is HARD. Just stupid. So if your trunk latch motor, latch or control wire messes up, and your back seats are up there is no way to get into your trunk without breaking something!!!!
I threw a battery in the car to see if the latch would work. Tried key in trunk, no go. Tried button hidden in the kick panel (why not the center console with the other buttons???? I will end up putting it up there), no go. I checked for power on the trunk release fuse and no power. I then put the key in the ignition and tried the fuse again. Power!? It is nice to know there is power at the fuse with the key on, but how do you use the key to open the trunk if you have to use it to turn the car on?????????? I am missing a relay for "power top and hatch". I hope this relay is triggered by the latch micro switch to then power up the latch motor or else - actually it has to, I just can not believe people are this stupid. Even though I do not have a "hatch" I hope it refers to the trunk. I would look at the wiring diagram but I needed to move on, I can only take so much stupidity.
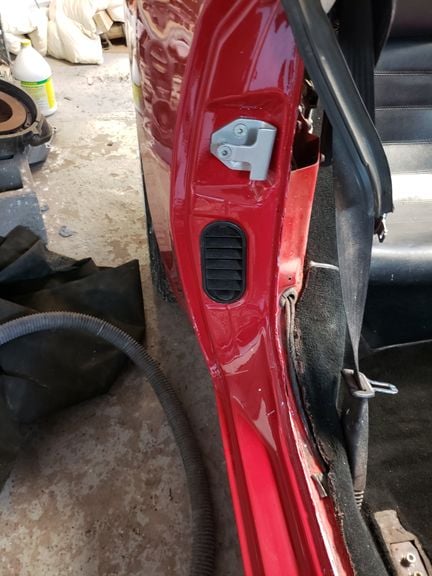
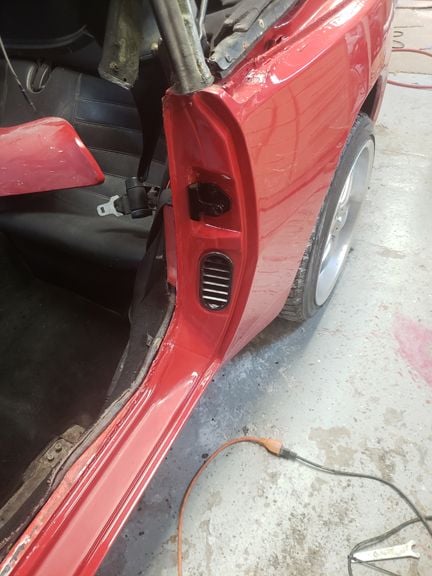
I moved to the door latches. I tried silver powder coat.
Did not like it next to the black vent (what is that for? to vent the door?) so redid them in black.
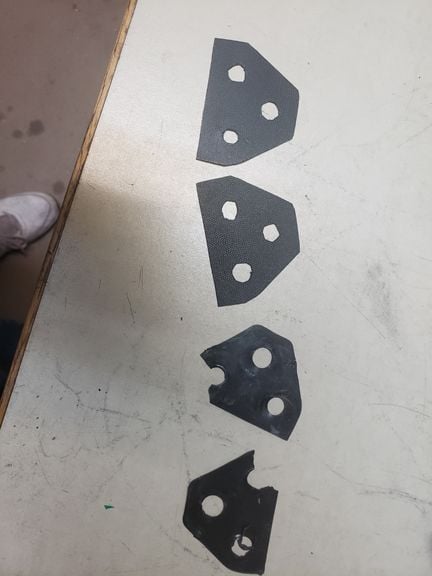
I ordered new latch bolts as the plastic on mine was pretty chewed up. I also had to make new "desk pads" since they are NLA and mine had corners broken. Of course the $0.41 part is NLA!
While on latches I did the hood latch.
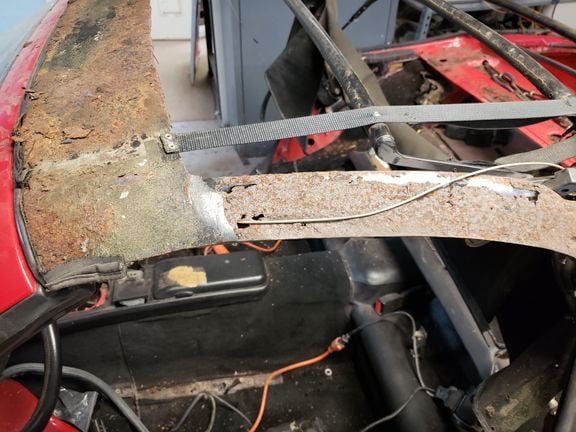
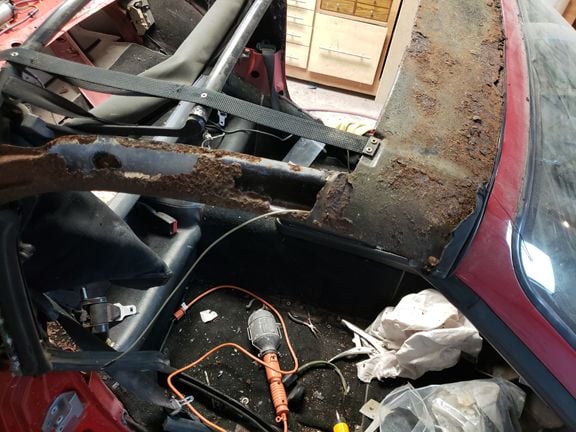
While I wait for parts to come in so I can finish up the trunk and doors (gaskets etc) and start assembling the engine (OE gaskets for areas I do not trust the VR gaskets for) I decided to replace the top since that came in. Got the back part off and all looks good.
Then I took the the front part off. Very slight problem.
It seems to have very light surface rust! So time to move on as I figure this out.
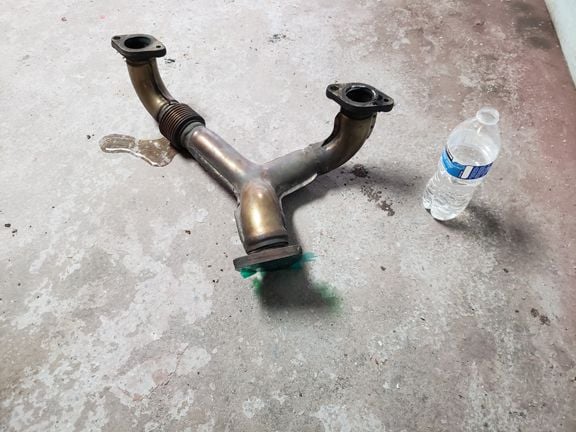
Time to send the headers off to jet-hot to be coated...but I figured just for fun I would check them for leaks before spending all that money. Taped off one hole and added water.
Do they make depends out of asbestos? Both are leaking. So as I try and figure this out time to move to the next thing........
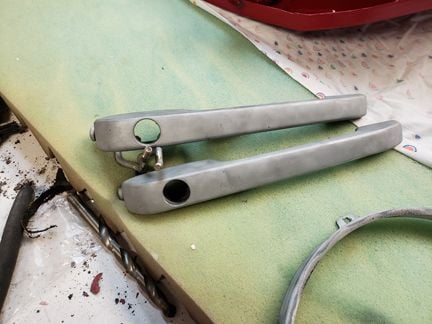
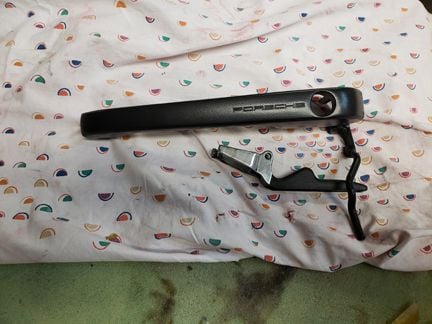
I continued on with the doors with the door handles
Blasted them, PC'ed them and installed. When I bought the car the drivers side door would not open. I thought it just needed adjusting. I was wrong!
So time for script handles.
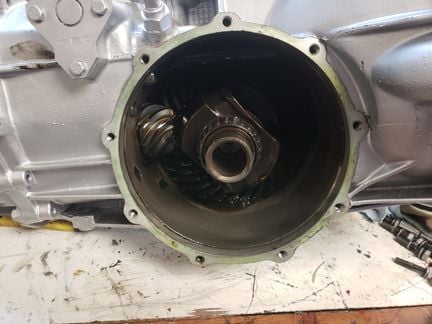
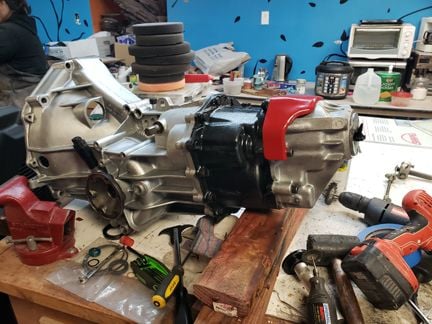
Started in on the transaxle
Don't know much about them. Things "look" good so all I know how to do is replace all seals/gaskets and clean it up.
Still waiting for a new end plug and bolt to arrive to finish it off. Then I'll install the only944 short shift to replace the worn out stock one.
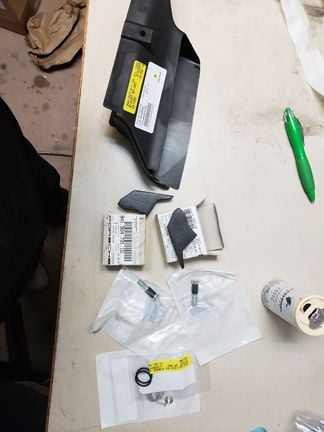
Got some parts in from Porsche
My oil cooler duct was torn so got new one.
My door striker bolts had the plastic starting to get mangled so new ones. I looked them up on ebay and a lot of people were selling them without the plastic parts. I wonder how many people know it should have plastic?
Also got the foam pads that go under the side panels. NLA in the US so had to get them from Germany. Total waste of money! They are on the shelf where they will remain until I throw them out.
Here is a comparison of 951 oil cooler and S2 setup
Yes, the duct is on backwards. Figured that out when I tried to install!
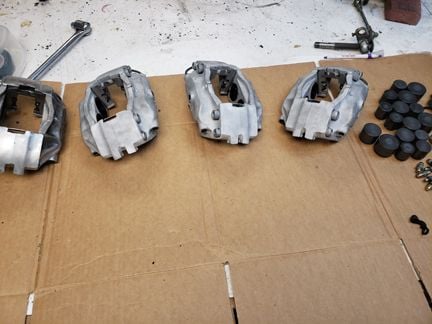
Starting in on the brakes
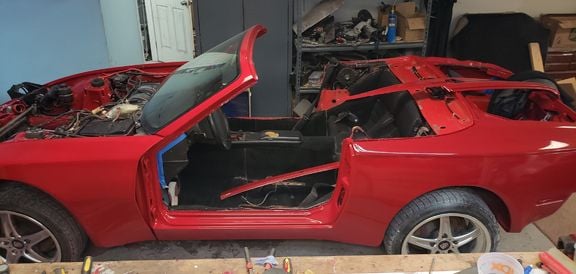
Just doing a quick polish for now. Have to wait until paint is fully dry to fully polish it. It is starting to look like a car though!
Found a set of non leaking headers and a new frame for the top so I hope to be finished in couple of months.
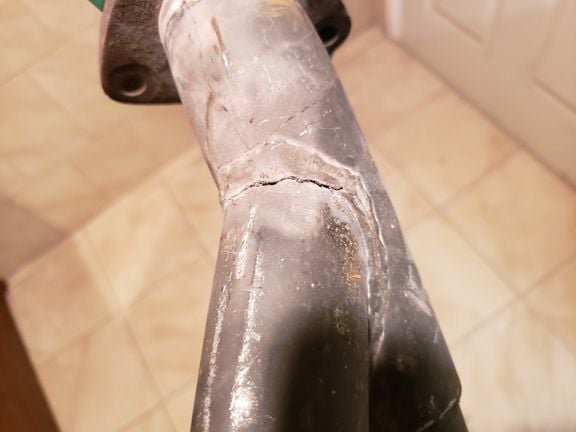
The 1-4 was leaking at the accordion part.
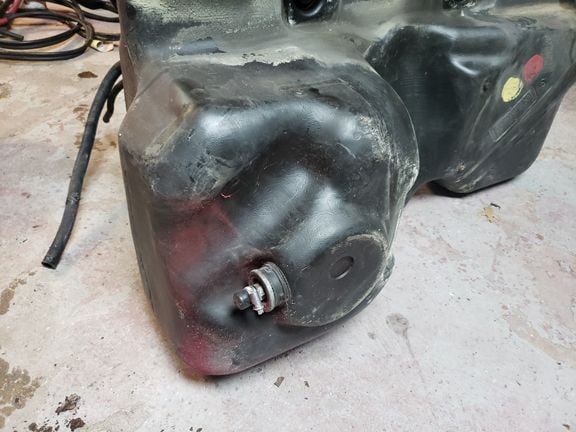
Started on the fuel system. The car did not come with a fuel pump, but at least they capped the tank off.
The tank was pretty clean inside. No garbage, just a little varnish.
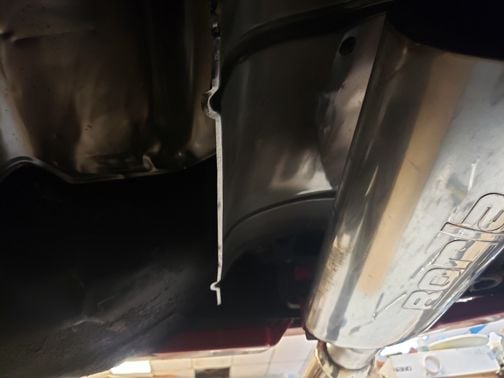
Got the straps and exhaust hangers PC'd and put new foam on the hangers
Got the tank back up and wanted to make sure the muffler fits.
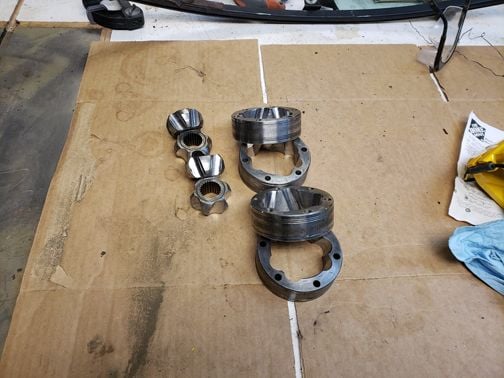
Cleaned up the cv joint with a quick polish
I will put the new boots and grease on when I am ready to install.
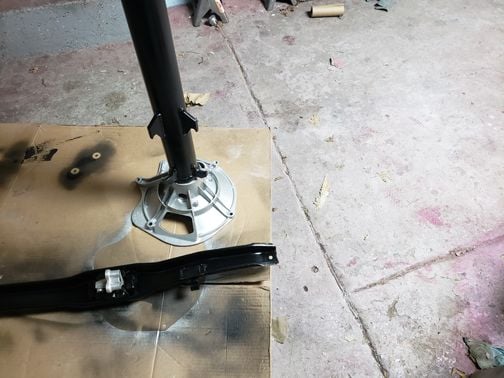
I managed to find a second generation TT. I was originally looking for a 2nd gen TT to rebuild-did not want to deal with 3rd gen split tube-but the bearings in this one seem excellent so I just cleaned and painted.
Also cleaned up the trans cross bar.
I hope to have the car up in running within a month!
 08-22-2018, 04:46 PM