When you click on links to various merchants on this site and make a purchase, this can result in this site earning a commission. Affiliate programs and affiliations include, but are not limited to, the eBay Partner Network.
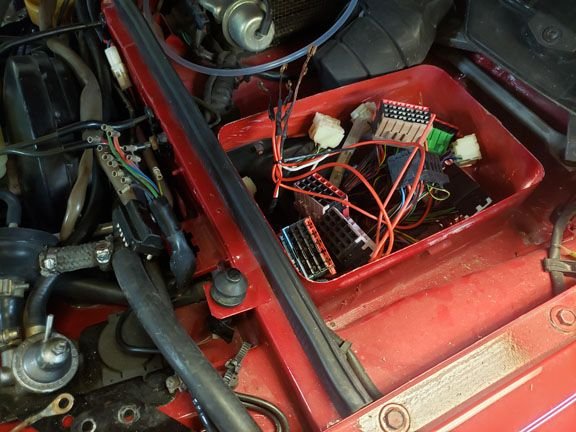
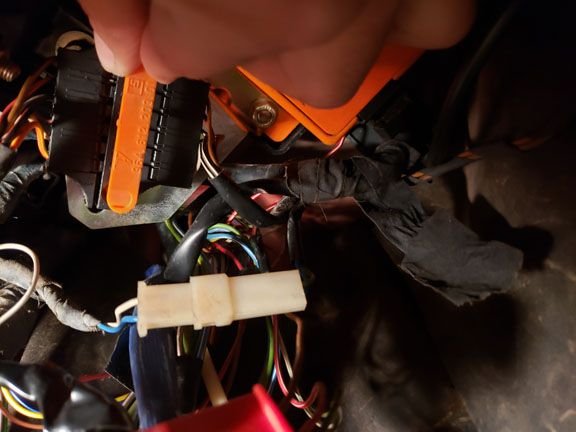
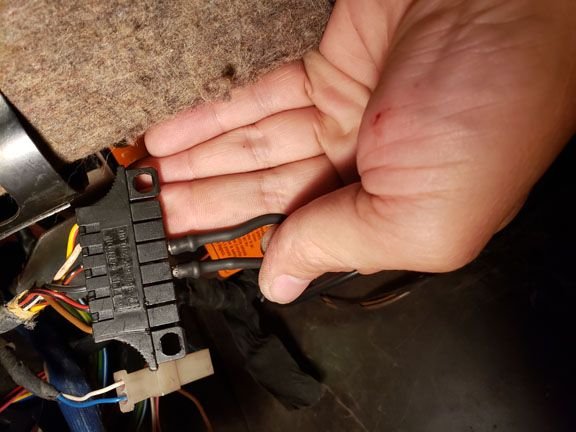
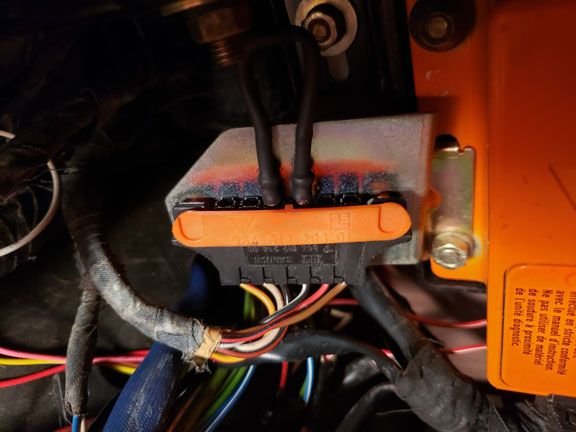
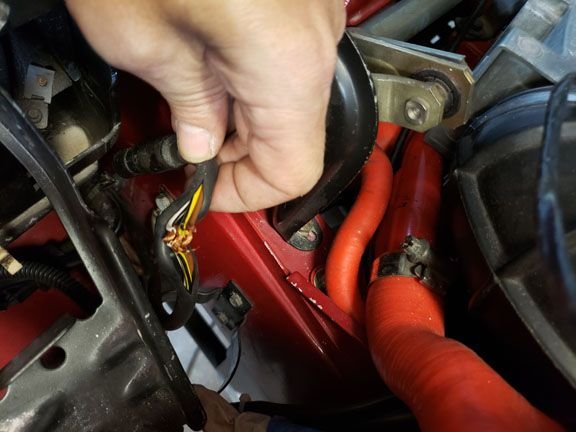
Next need to deal with 14 pin by brake booster and aux turbo water pump relay.
To wire this up you need to remove CE
I kept the '86 plug intact and modified the S2 plug
wire pin 7 (S2 plug) to plug E pin 35 of the CE (central electronics)
wire pin 11 (S2 plug) to pin 4 of the water pump relay.
remove pins 12 and 14 (S2 plug)
Now pin 1 is supposed to go to the coil. However on the S2 it goes to pin one of the igniter. To get around this I removed the igniter, then spliced the two green wires, pin 1 and 5, together.
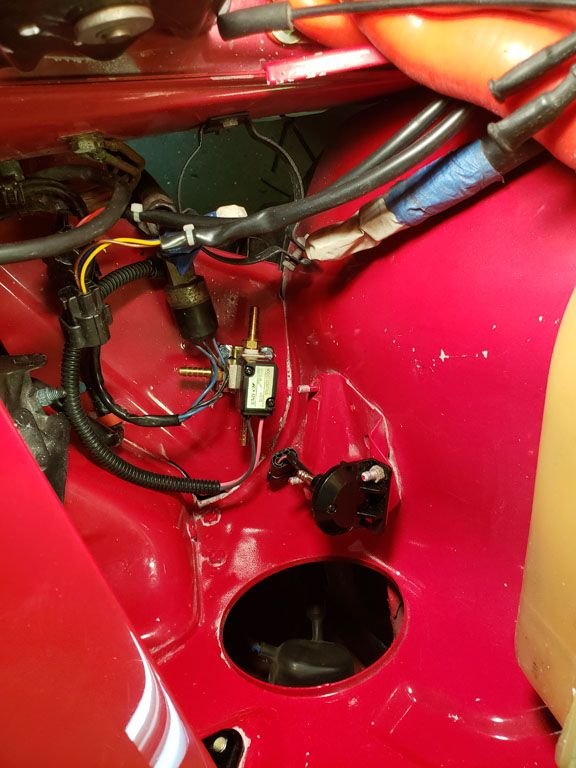
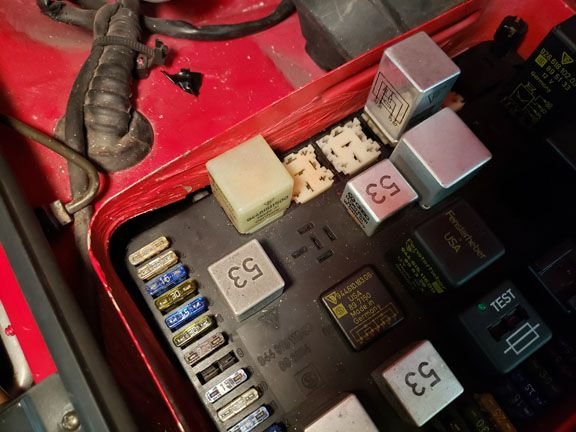
Water pump relay
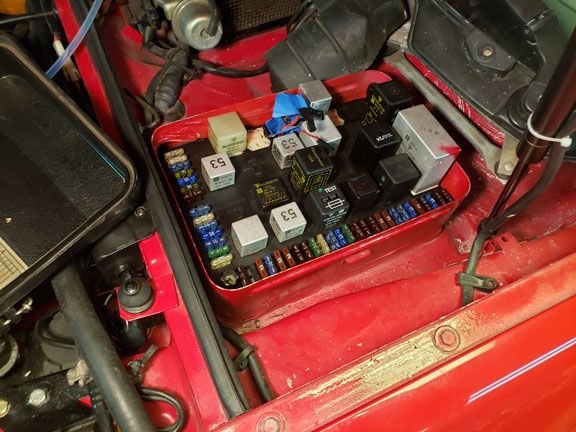
You need to get a relay block from a newer car, the old ones are numbered differently and do not fit in the holes. I have one on the way.
slot 2 has two wires. One goes to plug E pin 22 on CE. The other goes to pin two on the water pump (brown wire)
slot 3 goes to plug N pin 13 on CE
slot 4 goes to pin 11 on the 14 pin plug near brake booster. We just did this above in the 14 pin section.
slot 5 goes to pin one on water pump (red/grey)
slot 7 goes to plug E pin 24 on CE
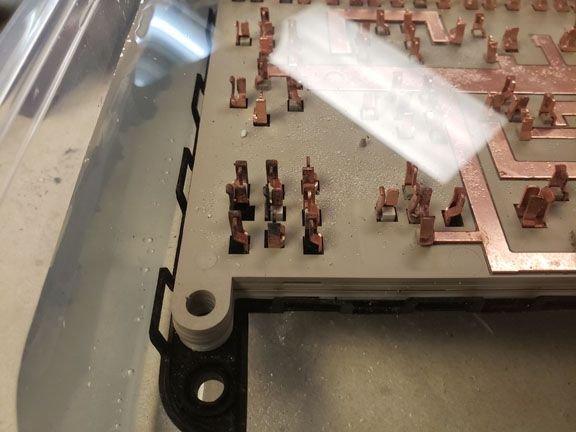
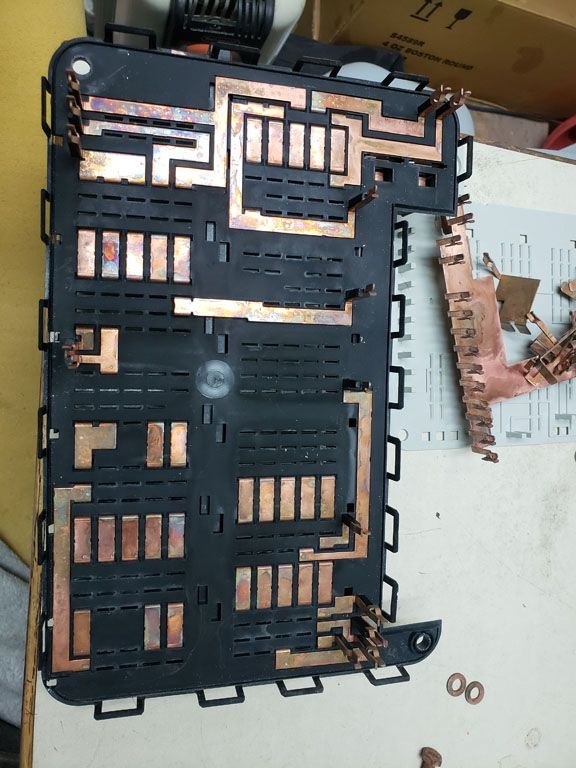
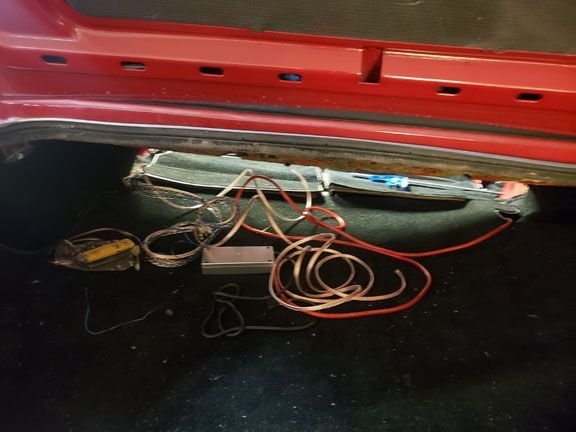
Here it is wired up, put together and waiting for the relay base
you can see some dirty connectors. You can also see me being lazy by putting the whole thing in a vinegar/salt bath. Do not do this. You can never dry it properly.
ended up taking it apart level by level. After cleaning I used a dremel with wire wheel to make sure it was clean, then put it back together.
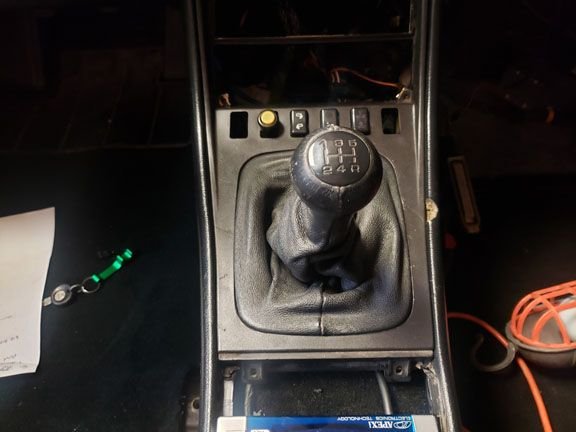
I wont go into the EBC wiring, it has been done many times. However here is an old picture of my scramble button.
I since moved it up to the rear defrost button slot (not used on cabs). I just happened to have this hanging around. Need to find an appropriate button once I decide on my switch gear.
Continued with electrical...
Houston we have a problem!
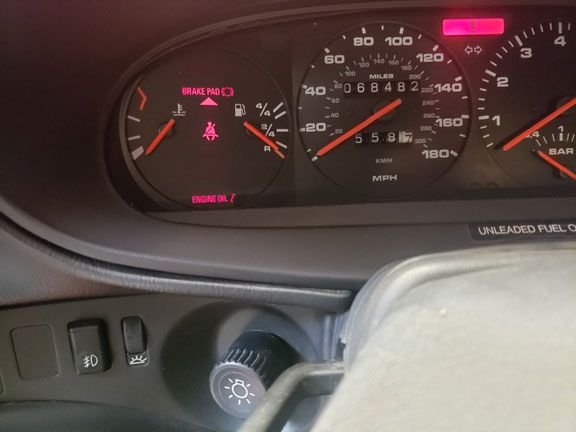
Oil level idiot light came on today! It was off the other day, I am pretty sure. Could be bad connection at cluster. Will check into it more.
Moved the "scramble" switch to defrost location
Started testing all electrical connections
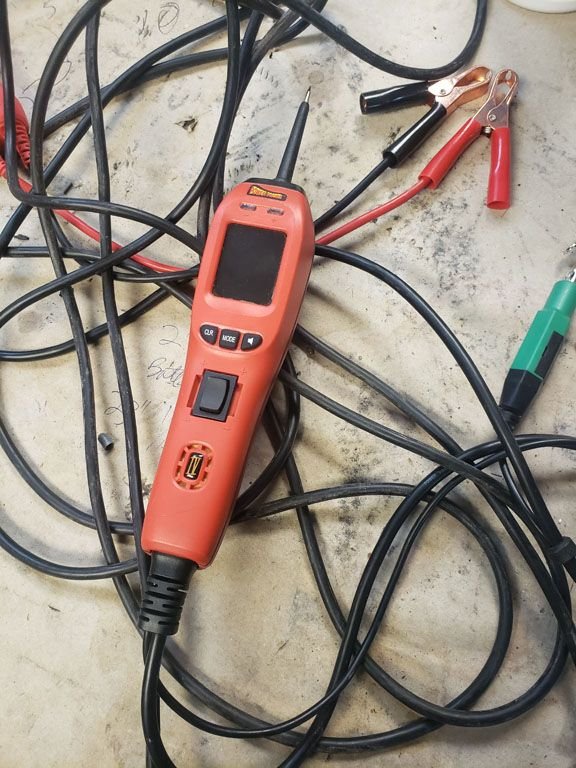
Highly recommend using a power probe, makes testing easy!
I was having trouble with the blinkers and the horn. I removed the new blinker covers, and the new bulbs that came with them, to test the connections.
What is wrong with that picture above?
I looked at the socket, with TWO contacts, then at the bulb, with ONE. If you are going to sell a very specific part for a specific application include the RIGHT bulbs or none at all! Yes, it is my fault for not checking them when I first bought them and for not checking when I installed them. But come on..
Went to the parts store and they books do not go back that far. I grabbed the only one they had with the right contacts. It is a white bulb and the parking light side is pretty dim. They are going to have to work for now. I started playing with led sequential switchback lights that I will replace it with.
They are solid white then when you put the blinker on it becomes a moving yellow light in the direction of the turn.
Unfortunately the right bulbs did not fix the problem. Hazards no go either. Bought an electronic flasher - no go, but at least I have it for the led lights coming up.
Moved to the horn since that did not work either. All wires and connections were good. Put power to horns directly, and nothing. Took horns off and started playing with the tuning screws (did you know you could tune your horns) and got one to come back to life! Plugged back in and still did not work. A couple of weeks ago when I tested the horn I could hear the relay clicking. Now there was no click. All forum posts pointed to the ground wire from the steering rack. Maybe on early cars (doubtful though, the entire rack is grounded but does not even extend to the splines coming out of the rack, much less to the steering wheel) but definitely not on the S2. After putzing around for a while I went to stare at the wiring diagrams. It led me to the one place that I was sure I would have no problems, the CE. Looked at the CE and sure enough there was a plug not fully in. got it plugged in and now blinkers and horn work!
While the interior was apart I went ahead and ran the power, rca and speaker lines for an amp and front speakers.
Not quite sure exactly what I am going to do. Thinking of making a speaker box for a pair of 6x9 to fit in the space behind the rear seats. This way I can put the seats down. Then again it looks ugly with the seats down so might remove the seat backs and make a panel to replace them. Any ideas?
Wow what a great build! What talent! Great work! I am putting back on the road a 1987 951 myself. Will be tackling some issues and make a driver out of it. Need to tackle the rear wiper, rear hatch motor and stereo system.
RGS I am just muddling my way through this like everyone else.
My brother was in a u pull it getting parts for his 300zx convertible when he saw a 968 cab and asked if I wanted anything. It is funny we have, what I consider to be, the two convertibles with the ugliest tops! When he had his 951 I was into the z cars (9 of them!), 240z at the time, and now it has switched - he has a z and I have the 944! Anyway here is what he sent me.
Just so coupe owners understand why I was happy, those pieces of rubber are $4k!!! They seem to be in great shape, so are mine so these will be spares just in case. I also asked for the blue relay, convertible top relay ($500). He sent me the only blue one there was, unfortunately the 968 uses a blue relay to convert speed sensor signals to speedometer signals. Wrong relay and not used on 944
Not all is lost though, I installed the white base for my turbo water pump relay.
Getting the old wires out was a real pain. Normally you have to depress a center pin from the top. On these you have to also depress two tabs, on the square socket itself, at the same time. Very hard! Now that I said that you will notice the plug is not plugged in. After connecting all the terminals I tried to plug it in and realized it has to be plugged in from the bottom! Time to de-pin it and redo it!
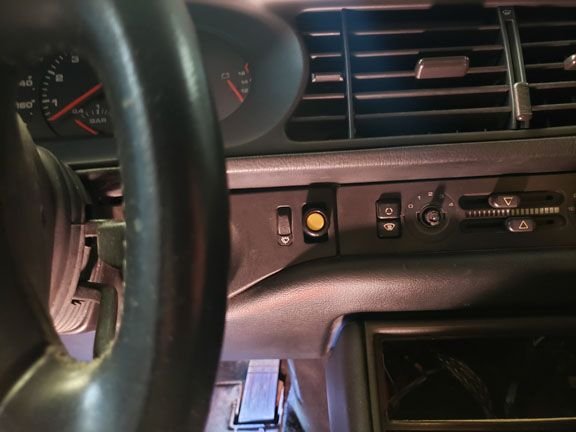
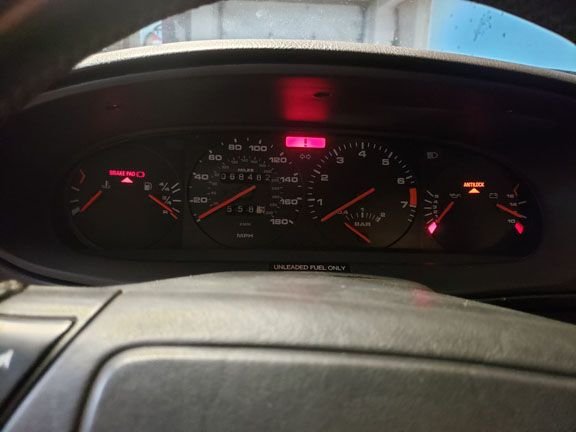
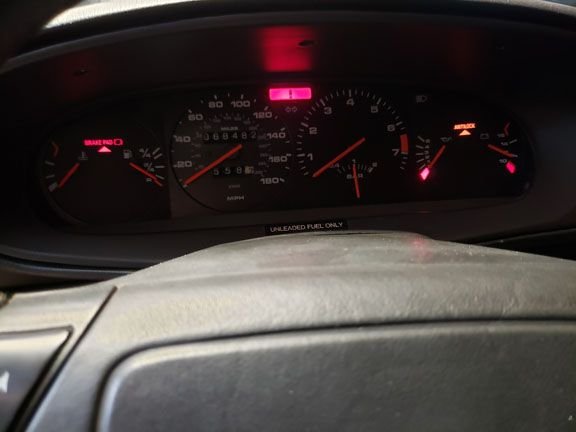
Did A little work to finish the the electrical. My dash looks like this now
I think I can cure the brake pad light by replacing this, broken wire in the brake pad sensor
I got rid of the airbag/ seatbelt light by disconnecting the airbag. The airbags are 20 years past the use by date, and they are still the early "killing" airbags.
The only other thing is the abs light. Does this stay on till after you start car? I also heard low battery will cause the light. The battery I am using for testing is not that great. Low battery voltage creates a lot of "problems".
The eagle eyed members here might have noticed one more issue (besides boost gauge - computers not hooked up yet till I am comfortable with the electric situation). Car has no gas in it, yet there is no light for that.
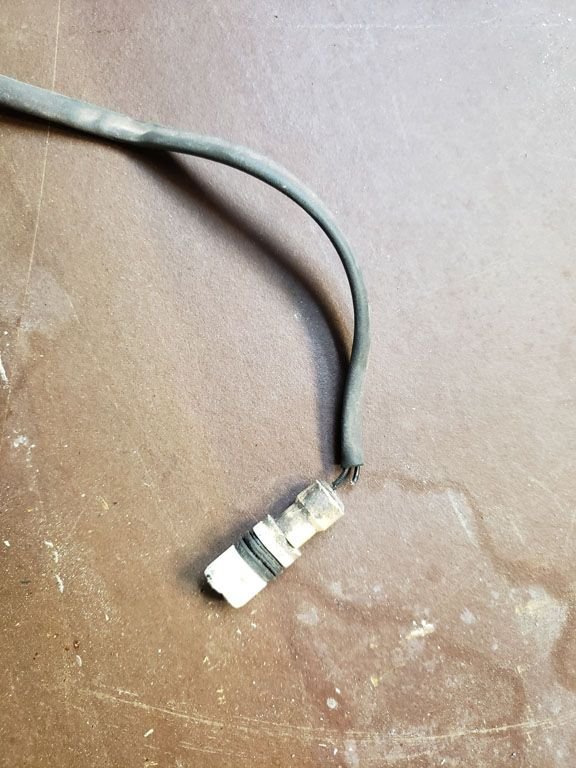
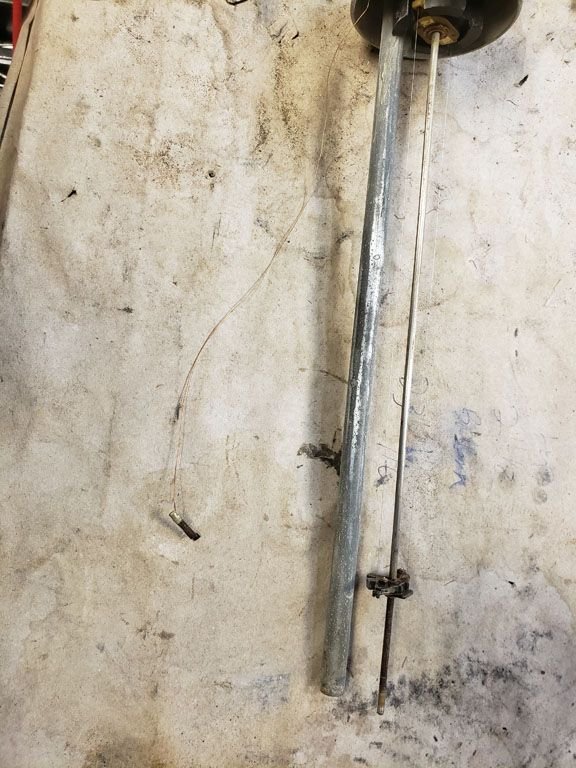
The sender looked good on the outside so I never took it apart - till now
Do you think the low fuel wire being broken off is the problem? I soldered it back on and tested it out. It worked intermittently. Took it apart again
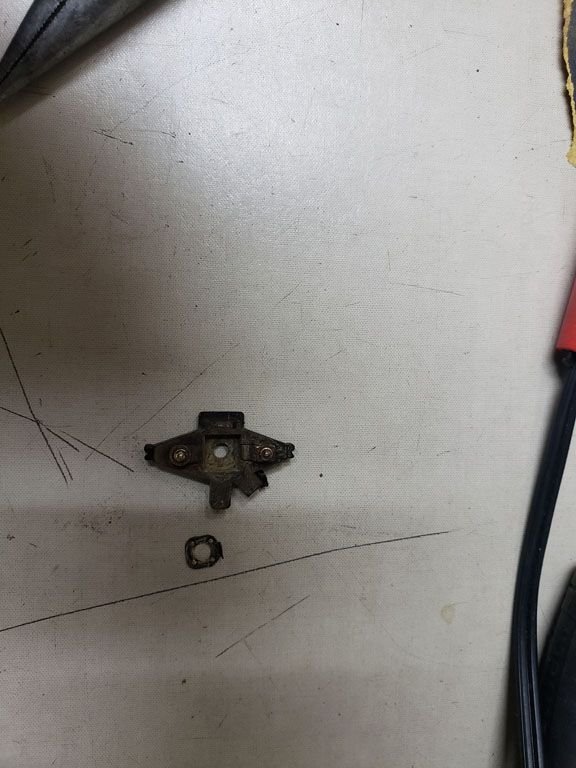
This tab was broken on the underside, required full disassembly to get at it. Soldered that back together and now works ok.
Great posts & pictures. 240Z, eh? Man those are sweet
"sweet" is relative. I had four or five 240z, one 280z, two 280zx turbo and two 300zx turbo. I modded the hell out of the 240z - suspension, exhaust, triple webers (look fantastic, but the worst thing you could do to a z) etc. When I got into them in the mid 80's they were already non competitive and past their prime without modding. I loved the interiors, the look, the seating position etc and with appropriate suspension mods they could be made to handle pretty good. To be honest, they really were not that much "fun". Every other z I had would smoke the 240z, then again a Honda minivan would smoke one. My favorite was the 280zx turbo. Not the best rear suspension, but was a lot of fun. Worst, of course, was the 300zx turbo (z31). When I look at prices for a 240z today it is shocking. The 944 is twice the car the 240z was. The 951 is in a whole different ball game. I think the 944 will be the next "240z"
Anyway I fixed the relay socket for the water pump
Now all I need is the actual relay!
I wanted to touch on some of the wiring I am doing. The changes are specifically for a '86 engine/harness and a 91 cab. The '91 944 has some different wiring then all other years, so not everything I am doing will translate to other years. For example - low oil sensor, check engine light and air bag. Make sure to check everything before doing this to your car - do not trust and idiot like me on the internet to get it all right.
Speaking of things only on the '91 I wanted to go into more depth on the air bag. I decided to disconnect mine, please do your research before you decide what to do with yours.
To properly disconnect the bag you need a simple wire job. On all years the airbag connector is a round 7 pin, except on '91 where it is a flat 6 pin
It looks like this. You need to disconnect this connector (battery must be unplugged for a couple of hours to be safe)
Then make a jumper
Then jump pins three and four (black/white and black/red)
then remount
You need to do this because the DME relay goes through the airbag controller. When the car gets into an accident big enough to set the bags of the controller will break the connection between these two pins to shut the fuel pump and ignition off. When you unplug the airbag you disable this feature. So you need the jumper to keep the DME relay path connected, so your car will start.
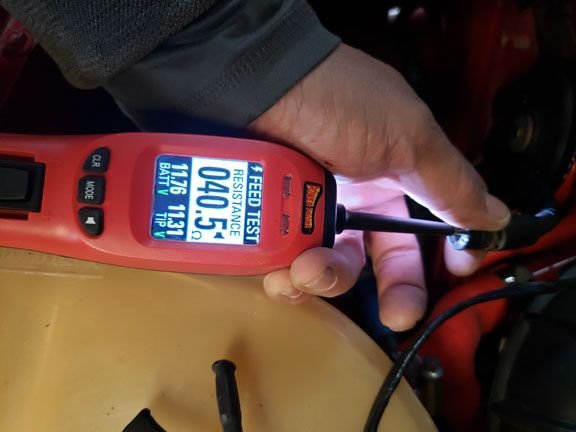
Next on the list was left headlight light. Probed the wires and was getting negative (with lights off) on all three wires. Slit the wire covering in the place I thought might be bad - the bend where it goes to the light.
This might be the problem! Fixed the wires and tested
got light! Need to test the voltage drop now
Looks like I am losing .45v (this is with a weak battery, might be more with a fully charged one - will retest with car running). Not horrible, but will probably relay it anyway. The power probe makes testing easy!
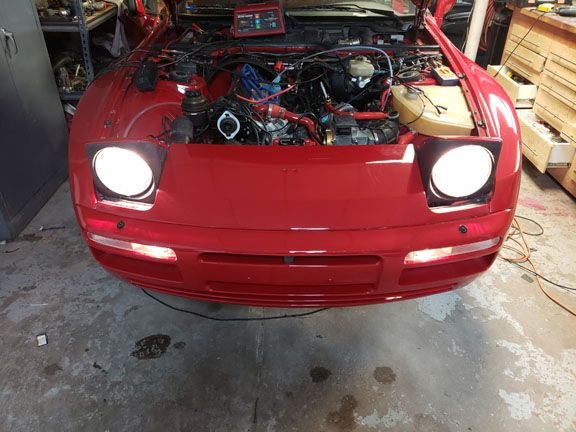
I plugged the computers in
The boost gauge is alive! So far it seems like all my changes seem to be working
I ended up replacing the one piece crossover with a two piece. When I put the one piece on, with the engine out, it took 10 minutes. Taking it out with the engine installed....hours! Putting the new one in sucked. Then I tried to put the exhaust on. Yep you need to loosen the crossover . so I loosened the crossover then bolted it all up. Wait, I need to put the pipe on from the wastegate that is already bolted to the TT. After many hours the exhaust is mostly on.
Now that it is on I see a possible problem with the A/C line
Do you guys think the A/C line is too close to the exhaust? On the Cab one A/C line follows the same path as all other 944s, and the other goes along the frame rail down low. Anyone with a turbo cab know if they changed the routing to follow other 944s? Or did they leave it where it is?
I bought a plastic heater valve, before I knew of the metal ones, so decided to relocate the heater valve. I went to the auto parts store to find a hose I could use. It took me at least five minutes to convince the idiot behind the counter to let me look at the radiator hoses to find one that I could use. He just could not understand how a hose made for another car could possibly work on something else. After the hose incident I asked him to look up something on a 944. I then asked him for BPR7ES spark plugs. He told me they were not listed for the 944 and they only had what they had. I spent a couple of minutes trying to convince him to just look up the spark plugs and not spark plugs for the 944. Again, it was too much for the idiot to understand how a spark plug not listed in his computer could possibly work. I gave up!
Anyway here is the hose I got
This is just a big L shaped hose. I connected the short end of the L to the water outlet. I then twisted the stock hose going to the Heater core so it came out the side
Just need to secure everything.
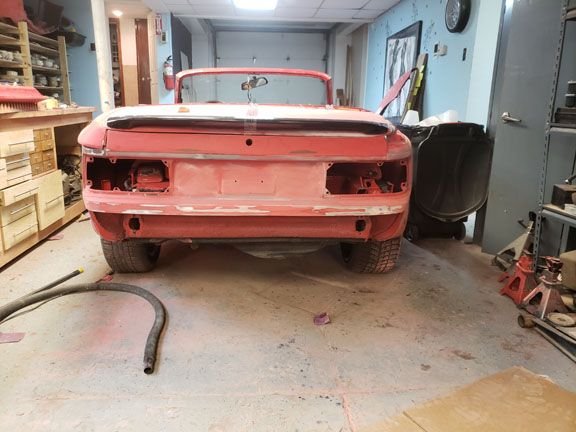
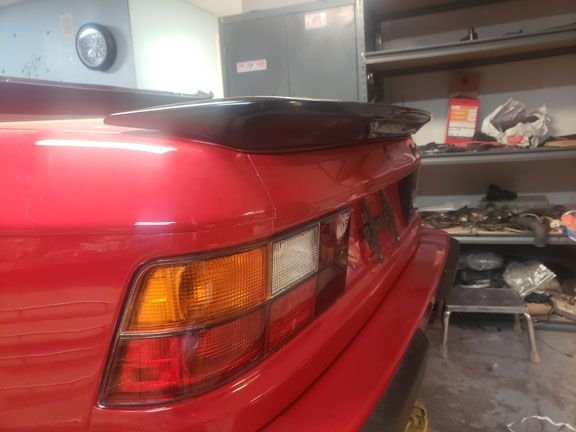
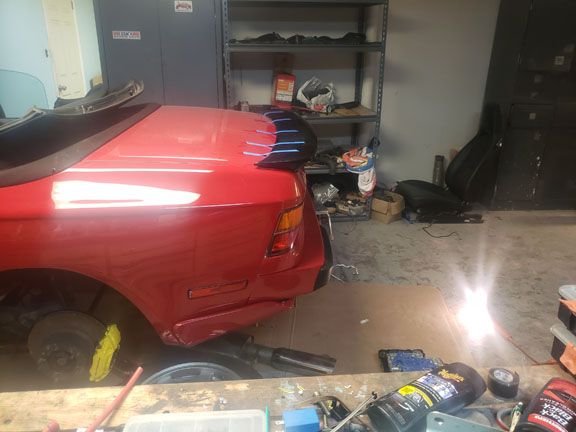
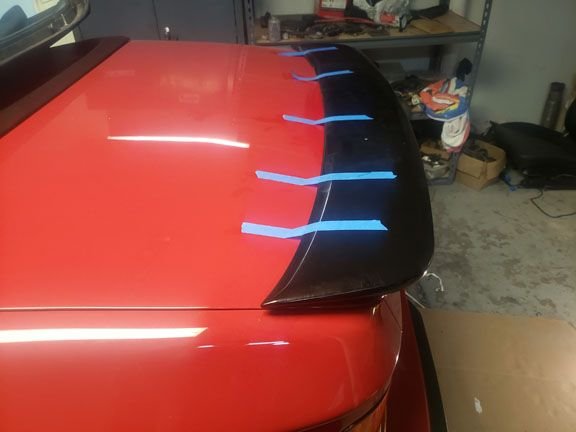
Was at the boneyard and found a spoiler
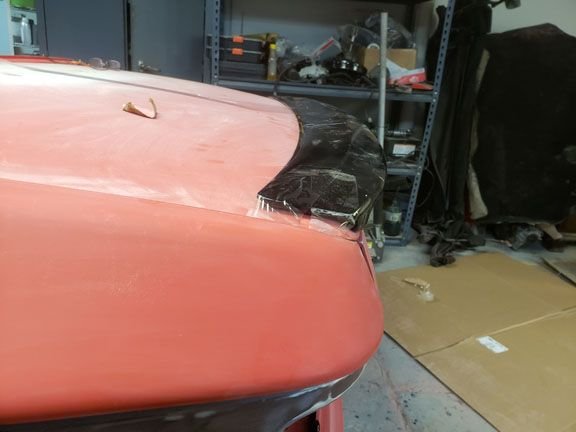
Any thoughts? I need to replace the third brake light that I shaved. Also need a place for the rear view camera. I think it looks good in pictures one and three. The problem comes from pictures two and four - you can see that the curve of the leading and trailing edges are curved too much. It does not follow the rear of the car - the 944 has an almost straight back, just a slight curve. I am looking to use this study proportions and shape. I will end up making a spoiler that follows the lines. Any thoughts on a spoiler would be appreciated.
Great job on the car, just curious why you didn't keep the stock heater valve in the stock location? I know that when they are old they can break and leak coolant on the clutch, but I have never seen anyone do that. Interesting idea.
As for the spoiler, it is an interesting look and doesn't look bad at all. I personally prefer the stock look, but the spoiler looks good on the car. What about a very small lip spoiler to integrate all of your wiring?
just curious why you didn't keep the stock heater valve in the stock location? I know that when they are old they can break and leak coolant on the clutch, but I have never seen anyone do that. Interesting idea.
I got this idea from a website..Rennlist! I wish I came up with this but others before me have done this. My reasons are 1)I bought the LR coolant hose kit. The elbow to connect to the pipe coming from the head is only 1.5" long on either side. Trying to connect the valve with all of the wiring coming out - well I could not find the space to do it without straining the hoses. There is too much going on there. 2) I got a new plastic valve, so I figured it was better to move it for preventative measures.
You need the A/C lines from a Turbo - they have the correct bend and alignment/routing to compensate for the Turbo components.
I think all 944s are routed the same way except for the cabs. The cabs have a double floor. This means both hoses for the charcoal canister goes through the engine department. Other 944s have one hose going underneath the car. I assume, because of the double floor of the cabs, they had to route both through the engine compartment. With the extra hose going behind the brake booster and under the brake lines Porsche probably decided there was not enough room to run another hose there so rerouted it down below along the frame rail. I will get another line when I am ready to do the A/C system. It is going to be very hard to route it the normal way, may have to delete the canister!
My main goal is for the car to be reliable. To this end I replaced every line in the engine compartment - except one.
When I came in and saw a leak under my car I knew exactly where to look.
I had the brake booster line coming out on the wrong side of the brake lines. Rerouting it the proper way strained the blue line and it developed a hole.
Lesson: Stop being cheap and lazy!! If you want an old car to be reliable you must replace EVERYTHING made out of rubber. At this point every line (blue on order) has been replaced and everything with rubber (brake booster/master clutch master/slave etc) has been replaced with new, except the blow off valve. When I first tested my valve it tested fine. After sitting for a year it tested bad. I got a great deal on a used forge valve, from a Rennlist member, so even though it has used rubber in it I will be using it.
Will def figure out the A/C lines after it runs!
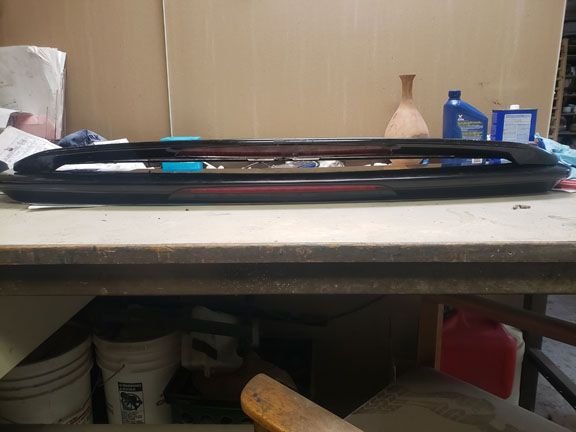
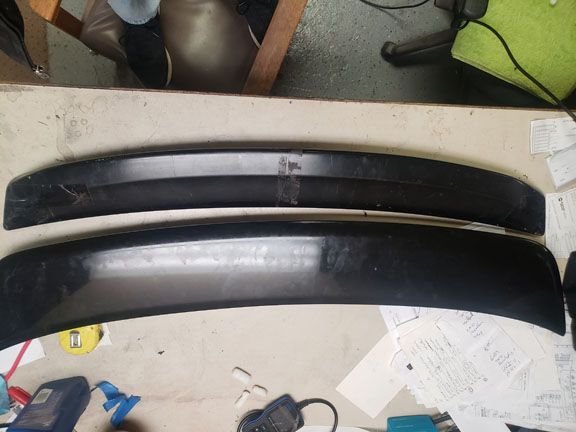
Here is another spoiler I brought home a long time ago..
I thought a smallish trunk spoiler
comparing the two
I kinda like the shape (except the curve) of the new one. Almost shaped like the stock 944 spoiler. The smaller one does not seem to do the job with the slope of the trunk. Anyway, this is in the future...
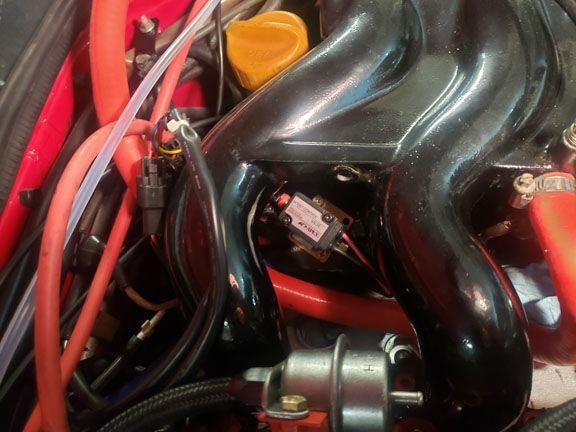
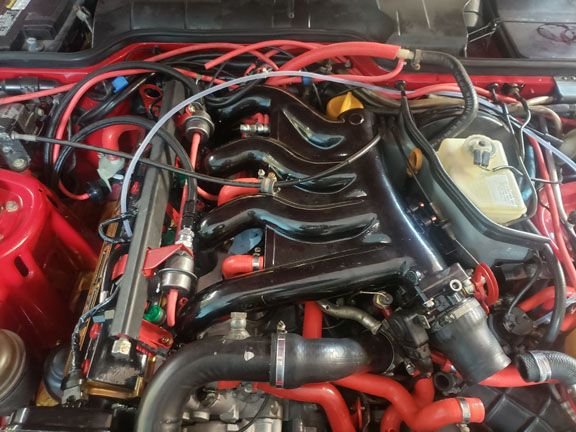
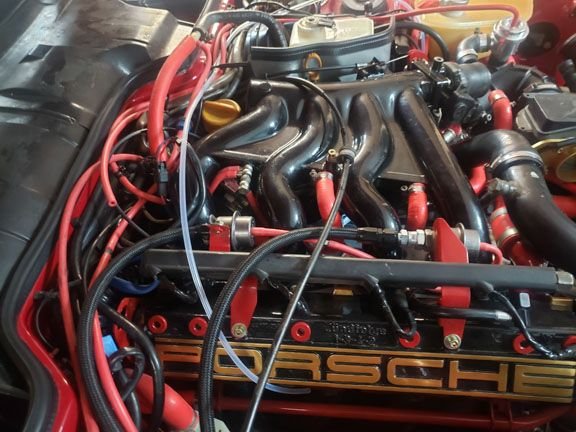
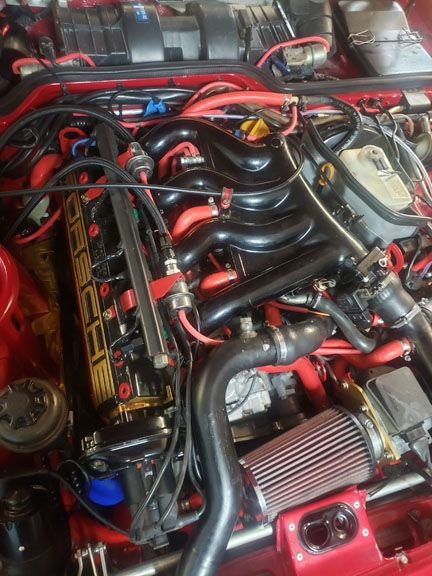
With the exhaust on the intake can go on!! I drilled and tapped some extra holes in the CV mount and mounted my solenoid there
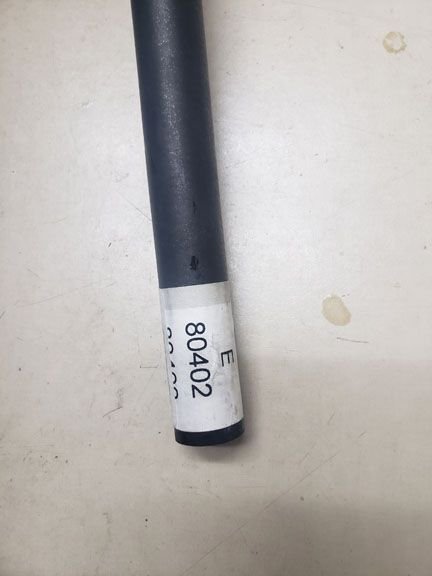
Made a little more progress. I was able to replace the blue line with a black BMW line. What a PIA!
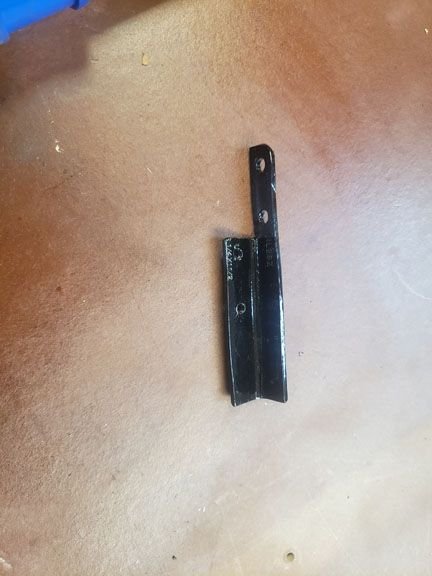
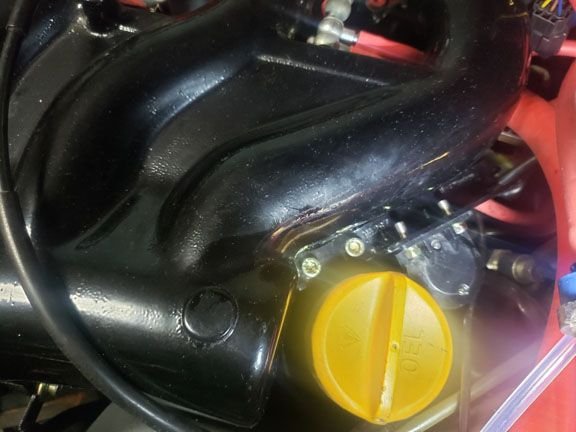
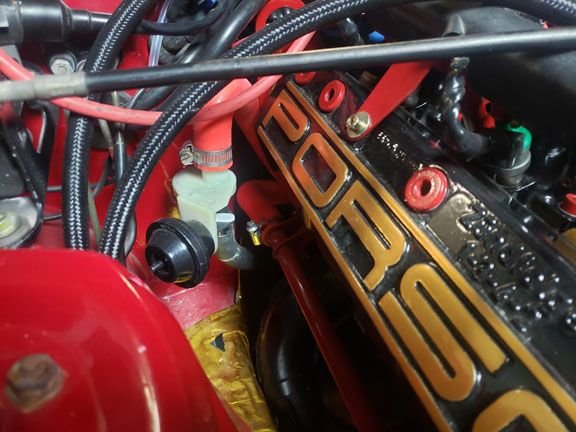
I relocated the MAP for the ebc. Took a piece of angle and cut, drilled, tapped and powdercoated.
installed
I wanted it as close to the manifold port as possible. It is pretty tight next to the oil fill.
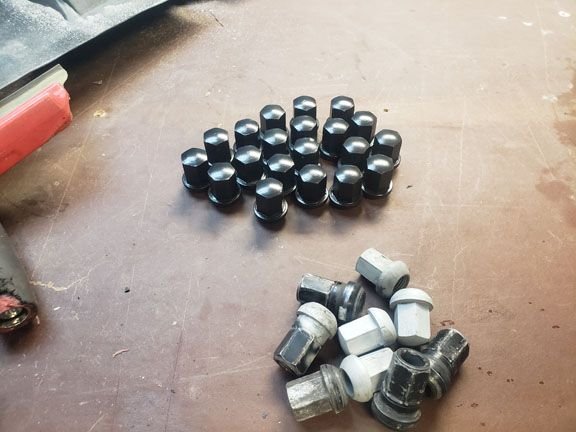
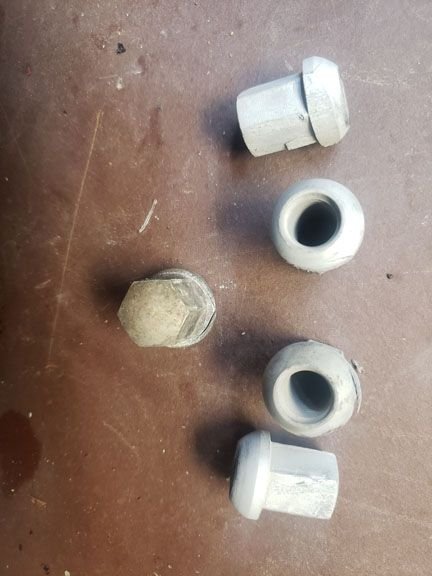
cleaned up and powder coated the lug nuts, the were looking bad.
good thing I had extras
You can see some are pretty damaged.
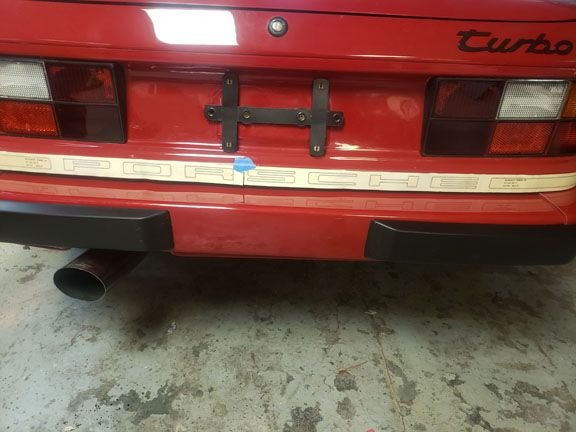
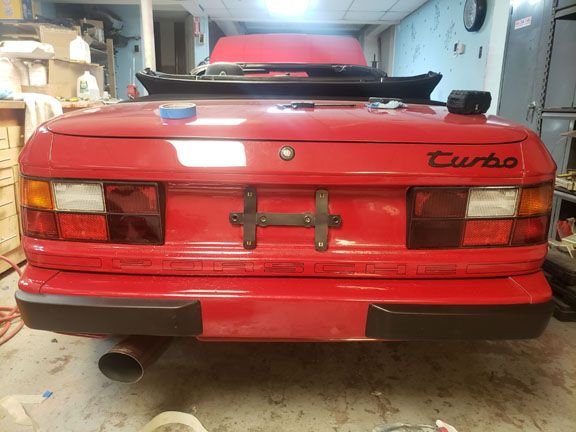
Put the "porsche" sticker and "turbo" emblem on
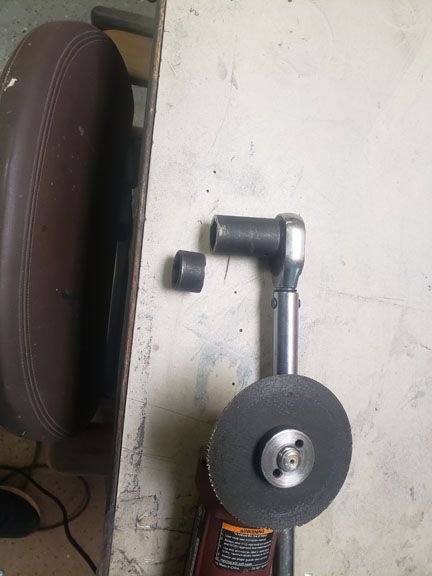
Needed to torque the crankshaft bolt down. The short socket was too short. The long socket too long. Time for my favorite tool!
Now it is just right!
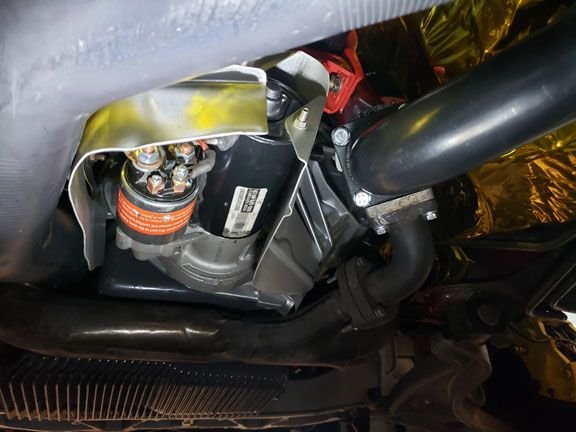
Finished installing starter and wires
I think it is about ready to prepare for starting
I ran some gas through the fuel lines to make sure they were clean. Then it was time to build some oil pressure before starting. Had some sender issues that GPA951s helped out on.
Hopefully I will be able to start it tomorrow!!

 01-05-2020 | 08:12 PM


 . so I loosened the crossover then bolted it all up. Wait, I need to put the pipe on from the wastegate that is already bolted to the TT.
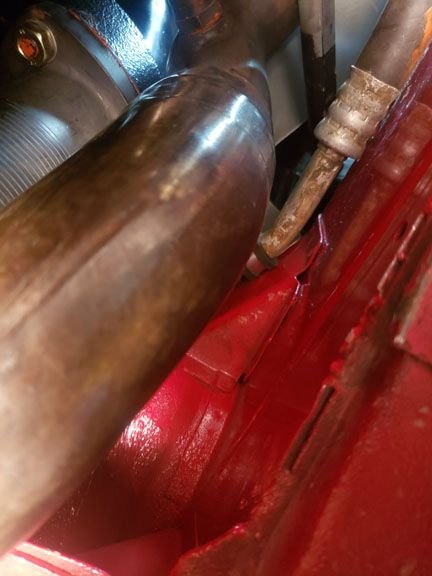


")