My 1967 912 Build Thread

 01-14-2014, 05:09 PM
#17
Professor of Pending Projects
Rennlist Member
Rennlist Member
Thread Starter
 Too funny...
PO got the seats today, picking those up after work.
Making a list, checking it twice... so far I have:
Making a list, checking it twice... so far I have:
(2) [901.628.311.01] Front Windshield Wiper Blade, 13" Silver - Ordered
(2) Side Vent Window Hardware 64454255800 - Ordered Installed!
(2) Washer for side vent window hardware 91154255648 - NLA, using the existing ones
(2) Coat Hooks - these are brittle and need replacement
(2) Hood Shocks 95951133300 - Ordered - Installed!
(1) Engine Lid Shock 90151233120 - Ordered - Installed!
(2) Rear Koni Shock Absorber - car came with Boge but I like the looks of those orange Koni shocks
- Ordered(2) Front Koni Inserts for Boge struts - Also, to document the correct orange color as per email from Koni. They use: Plasti-Kote 200 Chevrolet Orange Engine Enamel
(2) Rear suspension bushing - outter 901 333 195 00 (might look for something better than factory for both inner and outer bushings, like from Elephant Racing) - Got them - a gift from Michael
(2) Rear suspension bushing - inner - 644 333 131 00 - Got them - a gift from Michael
(2) Tie Rod End (Ball Joints) 911 347 322 04 - Ordered
(4) Stabilizer bar bushings 901 333 793 01
(3) [900.087.011.02] Hood Damper Pin - Ordered
All seals... need to finish the list... just listing the most critical ones to avoid water getting into the car...
(1) Windshield Rubber Seal 91154122503
(1) Front Hood Seal 90151190102
(2) Door Seal 91153109503
(1) Rear Window Seal 91154522500
(2) Felt Window Channel 911-542-905-00 - Ordered
(2) Plastic cover for window crank. I have it, but they marked it when removing it... 901 542 472 20
(1 of each) L and R Tail Light Lens... the ones in the car have hairline cracks and I see that you can get just the lens to replace... great.
(1) User Manual WKD-460-520 - Ordered. 1967 manual was still available from Porsche... and cheaper from them than other vendors...and I need to know what all the levers and lights mean...
Sheet Metal. What I have identified so far or just listing in case I needed (like the corner pieces in the front and rear window frame):
(1) Full Width Parcel Shelf Sheet Metal Replacement SMC.501.955.20
(1) Outer Rocker Panel – Right Side Metal Replacement SIC-503-402-04
(1) Lower Rear Window Frame Corner – Right Side Metal Replacement SIC-503-052-00
(1) Lower Rear Window Frame Corner – Left Side Metal Replacement SIC-503-051-00
(1) Windshield Frame and Cowl Repair – Right Side Metal Replacement SIC-503-088-42
(1) Windshield Frame and Cowl Repair – Left Side Metal Replacement SIC-503-087-42
(1) Front Floor Pan Half – Metal Replacement SIC-501-937-00
(1) Rear Seat Floor, Right Side Metal Replacement SMC.901.501.070.00
Engine. I just started this list... for now I am going to drop the engine to open and inspect. From feedback here, car has cast iron big bore Cylinders. Hopefully the issue that I have can be solved with just new set of cylinder rings, but the more I read, the more I doubt that to be the case...
(1) Carb Plug on top left side in the air filter housing 616 108 938 00 - Ordered
(4) Missing one bolt in the carb air cleaner housing N 010 354 1 - Ordered
(2) Exhaust clamp 369 54 109 - Ordered
(1) Need to check condition when I remove it, but just in case - Right Side Heat Exchanger 616211 004 01
(1) Engine Cylinder Head Gasket Set 616-100-184-03-M17 - Ordered
(1) Engine Crankcase Gasket Set 616-101-901-01-M17 - Ordered
(8) Oil Push Rod Tubes 616.105.231.00 - Ordered
(1) Oil Breather Reservoir 616.107.079.03 - I notices small pin-hole size holes in the top area, near the neck where the cap is... not sure if that can be repaired, I wll try to weld it with a bronze rod... Most likely the rest of the interior is in bad shape... (cool link on cleaning these, thought I would share Refinishing Oil Breather
(1) Oil Cooler... seems there are better alternatives made out of aluminum and with better cooling efficiency. - Aluminum Oil Cooler Ordered!
(1) Exhaust Stud 90006100501- Ordered
(1) Carburetor Rubber Sleeve 99970210150 - Ordered
(2) Rubber Sleeve in Heads 99970204750 - Ordered
(10) Washer Carburetor Bolts N0115247 - Ordered
(40) Pan Head Screws for Engine Tin 90001406502 - Ordered
(4) Connecting Rod Bushing 901-103-131-01 - Ordered
(8) Connecting Rod Nuts 502-03-114 - Ordered
(1) Main Bearing Set - need to determine size based on final inspection of the crank - Ordered
(1) Gland Nut with Pilot Bearing - Flywheel to Crankshaft 616-102-025-01-M260 - Ordered
(2) [ 539.06.116] Fan Shroud Rubber Plug - Ordered
(1) [616.108.938.00] Oval Wire Mesh Filter Plug - Ordered
(1) [999.211.004.00] Oil Cap, 912 (68-69) (wanted the cadmium plated finish) - Ordered
(1) [644.701.009.00] Oil Filter Decal, Fram - for when I paint the oil filter housing - Ordered
(1) [644.701.001.00] Valve Clearance Decal - Ordered
(1) Oil Strainer Sump Screen 616-101-380-00 - Ordered
(1) Oil line to oil filter housing 616-07-818 - Ordered
(1) Oil line to oil filter housing 539-07-826 - Ordered
(2) Cylinder Head Rubber Grommet for Oil Breather Tube 999-702-047-50 - Ordered
(1) Oil Pressure Relief Valve (Piston) 616-107-511-00 - Ordered
(1) Oil Sump Plate Kit - Ordered
Rubber Boot Covers
(1) Outside Shifter Tunnel 901 424 293 00 - Ordered
(1) Inside Shifter Tunnel 901 424 292 01 - Ordered
(2) On each side of the Shifter Tunnel 911 423 593 01 - Ordered
(1) Clutch cable 695 423 922 00 - Ordered
(4) CVJ Rubber Boot covers - Ordered
(4) CVJ Gaskets - Ordered
(1 kit) - [644.109.382.00] Engine Boot Set for electrical connectors in the engine - Ordered
I will update the list as I continue to go over the car...
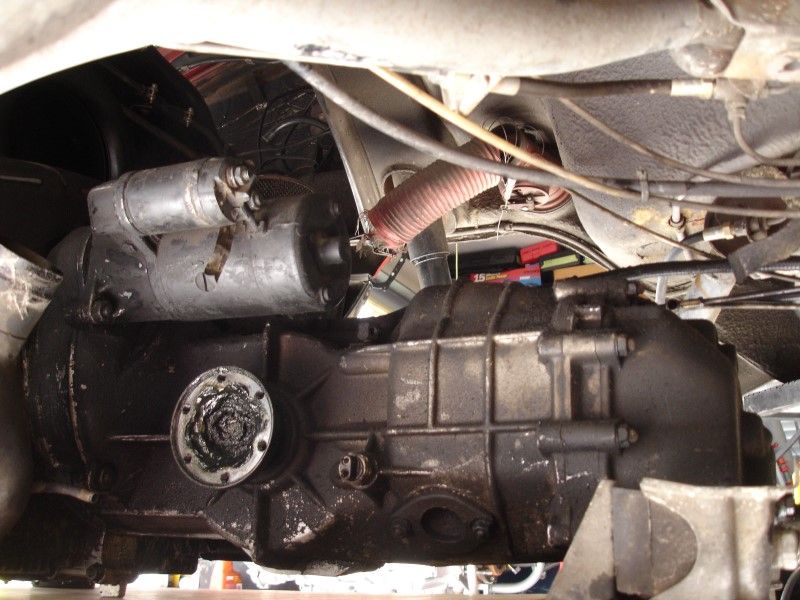
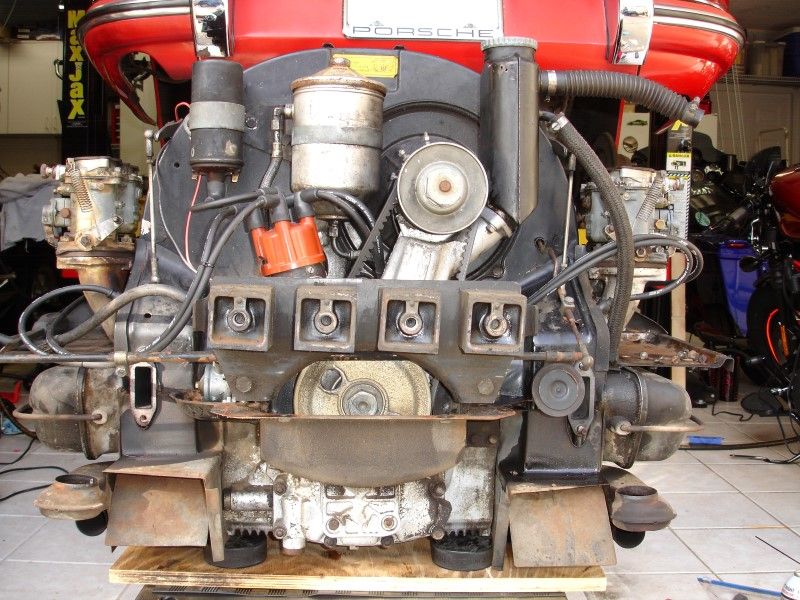
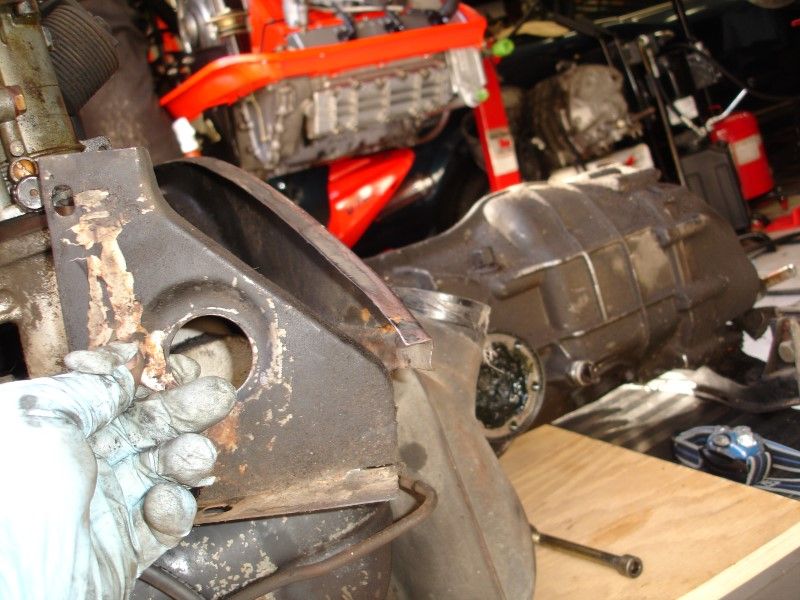
A few photos of what the bottom of the engine looks like... and yes... magnet stuck to them...so cast iron cylinders...


Plus the surface rust must have been a dead give away, right?


Last edited by Wachuko; 02-07-2014 at 01:54 AM. Reason: Updating parts list
01-14-2014, 10:05 PM
#18
Professor of Pending Projects
Rennlist Member
Rennlist Member
Thread Starter
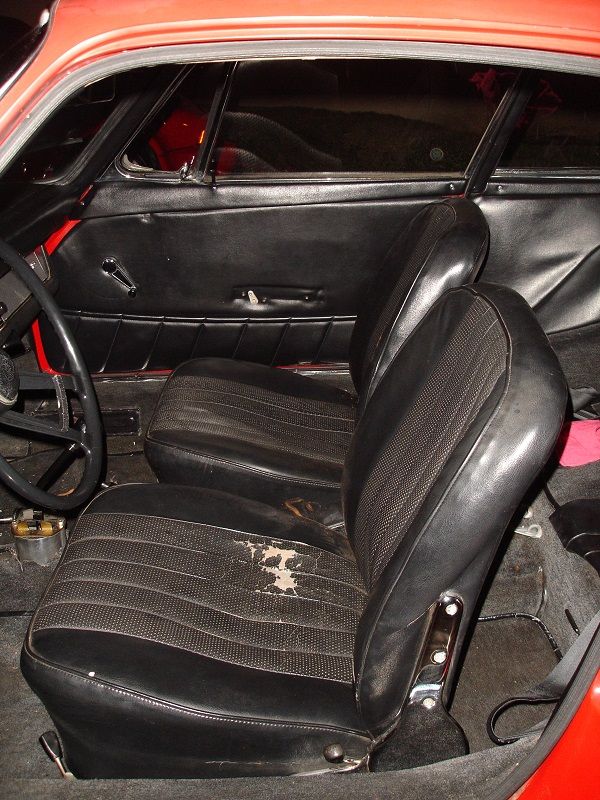
Got the seats from the PO today... they need an overhaul, but all there...
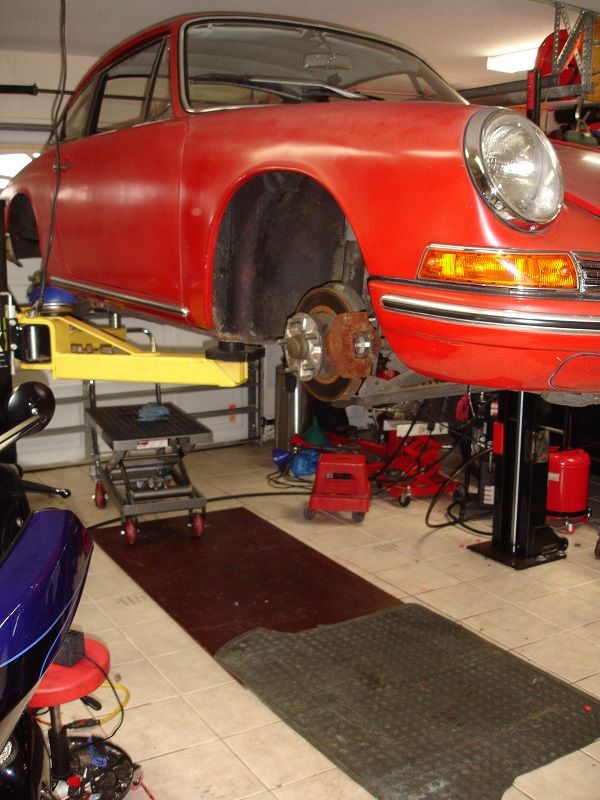
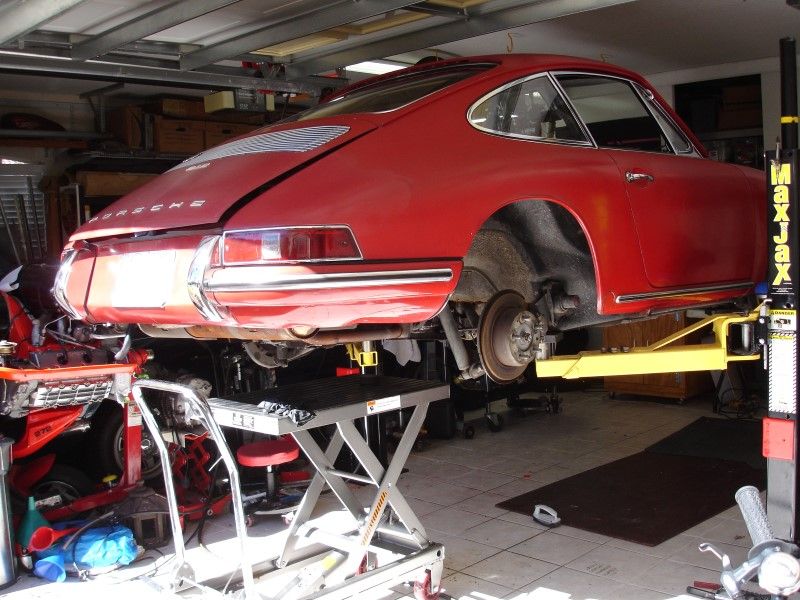
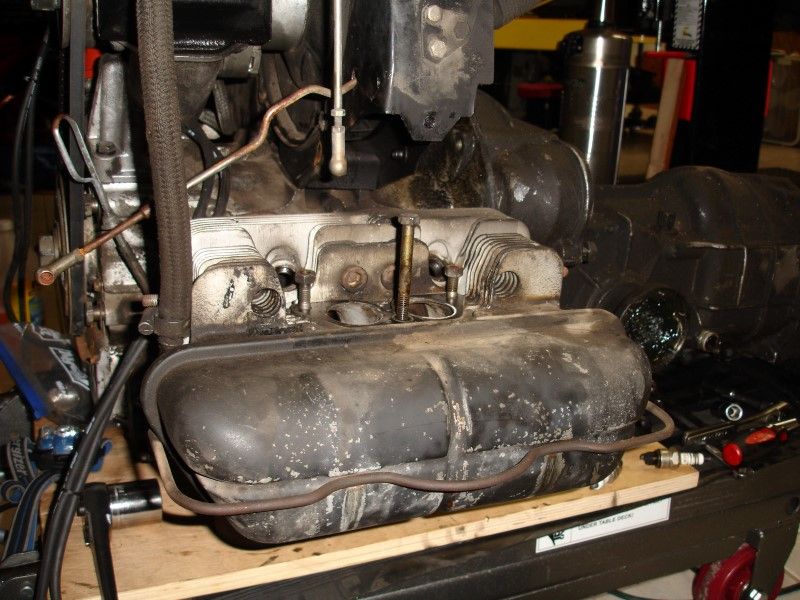
And getting the car ready to drop the engine...

And getting the car ready to drop the engine...
01-15-2014, 01:06 PM
#19
Professor of Pending Projects
Rennlist Member
Rennlist Member
Thread Starter
A few more photos.
Need to add boot covers to the list
Rubber Boot Covers
(1) Outside Shifter Tunnel 901 424 293 00
(1) Inside Shifter Tunnel 901 424 292 01
(2) On each side of the Shifter Tunnel 911 423 593 01
(1) Clutch linkage 695 423 922 00

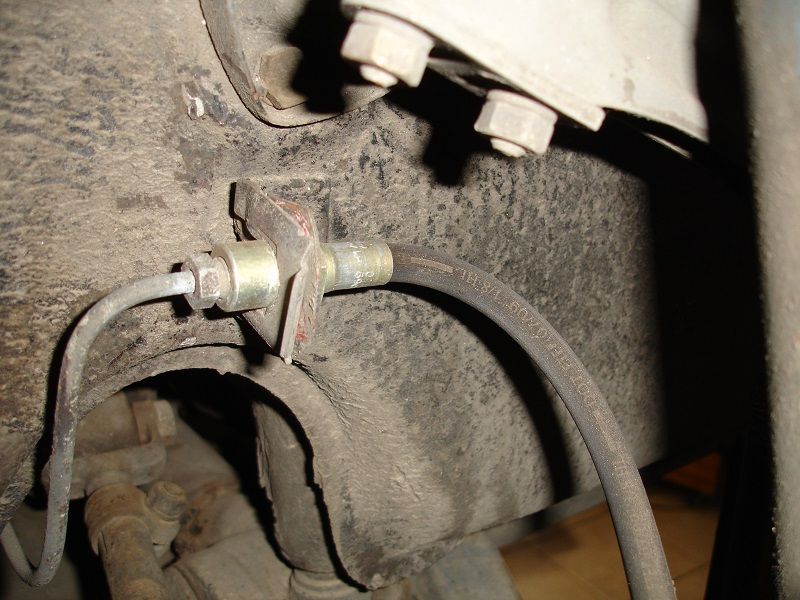
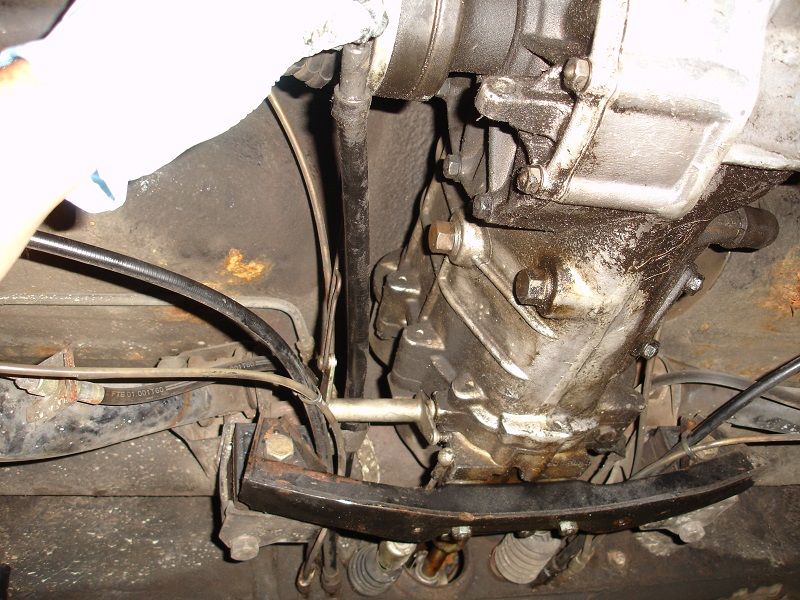
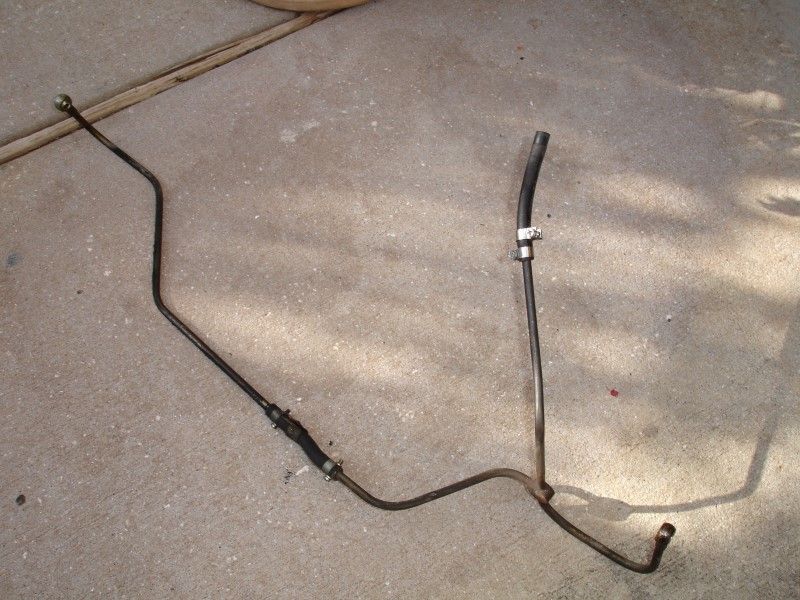
These look to be in good shape, just some cleaning and painting (or powder coating) needed. Plus new hose (adding the hoses to the list).
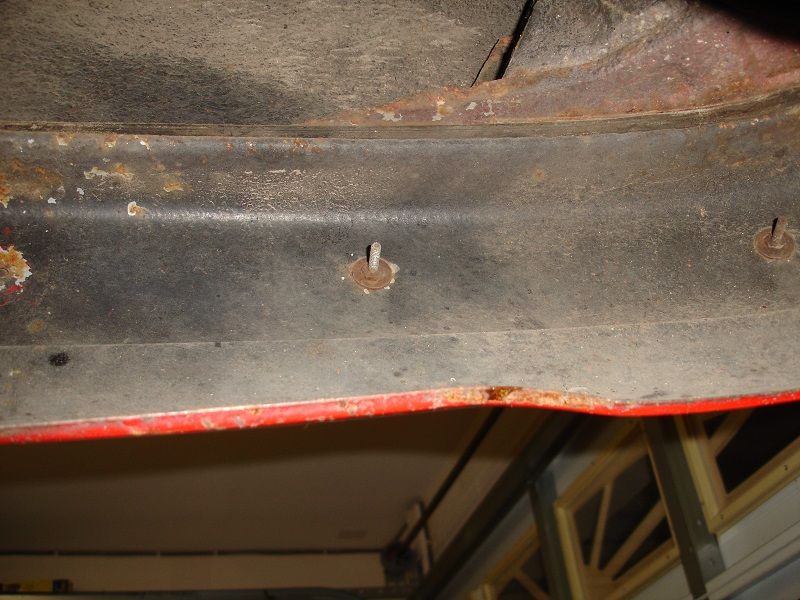
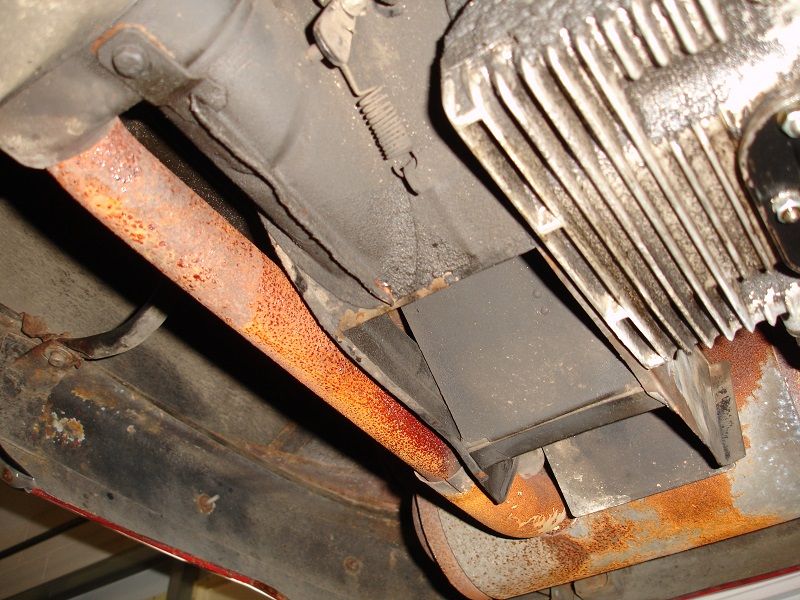
This I think that I can fix with some of the metal bodywork tools I just got...

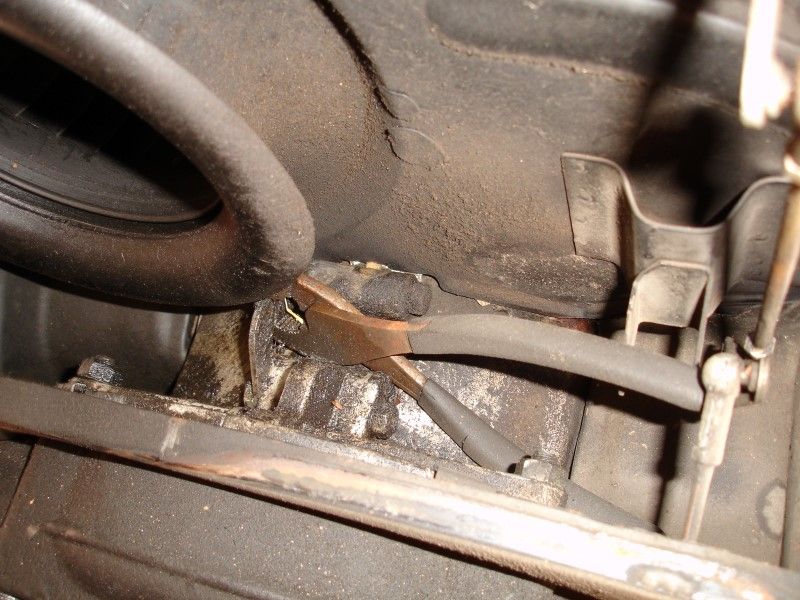
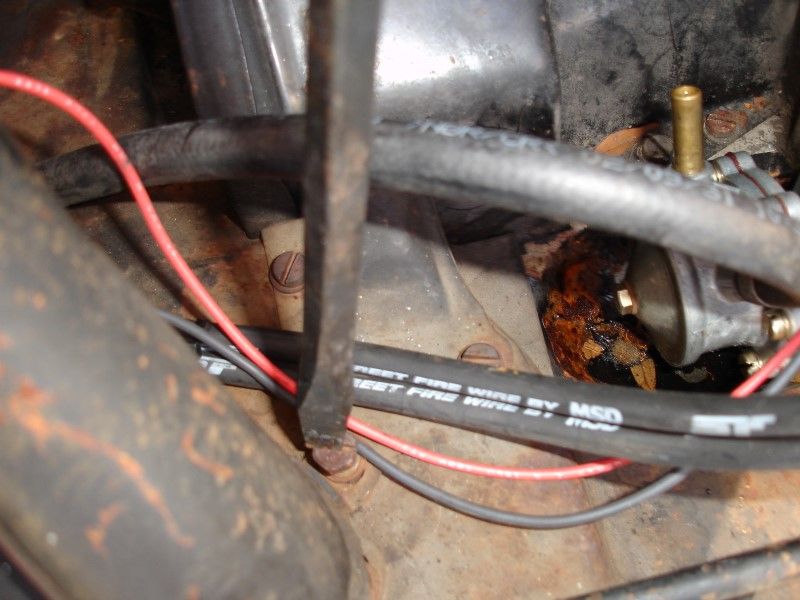
Owner prior to the person I bought it from, change the brakes... I can see newer lines, calipers, etc. Too bad they did not paint them at the time, to protect the caliper...
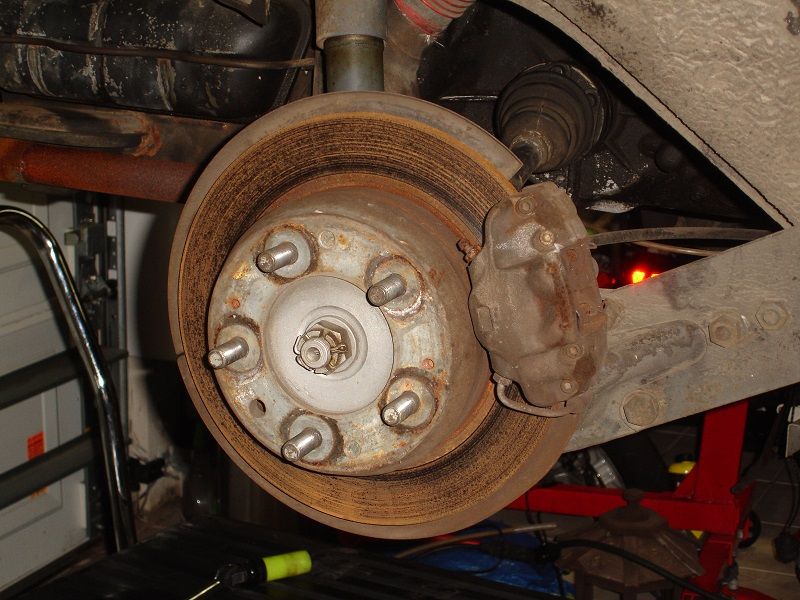
Adding new bushings to the list, these seem to have collapsed
(2) Rear suspension bushing - outter 901 333 195 00 (might look for something better than factory for both inner and outer bushings, like from Elephant Racing)
(2) Rear suspension bushing - inner - 644 333 131 00

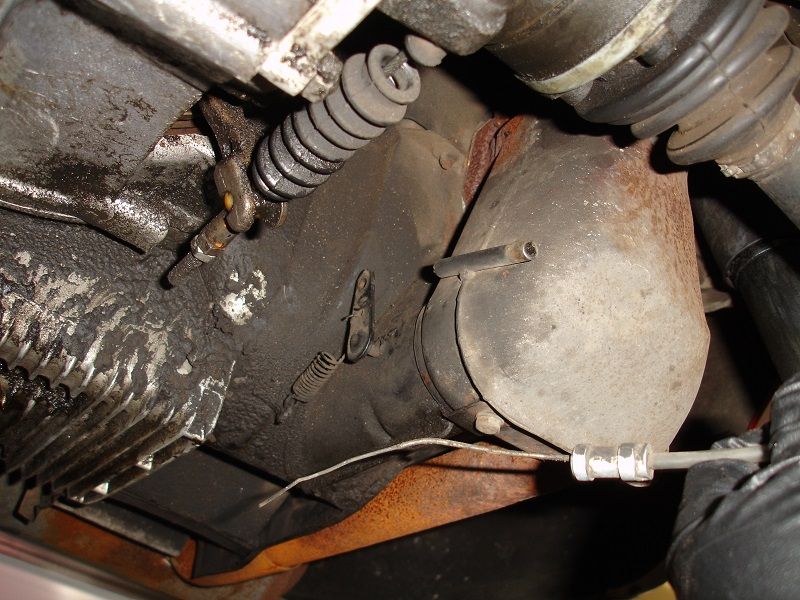
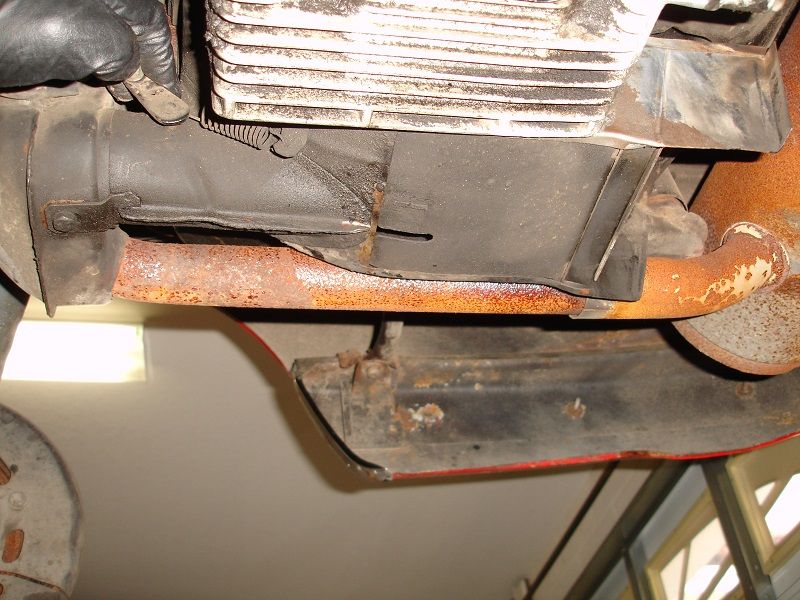
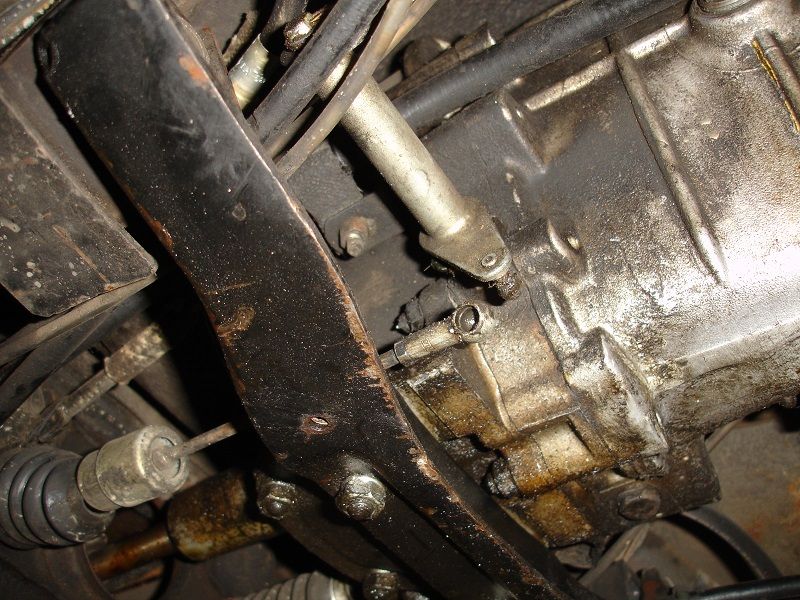
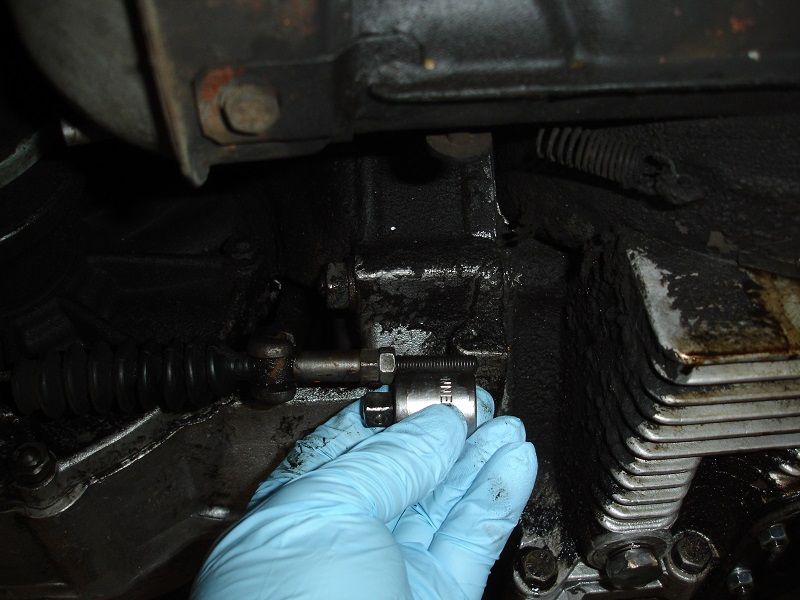
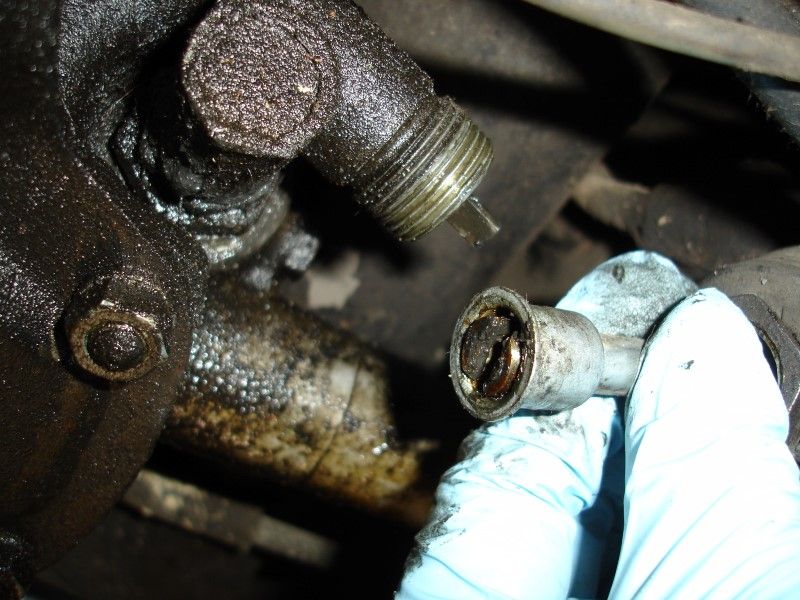
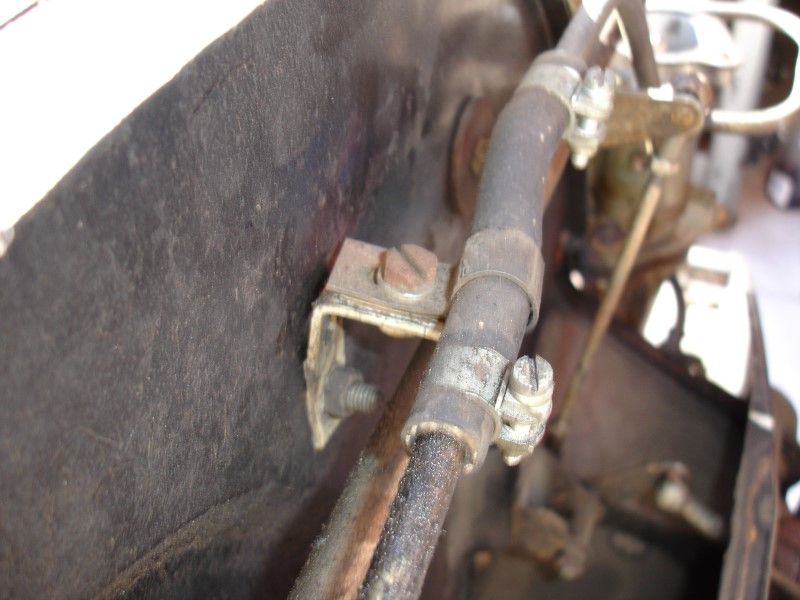
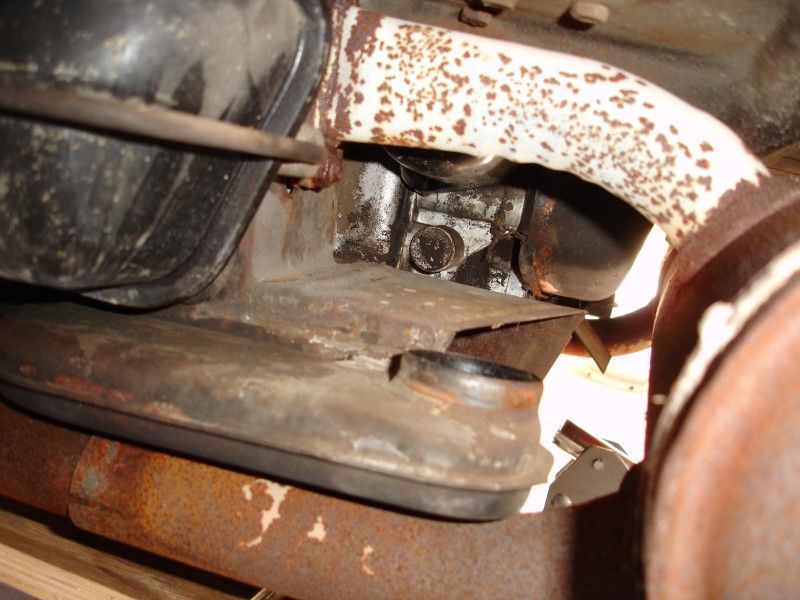
Is there supposed to be a clamp in here?? Yes indeed...
(2) Exhaust clamp 369 54 109
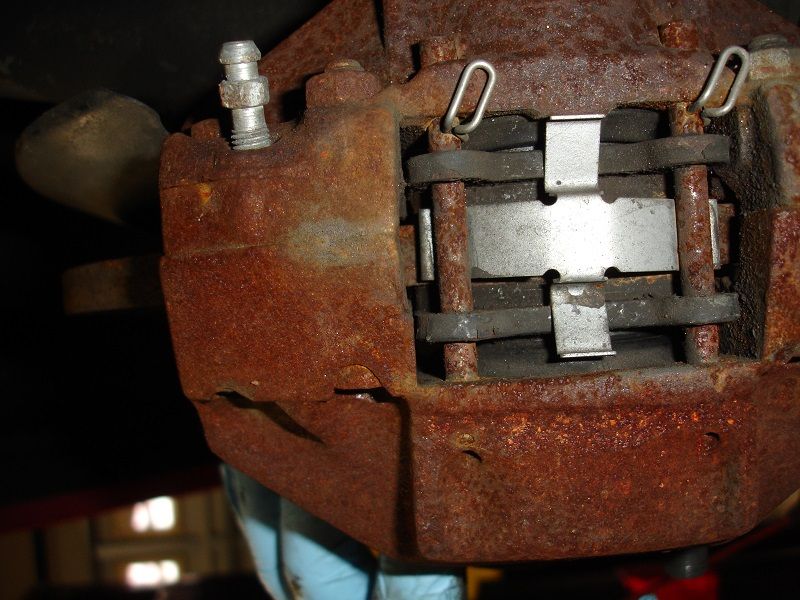
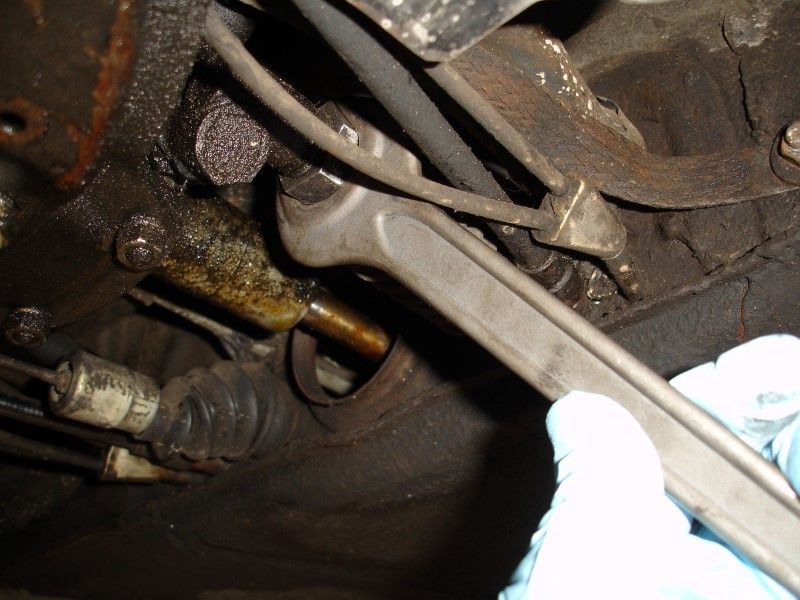
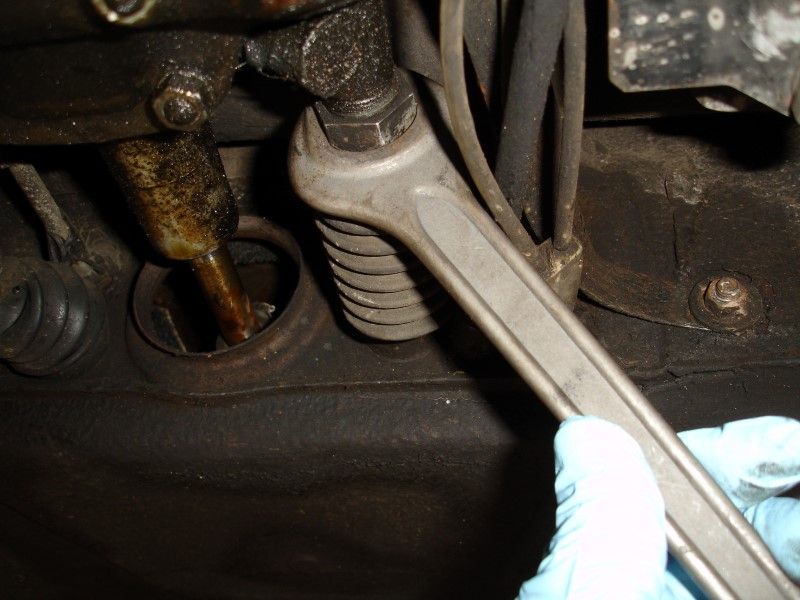
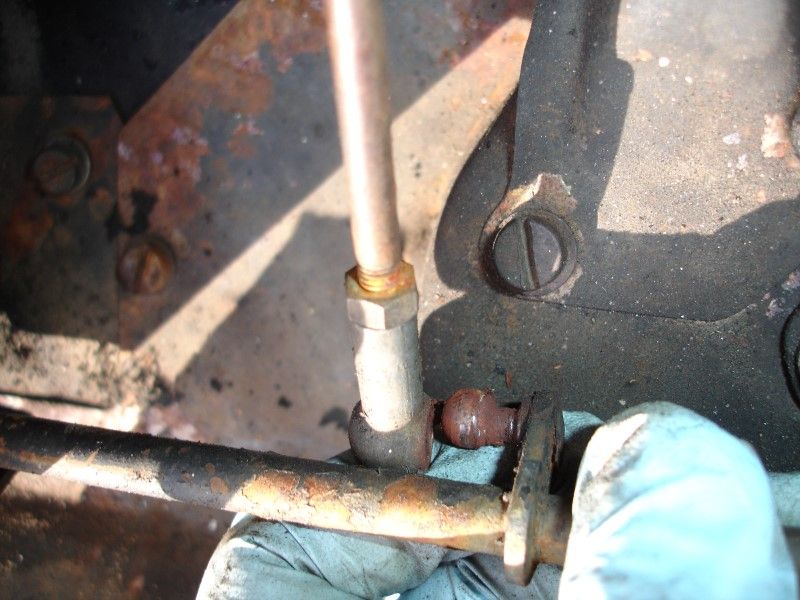
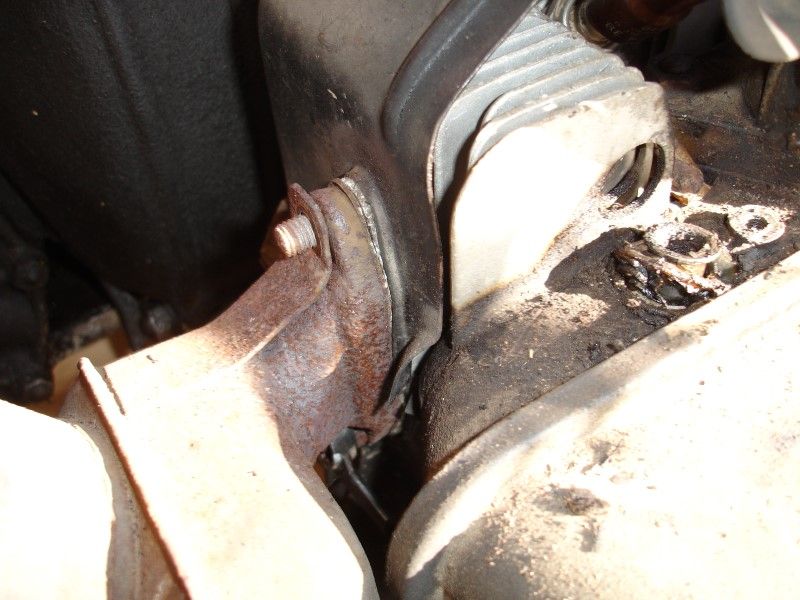
That end is working perfectly, no play, but the rubber boot is broken... only a matter of time before it start acting up... added to the list along with the stabilizer bar bushings
(2) Ball Joints 911 347 322 04
(4) Stabilizer bar bushings 901 333 793 01

Need to add boot covers to the list
Rubber Boot Covers
(1) Outside Shifter Tunnel 901 424 293 00
(1) Inside Shifter Tunnel 901 424 292 01
(2) On each side of the Shifter Tunnel 911 423 593 01
(1) Clutch linkage 695 423 922 00
These look to be in good shape, just some cleaning and painting (or powder coating) needed. Plus new hose (adding the hoses to the list).
This I think that I can fix with some of the metal bodywork tools I just got...
Owner prior to the person I bought it from, change the brakes... I can see newer lines, calipers, etc. Too bad they did not paint them at the time, to protect the caliper...
Adding new bushings to the list, these seem to have collapsed
(2) Rear suspension bushing - outter 901 333 195 00 (might look for something better than factory for both inner and outer bushings, like from Elephant Racing)
(2) Rear suspension bushing - inner - 644 333 131 00
Is there supposed to be a clamp in here?? Yes indeed...
(2) Exhaust clamp 369 54 109
That end is working perfectly, no play, but the rubber boot is broken... only a matter of time before it start acting up... added to the list along with the stabilizer bar bushings
(2) Ball Joints 911 347 322 04
(4) Stabilizer bar bushings 901 333 793 01
Last edited by Wachuko; 01-15-2014 at 02:19 PM. Reason: Added part numbers...
01-16-2014, 05:49 PM
#20
Professor of Pending Projects
Rennlist Member
Rennlist Member
Thread Starter
Hood crest with the orange bars ordered from Sunset Porsche in Oregon... it was the lowest price that I could find.
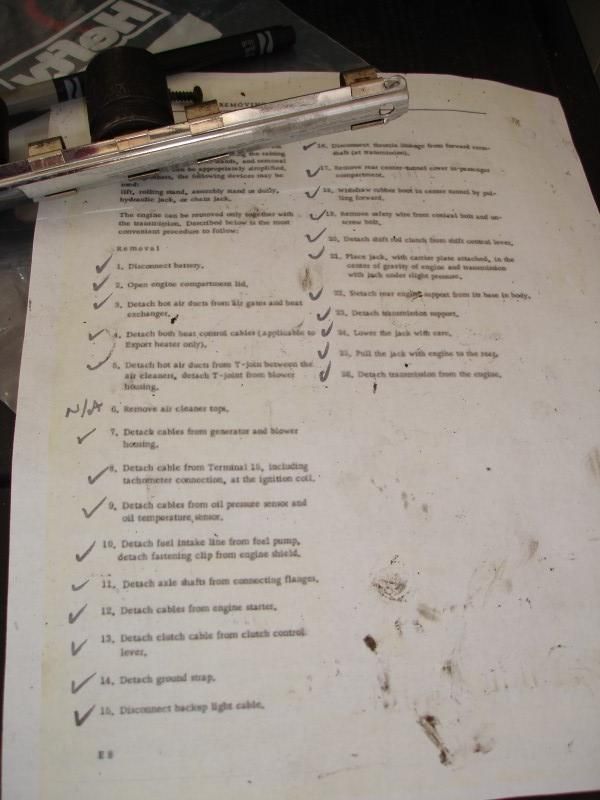
Also, took today and tomorrow off from work to make it a long weekend to work in the car. Started going down the list from the removing and installing the engine instructions on the link posted earlier. Will provide photos along the way. Cheers!!
Let's get this started!!
Battery removed. I then started by disconnecting the heater hose

Then the cables to the heater box control...

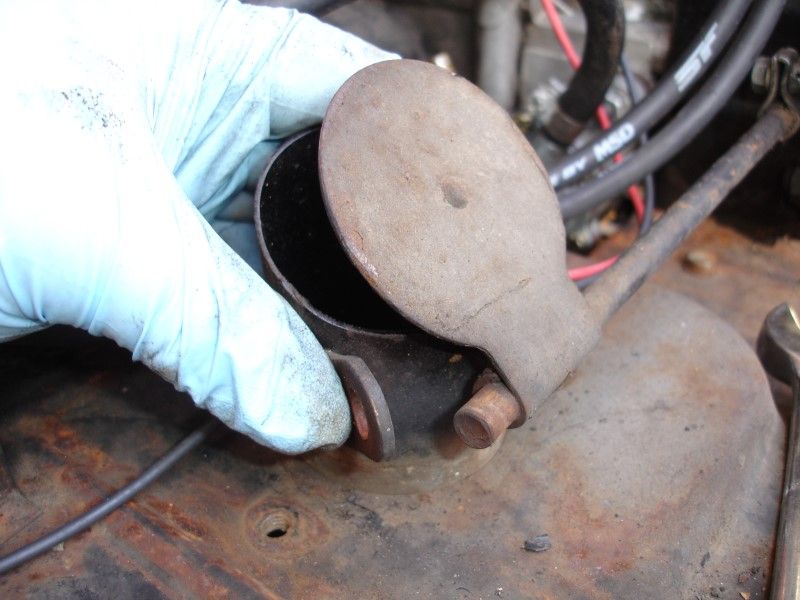
Took time to check if these were working. They open and close without issues...
Open
Close
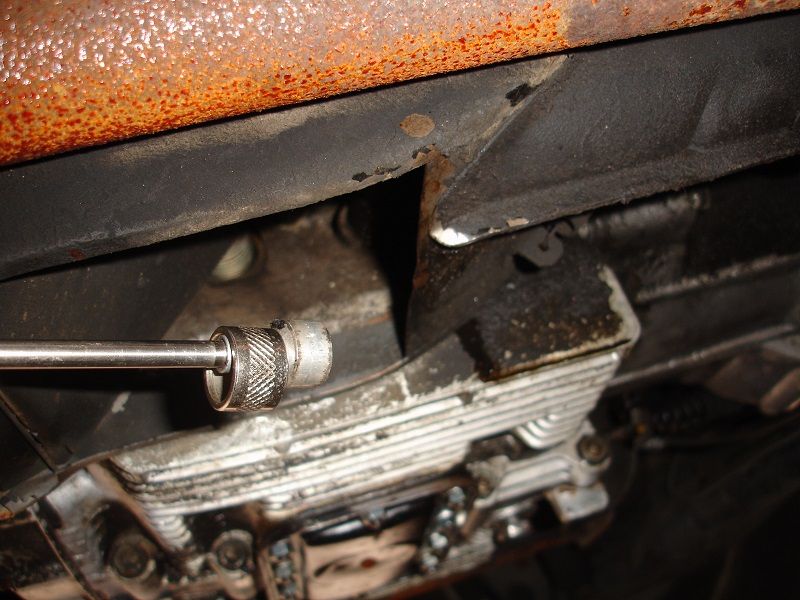
Now let's remove the drive shafts. 6mm hex socket... make sure the hex socket goes in all the way to avoid stripping the bolts. Loosen all the bolts before removing any. I used the e-brake to help me avoid them rotating... then undo the e-brake, rotate, loosen the next set... rinse an repeat with the other side. Once all are loose then undo de e-brake and start getting them off...
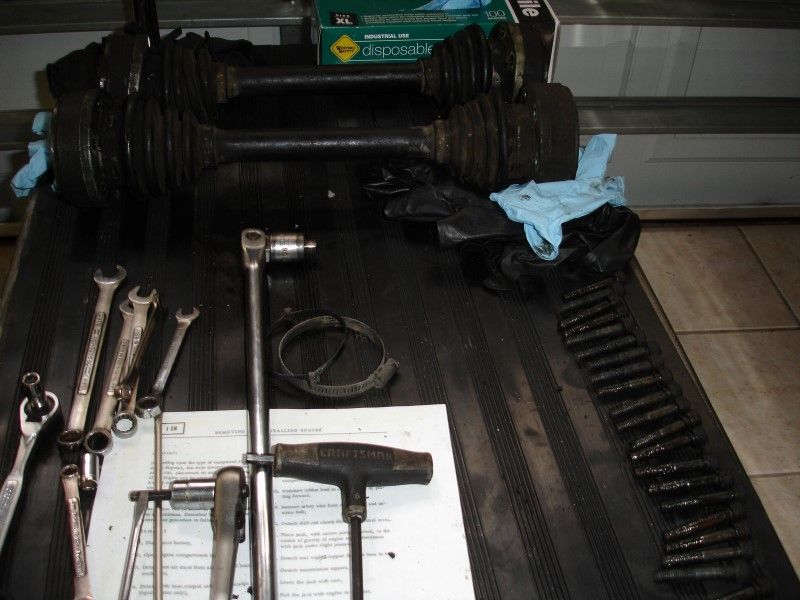
I should install new rubber boots and clean and repack the CVJ since I am there...

and they are out!


Decouple throttle link...

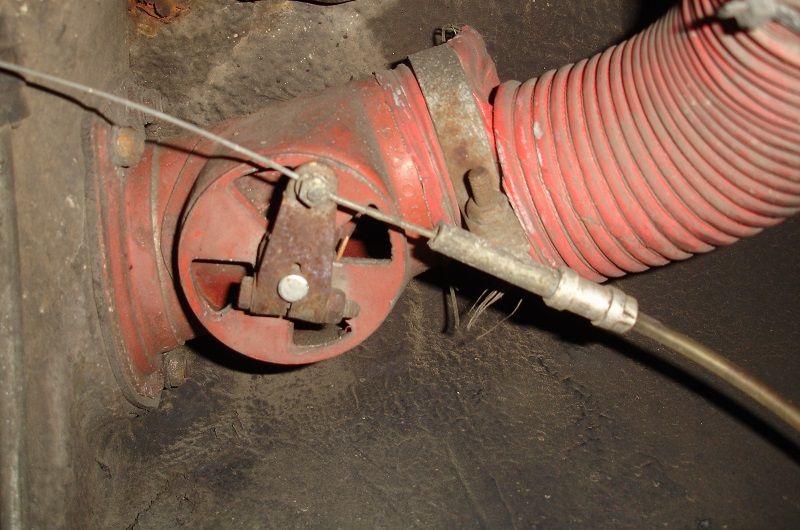
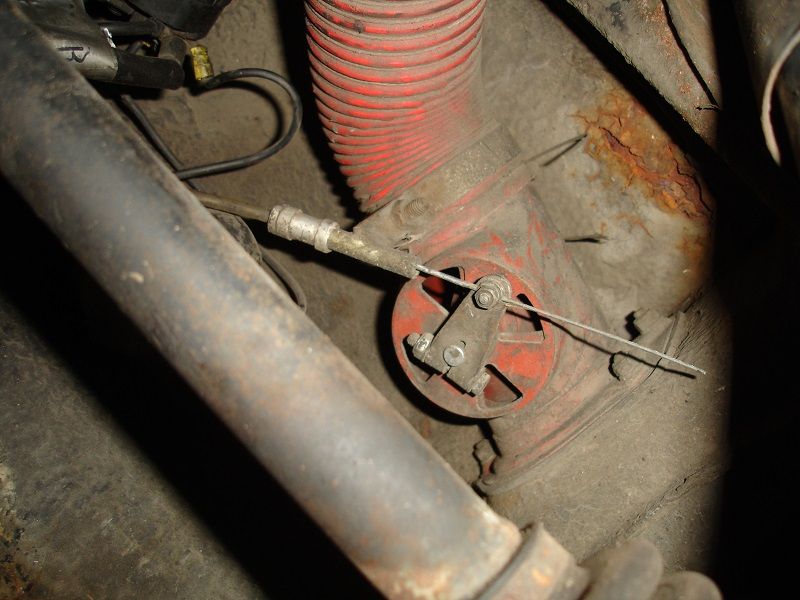
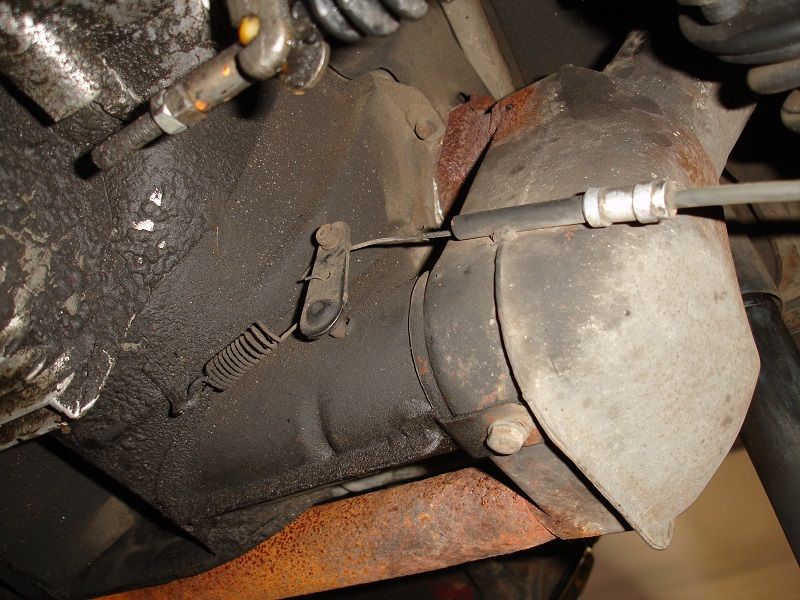
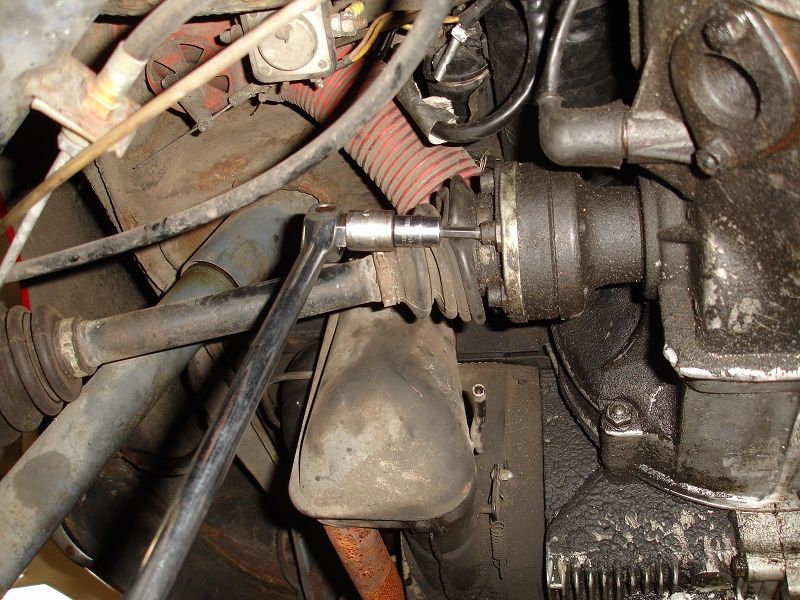
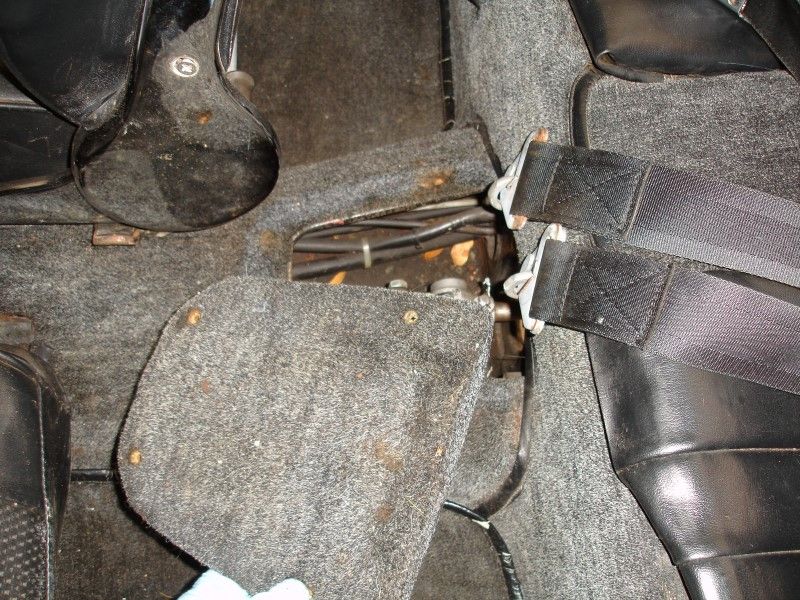
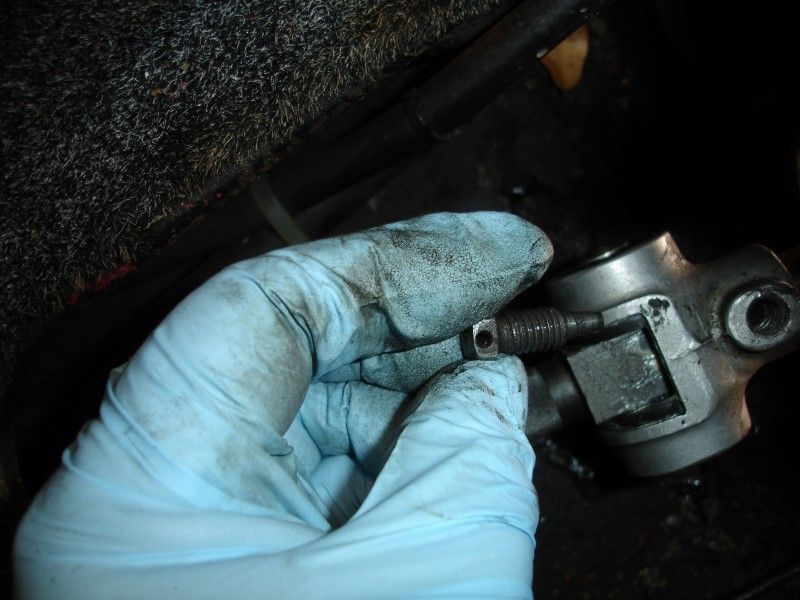
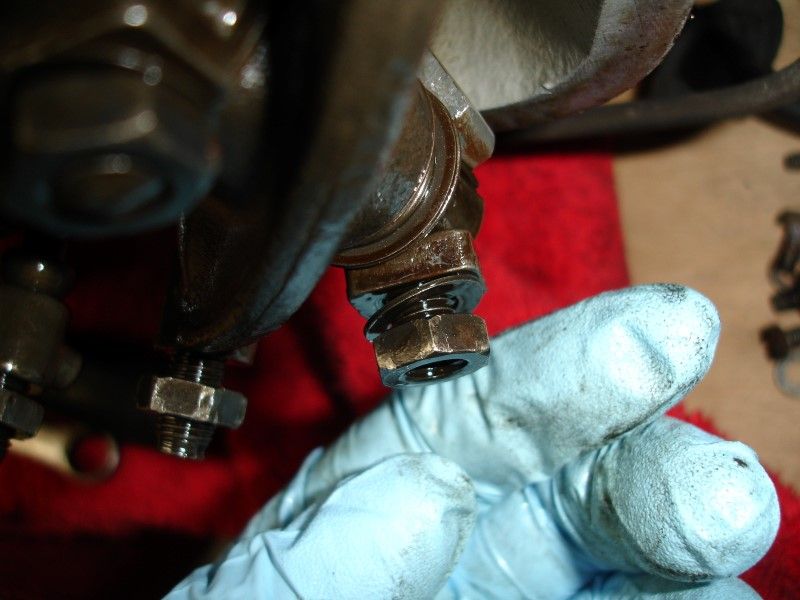
Now take out the clutch cable... I measured (I know, I know... too lazy to get under the car to get the caliper to measure it correctly...) the threads to make sure I do not have to guess adjustment when re-installing it...

Remember the strap that holds the clutch cable in the back...

Now removed and pushed aside
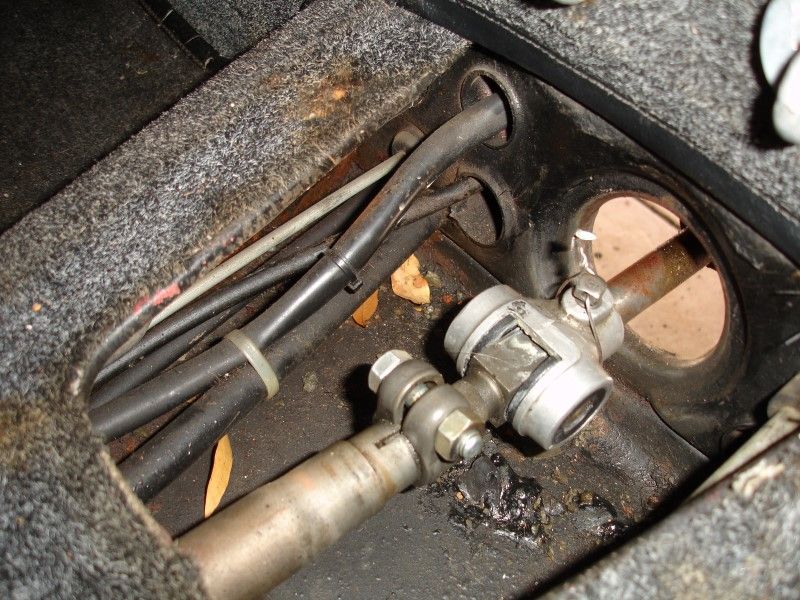
Disconnect speedometer cable
Also, took today and tomorrow off from work to make it a long weekend to work in the car. Started going down the list from the removing and installing the engine instructions on the link posted earlier. Will provide photos along the way. Cheers!!
Let's get this started!!
Battery removed. I then started by disconnecting the heater hose
Then the cables to the heater box control...
Took time to check if these were working. They open and close without issues...
Open
Close
Now let's remove the drive shafts. 6mm hex socket... make sure the hex socket goes in all the way to avoid stripping the bolts. Loosen all the bolts before removing any. I used the e-brake to help me avoid them rotating... then undo the e-brake, rotate, loosen the next set... rinse an repeat with the other side. Once all are loose then undo de e-brake and start getting them off...
I should install new rubber boots and clean and repack the CVJ since I am there...
and they are out!
Decouple throttle link...
Now take out the clutch cable... I measured (I know, I know... too lazy to get under the car to get the caliper to measure it correctly...) the threads to make sure I do not have to guess adjustment when re-installing it...
Remember the strap that holds the clutch cable in the back...
Now removed and pushed aside
Disconnect speedometer cable
01-16-2014, 05:50 PM
#21
Professor of Pending Projects
Rennlist Member
Rennlist Member
Thread Starter
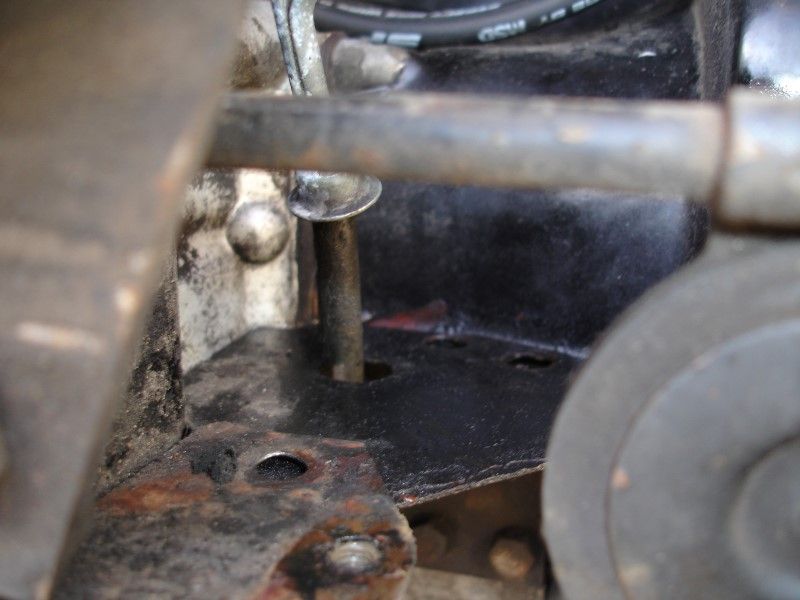
Another photo of the speedometer cable connector
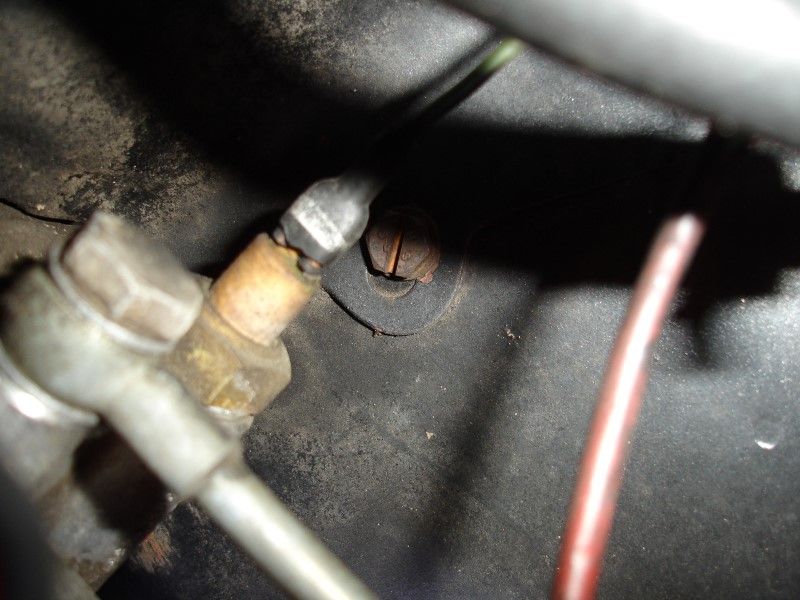
There is a nut in there holding the ground strap...
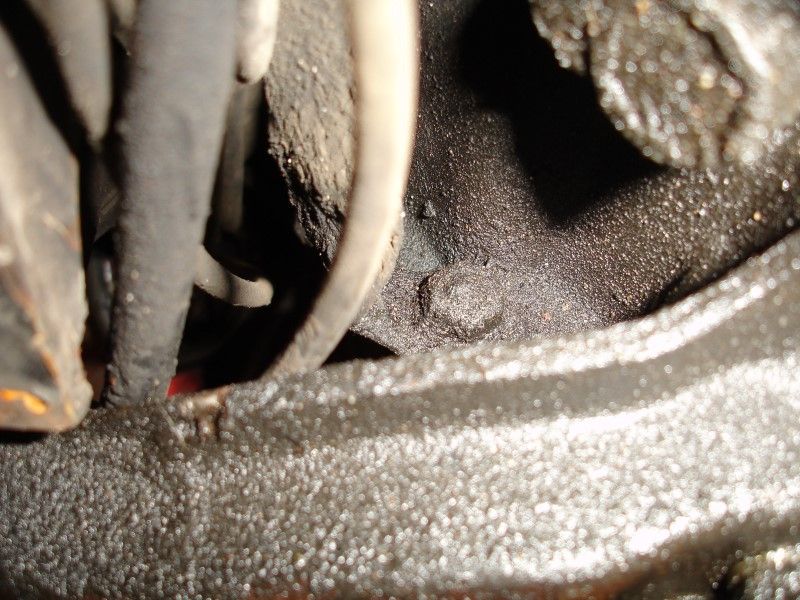
See the strap and the threaded stud?

Disconnect the cables to the starter...

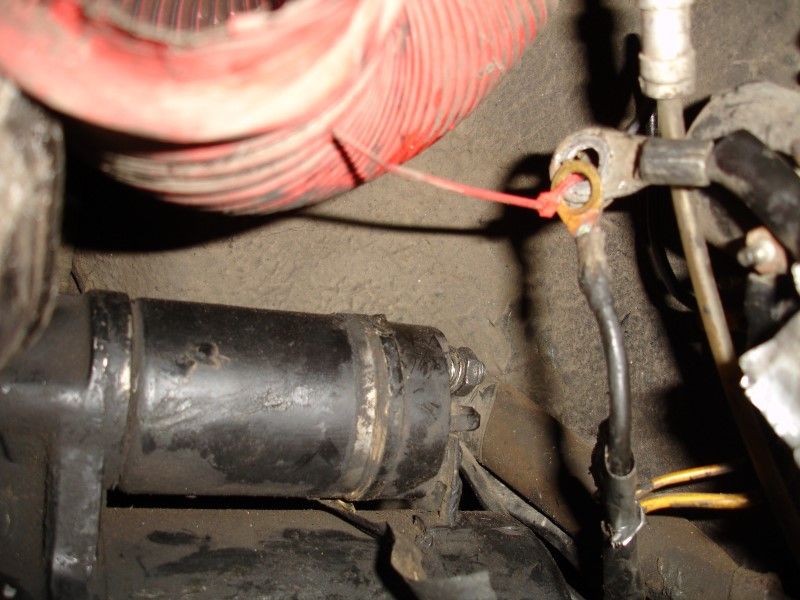
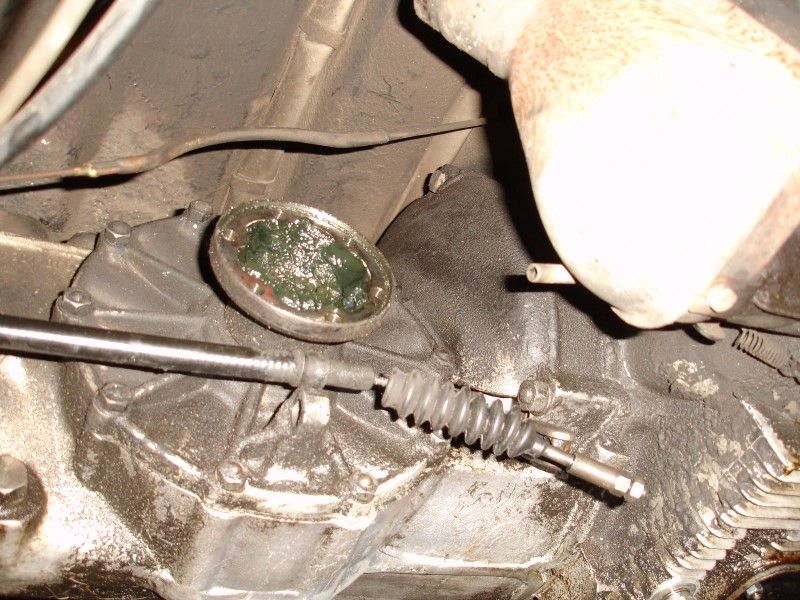
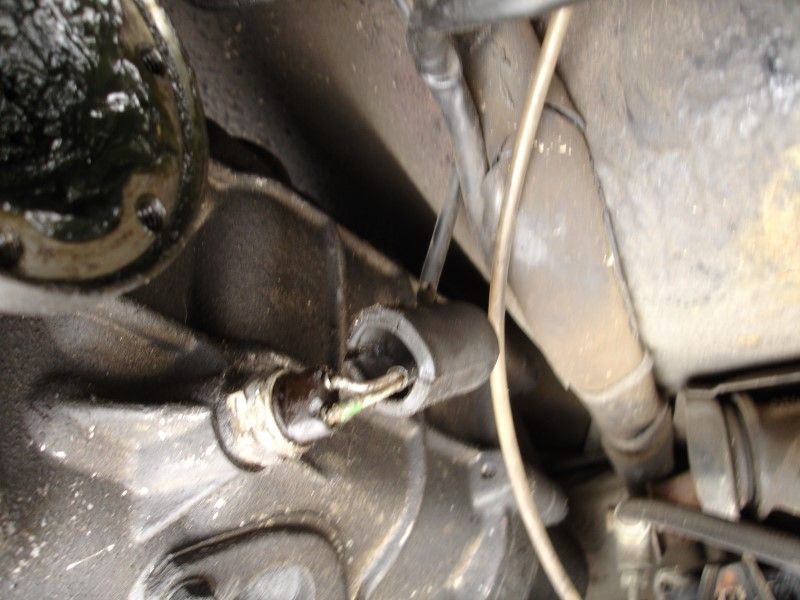
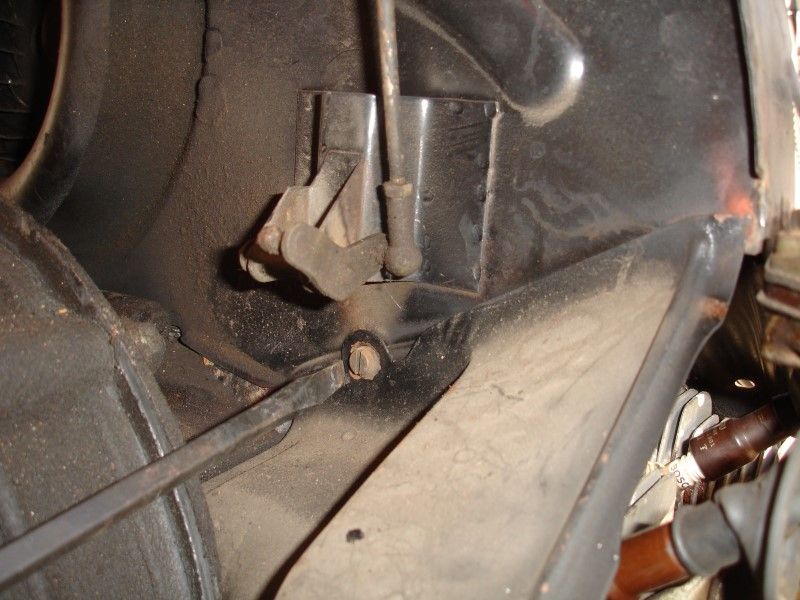
Let's undo the shifter shaft connector... this is done from inside the car by removing the inspection cover... but here is what it looks like from under the car...

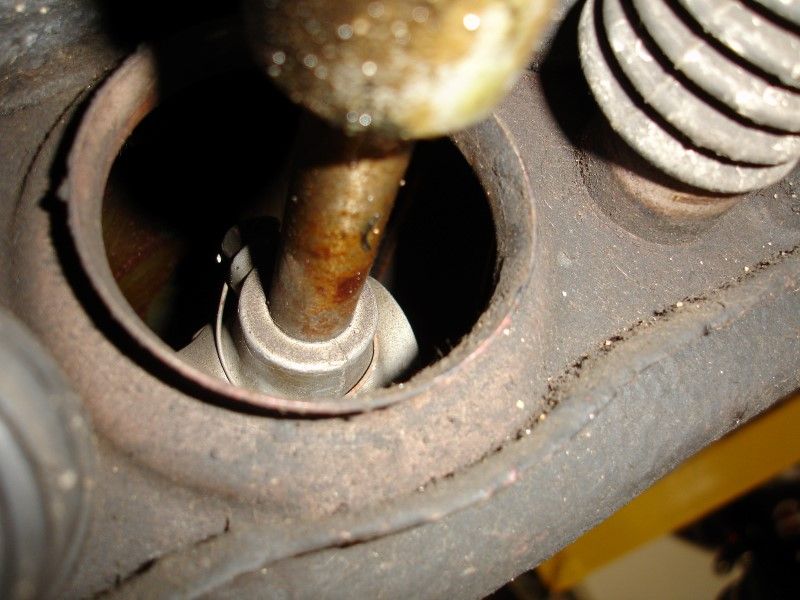
And not to remove the coupling...
Done...

There is a nut in there holding the ground strap...
See the strap and the threaded stud?
Disconnect the cables to the starter...
Let's undo the shifter shaft connector... this is done from inside the car by removing the inspection cover... but here is what it looks like from under the car...
And not to remove the coupling...
Done...
01-16-2014, 05:51 PM
#22
Professor of Pending Projects
Rennlist Member
Rennlist Member
Thread Starter
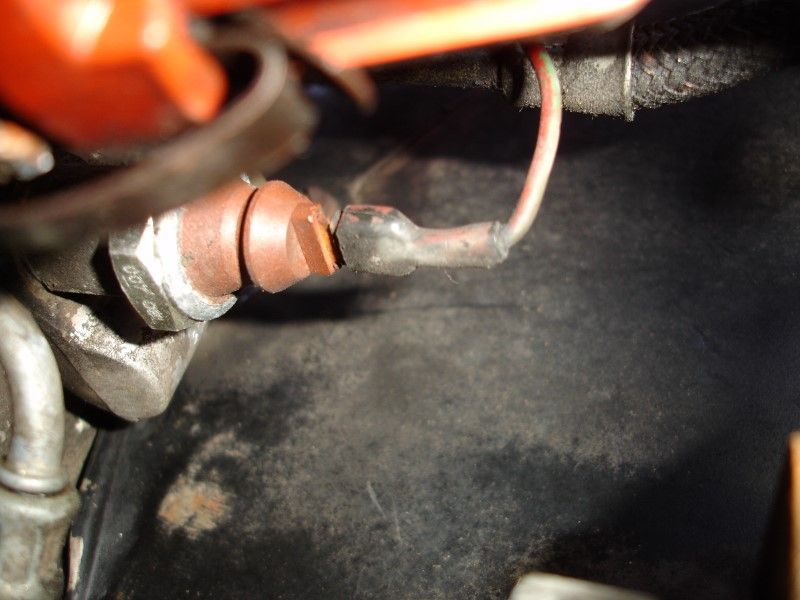
Great to have a list to go by... I almost forgot to disconnect the reverse light sensor
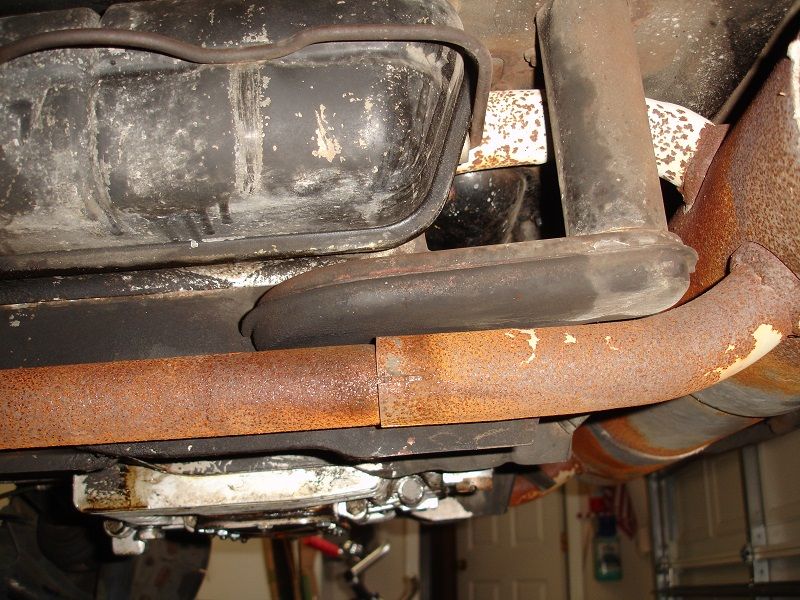
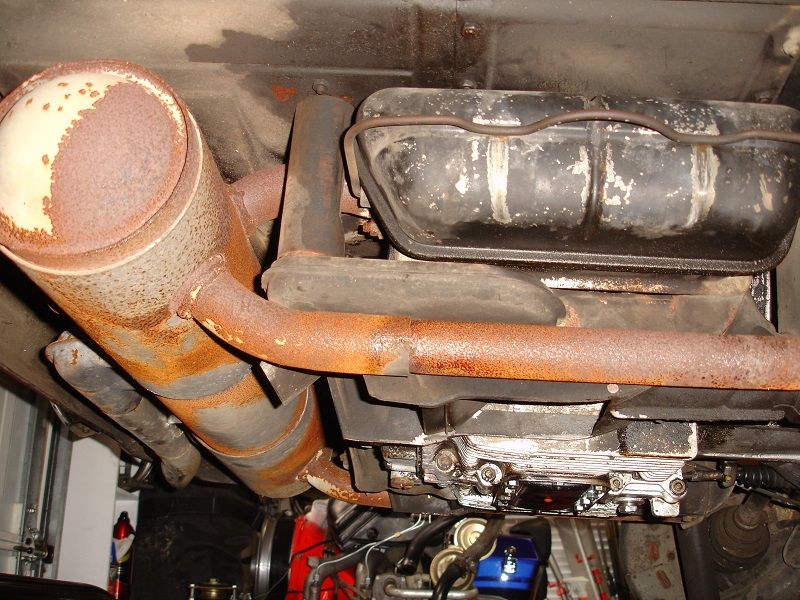
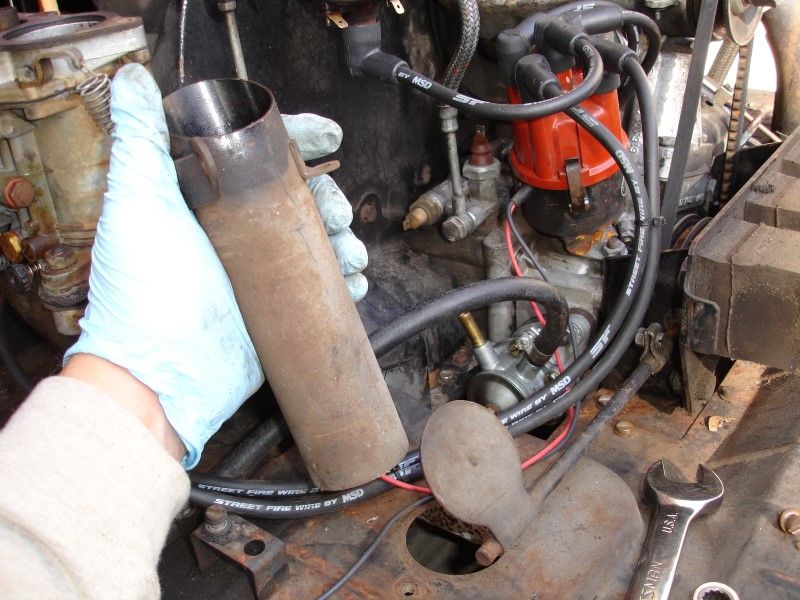
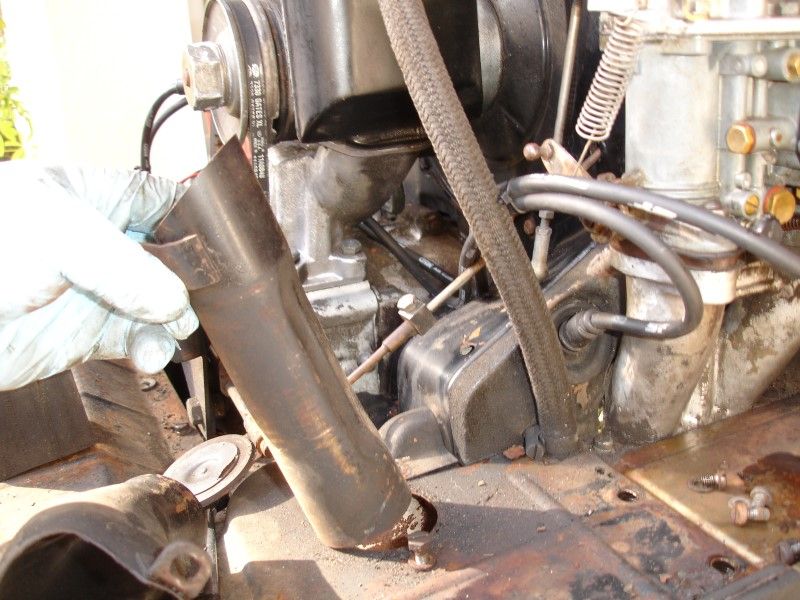
I also removed the tail pipe just to have more clearance to move the engine back a little to clear the transmission shaft... maybe it was not needed, but did it just in case...


Now... everything under the car is disconnected, check the list... Now let's go in the engine bay...
Disconnect cables from generator
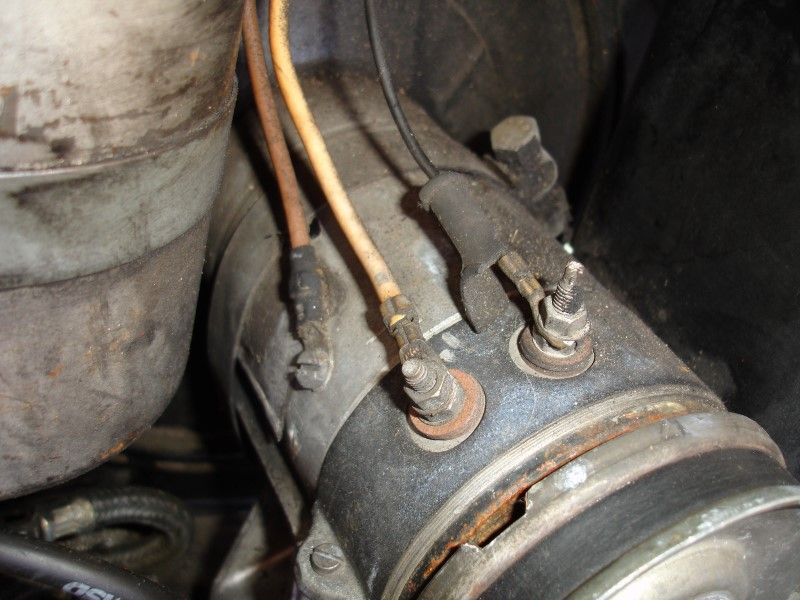
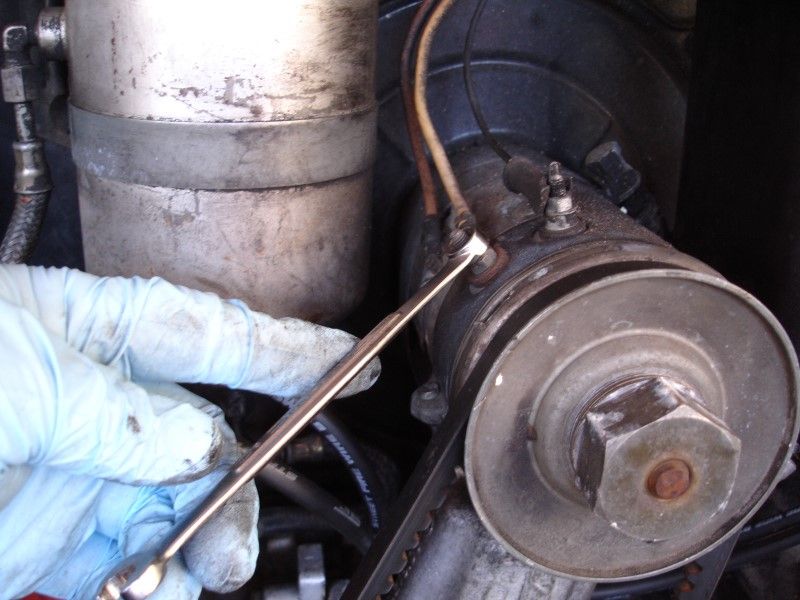


Out of the way
I also removed the tail pipe just to have more clearance to move the engine back a little to clear the transmission shaft... maybe it was not needed, but did it just in case...
Now... everything under the car is disconnected, check the list... Now let's go in the engine bay...
Disconnect cables from generator
Out of the way
01-16-2014, 05:52 PM
#23
Professor of Pending Projects
Rennlist Member
Rennlist Member
Thread Starter
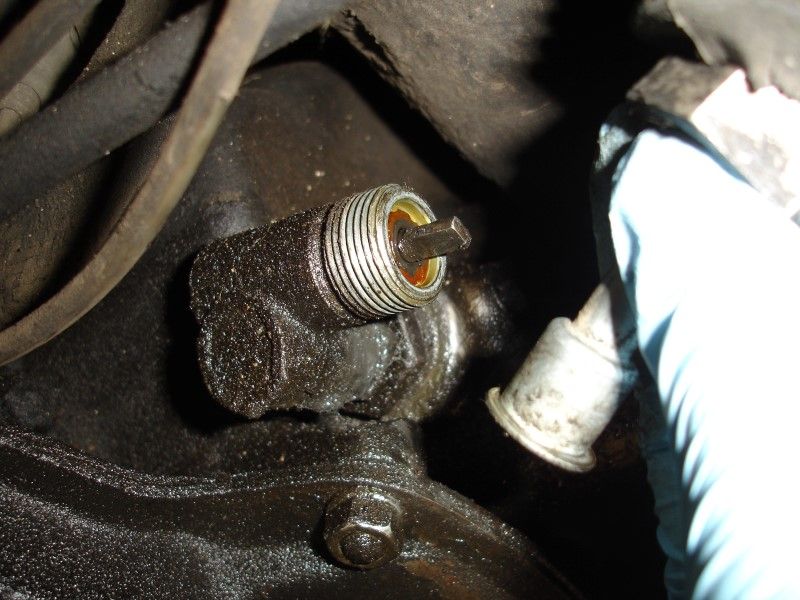
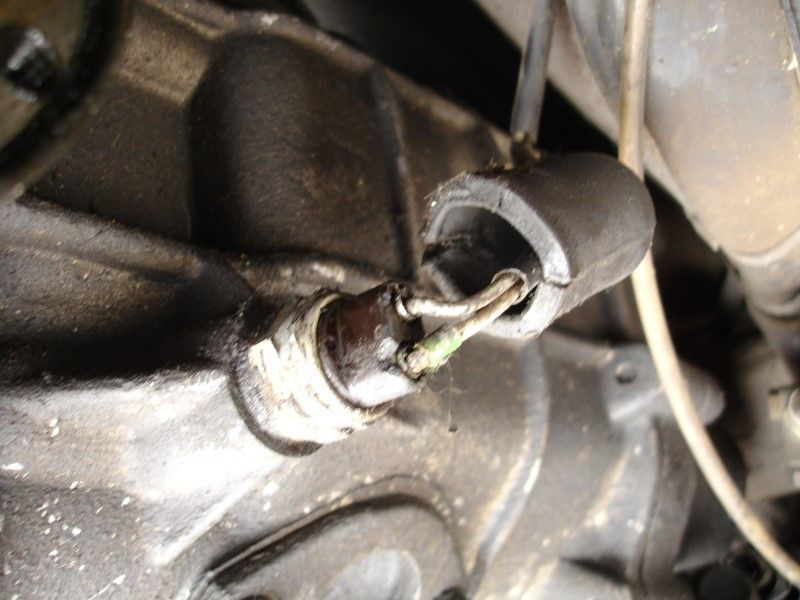
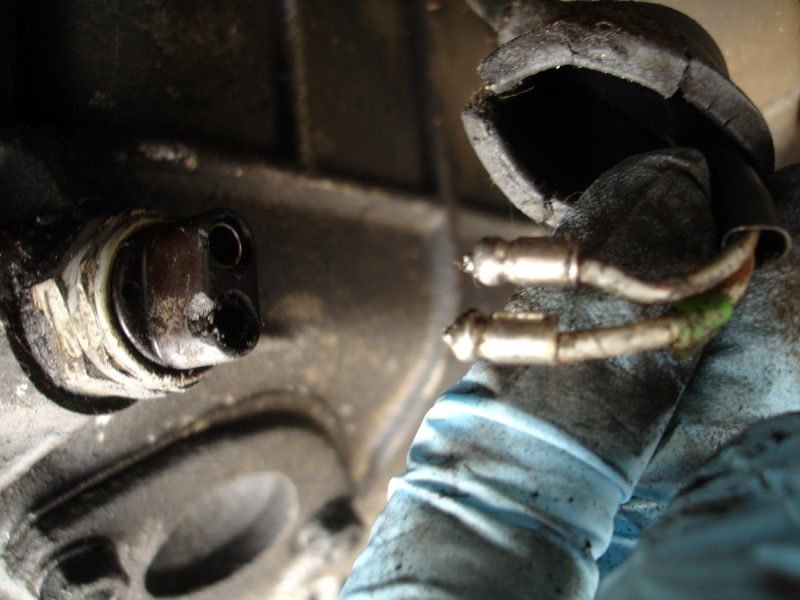
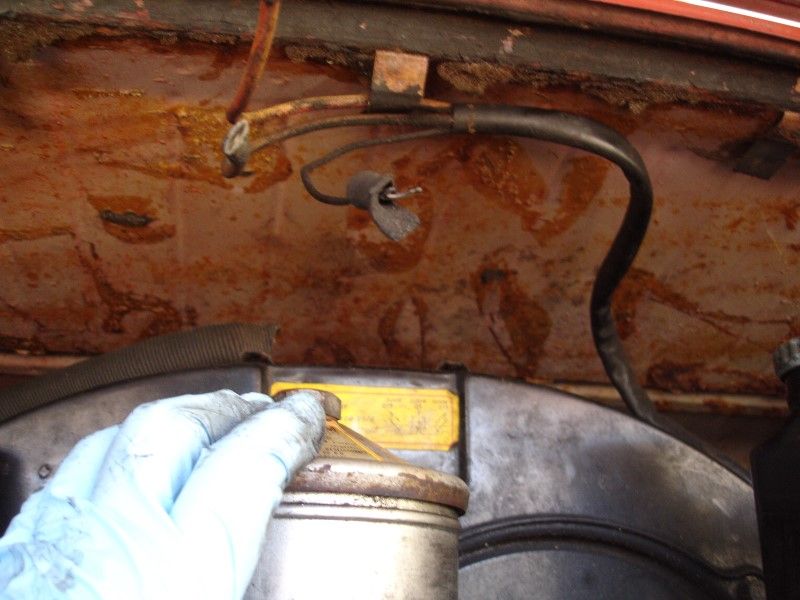
Disconnect fuel line from filter

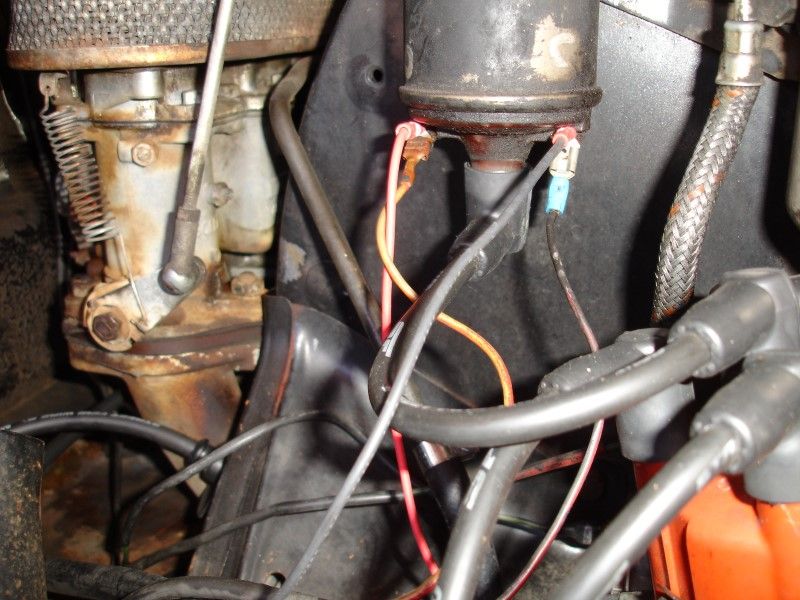
Disconnect cables from ignition coil... oil pressure sensor, oil temperature sensor...
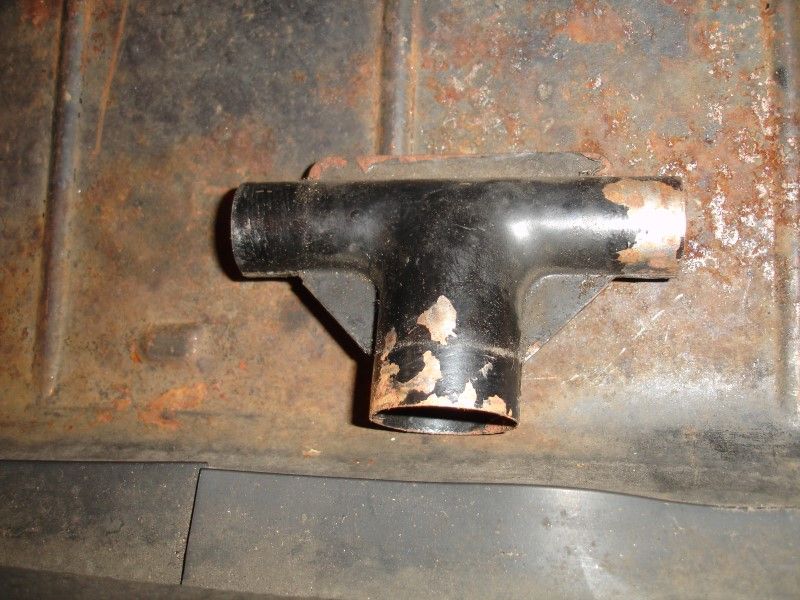
Remove the "T" connecting the heater tubes on the top of the engine fan housing... (humm... looks like I did not take photos of this step)
Check the list again...
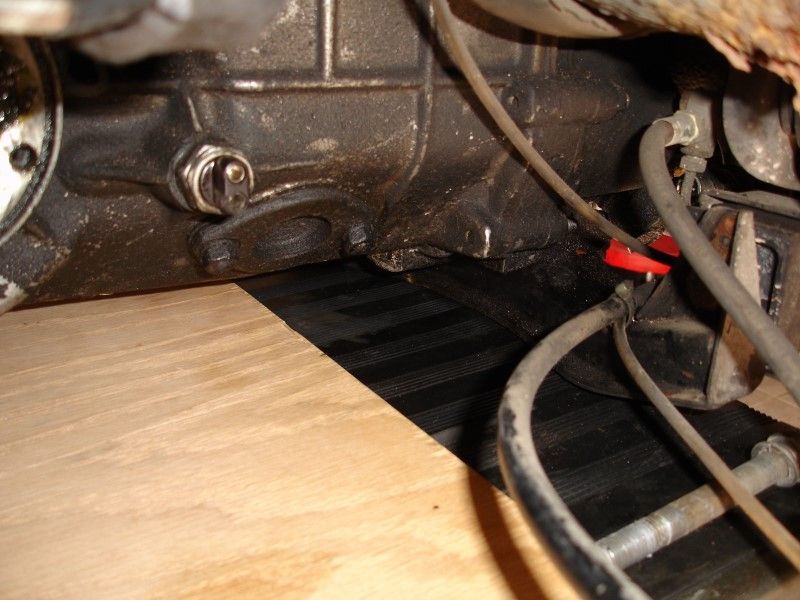
OK, here we go... slide the lift table under the car. I went in so that the lift table end was under the transmission crossbar... then placed a wood panel in between the engine and lift. I used two hockey pucks to put on the side of the engine to avoid it moving left to right...


I then raised the lift table enough to get pressure of the bolts holding engine and transmission, and loosen the bolts... once the two bolts in the engine bay were out, and the two in the transmission crossbar... I lifted the car slowly, checking for anything that could be touching or in the way... as I lowered the engine (well, lifted the car), I pulled the engine a little bit to the rear of the car to clear the transmission shaft.

Slowly...

And it is out!!!
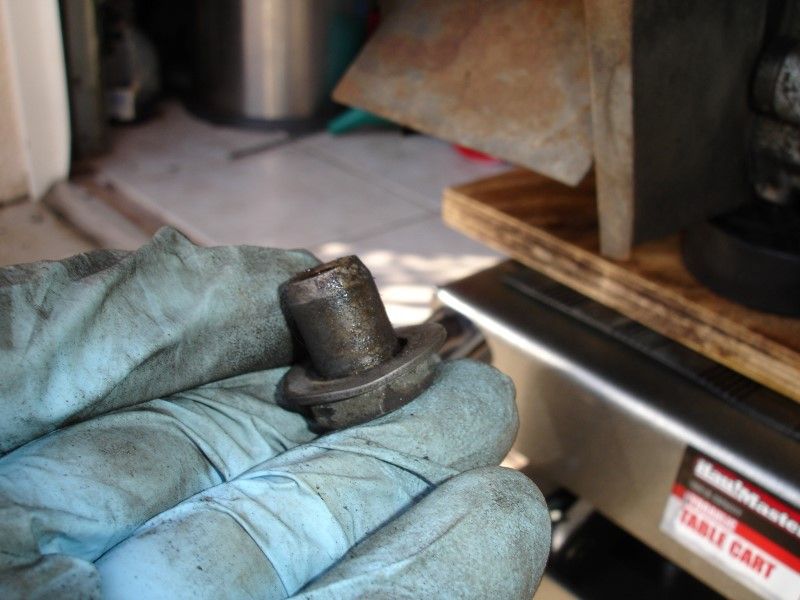
Funny the stuff you sometimes find... this was in the bottom of the back of the engine... why can't it be some snap-on tool???
Disconnect cables from ignition coil... oil pressure sensor, oil temperature sensor...
Remove the "T" connecting the heater tubes on the top of the engine fan housing... (humm... looks like I did not take photos of this step)
Check the list again...
OK, here we go... slide the lift table under the car. I went in so that the lift table end was under the transmission crossbar... then placed a wood panel in between the engine and lift. I used two hockey pucks to put on the side of the engine to avoid it moving left to right...
I then raised the lift table enough to get pressure of the bolts holding engine and transmission, and loosen the bolts... once the two bolts in the engine bay were out, and the two in the transmission crossbar... I lifted the car slowly, checking for anything that could be touching or in the way... as I lowered the engine (well, lifted the car), I pulled the engine a little bit to the rear of the car to clear the transmission shaft.
Slowly...
And it is out!!!
Funny the stuff you sometimes find... this was in the bottom of the back of the engine... why can't it be some snap-on tool???
Last edited by Wachuko; 01-18-2014 at 12:18 PM.
01-18-2014, 01:07 PM
#24
Professor of Pending Projects
Rennlist Member
Rennlist Member
Thread Starter
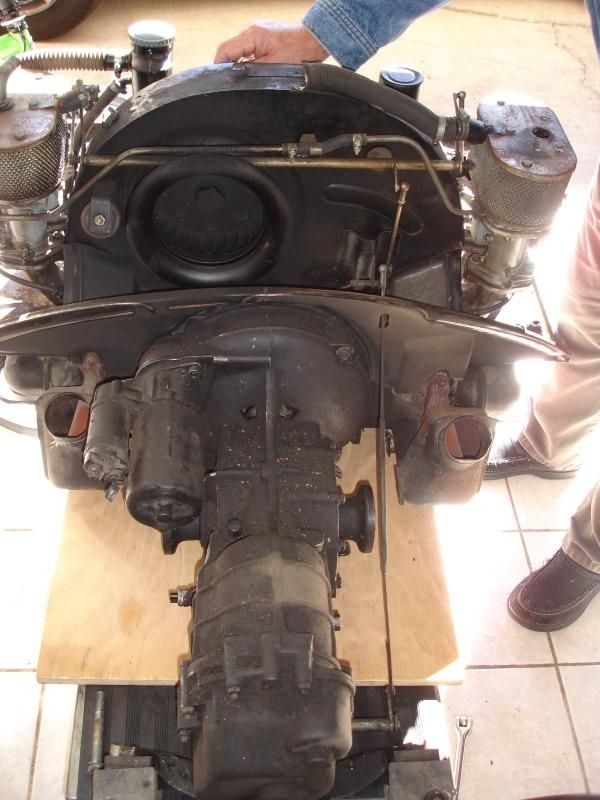
Table ready for engine parts... car came with a new starter in the trunk... not sure why, the one in the car is working fine...

Removed the starter in the car. Top bolt was loose... maybe that is why the PO thought he needed a new one??

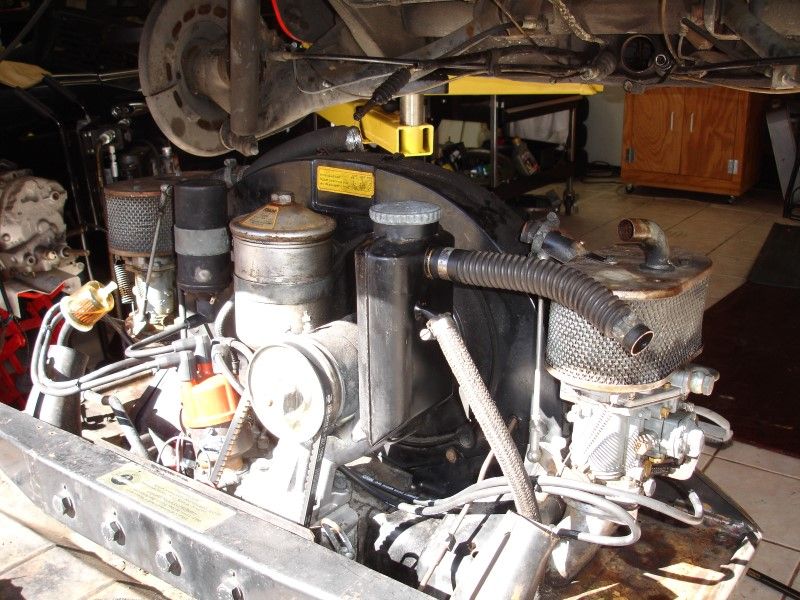
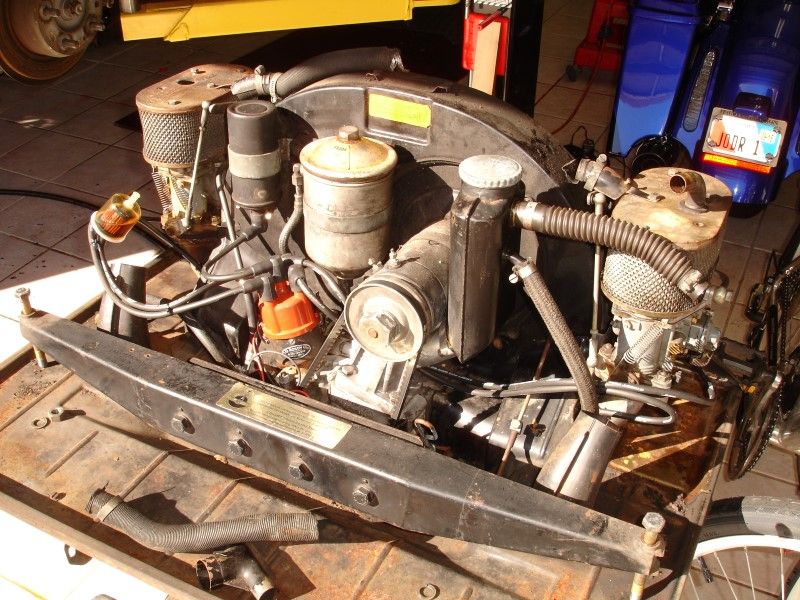
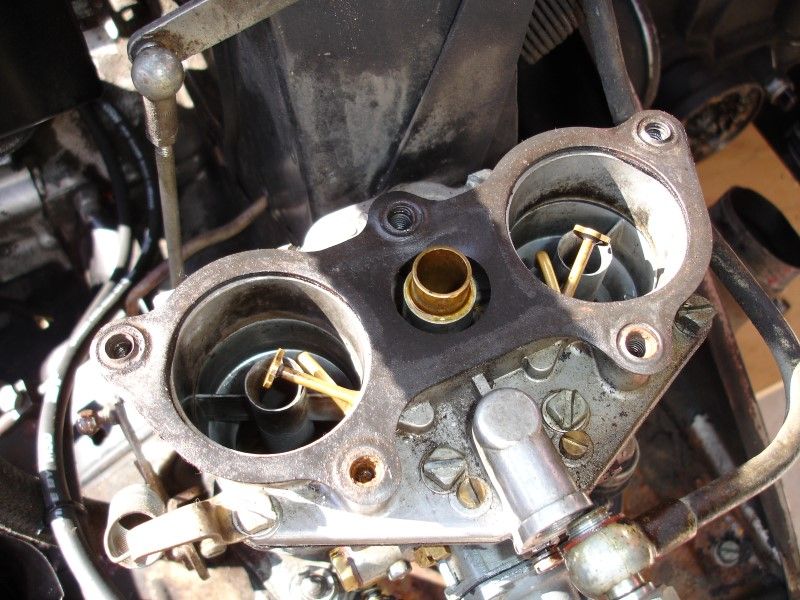
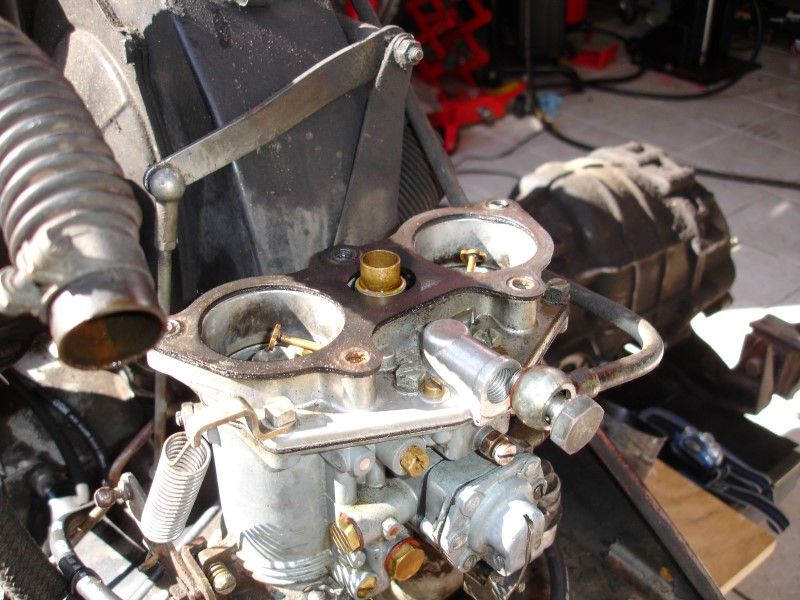
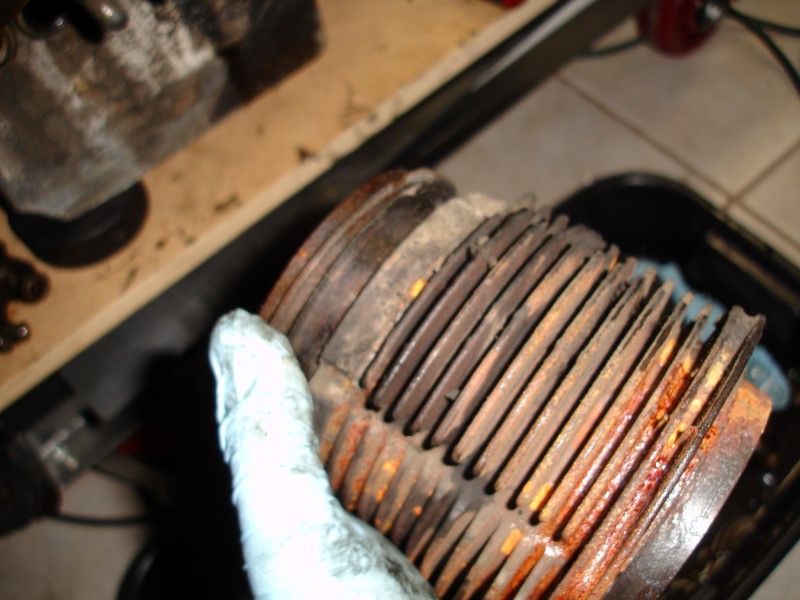
With that out let's get the air filters out... I wanted to see the condition of the carburetors. There some nice shiny parts in it, like if somebody went over them not too long ago.
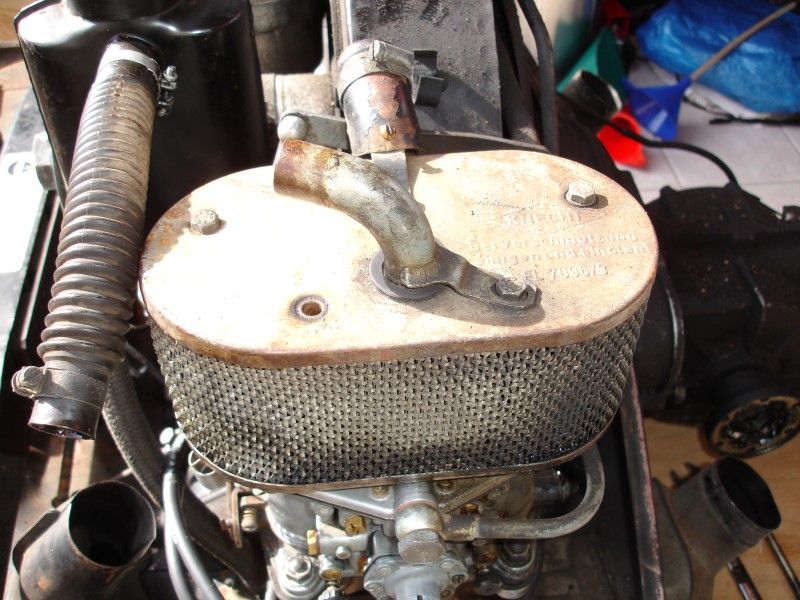
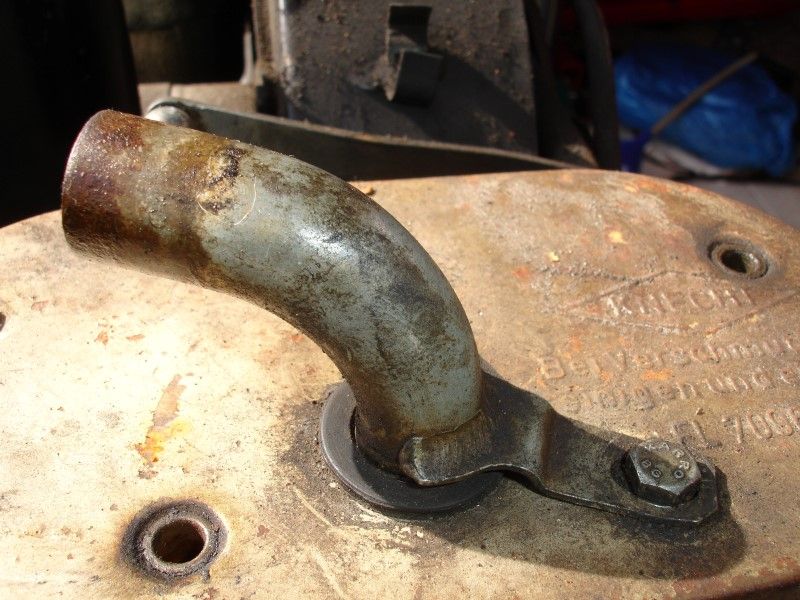
I thought about getting new oval wire mest air filters since these looked so bad... that is, until I saw that they want for them new... US$375.00 each!!!
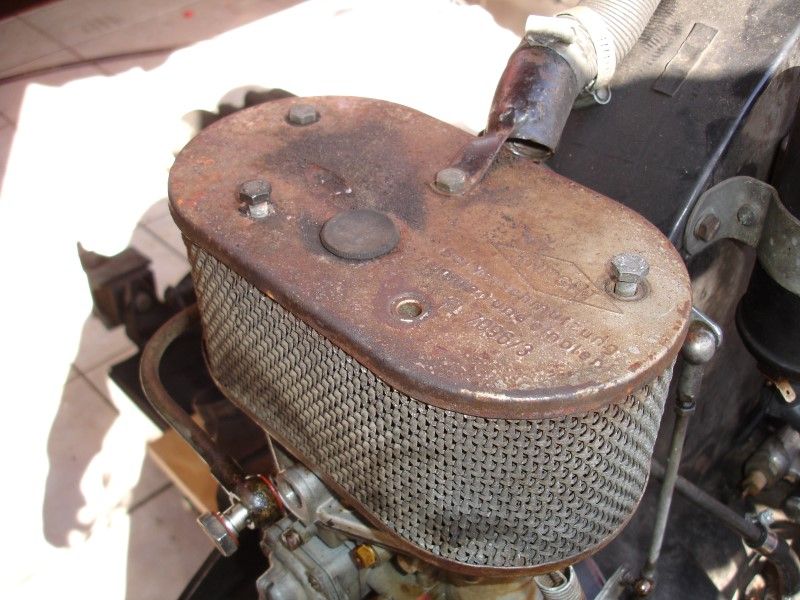
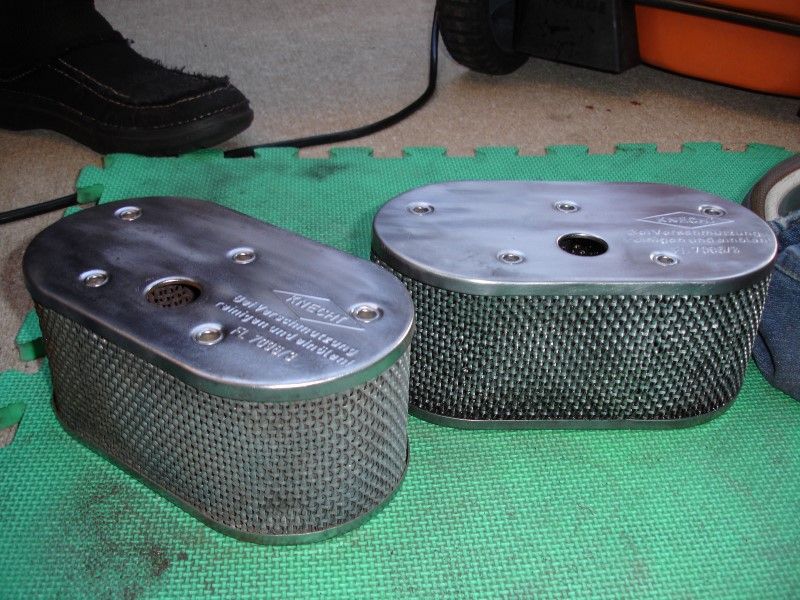
US$375.00 each!!!?? Really!!?? Worth getting the wire brush wheel out with the drill and trying to make them look good again...

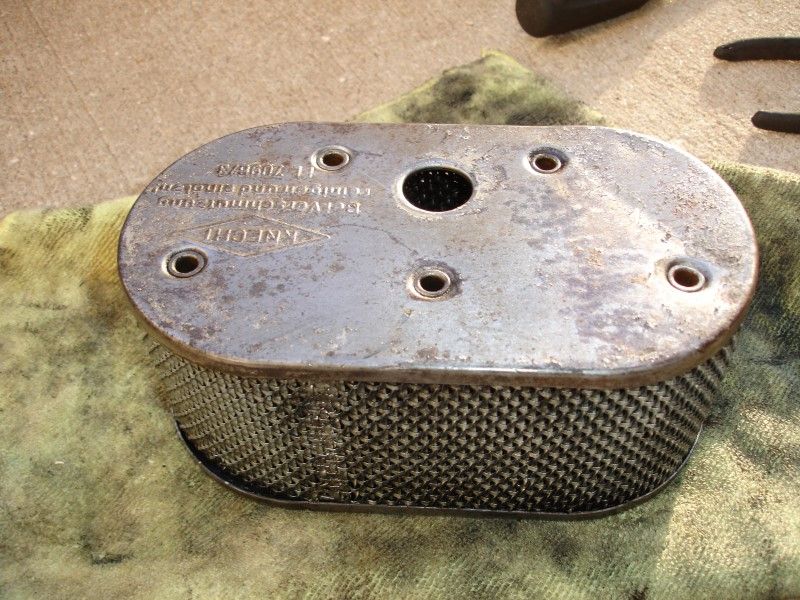

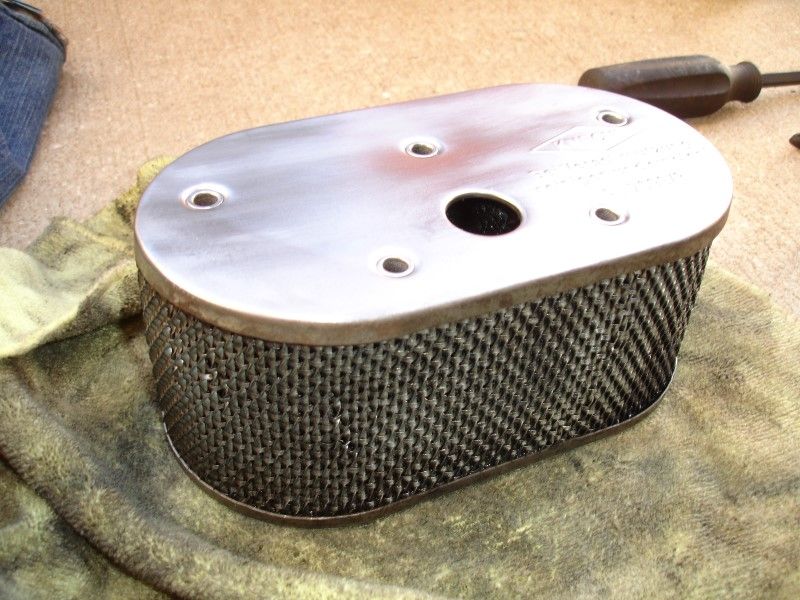
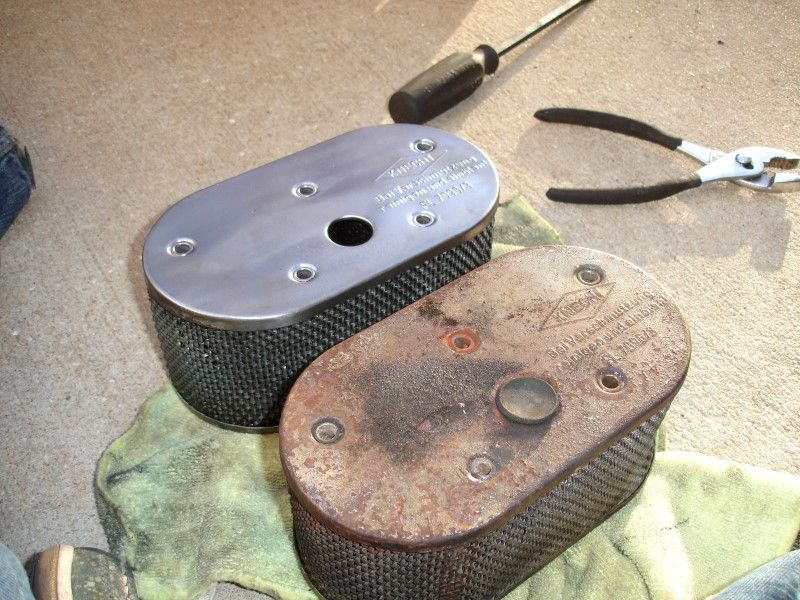

750.00... pusffffftt... I will get other buffing wheels and continue to go through them until they shine... for now, this looks a heck of a lot better...
Disconnected and removed the fuel lines
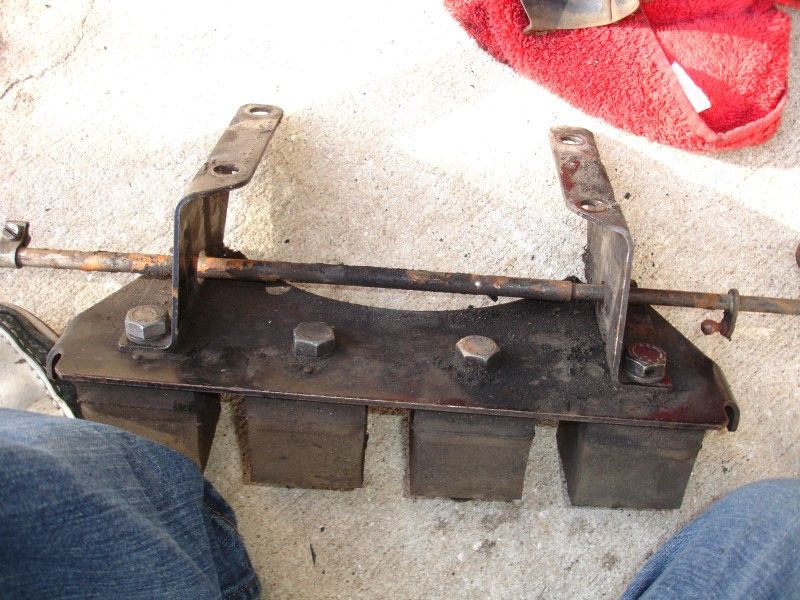
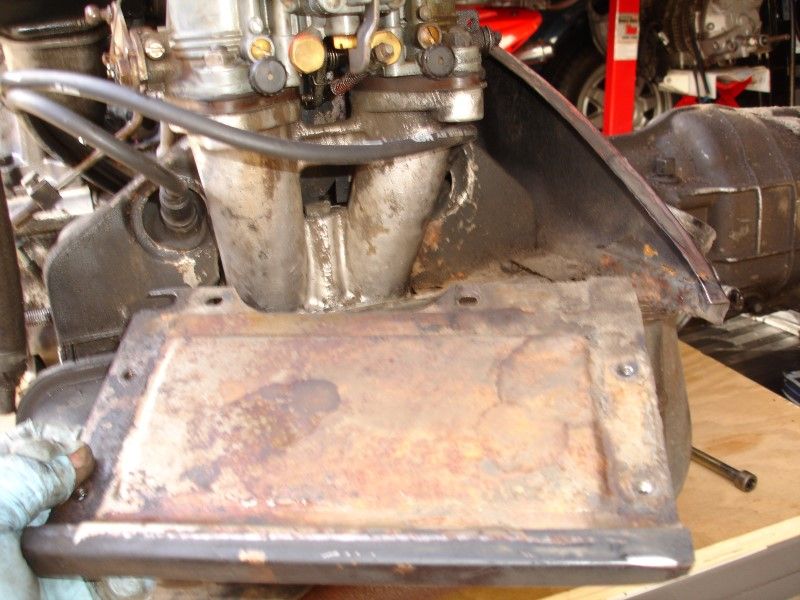
And started to remove the engine tins... (want to get them all powder coated in gloss black) but first got to remove the cross bar...


Lots of these bolts... I will get new ones as some where replaced with hex bolts, some are in poor condition, etc.

Removed the starter in the car. Top bolt was loose... maybe that is why the PO thought he needed a new one??
With that out let's get the air filters out... I wanted to see the condition of the carburetors. There some nice shiny parts in it, like if somebody went over them not too long ago.
I thought about getting new oval wire mest air filters since these looked so bad... that is, until I saw that they want for them new... US$375.00 each!!!
US$375.00 each!!!?? Really!!?? Worth getting the wire brush wheel out with the drill and trying to make them look good again...
750.00... pusffffftt... I will get other buffing wheels and continue to go through them until they shine... for now, this looks a heck of a lot better...
Disconnected and removed the fuel lines
And started to remove the engine tins... (want to get them all powder coated in gloss black) but first got to remove the cross bar...
Lots of these bolts... I will get new ones as some where replaced with hex bolts, some are in poor condition, etc.
01-18-2014, 01:08 PM
#25
Professor of Pending Projects
Rennlist Member
Rennlist Member
Thread Starter
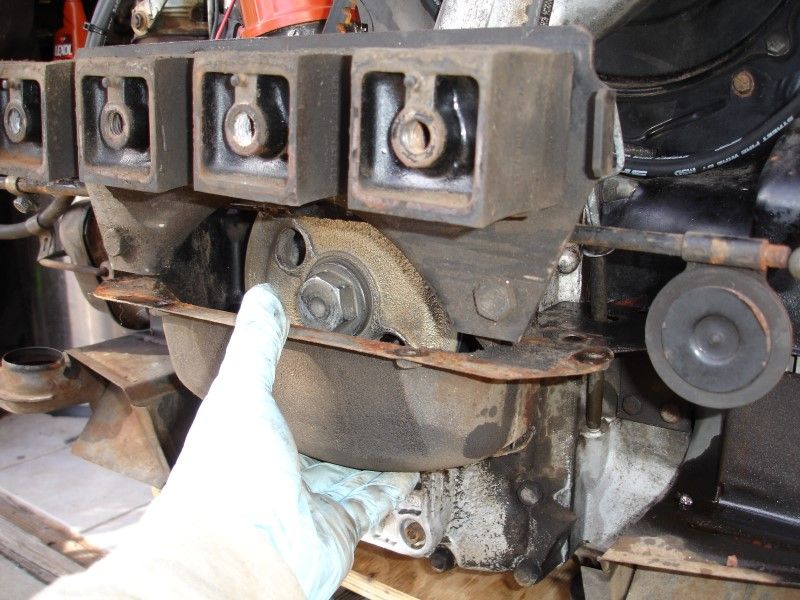
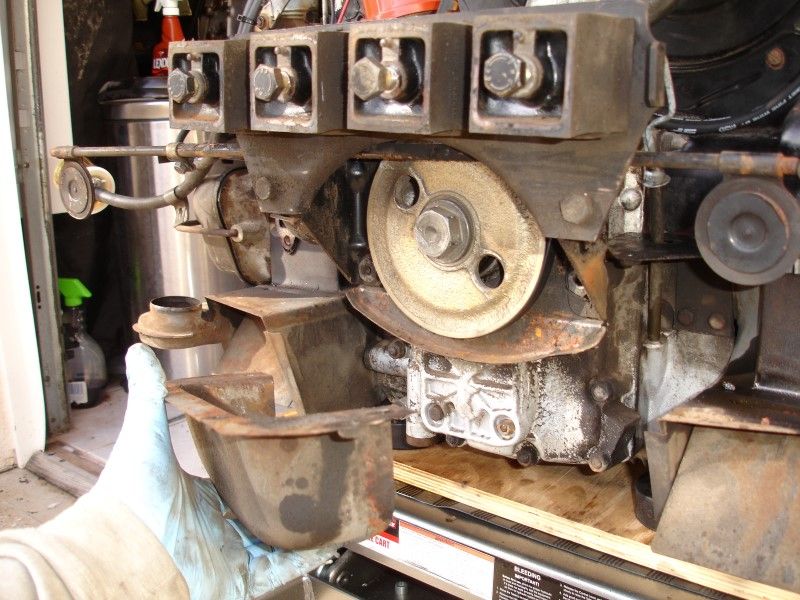
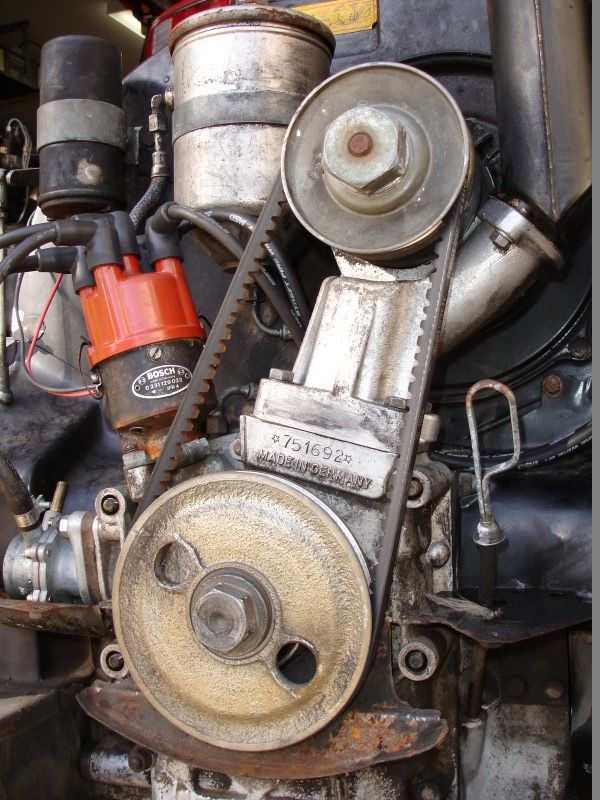
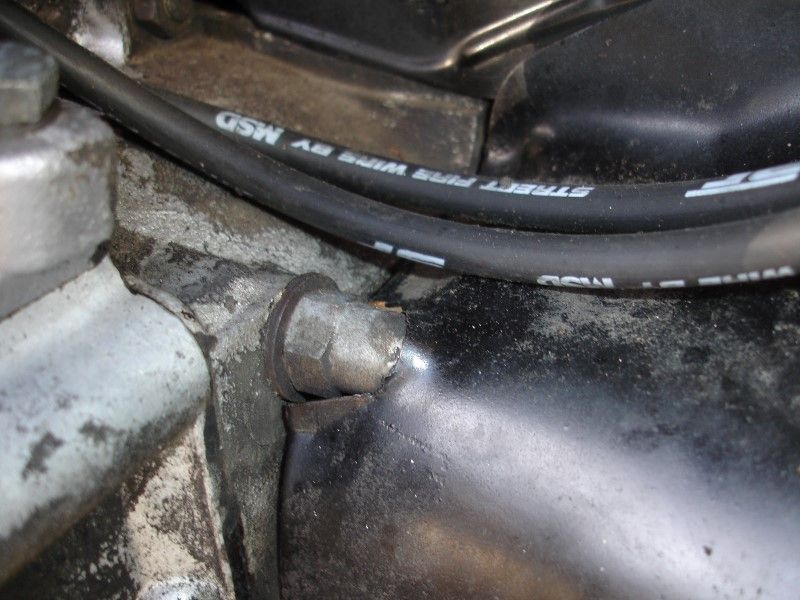
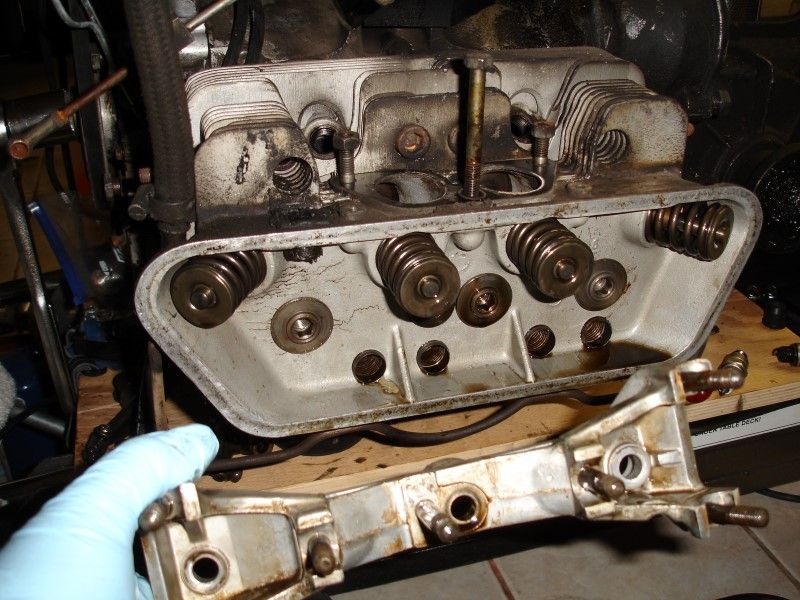
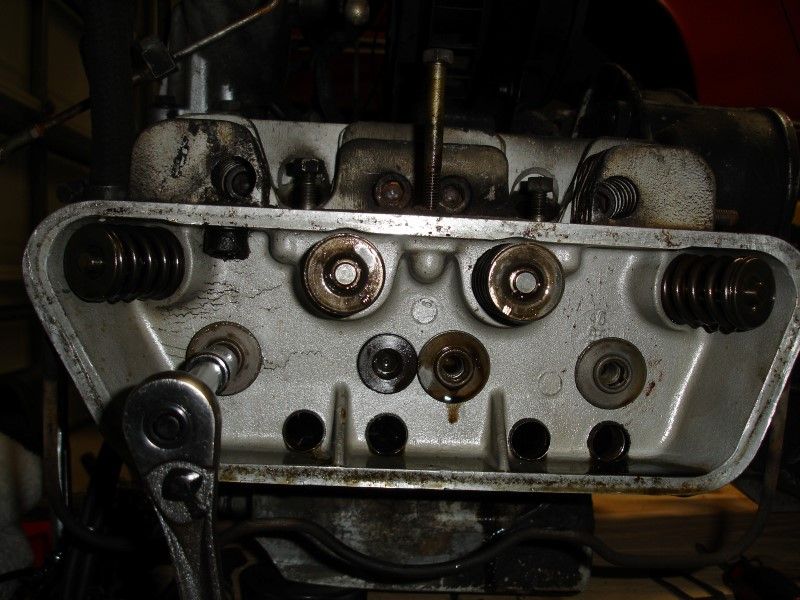
Loosen these flaps so that I could turn them and get them of the shaft... apologies for not calling them by their name, not sure what they are called and not close to the parts diagram to check...


And it is out...

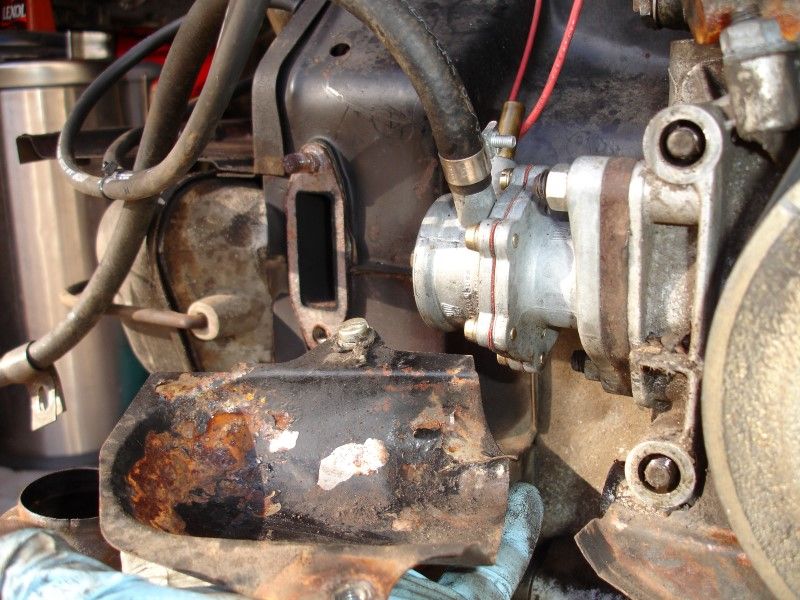
Now let's do the exhaust...
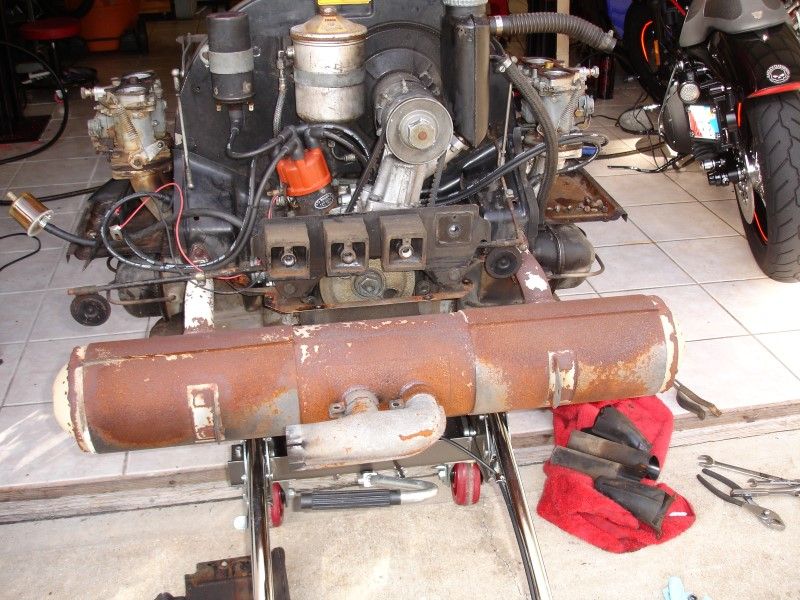
I sprayed some of this in the hopes they would not give me a fight..
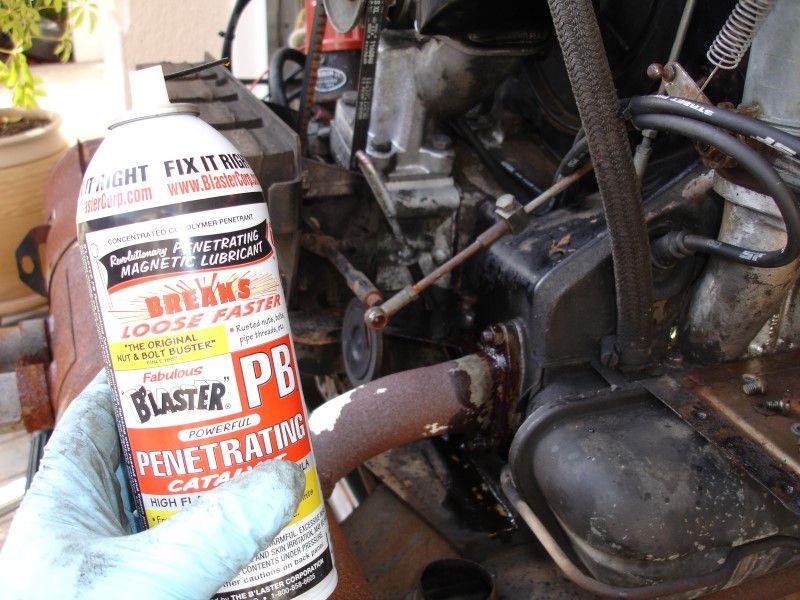

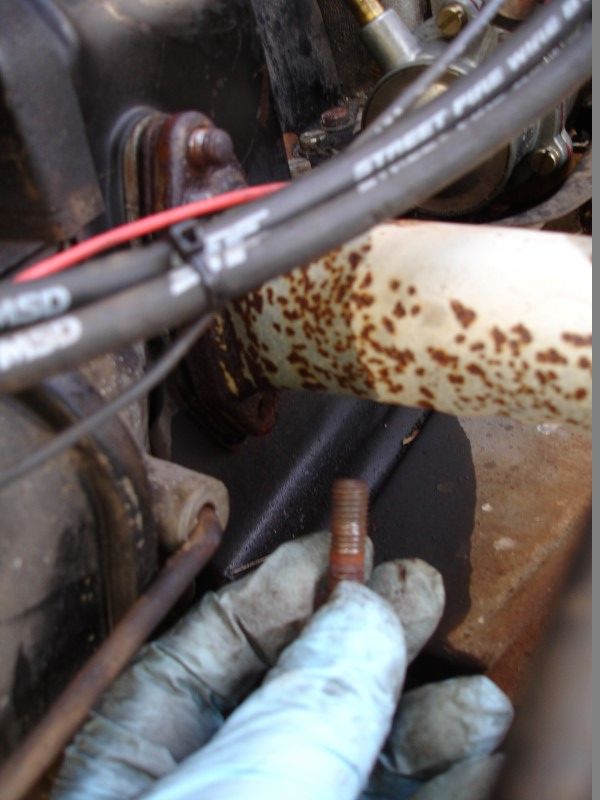
I was lucky that all came out easy... one stud came out, I will get a new one and replace..
OK, moving on...
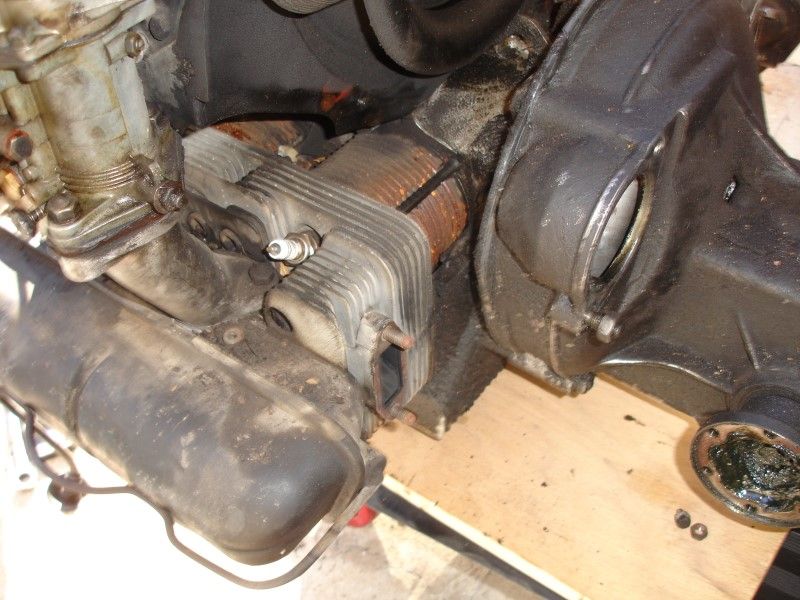
Four of these nuts to remove the bracket with the those rubber mounts...
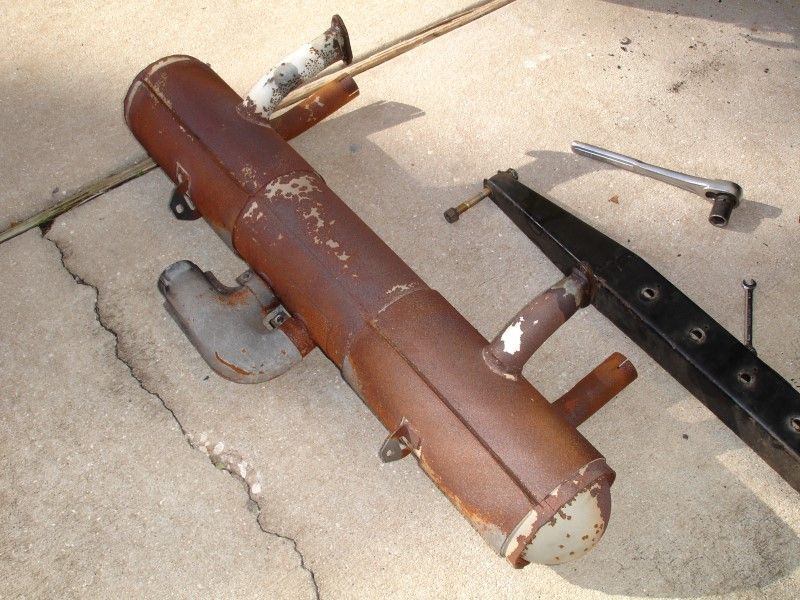
Out
More pieces of the puzzle...
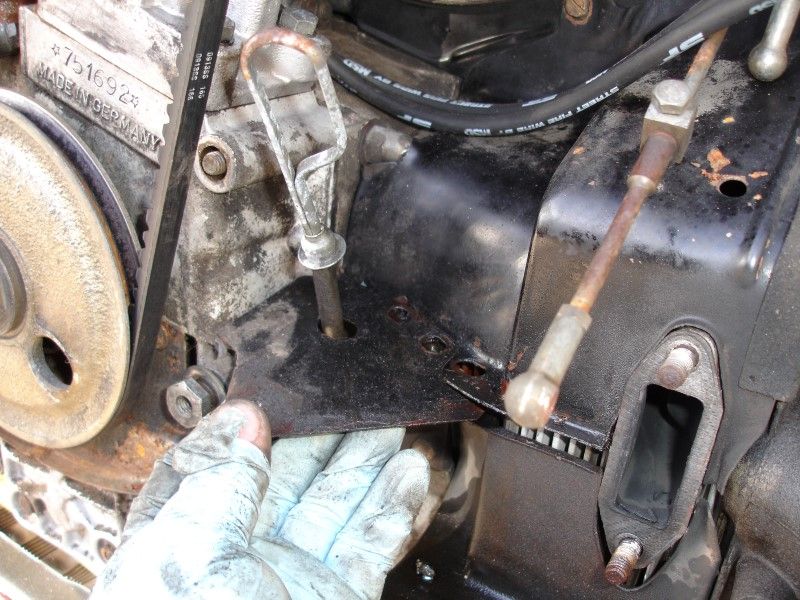
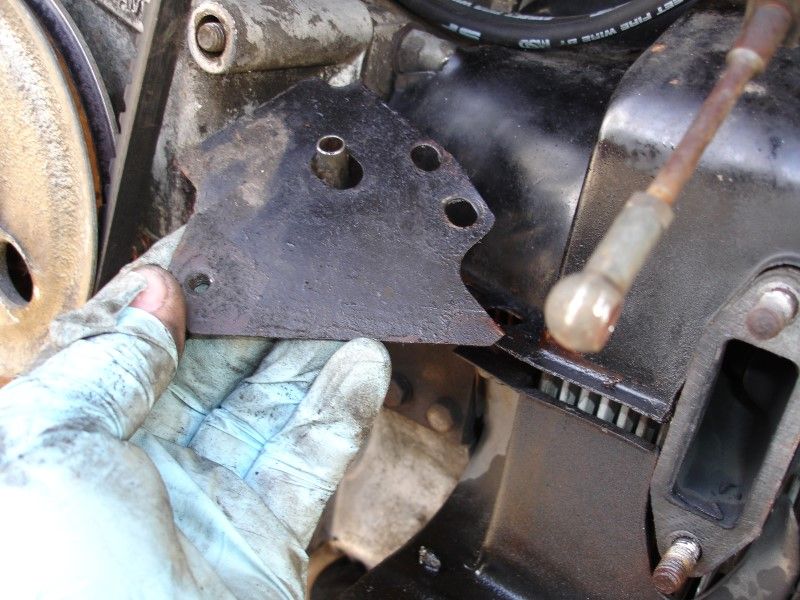

Hummm.... this one does not look right...


OK... more later, need to take the family out for a drive...
And it is out...
Now let's do the exhaust...
I sprayed some of this in the hopes they would not give me a fight..
I was lucky that all came out easy... one stud came out, I will get a new one and replace..
OK, moving on...
Four of these nuts to remove the bracket with the those rubber mounts...
Out
More pieces of the puzzle...
Hummm.... this one does not look right...
OK... more later, need to take the family out for a drive...
01-18-2014, 09:36 PM
#26
Professor of Pending Projects
Rennlist Member
Rennlist Member
Thread Starter
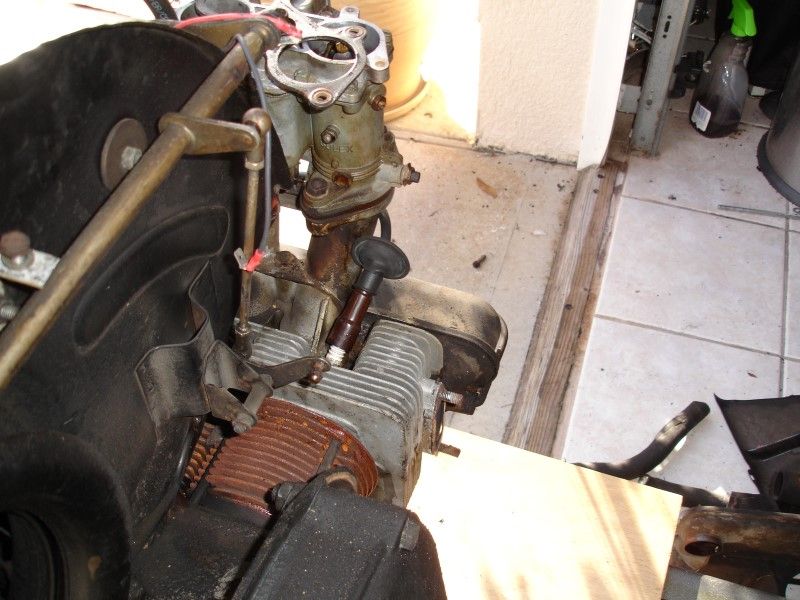
After looking at the Maestro video two times (and I need to watch it again and again so that some of that information sticks in my brain as I work through this), started to disassemble the engine.
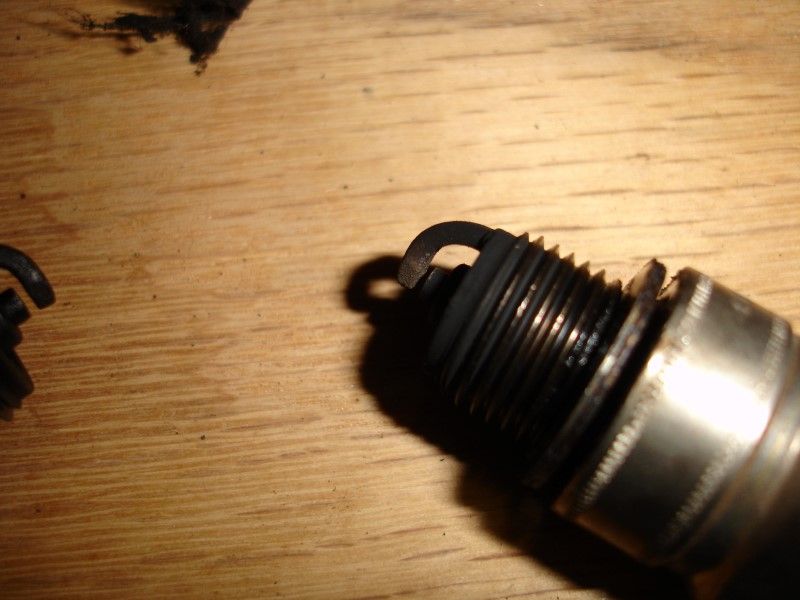
Quick look at the plugs first...
Removing carburetors...I took them off as one piece with the intakes. Wanted to undo as little as possible at this time. I will give them a good clean and leave them alone, not plans to open them as they were working fine.

[img]https://i151.photobucket.com/albums/s144/wachuko/Porsche%20912/DSC08182Custom_zpscc8cbd25.jpg/img]
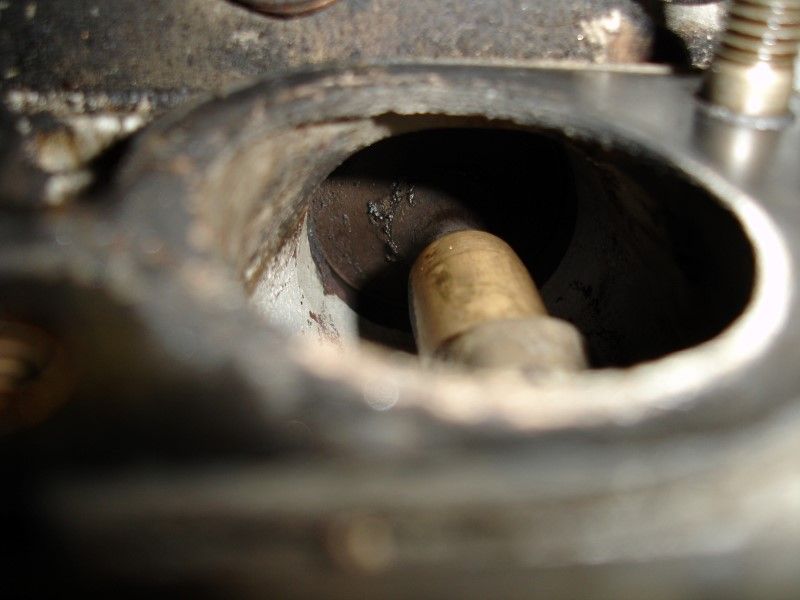
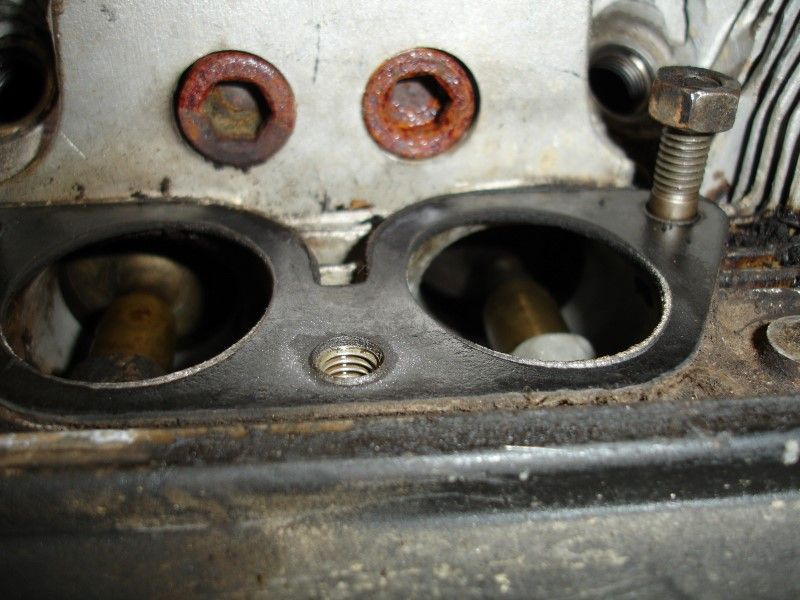
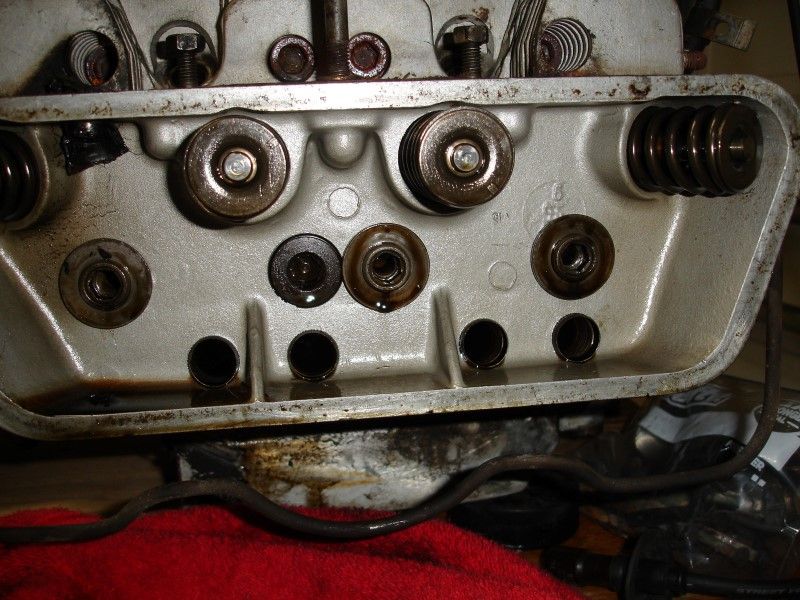
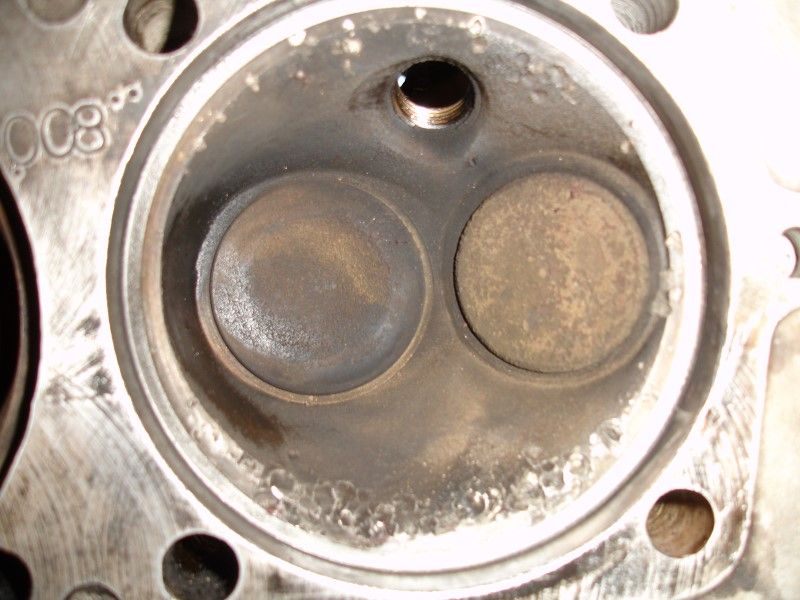
Taking a peak at the valves... everything in the heads seems like it was done not too long ago.

Repeat on the other side...

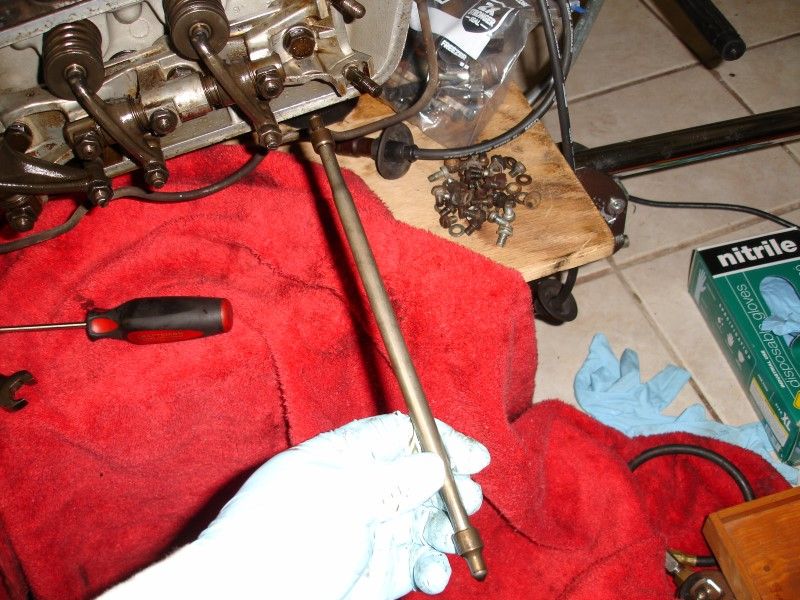
From the video I learned that the 3-4 side is the one that takes the most amount of beating, so I decided to start there...
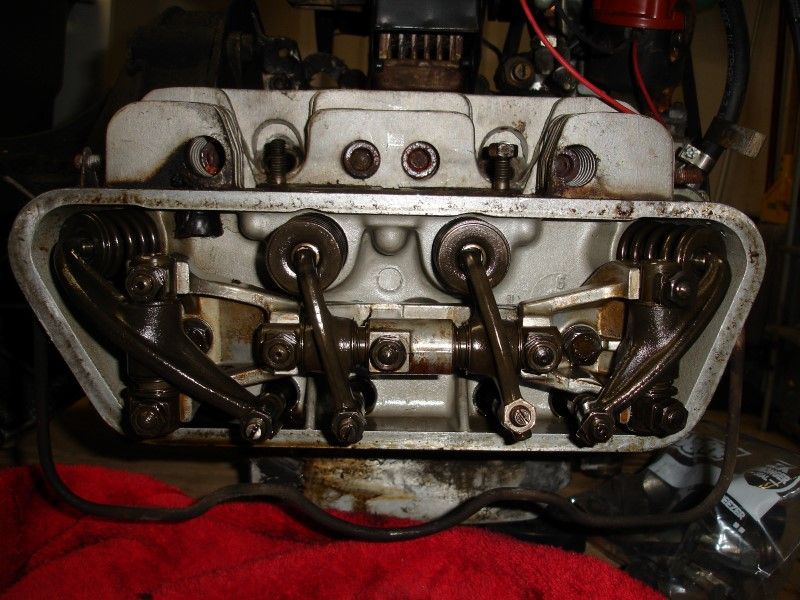
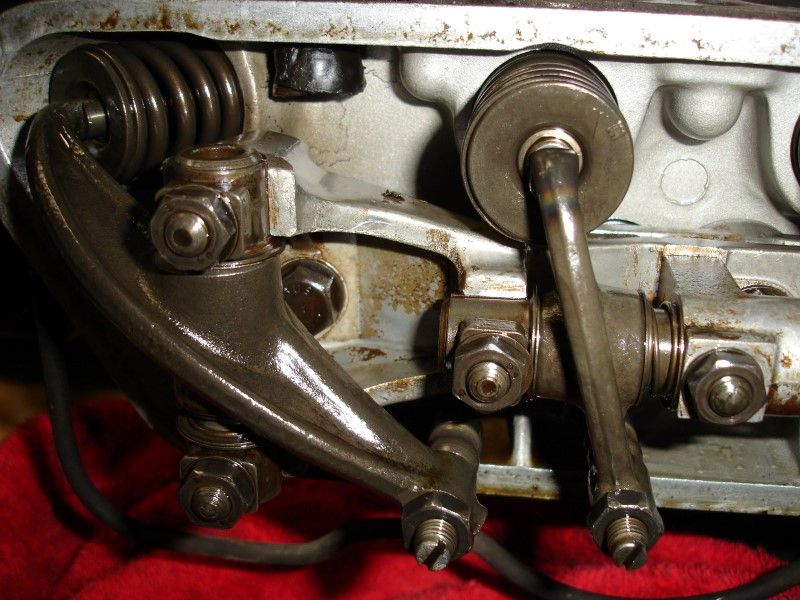

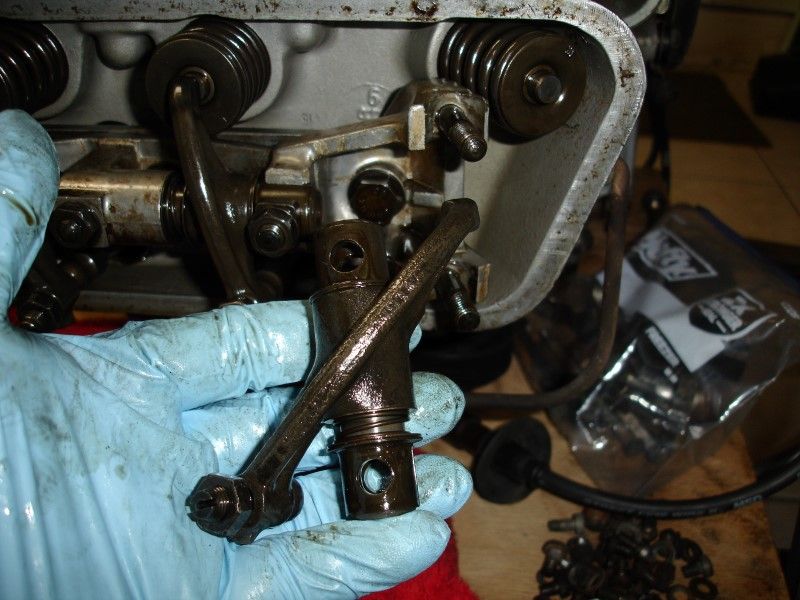
No pitting, not marks, looks nice and feels smooth
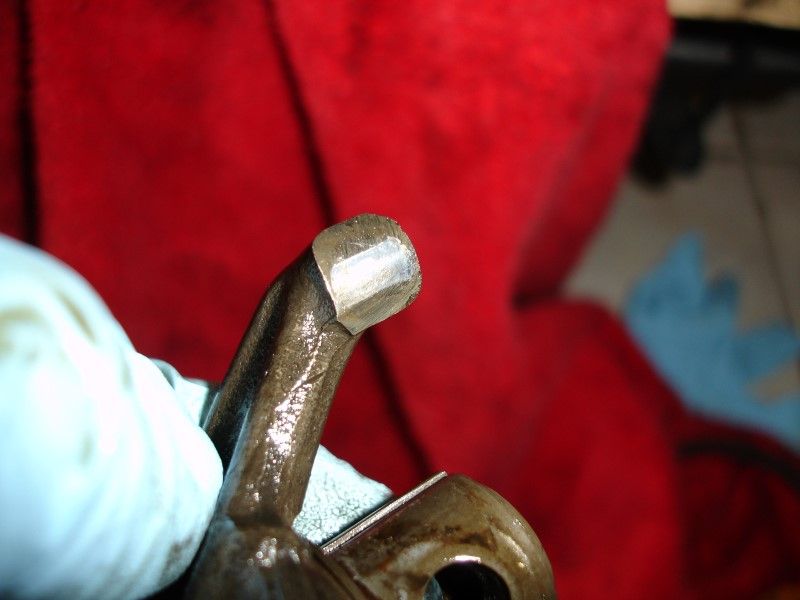
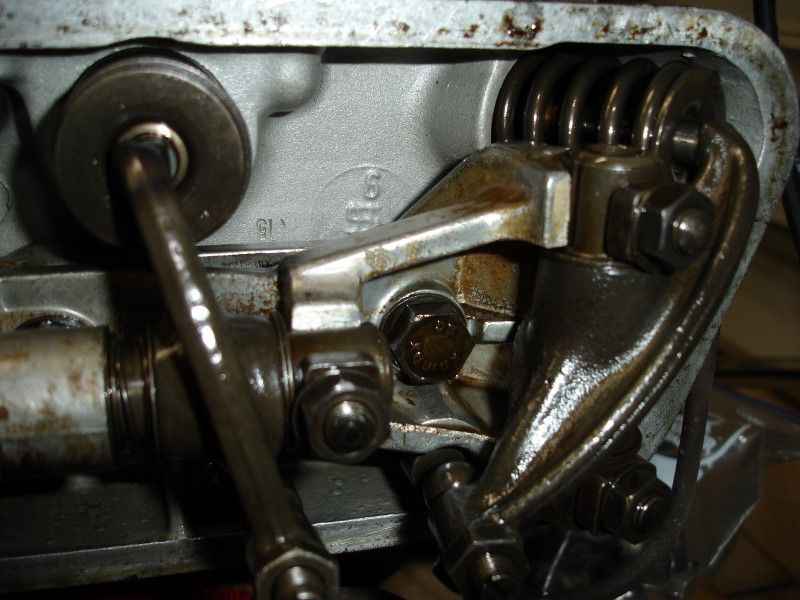
These were all straight on that side (have not opened the 1-2 side), and when tilted oil came out of the holes...

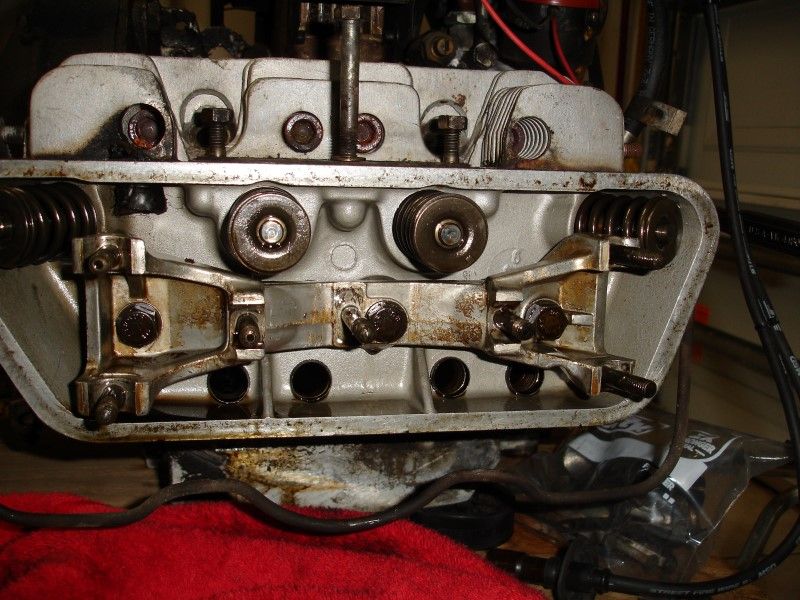

With the valves now all closed I turned the engine to see if I got some compression... Cylinder #4 was nice and sucked my finger with force... When I installed the compression gauge it went to about 40 psi (first time I get to use a compression gauge, I just wanted to try it out, hehehehe)
When I did the same test of Cylinder #3, nothing...
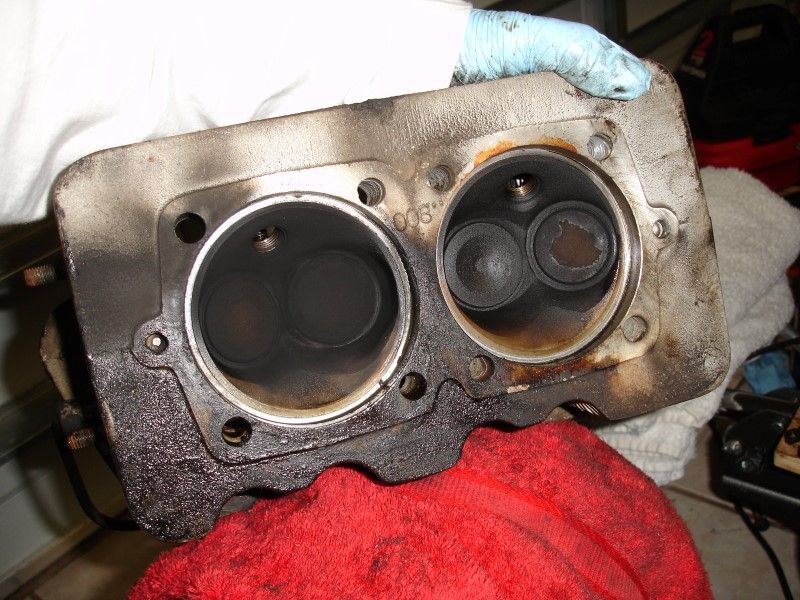
Removed the head and found the problem...
#4 looks fine...
#3 on the other hand... Is that a piece of the piston border that I see missing?

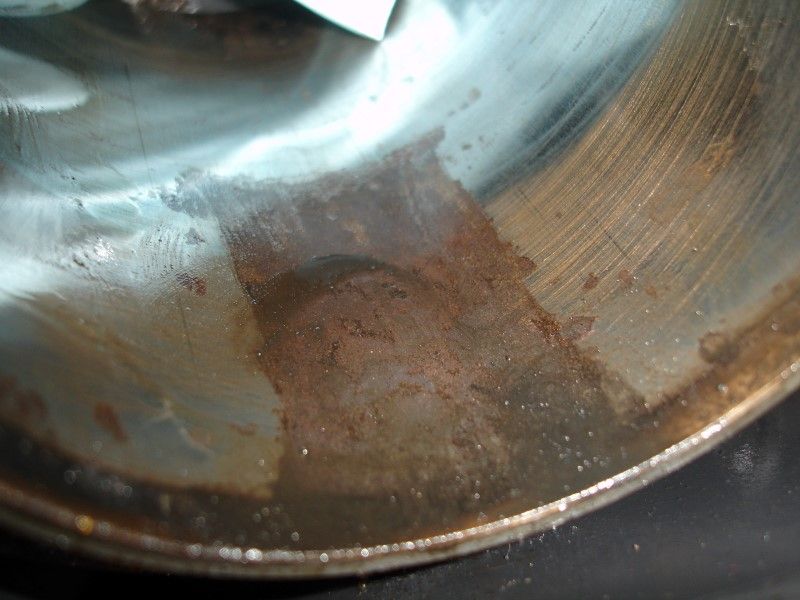
Let me remove the Cylinder to take a better look at that piston...
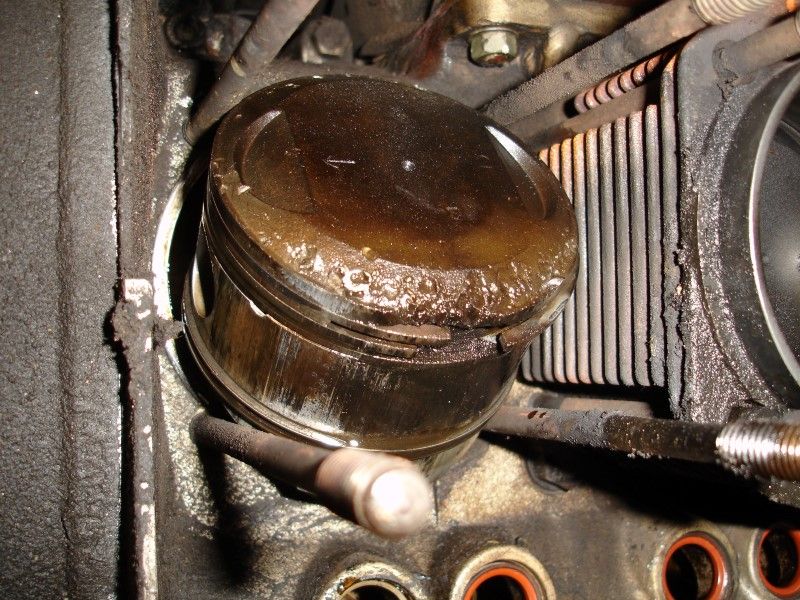

Cylinder wall...

Quick look at the plugs first...
Removing carburetors...I took them off as one piece with the intakes. Wanted to undo as little as possible at this time. I will give them a good clean and leave them alone, not plans to open them as they were working fine.
[img]https://i151.photobucket.com/albums/s144/wachuko/Porsche%20912/DSC08182Custom_zpscc8cbd25.jpg/img]
Taking a peak at the valves... everything in the heads seems like it was done not too long ago.
Repeat on the other side...
From the video I learned that the 3-4 side is the one that takes the most amount of beating, so I decided to start there...
No pitting, not marks, looks nice and feels smooth
These were all straight on that side (have not opened the 1-2 side), and when tilted oil came out of the holes...
With the valves now all closed I turned the engine to see if I got some compression... Cylinder #4 was nice and sucked my finger with force... When I installed the compression gauge it went to about 40 psi (first time I get to use a compression gauge, I just wanted to try it out, hehehehe)
When I did the same test of Cylinder #3, nothing...
Removed the head and found the problem...
#4 looks fine...
#3 on the other hand... Is that a piece of the piston border that I see missing?
Let me remove the Cylinder to take a better look at that piston...
Cylinder wall...
01-19-2014, 12:07 AM
#27
Professor of Pending Projects
Rennlist Member
Rennlist Member
Thread Starter
A few more photos...
After cleaning a little bit the crud from the head. The surface that mates with the piston is intact (visually at least)


And the damage to the head by the offending piston and ring... I saw in the video that this can be smooth out with a dremel...
Doing the other side...

Again... headnuts were not torqued to spec...
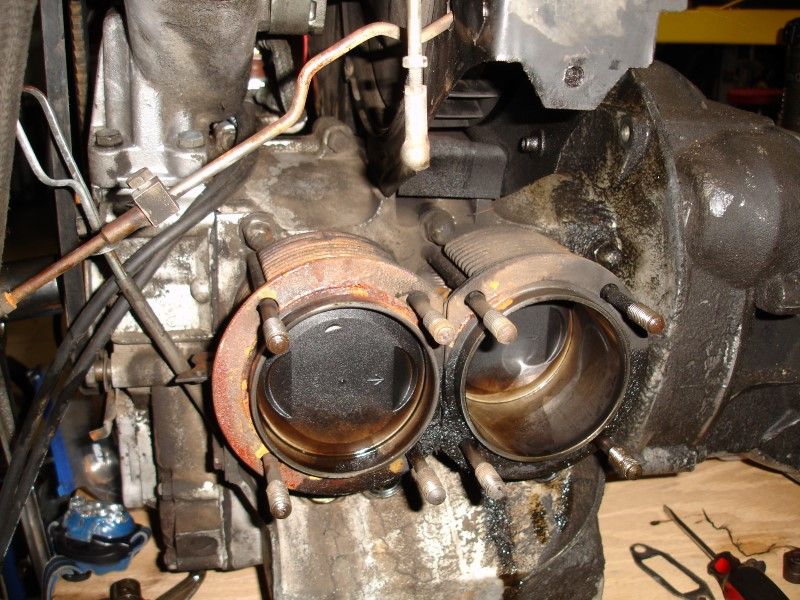
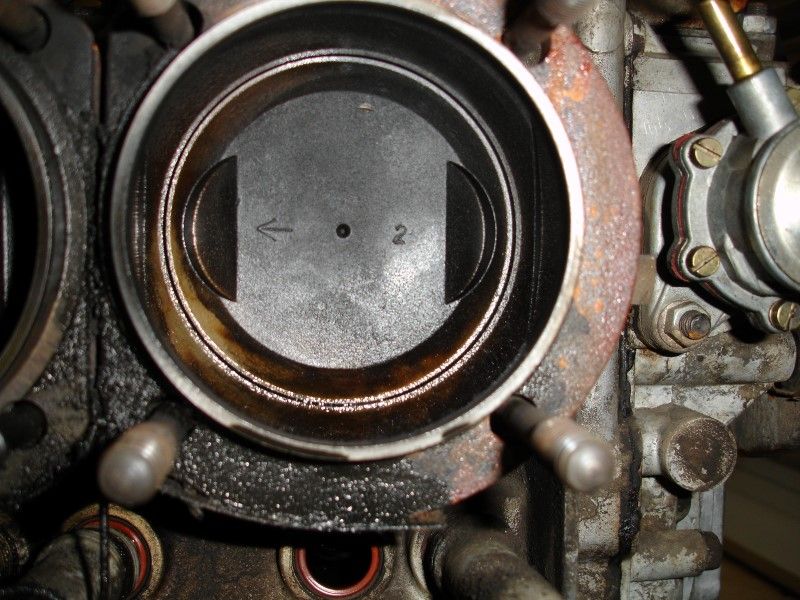
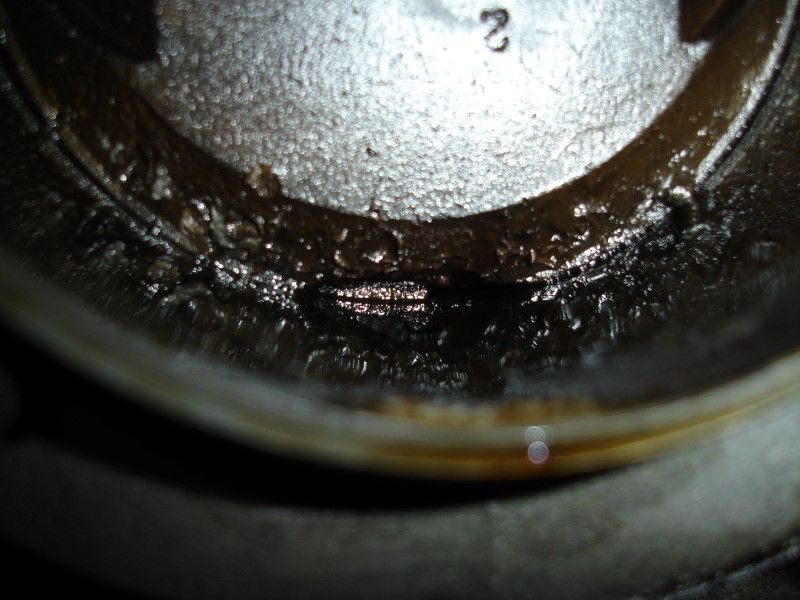
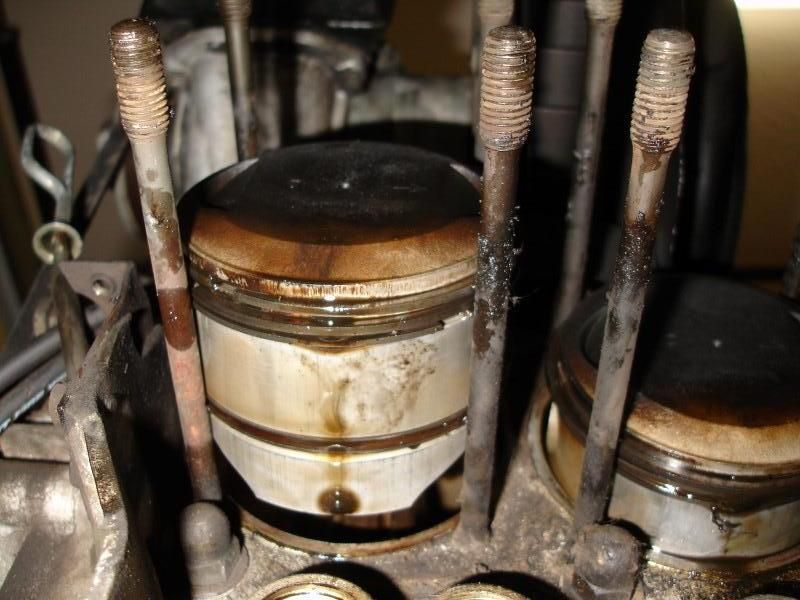
Look at Cylinder #2... piston looked fine, but when I took the cylinder out... is that not supposed to be smooth?

After cleaning a little bit the crud from the head. The surface that mates with the piston is intact (visually at least)
And the damage to the head by the offending piston and ring... I saw in the video that this can be smooth out with a dremel...
Doing the other side...
Again... headnuts were not torqued to spec...
Look at Cylinder #2... piston looked fine, but when I took the cylinder out... is that not supposed to be smooth?
01-19-2014, 01:30 AM
#29
Instructor
Wachuko, since you love working on cars so much why not turn it into a business? Have fun & make money at the same time.
01-19-2014, 09:05 AM
#30
Professor of Pending Projects
Rennlist Member
Rennlist Member
Thread Starter
A fellow forum member in the 912bbs was kind enough to let me borrow his video set from The Maestro. DVDs that goes over tearing down, inspecting, and rebuilding a 356 engine... I am watching those over and over to minimize mistakes as I go through this.
All this is for me is great therapy...nothing more. I enjoy it without the pressure of somebody else pressing for time (well, my wife is the stress factor in all of this when is time to start ordering parts not in the budget, and understand that the whole car was not in the budget!!!
)
Last edited by Wachuko; 01-19-2014 at 09:26 AM.