When you click on links to various merchants on this site and make a purchase, this can result in this site earning a commission. Affiliate programs and affiliations include, but are not limited to, the eBay Partner Network.
As per a previous post I just bought an 87� Carerra. I bought a bunch of parts from Pelican and will be swapping out shocks, rubber bushings, fluid changes, etc.
I�m fairly mechanically inclined and have been working on bikes and cars a while. I�m not worried about the valve adjustment �part� but rather the access to them. Especially on the passenger side (intakes). Thoughts?
I�ve watched YouTube vids but they don�t mention how hard access is. Obviously I�ll need to remove the intake, other accessories. But I have no plans on removing the AC condenser.
Thoughts? Tips (besides what I have seen on YouTube)?
the compressor is designed to come our for servicing. most rear engine covers for serviceing ( like mine) have a plastic panel woven in to rest the compressor on. Ultimately you have to decide if you want to go through the trouble of getting everything out of the way to do it, or pay someone else to.
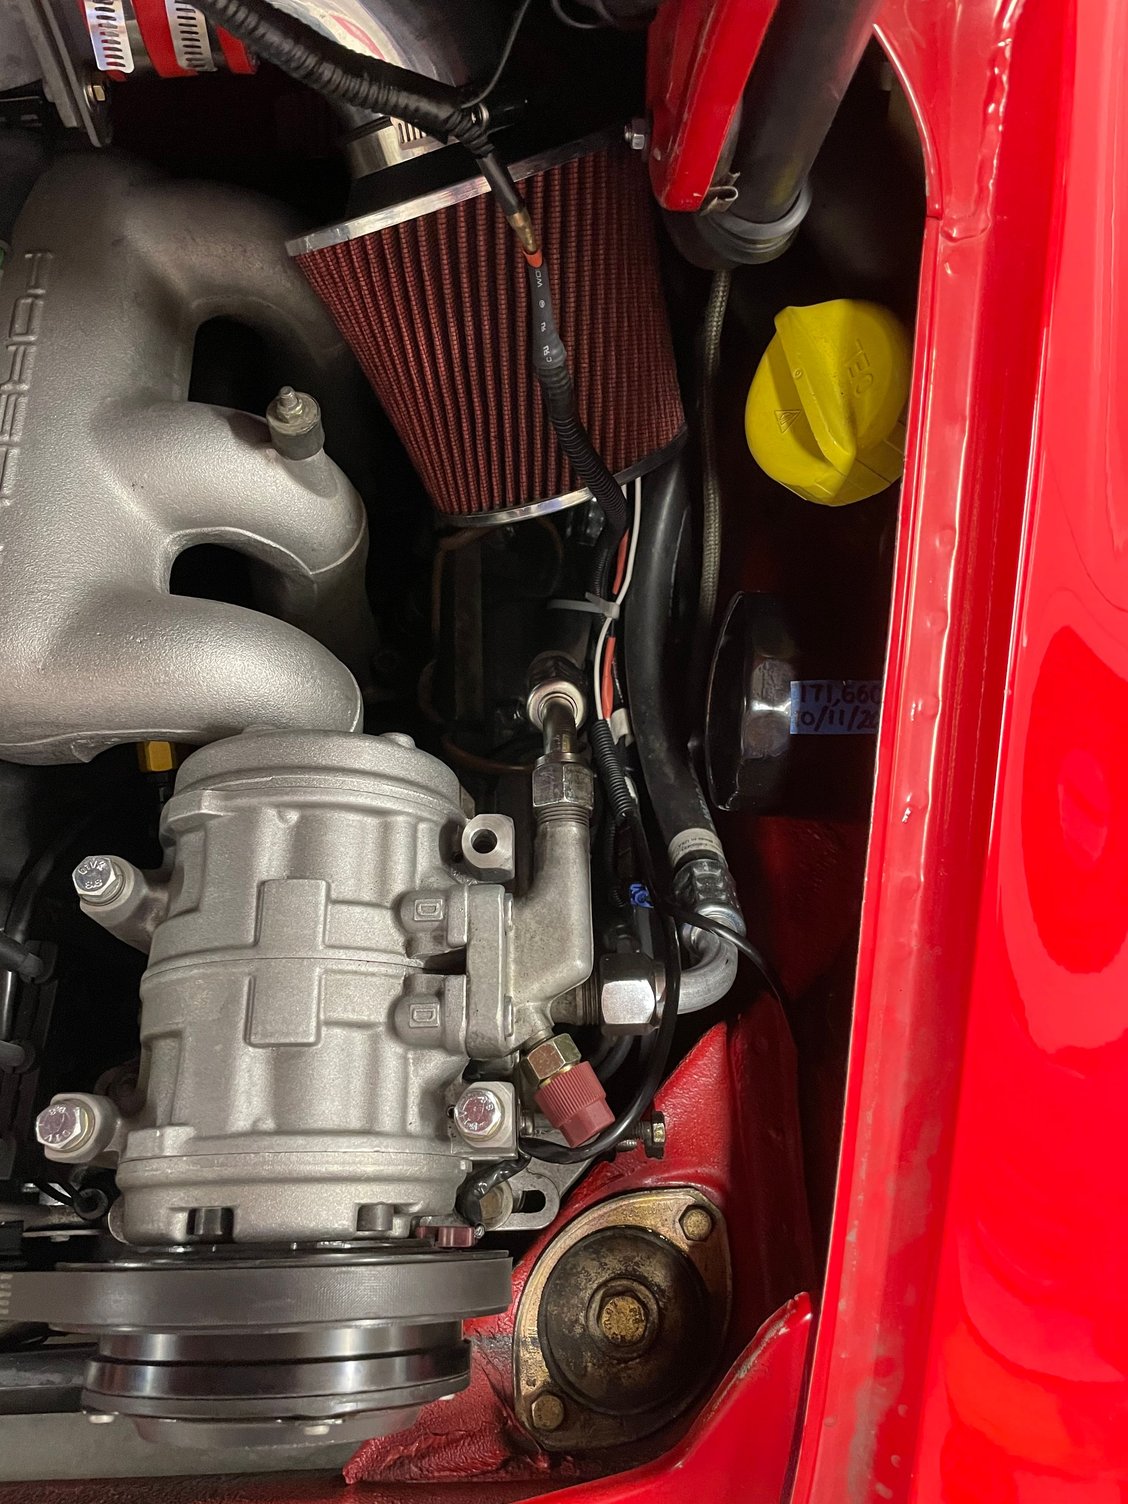
It's gonna take a bit of contorting, but you can definitely do it. I just loosen and slide my compressor all the way to the left, remove the intake and filter, as well as the blower tube in your second photo. If you've never done a valve adjustment I'd recommend getting some help, but if you know what you're looking for you'll be good to go. You can buy that specialty feeler gauge off of pelican or just take the end of your gauge and bend the last bit (about 1/2" 90 degrees. Takes ages so make sure you have enough beer in the fridge
I have none of the stock intake, plastic or AC fluff on my 3.2 and I gave up trying to do it the first time with the engine in the car. There is very little clearance to put the feeler gauge and little room to see what you are doing. Having done it on with the motor out and on the stand, it was easy, though you have to sometimes push the opposite side of the rocker arm to release the elephant foot from the valve.
A 40+ year Porsche mechanic showed me that he used a feeler gauge shaped like the porsche / baum tool, but about 1/2 the size, which would make getting the tool in and checking the clearance much easier.
Last edited by TheTorch; Apr 19, 2021 at 11:37 PM.
Reason: half size, not 1/3
It's gonna take a bit of contorting, but you can definitely do it. I just loosen and slide my compressor all the way to the left, remove the intake and filter, as well as the blower tube in your second photo. If you've never done a valve adjustment I'd recommend getting some help, but if you know what you're looking for you'll be good to go. You can buy that specialty feeler gauge off of pelican or just take the end of your gauge and bend the last bit (about 1/2" 90 degrees. Takes ages so make sure you have enough beer in the fridge
OK great. Did it on an Isuzu pick up back in the day. Also on my motorcycles. Some of them
were screw type and some were shim
under Bucket. Just had more room with those vehicles!!
I have none of the stock intake, plastic or AC fluff on my 3.2 and I gave up trying to do it the first time with the engine in the car. There is very little clearance to put the feeler gauge and little room to see what you are doing. Having done it on with the motor out and on the stand, it was easy, though you have to sometimes push the opposite side of the rocker arm to release the elephant foot from the valve.
A 40+ year Porsche mechanic showed me that he used a feeler gauge shaped like the porsche / baum tool, but about 1/2 the size, which would make getting the tool in and checking the clearance much easier.
You will need the short Porsche tool , or substitute ... just make sure you buy a bunch of extra blades because
with the restricted access it's easy to bend them and then you get a false reading.I've done it twice in situ on my 89 and
a few times with an engine on the bench for other people, which is a whole lot easier.
The first time is a bit overwhelming , especially when you have to rotate the engine to take your
readings and then double and triple check your adjustments.
Think of it as bonding time with your engine !
Cheers
Phil
*** EDIT ***
Yes that's the tool , make sure you buy a bunch of extra blades, it's easy to scrap them when
adjusting the clearance in situ.
Last edited by wildcat077; Apr 19, 2021 at 11:47 PM.
...so take one of those spare blades and try trimming /grinding it a bit narrower and a couple mm shorter without disturbing the thickness. Then attach to a smaller angled piece of bent aluminum or something soft, same shape as the tool in your picture using whichever screw / hole is left.
That will help get it in there. You will see when you try to do it why this helps. Worst case you only wasted an extra blade.
OK great. Did it on an Isuzu pick up back in the day. Also on my motorcycles. Some of them
were screw type and some were shim
under Bucket. Just had more room with those vehicles!!
Nice then yeah you'll be good to go. For what its worth I think I only even had to adjust two or three when I did mine. Depending on your exhaust setup, the easiest ones to access are the passenger side exhaust valves. Maybe start checking these first while you're under it on the creeper with a headlamp, you can actually kind of see what you're doing so when you get to the others you'll have a good feel for it.
Adjusting valves was not my favorite 911 job… I have done pretty much everything on the car, including a full engine rebuild with very good results, so I do know my way around tools… Doing the valve adjustment out of the car is easy, but in the car, you do have challenges. I have stock 3.2 but large hands. What I never like about doing the job in the car is that I do it so infrequently I don’t have that pro feel for it and I was never 100% sure that I nailed it and kept fiddling back and forth, trying to keep the elephant’s foot screw from not rotating that little fraction as the nut is tightened. I tried both the backside method and the conventional, each has its plusses.
This last time, I decided to give the SnapGap system a try. I purchased the nuts, screws and shims separately, as I already had a good micro torque wrench and crow’s foot.
The job was super easy. I was completely done in one morning, start to finish, including all the peripheral item removal and reinstallation and the usual diversions due to my OCD. The result is essentially perfect in terms of gap accuracy and I like torqueing the nut to a specified value rather than estimating with a wrench while trying to keep the elephant’s foot from turning.
There are some tools out there that are also designed to help with valve adjustment. You may want to read up on that too, although I have not tried any.
Pros of SnapGap:
Exact result easily obtained/repeatable
Uniform torque on nuts
Cons of SnapGap
Not cheap
Slightly heavier than nuts, so valvetrain mass increases
It is a topic that sometimes gets a lot of attention, and sometimes posturing (“I’m a good enough mechanic not to need that!” etc.), but just consider your own situation. But do think about hand size. Often overlooked how big of an impact this has on jobs like this. You have to get in there with both hands.
There is also the somewhat easier backside gap check and tools such as the Kirk tool that make it easier. Personally I think it is a stupid design to put a 1.0 mm pitch on the adjuster for a gap that is 0.1. I am sure there is a good reason, but I would have preferred a much finer pitch to make it easier.
As for doing it yourself, it is tedious, annoying and requires you clear out all that stuff to make access work but it will save you money and also it will give you confidence that the valves are not over-tight, which is the safer way to go.
Personally, if you wiggle the rocker with both lobes on the base circle, you can feel it when one is too tight or way too loose. Its a nice little click when they are right and it is cheap and easy validation that you did it (mostly) right.
I tried the backside method also. Getting that angle right with a flat feeler I had to bend and the engine in the car was not confidence inspiring and I gave up on it.
And I think nearly every task on the car is more difficult with XL hands. Except driving it.
Actually, if one does want to try the backside method, it is made much easier by removing the engine tin between the valve covers... I used a popsicle stick with the two feeler guage tips (the go and no-go) taped onto opposite ends and I was able to go straight in from the opposite side (i.e. from the top for the exhaust and vice versa).
Nice then yeah you'll be good to go. For what its worth I think I only even had to adjust two or three when I did mine. Depending on your exhaust setup, the easiest ones to access are the passenger side exhaust valves. Maybe start checking these first while you're under it on the creeper with a headlamp, you can actually kind of see what you're doing so when you get to the others you'll have a good feel for it.
Cheers,
Seth
Good plan. Hopefully I�ll get the hang of it after the exhaust valves.
Space is tight but it's very doable, if tedious. Take your time and work methodically. I didn't like using the Kirk tool and finally made peace with the special feeler. One simple recommendation I read here is to put a little oil on the blade. You would think that everything would already be oily enough, but it did help, especially when rechecking as it's then a very close fit, or should be. Good luck with it.