When you click on links to various merchants on this site and make a purchase, this can result in this site earning a commission. Affiliate programs and affiliations include, but are not limited to, the eBay Partner Network.
Well, its getting serious now. I have posted a few threads about my wiring journey for my '89 restomod which has many, many modifications ranging from sunroof delete/drip rail delete, to a brand new 3.4 (new case, new crank, new rods, new p/c's), Rasant Motec EMS with CoP and PMO ITB's, full Elephant suspension including ASP, revalved Bilsteins, Fuchsfelge 17 inch wheels, Recaro's etc etc. and lastly but not leastly, a 6 speed G50 where I modified the transmission and the centre tube on car to fit.
Its all taken a very long time, what with work in 3 countries including the US (I miss Colorado), a divorce, a marriage and no end of crap in life. But I am retired now and have time to work on it.
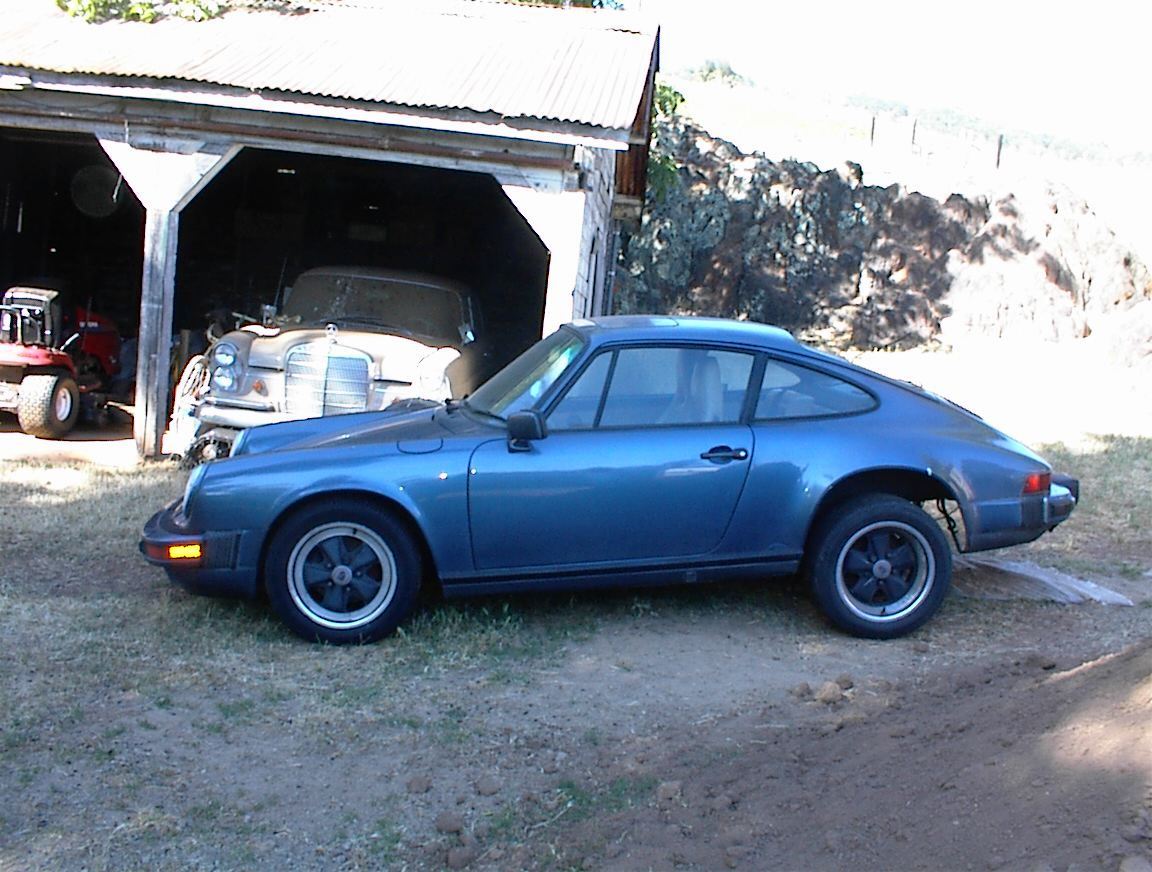
Here is what it looked like when I got it...it was the subject of a lawsuit in Pasadena and ended up sitting in an outside yard for a few years, the sun checked the paint and ruined the interior, the mechanic doing the work stole the engine and transmission and I was lucky enough to get it for a very good price.
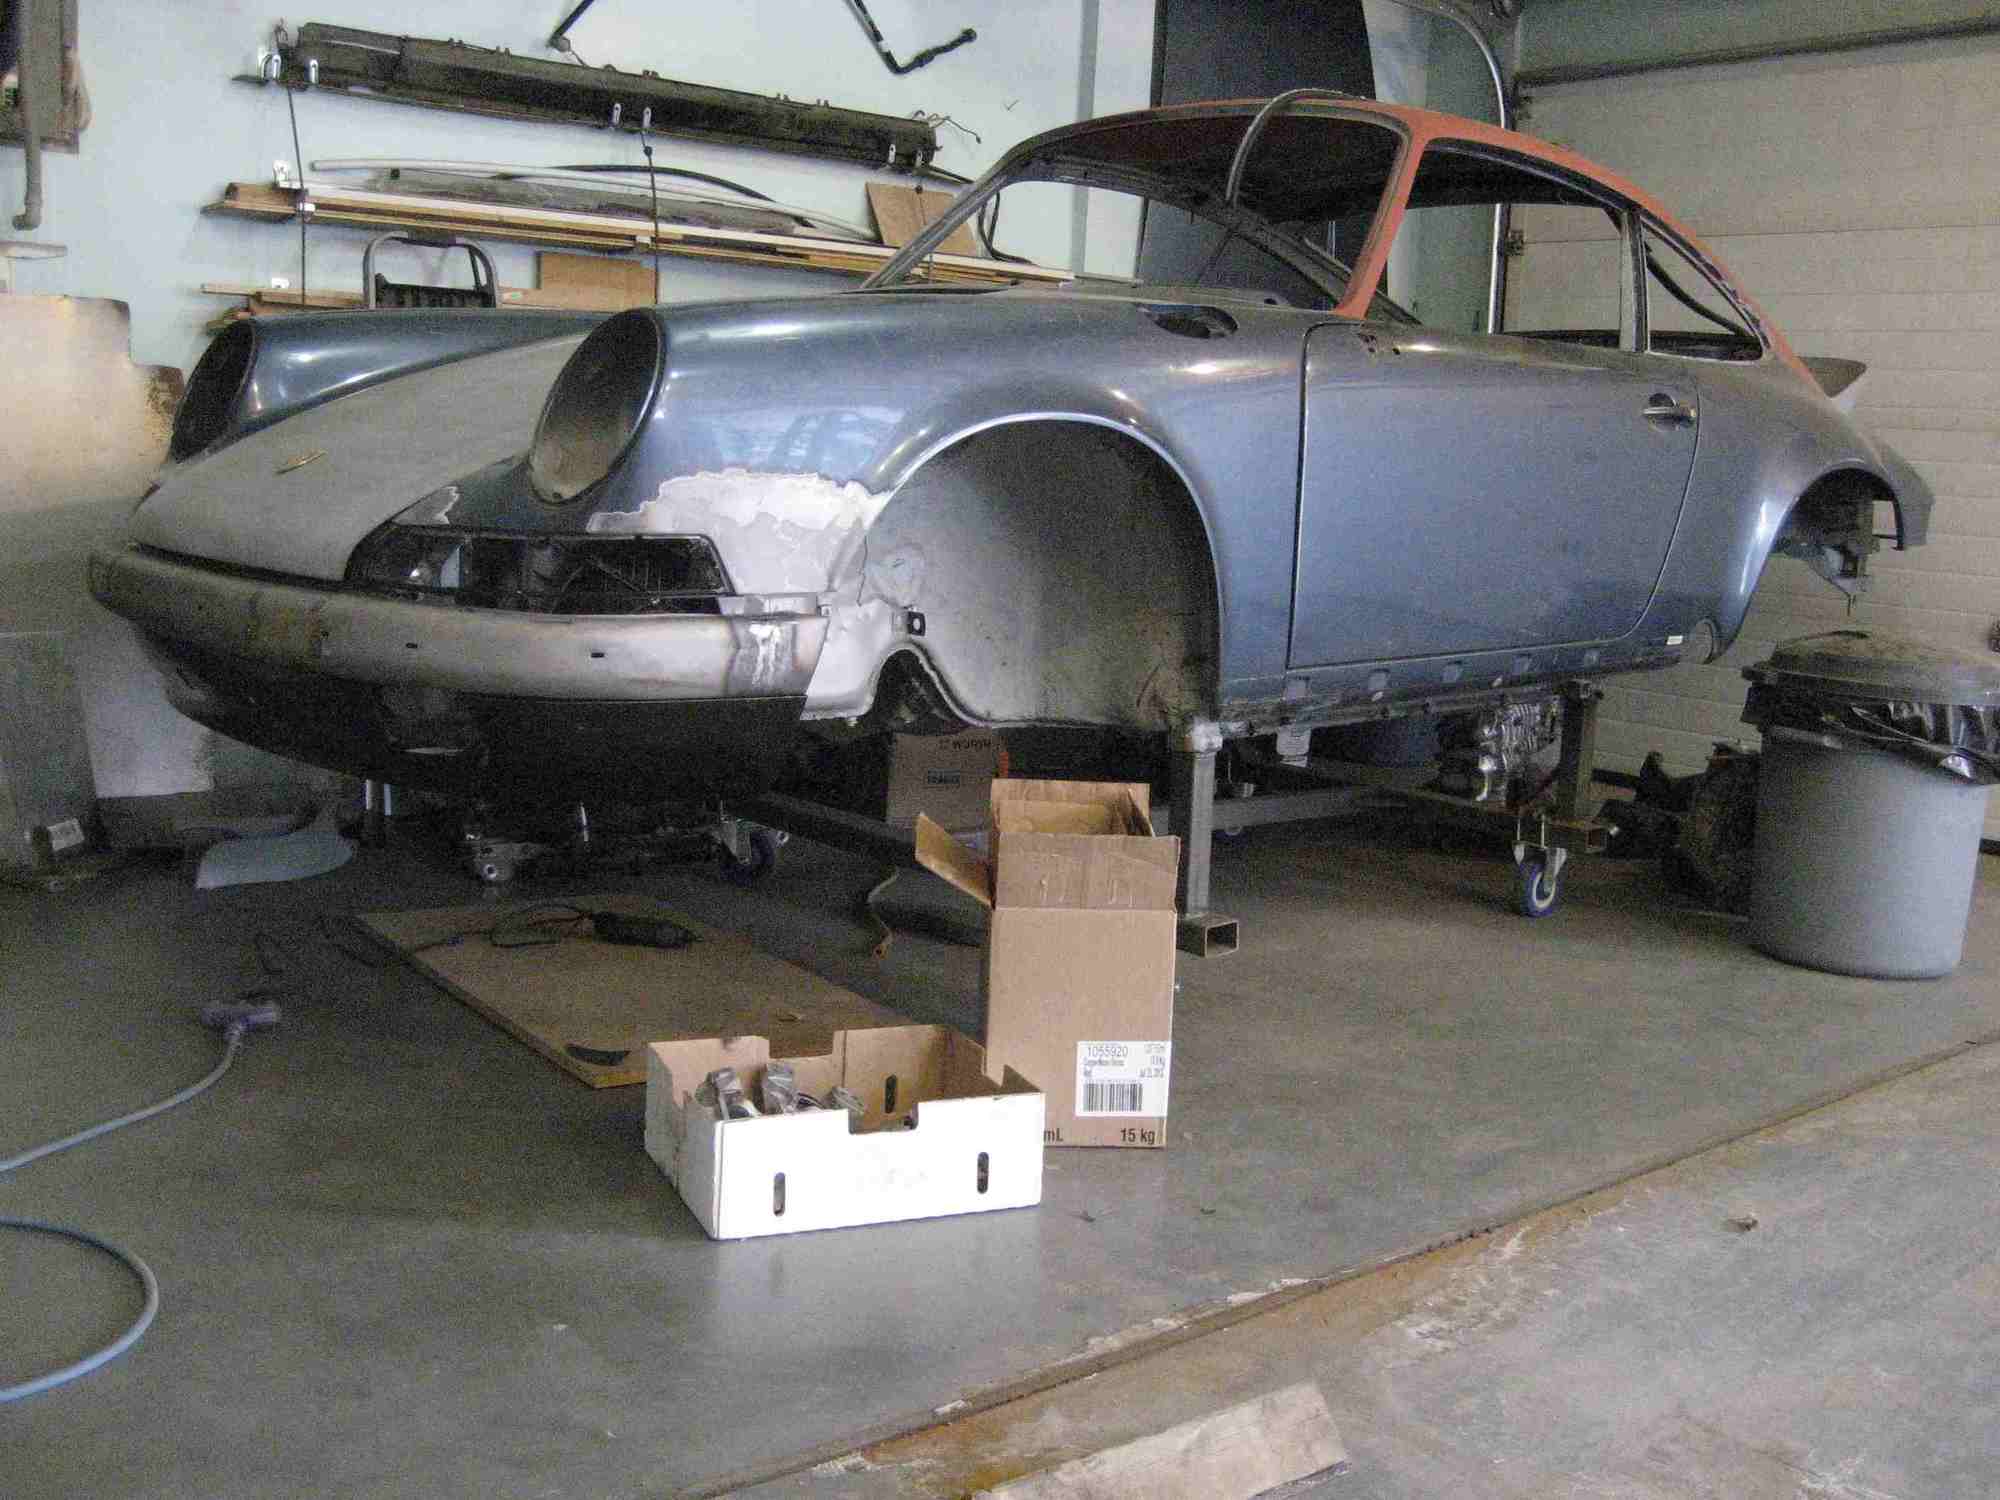
Then the work really began, with the chassis modification for the 6 speed, complete strip, weld in sunroof and drip rails...here is a few pics from along the way
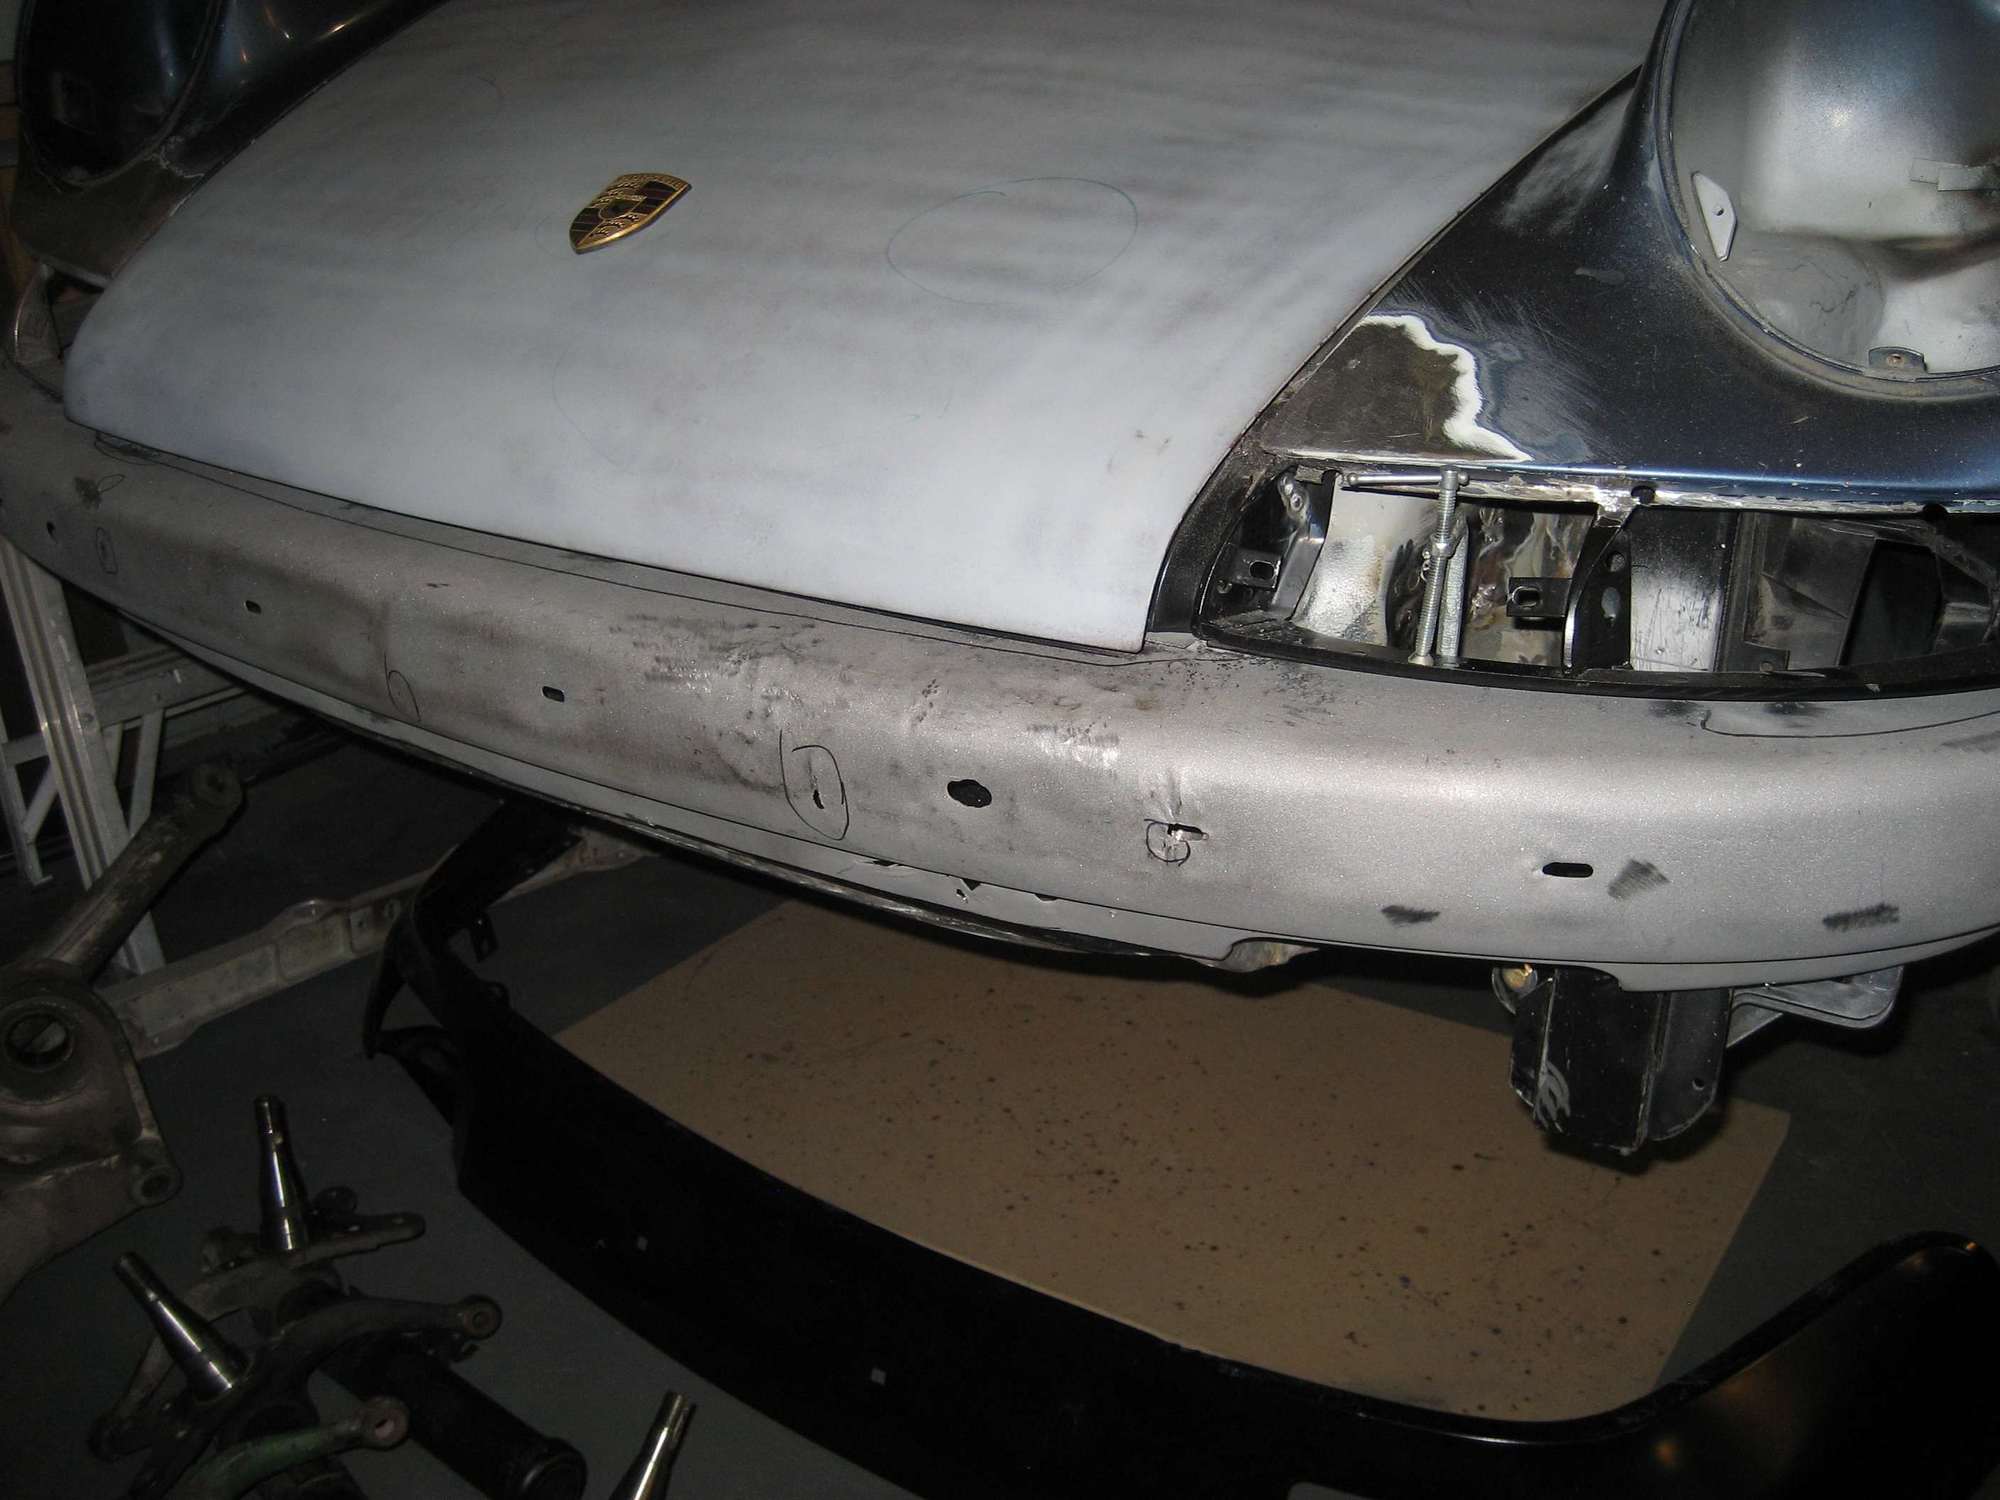
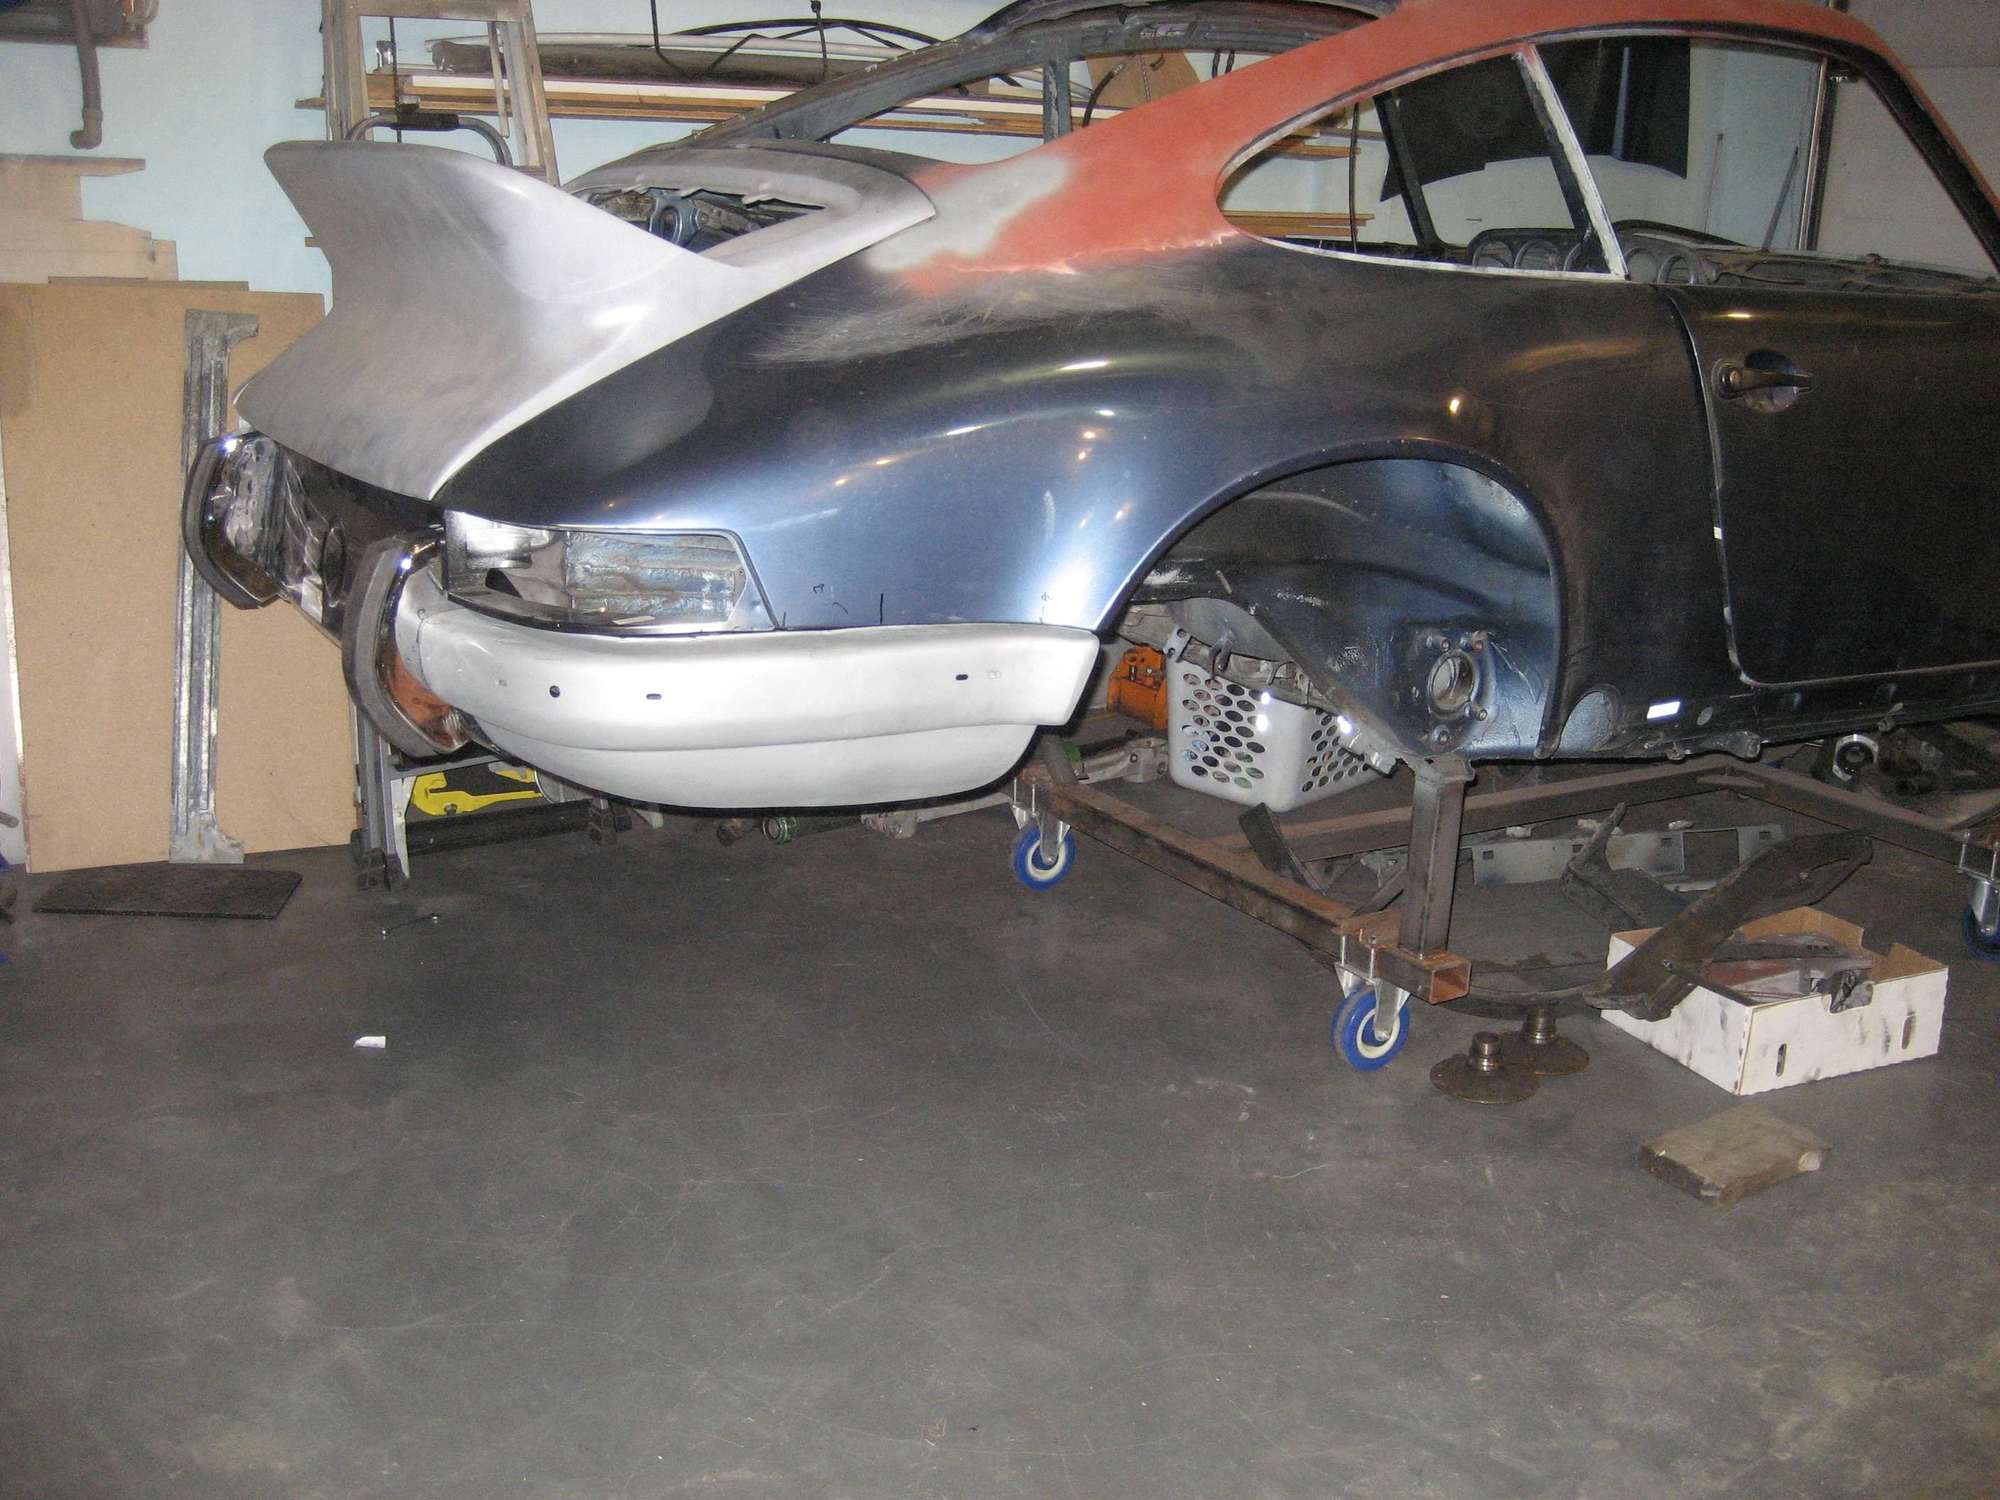
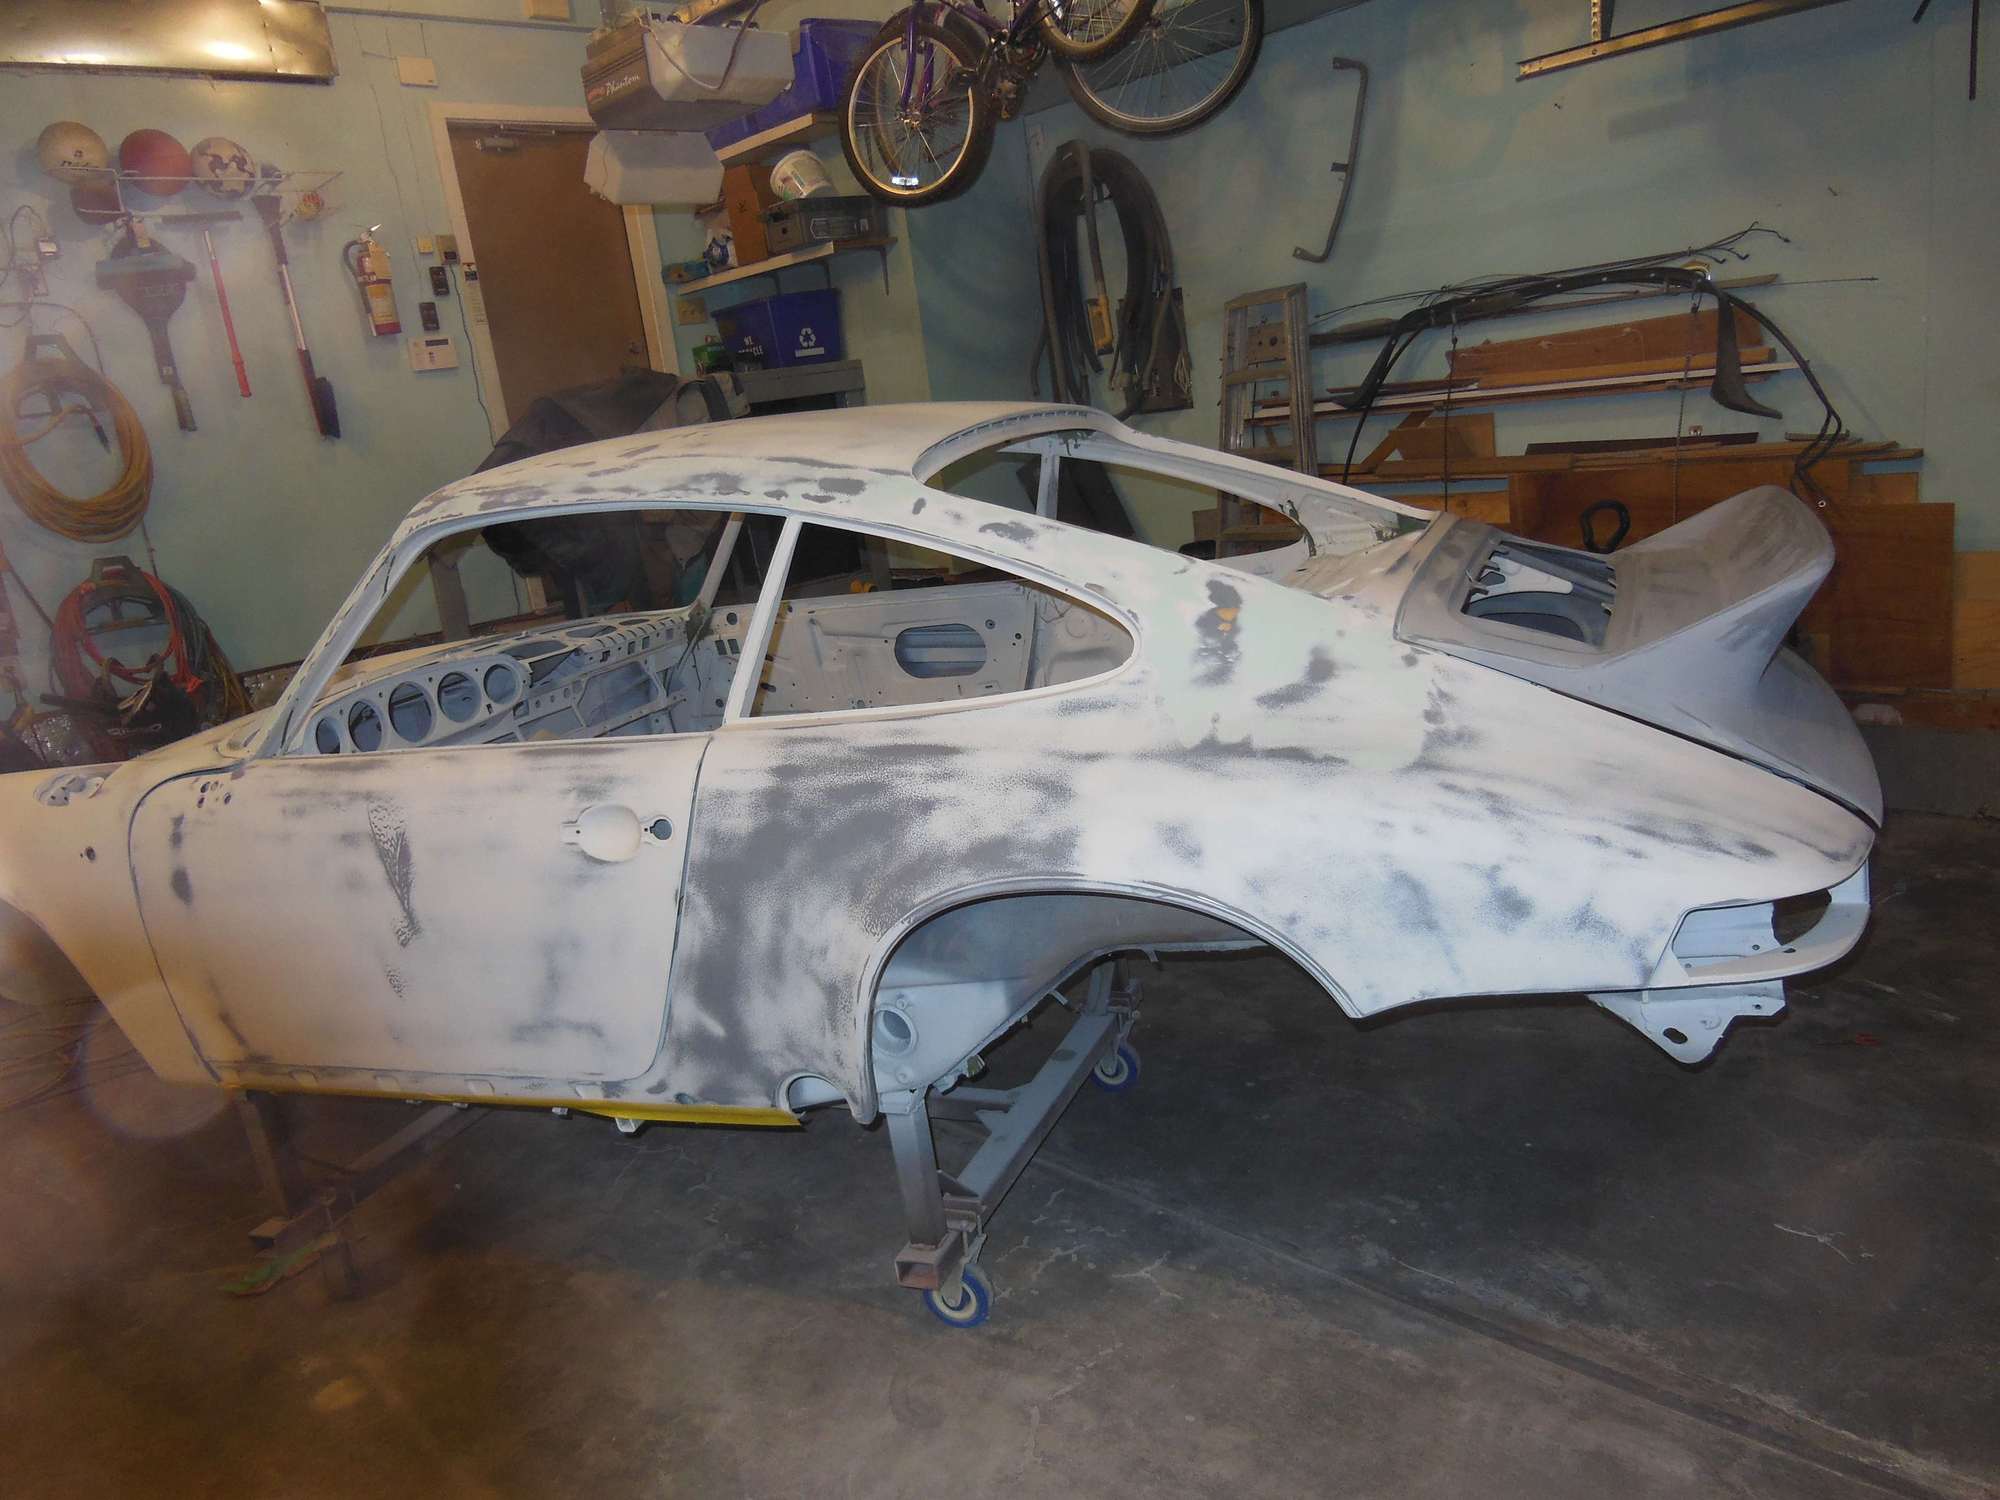
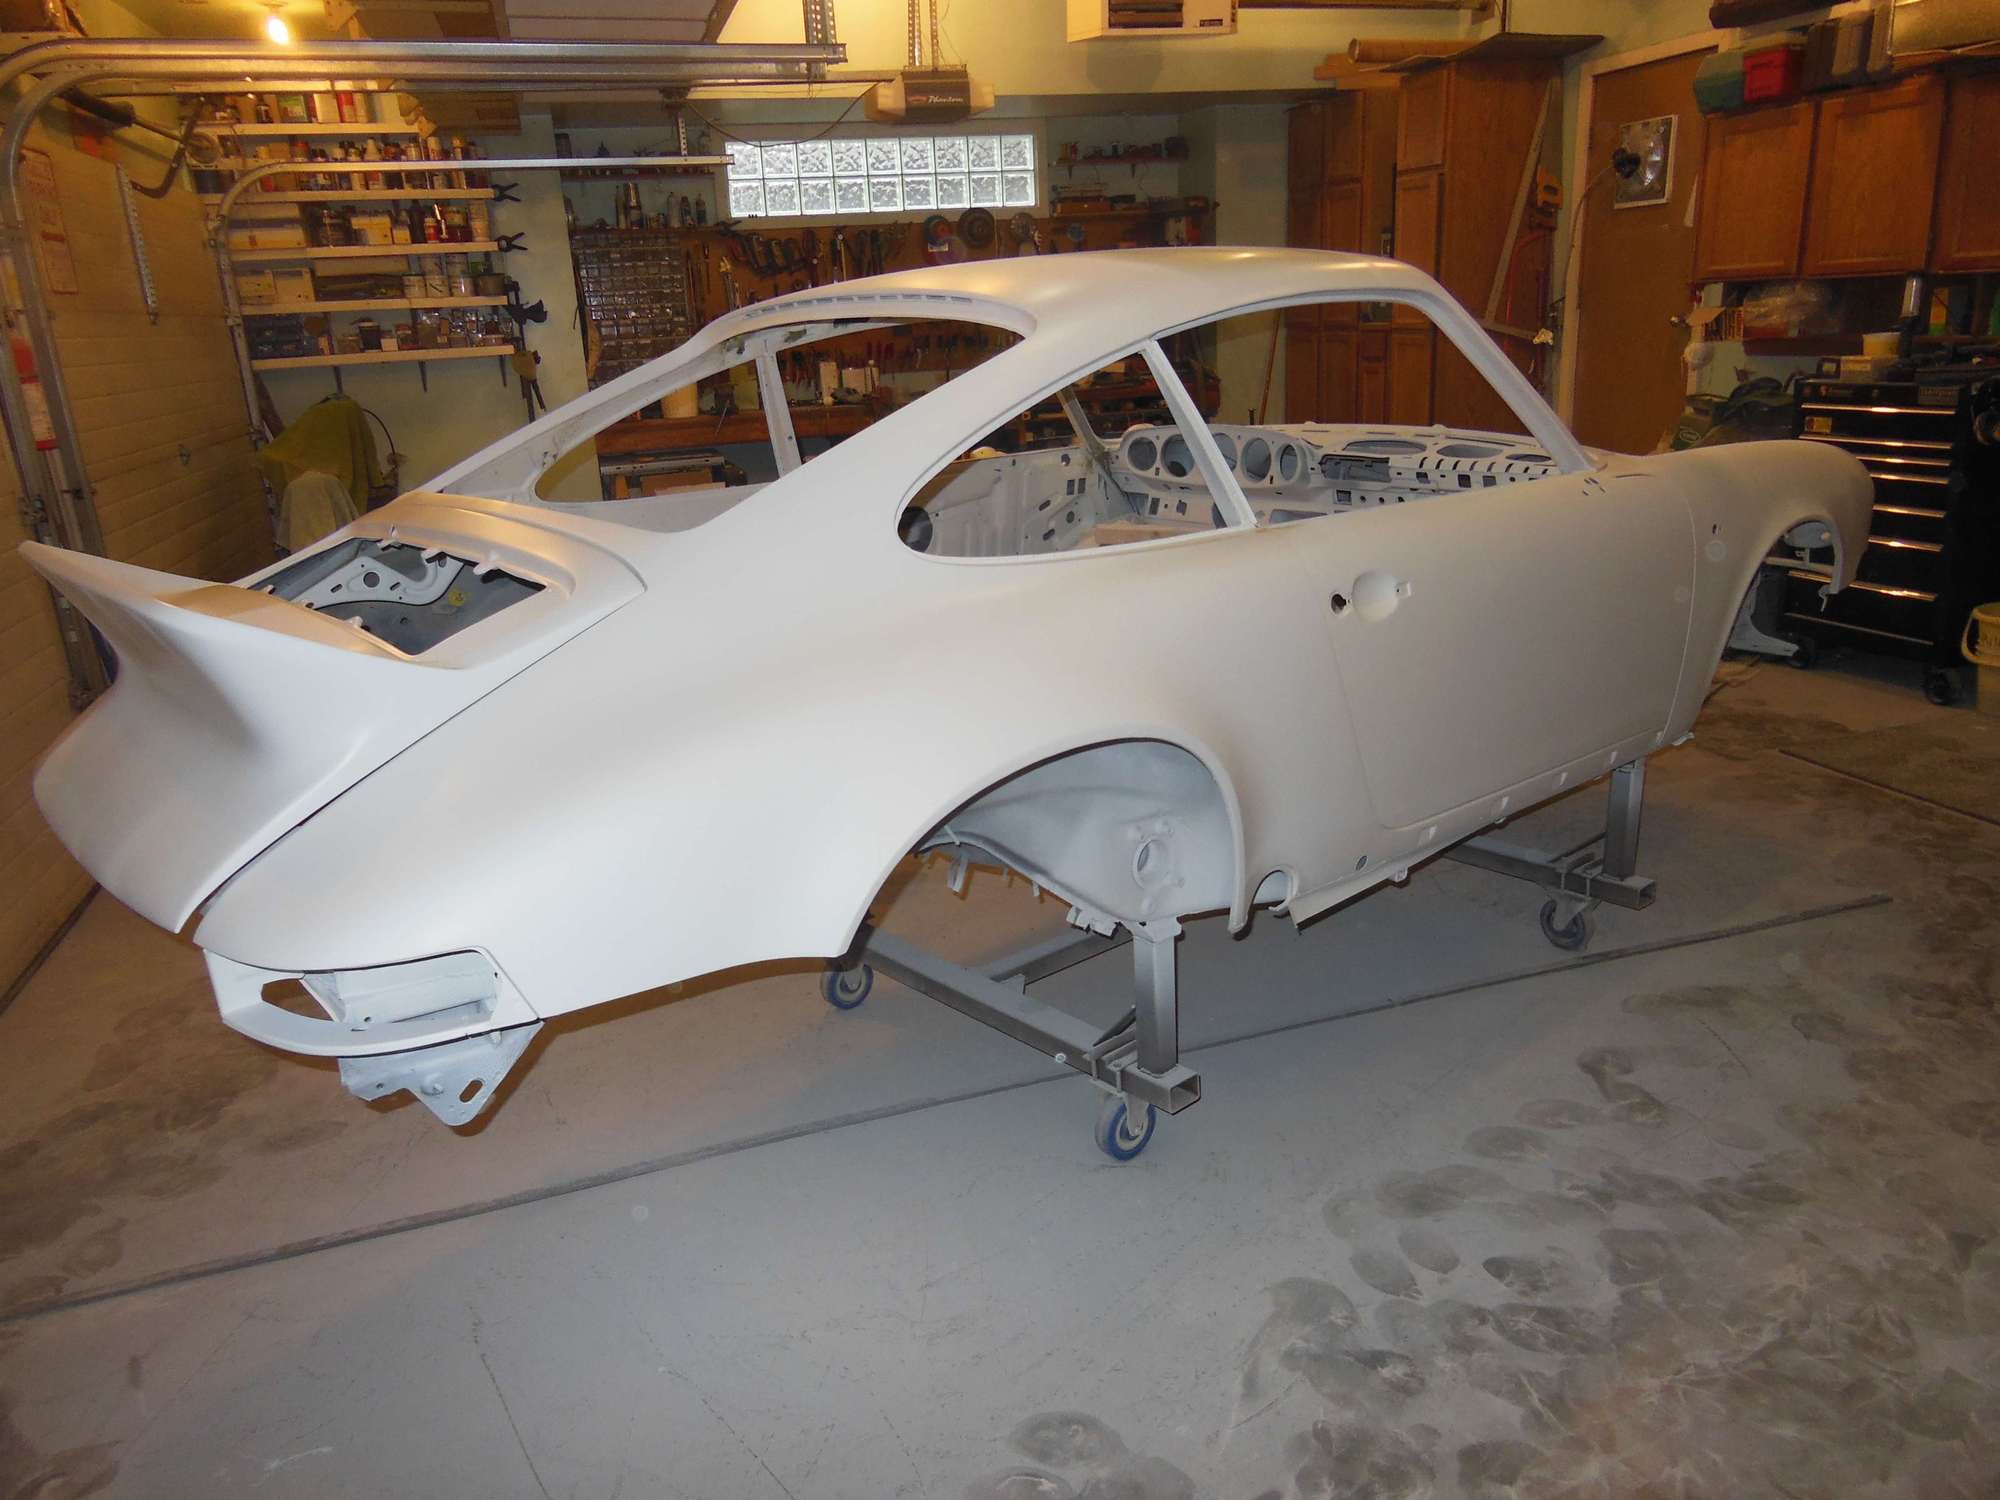
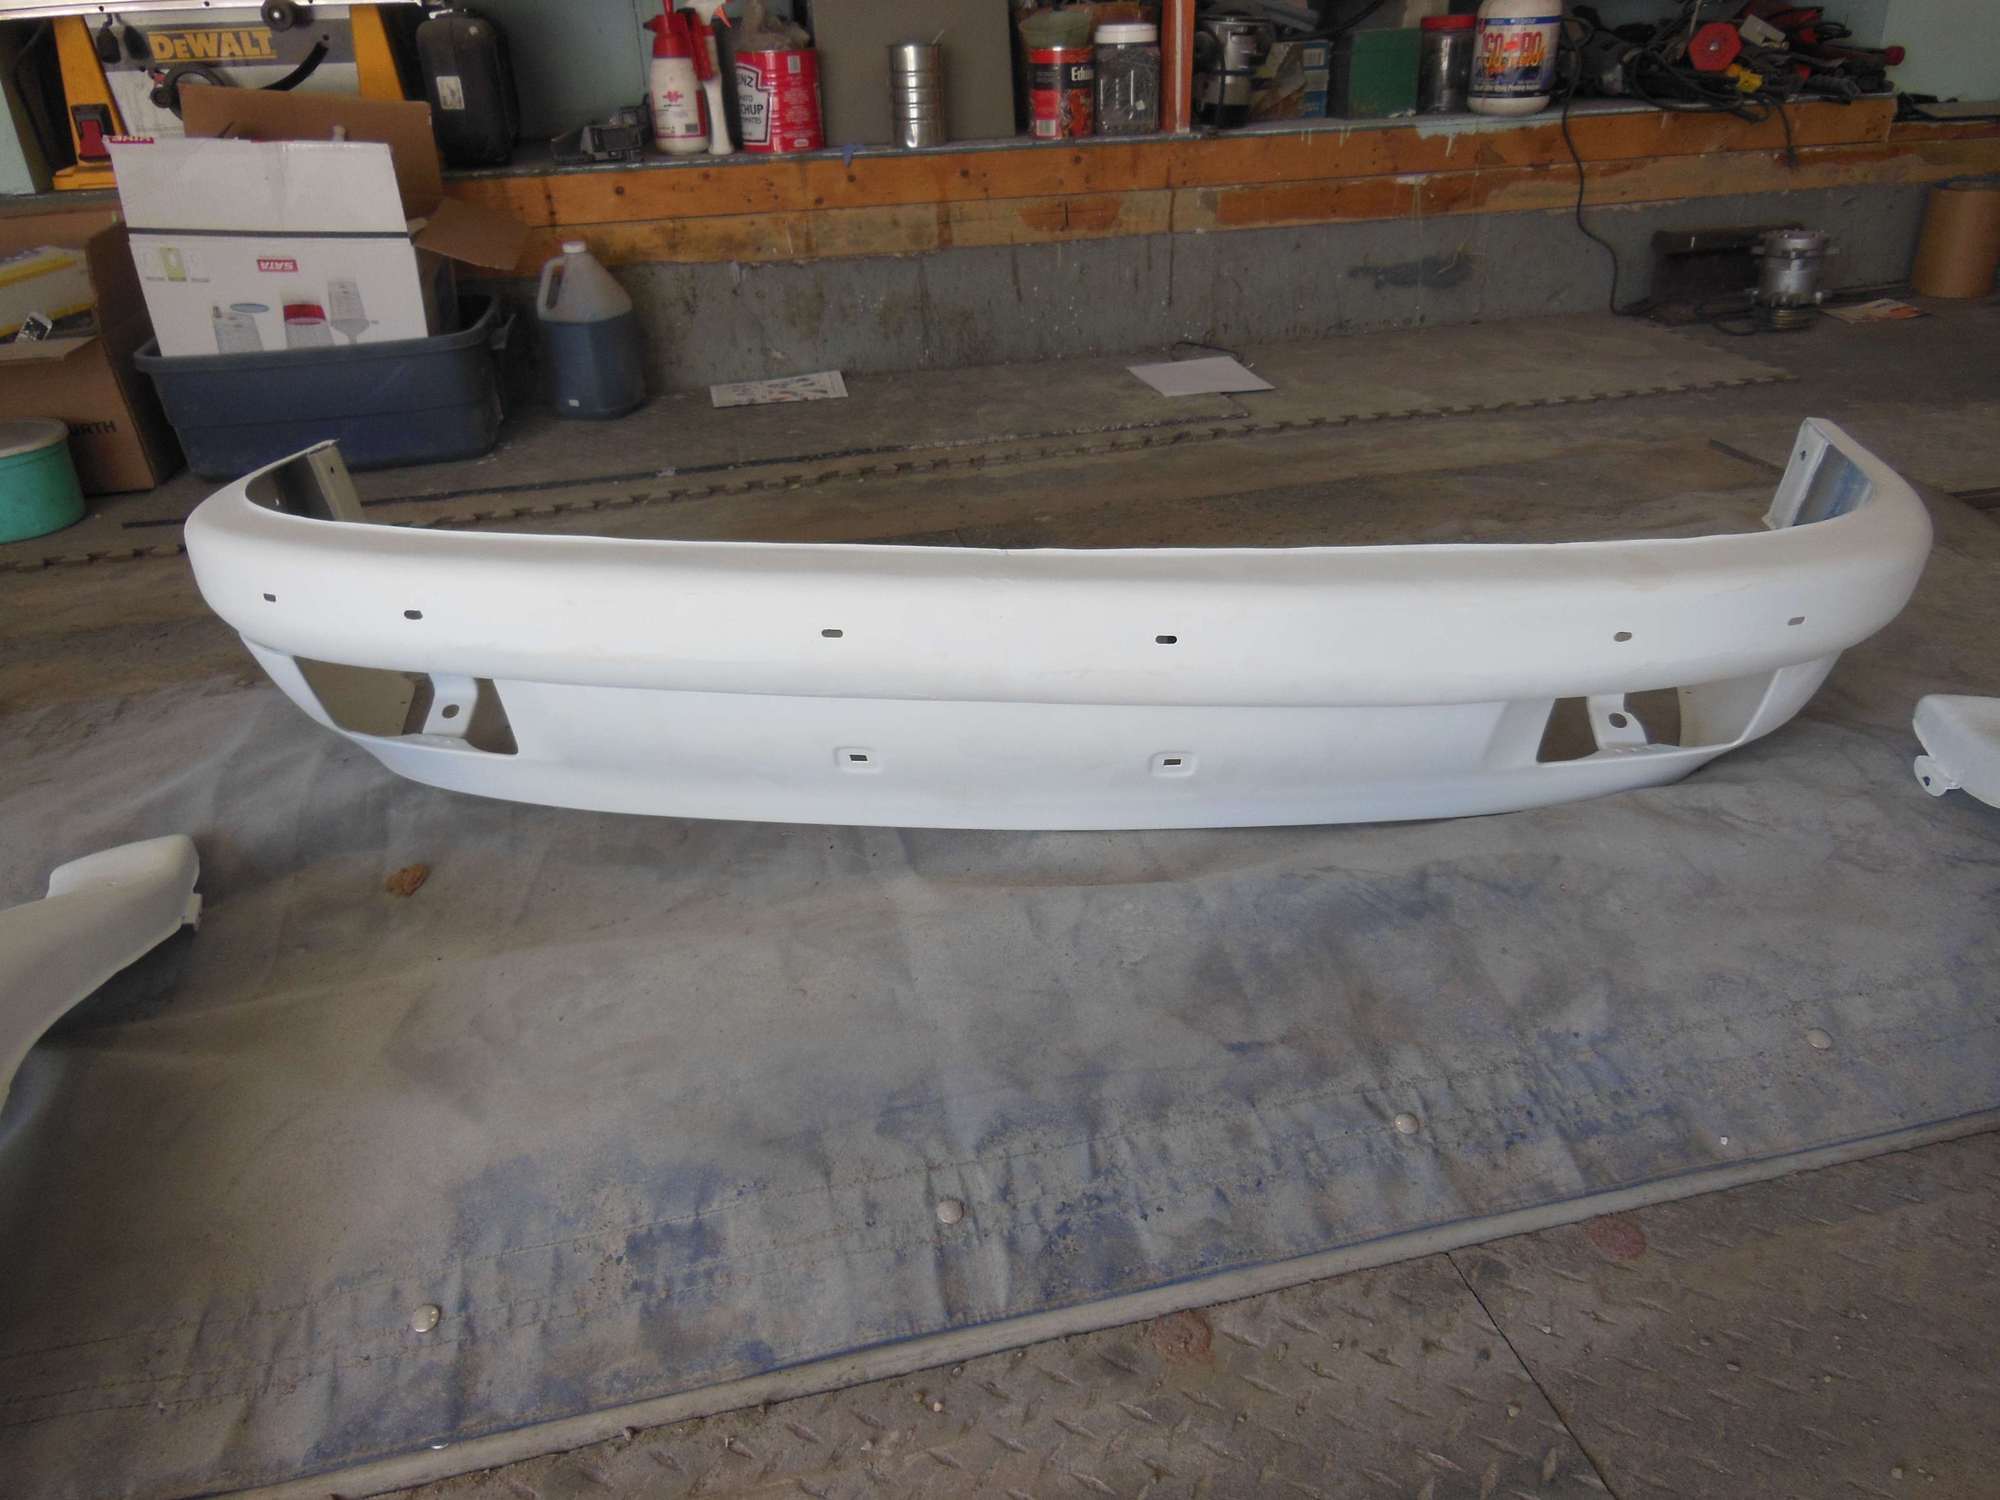
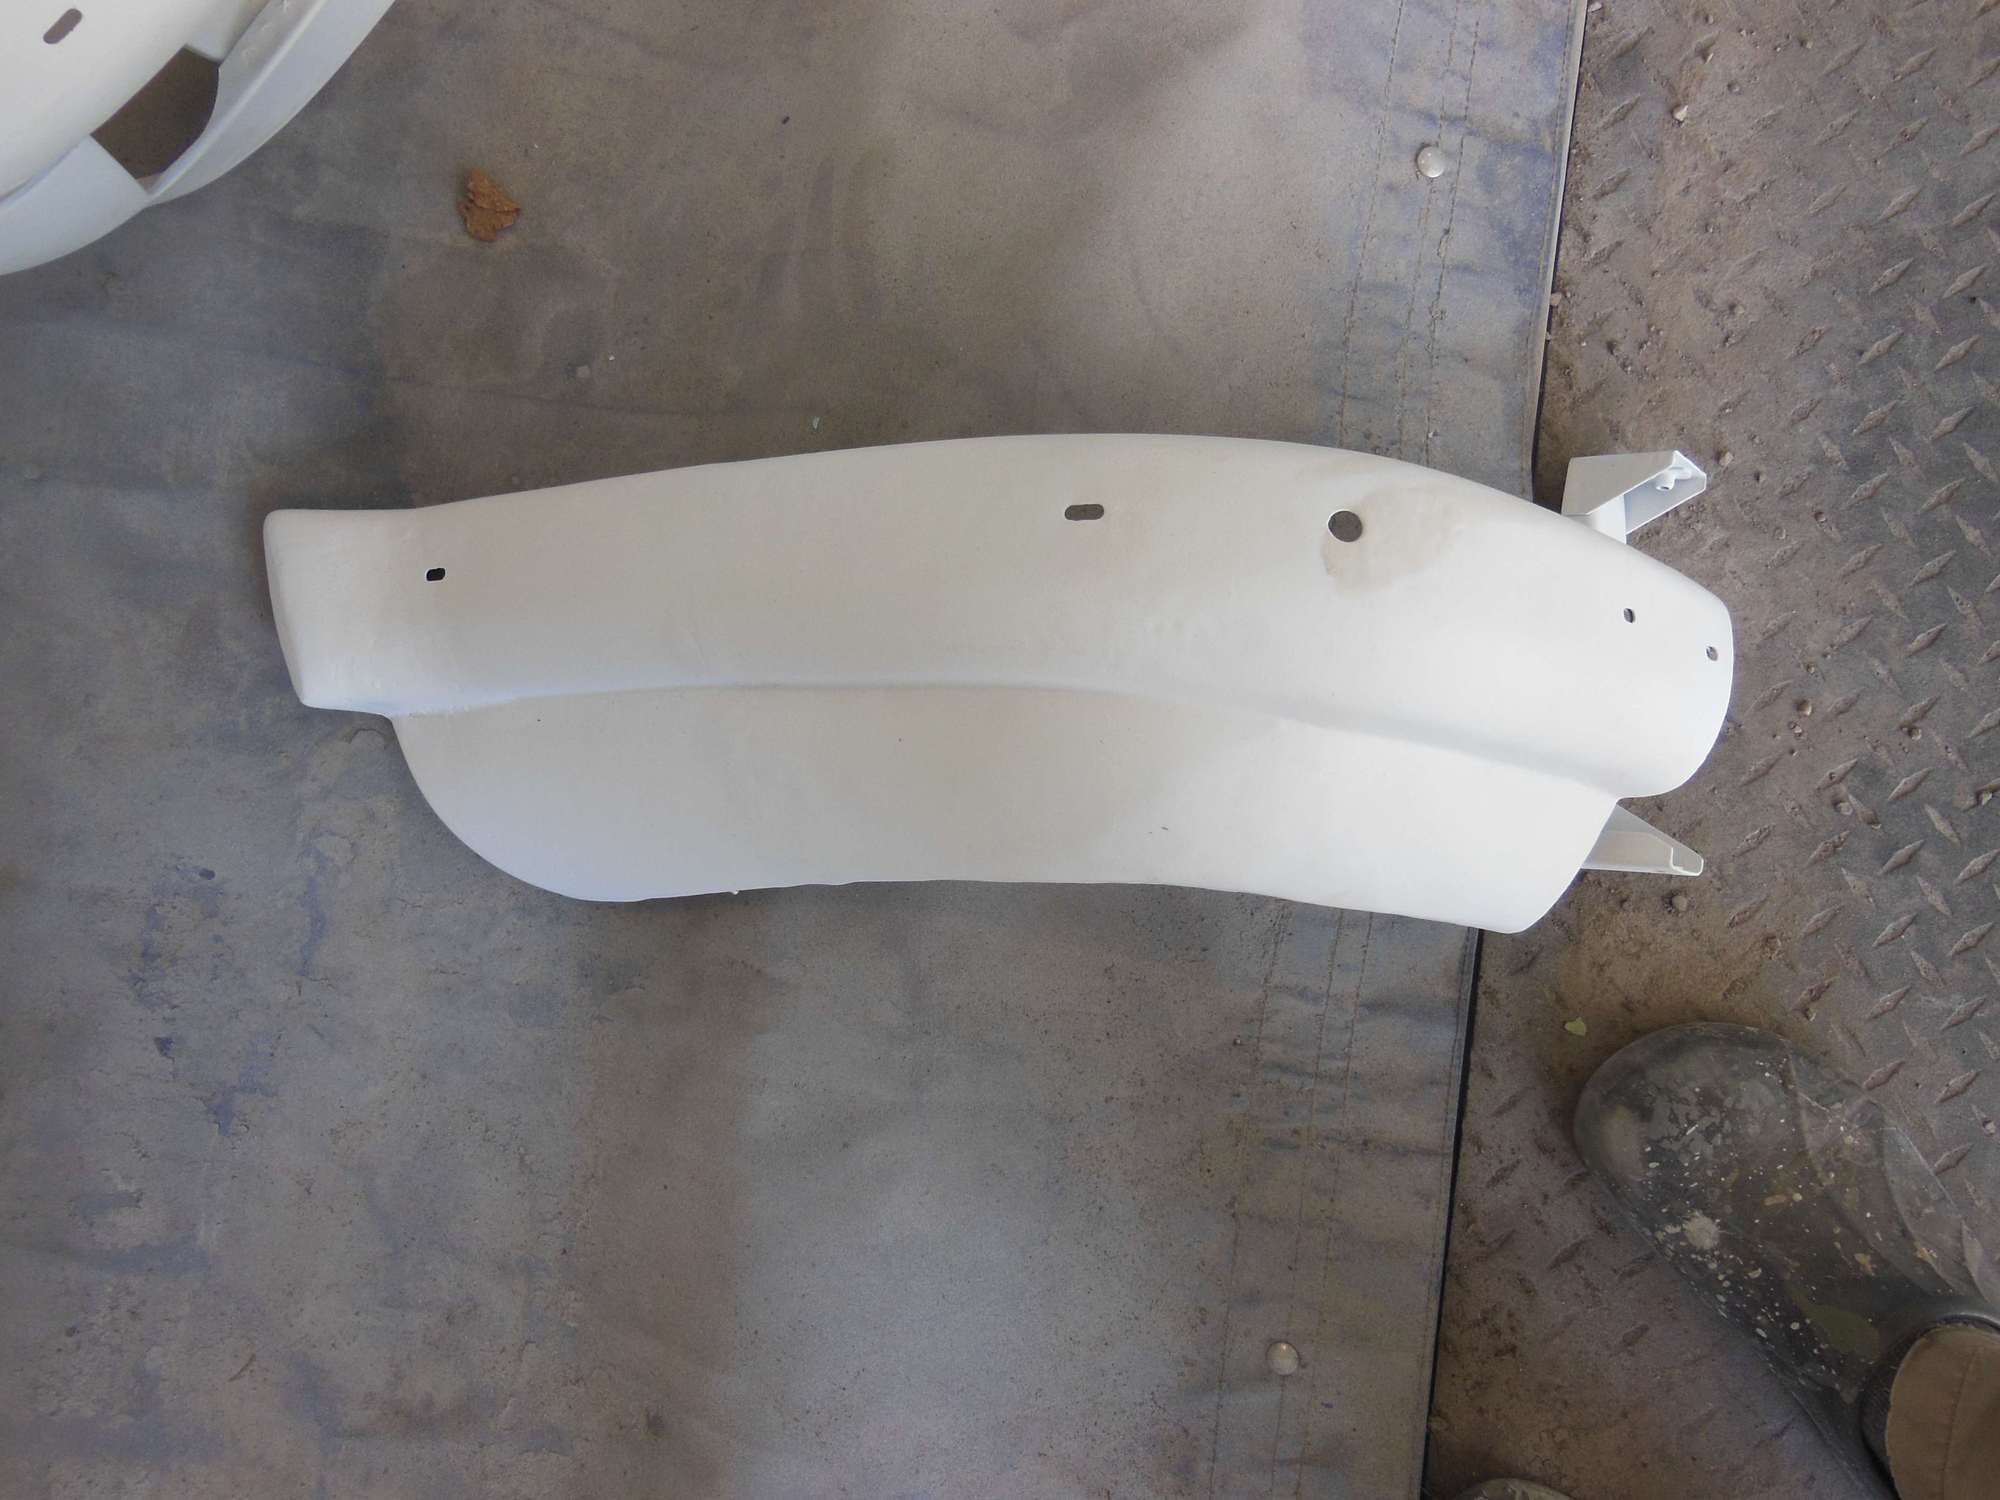
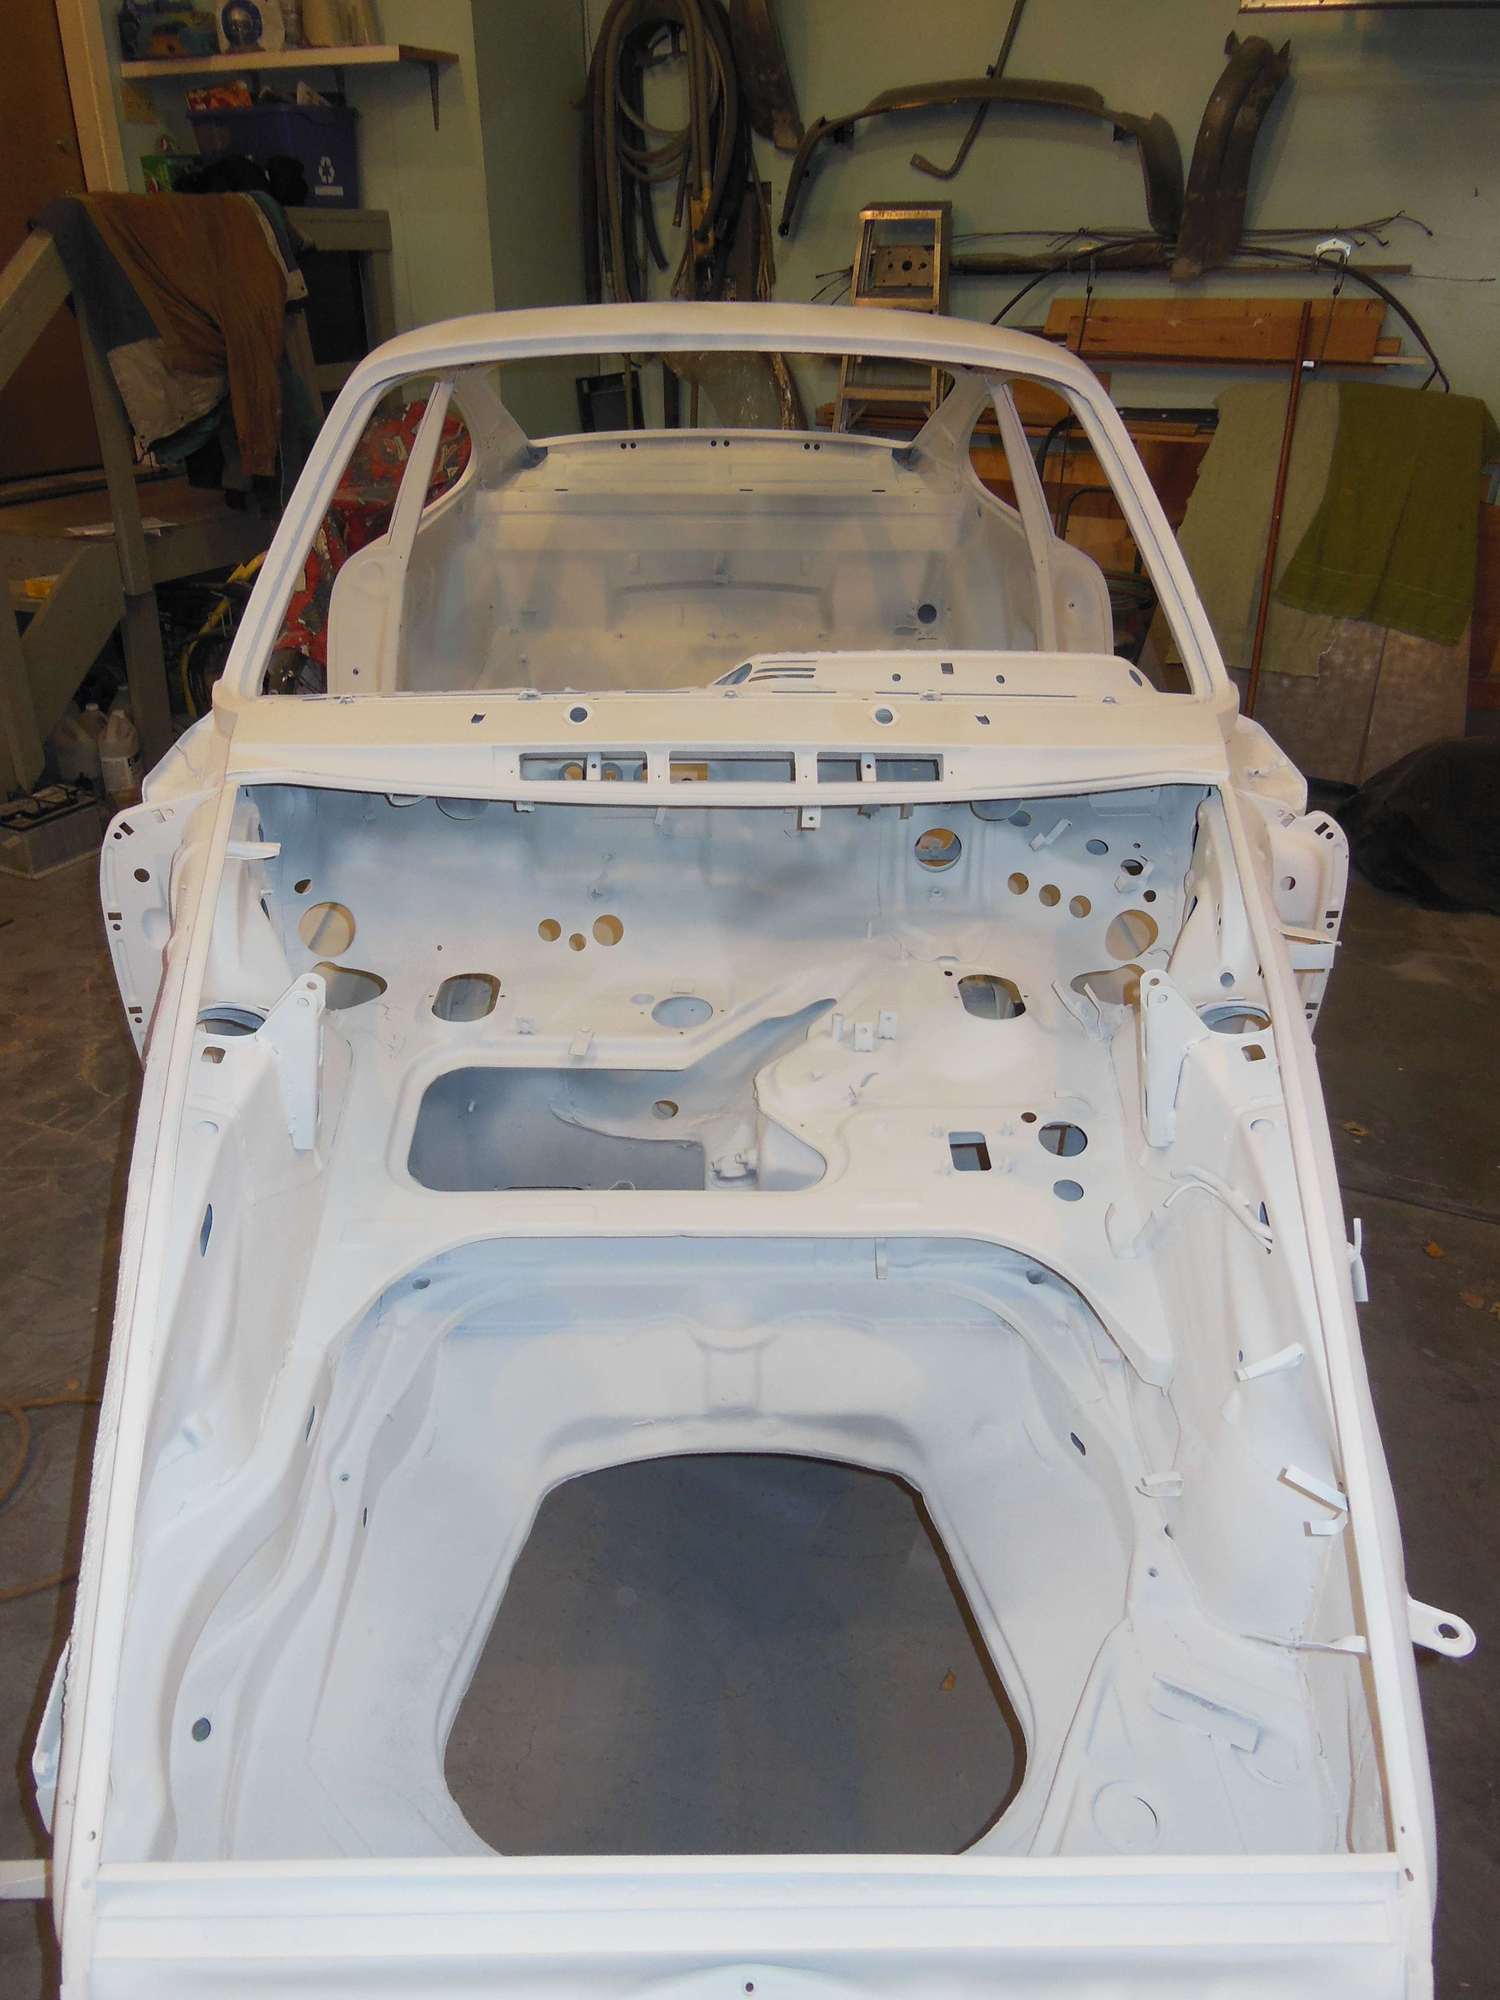
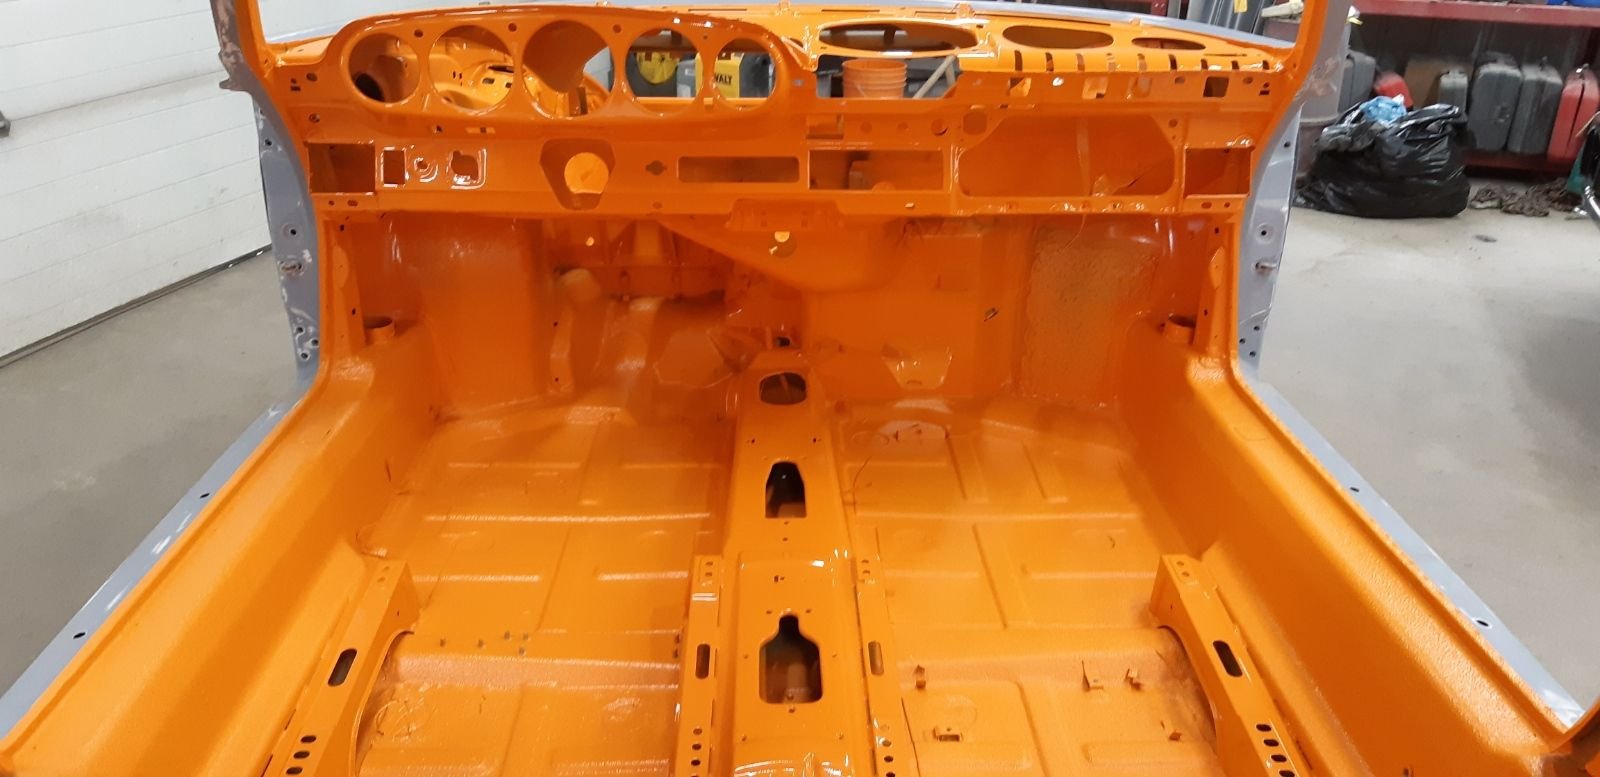
Here is the stripped tub ready for refinishing process Front bumper was basically shrapnel, so had to metal work it to look this good...then lead with a later valence added (recessed fog lights) Rear bumperettes were fabricated from ruined '68 parts Torsion tube modification to allow for longer G50 Front fender mod/fabrication to allow for 964 condenser with enough airflow After bead blasting, first round of primer Final primer Final front bumper assembly (valence bolts on) rear bumperettes...ok, but not great Frunks are good
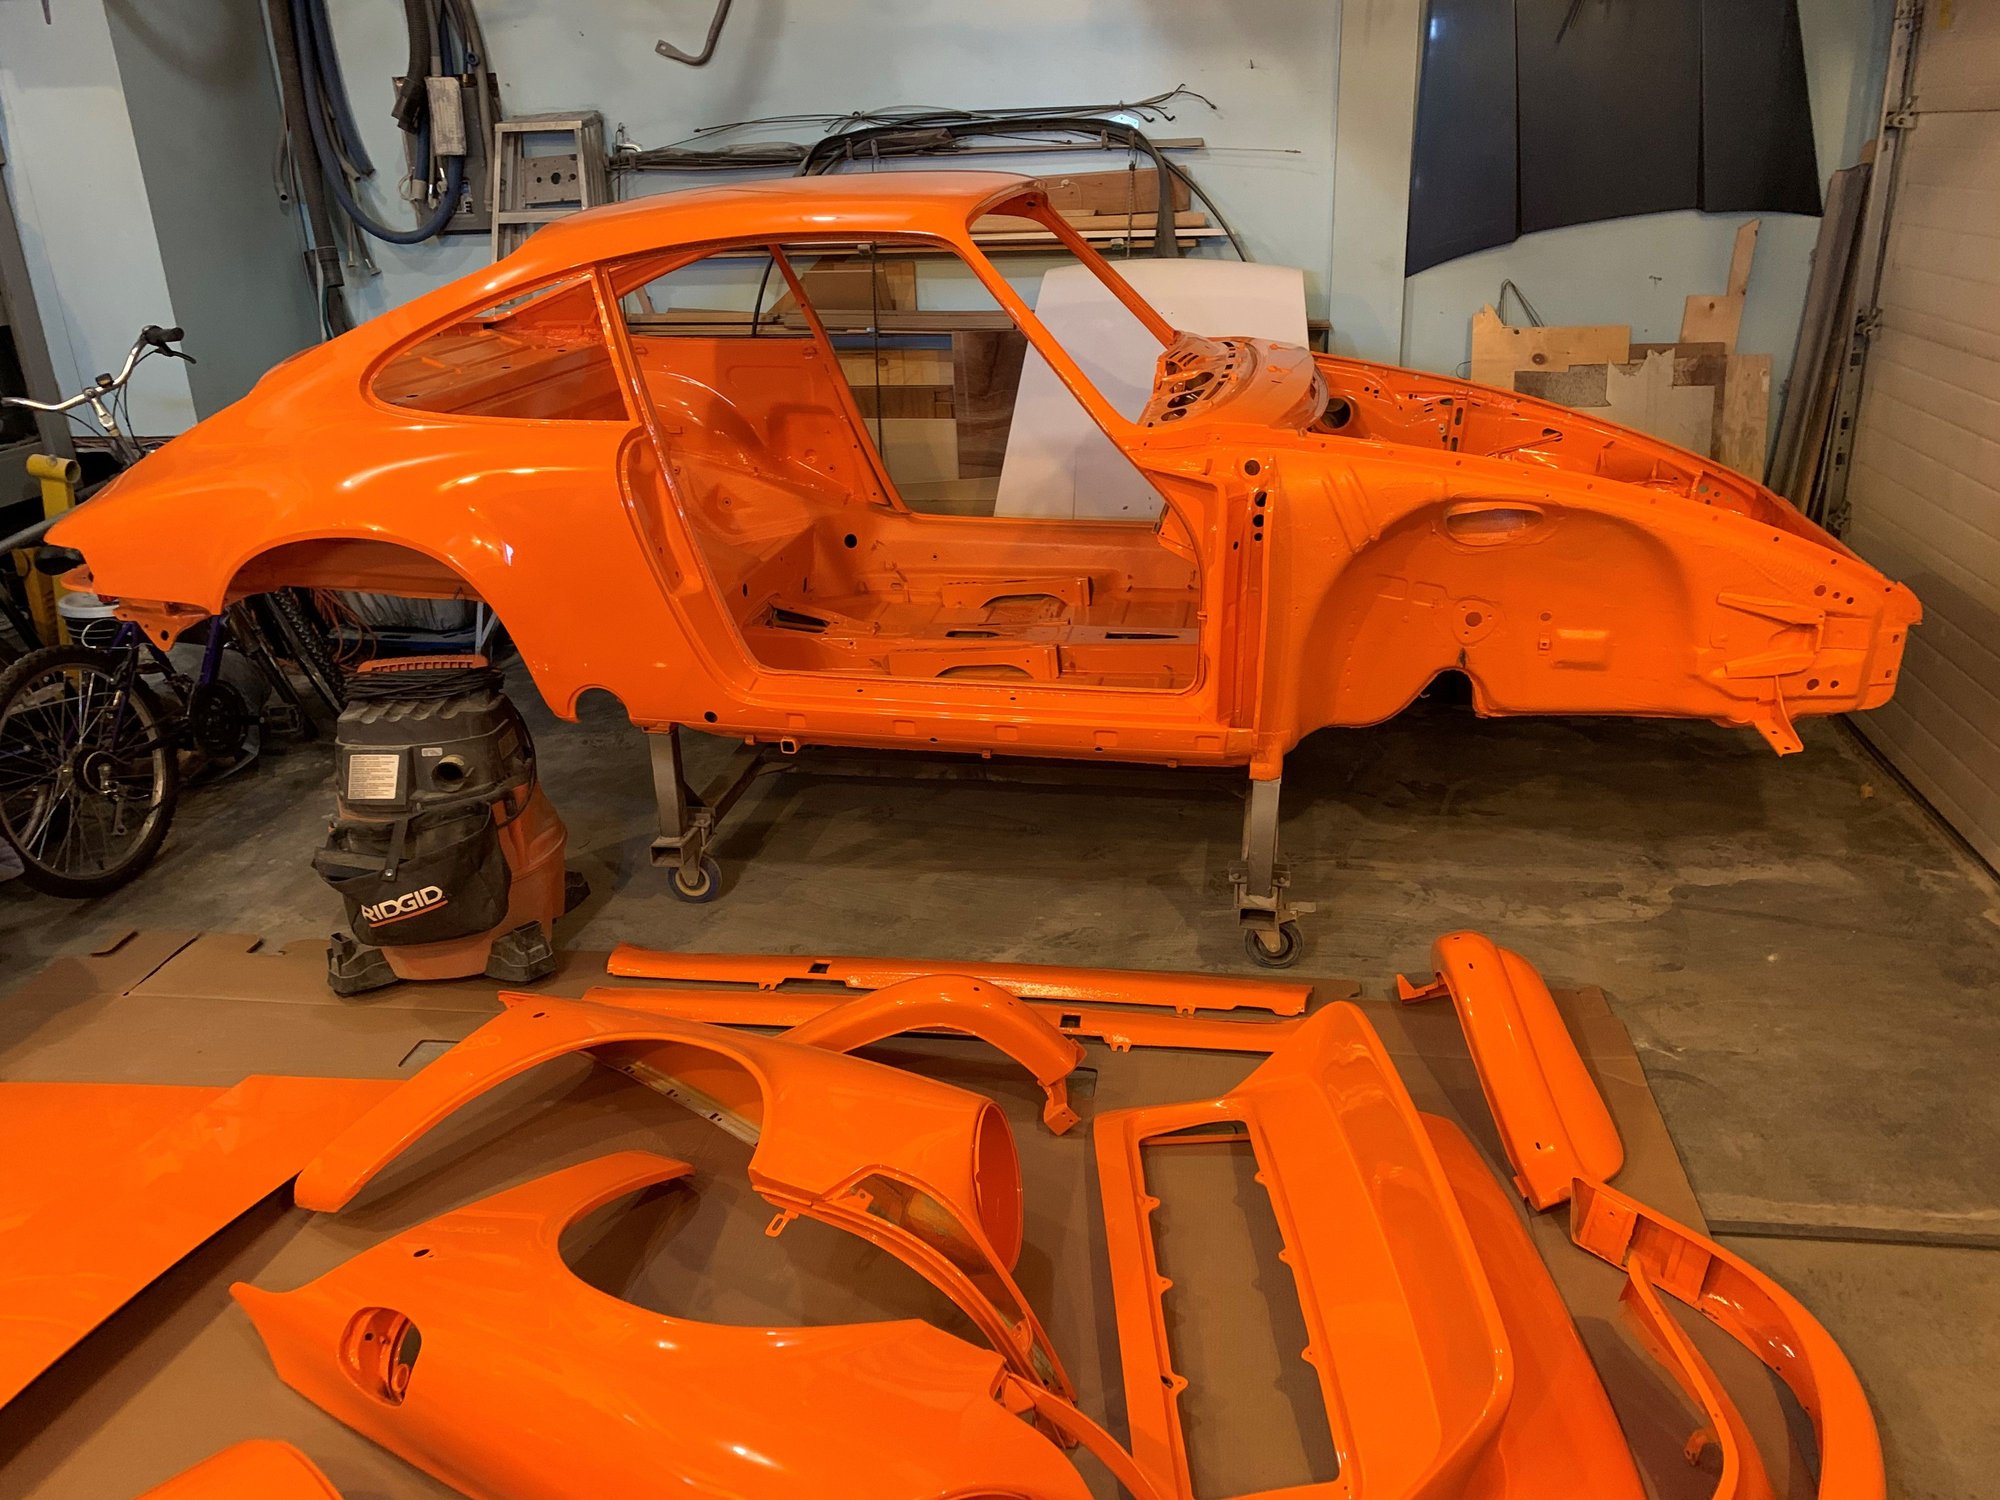
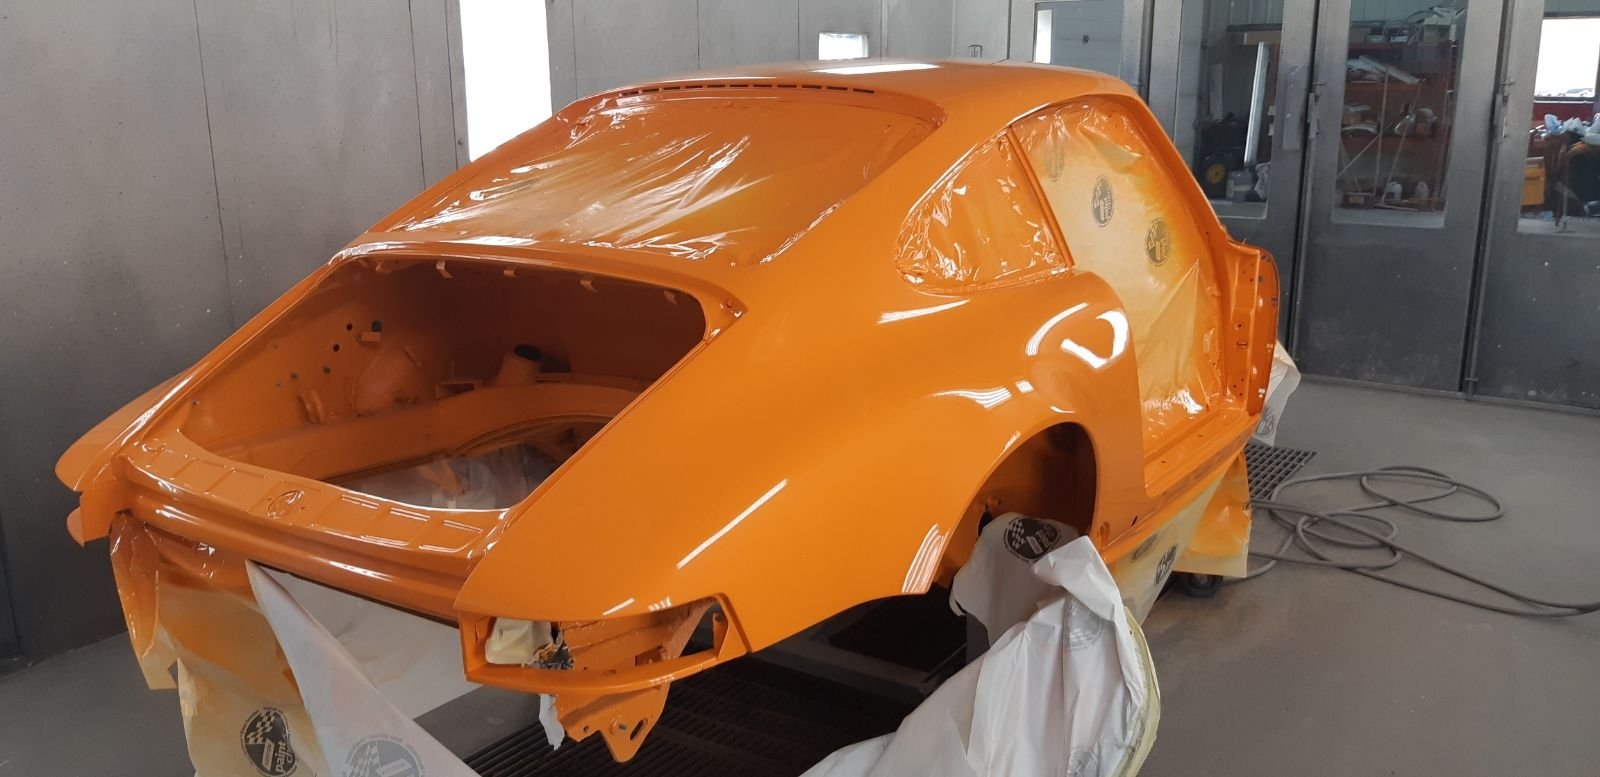
Then came the paint, I must admit I did not do the topcoat as I was temporarily in the US and my age dictated that I needed to get it done while I was away. I guess my bodywork and primer work was good enough, as the final product is pretty decent although I will colour sand and polish at some point.
...and now that all the electrical is done (except for some parts where I will need to adjust wire lengths once it is in the car), the reassembly process begins.
Its bit daunting actually, its been 16 years in process and now it is finally going back together...from nadirs of despair to what is hopefully the zenith of happiness when it is back on the road. Target is Oct 1, 2021.
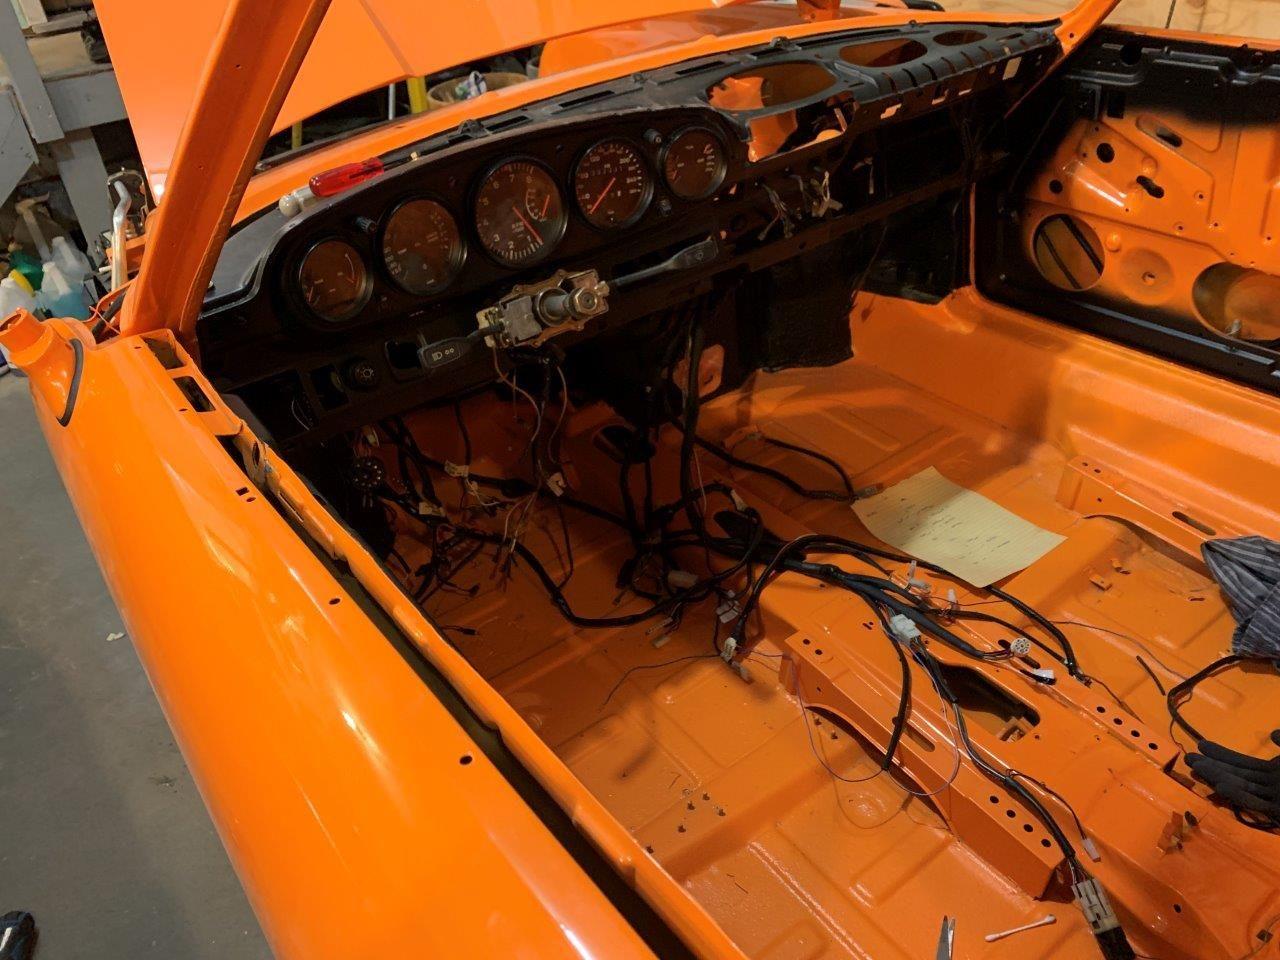
So, for some reason this next step seems like the beginning of go forward. The base is done..next two steps were paint the dash black (SEM Trim Black), followed by complete anticorrosion wax spray in every structural tube I can possibly reach. I will be using the 3M system for that....4 cans ought to be enough and they sell a nice little wand kit to get way deep into the chassis.
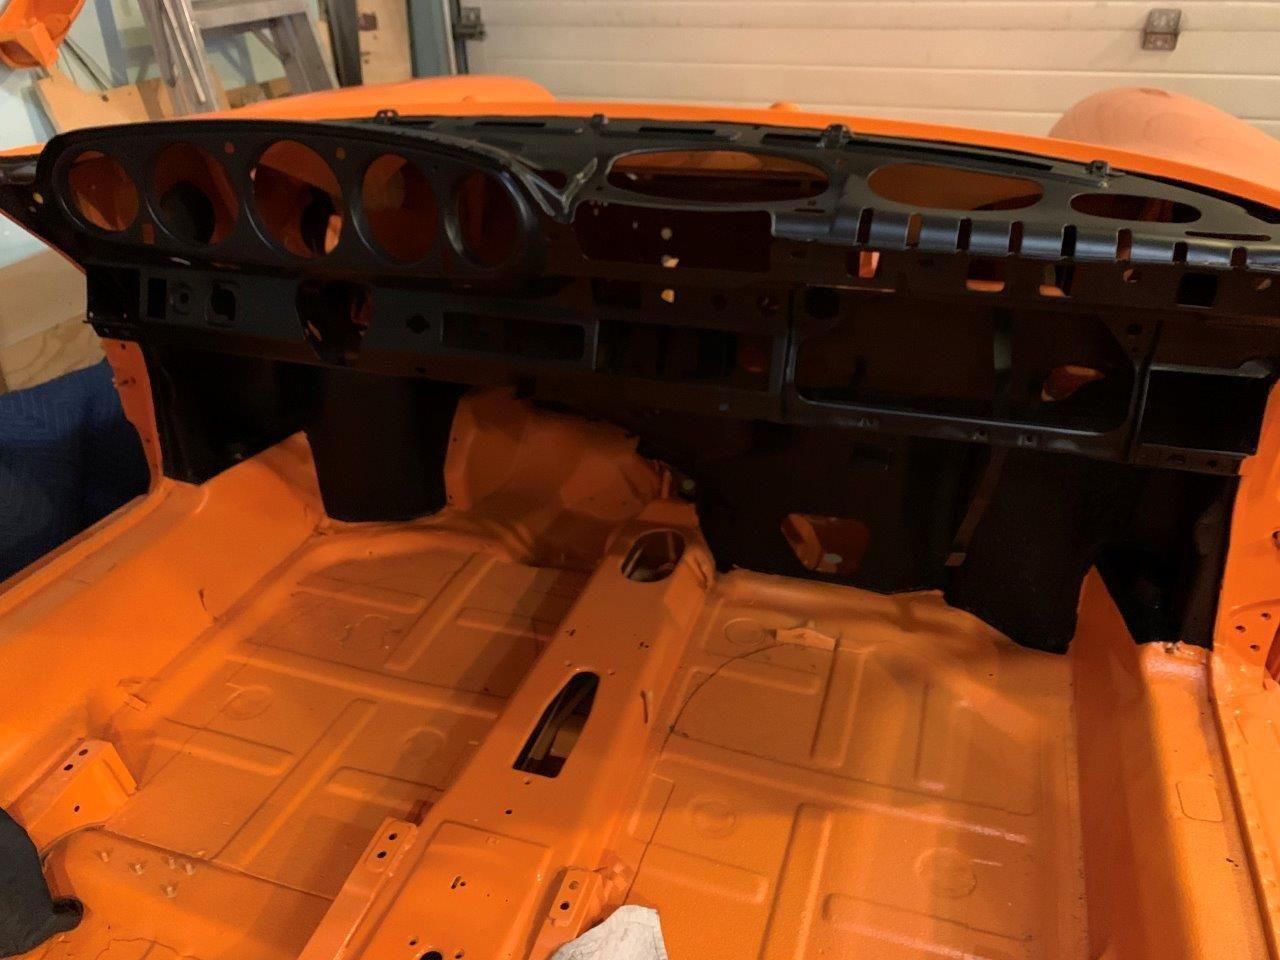
But here is the after of the dash....looks OK, but sanding was an absolute bear and masking all that just about cost me what little sanity I have left.
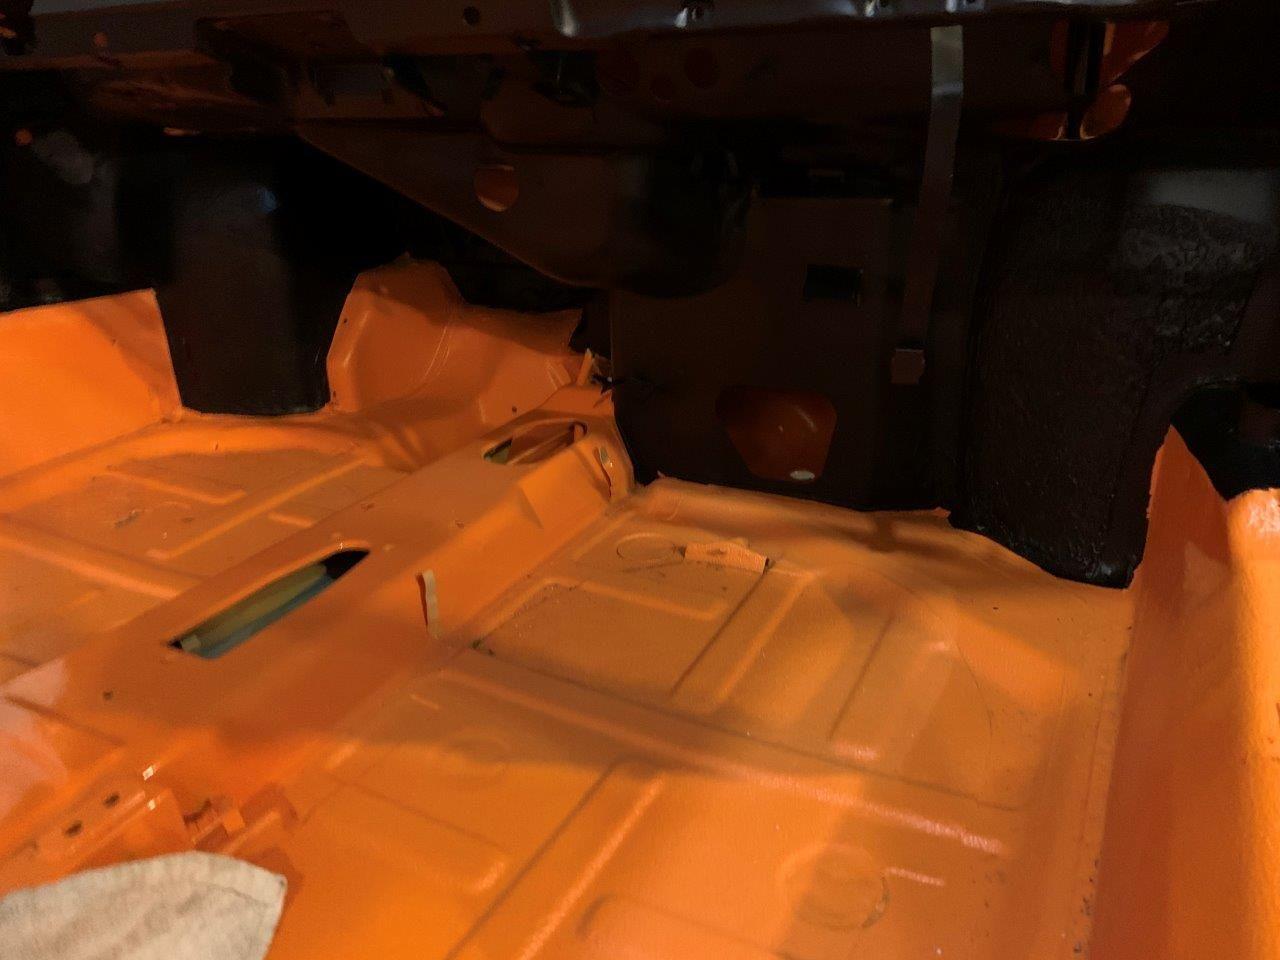
Did not want to spray trim black on floor area (it has Raptor on it for anti-drum and protection). Most of this will be hidden, but if any parts peek out they ought to be less visible due to the hiding effect of black
Ok. today was officially frustrating. I thought I would spend a quiet Sunday in the garage and basement getting ready for the harness reinstallation after the corrosion wax job. Thought I would check on one small detail namely how to fish the wire for the interior lights in the roof down into the frunk. Thought that would take maybe 10 minutes and then off to the basement to shrink the harness loom wrap and finish a few details there.
So much for that theory. Spent all day trying to fish through what I thought was a blockage in the windshield A pillar...tried everything including flattening a chunk of wire to form a rudimentary drill to try to drill through the "stuff" but when I finally went through, for the love of all that is holy, could not find the other end of the fish to save my life. I tried several fishes, had my endoscope working double time trying to see where things were going but COULD not do it. Totally frustrated.
Then, the other brain cell fired and I thought, this little bugger used to have a sunroof, where do those pipes go as I was not seeing them on the endoscope.
Well, turns out there are TWO paths in the A pillar, one leads to the frunk, the other leads who knows where....
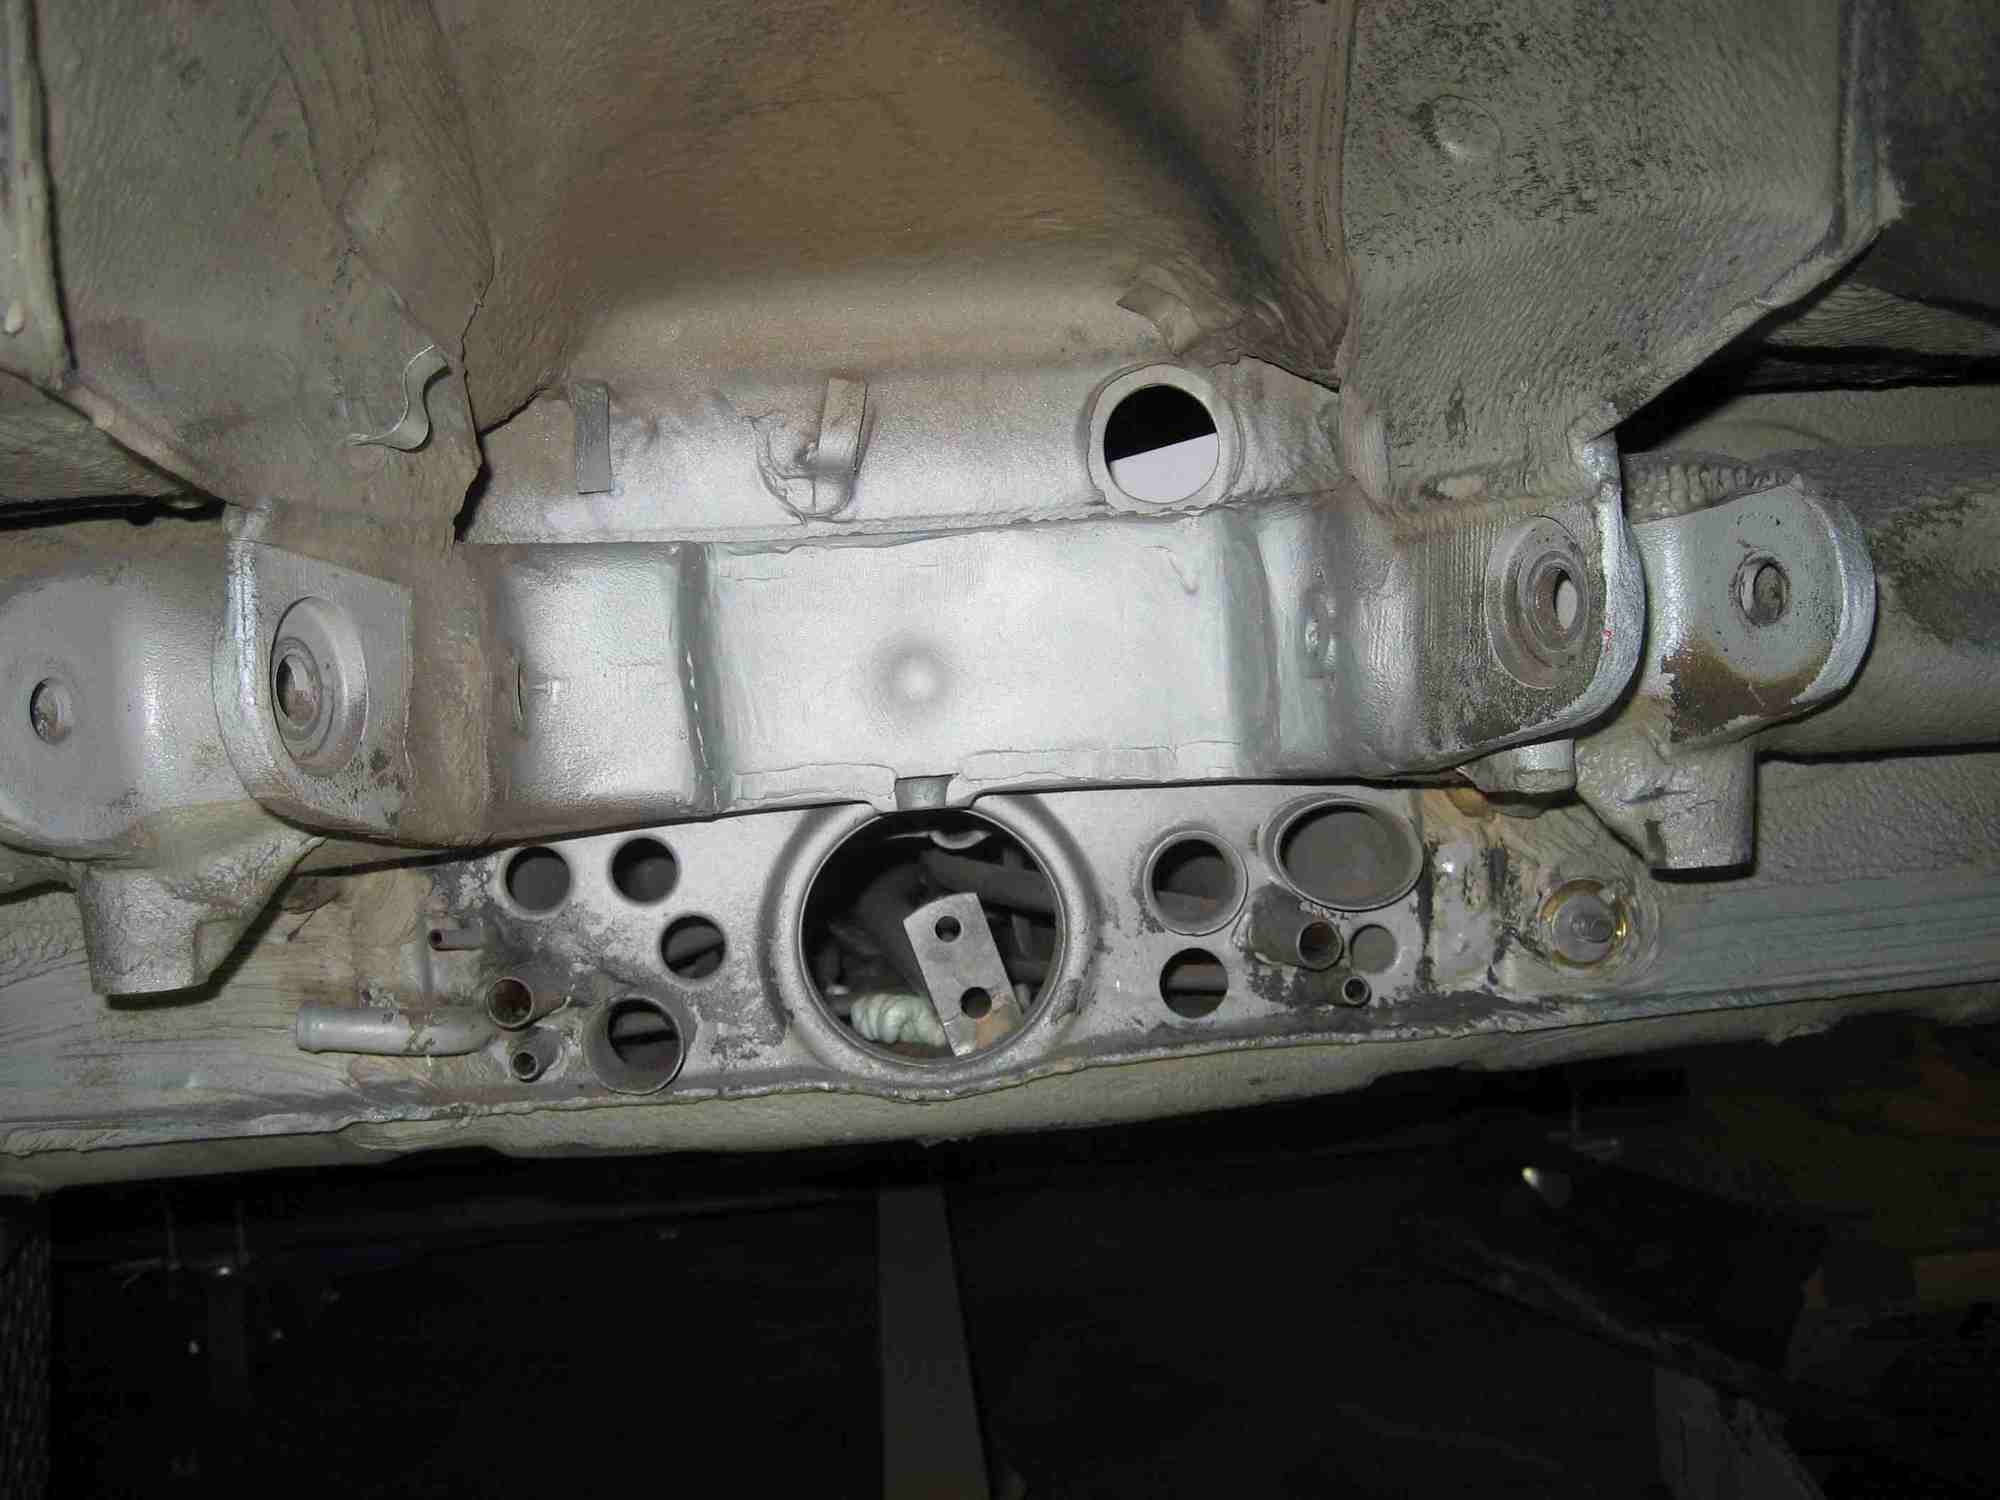
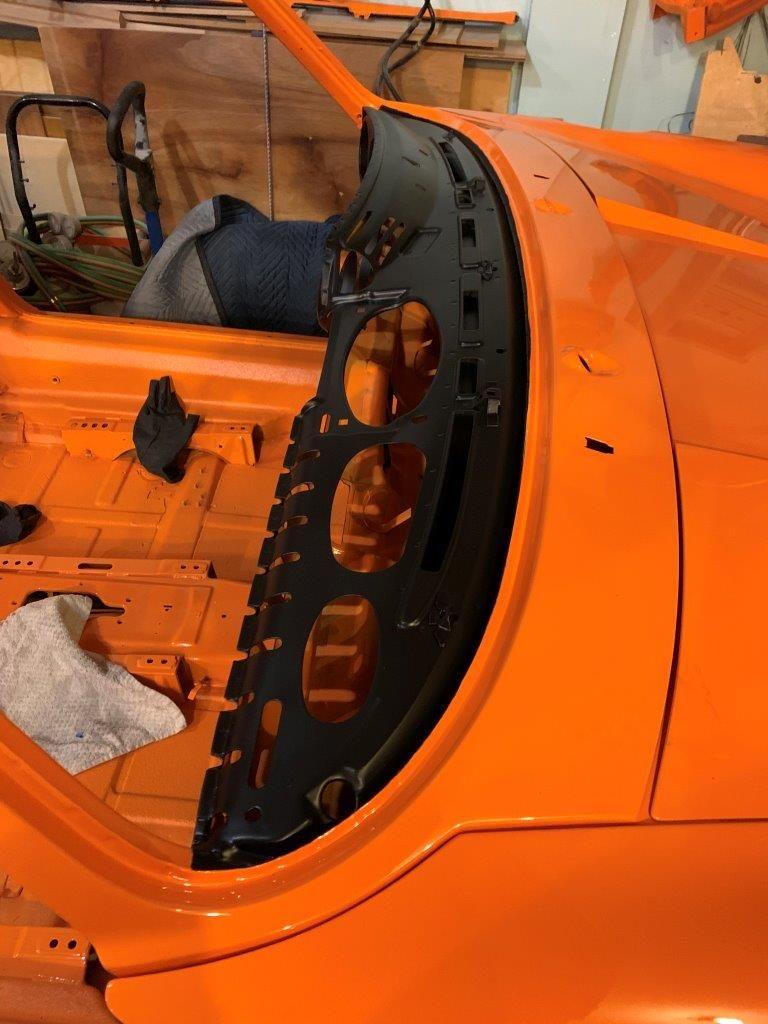
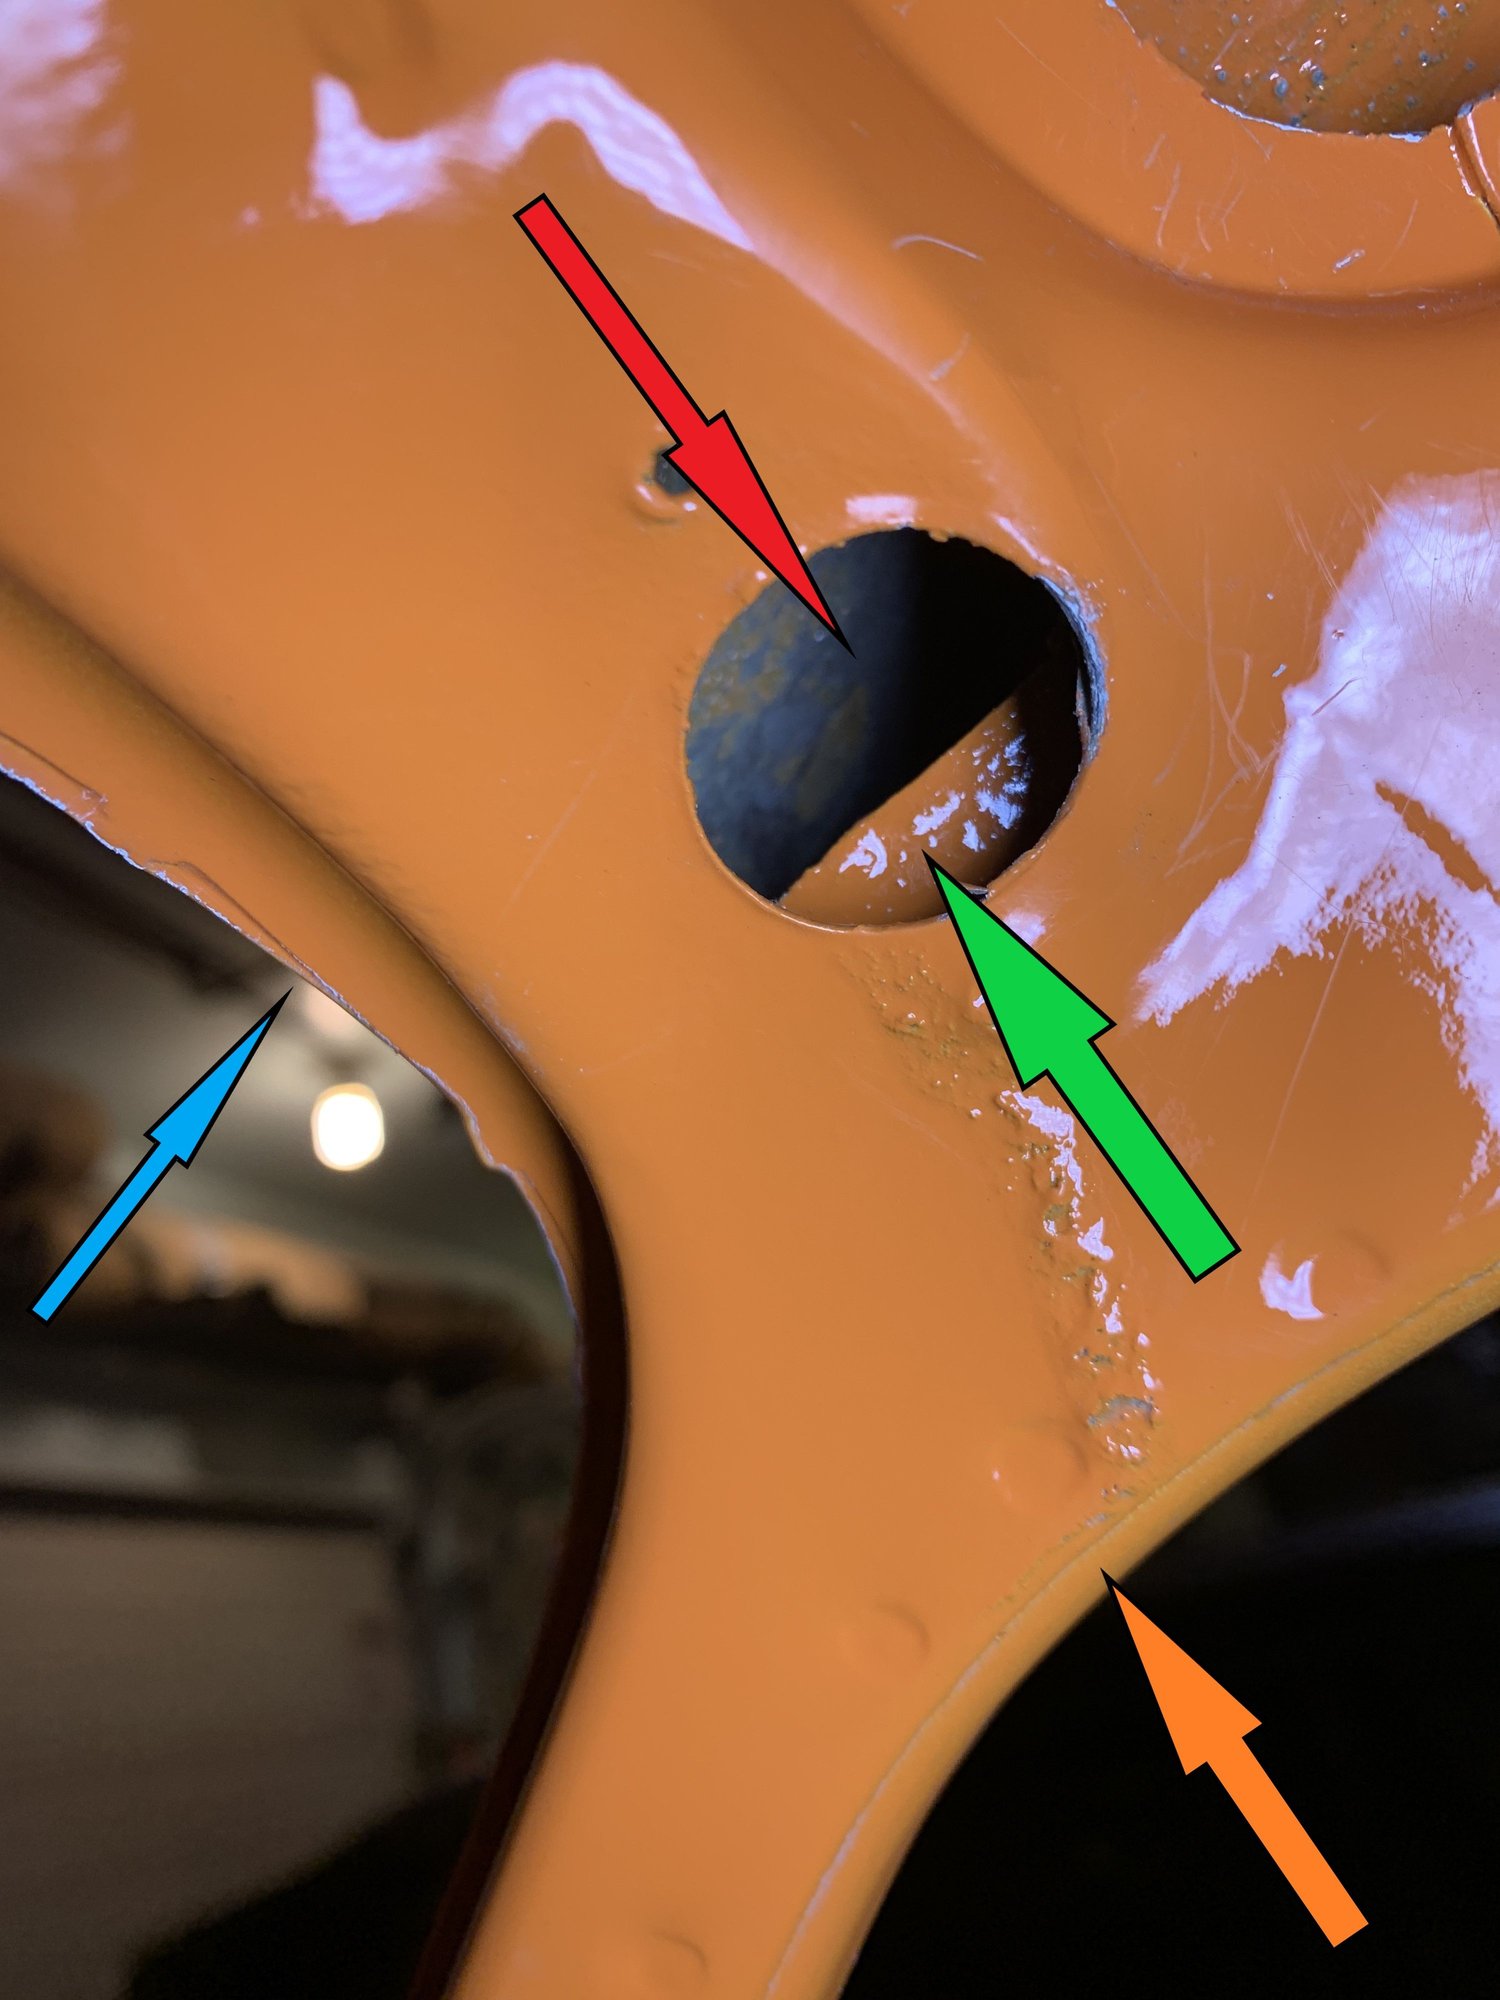
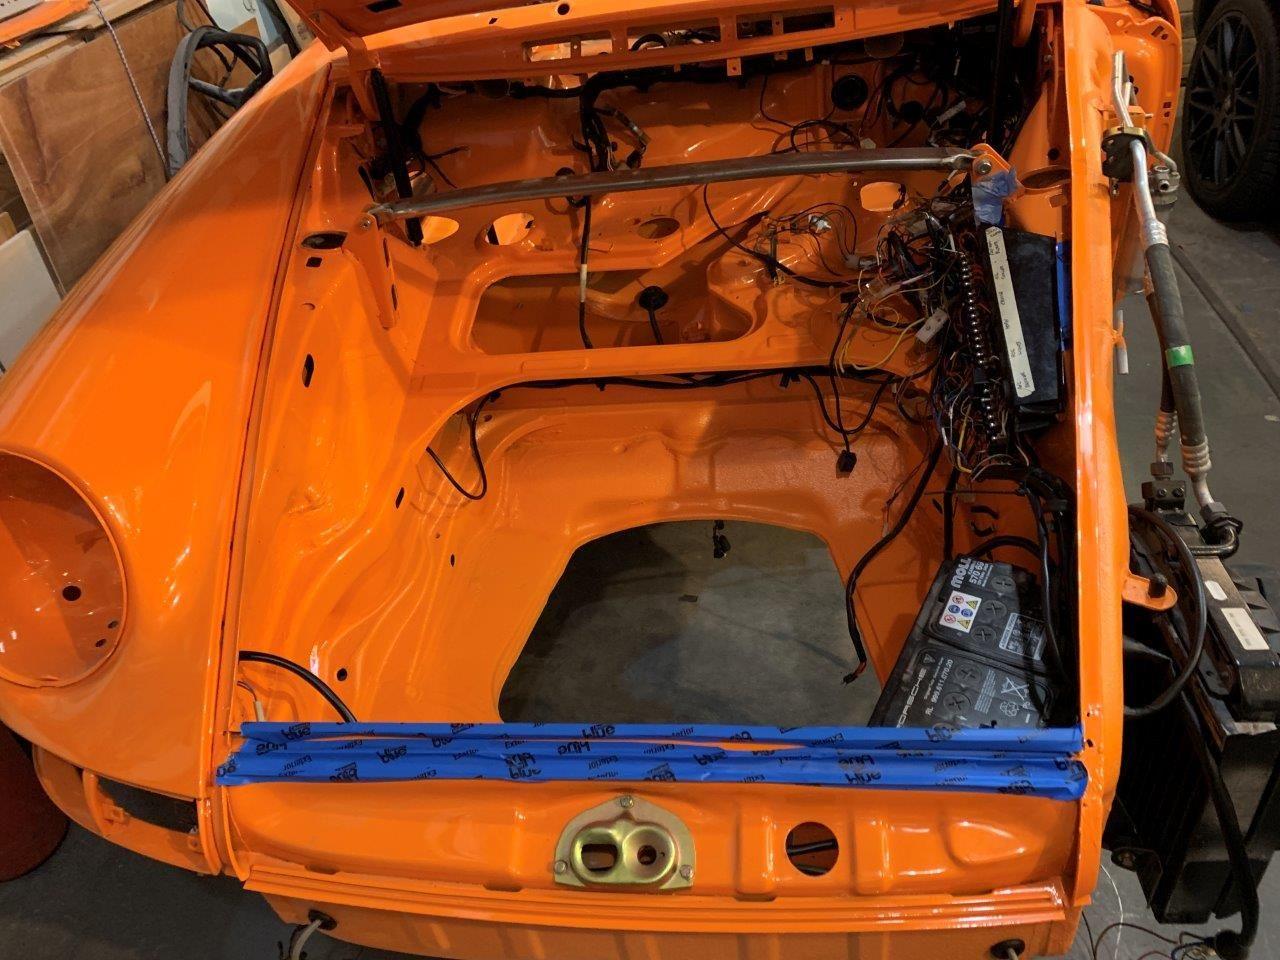
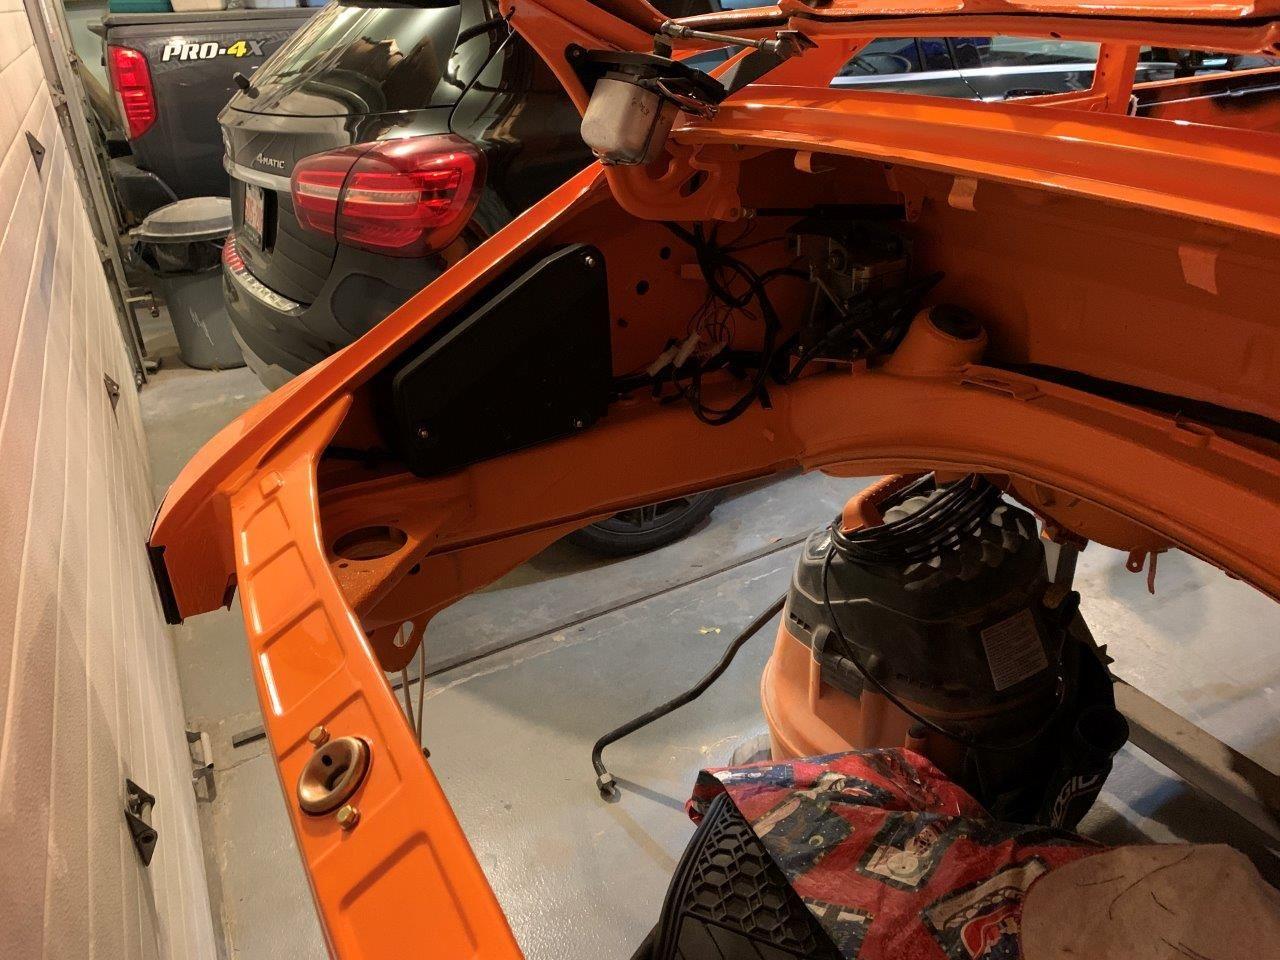
So, here is a pic that helps I hope. It is of the sunroof mount, passenger side, small hole is towards the interior of the car.
Blue arrow is windshield opening, Orange is passenger door.
Red is the large, apparently obvious path for wiring to take. Don't be fooled, it leads nowhere and appears to be sealed as it does lead into the roof framing.
Green arrow points to the flange of the second part of the A pillar that actually is the path that the sunroof drain tube takes and which ends up in the frunk's large structural compartments just under the window frame. You can fairly easily stick a small wire ( I used a coathanger) right through and you can look through the holes into the structural compartments from the frunk side and see where it comes out.
Now question for the assembled multitude is whether or not my scritching and scratching around has damaged the coating enough to warrant a pass of the Eastwood anti-corrosion paint (I have a can of the stuff, have used it throughout) prior to the coating with the 3M anti-corrosion wax. Also wondering if I should try to reseal the sealant that was put in there (I suspect that the tube leads outside or into the door pillar).
If anyone knows for sure what the path of that structural member is and whether or not I need to get nervous about resealing and/or recoating prior to putting the headliner back in and the car together....that'd be great. If it is just part of a closed compartment, I won't do it as the car is pretty well sealed everywhere and it is a 1989 which had as good of rust protection as any of the early air cooled cars ever had.
I feel your pain. I just did this exact same task a few days ago. Used an endoscope as well! Tried everything and also figured out the dead end path. Was so happy once I was able to finish this! What a pain.
I feel your pain. I just did this exact same task a few days ago. Used an endoscope as well! Tried everything and also figured out the dead end path. Was so happy once I was able to finish this! What a pain.
Maybe we ought to set up a support group.....its so easy to miss and I did not document this path when I took the car apart as it was "obvious"....
I think I am going to run a pass of the corrosion inhibitor through both A pillars, the car will end up in the Netherlands with lots of moist, salty air and its relatively easy to do now, just have to make sure to seal up all the openings as I don't want any of that ugly green stuff on my pretty orange paint...anywhere.
She Who Must Be Obeyed has told me I have to be social so we are going to visit some folks for a couple of days....personally I am happier in my garage, but domestic tranquillity has its upsides as well.
Worst case if the socialization does not go well, I can always obey Oscar Wilde who said, to paraphrase, "man, being rational, must drink".
Keep sharing your experiences, I will share mine, hopefully we can help each other dodge a bullet or two...
Netherlands is a beautiful country. My wife and I got to experience Kings Day in Amsterdam a couple years ago. Lots of fun - that could never happen in America.
I finished checking out the wiring and everything testable on the bench has been tested and is working properly. Some things cannot be tested until the engine is in place (e.g. oil pressure sender), but I did check for continuity on those wires and they will be checked again once in the car.
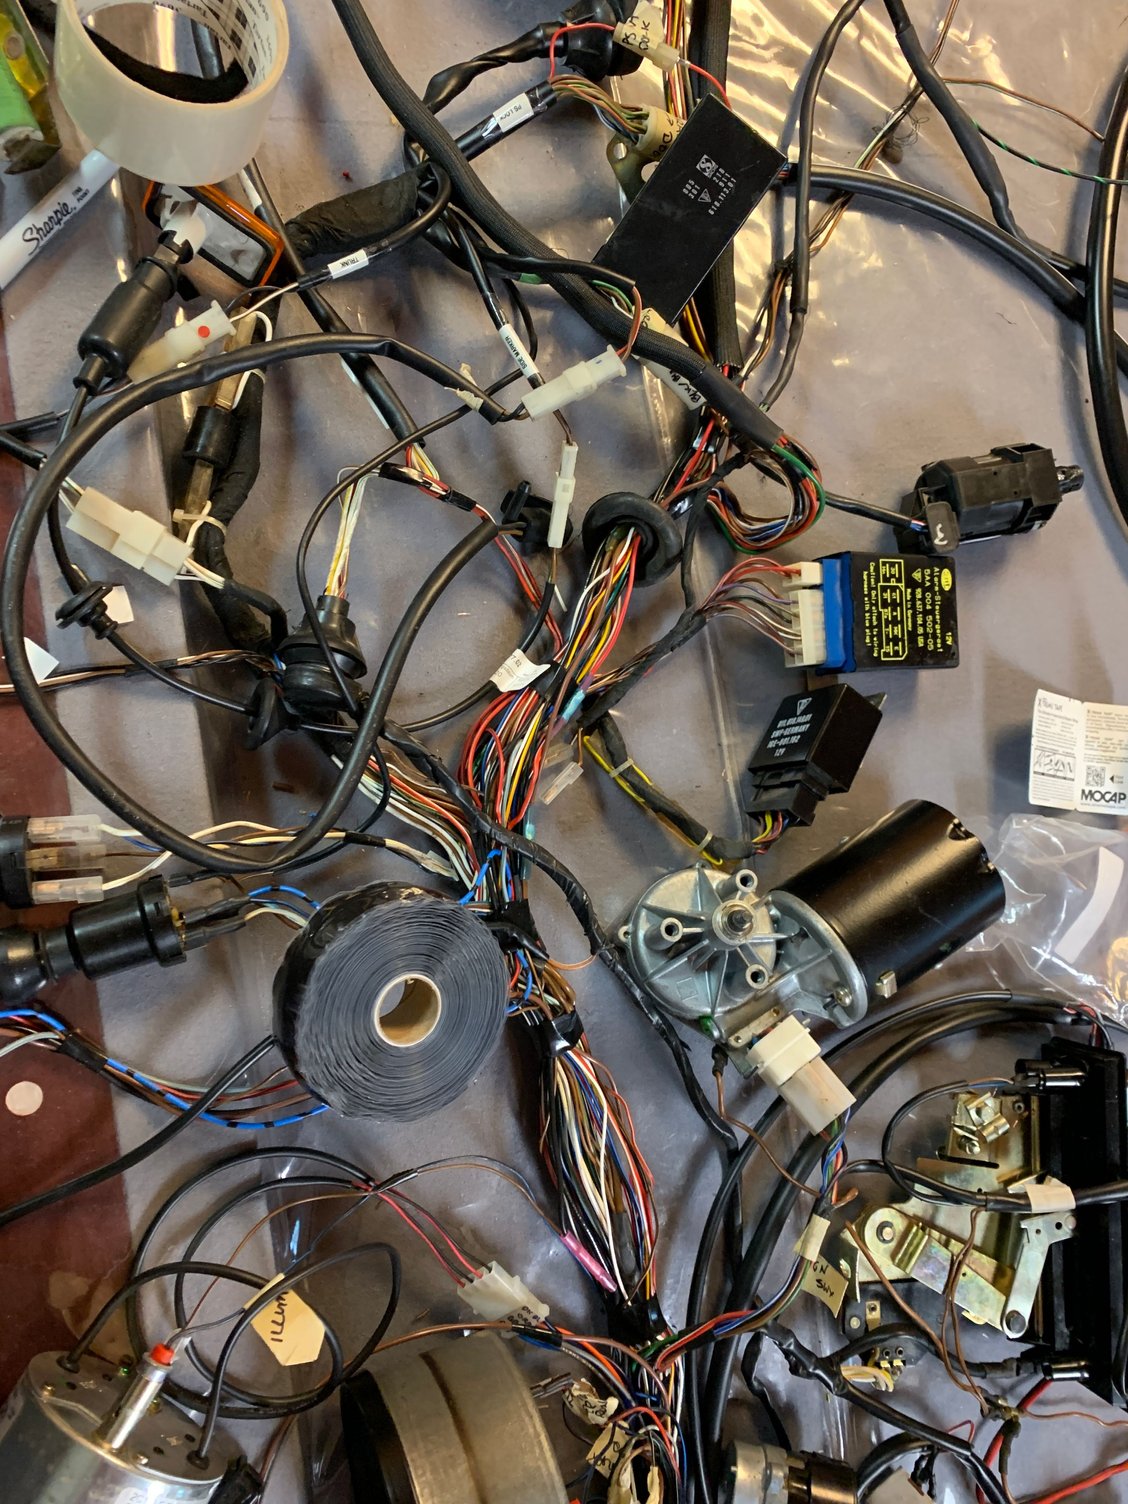
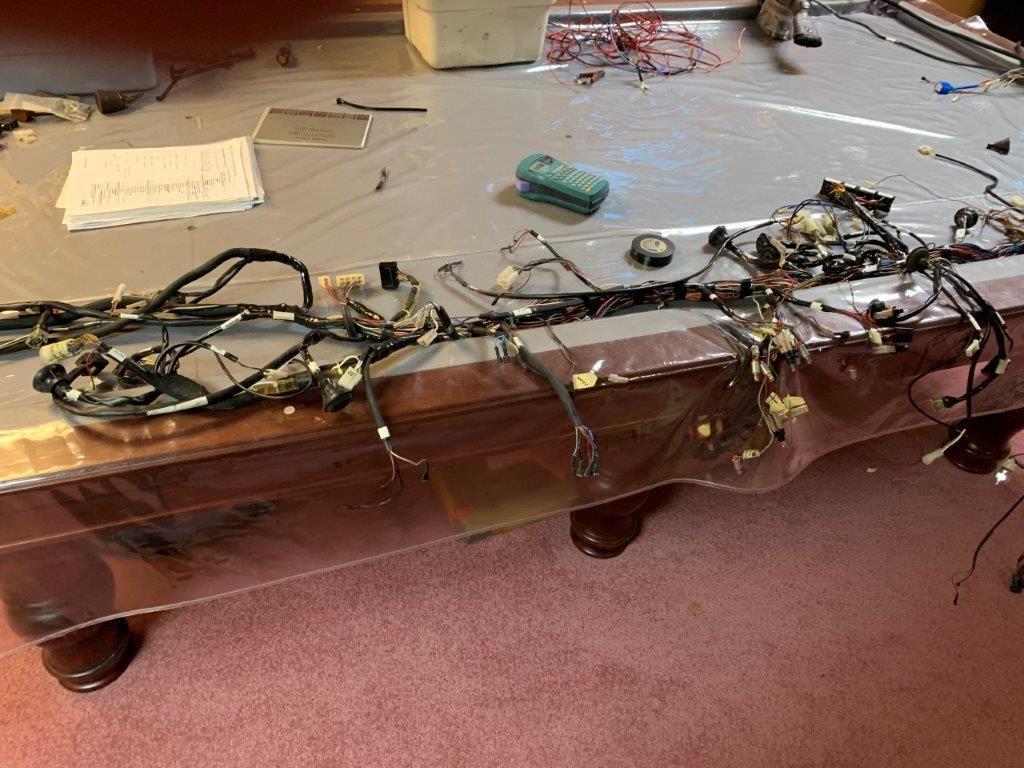
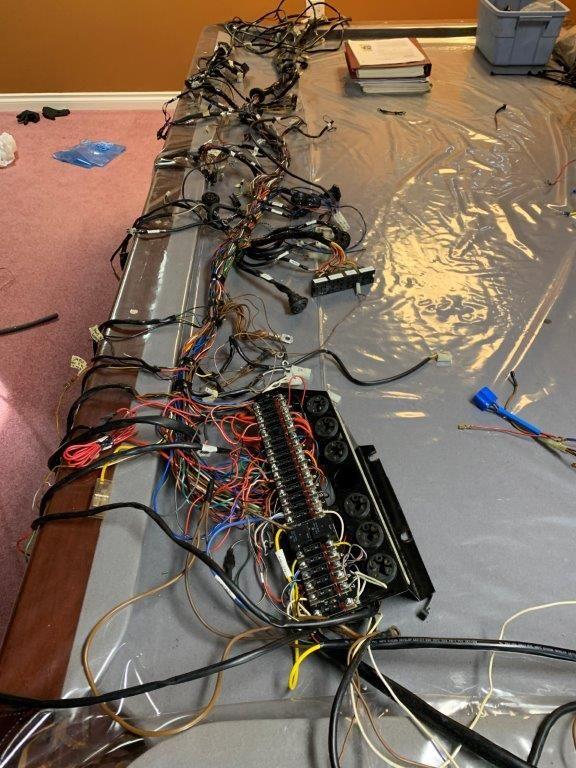
Here is part of the harness fully assembled on my pool table, all checked out and making appropriate whirring noises, heating noises etc etc.
After everything was checked out, then the tedious job of putting proper loom protection on and labelling everything had to take place. There were countless times where I had to adjust something, sometimes as there was a problem with a wire or the existing loom, other times to fit additional items such as the trinary switch for the AC (hi/lo cutoff plus fan control integrated in one switch), the additional options such as intermittent rear wiper, relocation of the autoheat to the center console, the intensive washer system etc etc...plus the deletes (got rid of sunroof, headlight washers and a few other things).
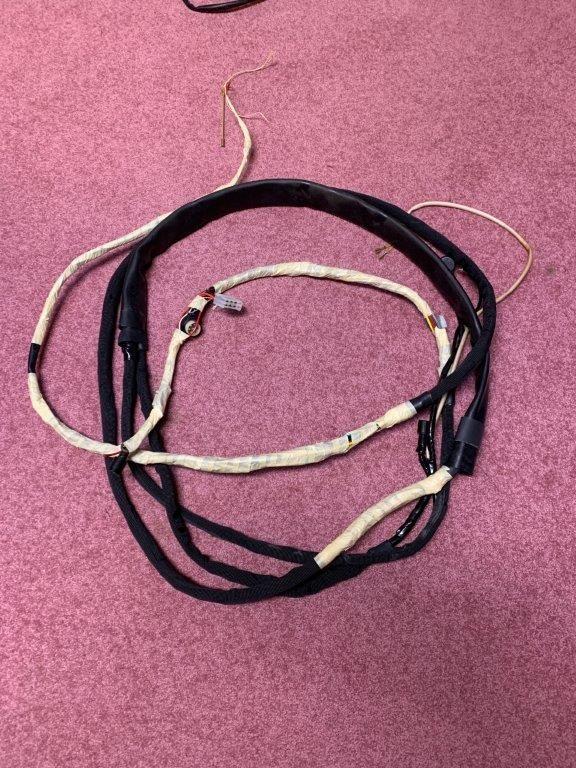
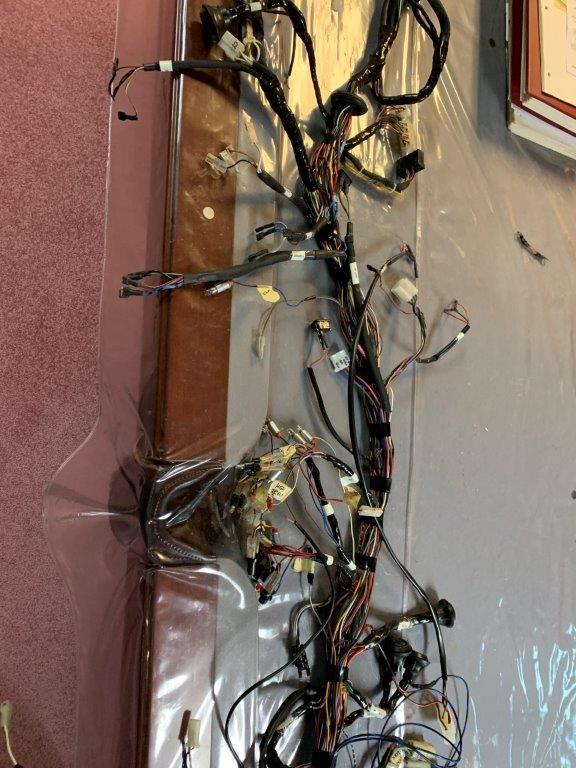
Well, one little surprise was to find out that you actually can separate the rear wiring harness from the front, so the section that runs from the fuse box to the rear of the car/engine compartment, can be separated either by plug or by removing the fuse box connection. After careful labelling this was done, so here is the rear harness just before I put it into the car.
Rear harness and cruise harness stretched out Rear harness only, loose wires wrapped with masking tape to prepare them through their journey through the center tunnel
I truly wish I had known that I could separate the rear harness as it would have made fitting the loom covering far, far easier. I had to work the loom covering (a 1.25 inch heat shrinkable fabric loom material) over the 6 pin plugs for the rear signal lights and it **barely** fit. It was truly a pain on both ends of the spinal cord.
If I would have known, I could have used an easier material (and cheaper), but all in all, the heat shrink fabric is pretty tough and I like it a lot.
Other issue was the fitting of the heavy rubber loom that covers the section of harness that runs from the tunnel, over the torsion tube and into the engine compartment. It was really tough to fit and align, again, if I would have known, it would have been duck soup. As it was I did not shrink the loom material, so then it bunched up and made it real hard. Easy way would have been to shrink the loom and then easily slide the rubber over the much smaller loom material.
Oh well.
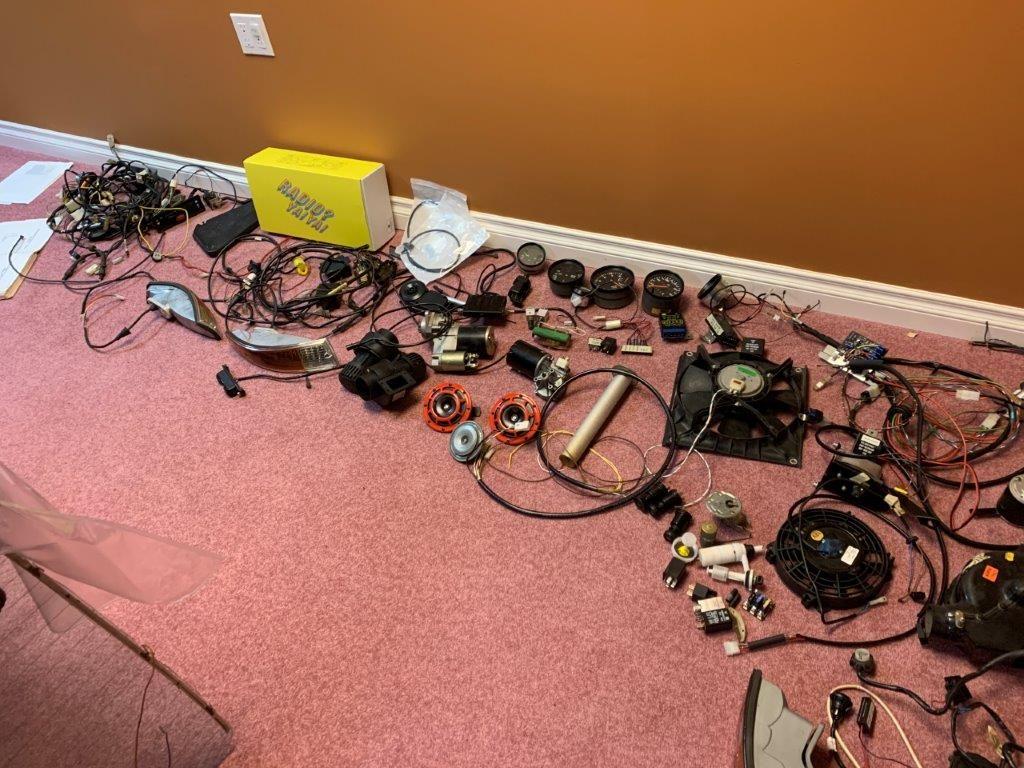
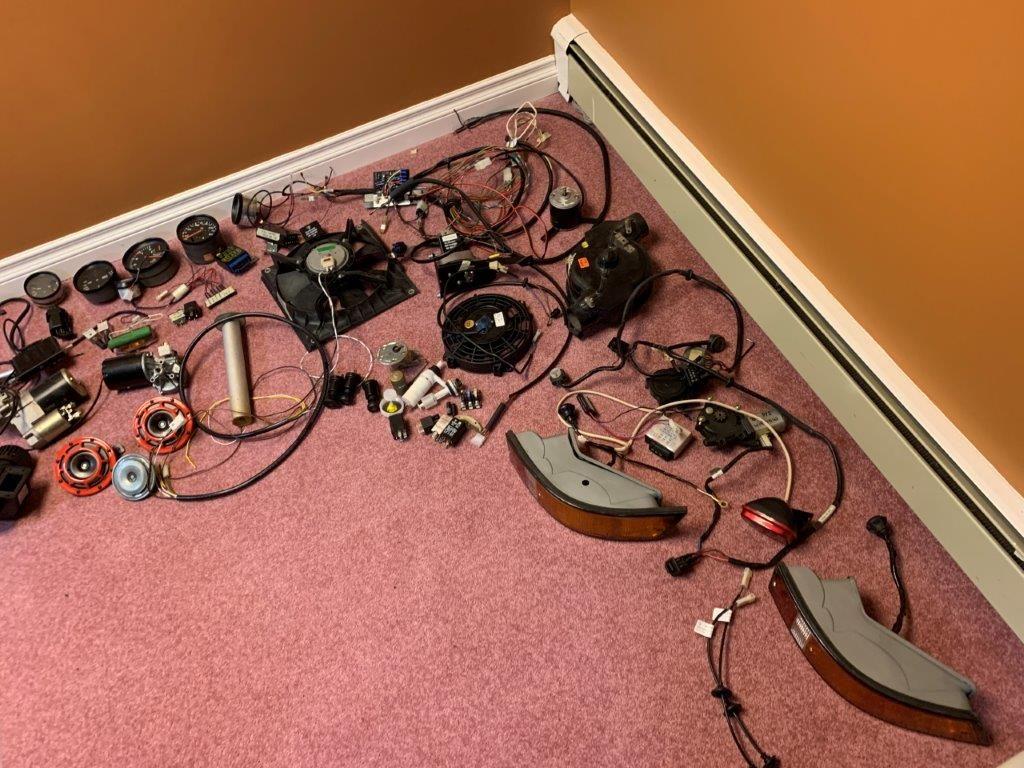
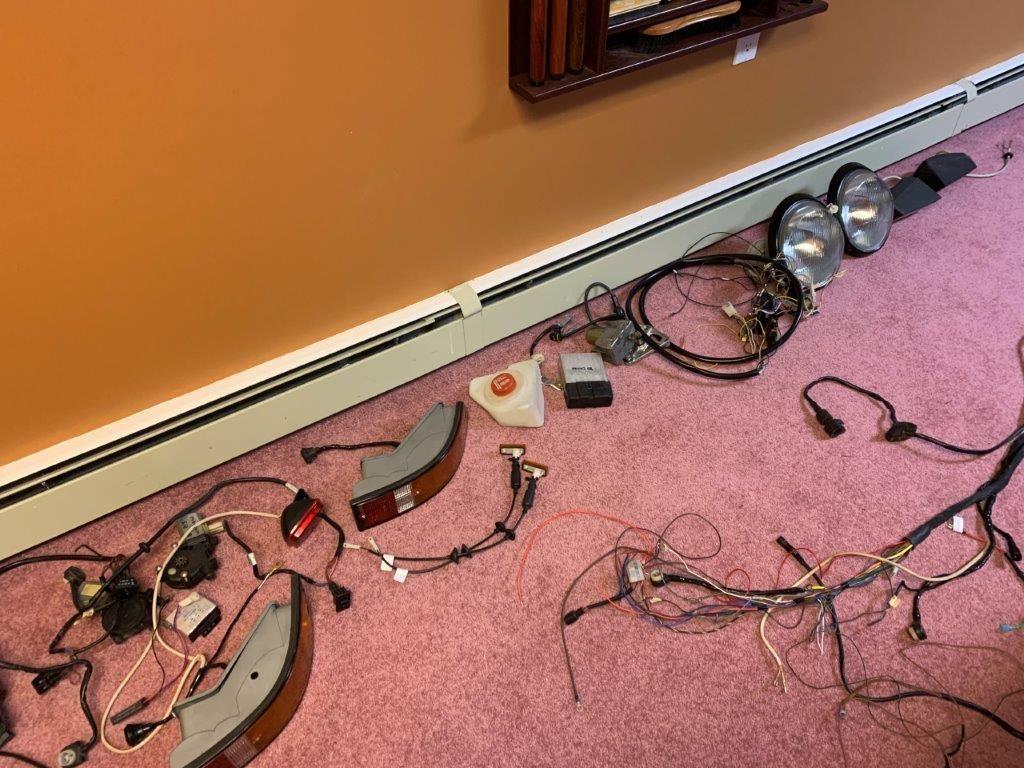
Now, there is a pile of parts, harnesses and so forth that need to go into the car. I separated out the ones I have tested from the spares I have (have checked them out too), so here are the electrical parts to go into the car eventually.
So what that leaves is the front harness as below.
All the equipment removed, labels everywhere and generally Ok. I pulled most of the stuff off to minimize risk of damage during the install process I will wrap key sections once I offer it all up in the frunk.
There is still adjusting required for wire lengths and such. For example, I do not know how long I need the trinary switch harness to be as it will exit from the fuse box to the receiver/drier in the DS fender well so easiest is to fit it all, then trim and terminate to length at that point. Same for the autoheat controls and the relocation of the windshield washer, 964 condenser fan etc etc
I also will wrap sections of the harness where I feel they need the protection, in this case I will use the self adhering silicone tape that is really good stuff. Basically it is like electricians tape without the adhesive, you wrap your harness and it adheres to itself permanently to form a very good silicone protective loom. Ideal for small sections which are hard to fit conventional loom materials due to the branching and also components/connectors that make it awkward.
I will probably leave the labels on for the most part...I have made full diagrams of all the complicated wiring changes, so that with the factory wiring schematics (which are mostly right) and Bentley (right for the most part) I ought to be able to diagnose.
Note that I fused the interior lights circuit by running an appropriate wire from the light switch, to the unused S3 (formerly fuel pump) and back to the interior lights system rather than putting one of those annoying inline fuses near the light switch
The Rasant harness manages the fuel pump via a new relay and fuse, so that is what freed up S3.
I installed the rear harness yesterday...went pretty well, it is in place and fits properly although I need to move it about 3 cm forward to give enough room for the fuse box to have a little spare wire length. Pics to follow.
One question for readers....does anyone have a picture of where the starter cable (big cable from battery to starter) goes through the fuel tank area?
There are two holes there, a big one (about 3 cm) and a smaller 15 mm hole...which one to use? Anyone with a picture of a later car ('88 or '89) showing where the starter cable runs in the fuel tank area/well would be greatly appreciated to confirm...I would specifically like to see the hole used and the grommet used if the larger hole is the one used (I have a few to choose from and they are not separately called out in PET).
Ok, time for an update. I've been fooling around with lots of stuff, an unfortunate amount of time is spent searching for parts....either the original part which is in one of about 8 big storage boxes that hold them all, or in my new parts stashes or, and most difficult, when a part was disassembled to get some parts plated, others elements new and some old...well, my old brain can't remember it all. Spent the morning finding all the parts for the central lock rod...some new, some replated, some original.
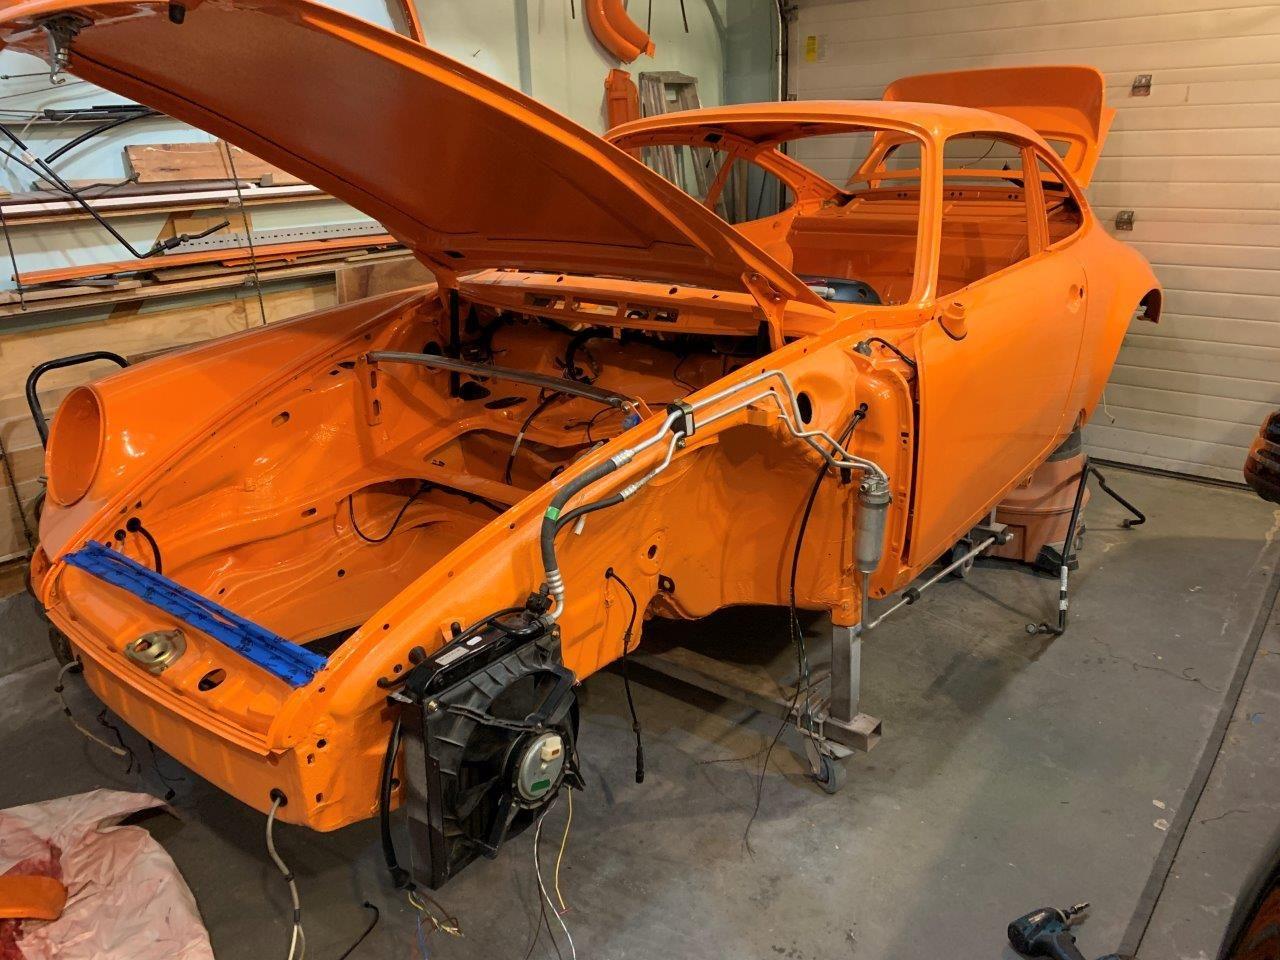
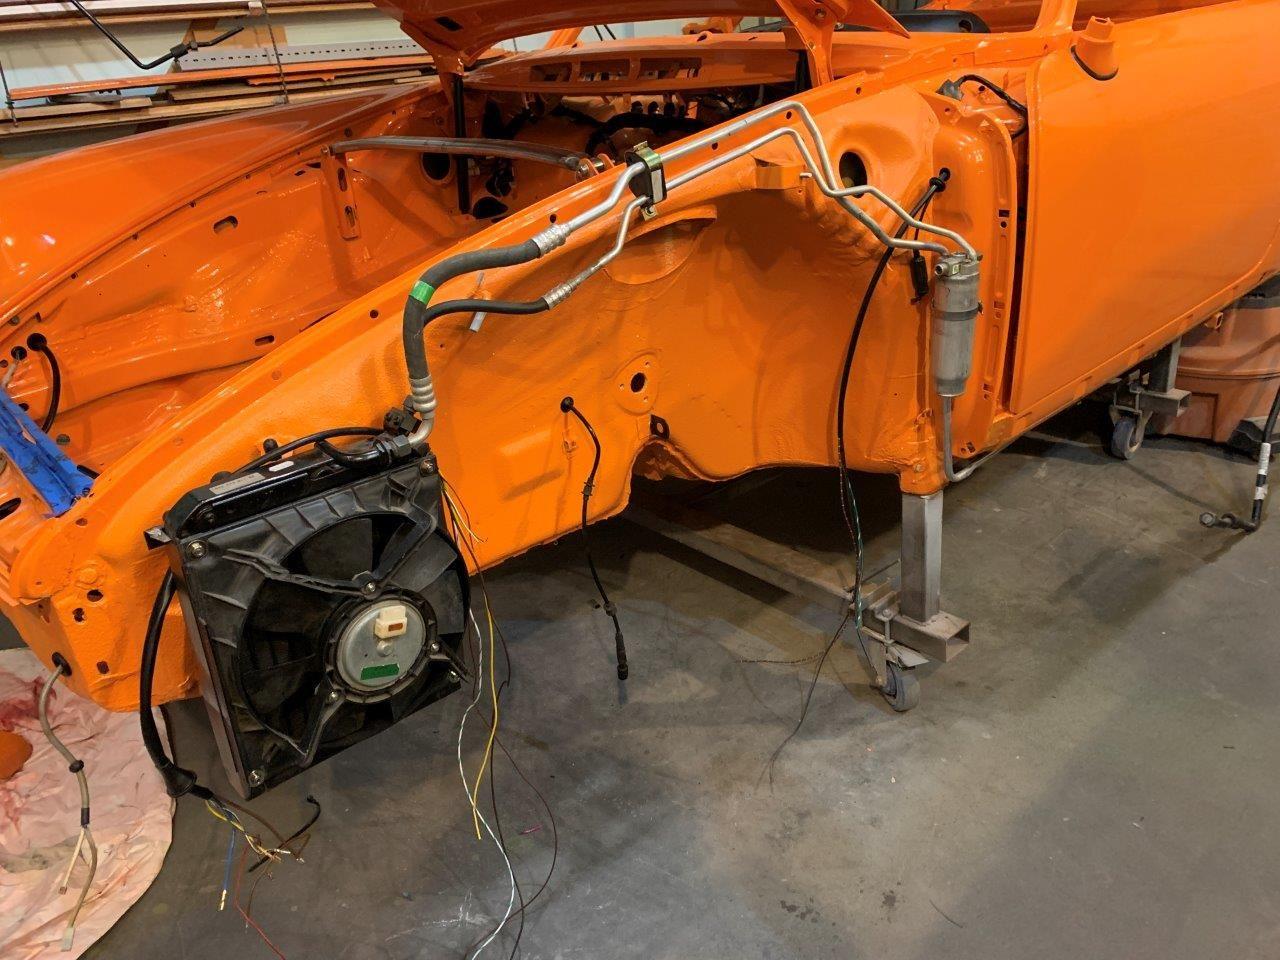
Front compartment with AC condenser in place, getting the lines to it. These are 964 lines, the suction will go all the way to the engine compartment but the pressure side will be all rubber hose as it is way easier to fit. This stuff fit very nice...
Front view, just fitting the AC condenser and piping
Panel in, AC wiring in, brake pad warning in, cruise wiring in, instruments hooked up, relay bases in place and ready for relay install.....happy with my strut brace, the "X" still needs to go on, but it may have to wait. All bronze bushings throughout, will be powdercoated
Still not happy with the mass of wires around the fuse box, but the strut brace is looking good
Man, I love North Hollywood Speedometer, note the custom EGT/CHT where the clock used to be. I have the extended steering shaft, NLA as according to Porsche I got the last one when I bought it a few years back. Have the matching hub and steering wheel....I am 190 cm so like the steering wheel closer to me
Interior wiring is just laying there for now, all in good time
Quite happy with the 964 fuse box, all tidy...the Rasant fuse box will go just ahead of it, using the original coil mounting bolts.
AC condenser very close to final install, need to fiddle with the upper mount a little as it is fairly tight to the fender
Where did you get the rear bumper ends? They look like the ones that Aase sells. You mentioned that they were ok but not great?
Also are you going to run a rear deck lid condenser for the A/C along with the 964 front condenser?
At this point no, but it is an option down the road if it turns out I need it. The car is going home to the Netherlands and to be truthful, AC is not that big of a deal and I can deal with "average" cooling unless we end up spending a bunch of time in Italy or Spain in summer.
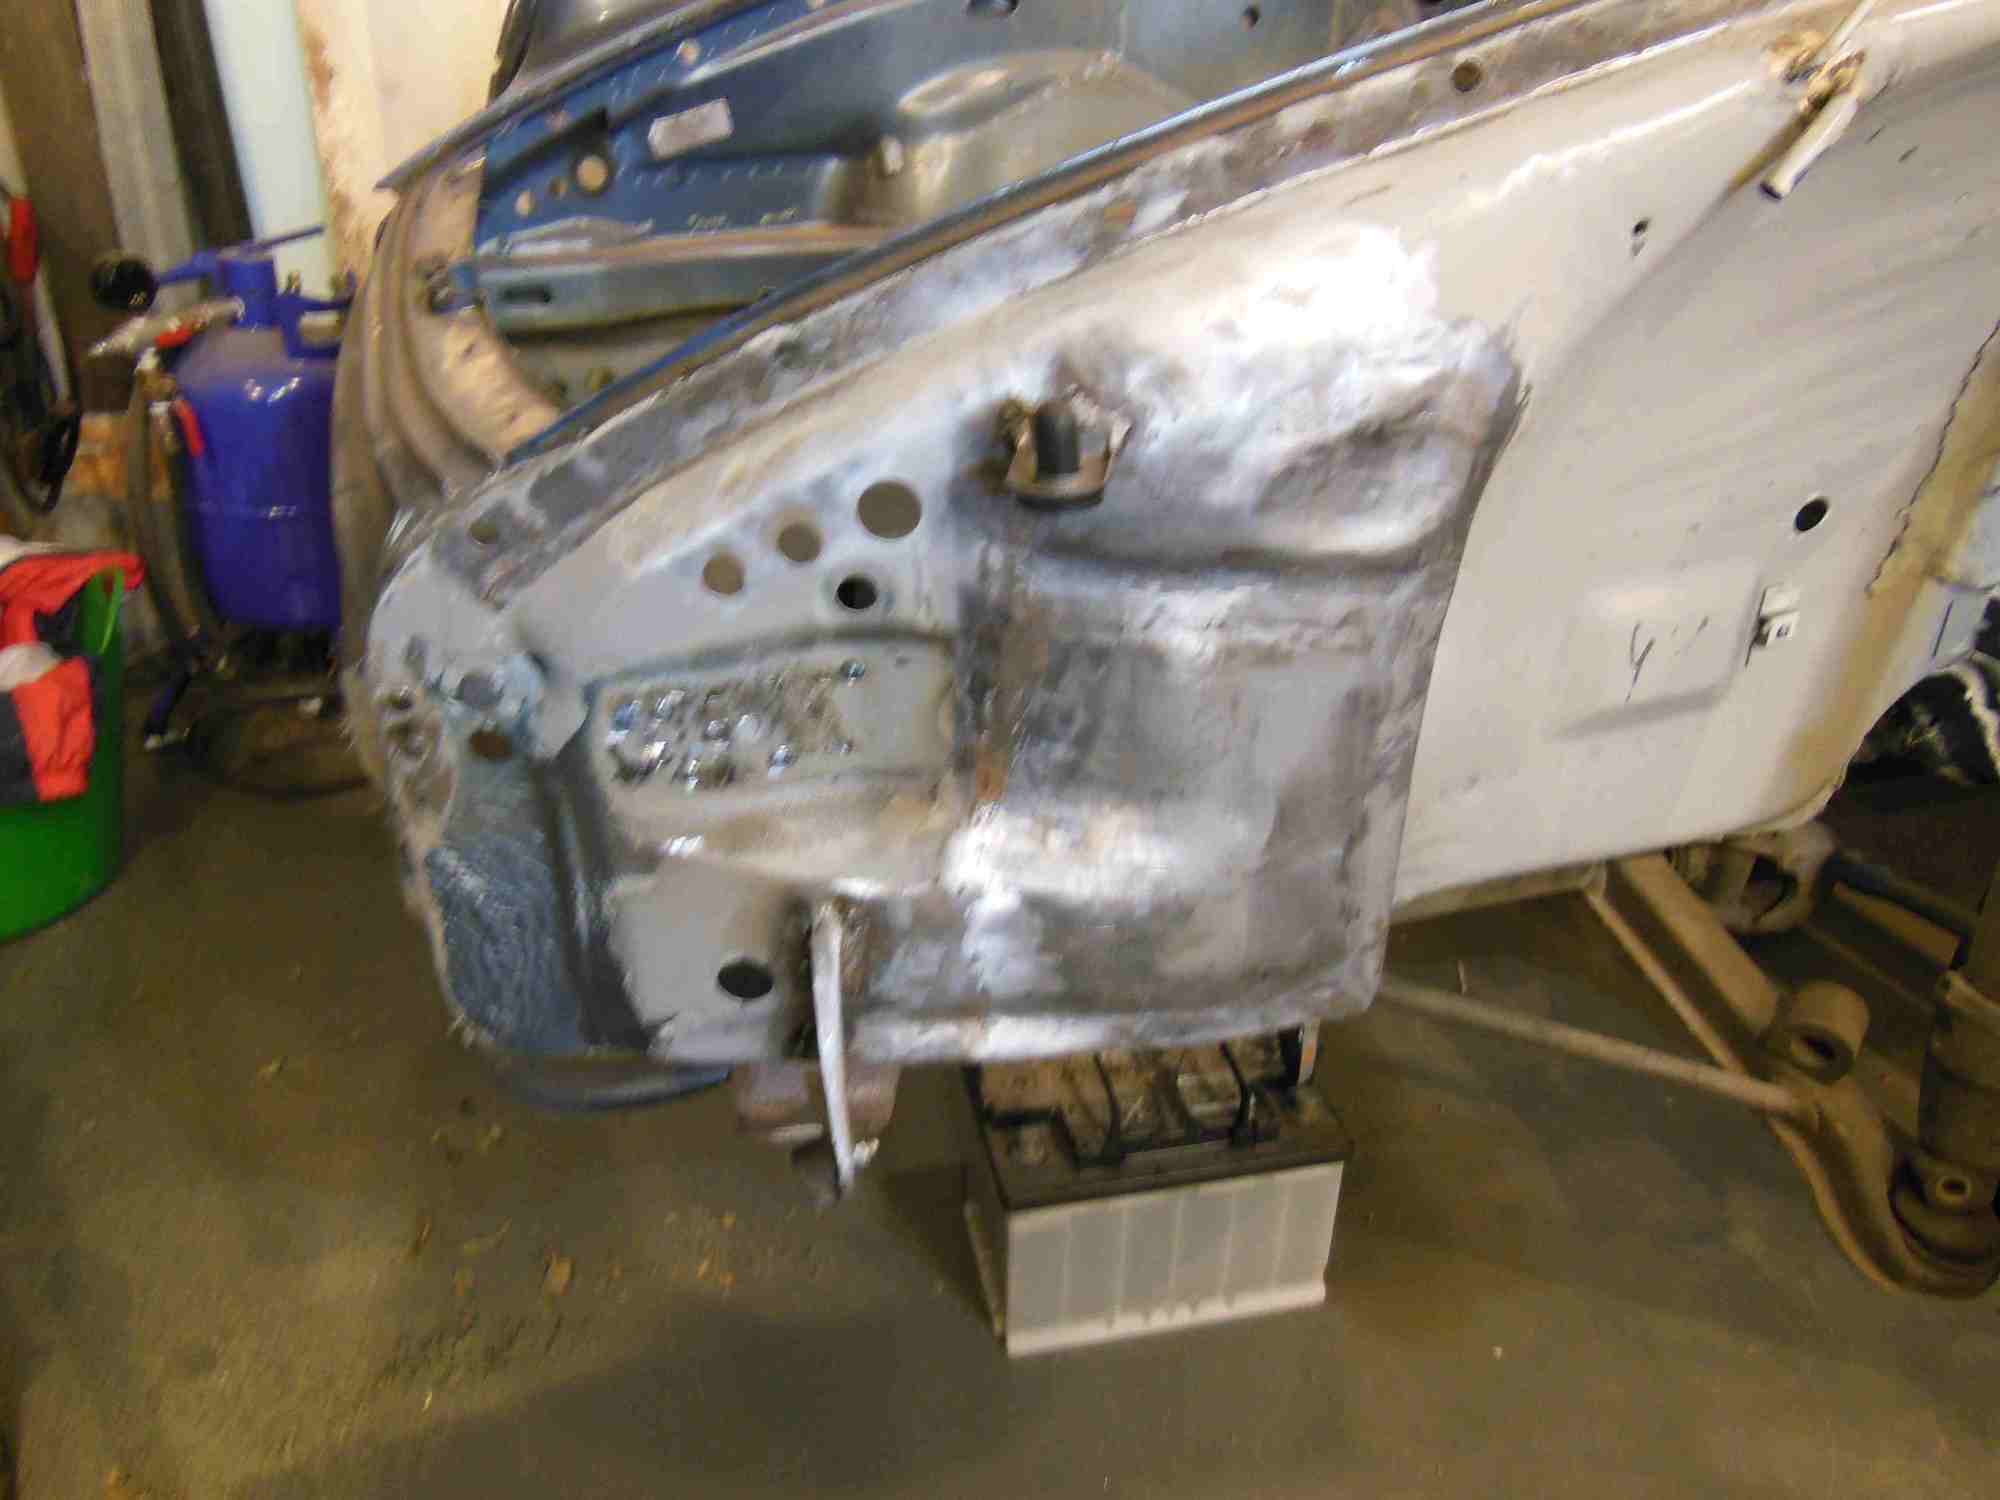
As for the rear bumperettes, I fabricated them from some wrecked ones from a pre-1969 pair, it was a bit of a pita, but not that hard...just time consuming and since the original parts were pretty well shrapnel to begin with, they were never going to be great. Here are some pics of the process..under the relatively nice paint of the bumperettes, there was a ton of plastic filler and not nice stuff...plus of course they are too long for a later car, plus I had to fab the curvy shape to match the fender.
I finish with lead, so there is lead in those final products, not much...less than 1 mm everywhere, but it ought to be durable. I also wanted to avoid tearing out the rear bumper mounts so I fabbed a custom mount using the stock '89 bumper supports and a mount in the bumperette...issue was maintaining alignment, strength and also keeping the other parts in the right place...
Putting in the curve, small slices to allow it to bend, using gas welding to allow me to form it...MIG is too hard...and then a small fill strip. I usually do not use filler, if you use a small tip you can just fuse the two ends together into one piece which makes for a nicer product Roughed in, you can see where I sectioned it and the newish RS curve Inside with reinforcements and with the supporting rod (which needed to be shortened and bent to fit the new part. This is only anti-rust spray on it at this point..it all got bead blasted and then proper Glasurit paint
Here a bunch of pics showing how I fabbed the mounting points....pretty well self explanatory with the captions....
Rough in....just a steel tube from the existing mount to the bumper...rubber between the two Its tight in there There is rubber at the front of the tube, plus under the (stock) clamp, plus on the bumperette The rear vertical and externally visible overrider/bumperette mounts on the T piece...it was pesky You need the reinforcements to ensure the two horizonal pieces stay where they should Roughing in plug for exhaust cut out Near finished First mock up With overrider Ready for prime and paint
Oh sigh....well, shall we say I have had a few challenges.....spent a couple of years in Colorado away from the car, quite a few years working 10-14 hour days at my work (I am semi-retired now)...and throw in a divorce that got ugly, marriage to a wonderful lady and you understand.
Oh sigh....well, shall we say I have had a few challenges.....spent a couple of years in Colorado away from the car, quite a few years working 10-14 hour days at my work (I am semi-retired now)...and throw in a divorce that got ugly, marriage to a wonderful lady and you understand.
A coach once said to me "Life is not a race -- you don't win by getting to the end first." Great to see you are able to enjoy the hobby, regardless of the time away from it.

 11-21-2020, 06:23 PM