

Budget 911 Engine Refresh Adventure, Cant Afford Pros, DIVE IN
 10-13-2020 | 03:32 PM
#61

Nope, leakdown checked out okay, and headstuds were fine, so just going to send it for now.
They're definitely steel, one of them had a tiny bit of rust inside on one of the lips. Very robust, nice quality.
They're definitely steel, one of them had a tiny bit of rust inside on one of the lips. Very robust, nice quality.
10-16-2020 | 11:42 AM
#62
Another quick update on valve adjustments.... this was.... super easy. Am I doing this right? It was just like doing any other car except it required a funky feeler gauge. I know htey make all sorts of complex tools for this, but why? Is there a benefit to buying those expensive tools over just using a feeler like this?
10-16-2020 | 03:54 PM
#63
Team Owner
i think anyone with experience using a feeler gauge will be fine , the feeler drag is somewhat subjective and getting in and around the valves with the engine in place can be tricky ... overall its not magic.
10-17-2020 | 05:06 AM
#64
Addict
Lifetime Rennlist
Member
Lifetime Rennlist
Member
As "theiceman" (a Kimi fan here?) said, you're fine with just the bent feeler gauge you have. It needs a little
practice, but basically very easy.
I would suggest that you don't loosen the adjustment, check play first. Usually you don't need to adjust all valves.
If you can move the feeler gauge even with some difficulty, play is OK. Now when you have the engine out, you
could experiment to verify your valve play with a dial indicator. This way you get a feeling what play you get with
what feeler resistance, sorry about my poor english. Let me know if this don't make sense.
You need a quality toolbit to loosen / tighten the flywheel nuts. Try to wedge something between the tool and
engine stand so the bit can't slip from the very shallow bolt head. It's quite some time I did this but remember
having something to keep the bit in the bolt head. Resist the temptation to grind the bad toolbit shorter as it will
soften and you can end up screwing up the bolt head > big trouble.
Nice videos, these should be "sticky" when you are finished as they would definitely help others.
10-24-2020 | 05:02 PM
#65
Yeah, not looking forward to doing it with the engine in.
@ Vane: No dial indicator here, but the fact you're talking about having 'quality' bits for hte flywheel bolts.... yeah. First hand experience of soft chinesium bits, in this next video lol. Had to upgrade halfway through the installation to get better quality 12 point bits!
So I'm pretty stoked about this guys, I found a CRAZY deal on a Sachs Power Clutch kit on Ebay, seller is in the UK and selling them for $350 which is the cheapest price I can find anywhere. Pelican's price is over double that. So I 'watched' the auction, and a day later he sent me an offer for $325!!!!!! INSANE! Shipping was fast, super happy with the purchase, here is dudes ebay listing if anyone else wants to scoop this deal!
 https://www.ebay.com/itm/Genuine-SACH...
I wound up measuring the weights of the stock pressure plate vs the aluminum sachs one in the video, and not only was that significantly lighter, even the clutch disc itself was 7-8oz lighter! I wound up keeping my stock flywheel and just getting it resurfaced, but I really feel like this is the better way to lose rotational mass if you need to buy a clutch kit anyway.
Also, I found out my throwout bearing was assembled wrong THE ENTIRE TIME IVE OWNED THIS CAR (7+ years now!?). Buttoned her up and ready to keep moving, waiting on Len's fuel lines and my intake runners.... once I have those, I should have everything I need to put the car back on the road!
@ Vane: No dial indicator here, but the fact you're talking about having 'quality' bits for hte flywheel bolts.... yeah. First hand experience of soft chinesium bits, in this next video lol. Had to upgrade halfway through the installation to get better quality 12 point bits!
So I'm pretty stoked about this guys, I found a CRAZY deal on a Sachs Power Clutch kit on Ebay, seller is in the UK and selling them for $350 which is the cheapest price I can find anywhere. Pelican's price is over double that. So I 'watched' the auction, and a day later he sent me an offer for $325!!!!!! INSANE! Shipping was fast, super happy with the purchase, here is dudes ebay listing if anyone else wants to scoop this deal!
I wound up measuring the weights of the stock pressure plate vs the aluminum sachs one in the video, and not only was that significantly lighter, even the clutch disc itself was 7-8oz lighter! I wound up keeping my stock flywheel and just getting it resurfaced, but I really feel like this is the better way to lose rotational mass if you need to buy a clutch kit anyway.
Also, I found out my throwout bearing was assembled wrong THE ENTIRE TIME IVE OWNED THIS CAR (7+ years now!?). Buttoned her up and ready to keep moving, waiting on Len's fuel lines and my intake runners.... once I have those, I should have everything I need to put the car back on the road!
11-12-2020 | 11:50 AM
#67
Quick episode; just leveling the valve covers, but you can see how the powdercoating turned out, pretty geeked about how ridiculous this looks in person, they look like gold bars.
11-14-2020 | 12:43 PM
#68
Super quick update, just installing a Rennline "Outlaw" Stainless Fan Strap. Going to try to crank all weekend; want to get this thing driveable before it's all salty and gross. Plus I want to move my new jag project into the garage.
Time is goign to be tight. $700 worth of fuel lines just got here yesterday.
11-14-2020 | 09:22 PM
#69

https://www.youtube.com/watch?v=kRIR9orBB3k
Super quick update, just installing a Rennline "Outlaw" Stainless Fan Strap. Going to try to crank all weekend; want to get this thing driveable before it's all salty and gross. Plus I want to move my new jag project into the garage.
Time is goign to be tight. $700 worth of fuel lines just got here yesterday.
11-16-2020 | 12:35 AM
#70
Nah, it's definitely seated. Triple checked it, even tried tapping it around with a piece of wood. There's a pin on the bottom that goes into a slot, so there isn't much room for error.
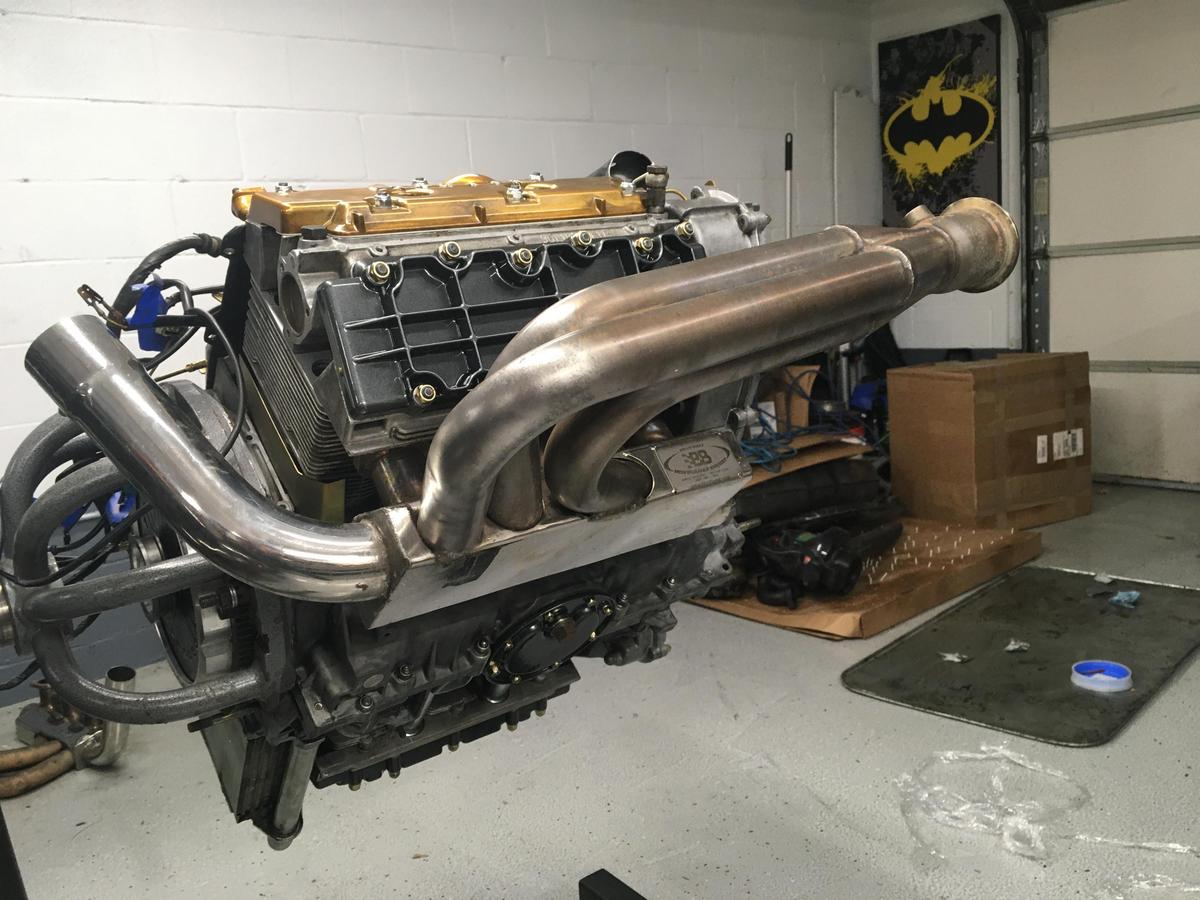
Made some progress today...
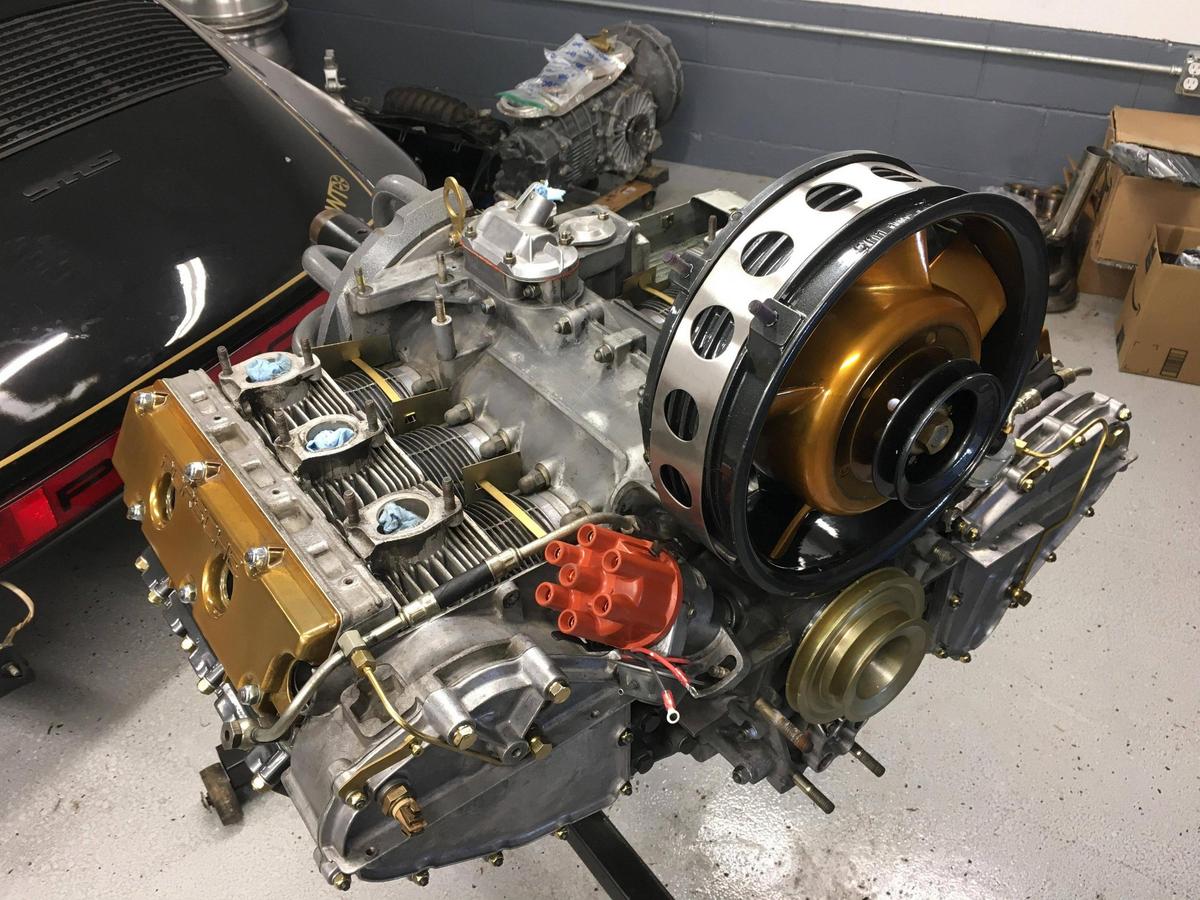
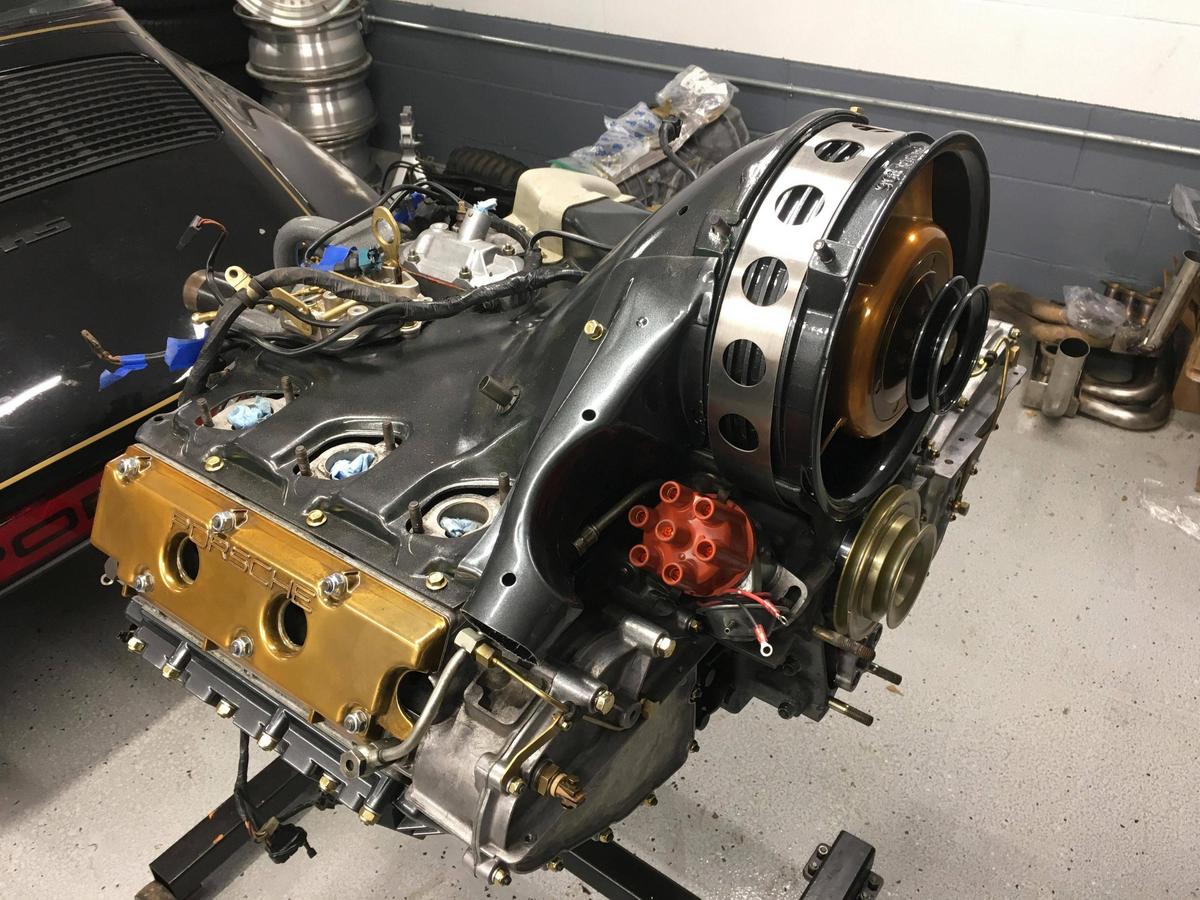

Runners just sitting there because I wanted to visualize what's been in my head for 6 months now. Really starting to get stoked. I think a lot of people use the wrong colors for emphasis on this engine; if you paint the timing chain covers black, it looks badass on the stand but once you have black shrouds/engine tin it just makes the whole engine disappear in the engine bay. Purposefully keeping raw alumium next to the graphite/charcoal engine tins, with the gold for "pop".
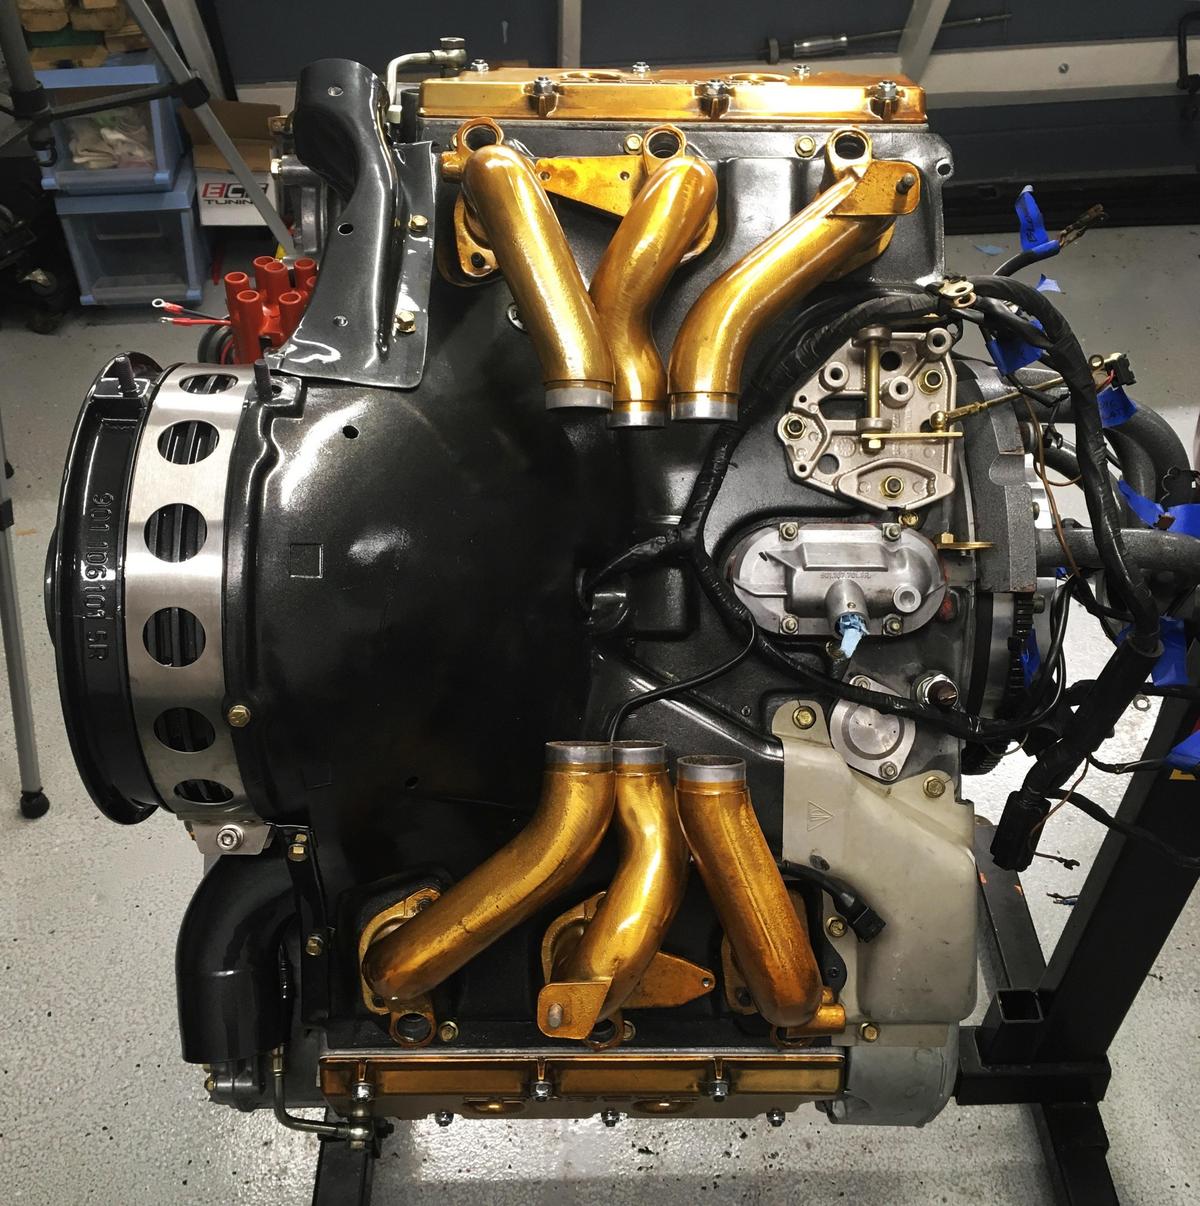
Top view, before I started tearing into the CIS system, just cuz it's a rare view of a 911 engine, really shows off the design of the runners pretty well:
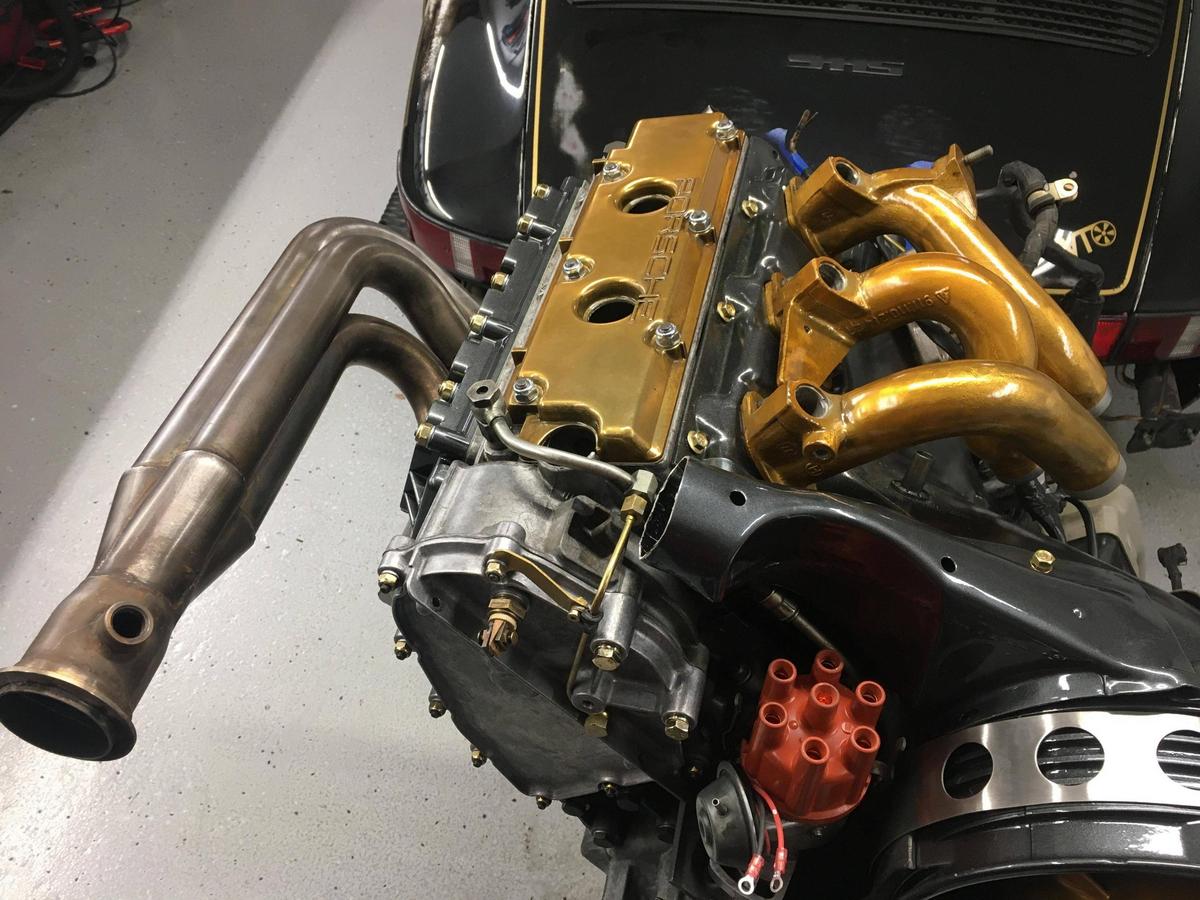
Test fit the exhaust... yeah... I am still aware it's way too big for this engine, and my performance will suffer. I'm still going to run it. I don't know for how long before I switch it to something else, but this system is just too badass not to use for a bit. Maybe I'll eventually build a 3.6 to justify it.
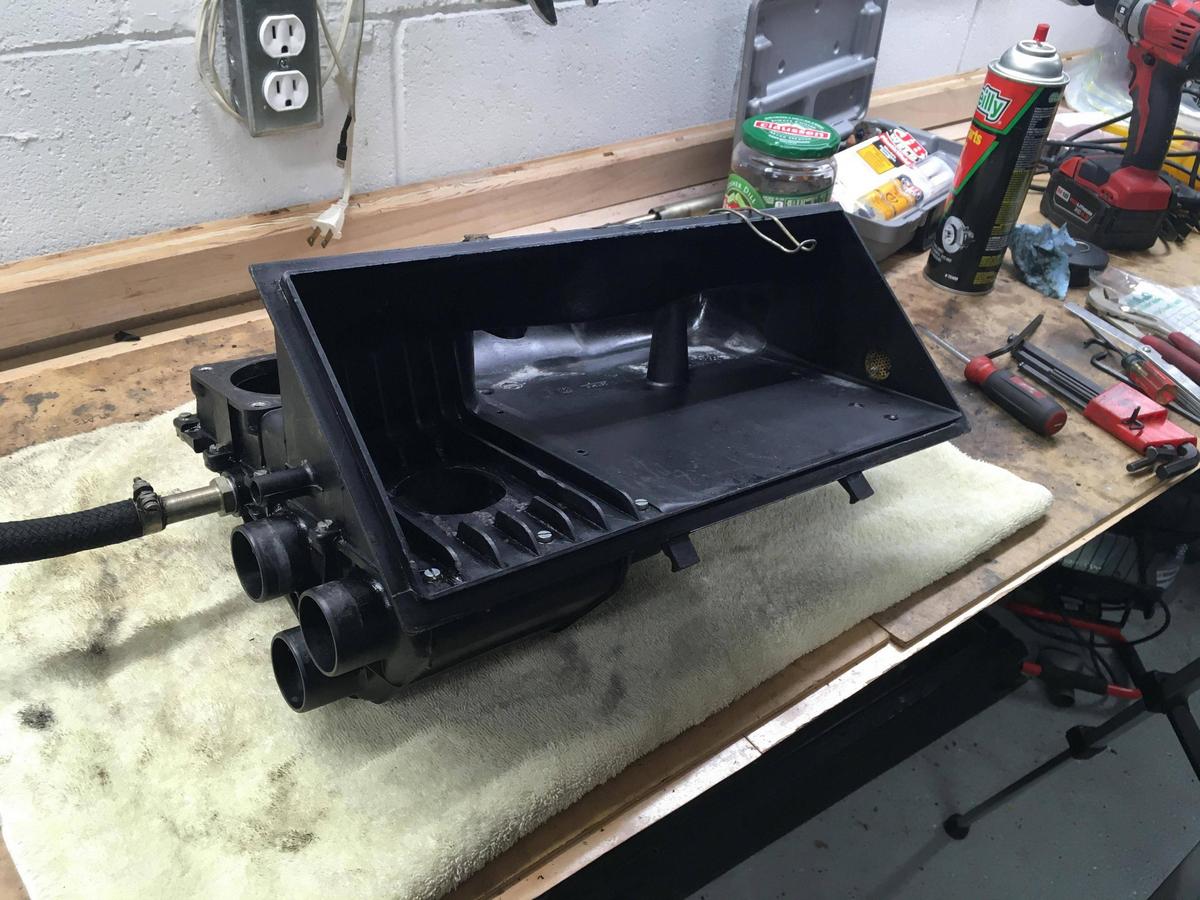
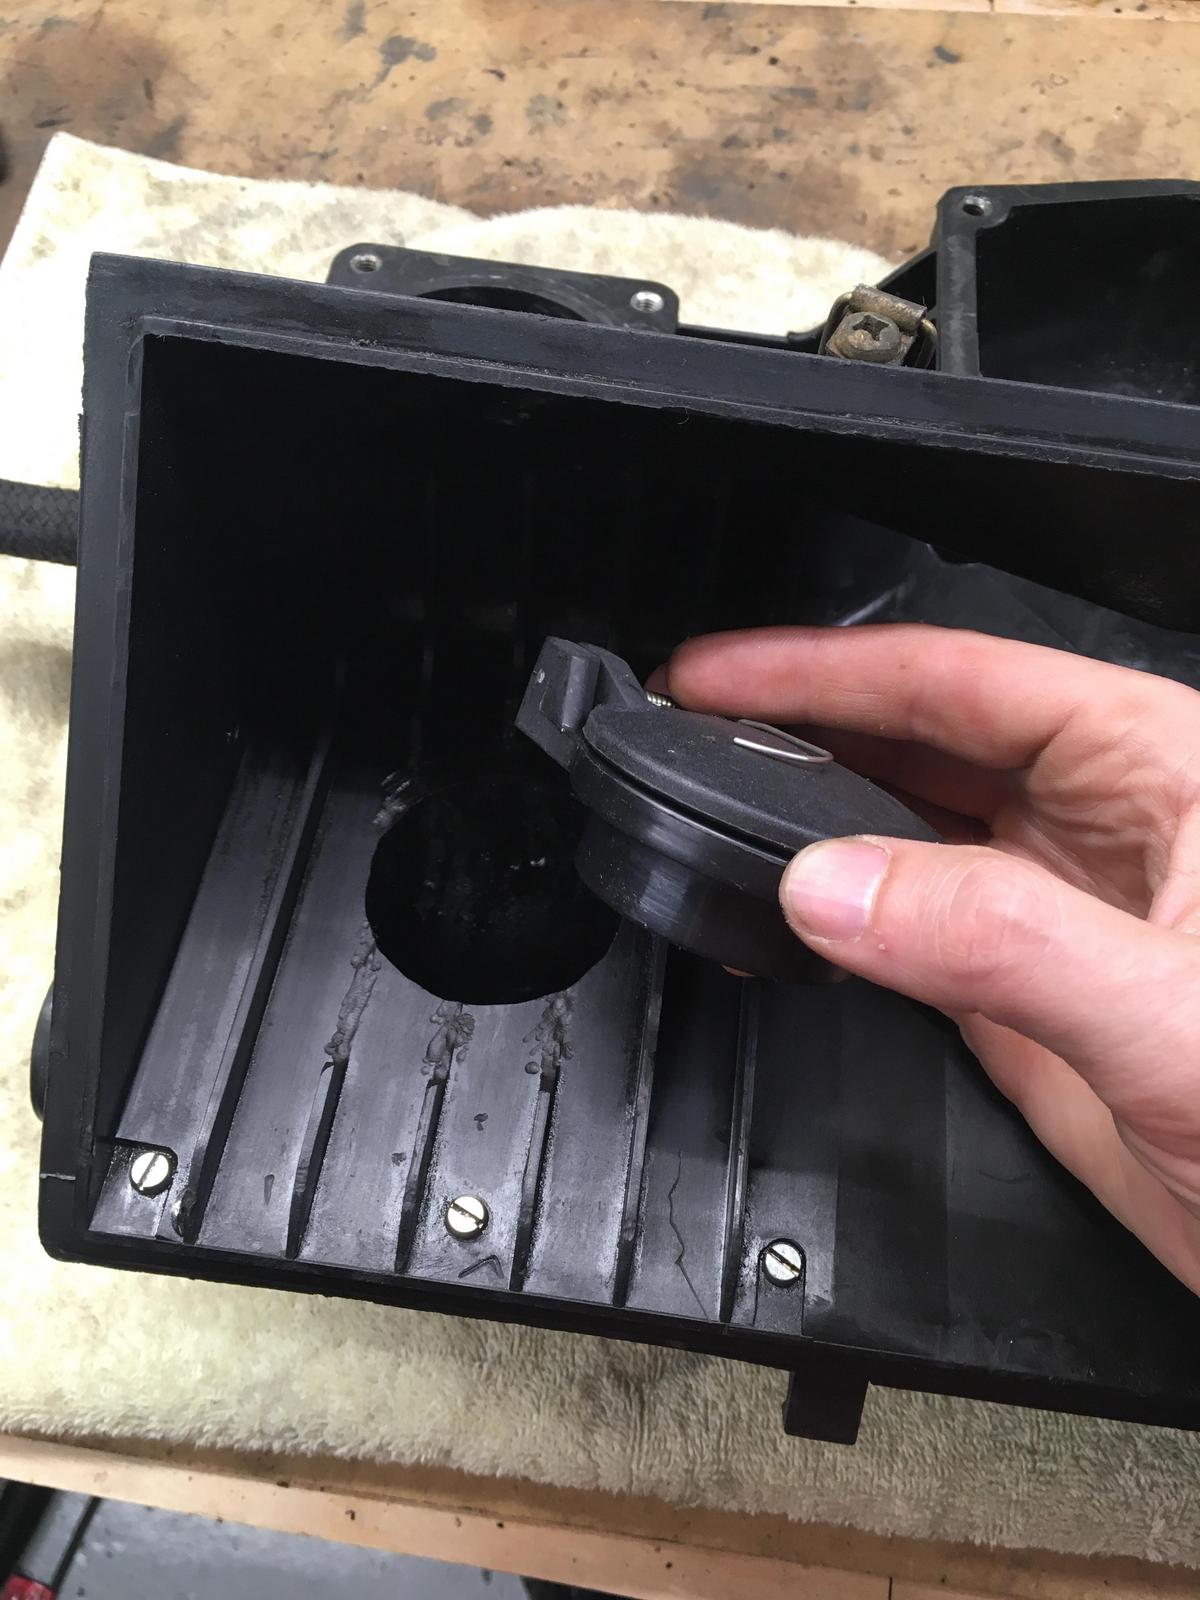
Wound up tearing the CIS system all the way down to the airbox. Fixing a split seam w plastic epoxy, and swapping the machine screws for nuts/bolts/washers for more compression. Should hold okay, also installing a pop off valve to prevent it from splitting in the future. THing was DISGUSTING. I probably spent 2 hours cleaning this so far...
Made some progress today...
Runners just sitting there because I wanted to visualize what's been in my head for 6 months now. Really starting to get stoked. I think a lot of people use the wrong colors for emphasis on this engine; if you paint the timing chain covers black, it looks badass on the stand but once you have black shrouds/engine tin it just makes the whole engine disappear in the engine bay. Purposefully keeping raw alumium next to the graphite/charcoal engine tins, with the gold for "pop".
Top view, before I started tearing into the CIS system, just cuz it's a rare view of a 911 engine, really shows off the design of the runners pretty well:
Test fit the exhaust... yeah... I am still aware it's way too big for this engine, and my performance will suffer. I'm still going to run it. I don't know for how long before I switch it to something else, but this system is just too badass not to use for a bit. Maybe I'll eventually build a 3.6 to justify it.
Wound up tearing the CIS system all the way down to the airbox. Fixing a split seam w plastic epoxy, and swapping the machine screws for nuts/bolts/washers for more compression. Should hold okay, also installing a pop off valve to prevent it from splitting in the future. THing was DISGUSTING. I probably spent 2 hours cleaning this so far...
12-12-2020 | 12:53 PM
#73
Ok, update, but I gotta say this part was worse than everything else so far. The CIS rebuild.
I go through how to
So here's the kicker: After installing all this to the engine, I remembered that when I used the engine hoist to lift it off the ground onto the engine stand, I removed the intake/fuel system.... so... unless I come up with a creative way of getting this back onto the ground, I might have to take all this **** back OFF, install the engine leveler, lift it off the stand, place it on the ground, then reinstall it. I really don't want to do that... so... if anyone has any ideas, I am all ears.
I go through how to
- rebuild the intake runners, new fuel injector inserts/o rings, new boots/sleeves
- how to install them on the airbox and keep them level
- Resealing the cold start valve
- Cleaning and reassembling the air meter & throttle body
- EGR delete
- Spark plug wires/routing, ignition coil installation
- Airbox supports and modifications
- Install WUR, AAR
- ALL NEW hoses
- Vacuum line routing
So here's the kicker: After installing all this to the engine, I remembered that when I used the engine hoist to lift it off the ground onto the engine stand, I removed the intake/fuel system.... so... unless I come up with a creative way of getting this back onto the ground, I might have to take all this **** back OFF, install the engine leveler, lift it off the stand, place it on the ground, then reinstall it. I really don't want to do that... so... if anyone has any ideas, I am all ears.
12-12-2020 | 04:01 PM
#74
Addict
Lifetime Rennlist
Member
Lifetime Rennlist
Member
I would install the exhaust now on engine. My 3.2 exhaust are really flat, it depend how your headers look like,
are they flat so that you can have your engine on trolley or how you will move it under the car.
Can't you make a similar lifting system like they use when lifting boats? Use flat sling and something to keep the
slings vertical up from engine so they don't squash your CIS components. Use some padding so the slings don't
ruin the paint on your valve covers. Hope I understood your problem correctly?
