When you click on links to various merchants on this site and make a purchase, this can result in this site earning a commission. Affiliate programs and affiliations include, but are not limited to, the eBay Partner Network.
I searched for discussion of performing a wheel alignment at home but couldn’t find one. Anyone have a home tool alignment kit they are pleased with for use on an ‘81 SC?
I found plenty of discussion for race setup or lowering, etc., but my use is regular street and highway use. I think my car is “jumpy” at speeds above 70mph. When I study tire wear, I don’t see anything. But my visual studying makes me think my driver’s front wheel has more negative camber than the left wheel.
You can do everything you need to do with 4 jacks stands, a digital level that has a degrees setting, a tape measure, math and a good repeatable procedure. Is it as convenient as a an alignment rack? No? Can you do an acceptable job? You bet. Race teams have been doing it that way for decades.
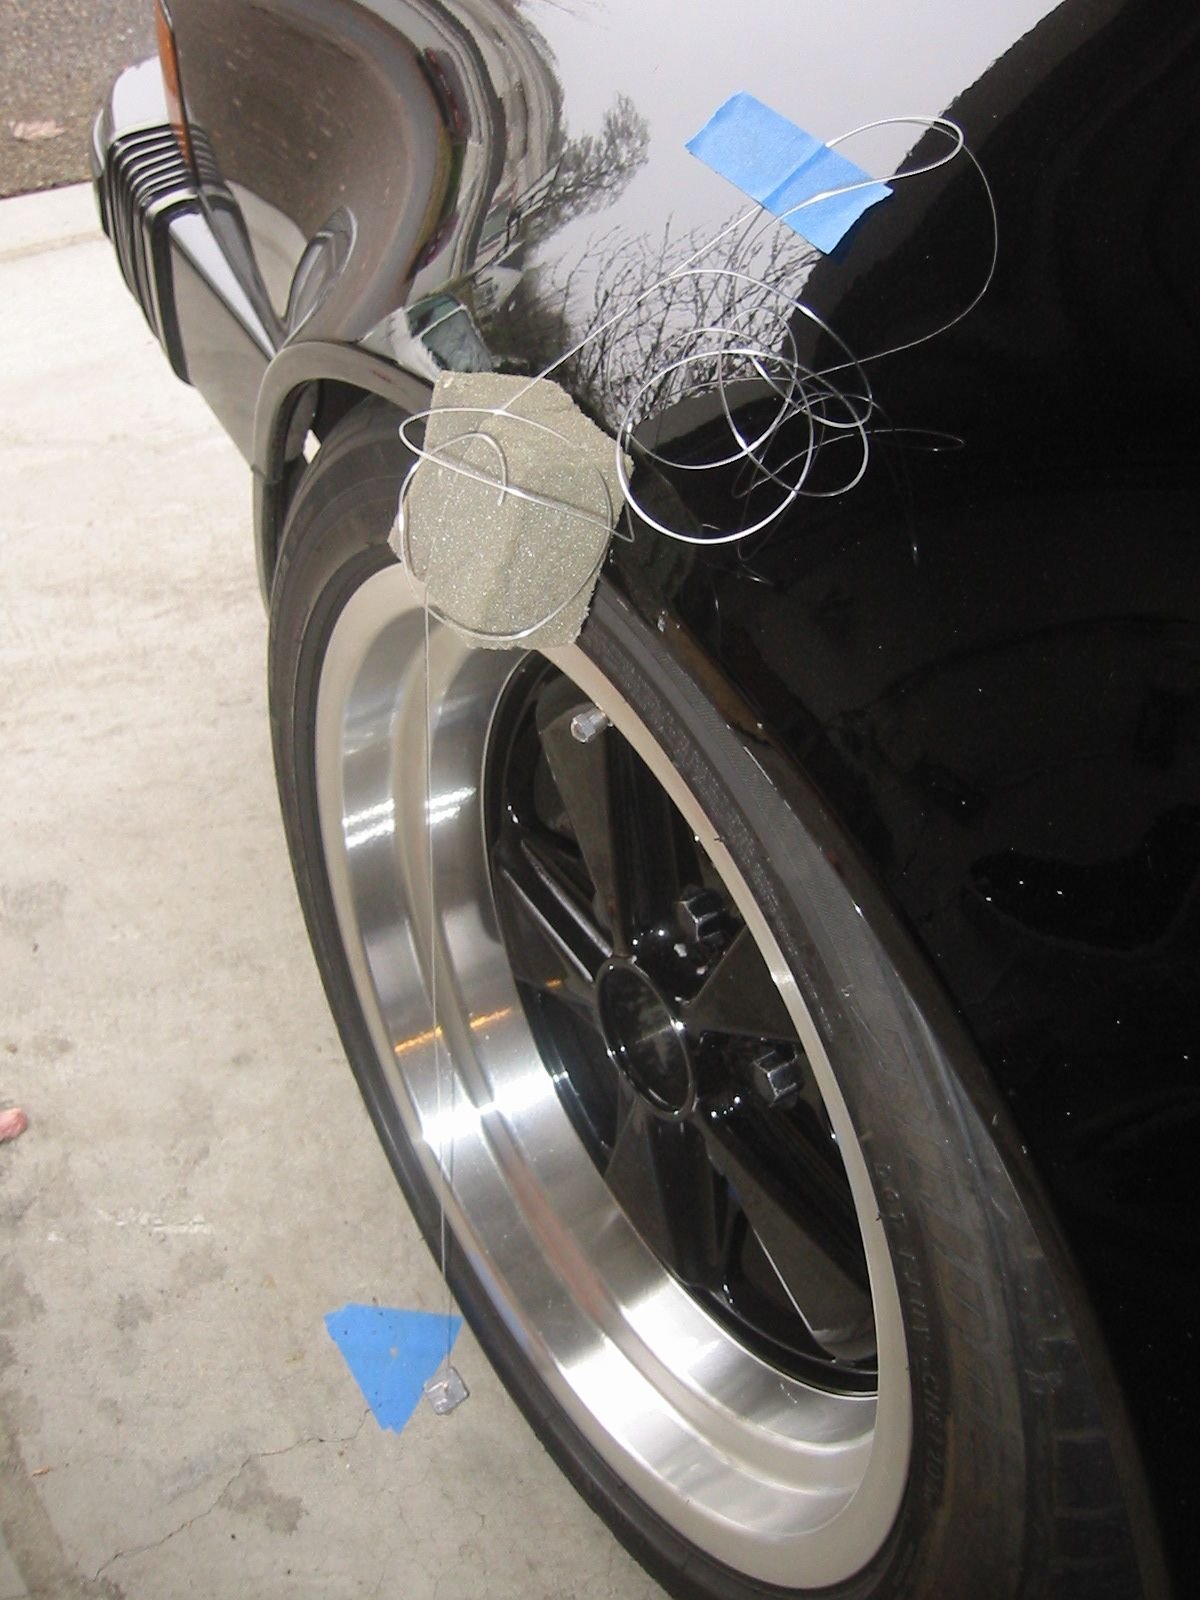
I'm a big fan of string alignment. Two conduit pipe on jack stands and fish lines. Used SmartStrings but amount of work necessary vs just strings is not that much different while I have more confidence in just strings. You don't need camber gauge for camber measurements. Just a string with heavy nut tied to it which should be held on to the fender with a masking tape, and a ruler to measure rim to string distances. when you need more distance between the string and the wheel, just put some sponge, rubber, or any non-paint damaging material sandwiched between the string and the fender. Only thing I won't be able to measure easily is caster but as long as the car drives straight, i assume the cambers are even.
This is a link to a guy using string to align his 914. The last page has a diagram worth printing illustrating a string use setup.
There is no caster measurement, just a suggestion for street use “in the middle of the range.”
I'm a big fan of string alignment. Two conduit pipe on jack stands and fish lines. Used SmartStrings but amount of work necessary vs just strings is not that much different while I have more confidence in just strings. You don't need camber gauge for camber measurements. Just a string with heavy nut tied to it which should be held on to the fender with a masking tape, and a ruler to measure rim to string distances. when you need more distance between the string and the wheel, just put some sponge, rubber, or any non-paint damaging material sandwiched between the string and the fender. Only thing I won't be able to measure easily is caster but as long as the car drives straight, i assume the cambers are even.
The only advantage I can see to the SmartStrings setup is that it moves with the car so if you aren't working on slip plates and need to move the car to settle things after coming down off the jacks then it saves you resetting the strings.
The only advantage I can see to the SmartStrings setup is that it moves with the car so if you aren't working on slip plates and need to move the car to settle things after coming down off the jacks then it saves you resetting the strings.
Ok, so I started off by measuring the rim edge of the 16” wheel, which is 17.5”. I cut my nice aluminum level off at 17.5” so I could just place it against the rim inside the tire bead. Both were horribly negative camber for street use, which would explain the bad jump I get from speed bumps. I used a measure to find the “opposite” side of the triangle to see what degree they were leaning in. The driver’s side measured .375” to get the level bubble in the middle and the passenger side measured .625”.
Making my high school Trigonometry teacher proud, I remembered this required trig, so I looked up what to use.
Tan angle = opposite/adjacent. Or angle = inverse tangent (.375/17.5) which shows driver’s side 1.2275 degrees and pass side 2.0454 degrees.
Next came chiseling away all the locking black crap on the top off the struts and the locking plates. Holy crap is was 1/8” thick. Finally I was able to lever the strut out to decrease negative camber. I made visual mental notes on where the struts where front/back for caster adjustment and tried to keep it the same.
I moved them quite a bit, maybe as far as they could go to get them almost zero camber. Each time I’d work front end up and down a few times trying to settle it. (By the way, full tank of gas, spare in, nobody in seats.)
My end result was identical each side with negative camber of 0.41 degrees.
Drove the car at high way speed and it was wonderful. So much more stable at 80 mph. Checked with my level again and had same camber, so it stayed in place.
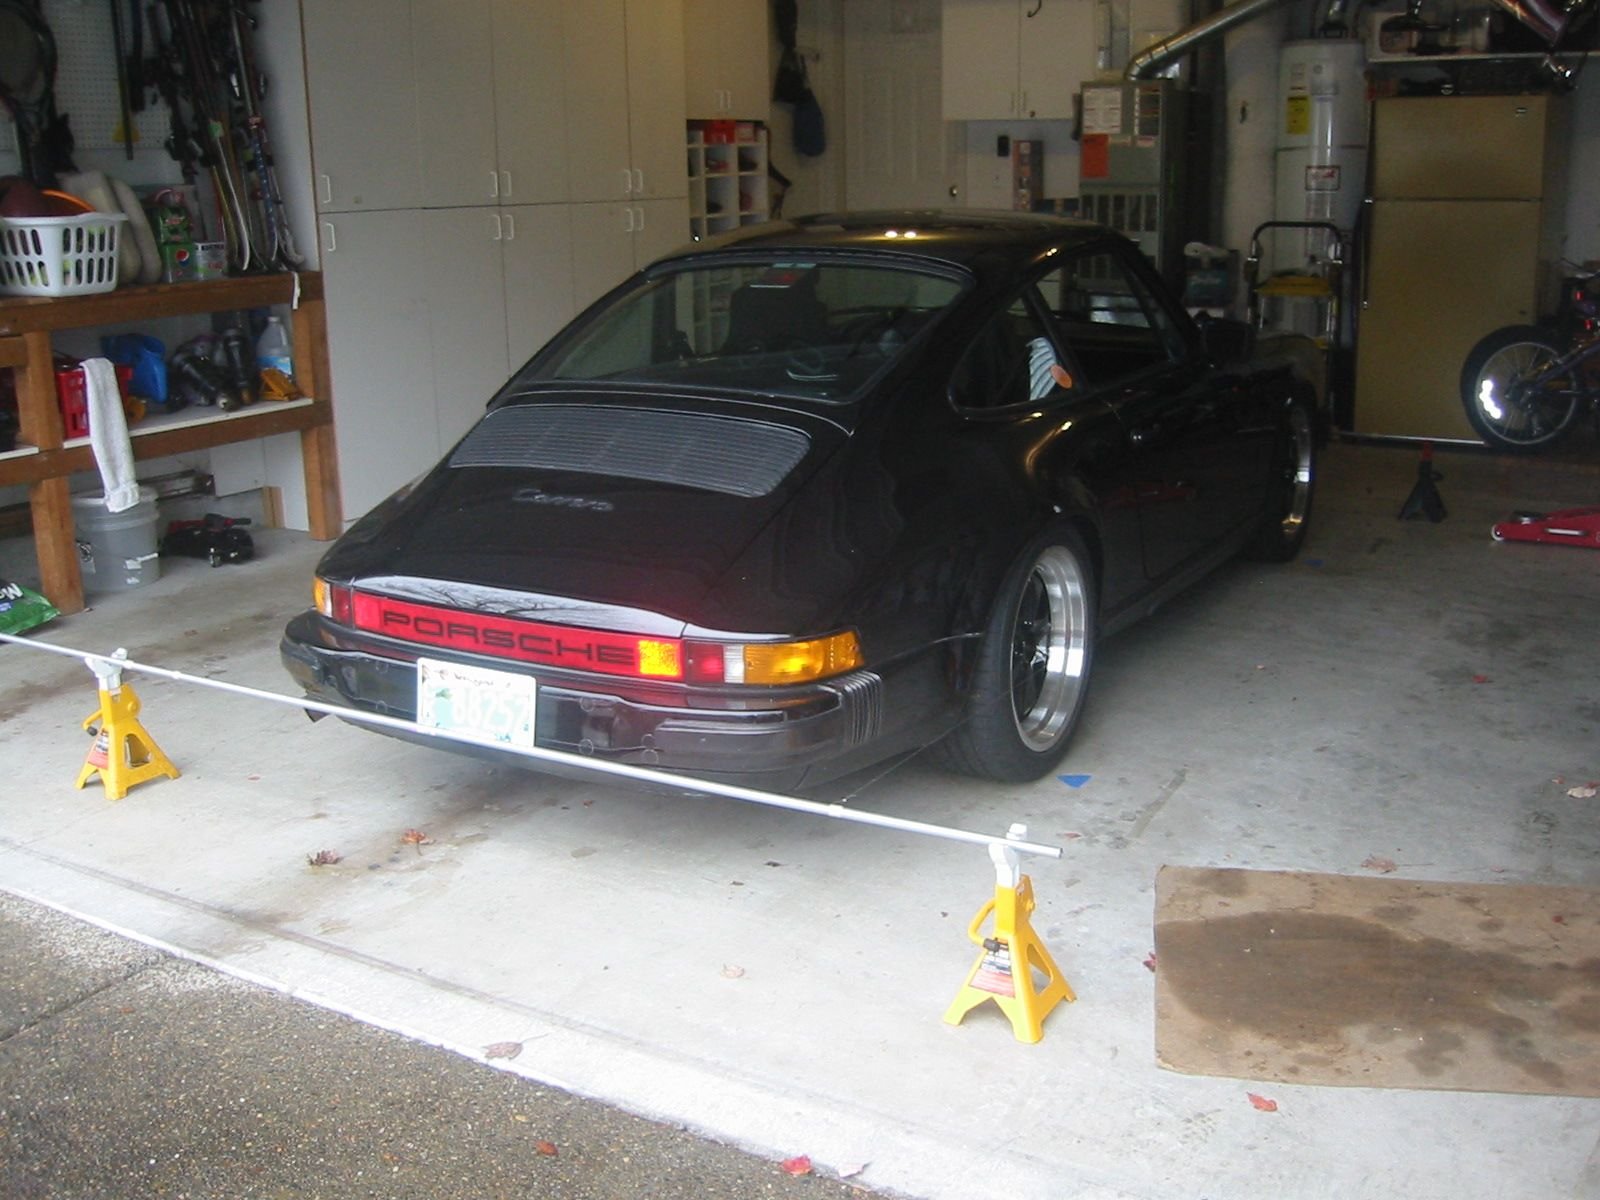
I used four large jack stands and fishing line to rig up a square around the car. Both lines were about 2’ longer than the car on each end. It took a lot of fiddling but eventually had it set where the string was 2” from the center of the front wheel hub and 2 9/16” from the rear wheel centers. The fishing line on each end was 65” apart. Close enough, my legs were getting tired of all the micro adjustments and multiple measurements.
Rear wheels, measuring from the outer lip of the rim, at 3 and 9 o’clock:
Left, rear was 2 21/32”, front was 2 3/4” thus toe-in of .09375”
Right, rear was 2 11/16”, front was 2 3/4”, thus toe-in of .0625”
The Bentley book says total toe-in rear is 10’ +/- 10’ I need to think about that. A minute is 1/60 of a degree, therefore ?
Front Wheels (Steering wheel perfectly lined up with gauges)
Left, rear was 1 5/32”, front was 1 5/16”; toe-in of .15625”
Right, rear was 1 19/64”, front was 1 11/64”; toe-in of .415025”
I’m shooting for 1/16” total toe-in or less to zero so both sides need adjustment.
Well crap, I can’t get to the 22mm nuts on the tie-rod very well on the ground. I wish I had cracked them loose before setting strings. Too tired to work any more tonight.
I’ll get the front in the air tomorrow and bust all four lock nuts loose. I read where 1/4 turn on the rod moves the toe 1/8” so it won’t take much.
Have them loose, car back on the ground set back up strings, and then adjust. whew!
did you work on making sure the floor is level? at least need level left to right. front and rear not so much.
looks like you're on a right track. I like learning things this way too.
comparing what i did for camber, yours is way too much engineering involved.
did you work on making sure the floor is level? at least need level left to right. front and rear not so much.
looks like you're on a right track. I like learning things this way too.
comparing what i did for camber, yours is way too much engineering involved.
Oh yes, my slab on the left side is very level. I was there when the poured it and really made them make it as level as possible. If anything, it has the slightest drop right to left as sitting in the car when parking. I see the a/c condensation drift that way.
Maybe it is time to rebuild my front end. As reported earlier in my post, my floor is level. I checked again when I got home yesterday. After driving my car yesterday about 15 miles, I eased into the level parking spot and put my level against the rims again. My negative camber has increased again showing about 1 degree negative camber. (I also have a degree measurement tool to hold against my square level I cut to 17.5", the lip-to-lip length of the rim just inside the tire bead. So my car after driving went from about .4 negative camber to 1 degree negative camber. There is no more adjustment room at the top of the struts to lean the wheel toward positive camber. I'm at the limit.
With the front end off the ground, I grabbed the wheel at 12 and 6 to rock the assembly. Both side had a small amount of movement. From behind, it appeared to me it was in the wheel bearing more than anywhere else. I cinched up the wheel bearings and most of the movement went away, however there still is a little movement. I was thinking maybe the lower ball joints have wear. I tried prying on them to see if I could get a little movement and think if there is movement, it is the thousands of inch movement.
I want this car to be enjoyed in regular daily street use. I'm not an autocrosser or track guy.
1) This is on an 81 SC - did these cars suffer from shock tower collapse?
I've been studying the exploded diagrams and think since I don't know if these pieces on this 53K mile car have ever been replaced, I would replace the lower ball joints, the rubber bushings for the wishbone, the upper rubber strut supporting mount. My struts' bounce control feels normal. My tie rod ends feel tight.
2) Tool required to remove the bottom ball joint nut?
Also, I worked on my toe-in. Again, my car is toed-in too much. I got the 22mm locking tie rod nuts loose fairly easily, but had to heat up the outer tie rod on the passenger side to get it to turn. On the driver's side, the inner tie rod threaded point won't let go. I had a hell of a time heating it up several times. I see i can just unscrew the assembly and take it to my workbench. I realize it is an upgrade to install the turbo tie rod ends, but one gives up the rubber bush on the inner rod connection, thus a lot of road feedback through to the steering wheel - correct? Again, I'd rather not stiffen up the suspension or tighten up the comfort of the rubber isolation on the inner tie rods.
3) Thoughts?
(In my XJ Jag world, many guys would install polyurethane bushings on the steering rack where rubber ones were and that stiffened up the play in the rack. - it can make a steering wheel vibrate and jump with every bump and for highway pleasure driving, not worth the irritation)
4) Am i missing something front suspension wise related to why my camber can't get to zero?
for camber, how accurate is your gauge? do my string method for more granular measurements. 1 degree of negative camber is not bad though. perhaps just focus on equal amount left and right.
I do suggest upgrading to turbo tie rods. I didn't like the job but I'm glad I did.
I have the special ball joint tool, but I didn't use. I used a large channel lock plier to remove and to install. I had the a-arm off the car and i could use lever with the a-arm on a vise. somehow i got it work. i was servicing the whole a-arm hence off the car.
For camber, I'm using a level floor, a cut off bubble level with assume very straight sides, and then measuring the angle two ways - first by holding an electronic angle reader along side the flat edge of the level, and second by using a machinist rule to measure the distance from the top of the level back to the lip of the rim followed by trigonometry. Pretty accurate when both results are so similar.
I've come to the conclusion my lower wishbone rubber bushings must be crushed combined with possible movement in the lower ball joint. I haven't measured the suspension height - center of torsion bar vs center of hub. Maybe my car is already sitting low in the front? Haven't studied this. This would give quite a bit of negative camber, correct? I also haven't measured the camber on the rear wheels.
Still debating why the need to upgrade the tie rods to the turbo ends. Without the rubber bushing on the inside end of the tie rods, doesn't the steering wheel receive A LOT more road feedback?


 07-13-2019, 08:43 PM