When you click on links to various merchants on this site and make a purchase, this can result in this site earning a commission. Affiliate programs and affiliations include, but are not limited to, the eBay Partner Network.
So finally going to start my SSI project. I have a few oil leaks from me engine build a couple of years ago so going to try and address those too if I can.
This all came off in half an hour, if I had not done a rebuild recently it likely would have been half a month !!!
Is this going on a SC? Are you using the the thick flange SSIs? Which muffler? TIA.
great questions.
I have a 78 SC which is thin flange from the factory.
To give a bit of history the thick flange exchangers I bought before my rebuild, so I new when I rebuilt I would have to put the longer studs in ( the longer studs and thick flange HE on the SC I believe started in 80 but not sure. ) . Also of note the later cars had a recess in the heads that a protrusion on the exchangers fit into. This protrusion had to be cut off my later exchangers. when I did my rebuild.
Adding to that the SSI exchangers I got were of the later style ( maybe even Carrera ) . so I had to cut off the protrution as well as a reducer on one of the heat inlets. Not a big deal with air tools.
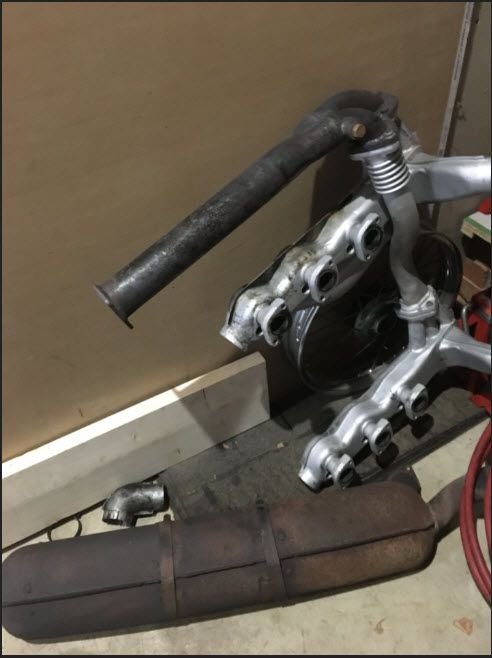
For a muffler I got one given . Its a Bischoff and It is part number. 911.025.02/ 1076
I am not sure if it will work but it is a 2-1 and I had to have a few things fixed on it. According to the guys on Pelican it is from a 76 reactor car. So we will see.
cutting off lip
patched and prepped muffler, got my oil , oil lines and gaskets !!
Got my oil lines off. Not too bad as i didn't over reef them two years ago. I knew i would be doing this project.
When i put my car on the ramps i forgot i had to pull the rear pass wheel. Had to put that side on a jack stand so it slowed me down a little.
Good luck with the oil line fitment! Go slow and don't tighten anything that doesn't feel properly aligned. I ended up having to bend my under engine line for the SSIs quite a lot, and don't try using heat it will discolor the line immediately!
Oil lines in ... everything fit perfectly. Not sure if its because i used actual lines off an early car. Not pelican reproductions. Took 15 minutes to install. Posted pic of my awesome home made tool also
Congrats on the easy fitting with the oil lines and the easy removal of the OEM system. I was scared to death to touch the old, rusty barrel nuts, but MAPP did the trick for me. Everything came off with no broken studs.
I spent a lot of time on my back on the cold concrete floor fiddling with my oil lines (bought from EBS). I never had to really bend anything, but I did spend a lot of time turning the nuts very slightly, going back and forth. Worth it in the end - happy with the result.
Thanks Sam
I wont be progressing much further for a while.
I think im going to have to replace a few leaking rocker shafts.
Yes i used map gas when i removed my exhaust the first time. It was very tedious but i was successful also after them being on for 35 years.
It was very nerve racking though. This was a breeze.
Don't think for a second it will be this easy though. Getting the oil line off the stat and exchangers off rusted studs can be a real nightmare. In fact i treated them as separate projects just to get ready for this.
Listen to Iceman regarding difficulty. He did an engine rebuild not long ago, so his studs/nuts were in great shape.
Don't be me. I did my exhaust update in the driveway with the car on jackstands and no one to help lifting/holding the SSIs or the sport muffler.
I recommend getting the right wrenches for the oil line removal. I ended up having to use a Dremel tool to split one nut. I bought a Map gas torch at Lowes to heat the nuts to cherry red before attempting to remove them. Check your oil return lines. If they are leaking, easiest time to replace them is with the exhaust off.
Mechanical difficulty was about two out of ten, pucker factor was about eleven.
Sam
Sam that is exactly what i did. Cut nut off stat with a dremmel sweating bulllets the whole way
I was fortunate enough to have my heads and exchangers on the bench. Used the map gas and a lot of patience. Ended up having machine shop remove the 7 that stayed so i could put longer studs in.
I dont want people coming back calling me an a hole.
Okay thats normal, but not for this thread i meant 😉
Listen to Iceman regarding difficulty. He did an engine rebuild not long ago, so his studs/nuts were in great shape.
Don't be me. I did my exhaust update in the driveway with the car on jackstands and no one to help lifting/holding the SSIs or the sport muffler.
I recommend getting the right wrenches for the oil line removal. I ended up having to use a Dremel tool to split one nut. I bought a Map gas torch at Lowes to heat the nuts to cherry red before attempting to remove them. Check your oil return lines. If they are leaking, easiest time to replace them is with the exhaust off.
Mechanical difficulty was about two out of ten, pucker factor was about eleven.
Sam
Originally Posted by theiceman
Sam that is exactly what i did. Cut nut off stat with a dremmel sweating bulllets the whole way
I was fortunate enough to have my heads and exchangers on the bench. Used the map gas and a lot of patience. Ended up having machine shop remove the 7 that stayed so i could put longer studs in.
I dont want people coming back calling me an a hole.
Okay thats normal, but not for this thread i meant 😉
Thanks for the great advice guys. I will likely have my shop do this install.


 05-04-2018, 10:41 AM