When you click on links to various merchants on this site and make a purchase, this can result in this site earning a commission. Affiliate programs and affiliations include, but are not limited to, the eBay Partner Network.
Sooooo had a lazy Sunday. All i did was clean up the studs and hardware that came out with the exchangers. I never initially loctighted the studs into the head and they stayed tight until i cracked them.
Decided to at least blue loctight them this time as I had some minor blow by at the gaskets.
I remember how much of a pain it was to remove the exaust fasteners from my 3.2 , i did however
replace all the nuts and bolts with stainless which should last forever without rusting out !
Not that i plan to remove the exaust regularly ... lol
I remember how much of a pain it was to remove the exaust fasteners from my 3.2 , i did however
replace all the nuts and bolts with stainless which should last forever without rusting out !
Not that i plan to remove the exaust regularly ... lol
Phil I did think of that actually. I was advised against it by my hardware suppler as he said the stainless can become brittle and snap . Not sure though . I might relook at it though since its all off. so you did not go with copper exhaust nuts at all ?
I use copper exaust nuts on my 944 as i remove the header quite often but so far the stainless hardware has held up really well
on the 911.
Somehow i can't imagine stainless bolts becoming brittle and snapping as there isn't much load on them , but i would consider it.
Aren't those cars just a labor of love ... lol .. always something to fix or upgrade !
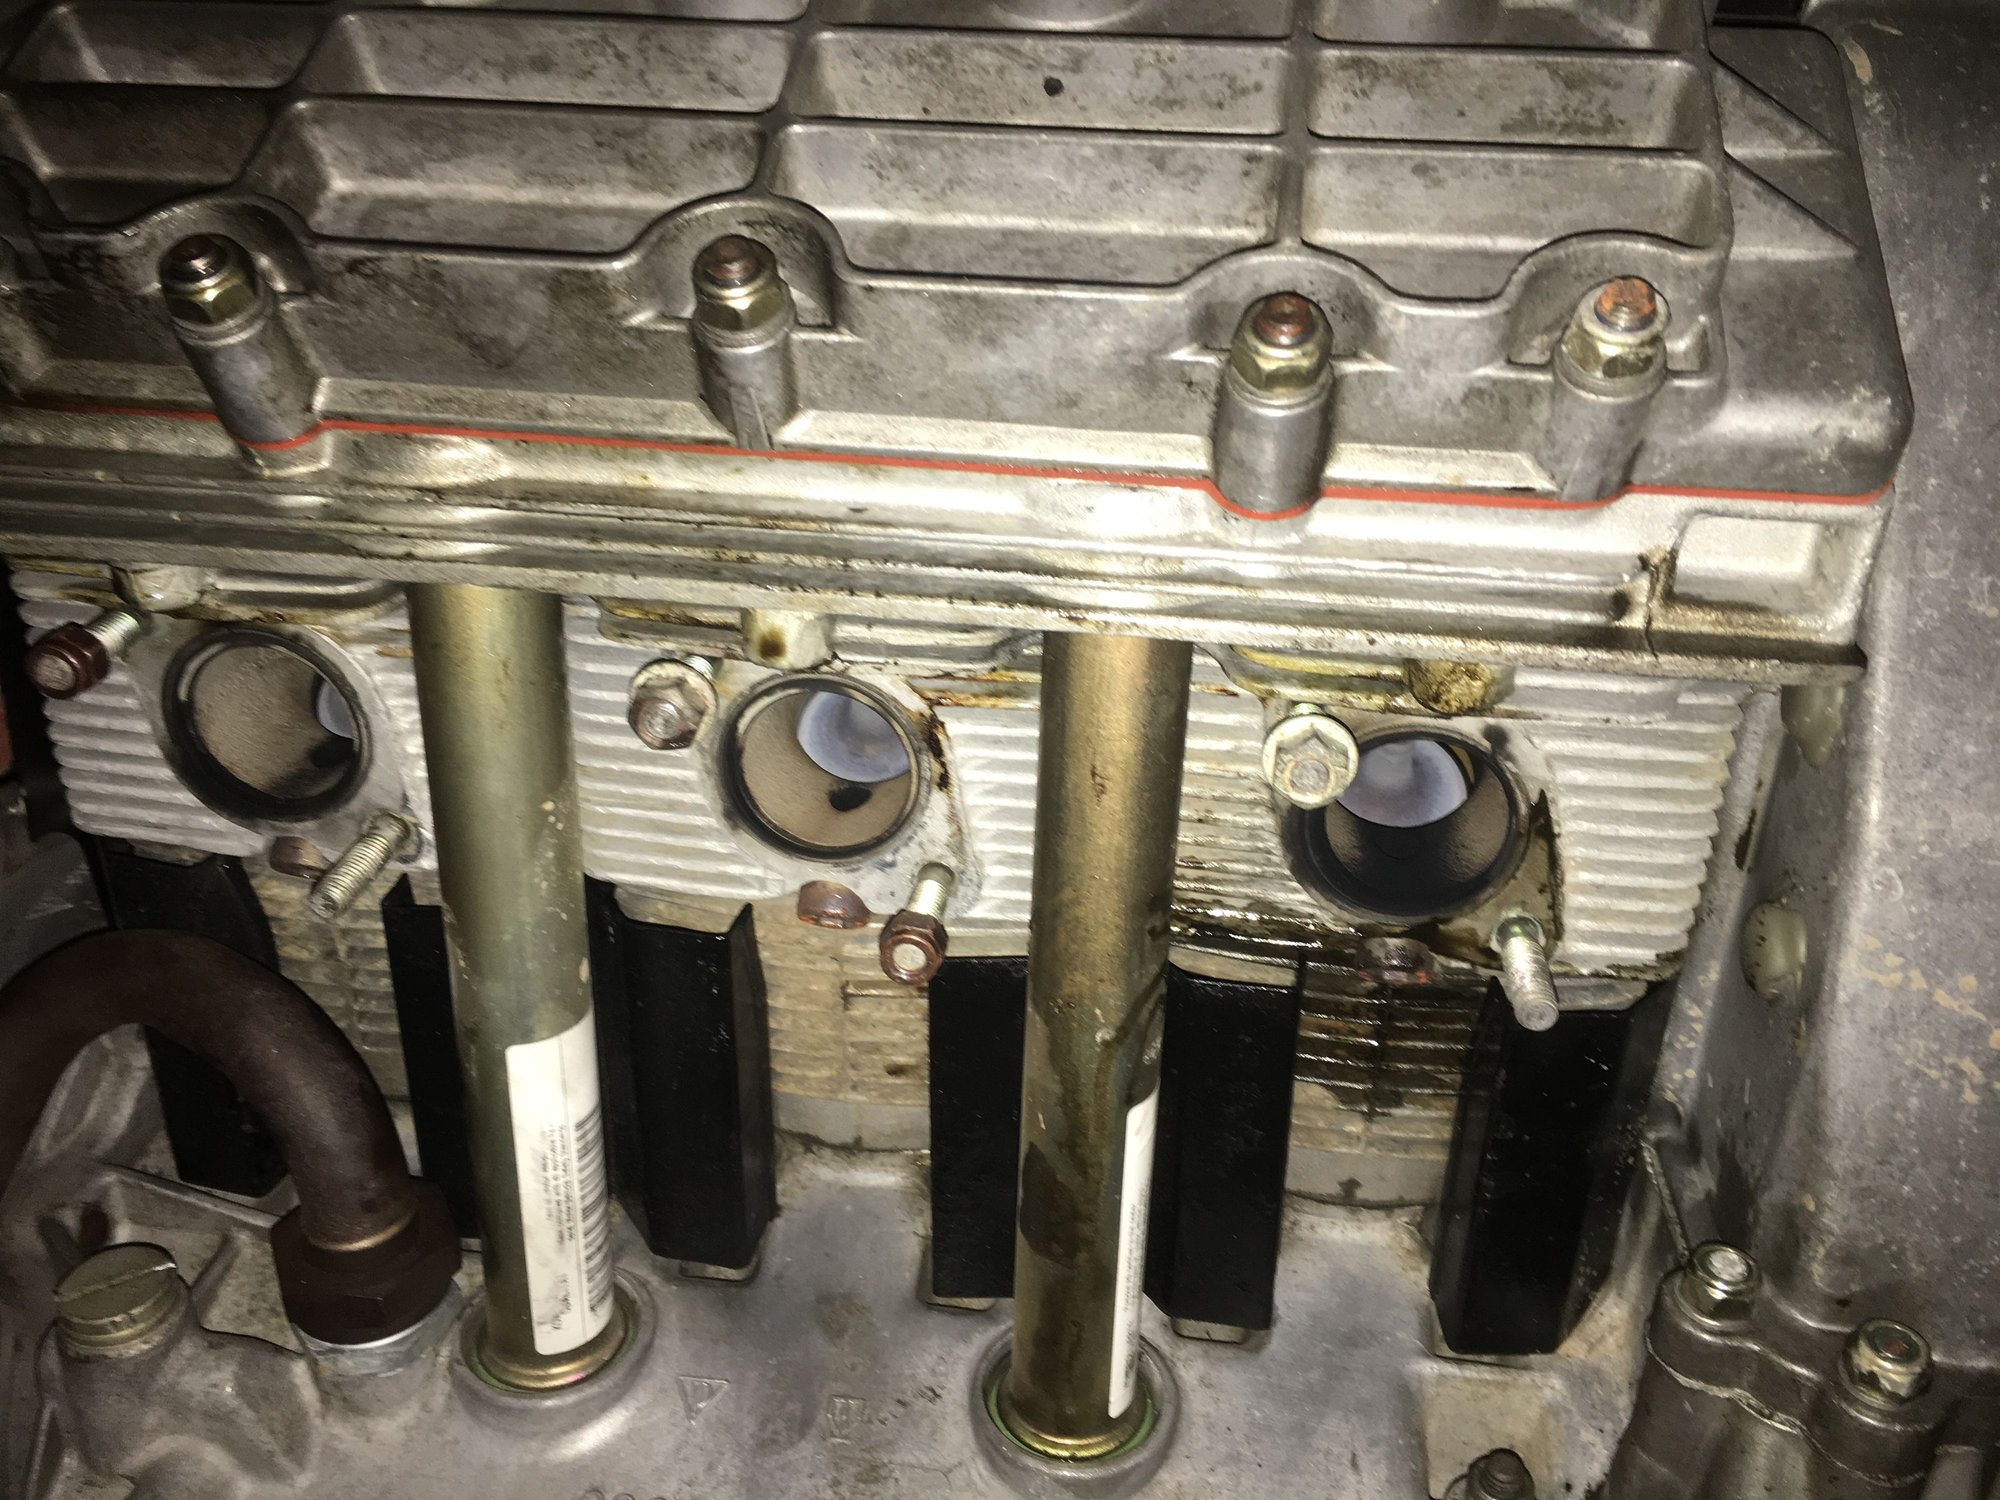
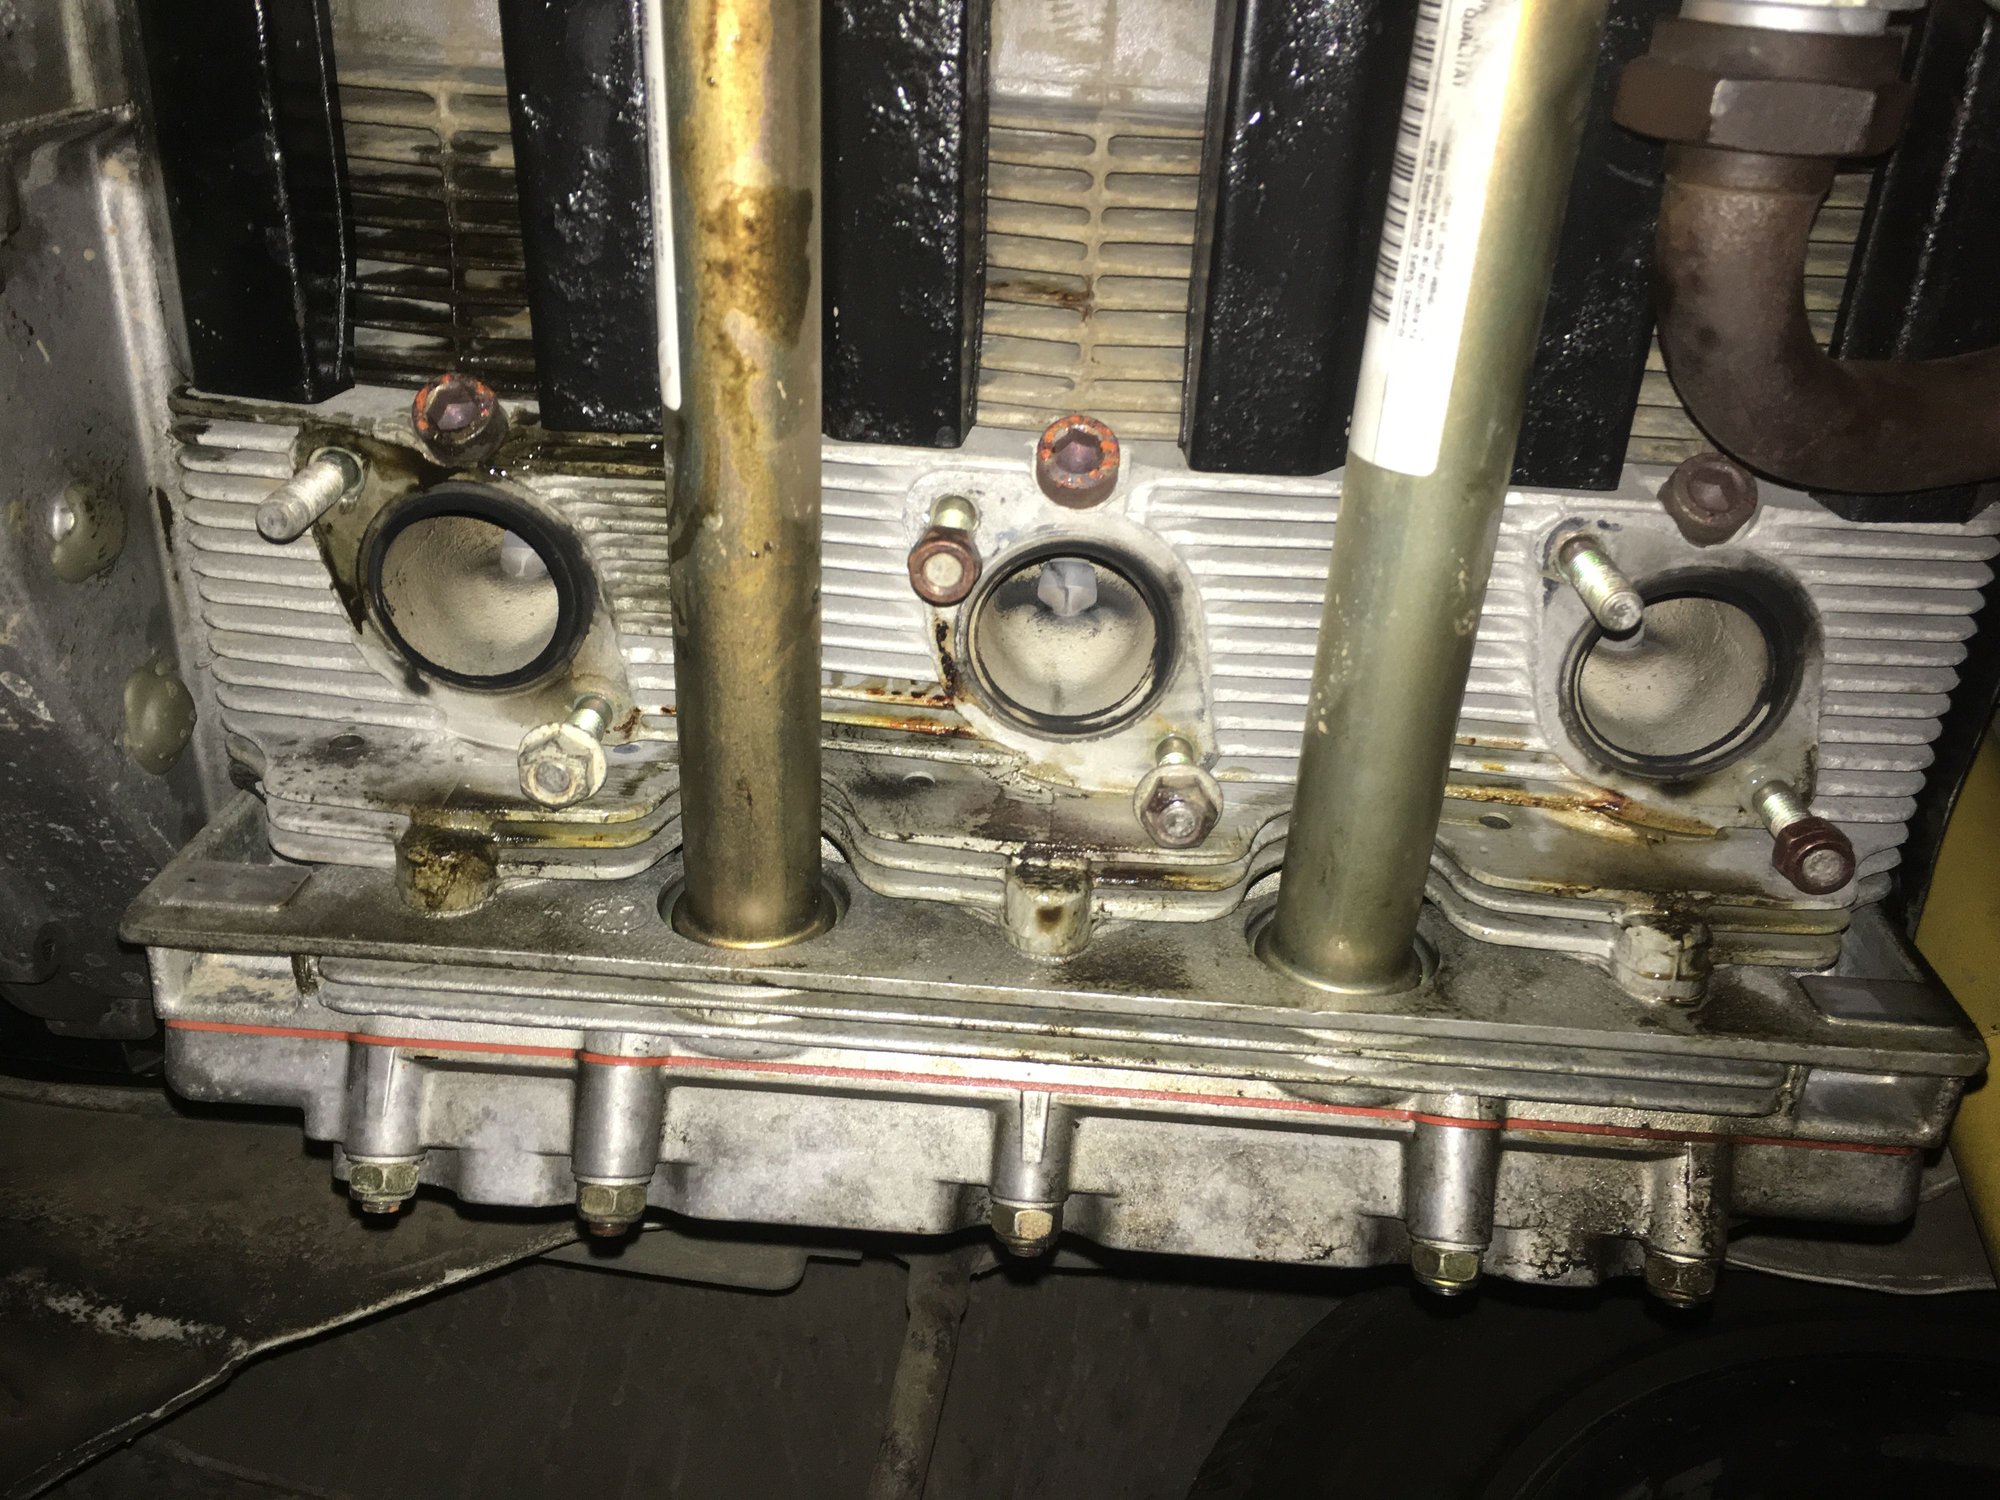
Well I spent the night working on just one side of the engine. After my rebuild I had a few oil leaks and wanted to try and address them. This is one of the advantages of doing it yourself. You are not unbolting and bolting . You can unbolt and now have great access under the engine to do cleaning inspection and some work.
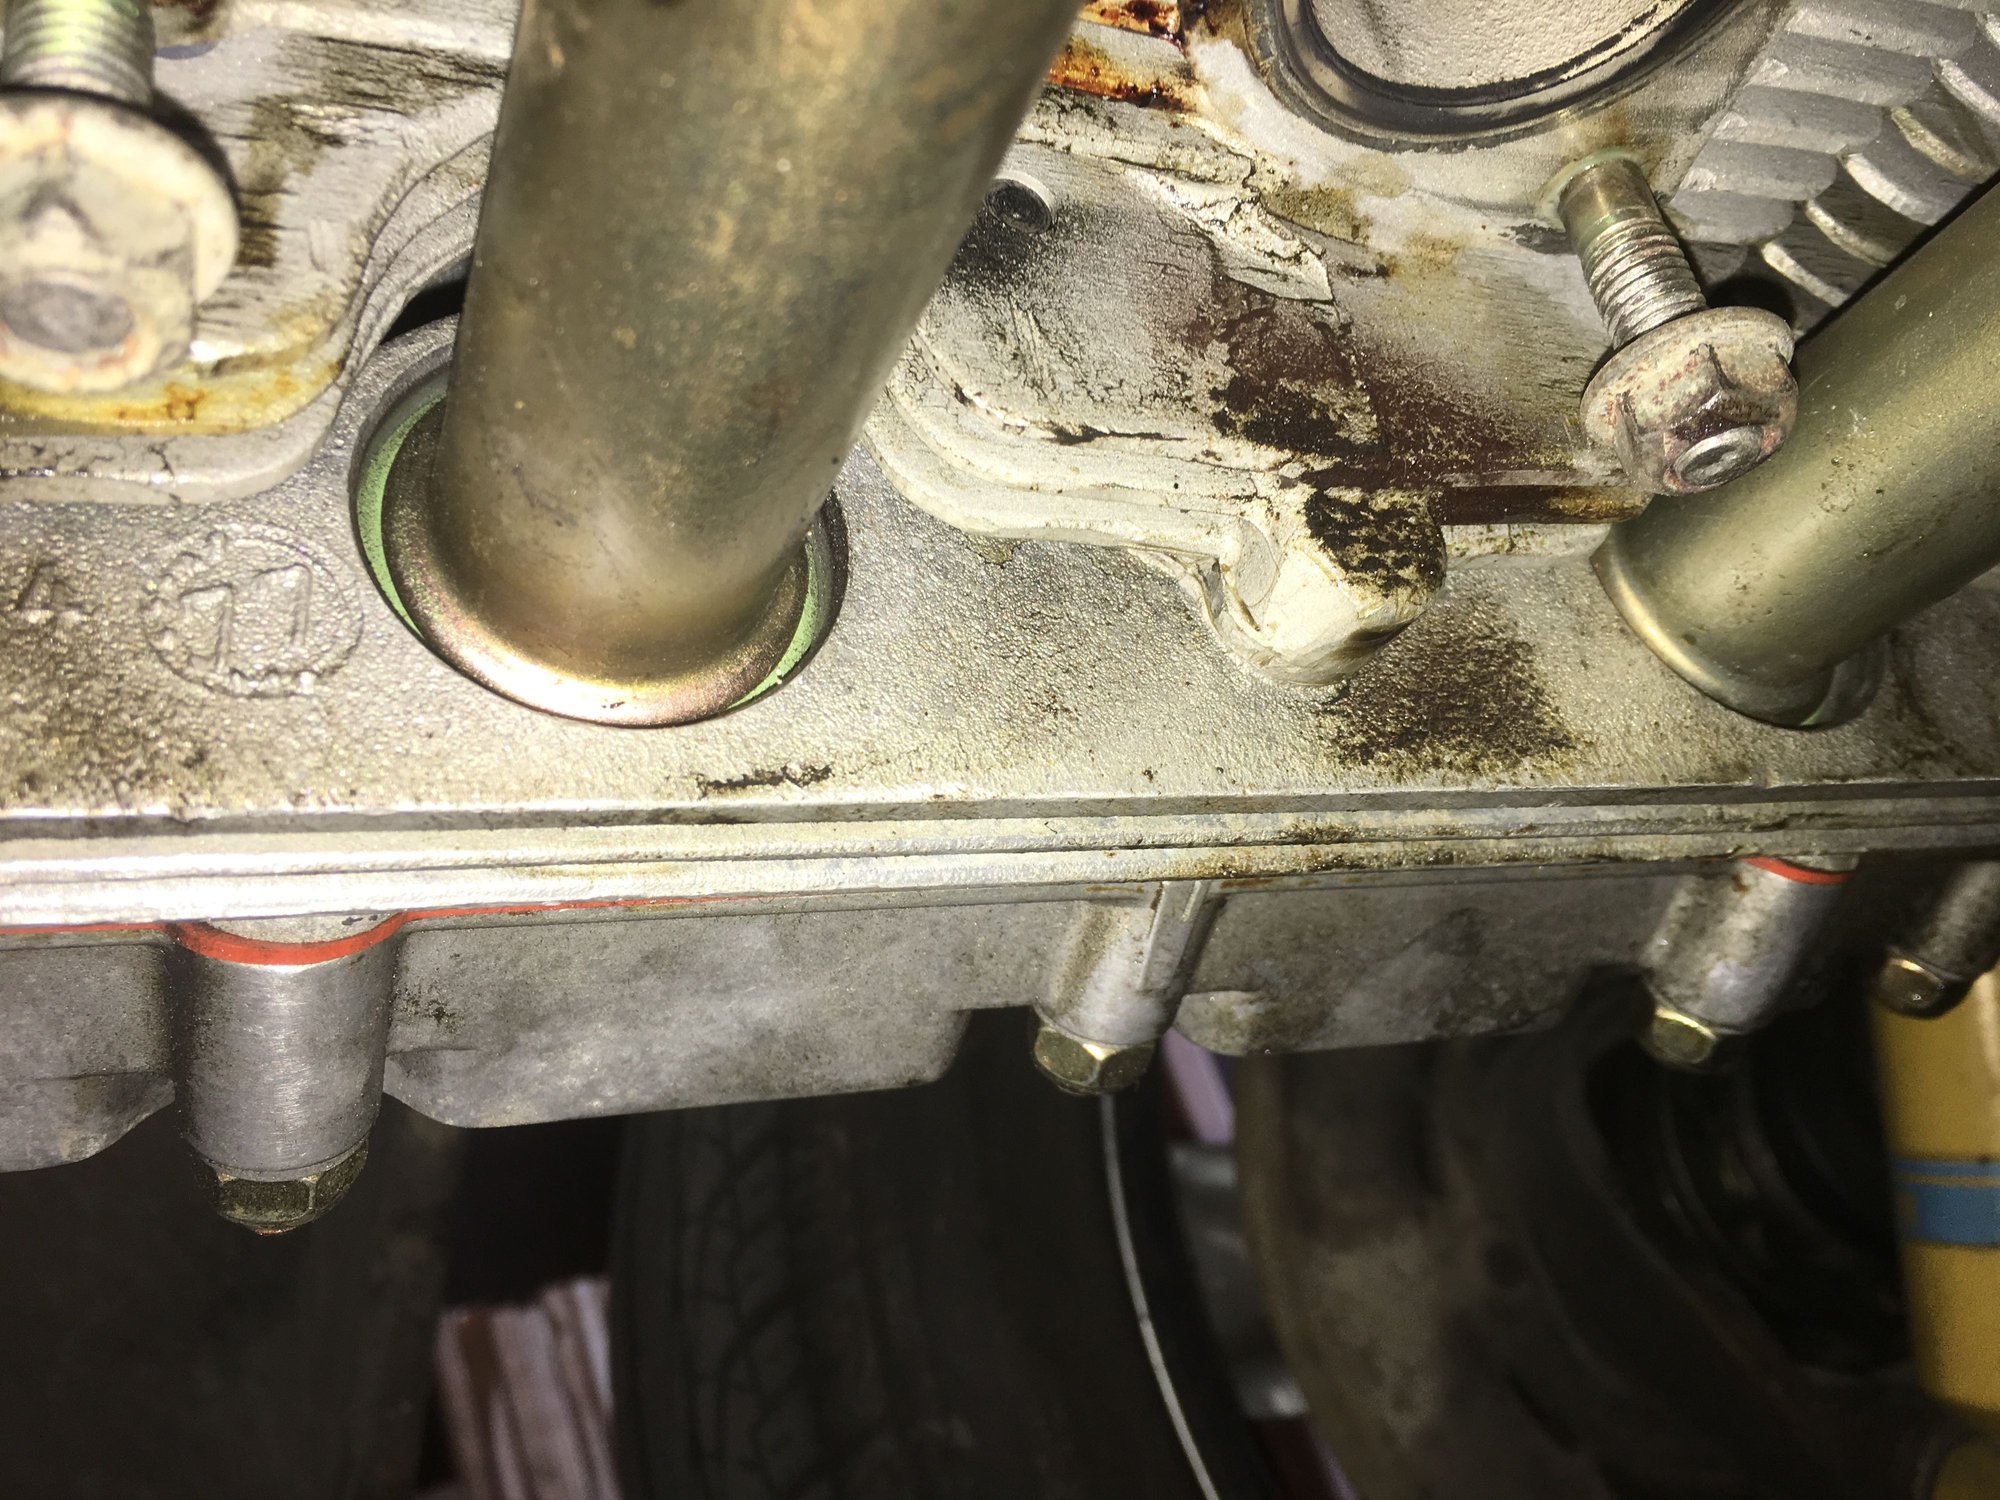
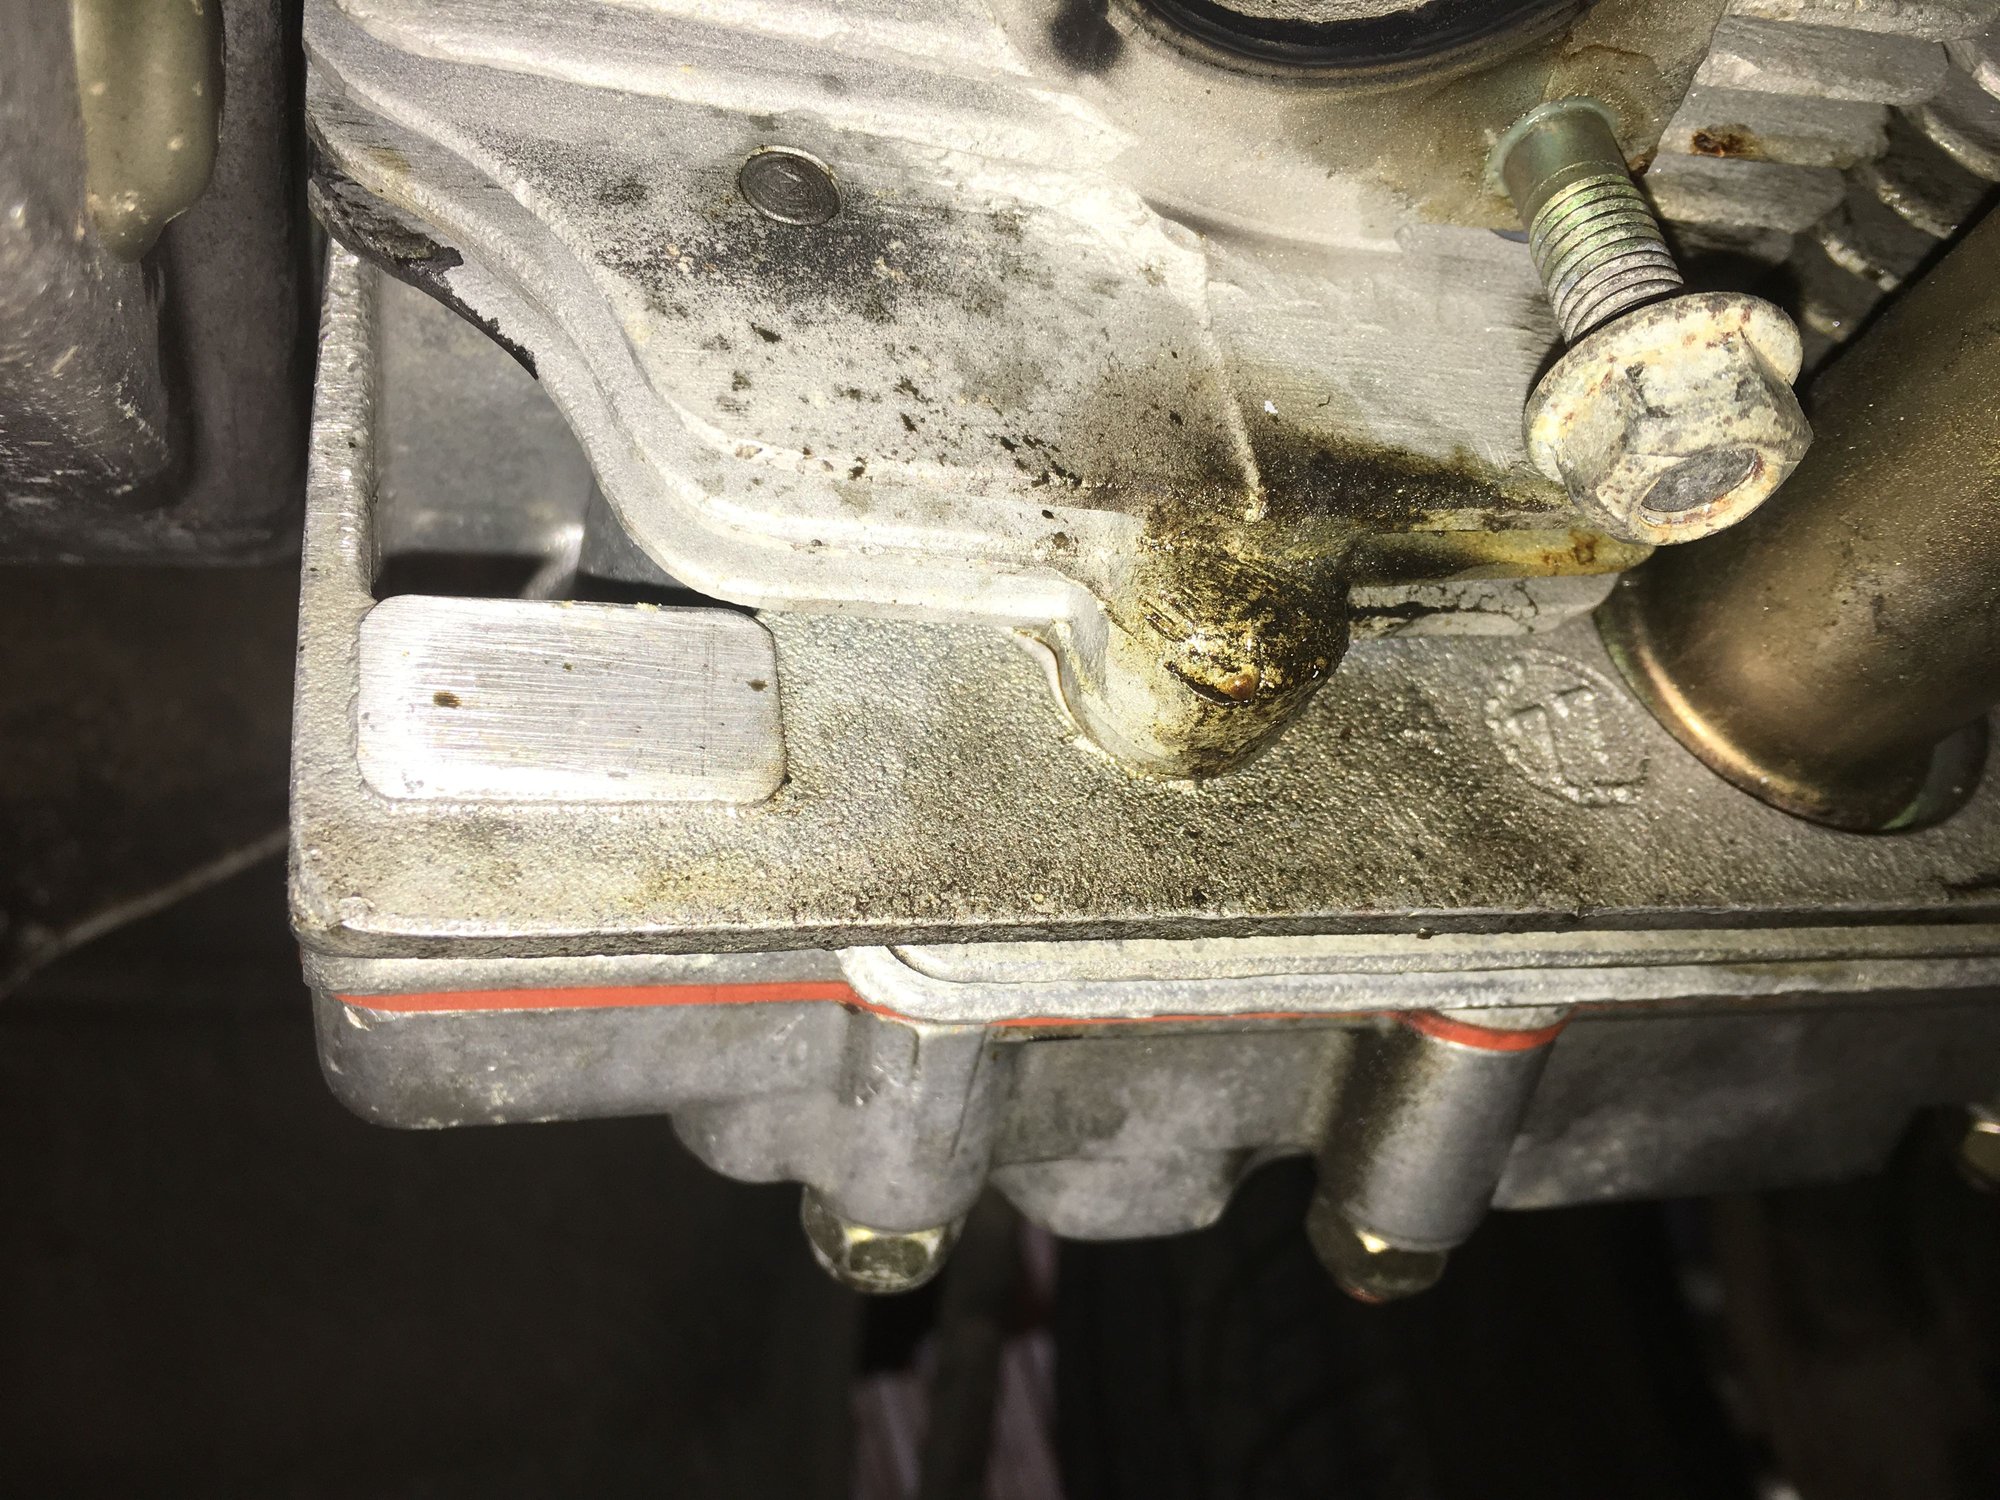
So I spent the evening working on cyl 4-6. I inspected upper and lower rocker shafts and found 4 of the 6 leaking. When I did my rebuild I used the old rocker shafts but I have since bought replacements and more seals. The only real drag is you have to guess at torque now as its impossible to get a torque wrench in there , at least mine . so I went with the German " gooduntight" method.
The uppers were easy to spot as they were leaking a fair bit and it was black on my new cam towers. The lowers were tougher to spot, but once I got the dental mirror on them I saw the tell tale pool of oil sitting at the bottom of the recess where the shaft sits. I am sure there are some secrets to these I don't know but I did it a little different this time . I did not use assembly lube, I put them in dry and put a few drops of oil on the rocker shaft hole after assembly. I have to do something different right ? instead of tourqing to 18ft lbs I was probably more around 24. I'm a little concerned about marring the housing but what ya gonna do .
Was a very easy night actually and quite enjoyable. with the exhaust out of the way.
Cylinder one is a bit of a gusher , I'm interested in what I find there.
I was looking at those rocker shafts the last time I had my valve covers off as I'm thinking they may be a part of my leaks--where in the world do you get allen wrenches that will fit in the gap to get at the sockets? Do you have photos of the tools you used?
I was looking at those rocker shafts the last time I had my valve covers off as I'm thinking they may be a part of my leaks--where in the world do you get allen wrenches that will fit in the gap to get at the sockets? Do you have photos of the tools you used?
I made them Dave . I will post , nothing fancy , just a cut down Alen key . Works great . its actually pretty easy work . Even easier with the exhaust off. I could have done all 6 on one side in one evening , but I wanted to save some as I only bought 6. pass side is easy too with no blower on that side.
Only problem is not enough space for a torque wrench.
also keep in mind the uppers are deceiving , they will run down the back side and make it look like your oil return tubes are leaking.
I just had SSI's installed on my 82SC ( I'm no wrench) and it changed the way I felt about the car. It was what seemed missing when I bought the car. Its a worthwhile upgrade.


 05-07-2018 | 09:01 AM