When you click on links to various merchants on this site and make a purchase, this can result in this site earning a commission. Affiliate programs and affiliations include, but are not limited to, the eBay Partner Network.
I swapped the springs last night laying on the garage floor. Wasn't that bad. Estimate about 1hr per corner, and another hour for the interior if you have a rollbar. I'm able bodied as was able to do this with just myself, but a 2nd pair of hands would make this much lighter work. That person doesn't even have to get dirty or on the ground too.
Tools:
Impact wrench (necessary for the strut topnut)
metric socket set - 13mm for strut top hat nuts, strut top nut was 22mm, swaybar requires a 17mm wrench and a 15mm socket
torx socket set
floor jack
2nd floor jack or cheapo scissor jack
short flathead screwdriver or similar poker tool
Optional but helpful Schwaben socket - for tightening the topnut without having to use 'ugga dugga' measurements
Fronts
Lift the corner
Remove the wheel
Disconnect the sway bar (you can also do this first while the weight of the car is on the suspension, it will be easier to remove from the bar)
Place the 2nd jack under the rear hub, make sure you don't bend anything when you support the knuckle.
Mark your camber plate so you can relocate it (I used blue tape)
Using impact wrench or schwaben socket, remove the topnut on the strut
Lower the knuckle using the 2nd jack. The strut will drop out of the camber plate and lean forward in the wheel well. Keep an eye on the brake line that it doesn't get strained. There will be 'just enough' slack in the line to drop the knuckle low enough to remove the strut.
Remove the 3 13mm nuts holding the camber plate
Allow the camber plate to drop out of the chassis - now you can remove the springs from the strut, through the top of the wheel well where the camber plate hole is.
Install the new springs etc etc
Rears
Similar process
You must disconnect both sides of the rear swaybar first
Remove the black plastic aero brake ducting from the control arm (use a torx socket for the screws, use a flathead screw driver to unclip the 3 hooks at the front of the aero)
Lift a corner of the car, remove the wheel
Support the knuckle with a 2nd jack/scissor jack. Make sure you will be able to still lower the knuckle (using the lowest point of the knuckle to support it will not give you clearance enough)
Remove the rear interior to get access to the strut top plate (this was harder/longer for me as I have a rollbar)
Loosen the topnut on the strut piston (stock is 22mm but different struts have different size nuts). Need a impact wrench or schwaben tool here)
Lower knuckle allow strut to drop from top plate bearing.
Remove top plate nuts, let top plate drop.
Pull springs off strut and through the hole where the top plate was.
Reinstall everything
Torque values
24ft/lb for the top plate nutes (13mm)
2 ugga dugga with an impact wrench for the strut piston topnut
1 ugga dugga on the swaybar nut. These come loose, one of mine was loose in the rear, so loctite can't hurt (blue probably)
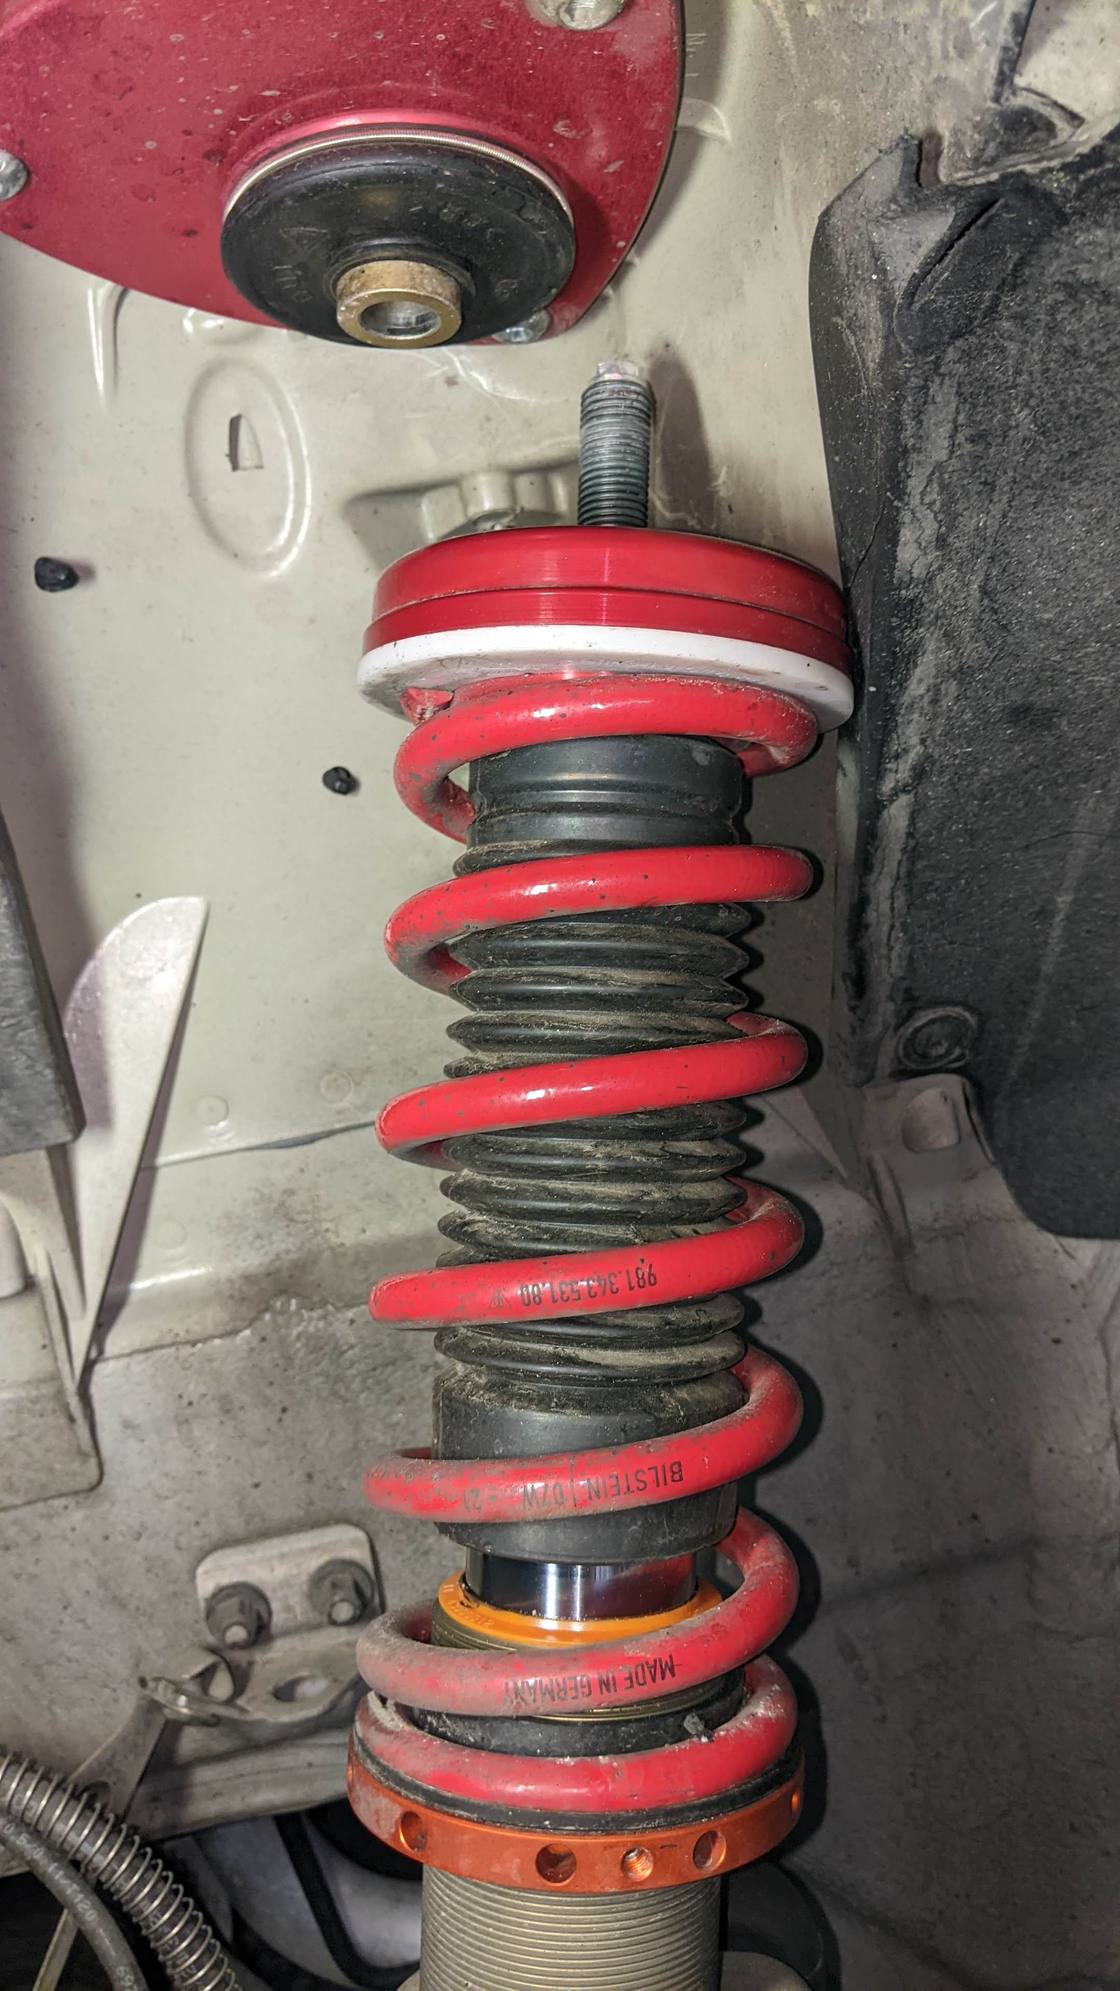
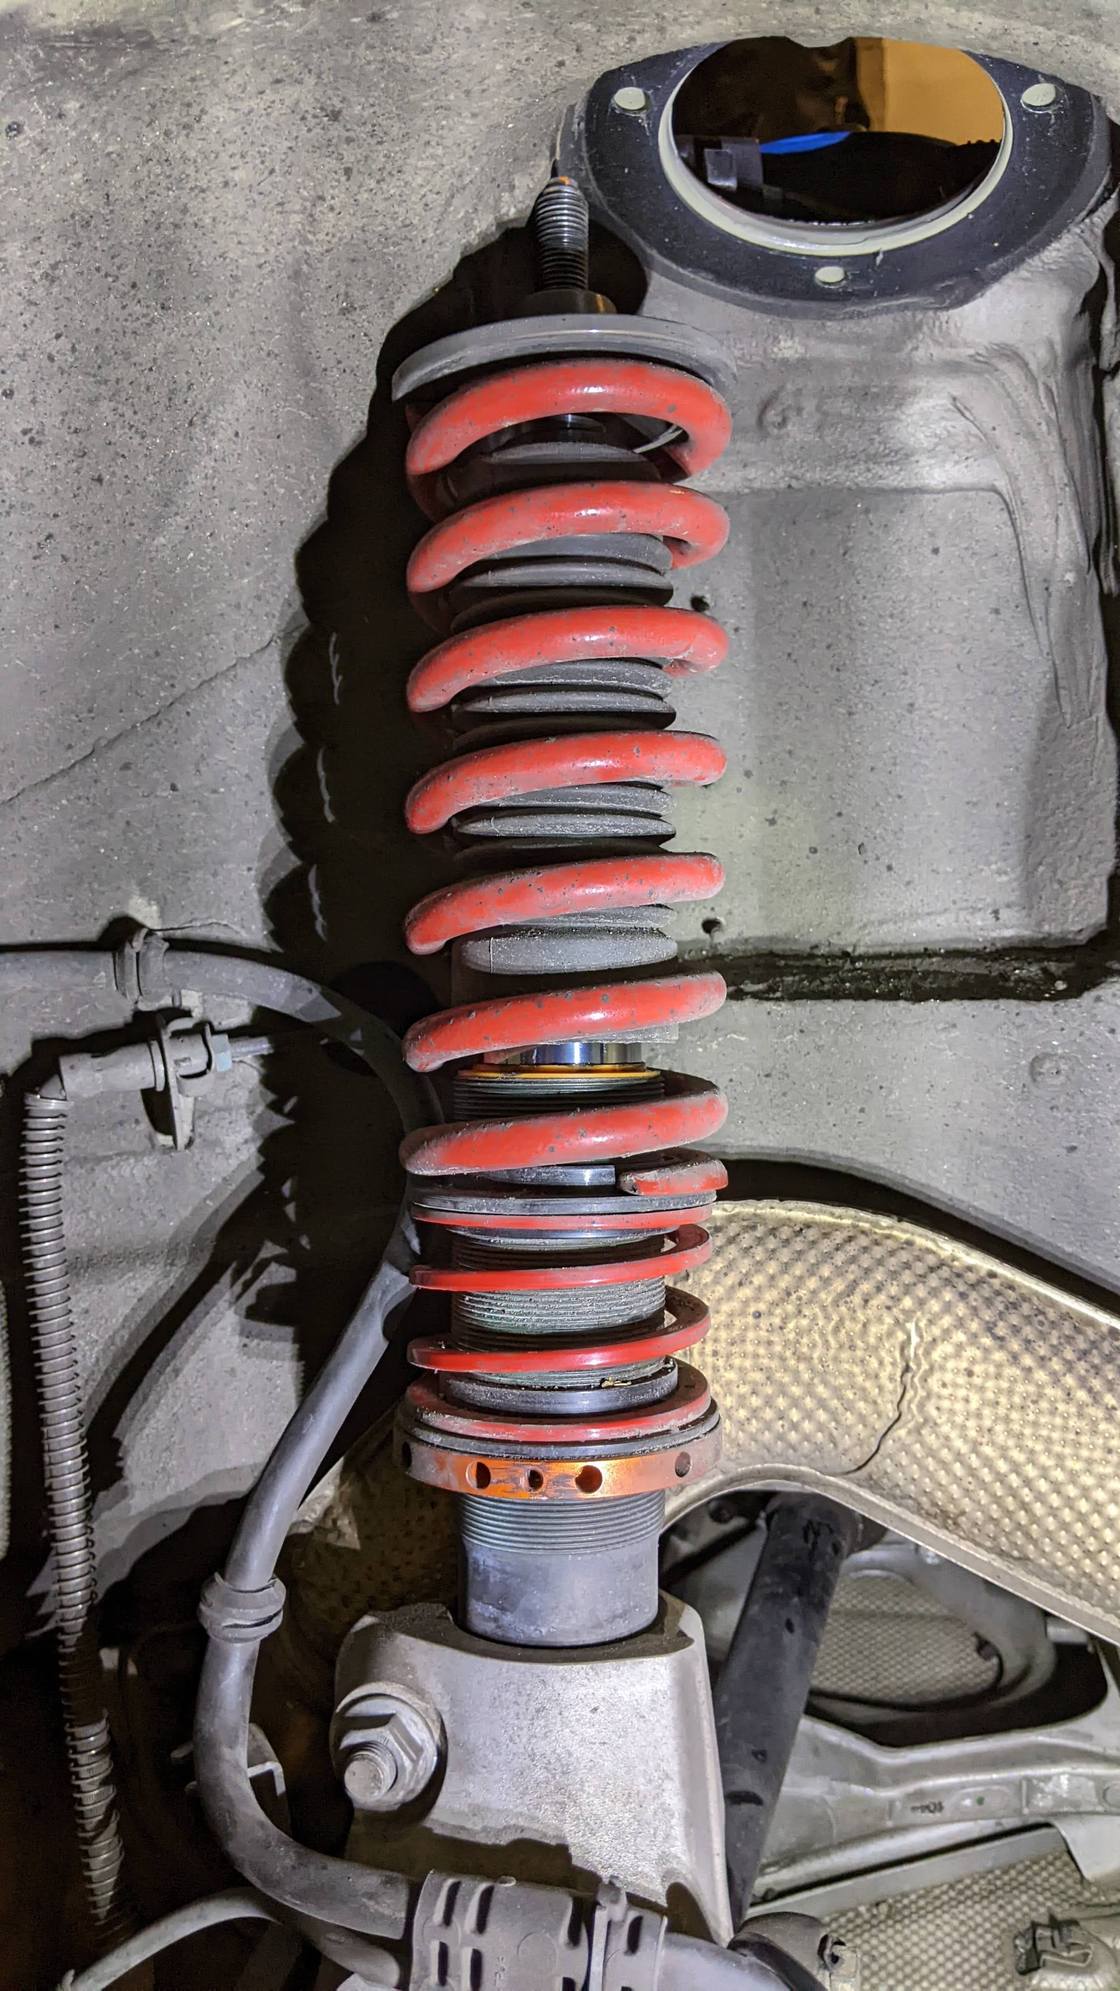
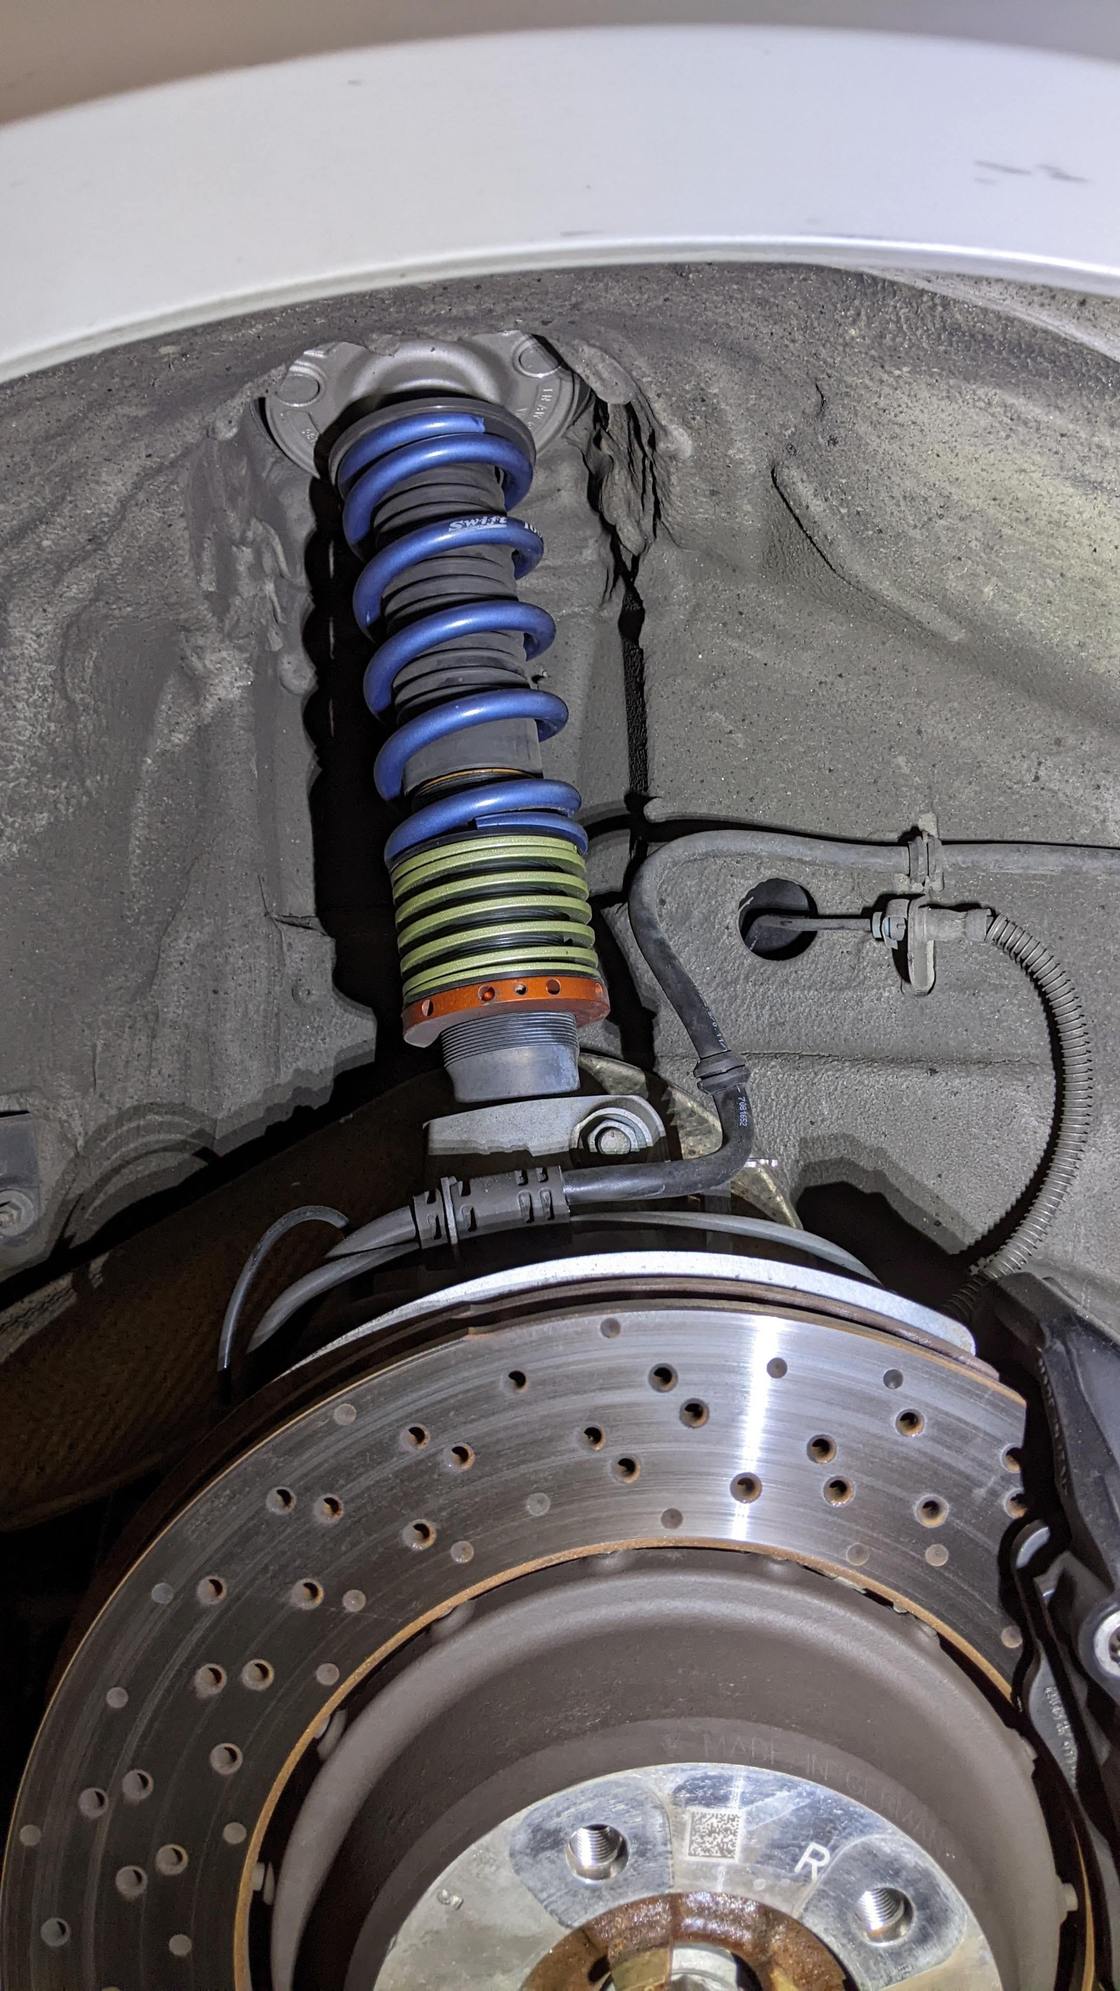
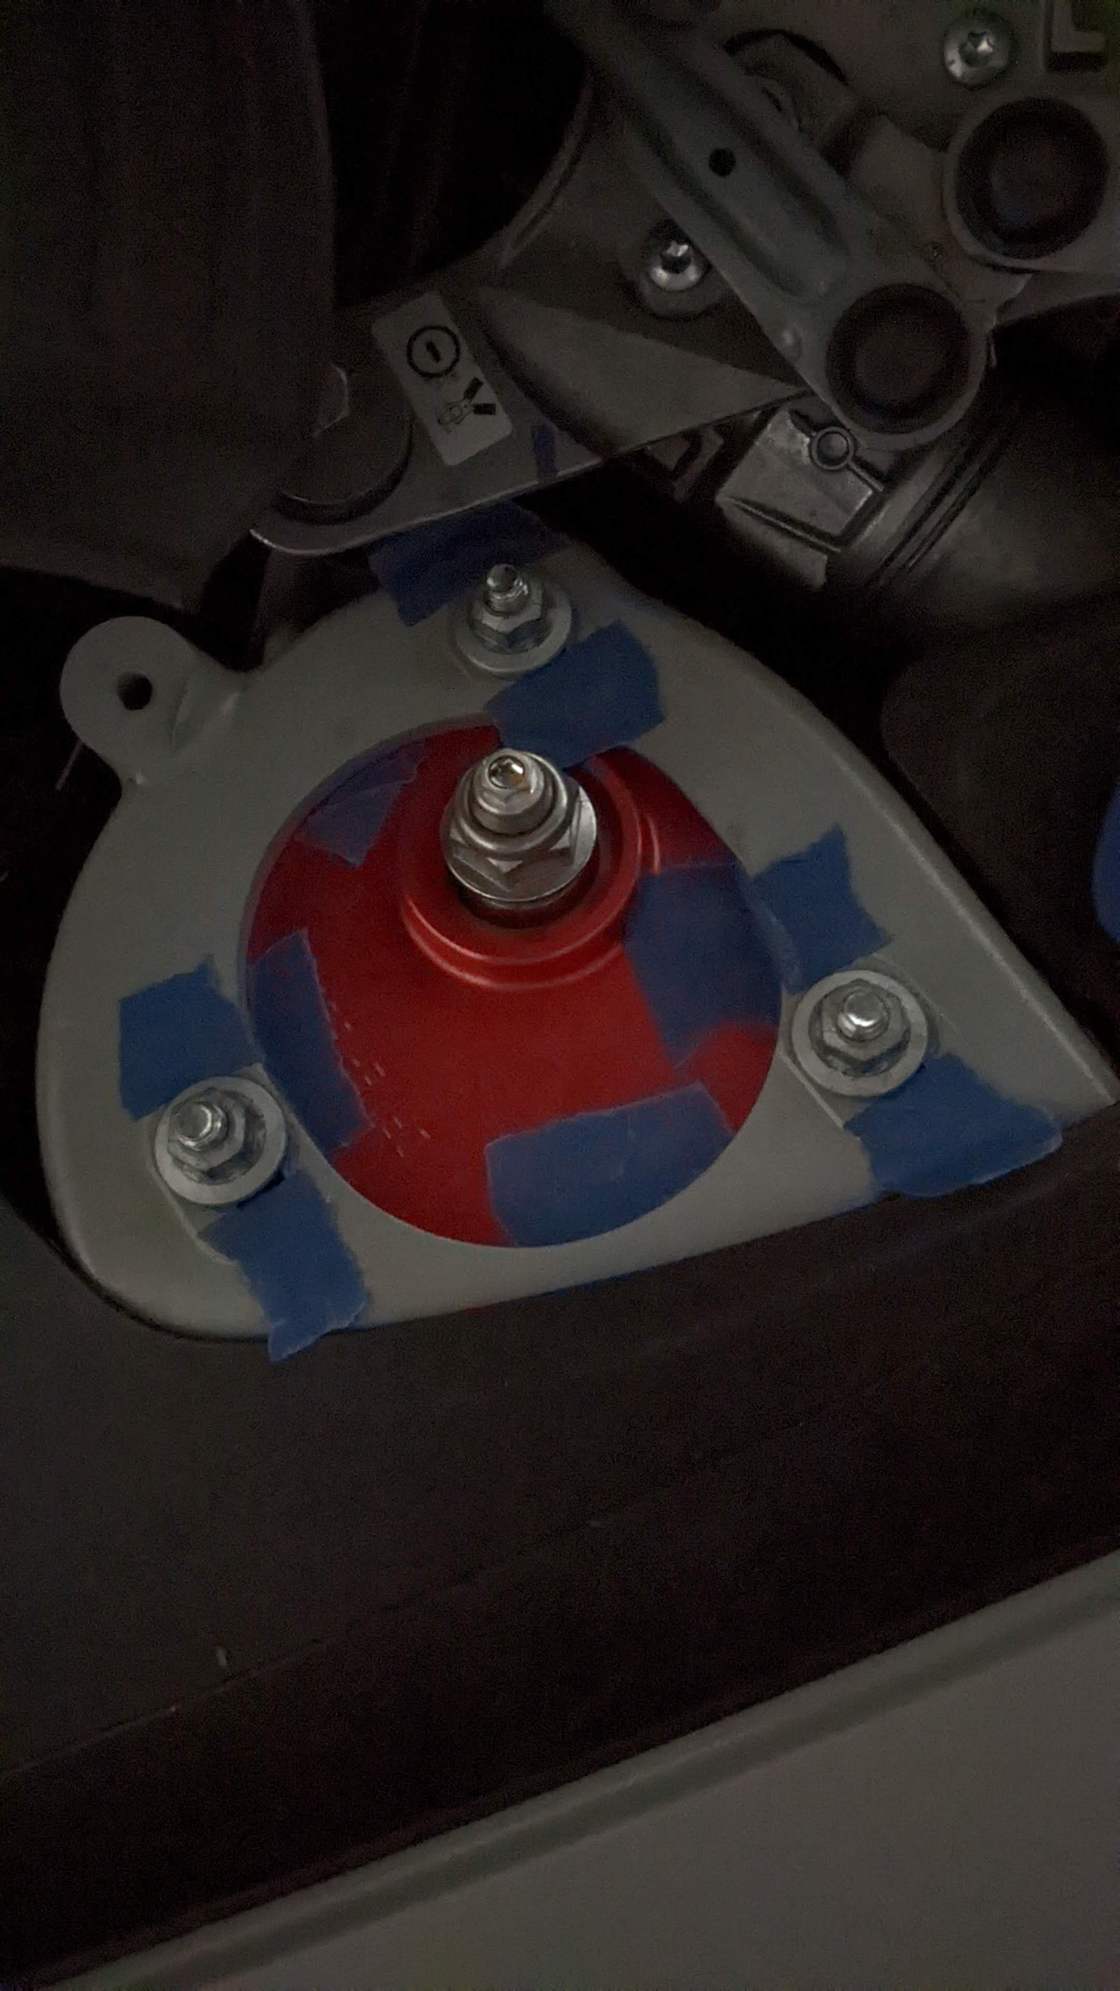
Front strut dropped from camber plate. Rear strut dropped from camber plate. Top plate removed, ready to pull spring up through chassis. Rear with spring removed Reinstalled spring. Drop it in through the hole where the top plate is. I blue taped off the camber plate to re-locate it after removal. The tape around the nuts is to locate left and right limits, the blue tape on the to plate was cut down to locate plate dimensionally in the chassis. Be careful when re-installing as the plate can move around and could push the tape.
I swapped the springs last night laying on the garage floor. Wasn't that bad. Estimate about 1hr per corner, and another hour for the interior if you have a rollbar. I'm able bodied as was able to do this with just myself, but a 2nd pair of hands would make this much lighter work. That person doesn't even have to get dirty or on the ground too.
Tools:
Impact wrench (necessary for the strut topnut)
metric socket set - 13mm for strut top hat nuts, strut top nut was 22mm, swaybar requires a 17mm wrench and a 15mm socket
torx socket set
floor jack
2nd floor jack or cheapo scissor jack
short flathead screwdriver or similar poker tool
Optional but helpful Schwaben socket - for tightening the topnut without having to use 'ugga dugga' measurements
Fronts
Lift the corner
Remove the wheel
Disconnect the sway bar (you can also do this first while the weight of the car is on the suspension, it will be easier to remove from the bar)
Place the 2nd jack under the rear hub, make sure you don't bend anything when you support the knuckle.
Mark your camber plate so you can relocate it (I used blue tape)
Using impact wrench or schwaben socket, remove the topnut on the strut
Lower the knuckle using the 2nd jack. The strut will drop out of the camber plate and lean forward in the wheel well. Keep an eye on the brake line that it doesn't get strained. There will be 'just enough' slack in the line to drop the knuckle low enough to remove the strut.
Remove the 3 13mm nuts holding the camber plate
Allow the camber plate to drop out of the chassis - now you can remove the springs from the strut, through the top of the wheel well where the camber plate hole is.
Install the new springs etc etc
Rears
Similar process
You must disconnect both sides of the rear swaybar first
Remove the black plastic aero brake ducting from the control arm (use a torx socket for the screws, use a flathead screw driver to unclip the 3 hooks at the front of the aero)
Lift a corner of the car, remove the wheel
Support the knuckle with a 2nd jack/scissor jack. Make sure you will be able to still lower the knuckle (using the lowest point of the knuckle to support it will not give you clearance enough)
Remove the rear interior to get access to the strut top plate (this was harder/longer for me as I have a rollbar)
Loosen the topnut on the strut piston (stock is 22mm but different struts have different size nuts). Need a impact wrench or schwaben tool here)
Lower knuckle allow strut to drop from top plate bearing.
Remove top plate nuts, let top plate drop.
Pull springs off strut and through the hole where the top plate was.
Reinstall everything
Torque values
24ft/lb for the top plate nutes (13mm)
2 ugga dugga with an impact wrench for the strut piston topnut
1 ugga dugga on the swaybar nut. These come loose, one of mine was loose in the rear, so loctite can't hurt (blue probably)
Front strut dropped from camber plate. Rear strut dropped from camber plate. Top plate removed, ready to pull spring up through chassis. Rear with spring removed Reinstalled spring. Drop it in through the hole where the top plate is. I blue taped off the camber plate to re-locate it after removal. The tape around the nuts is to locate left and right limits, the blue tape on the to plate was cut down to locate plate dimensionally in the chassis. Be careful when re-installing as the plate can move around and could push the tape.
brave man (certainly braver than I) ! - you could have used a sharpie to mark the camber plate settings, that would avoid any issues if the tape gets dislodged...
p.s what spring (rates) did you replace OEM with?
p.p.s were you not inclined to also install MS camber plates while you were at it?
Haha too hard to tell right now. I drove around with the front springs only just to see, but it's quite difficult to quickly make a conclusion because with the DSC I can really make or break the car. I'm also on all seasons which are quite different than the cup2's. I also can't push it on the street to a point that I get any meaningful feedback on improved performance.
I'lll finish installing the rollbar today, then take it out a bit with the rear springs. Once it settles, measure the ride heights and get the rake back in order. Then I'll start messing with the DSC because I need to find a new configuration for this spring. (I usually start with the PASM settings and then go from there)
brave man (certainly braver than I) ! - you could have used a sharpie to mark the camber plate settings, that would avoid any issues if the tape gets dislodged...
p.s what spring (rates) did you replace OEM with?
p.p.s were you not inclined to also install MS camber plates while you were at it?
Yeah sharpie didn't work, you can't get the pen into the crevice close enough to be accurate. It also looks like **** later and I didn't want to wash/wipe it down. I blue taped it, and used a plastic razor to trim and push it flush. It won't be perfectly replaced but it was decent tolerance for shade tree work.
Oh and these are the 78N/mm / 98N/mm springs from Tarret. I got a deal so wanted to try them. I think I will ultimately end up going less spring front and rear, but for $500 I figured its worth a shot. I can always re-sell them since its a known kit.
Nice, simple explanation Erik! Sounds like it's just time consuming but straight forward with the right tools.
For the sway bar endlink nuts (you probably know this but I'll share):
Nuts are single use, but I use mine a few times before replacing them.
The torque spec is available in the "Driving on Race Circuits Manual" that came with your car: 30 ft-lbs + 30 degrees. This is pretty much all the strength I have with the 1ft 16mm wrench I use.
We all know how the 45/80 OEMs are. Tarett has a well proven 80/100 setup. I and others are pleased with my simple front upgrade 60/80 package. I bet a 70/90 setup would be good as well right there in the middle. Just depends what you are looking for. I can tell you that the 60/80 works well on the firm setting of PASM. I suspect that the stiffer spring rates would benefit from a DSC Sport box though.
Is it safe to assume that during this upgrade the toe is not affected/changed and if the top hats are put back at the same spot there won't be a need for an alignment?
Is it safe to assume that during this upgrade the toe is not affected/changed and if the top hats are put back at the same spot there won't be a need for an alignment?
Stiffer springs mean the car rides higher (less compression on the spring for the car's static weight)
The ride height affects toe and camber, so I think this change is affecting alignment. I'm going to try and drop the spring collars and get back to my original ride height (and hopefully alignment) but I've already scheduled an alignment appointment because thats how much faith I have in this working out perfectly =)
It's not a hard job, as you discovered, to simply swap the springs.
But even with you marking the strut plates... the way the weight is carried differently now, you likely should still have the car realigned and for sure now, corner balanced. And that's where the $$$ goes to properly complete this job.
ABSOLULETY ON POINT!!!
It took my install shop 5 labor hours to get my car properly corner balanced after my MCS install. I was not happy about it, but it is what it is. I changed shops after that, but not sure if I was gouged, or if it really is that long of a process.
It took my install shop 5 labor hours to get my car properly corner balanced after my MCS install. I was not happy about it, but it is what it is. I changed shops after that, but not sure if I was gouged, or if it really is that long of a process.
5 hours is pretty quick, by my personal standards anyways.
I do it myself (strings, scales, and a leveled 4-post lift) and it takes me about 10.... which, I think is decent time because the last shop I paid for a full alignment + CB charged me 10 hours.
Also worth noting - I don't know how much stiffer you went with these new springs, but the OE dampers are going to have a limit to how much spring they can control.
DSC used to modify the PASM-capable Bilsteins way back in the day so you could do spring changes... even they gave up on that and started selling their own shock/struts. At one point I'd sent a set into Bilstein that needed a rebuild (prior car was a PASM-equipped Cayman w/DSC box) and their advice was to NOT change out the springs, as the shock would not last.

 03-14-2023, 03:26 PM