When you click on links to various merchants on this site and make a purchase, this can result in this site earning a commission. Affiliate programs and affiliations include, but are not limited to, the eBay Partner Network.
Still working on the DSC settings for these springs. Testing has been slowed by the USB cables I ordered not working as expected, so I can't run the laptop in the car and manage the DSC at the same time.
I was able to borrow some scales and corner weight the car this weekend. I have about 1lb cross weight I couldn't reliably tune out. I think its just variance in the scales.
Corner weighing wasn't difficult per se - but not having a lift, driver weights, and only one floor jack made it tedious. Taking a wheel off, adjusting the height collar and then sitting back in the car and taking a picture of the scale.
One full turn on the spring perch is about 11lb off that particular corner (and about 11 on the opposite corner). Removing weight from a corner removes about 1/3rd the same weight on the adjacent corners.
Next time I do a full corner weight I'm going to spend more time getting the ride heights perfect, but I was able to change front springs (again) and adjust the corner weight in about 2hr without a lift.
Changes:
I'm playing with a 60/80 setup now, using a 7" 60ID 80Nm Swift spring in the front and the OEM rear spring w/helper. Still working a DSC tune, it bounces a little bit at the moment.
With the 80/100 Tarret kit I spend a day out in the hills running a route and making changes in the DSC. I ended up running similar settings to a stock PASM in sport mode but with much stronger rebound and some additional compression control that the tractive and DSC allows for. I would say I got the tune within a good place, but the ride frequency is much higher than I want to run on these rough streets here. On the track I think it would be great, but on the street I want more body roll to communicate with the limits so I'm probably going to sell the kit or maybe keep it for the helper springs in case I need them one day.
If you are bouncing off the spring, then you are underdamped. When it is properly set, you shouldn't get any secondary movements. It should be a once and done deal when dealing with bumps, dips, etc.
I am not sure of the range and damping curves on the Tractive, but on my MCS, while there are 18 clicks for both compression and rebound, I have found thru trial and error that there is a VERY SMALL window (like with-in 1 click of change) to where it feels just right. 1 click one direction and it feels a little underdamped, one click the other direction and it feels too tight and not compliant enough.
Caveat for that last statement though is for use on regular roads that are not smooth. If you are on glass smooth roads, then you can crank both up a bit more and it will feel good.
One full turn on the spring perch is about 11lb off that particular corner (and about 11 on the opposite corner). Removing weight from a corner removes about 1/3rd the same weight on the adjacent corners.
Can you please explain this example with four corner declaration and used spring rates?
Can you please explain this example with four corner declaration and used spring rates?
Our 4 corners of the car:
FL FR
RL RR
If I need to add 11lb of weight to the FR corner, raising (increasing the ride height) the spring perch on the FR corner one complete turn adds 11lb to that corner, and removes 2-3lb from the FL and RR, and 5-6lb from the RL corner.
This was with a 80Nm front spring, and 100Nm rear spring.
I only figured this out at the last tweak of the evening getting the car to a 50% cross-weight.
I think when I corner weight again, I will just take off the first wheel and give the spring perch one spin, and see how much weight that moves to the opposite corner of the car. That will speed up making changes with a fairly accurate understanding of how much weight one spin is worth for that cars current configuration.
I am a little curious, why is it that there is no simple calibration formula to corner weigh a ca? It seems mathematically possible to do so, even without understanding the weight distribution, moving the spring perches on each corner in a particular order should be enough to calibrate a formula for that session and then inform the engineer which springs to spin and how much.
Maybe there too much friction in bearings and bushings and so on to reliably calculate, or maybe varying ride height or rake desires make it too much work to calibrate a formula. <shrug>
I swapped the springs last night laying on the garage floor. Wasn't that bad. Estimate about 1hr per corner, and another hour for the interior if you have a rollbar. I'm able bodied as was able to do this with just myself, but a 2nd pair of hands would make this much lighter work. That person doesn't even have to get dirty or on the ground too.
Tools:
Impact wrench (necessary for the strut topnut)
metric socket set - 13mm for strut top hat nuts, strut top nut was 22mm, swaybar requires a 17mm wrench and a 15mm socket
torx socket set
floor jack
2nd floor jack or cheapo scissor jack
short flathead screwdriver or similar poker tool
Optional but helpful Schwaben socket - for tightening the topnut without having to use 'ugga dugga' measurements
Fronts
Lift the corner
Remove the wheel
Disconnect the sway bar (you can also do this first while the weight of the car is on the suspension, it will be easier to remove from the bar)
Place the 2nd jack under the rear hub, make sure you don't bend anything when you support the knuckle.
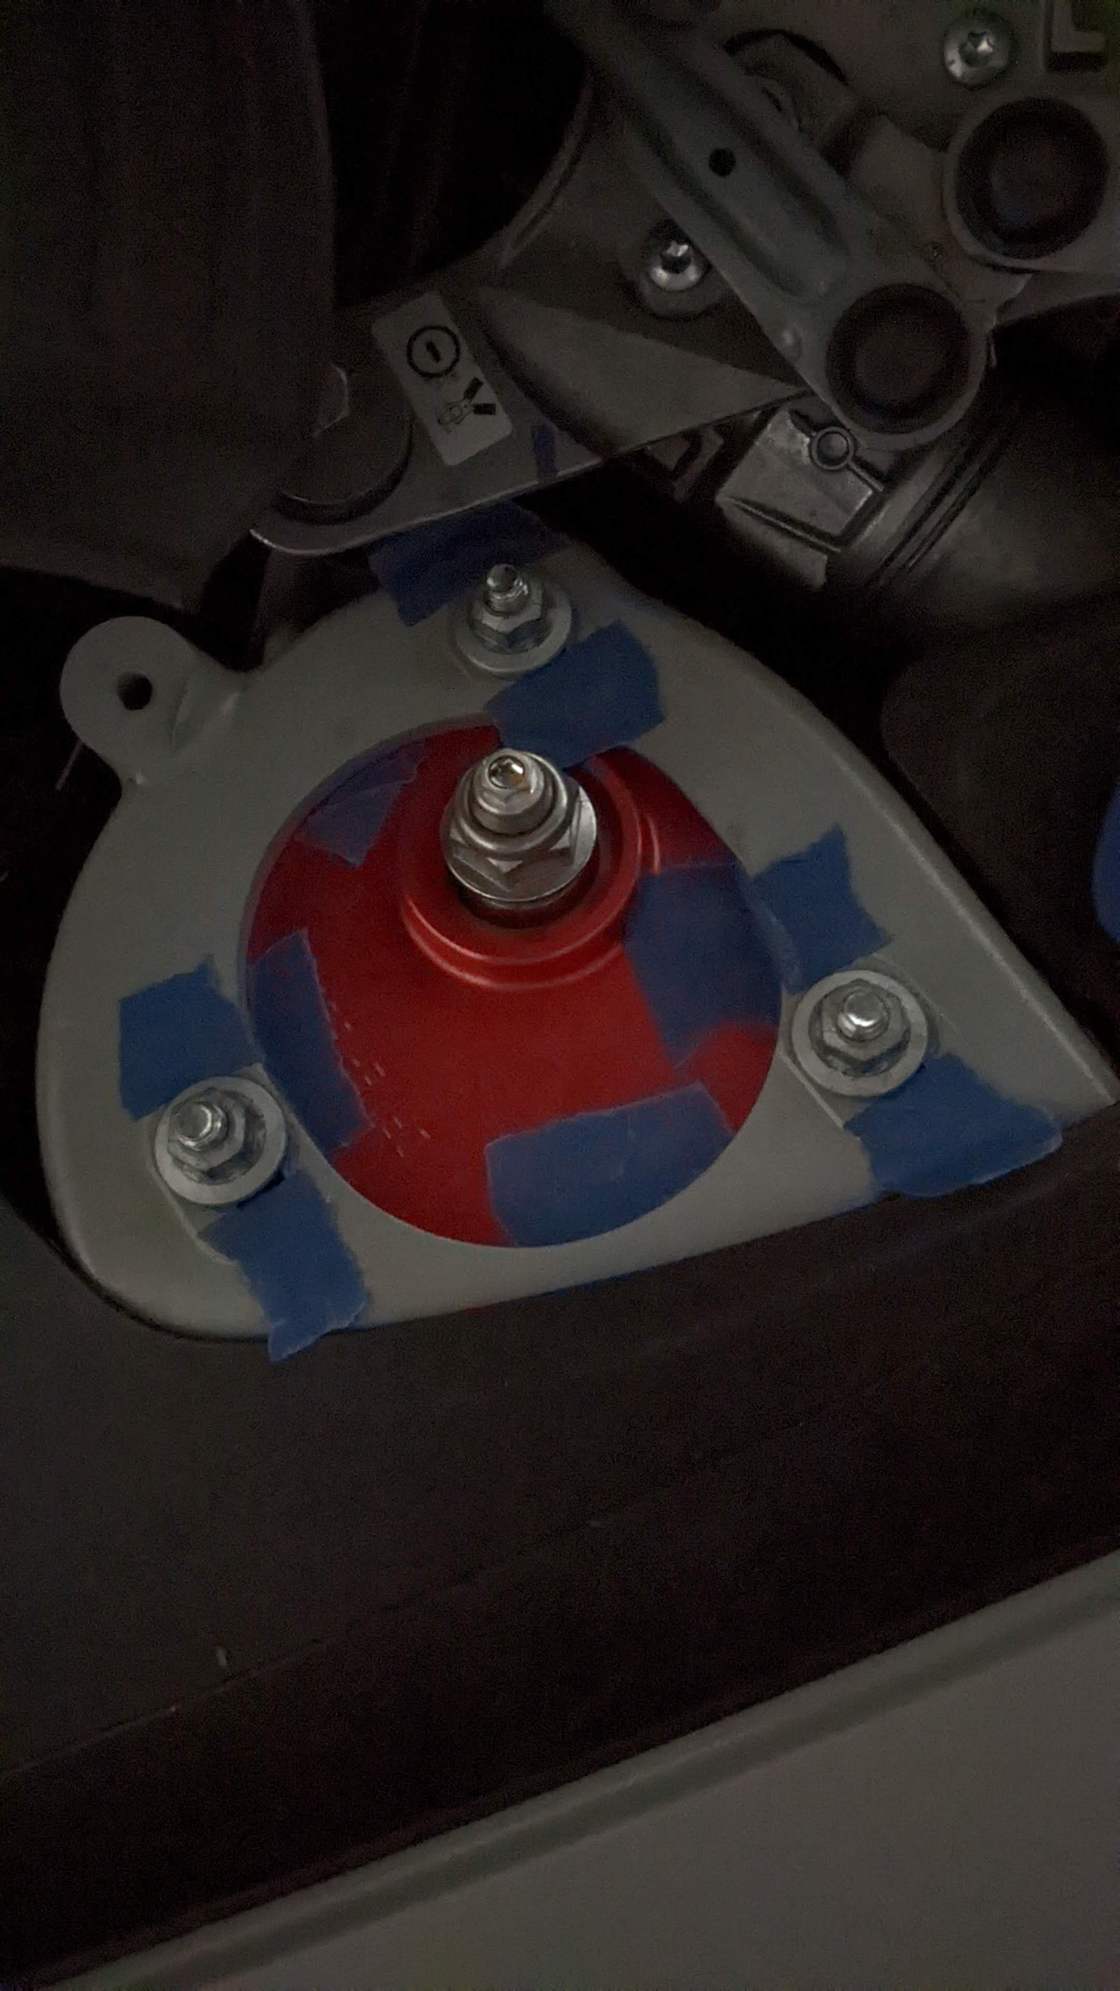
Mark your camber plate so you can relocate it (I used blue tape)
Using impact wrench or schwaben socket, remove the topnut on the strut
Lower the knuckle using the 2nd jack. The strut will drop out of the camber plate and lean forward in the wheel well. Keep an eye on the brake line that it doesn't get strained. There will be 'just enough' slack in the line to drop the knuckle low enough to remove the strut.
Remove the 3 13mm nuts holding the camber plate
Allow the camber plate to drop out of the chassis - now you can remove the springs from the strut, through the top of the wheel well where the camber plate hole is.
Install the new springs etc etc
Rears
Similar process
You must disconnect both sides of the rear swaybar first
Remove the black plastic aero brake ducting from the control arm (use a torx socket for the screws, use a flathead screw driver to unclip the 3 hooks at the front of the aero)
Lift a corner of the car, remove the wheel
Support the knuckle with a 2nd jack/scissor jack. Make sure you will be able to still lower the knuckle (using the lowest point of the knuckle to support it will not give you clearance enough)
Remove the rear interior to get access to the strut top plate (this was harder/longer for me as I have a rollbar)
Loosen the topnut on the strut piston (stock is 22mm but different struts have different size nuts). Need a impact wrench or schwaben tool here)
Lower knuckle allow strut to drop from top plate bearing.
Remove top plate nuts, let top plate drop.
Pull springs off strut and through the hole where the top plate was.
Reinstall everything
Torque values
24ft/lb for the top plate nutes (13mm)
2 ugga dugga with an impact wrench for the strut piston topnut
1 ugga dugga on the swaybar nut. These come loose, one of mine was loose in the rear, so loctite can't hurt (blue probably)
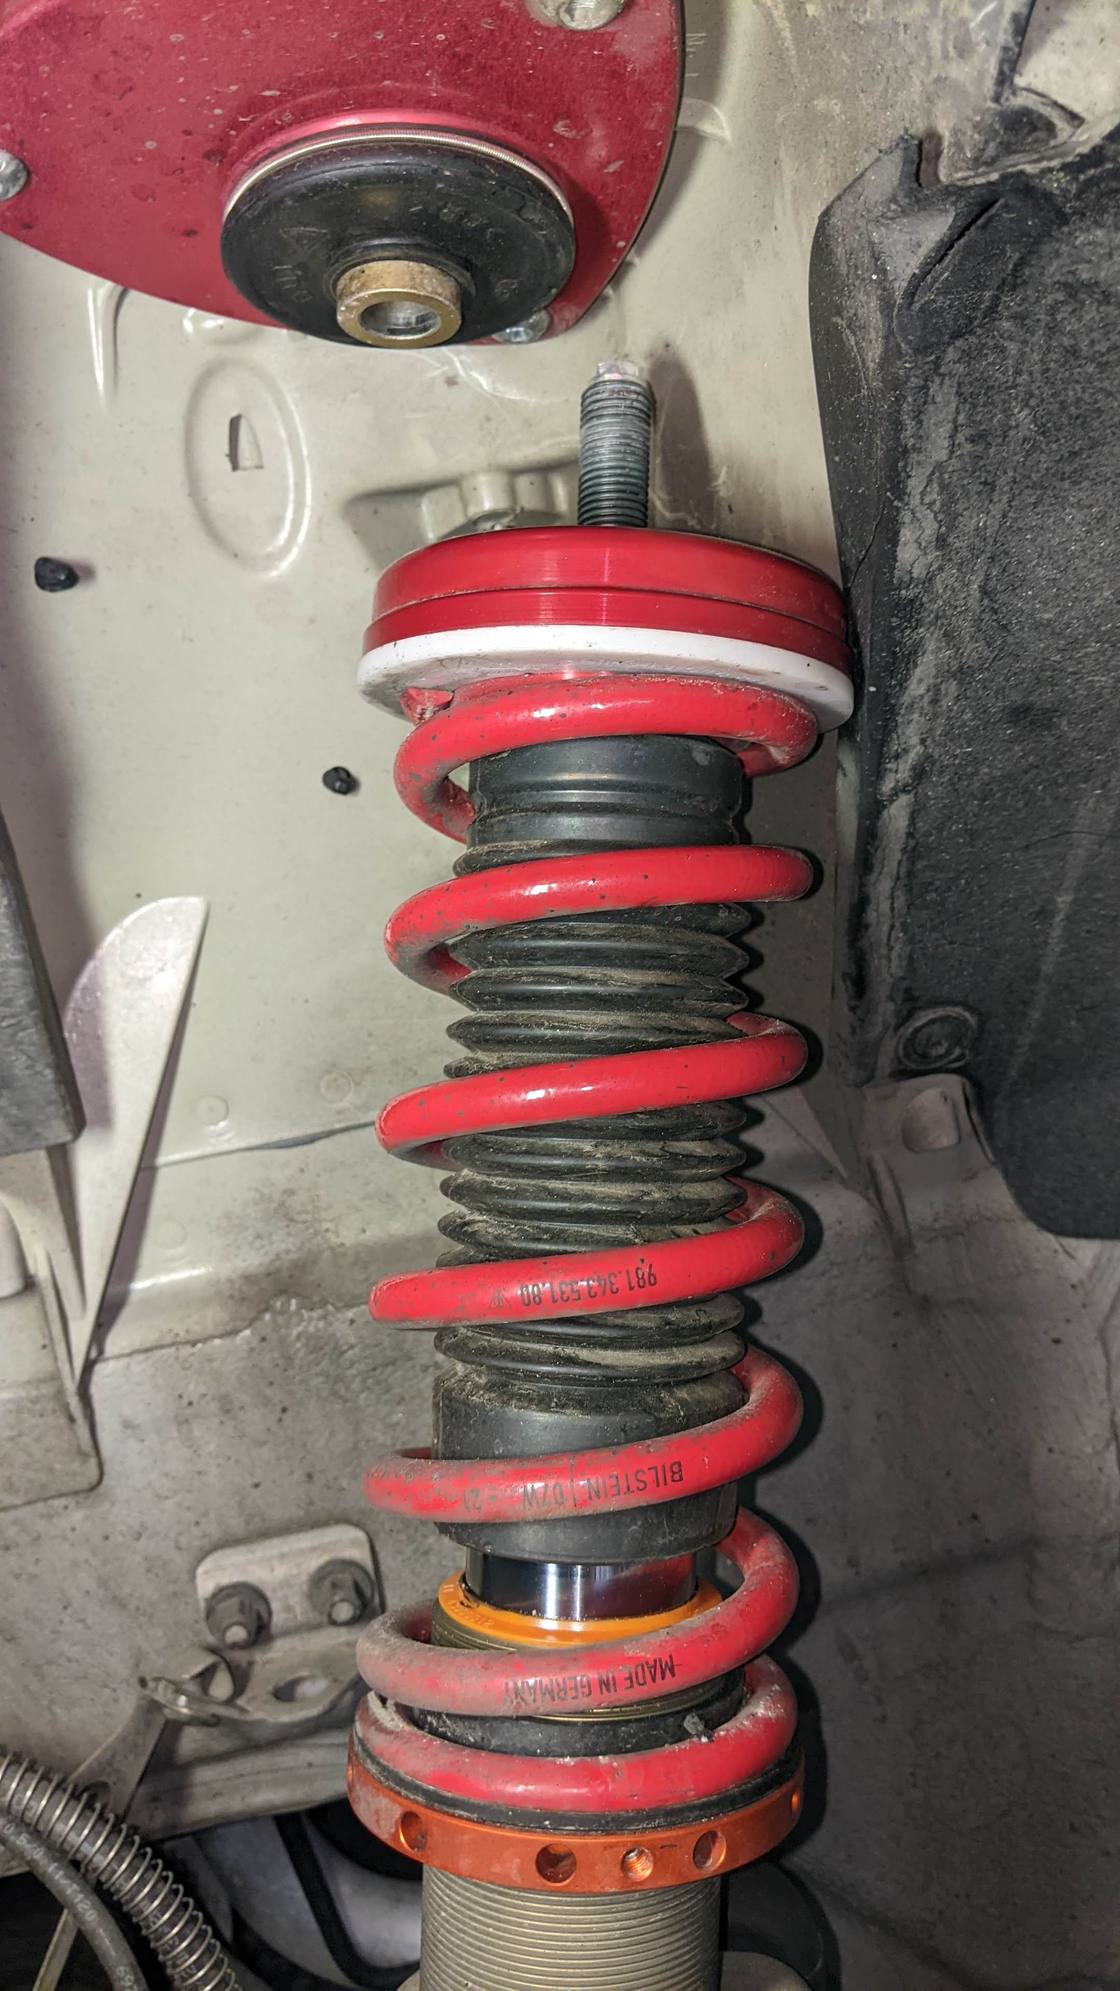
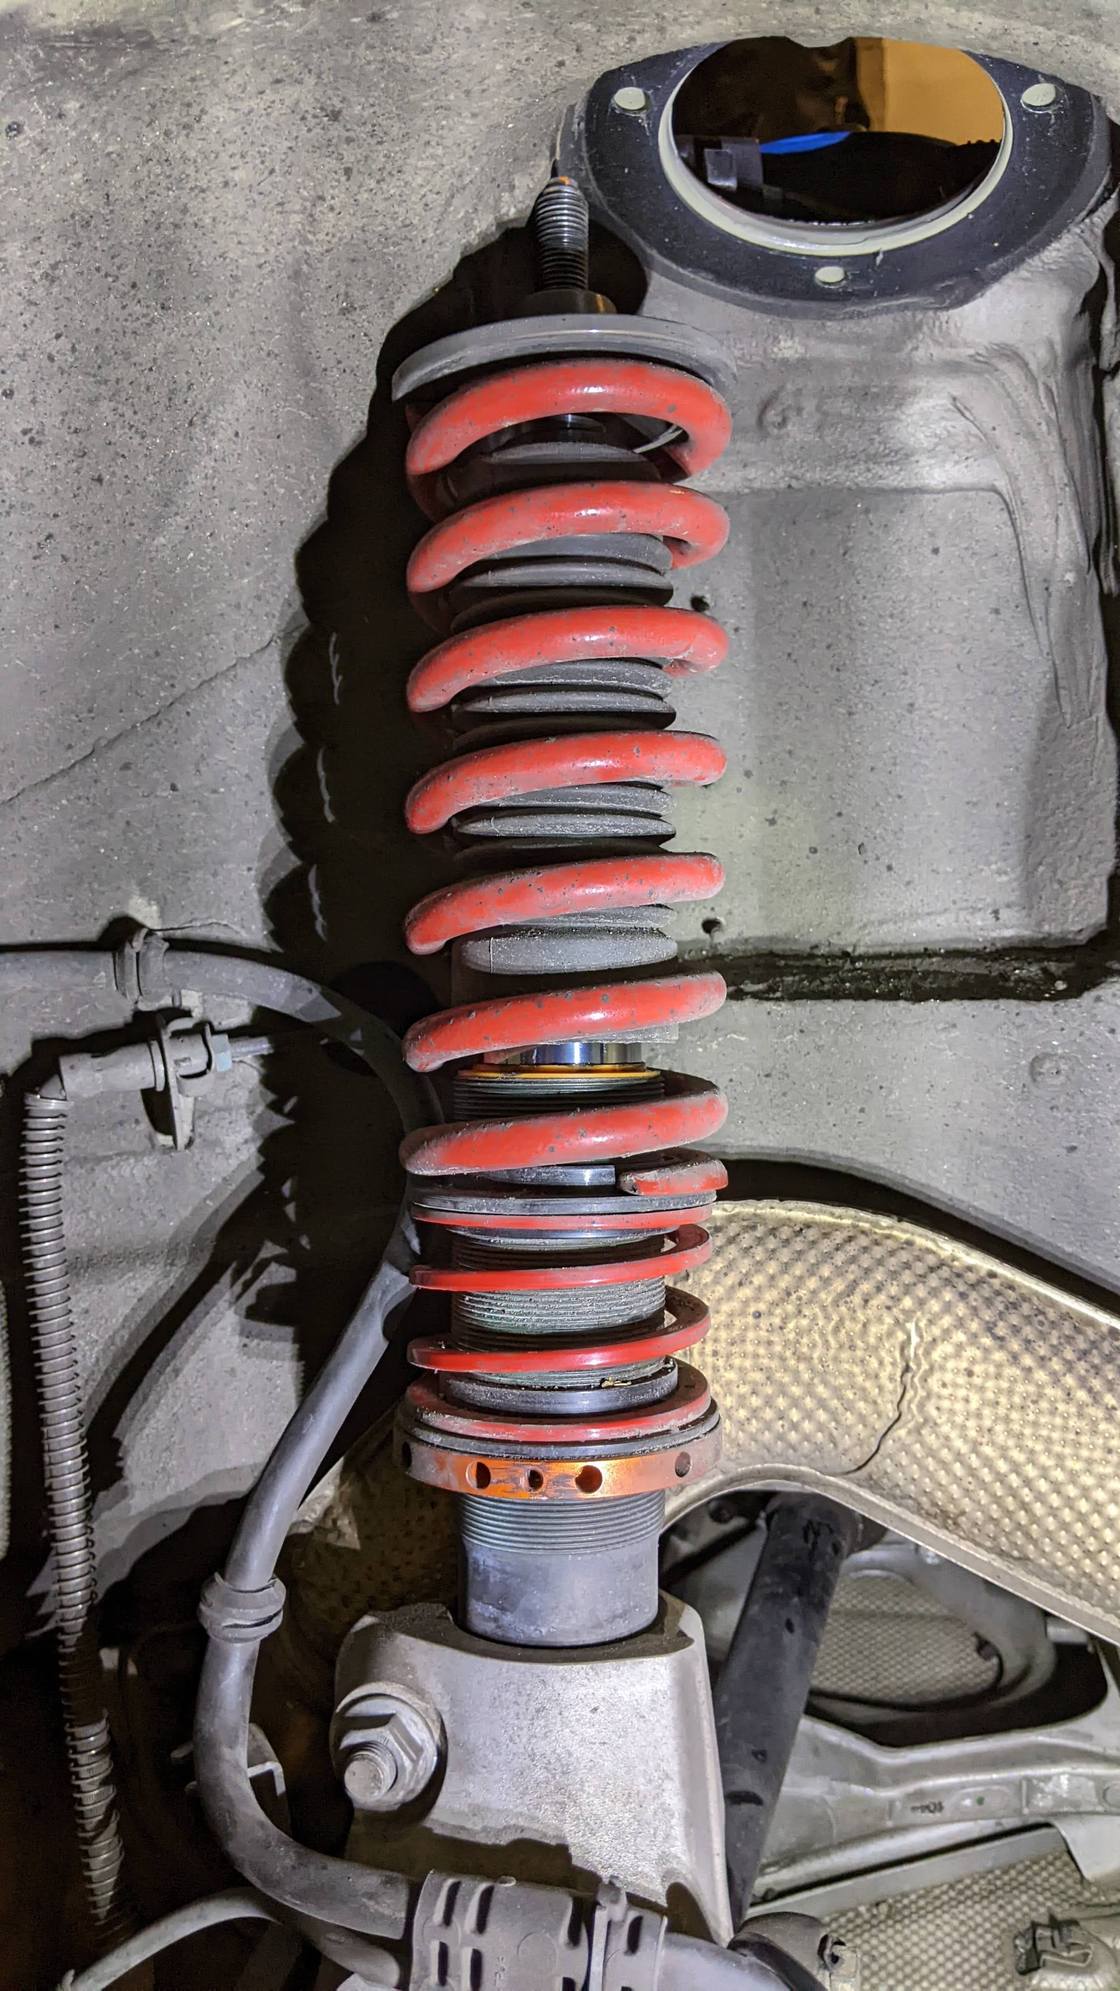
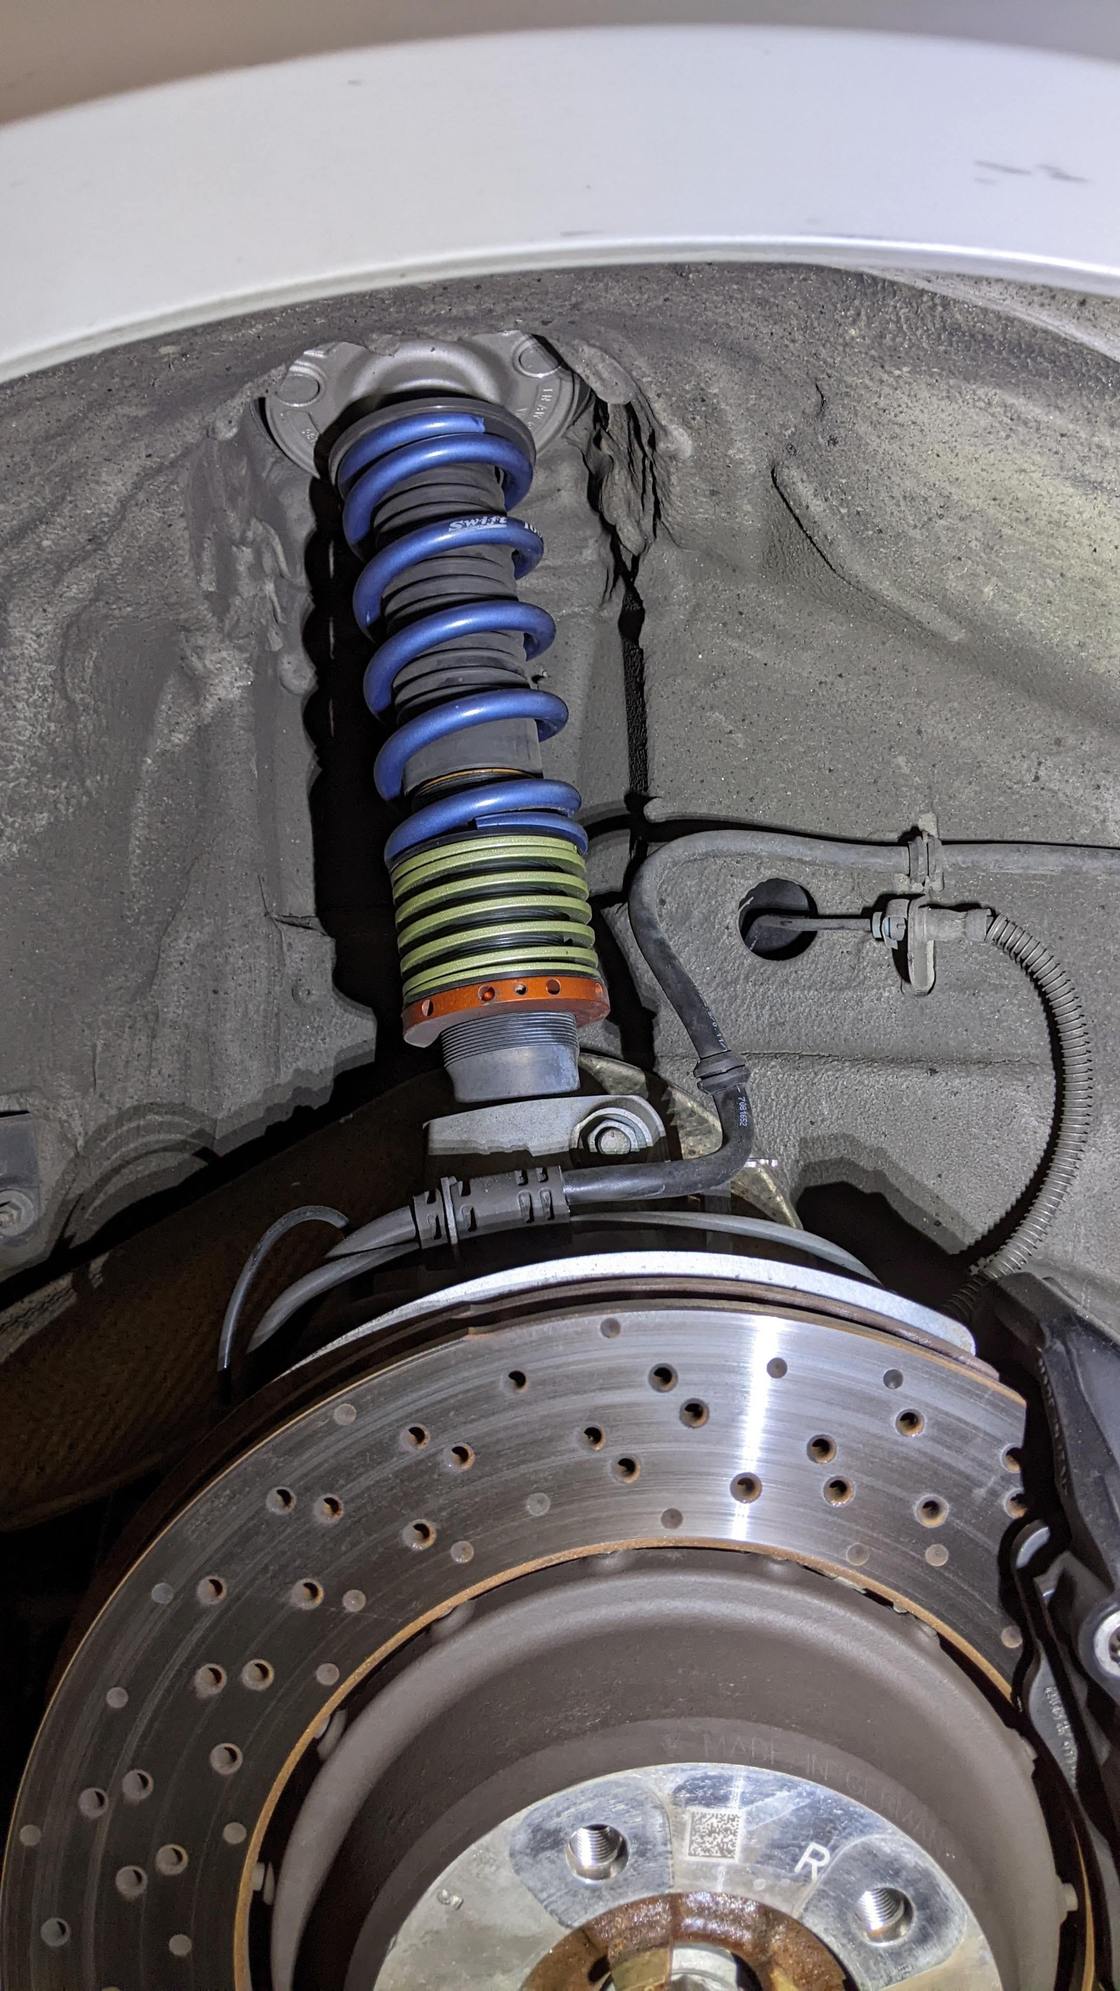
Front strut dropped from camber plate. Rear strut dropped from camber plate. Top plate removed, ready to pull spring up through chassis. Rear with spring removed Reinstalled spring. Drop it in through the hole where the top plate is. I blue taped off the camber plate to re-locate it after removal. The tape around the nuts is to locate left and right limits, the blue tape on the to plate was cut down to locate plate dimensionally in the chassis. Be careful when re-installing as the plate can move around and could push the tape.
I love that this is so easy you don't even need a spring compressor to do it, which has always been the sketchy part of me doing my own suspension work.
Thanks for the write-up, doing mine this weekend!

 03-20-2023, 05:48 AM