Porsche 997: How to Replace Serpentine Belt
A worn out serpentine belt is an easy fix for even the novice mechanic. Learn how to complete this DIY job for your Porsche 997 here.
This article applies to the Porsche 997 (2005-2012).
The Porsche 997 only has one belt on the engine that drives all the accessories, including the air conditioner, alternator and water pump. This serpentine belt — called that because it winds its way around the engine bay — is easy to inspect as it's easily visible by just opening the engine bay. A serpentine belt that is frayed or torn should be replaced, as should one missing large chunks from its ribbing. When a belt does fail, the most noticeable effects will be a loss of power steering and increasing engine temperatures; driving with a broken serpentine belt will cause the car to overheat. Fortunately, you can avoid this by replacing the serpentine belt, which is a pretty simple and straightforward process. Even for a total beginner, there aren't many ways to do damage to your 997's engine in the process. Follow the steps, and you'll be well on your way to keeping your 997 running cool and smooth.

Materials Needed
- 24mm socket
- Breaker bar
- Drive ratchet
- Flat head screwdriver
- New serpentine belt
Pro Tip
If you're replacing a belt that is showing light signs of wear early, a good practice is to save it in a plastic bag after spraying it with 303 Aerospace protectant. This will be a good back-up in case the new belt fails spontaneously.
Step 1 – Remove the air box
The first step is to remove the air box from on top of the engine. This is the large, black plastic contraption that holds the air filter and connects the throttle body to the outside world. There are several steps to this.
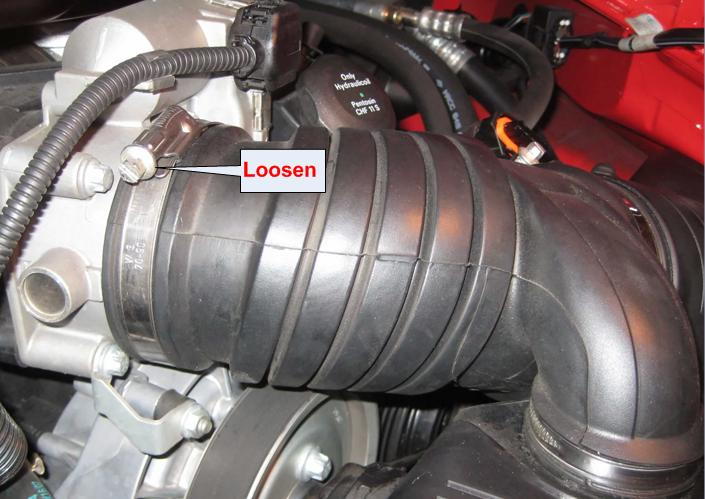
- First, loosen the clamp connecting the air box to the throttle body with a flat head screwdriver. The hose is flexible, so pull it off when the clamp is loose. Do not remove the clamp completely if you don't need to.
- Next, disconnect the mass air flow sensor (MAF). The connector is is attached to the air box near the throttle body. It's a regular plug, so you won't need any tools to remove it, but you will need to press down on the plug's tab to get it to release. Pull it off. Next, unclip the vacuum solenoid harness. It's identifiable as a brown plug near the MAF held tight by a metal clip. Lastly, pull out the vacuum hose attached to the other end of the vacuum solenoid harness.
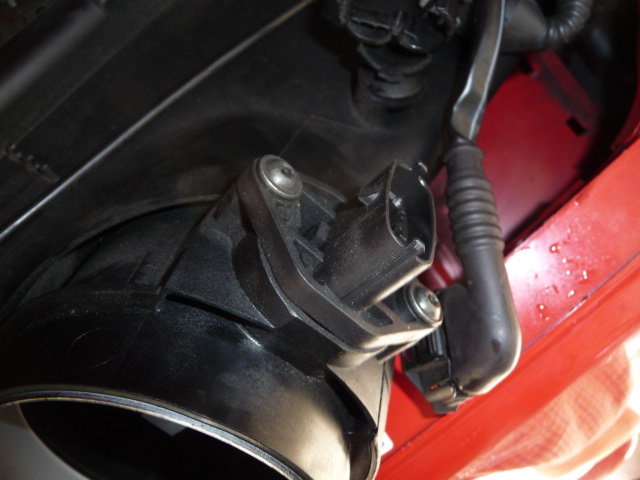
Figure 2. Mass Airflow Sensor plug. 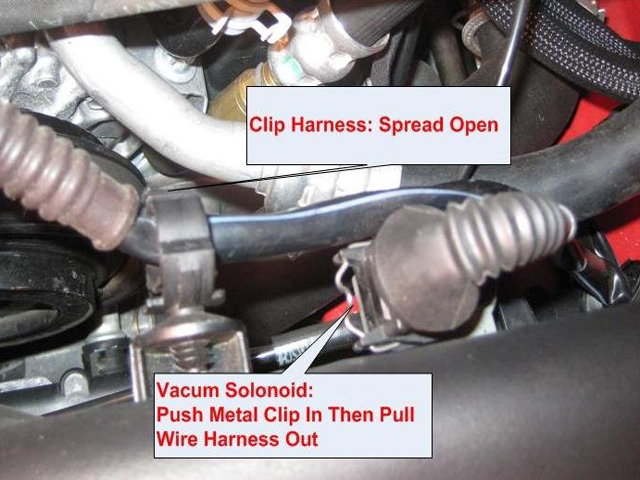
Figure 3. Vacuum solenoid plug.
- There are a few wires clipped onto the body of the air box, but they should all be easily visible. They're not attached in a hard fashion, mainly just in clips. Pull them off.
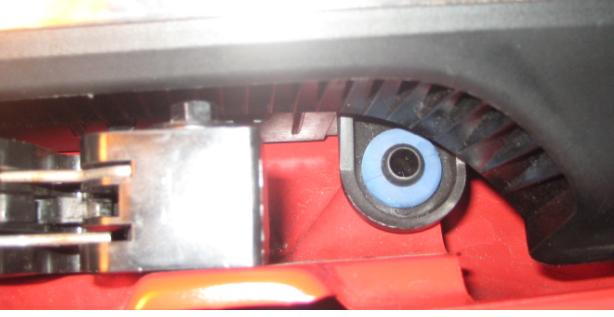
- Finally, once all wires attached to the air box have been unclipped, pull the air box out of the engine bay. It's held in place by a blue rubber ring and a plug that will provide resistance, but it's not a fastener so just use some force.
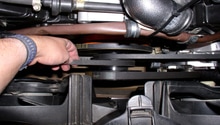
Step 2 – Remove serpentine belt
You'll need to slacken the tension on the serpentine belt in order to remove it. Take the drive ratchet and breaker bar with a 24mm socket to the tensioning pulley and turn it clockwise. This will loosen the serpentine belt and allow you to pull it off the pulleys.
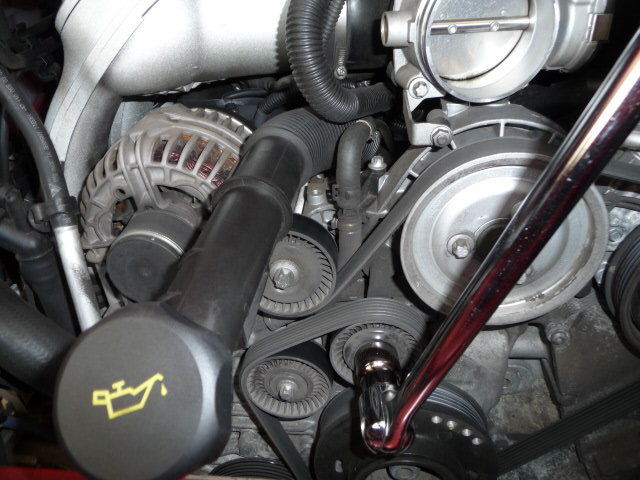
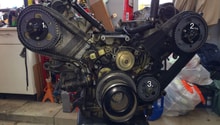
Step 3 – Route new belt
Begin installing the new belt by aligning it with the bottom pulleys first. It might be easier to get the belt around the middle pulleys by feeding them through the the two larger pulleys beneath them. Pull the rest of the belt around the top pulleys so that they're tight. You won't be able to completely put the serpentine belt on yet, so make sure the slack is at the top.
Crank the tensioner pulley clockwise again and pull the slack down around the top idler pulley. Release the tensioner to complete the installation.
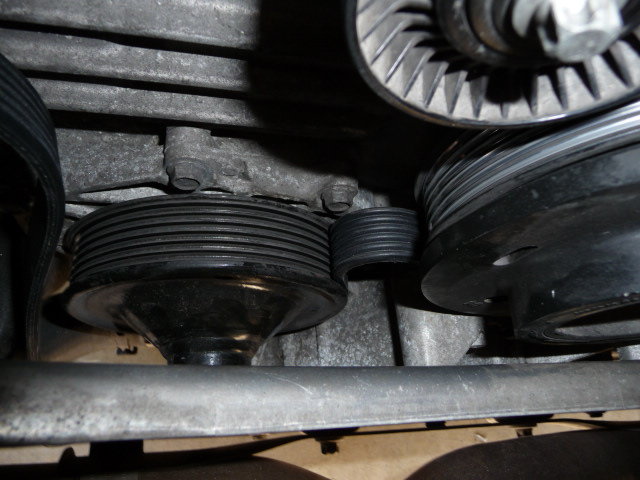
Figure 6. Serpentine belt routing. 
Figure 7. Serpentine belt slack. 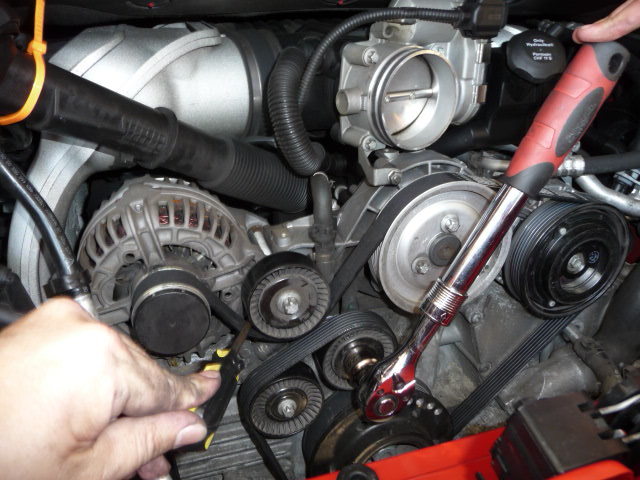
Figure 8. Serpentine belt tensioning.
Pro Tip
It might be easier to leave the slack around the tensioner pulley.
Step 4 – Finishing up
Re-install the air box by the blue ring and plug. Reconnect the vacuum hose, the vacuum solenoid plug, and the MAF plug. Tighten the clamp connecting the air box to the throttle body. Clip all loose wires back to the airbox.
Start the engine and listen for any harmonic noises that sound "off" and could be indicative of a worn pulley or an improper install. Get out and watch the engine as well. The belt should be moving along the pulleys in a smooth fashion, not bouncing or skipping.
Related Discussions and Site
- How to Replace Serpentine Belt - Rennlist.com
- Symptoms of Failing Serpentine Belt - Rennlist.com
- Example of Serpentine Belt Blow Out - Rennlist.com
- DIY Replace or Remove Air Box - 6SpeedOnline.com