Porsche 997: How to Remove Gauge Cluster
Whether you are changing the color of your gauge faces, detailing your interior, or trying to fix an annoying rattle, removal of the gauge cluster can seem like a job in itself. Fortunately, Porsche has designed the gauge cluster to be quickly and easily removed. Find out how simple it is to remove the gauge cluster of your Porsche 997.
This article applies to the Porsche 997 (2002-2012).
Unlike some of the older Porsche models, the Porsche 997 uses an entire gauge cluster assembly (as opposed to individual gauges). Porsche has cleverly hidden nearly all of the fasteners for the interior components, which makes for a visually appealing cabin. This is no different for the gauge cluster as it looks to be physically one with the dash. However, this can be a bit daunting for a DIY-er who is interested in working on the interior of their car. Fortunately, the gauge cluster can be easily removed from the dash in a matter of minutes. This step-by-step article will walk you through the process of removing your Porsche 997 gauge cluster.

Material Needed
- Magnetic screwdriver with Torx bits
Step 1 – Position steering wheel
To first gain access to the gauge cluster, adjust the steering wheel position. To do so, undo the steering wheel locking lever under the column, and pull the steering wheel all the way out (towards you). Simultaneously, move the steering wheel to the fully down position. With the adjustment complete, lock the steering wheel back in place with the locking lever.
Step 2 – Reposition lower gauge trim
With the steering wheel now lowered, the lower gauge trim piece is now easily accessible. To free the trim, simply pinch the piece in the center with your fingers, and pull it towards you. The trim is secured by two clips on the backside, which requires a bit of force to free. Once the trim is free of the gauge cluster, proceed to removing gauge cluster fasteners (Step 3).
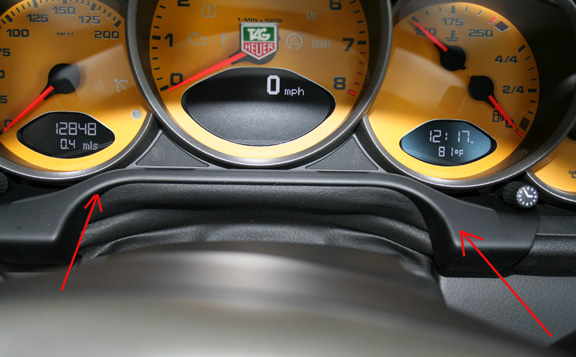
Figure 2. Gauge cluster trim location. 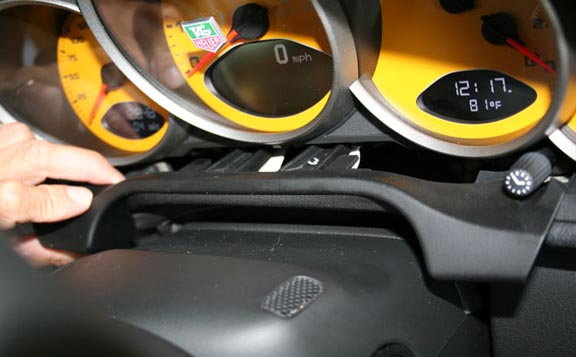
Figure 3. Pull out on the trim to free it.
Pro Tip
The trim piece is not completely removed from the dash, but it slid backwards enough to access the Torx fasteners on the gauge cluster.
Step 3 – Remove gauge cluster fasteners
Underneath the trim panel are two Torx screws that secure the bottom portion of the gauge cluster in place. Remove the two Torx screws, preferably using a magnetic driver to avoid losing the screws.

Step 4 – Free gauge cluster from dash
The gauge cluster is now ready to be separated from the dash. With a secure grip on the instrument cluster, give it a firm pull towards you. The gauge cluster uses several metal spring clips on its backside to help keep the cluster in place. These clips are notoriously difficult to remove, but a bit of force will allow the springs to compress and slide out of their seats.
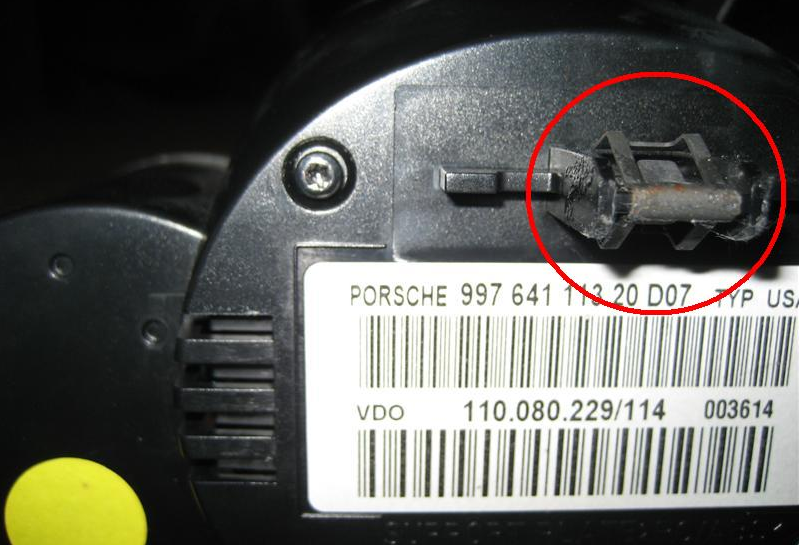
Figure 5. Spring clip on backside of cluster. 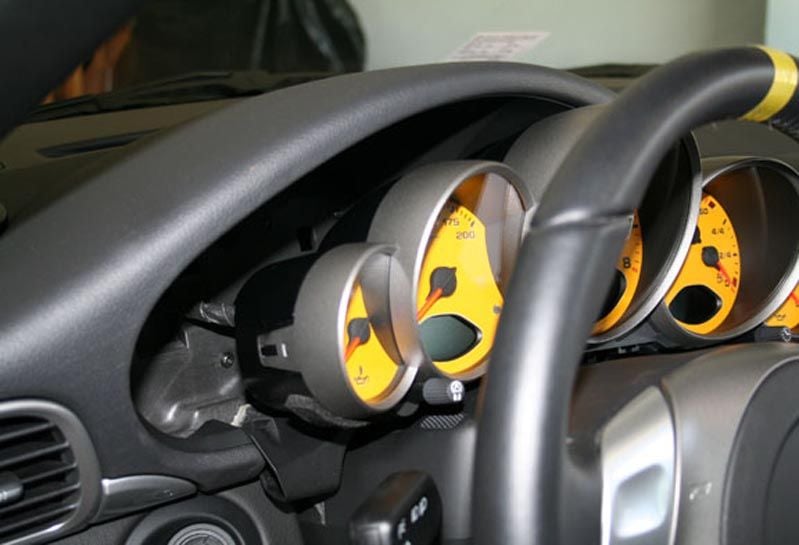
Figure 6. Separating instrument cluster from dash.
Pro Tip
Once you have the instrument cluster free of its mount, be careful as the electrical harness is still connected to the backside of it.
Step 5 – Remove electrical harness
With the instrument cluster now free, remove the electrical harness from the back of the cluster. The harness plug has a "swinging arm" style connector to keep it secured to the cluster. Simply un-clip the swinging arm by pushing down, and allowing it to swivel 90 degrees. With the swinging arm undone, the harness can be unplugged and the gauge cluster removed.
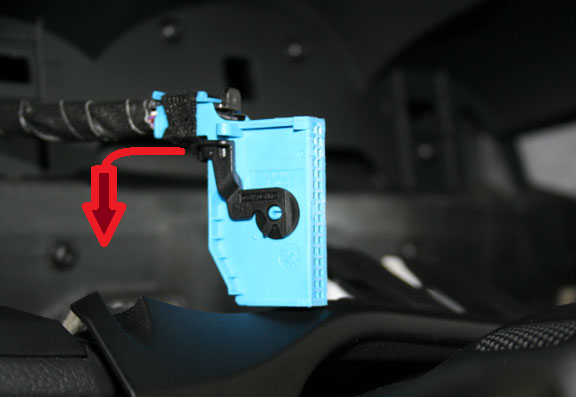
Figure 7. Swinging arm on electrical harness plug. 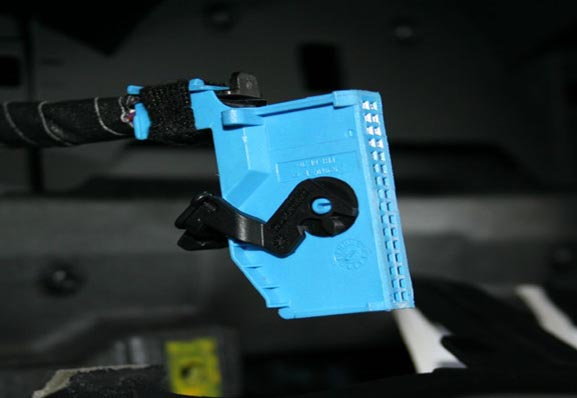
Figure 8. Swinging arm opened. 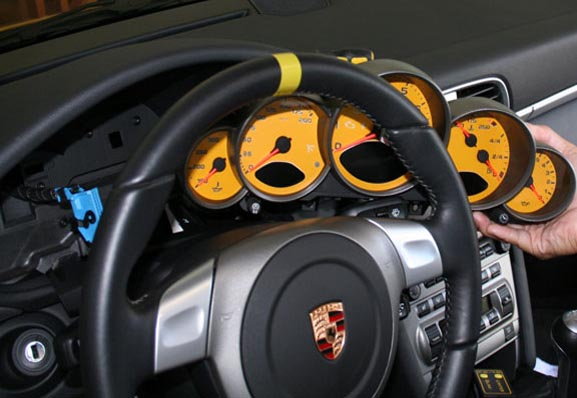
Figure 9. Instrument cluster removal.
Pro Tip
With the instrument cluster removed, do not turn on the ignition or attempt to start the car as an error code will likely be present once the gauge cluster is re-installed.
Step 6 – Re-installation
Installation is the reverse of the removal procedure.
- Plug electrical harness into instrument cluster. Be sure to secure the plug by locking the swinging arm into place, and listening for an audible click.
- Push gauge cluster into place, listening that the spring clips audibly engage.
- Install two Torx screws on the front side of the cluster. Do not over tighten.
- Clip lower gauge trim panel back into place.

Note
If installing an entire new instrument cluster, a PIWIS diagnostic tool is needed to program the previous cluster's settings into the new cluster.
Related Discussions
- Replacing Instrument Cluster - Rennlist.com
- Removal of Instrument Cluster - Rennlist.com
- 997 Dash Rattle - Rennlist.com
- Dash Rattle Solved! - Rennlist.com