My Trailer Diary


 04-15-2017, 09:53 AM
#542
Drifting
Thread Starter
Join Date: Jul 2009
Location: Black Sheep Racing World HQ
Posts: 3,278
Likes: 0
Received 25 Likes
on
14 Posts
OK, I got the Fabspeed tie downs installed and attempted to use the Reter method described a few posts earlier. I have to admit I was baffled. The front straps were fat too short to reach all the way into the frunk. It's still hard to reach the tie downs even with the car stopped along the ramps. I struggled to make it work, but sadly, I'll be going back to the looping thru the wheel technique.
04-16-2017, 10:56 PM
#544
GT3 player par excellence
Lifetime Rennlist
Member
Lifetime Rennlist
Member

 04-17-2017, 10:41 AM
#546
Drifting
Thread Starter
Join Date: Jul 2009
Location: Black Sheep Racing World HQ
Posts: 3,278
Likes: 0
Received 25 Likes
on
14 Posts
I must confess, I have other circumstances that prevent me from using the new tie down anchor points. I have a 2 shelf tire cart that is stored in the very back of the trailer, supported by 2 shoring beams. In order to roll the tire cart in the trailer, I need as much free floor space as possible. The rear tie downs are fairly close to the center of the car, and the straps just get in the way.
Here are some photos showing my set up:
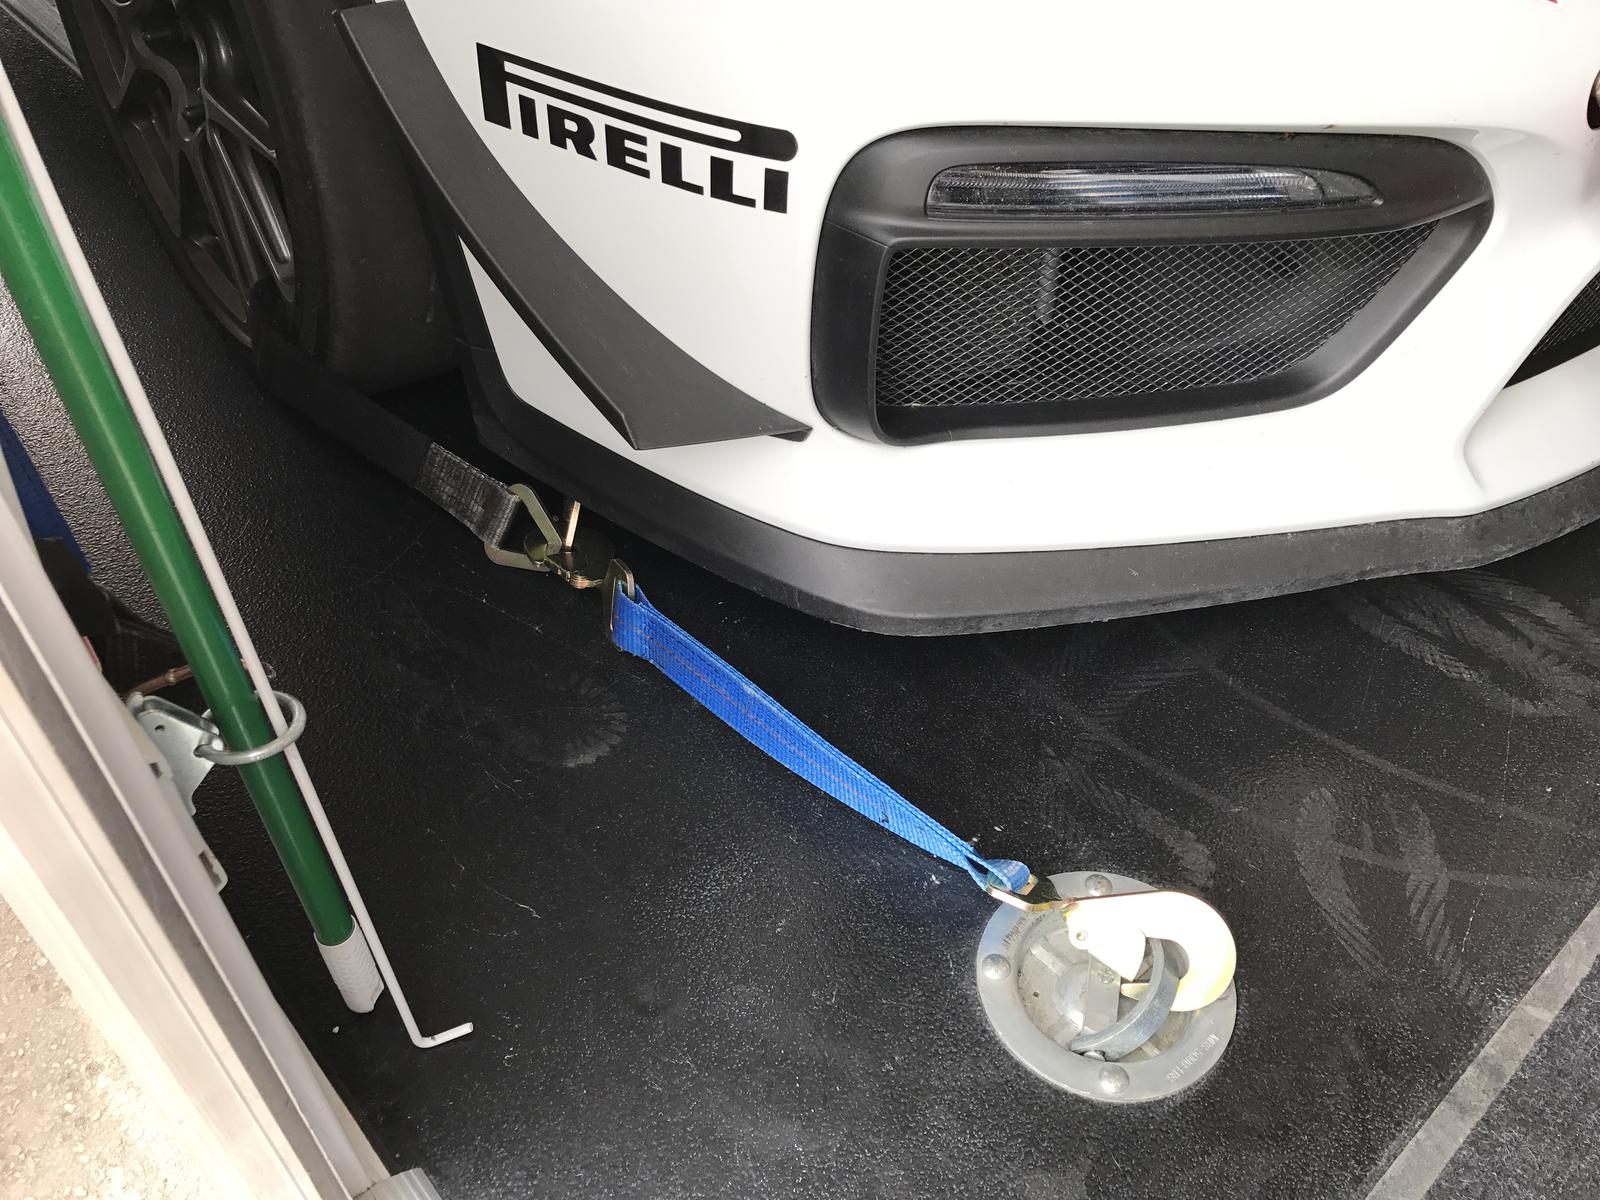
I used fixed length straps in the front
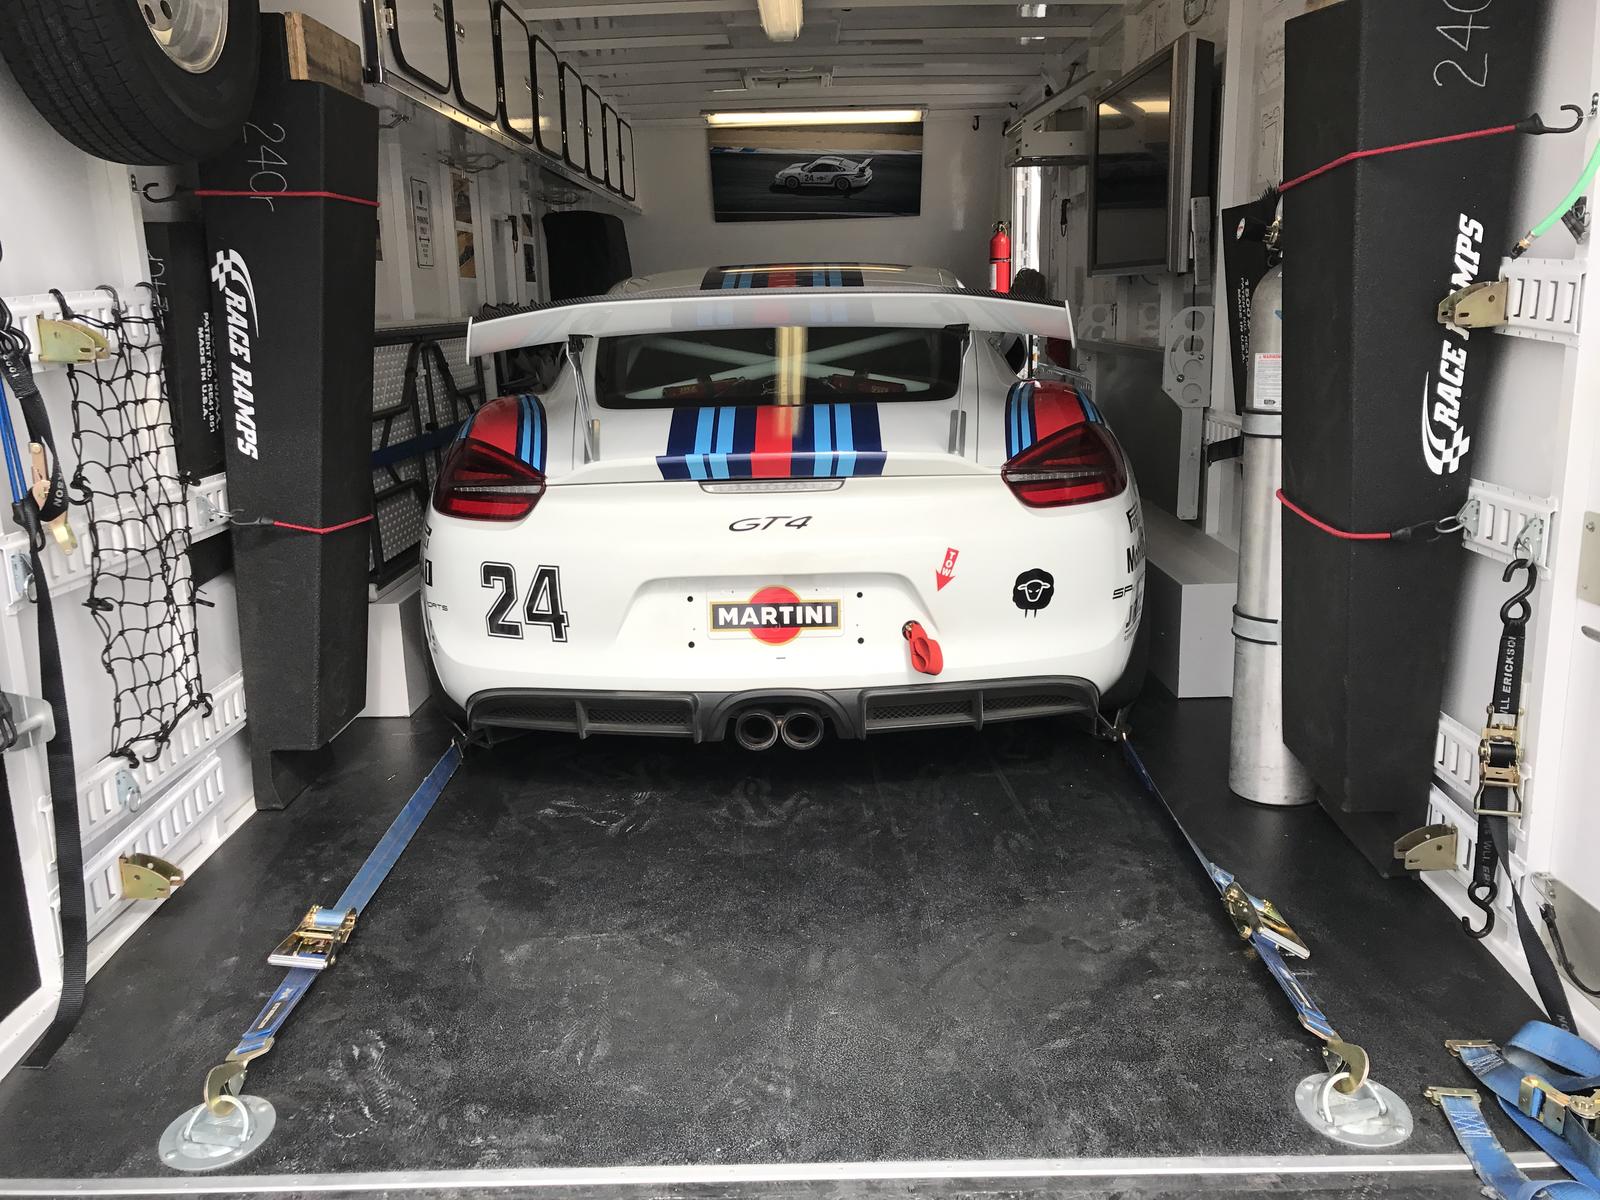
The rear uses standard ratchet straps

Notice the 2 shoring beams and obviously the tire cart
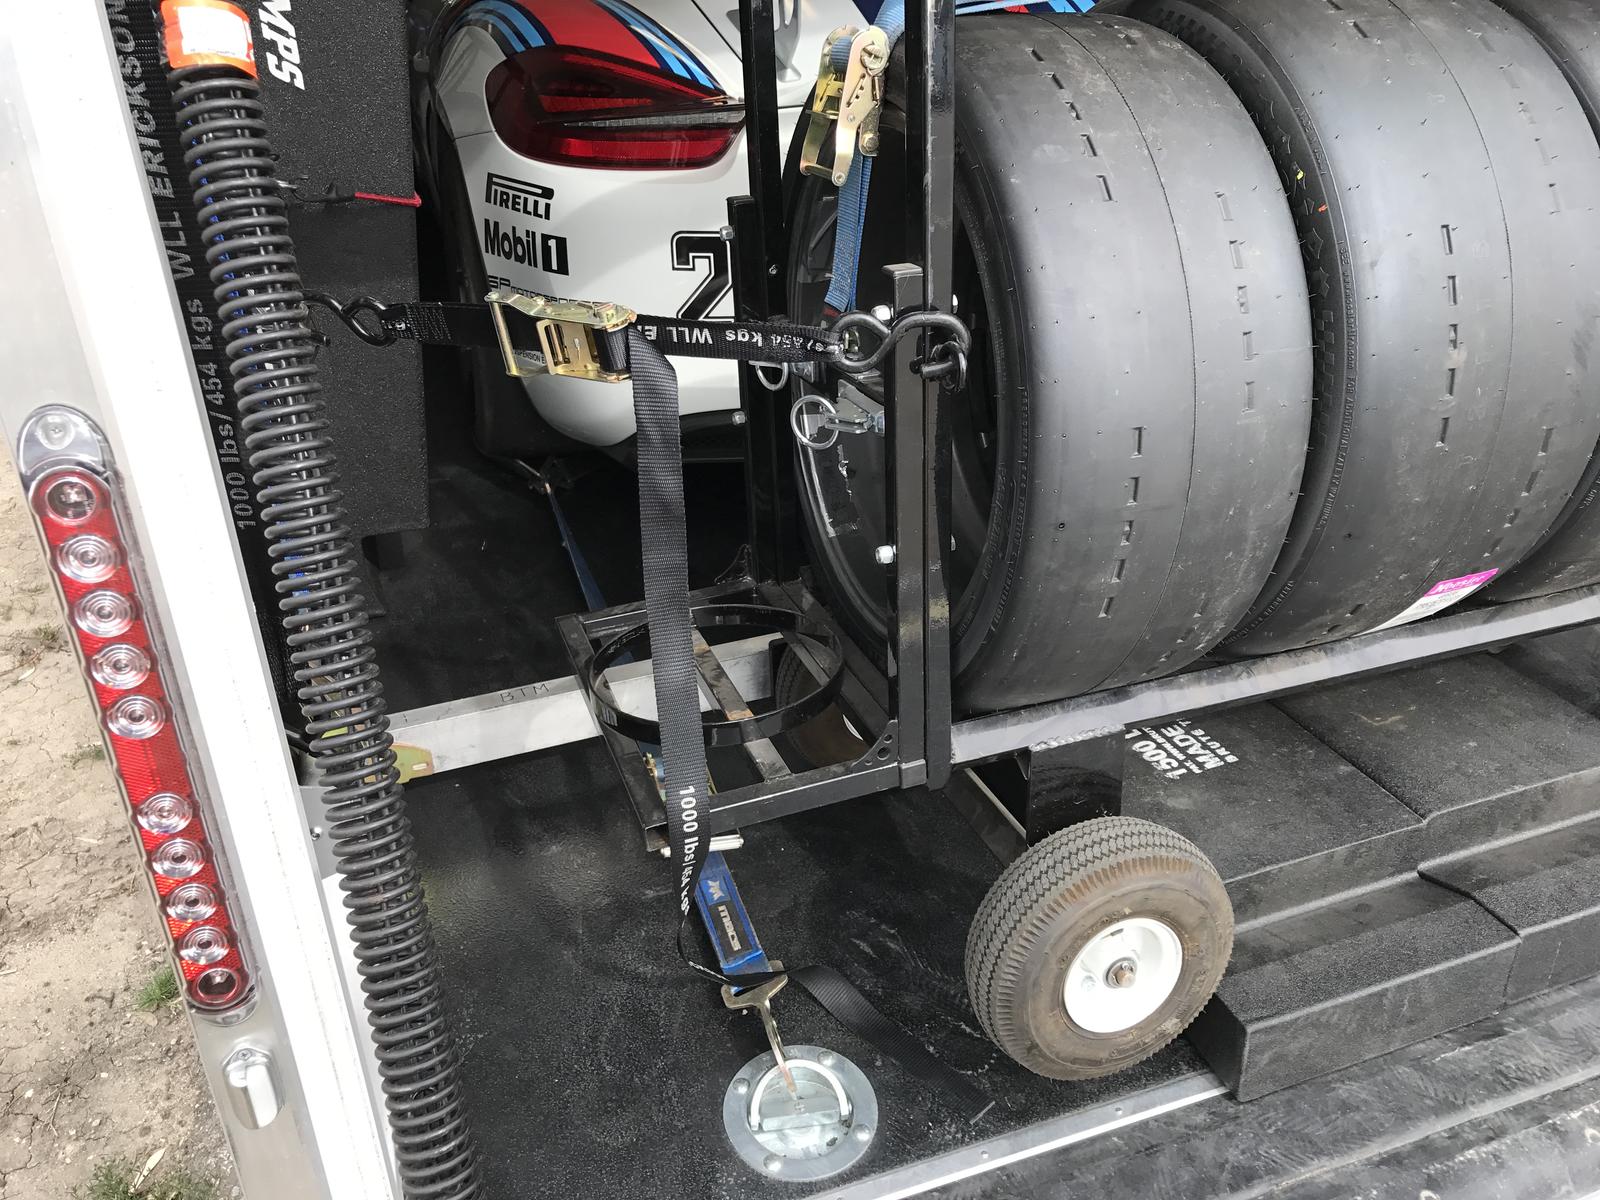
The straps pass under the lower shoring beam and outside of the cart
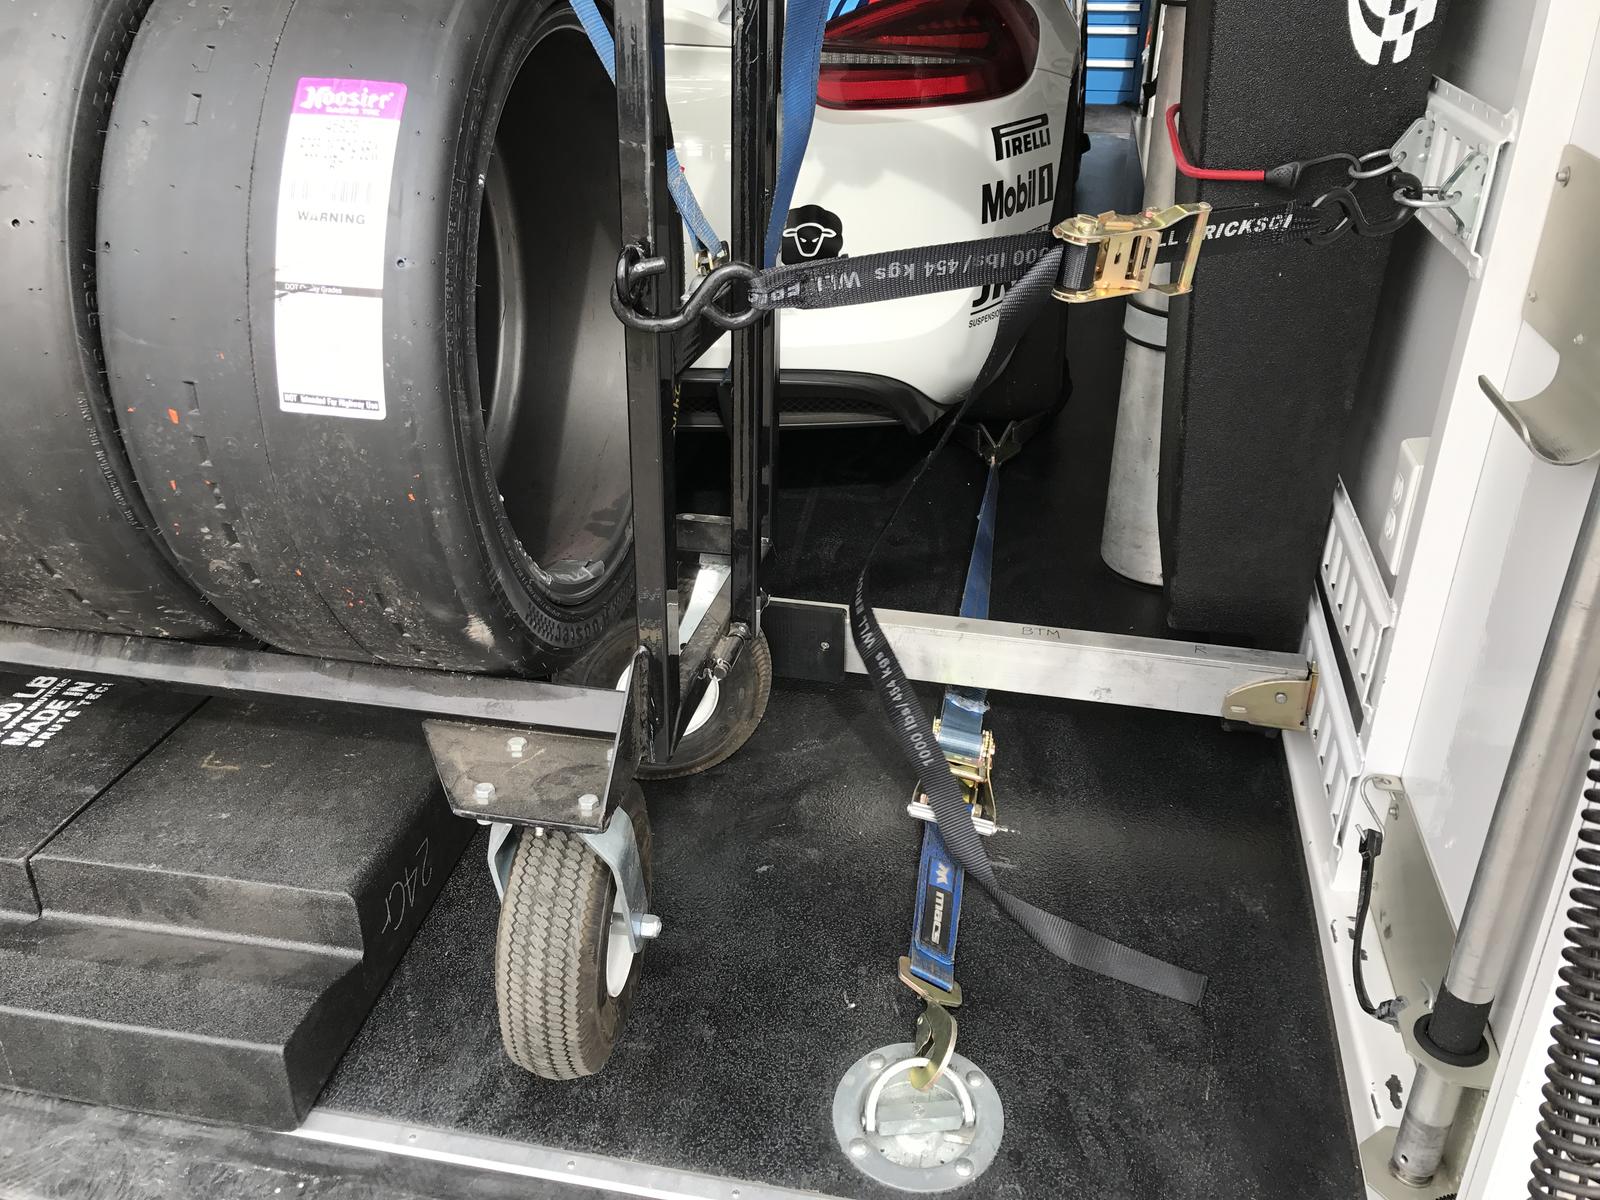
The smaller half of the 2-piece ramps is stored underneath the tire cart and lower shoring beam
Here are some photos showing my set up:
I used fixed length straps in the front
The rear uses standard ratchet straps
Notice the 2 shoring beams and obviously the tire cart
The straps pass under the lower shoring beam and outside of the cart
The smaller half of the 2-piece ramps is stored underneath the tire cart and lower shoring beam
04-17-2017, 11:57 AM
#548
Drifting
Thread Starter
Join Date: Jul 2009
Location: Black Sheep Racing World HQ
Posts: 3,278
Likes: 0
Received 25 Likes
on
14 Posts
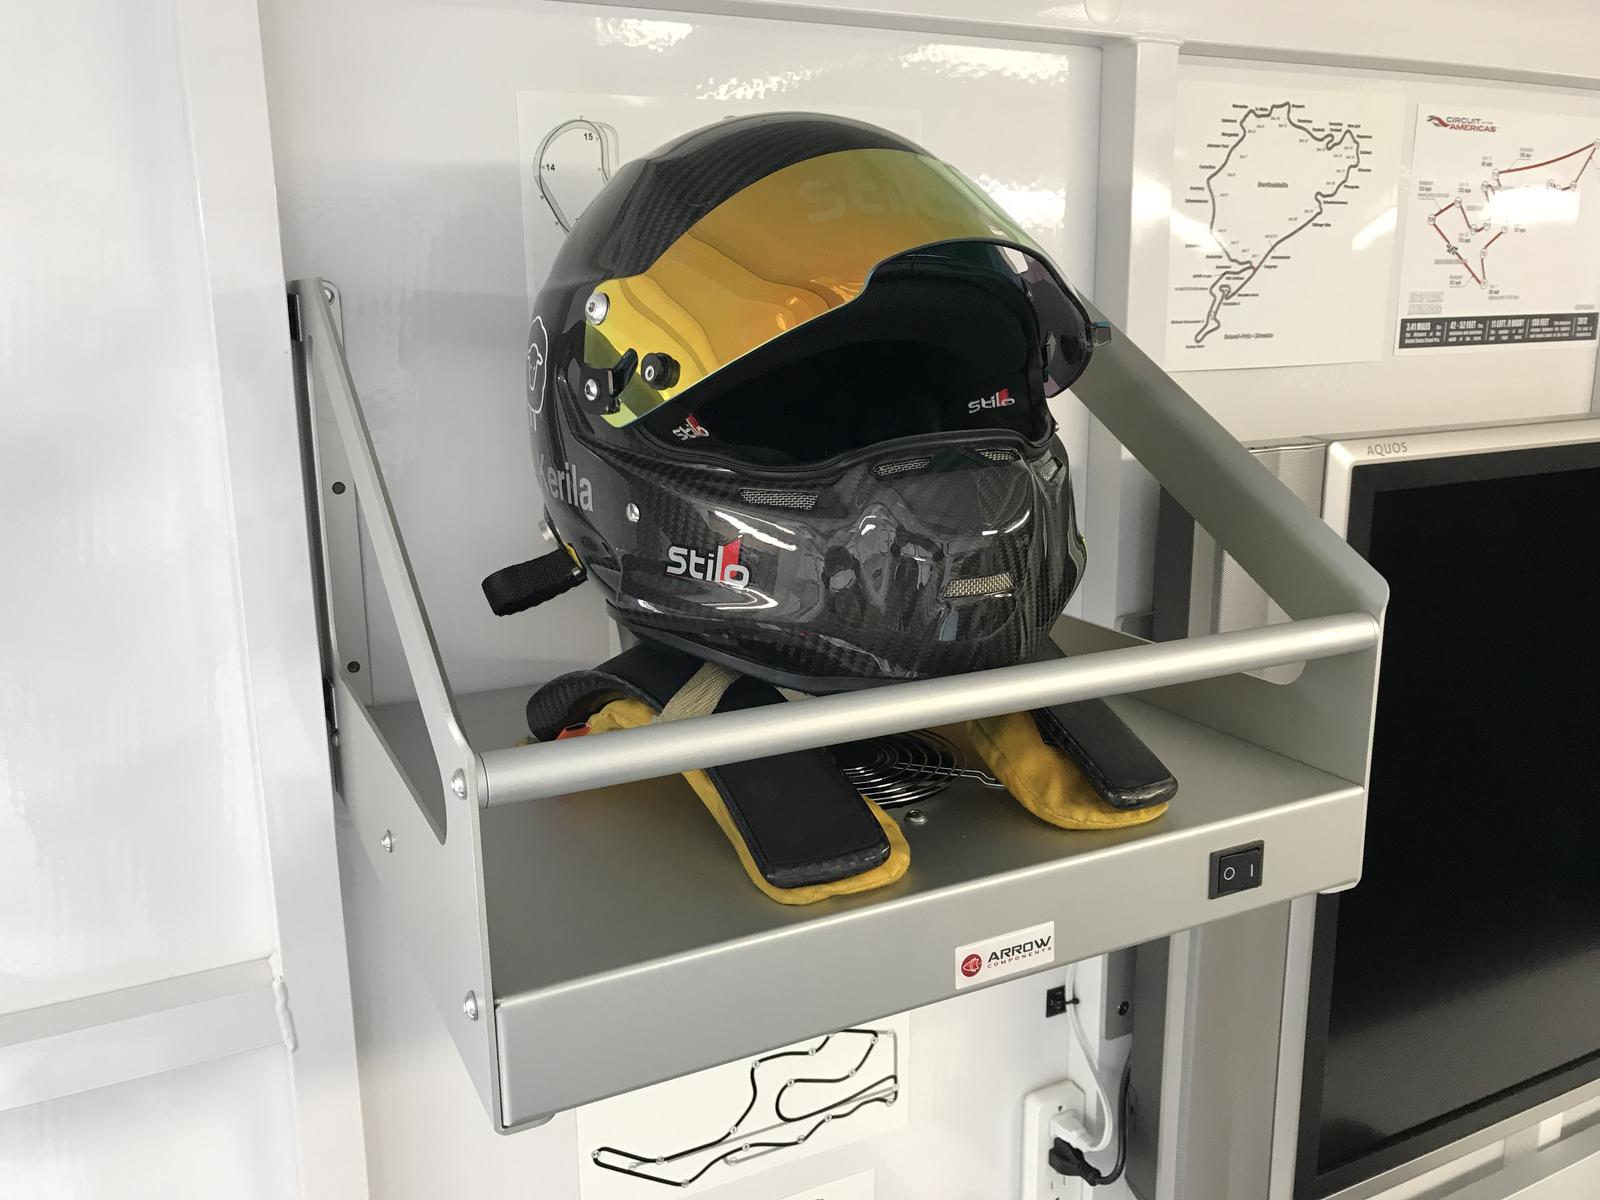
I built a helmet blower. I purchased a single helmet shelf from Arrow Components. I then purchased an AC tube axial fan, fan guards, and a switch along with some wiring bits. I had a machine shop cut the fan and switch holes. Works great!

04-17-2017, 09:16 PM
#550
Addict
Lifetime Rennlist
Member
Lifetime Rennlist
Member
Join Date: Oct 2005
Location: On Rennlist, apparently
Posts: 4,447
Likes: 0
Received 37 Likes
on
18 Posts
Originally Posted by 24Chromium
I built a helmet blower. I purchased a single helmet shelf from Arrow Components. I then purchased an AC tube axial fan, fan guards, and a switch along with some wiring bits. I had a machine shop cut the fan and switch holes. Works great!
Attachment 1156220
Attachment 1156221
Attachment 1156220
Attachment 1156221
Well done
04-18-2017, 12:04 AM
#552
GT3 player par excellence
Lifetime Rennlist
Member
Lifetime Rennlist
Member
^ this is why ppl should just do what i tell them to do. as i would tell max. dont ask why. just do what i say.
though you do make good use of space.
i suggest you add a viewing platform on the roof. TPD has that option
though you do make good use of space.
i suggest you add a viewing platform on the roof. TPD has that option
04-18-2017, 12:08 AM
#553
GT3 player par excellence
Lifetime Rennlist
Member
Lifetime Rennlist
Member
chromium, i need to commission you to builid me a helmet blower, two fan for two lids.
will it be ready for BW end of may.?
will it be ready for BW end of may.?
04-18-2017, 03:20 PM
#555
Rennlist Member
Lar, did you get the new fuel jug rack? photos?