When you click on links to various merchants on this site and make a purchase, this can result in this site earning a commission. Affiliate programs and affiliations include, but are not limited to, the eBay Partner Network.
Installed the Radiator Grill Store guards on the 992.2
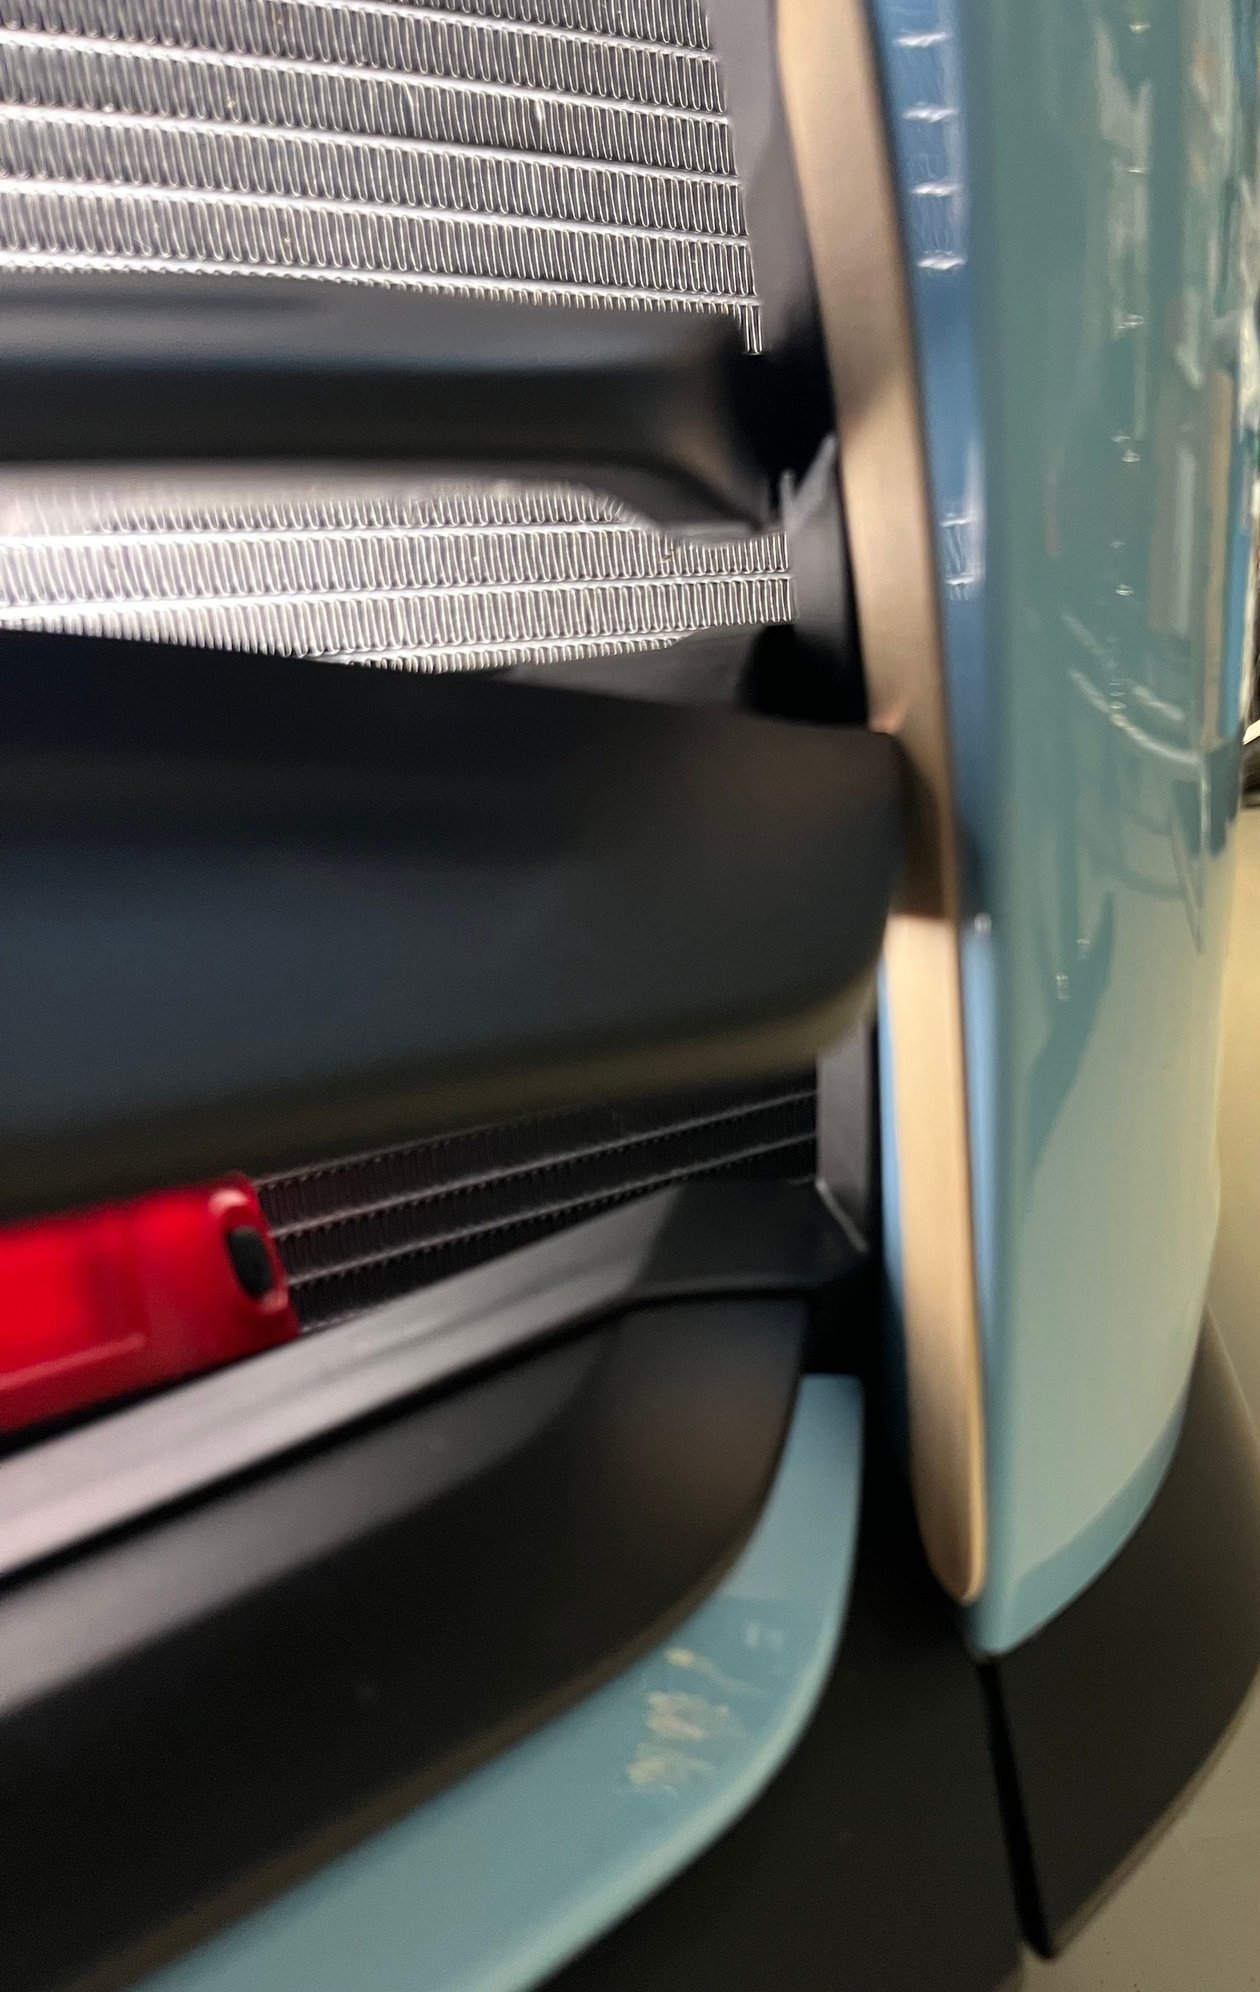
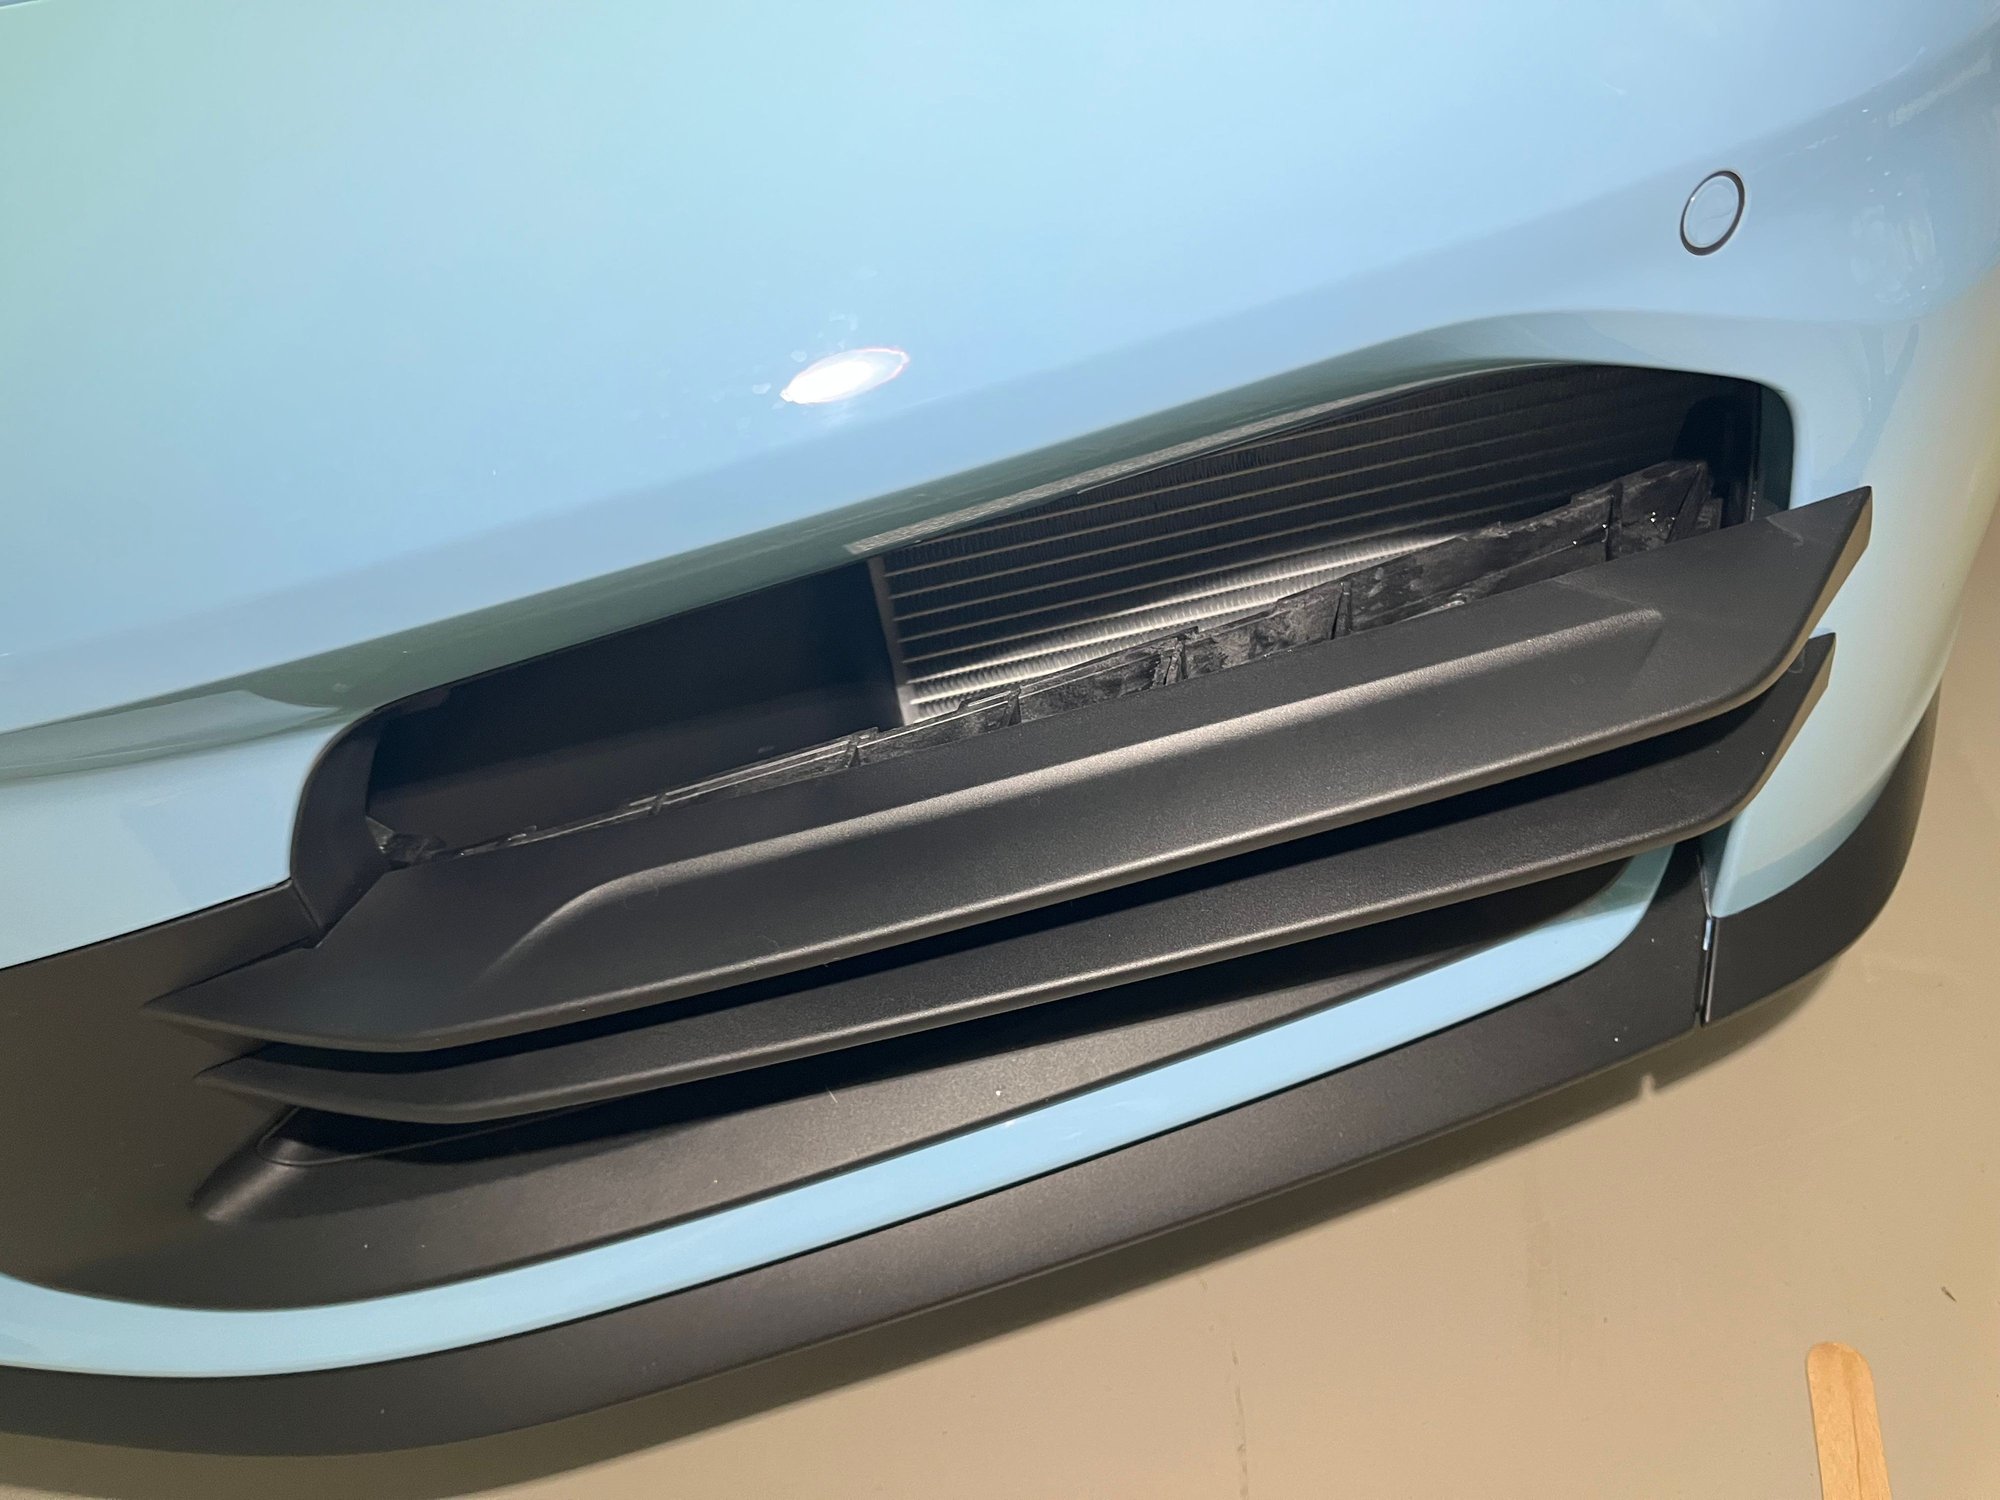
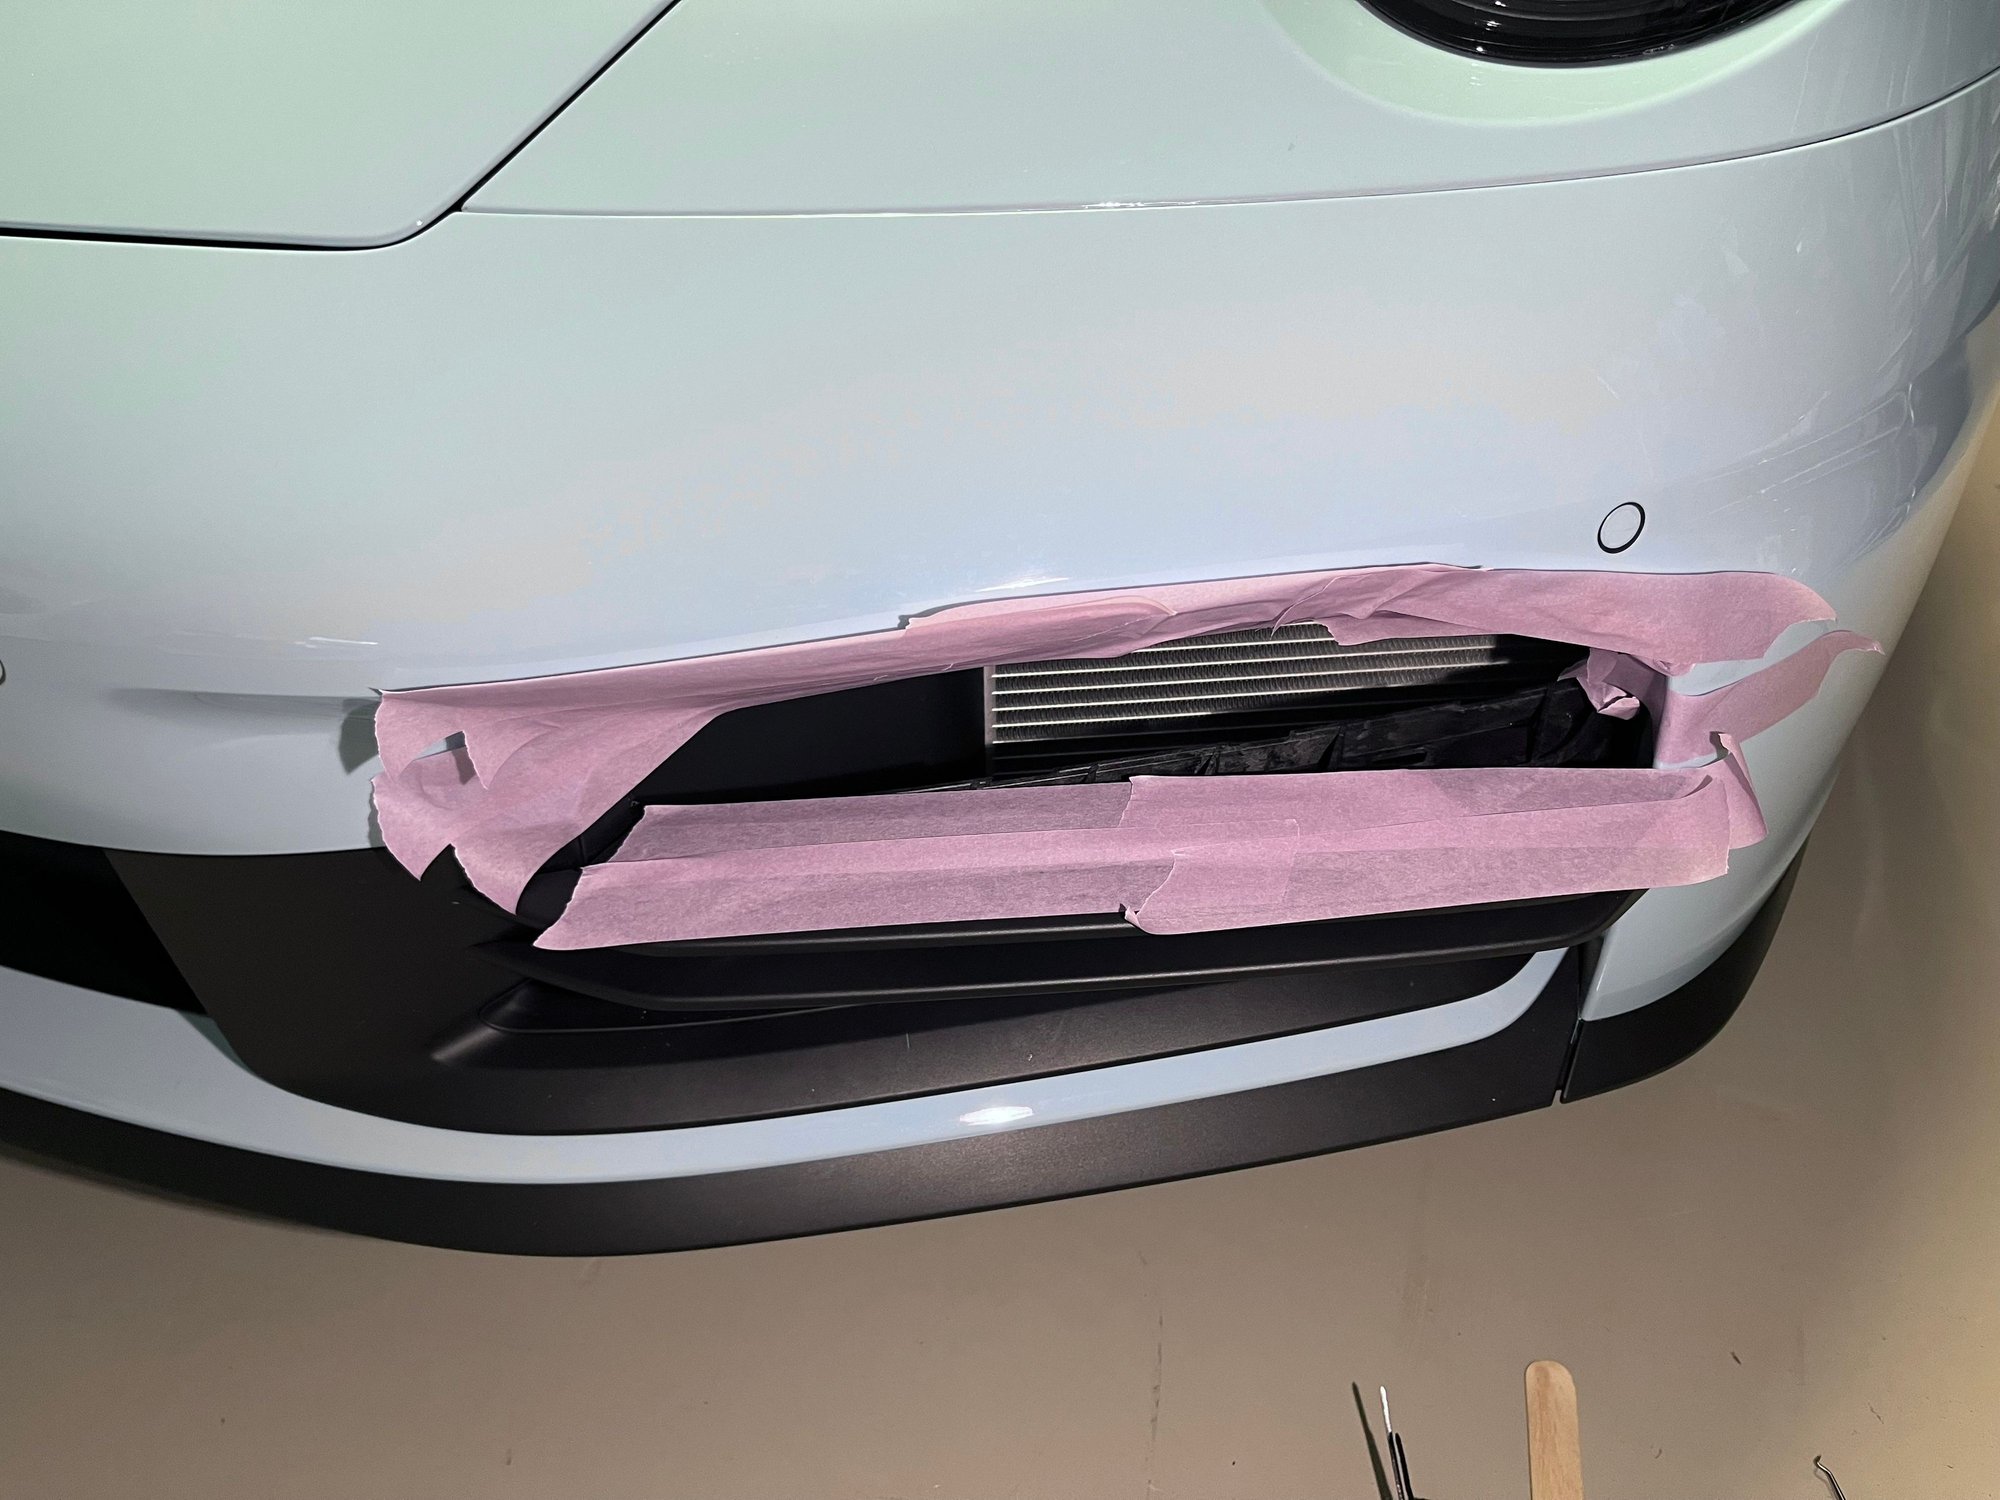
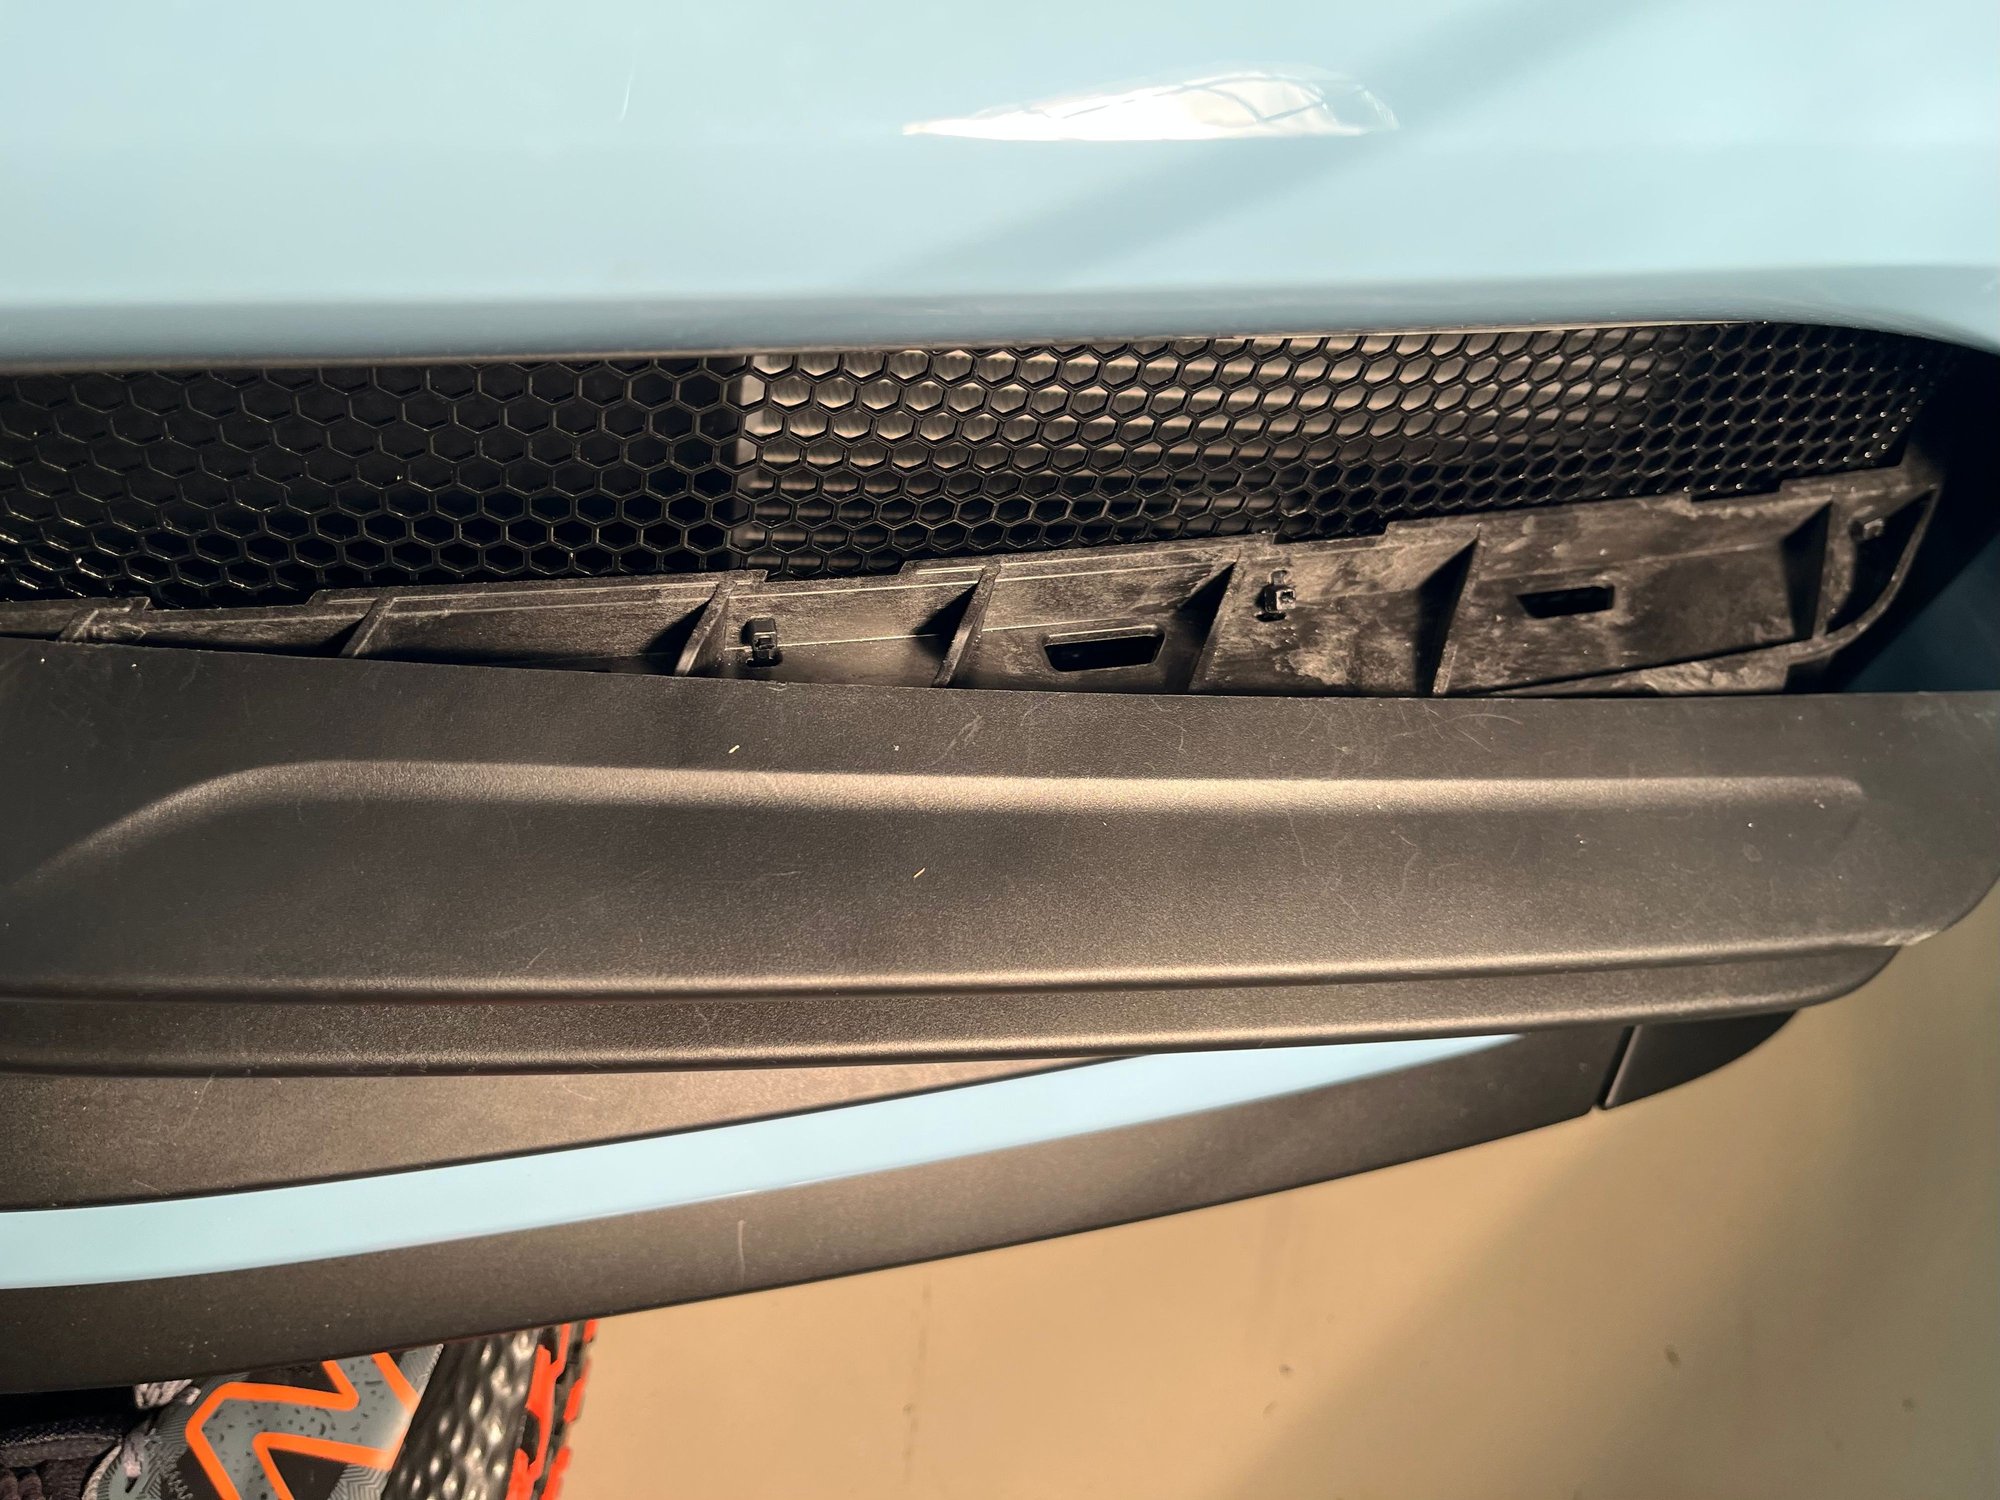
I was stunned at the giant pile of leaves that build up in the corners in front of the radiators in just a few hundred fall miles, as well as all the bugs in them, and I even found a stone in there. Porsche should have factory-grilled these so I ordered from @RGS .
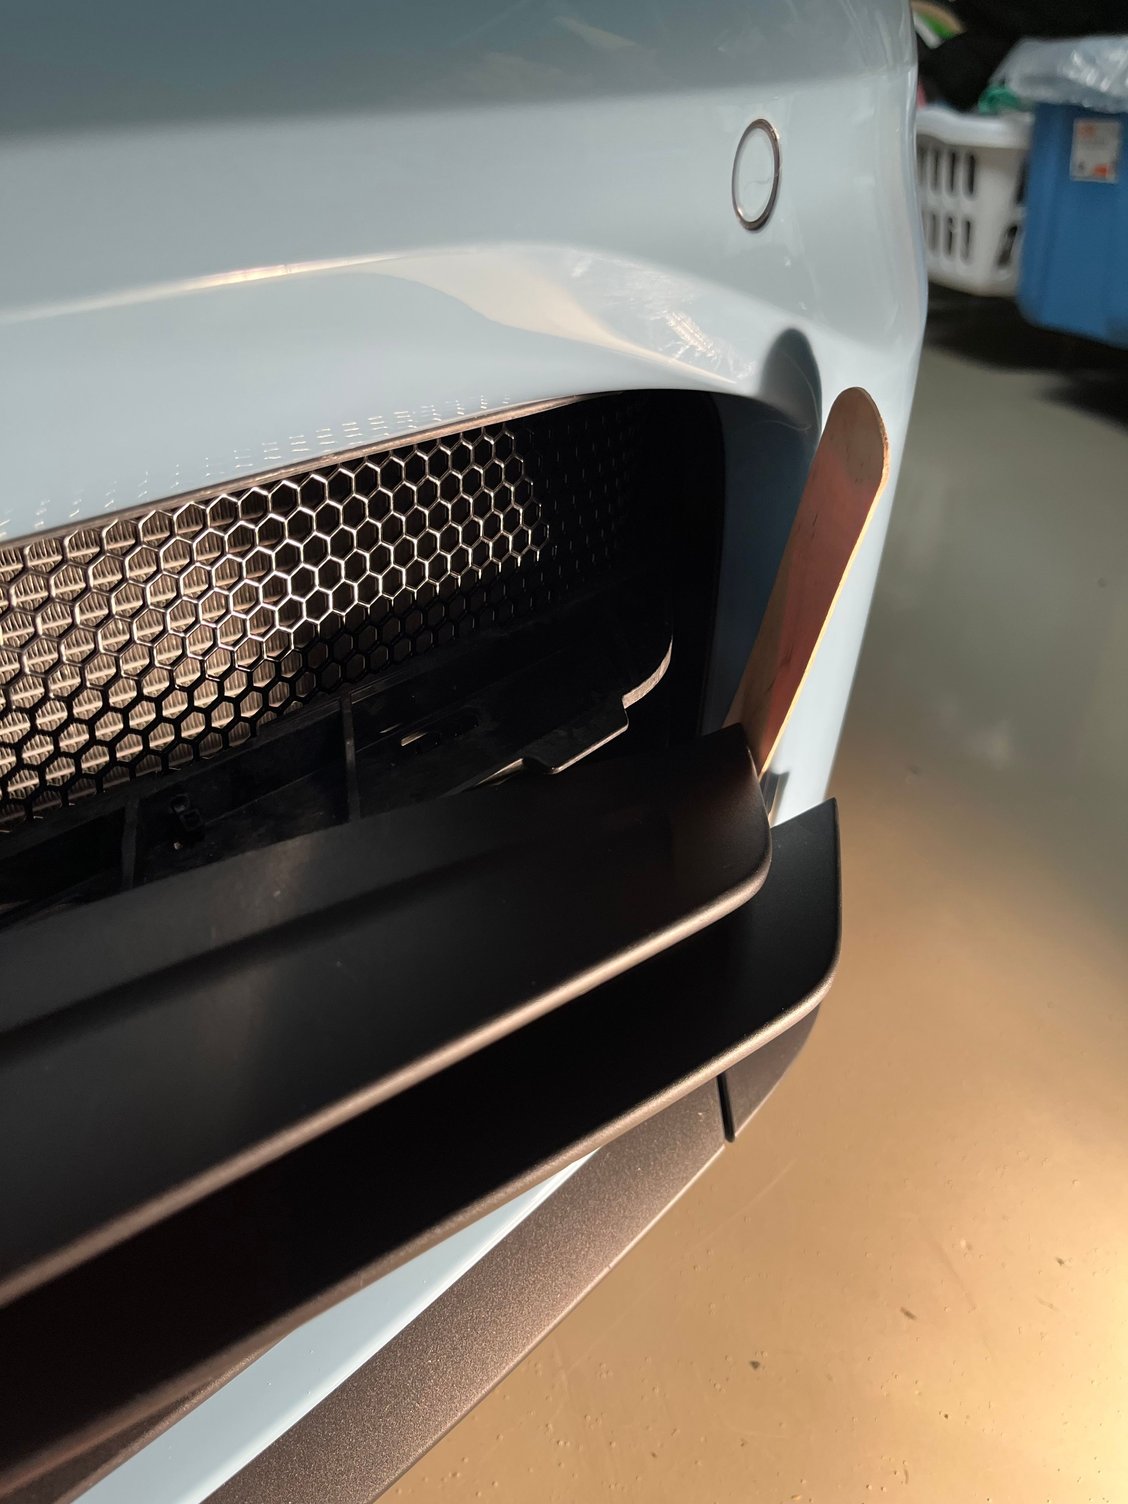
End result is pretty decent looking, but install was a bear and their instructions were sorely lacking in close-ups on what you'll actually encounter doing this. The first side especially is a learning experience. Their video instructions have this done in 10 minutes for one side. I spent almost 3 hours on this zooming on the video and trying to figure out what I was doing wrong and why the grills refused "slot in" at the bottom despite pulling on the zip tie "pulls" until my fingers were raw. Turns out after lots of trial and error, I figured they just weren't cut right from the factory and the notches on the sides of them weren't big enough to pull forward enough without interfering with the black bars that cross the opening. That nasty scratch on the black plastic is from where I slipped with an Allen wrench trying to pull the grill down and forward. A "pick tool" is pretty specialized but that & 3 hands would have been helpful in this. Cover EVERYTHING in masking tape when you attempt this in case a tool or the sharp-edge grill slips. I finally gave up trying to pull and manoeuver them as they were never going to come close to slotting into the bottom without removing them (with great difficulty) and attacking them at a guess with tinsnips. So I just locked the zipties down and hoped the bottoms wouldn't rattle despite their big flex. They didn't make any noise at all, so end result is satisfactory. If you just don't try to get all 4 sides to slot in place, they'll still do the job.
I also grabbed their colored drive mode selector ring in bordeaux red to match my Cayenne's seat belts. That's a 1 minute install and it looks great. A little stiffer than the plastic original but a very nice quality aluminum ring. Might grab a Lugano blue one as well...
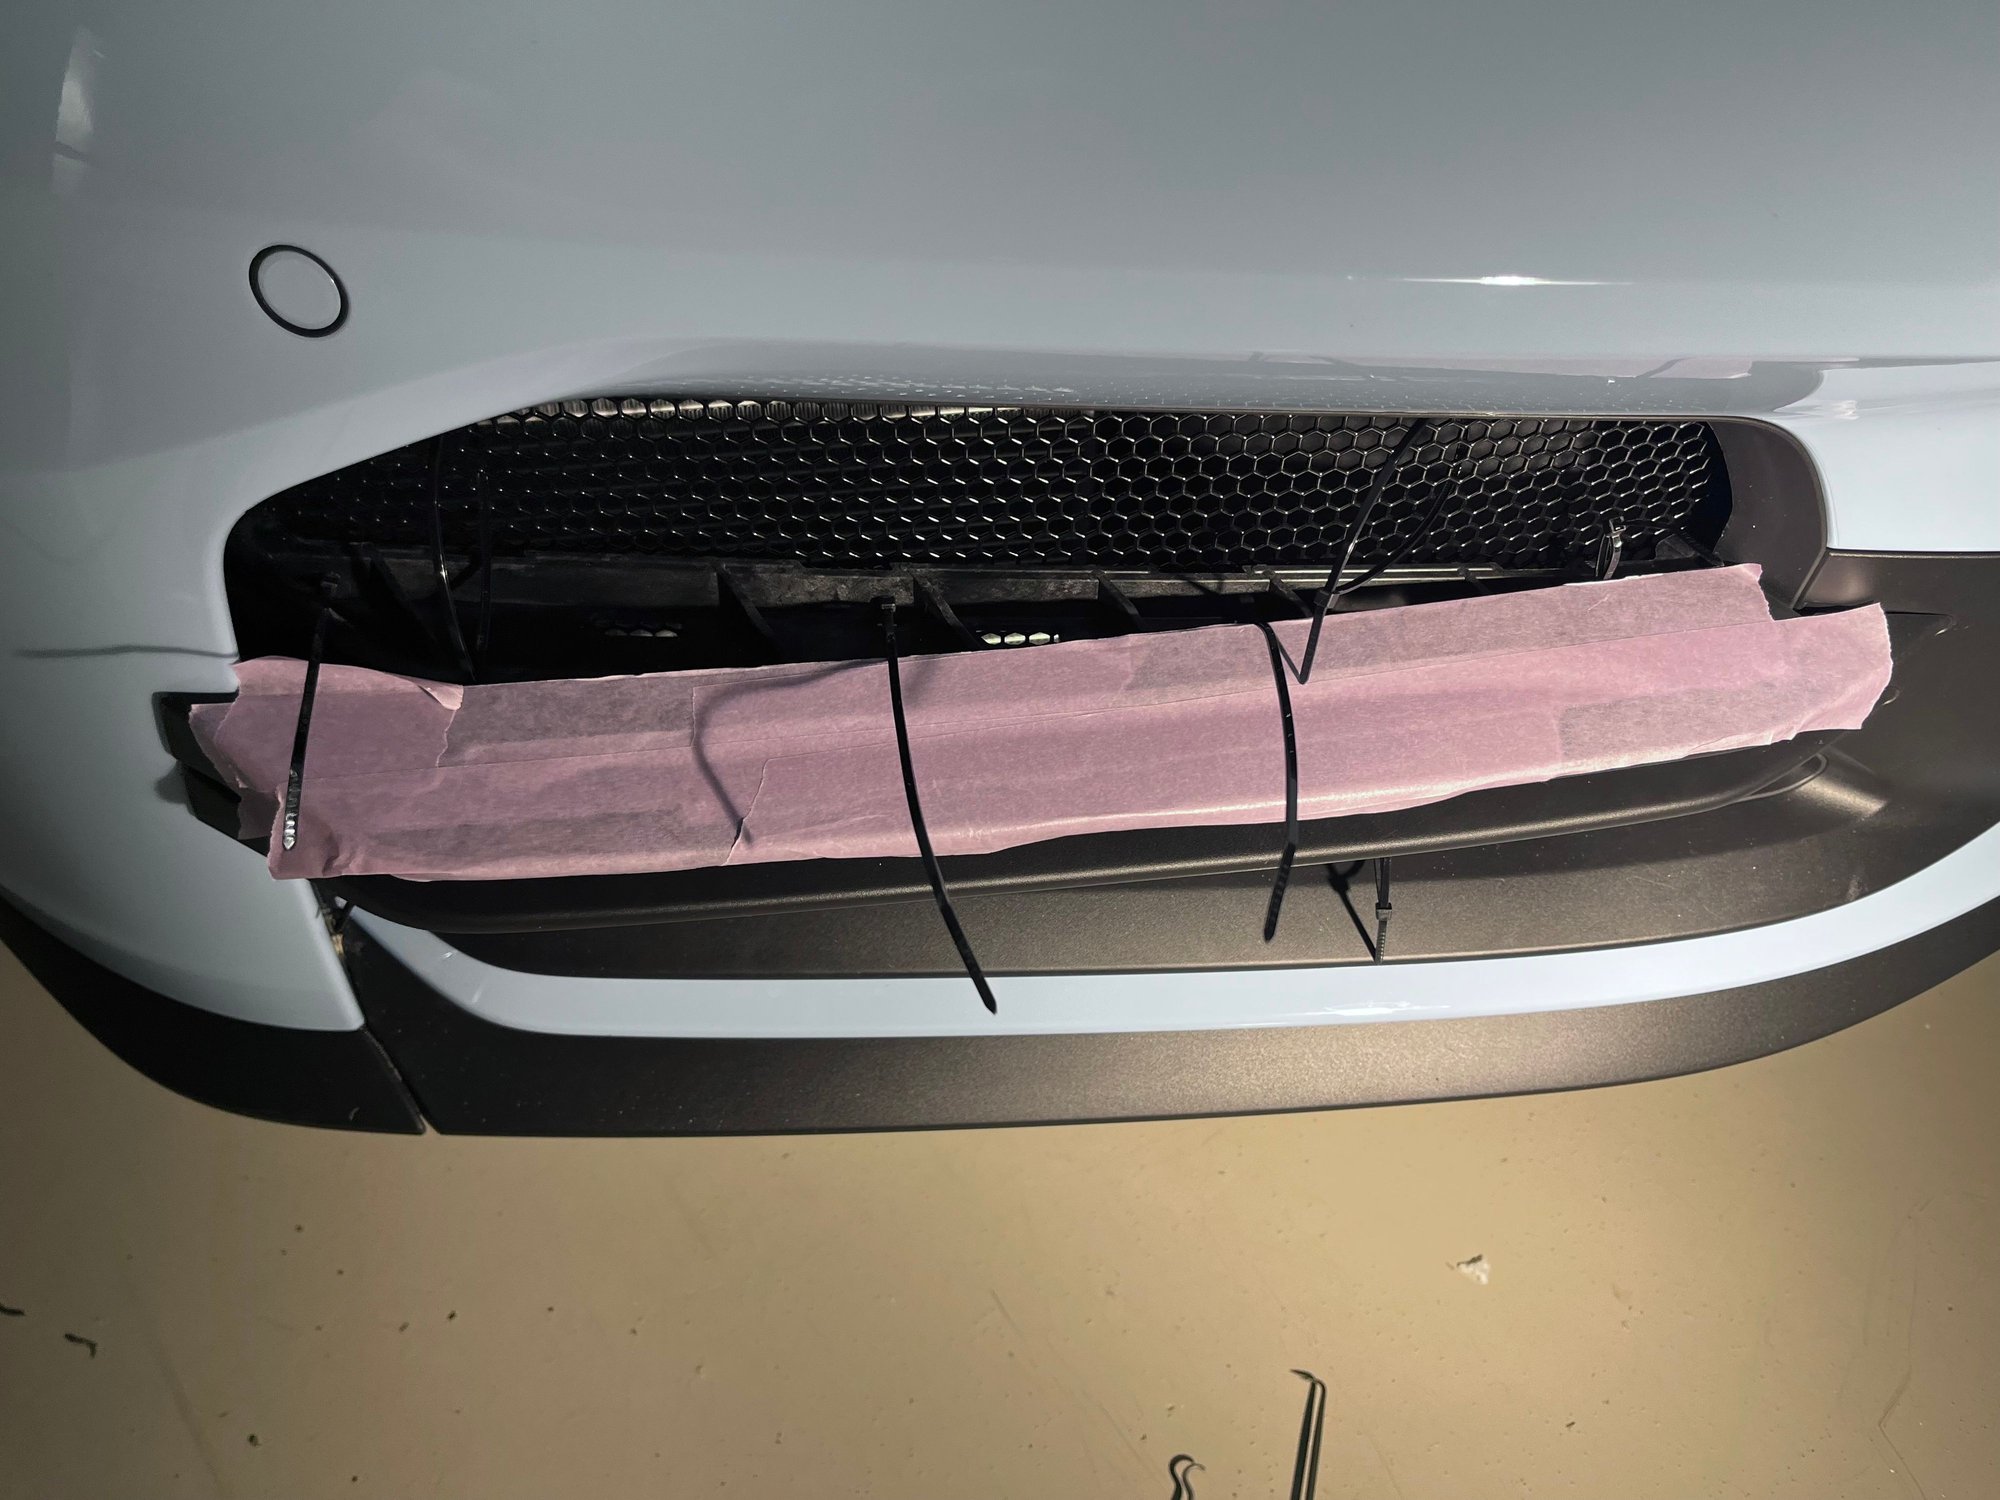
Tackled my first mod for the new 992.2� installed the RGS radiator grill covers. Made a bit of a project out of it as I found the fit to be fine but thought it could be improved by securing with four zip ties along its length at the upper crossbar. Found four small drain holes spaced along the length of the top bar, so quick drill of a second hole to allow the zip tie to be looped through. This hides the zip ties completely and does not interfere with the covers. Very tedious fishing the zip ties through but made easier with a collection of picks and tweezers. Super secure as the grills pull tight to the opening, the cross members are a glass filled plastic and sturdy. Grills are at a slight angle, down in outside corners as doing so allowed it to catch the bottom lip and secure without rattles. RGS may want to double check their template when they have the opportunity. Very high-quality grills, similar to what you see on the GT3 and ST.
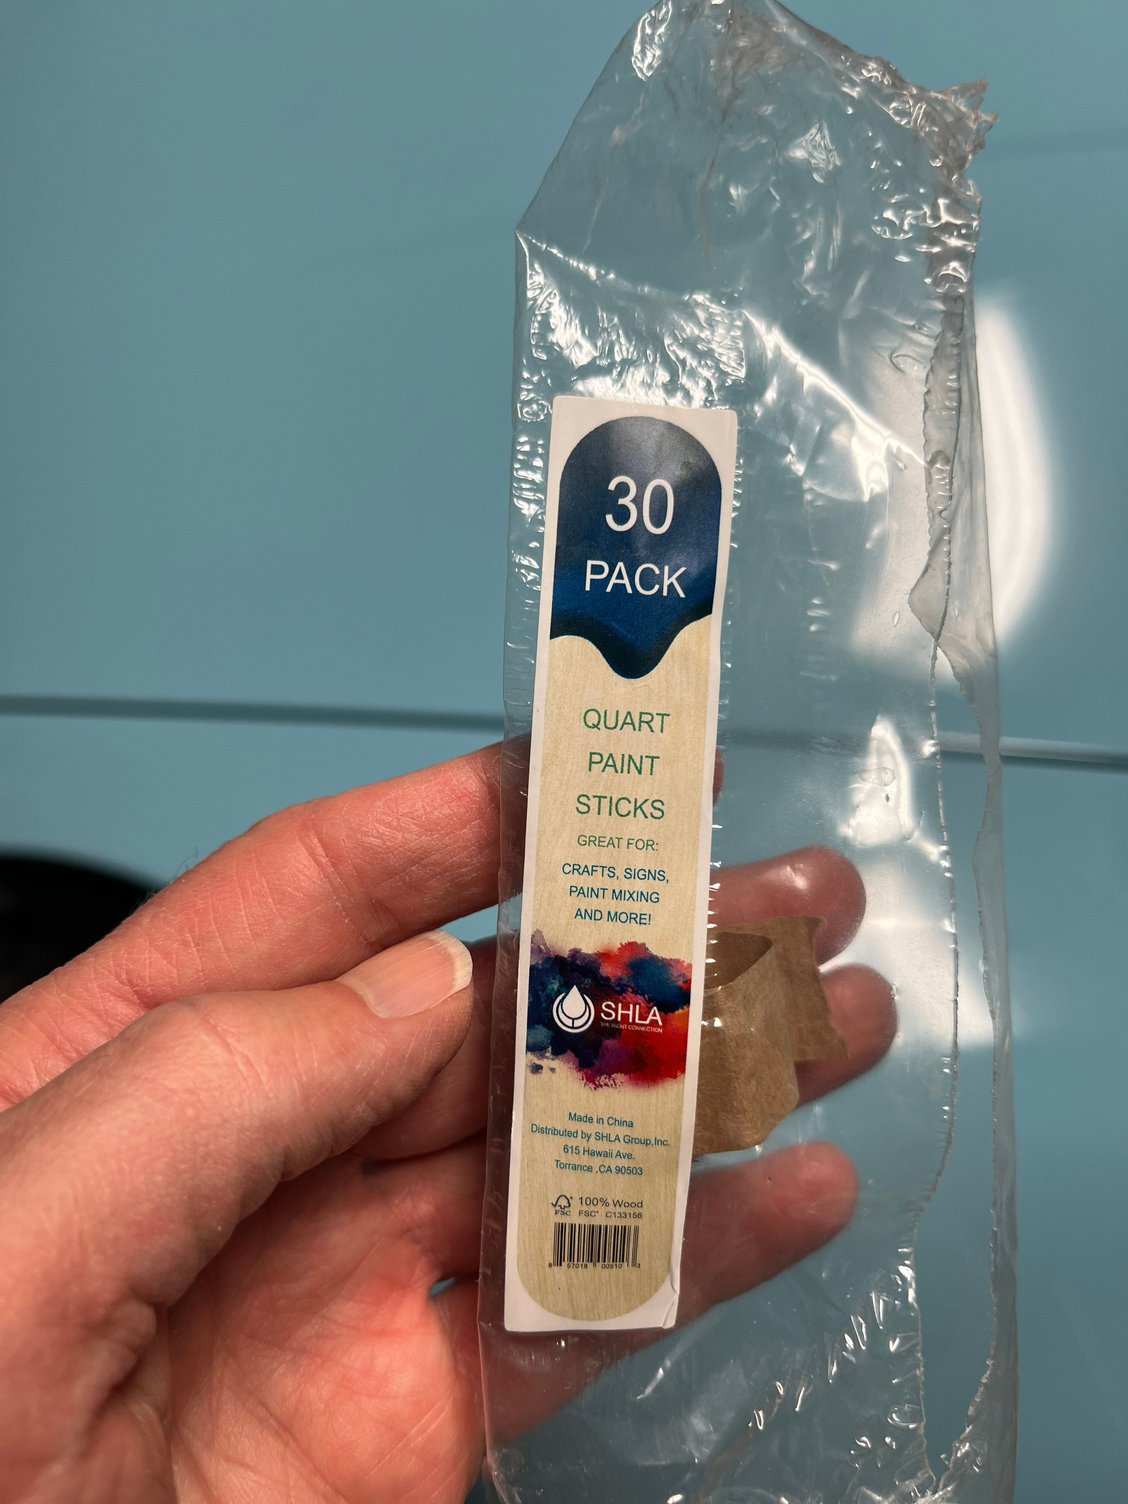
These thin stirring sticks are useful to keep the clips open at the bottom of the covers when you�re trying to pull them off, and then at the ends as there is significant pressure when flexing the covers to remove them. This will protect your PPF or paint.
Side protection.
Along the length of the upper crossbar you�ll find four drain holes through to the bottom, drilled a hole in the vertical portion just above the drain holes to allow the zip tie to be looped through and completely hidden
Low tack tape on PPF.
Prep for grill install.
Tape covering the plastic surfaces as they scratch very easily.
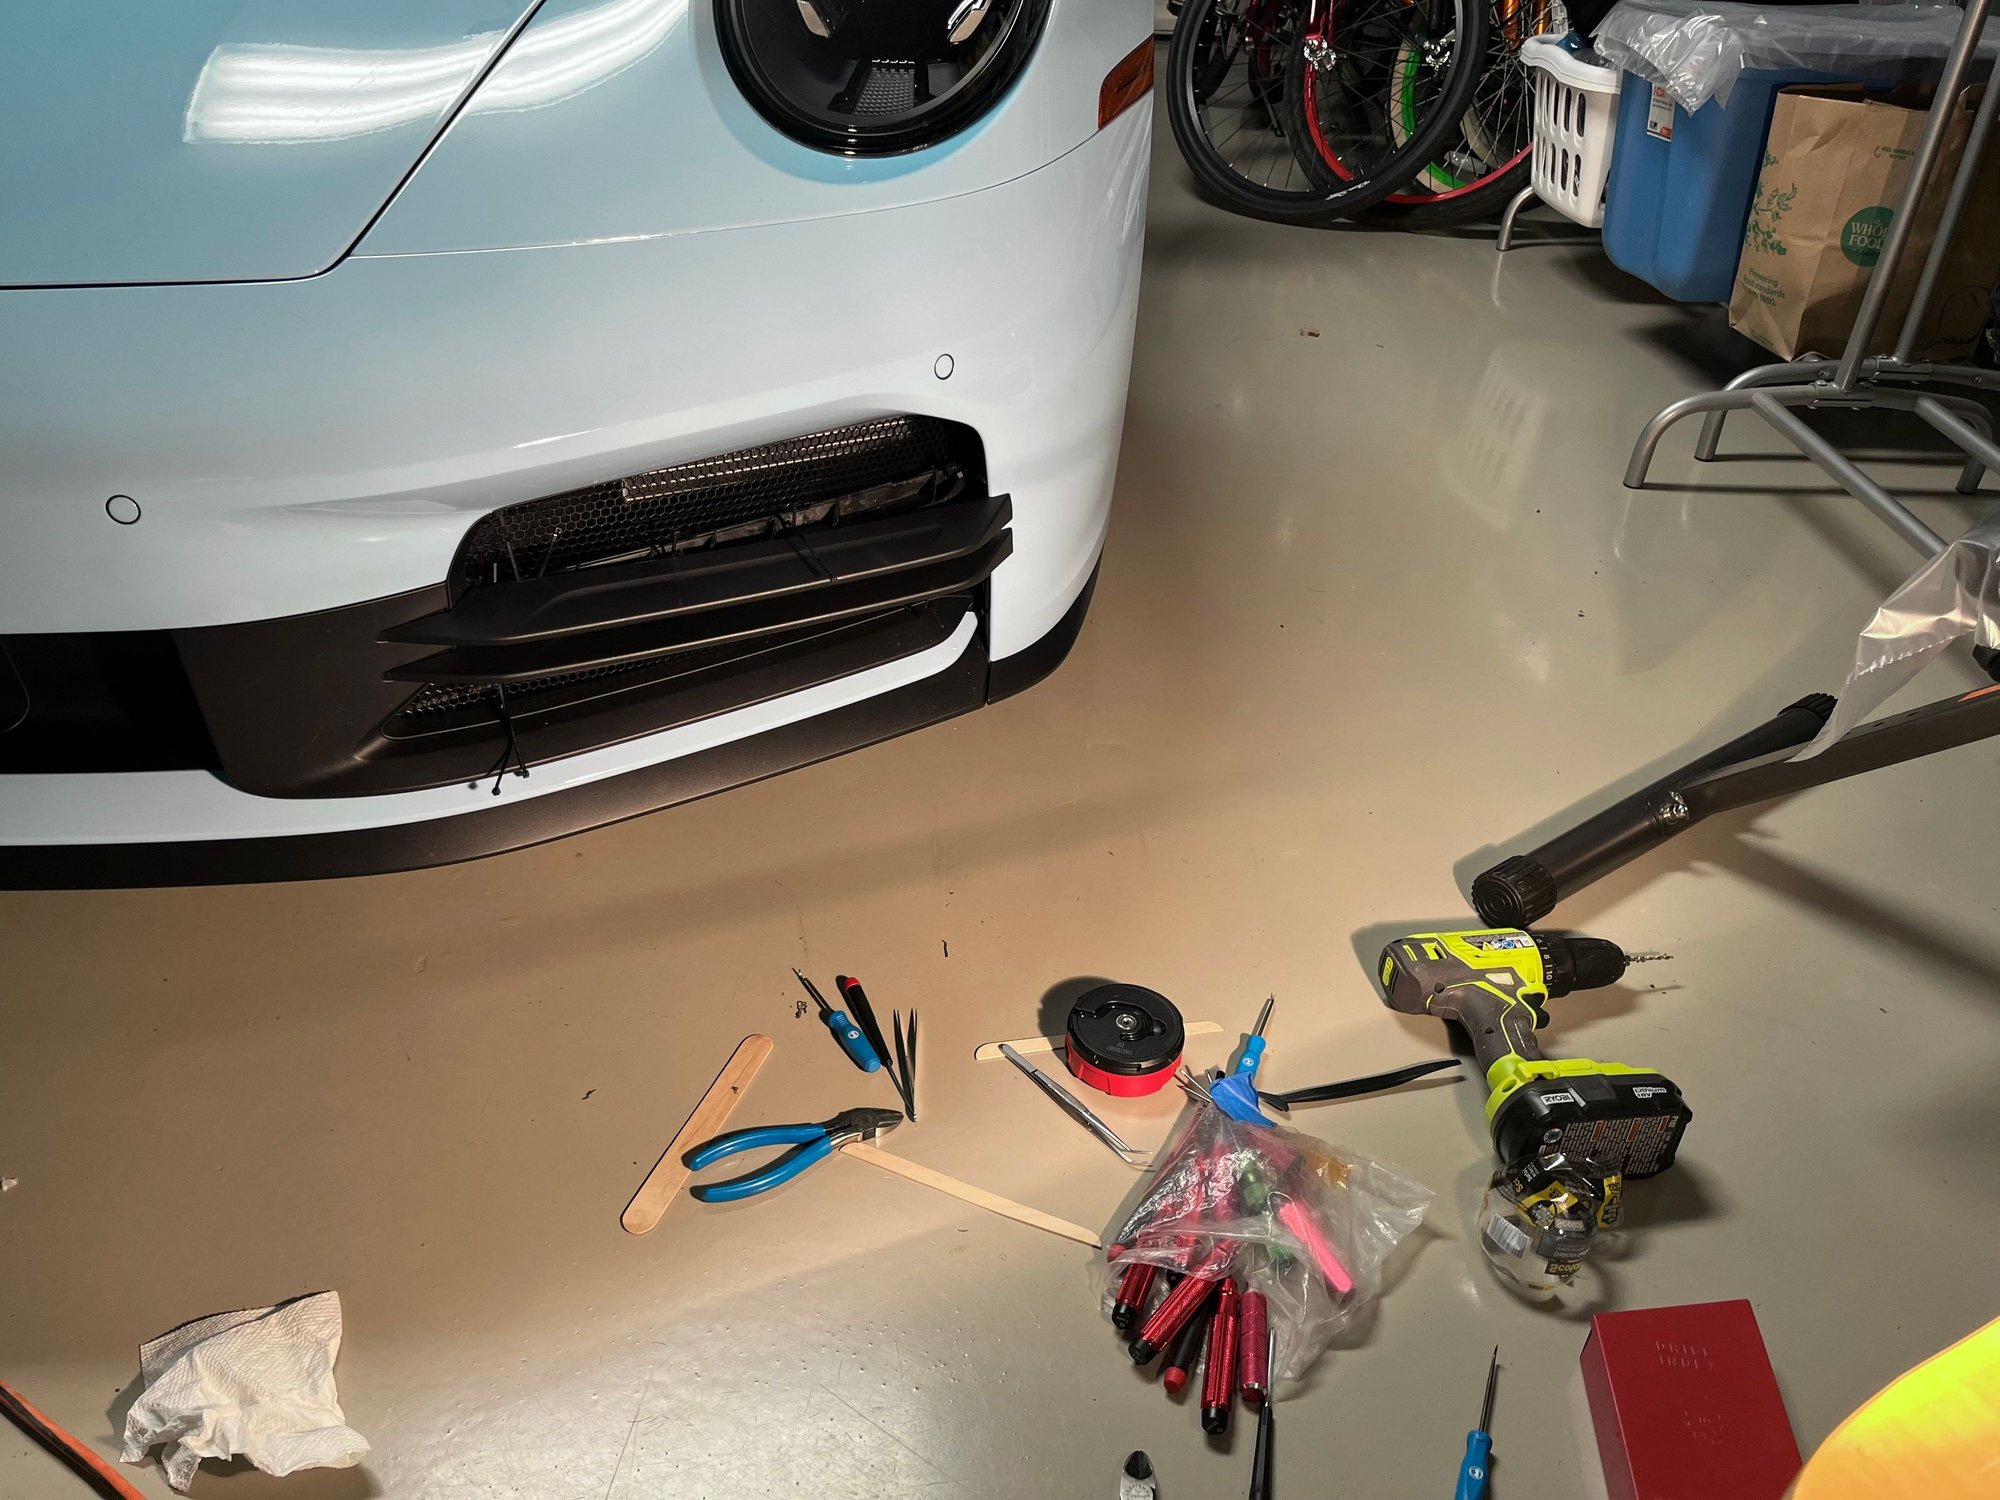
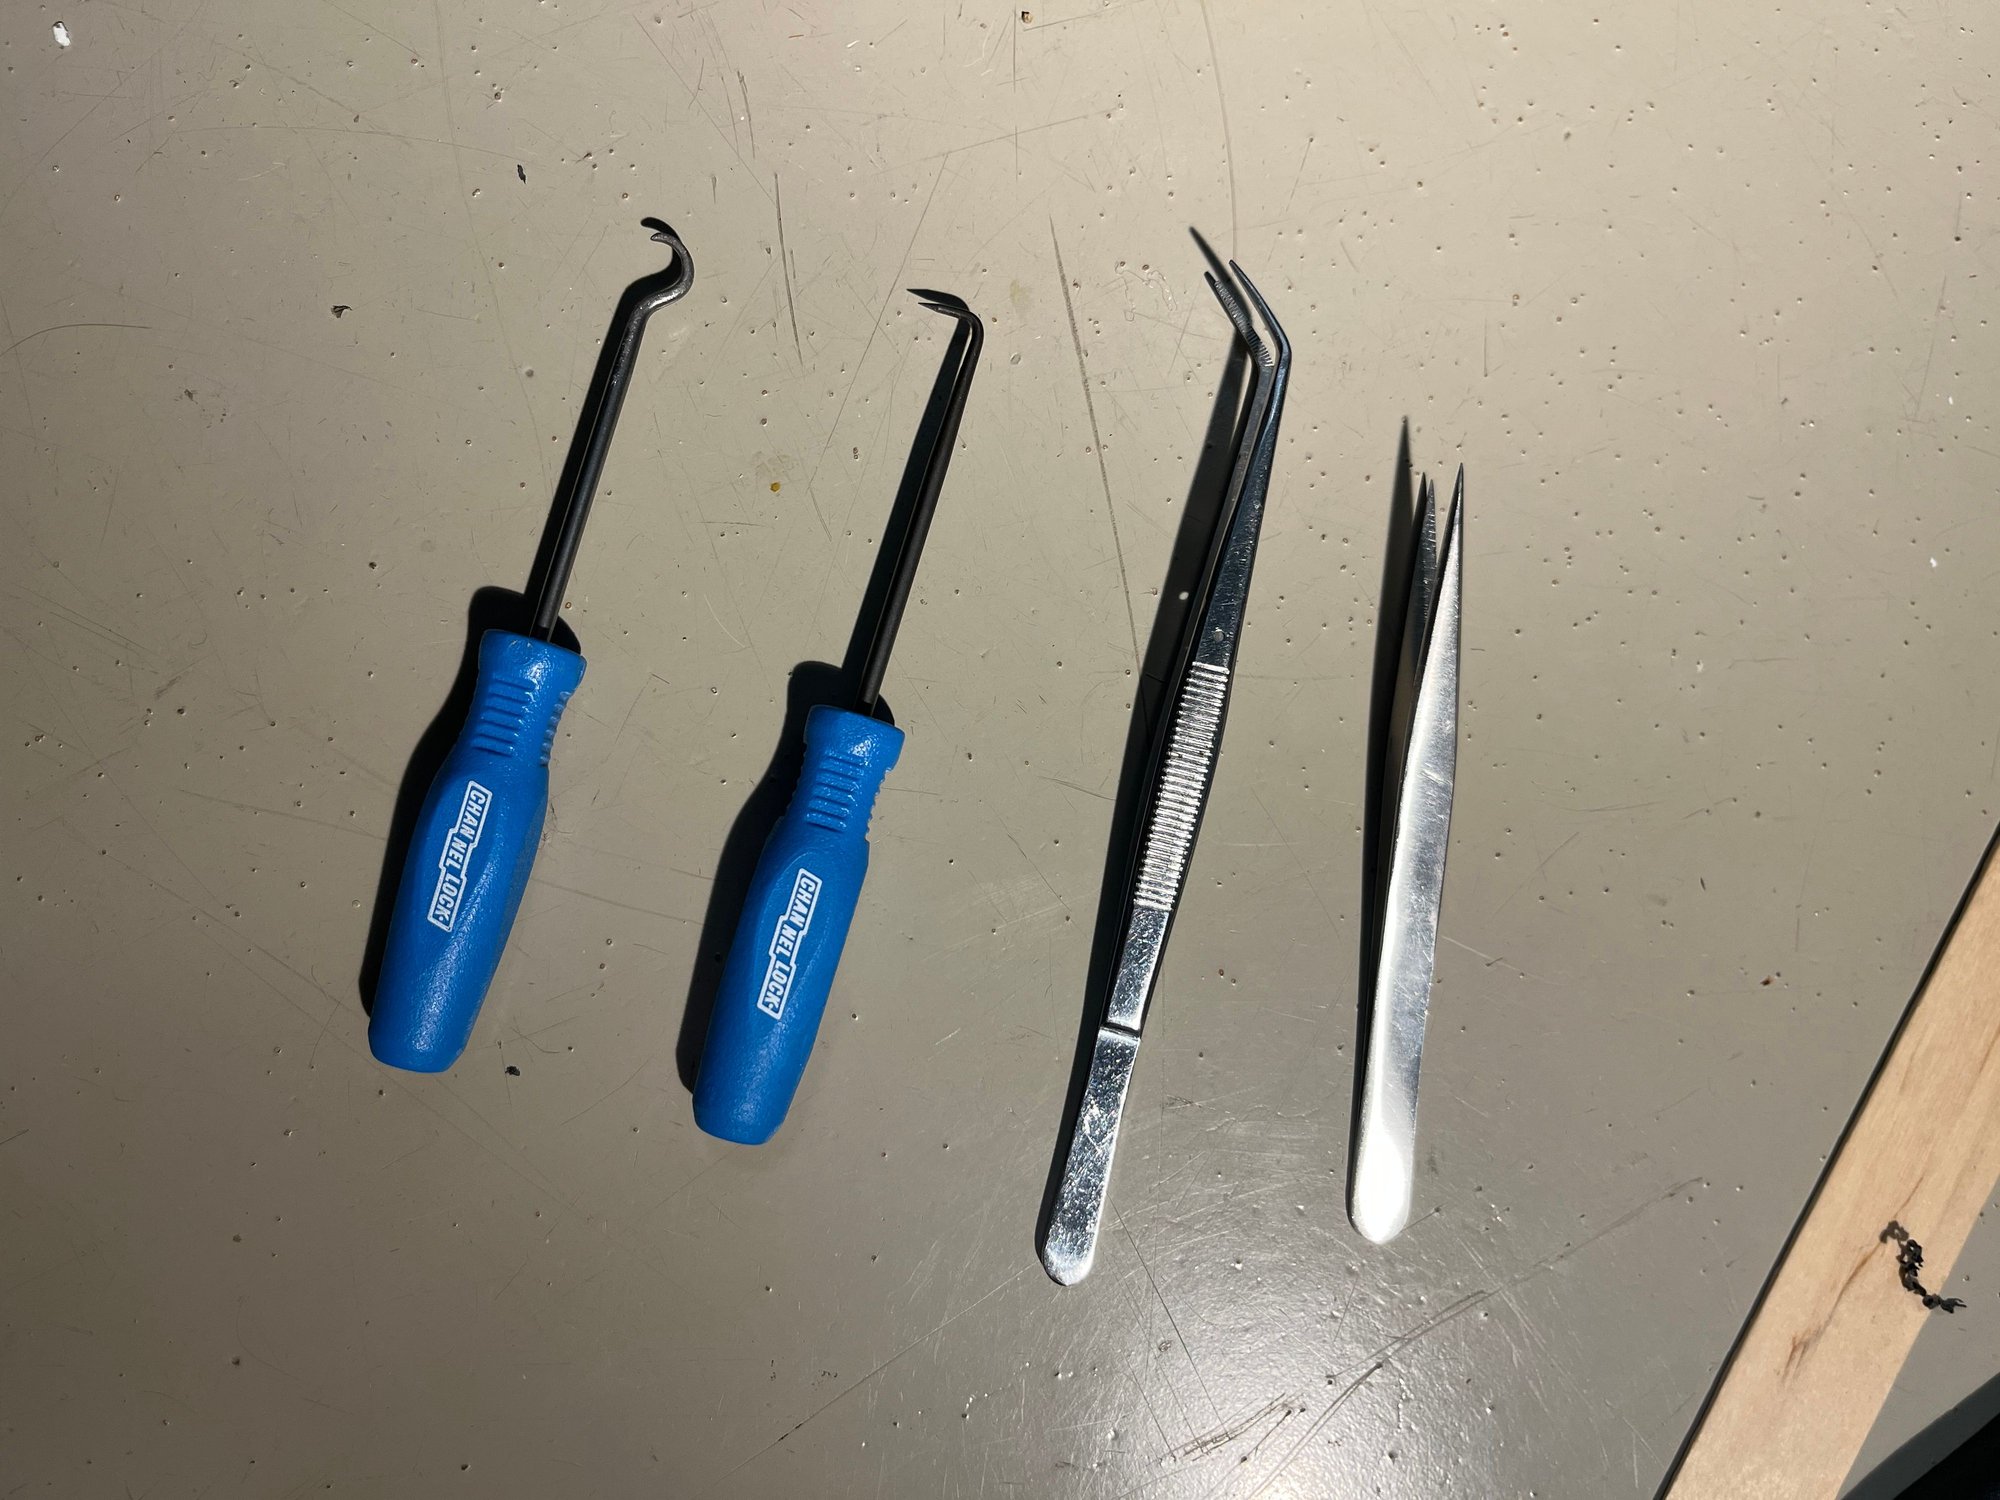
Small tools needed for this project� drill, several picks, several tweezers, side cutters and needle pliers.
Zip ties in place, four along the length.
Trimmed (this was a happy moment)
Not done yet, need to carefully wrestle the covers back on using the wooden stir stick as protection. It�s going to take quite a bit of manipulation to get this done.
Super secure, no rattles.
You can see the dip on the right side of the grill. It�s angled to catch the outside corner better.
Mine are sitting in the box waiting for the vehicle delivery in February. Any learnings, especially photos of modifications to the pre-cut screens, would be appreciated.
I can't comment on the 992.2 cut sizing not being right. I installed the customcargrilles ones on my 992.1, and yes I learned the secret is to pre-attach some ties raps as "pullers" so that when you insert the grill from the back, you have something to pull forward with to fit in it place. Then you attach the permanent ties to secure it. Then you go back and snip off the temporary puller ties to finish the install.
I took a bunch of pictures and some video during the install. I'll need to take some time to annotate them because without context the closeups are hard to understand. Hopefully RGS will do this themselves and re-test fit and check their grill cuts, but I can give you my amateur experience. In the meantime, to make your install much easier, purchase the "pick tool" they show in their install video (they should include one). I used an allen wrench, and when that started slipping I made a little hook on the end of a unrolled paperclip, but with the amount of force needed to pull the grill forward at the bottom neither of these worked well. And you'll absolutely want a small plastic trim tool, and wide painters or masking tape. A good flexible-necked shop light (I used a flex-necked desk lamp) is also a must to see what you're doing in there. Oh and a vacuum with a very small nozzle and small-diameter hose to clean out the cavities and radiators before you start any of this.
Anyway their instruction video is obviously done by someone who has done this many times, and knows what the hidden fasicia clips look like, and most importantly his grills are cut right. They don't even identify which grill is left and which is right, which again becomes obvious after you've installed one. I found out trying to match the video after I'd put one grill in, that the "thick edge" on my screen and the "thick edge" on his screen were on different sides and I'd put the left one in the right side. Sigh. Yeah lots of good memories. Let me see if I can write up an install guide so you can avoid the mistakes I made. In the meantime, here's the trim tool I used (the blue one on the floor) and the flat sharp end was a big help getting the black plastic fascias off the crossbars. I got a box of like 10 different trim tools on Amazon dirt cheap and I wish I'd had them years ago. The "pick" tool is probably for this job only.
I can't comment on the 992.2 cut sizing not being right. I installed the customcargrilles ones on my 992.1, and yes I learned the secret is to pre-attach some ties raps as "pullers" so that when you insert the grill from the back, you have something to pull forward with to fit in it place. Then you attach the permanent ties to secure it. Then you go back and snip off the temporary puller ties to finish the install.
RGS attaches 4 black zip tie looped as "pullers". Would have been nice if they made them a different color than the 4 black ones you need to loop around the crossbars when the grill is smashing them tight against it, but since you can't get behind the grill during the install they are the only way to move the grill forward in the cavity. Again the pick tool they show in their video would have been SO helpful had they included it.
So RGS pre-attaches the puller ties for you? Were they doing that before? Hey, I think they stole that idea from me! I posted that a while back when I installed the ones from the other vendor (same mechanics). But yes, without those its very hard to do.
Sorry to read that they were difficult to install, their video makes it look pretty easy
I sent them to my friends shop who does OEM work for a number of SoCal brands. He didn�t mention any issues on the install on our 992.1. But these guys know how to take apart just about anything and have all the tools in the world
As a few folks posted already, Porsche should have made these standard or some version standard. Just like the Sport Design bumper, the base one looks terrible, so you have to pay $3500 for a decent bumper!
on the other hand, the install on a Darwin Pro rear lip was a pain for him. He said he needs to order better tape, the lip kept lifting every time the secured a side!
I installed mine about two weeks ago. Its definitely not as easy as the video, it takes a little luck and patience. I found that slotting the top in first, then pulling the bottom forward worked for me. I add and extra zip tie in the middle of the grill. Definitely use a pick tool to help it, but be careful. Overall I am pleased, just be prepared to spend some time, I went into it thinking it was going to be a quick install, once I realized it wasn't, I just took my time. I think RGS should have set a better expectation on time etc to get these in, under promise and over deliver....not the other way around.