When you click on links to various merchants on this site and make a purchase, this can result in this site earning a commission. Affiliate programs and affiliations include, but are not limited to, the eBay Partner Network.
I am back working on the Red Witch, though starting off light.
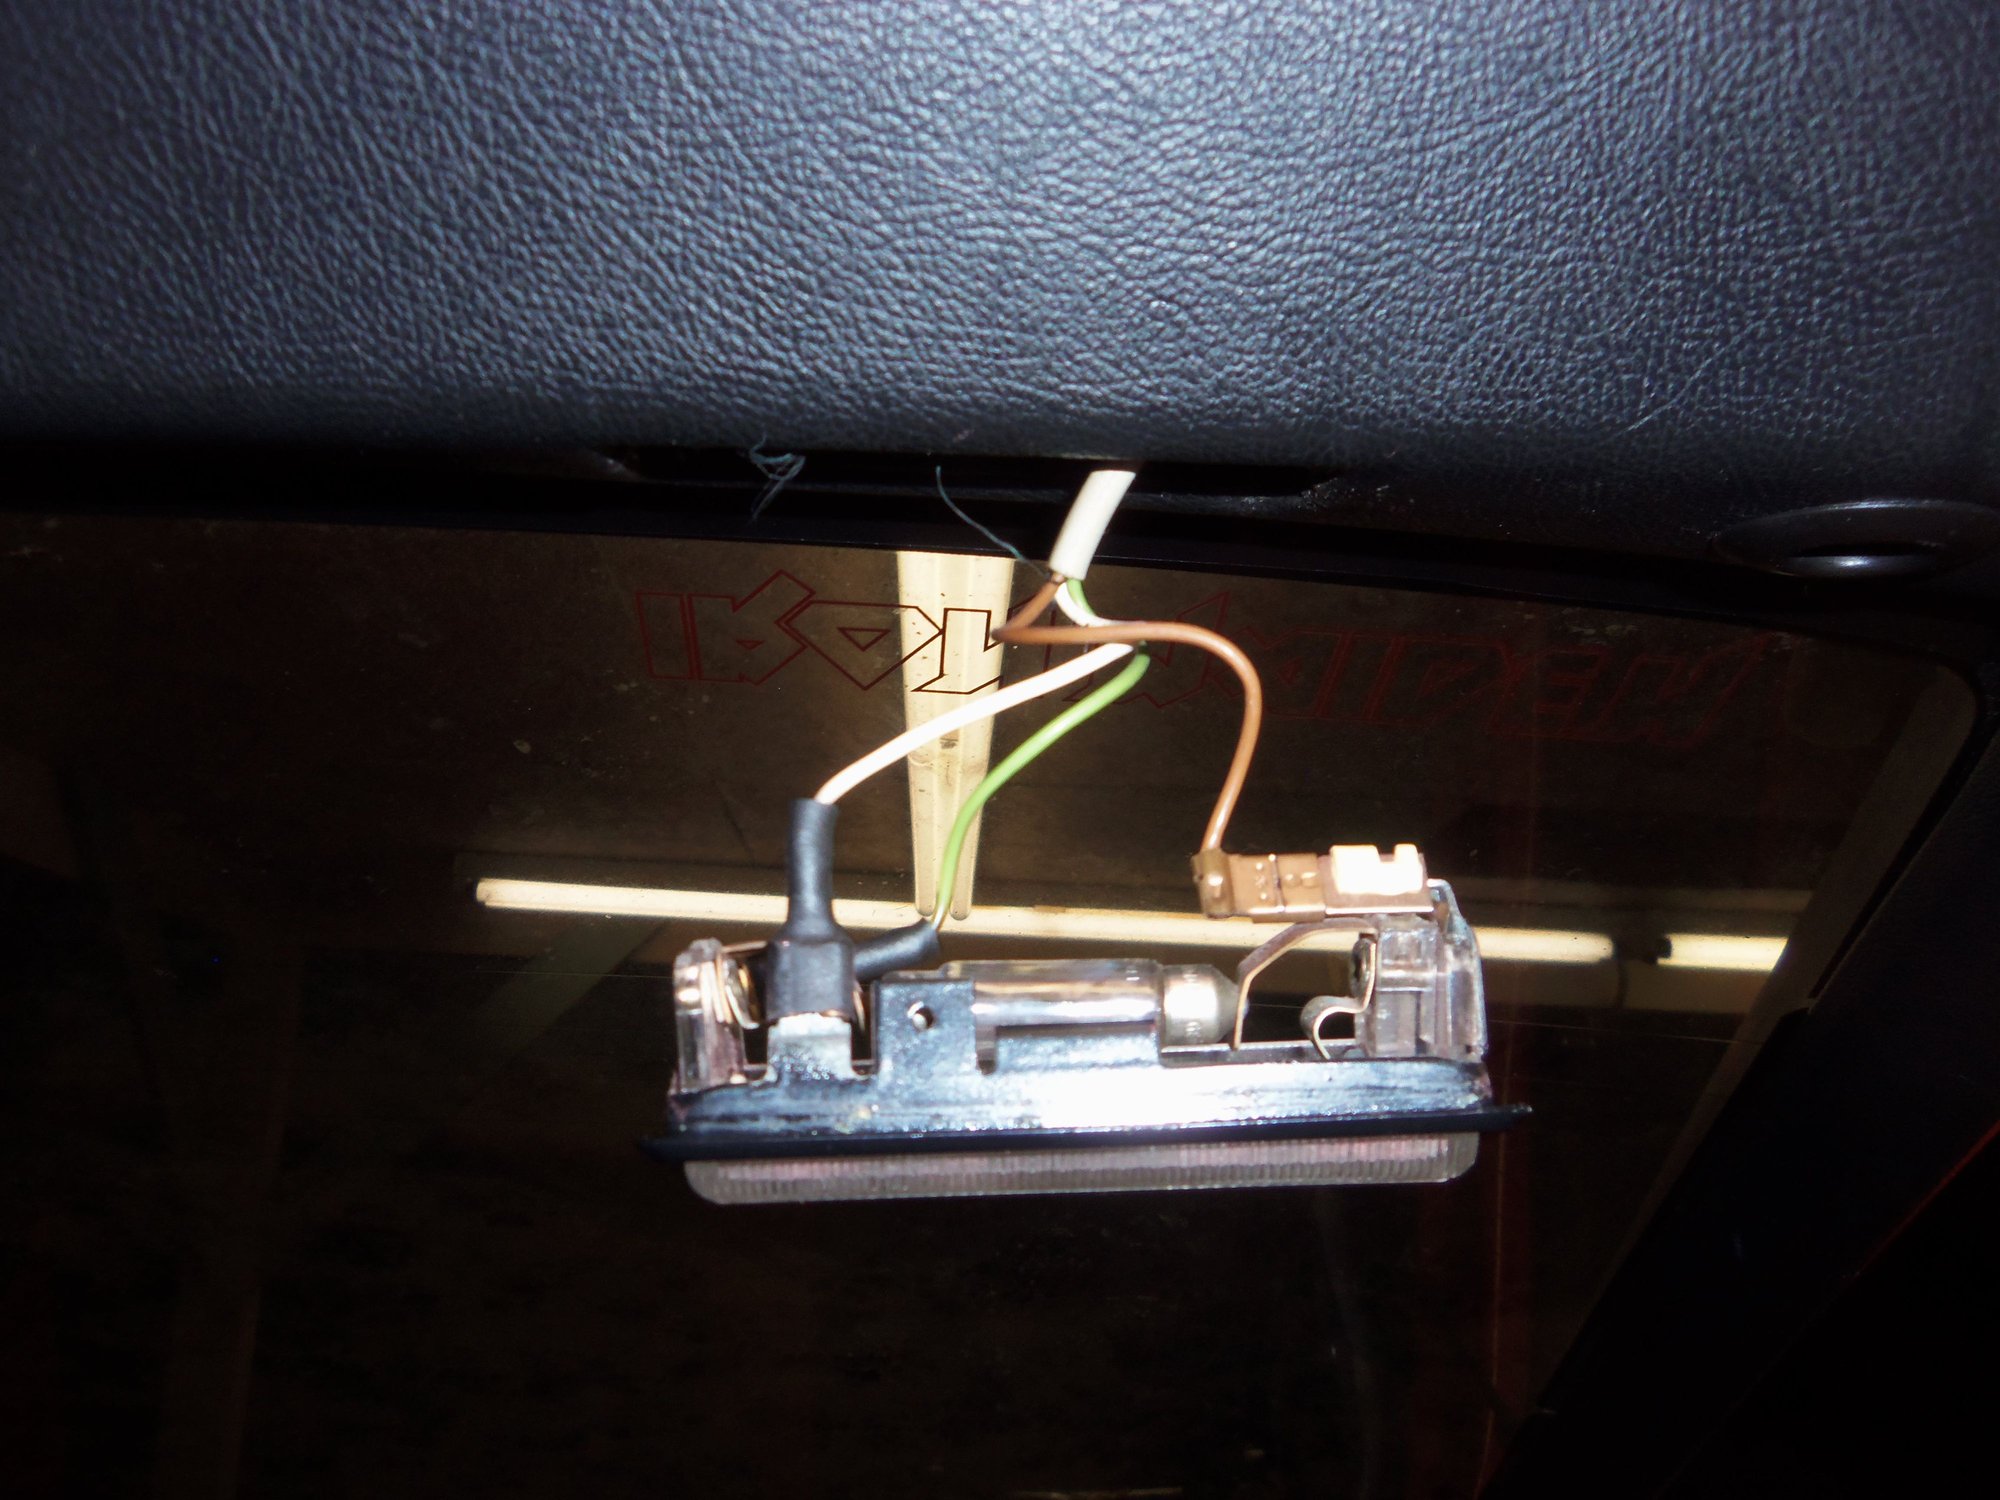
Up until a couple of months ago, I had no clue that there was an interior light at the very rear right edge of the underside of the hatch. It never worked. I knew about the light in the middle of the front of the hatch, but not this one.
Rocking the light back and forth, I could feel it had no detents. I ordered a good used light from the 928 Intl holiday sale.
I played around with the new to me light to get an idea how it worked. Between that and hooking it up to my workshop power supply, I figured out how it worked in the various 'modes.'
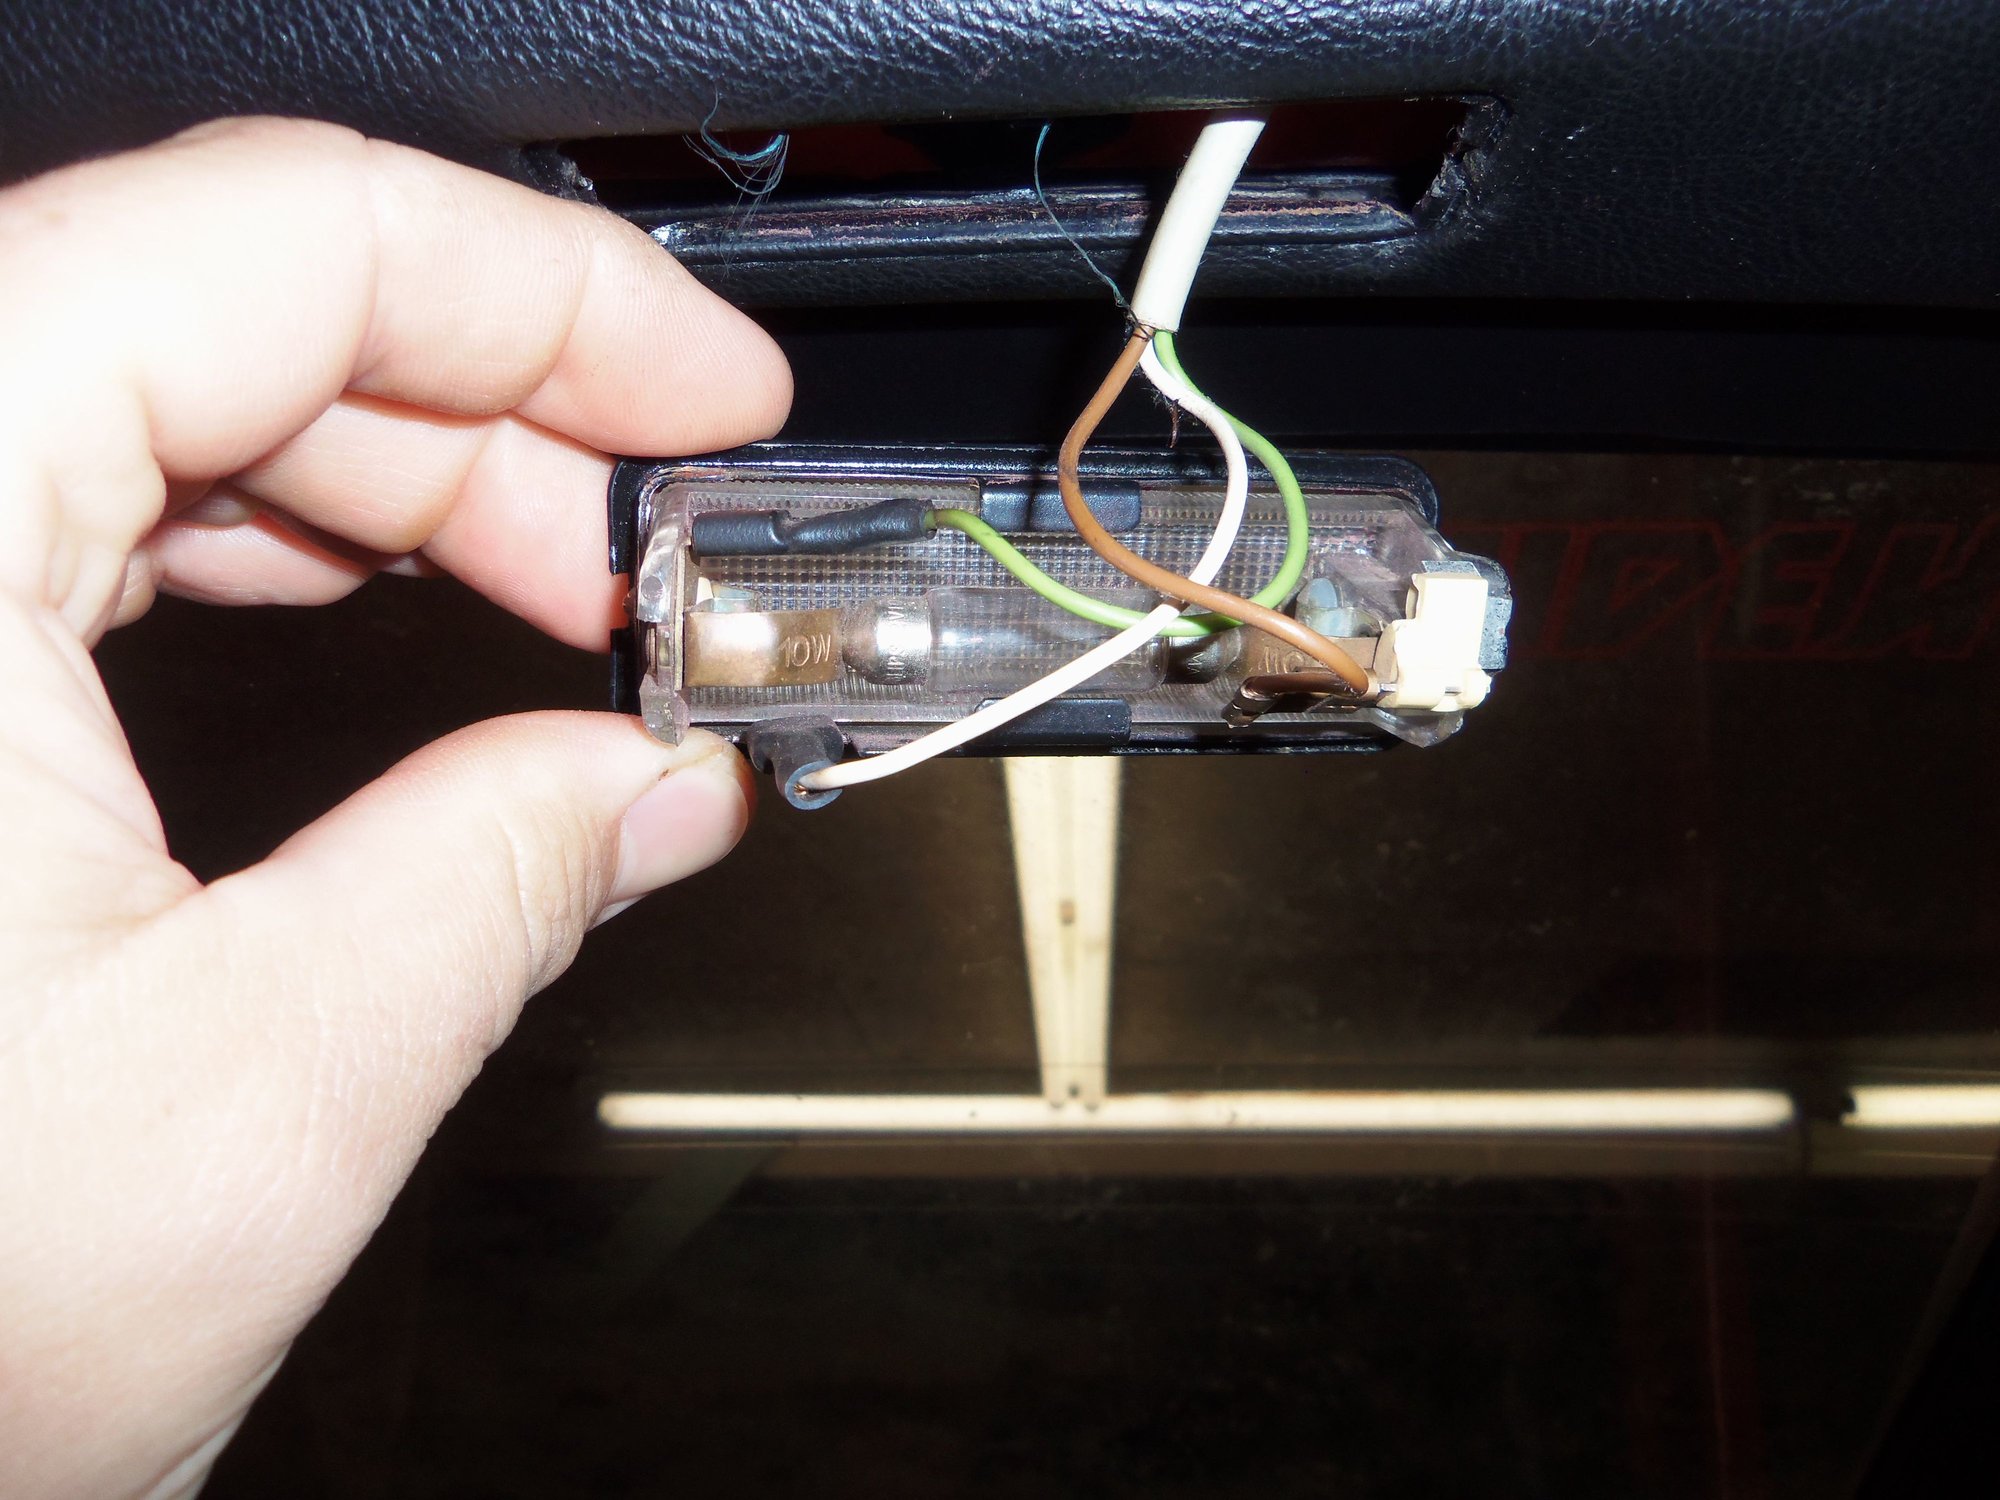
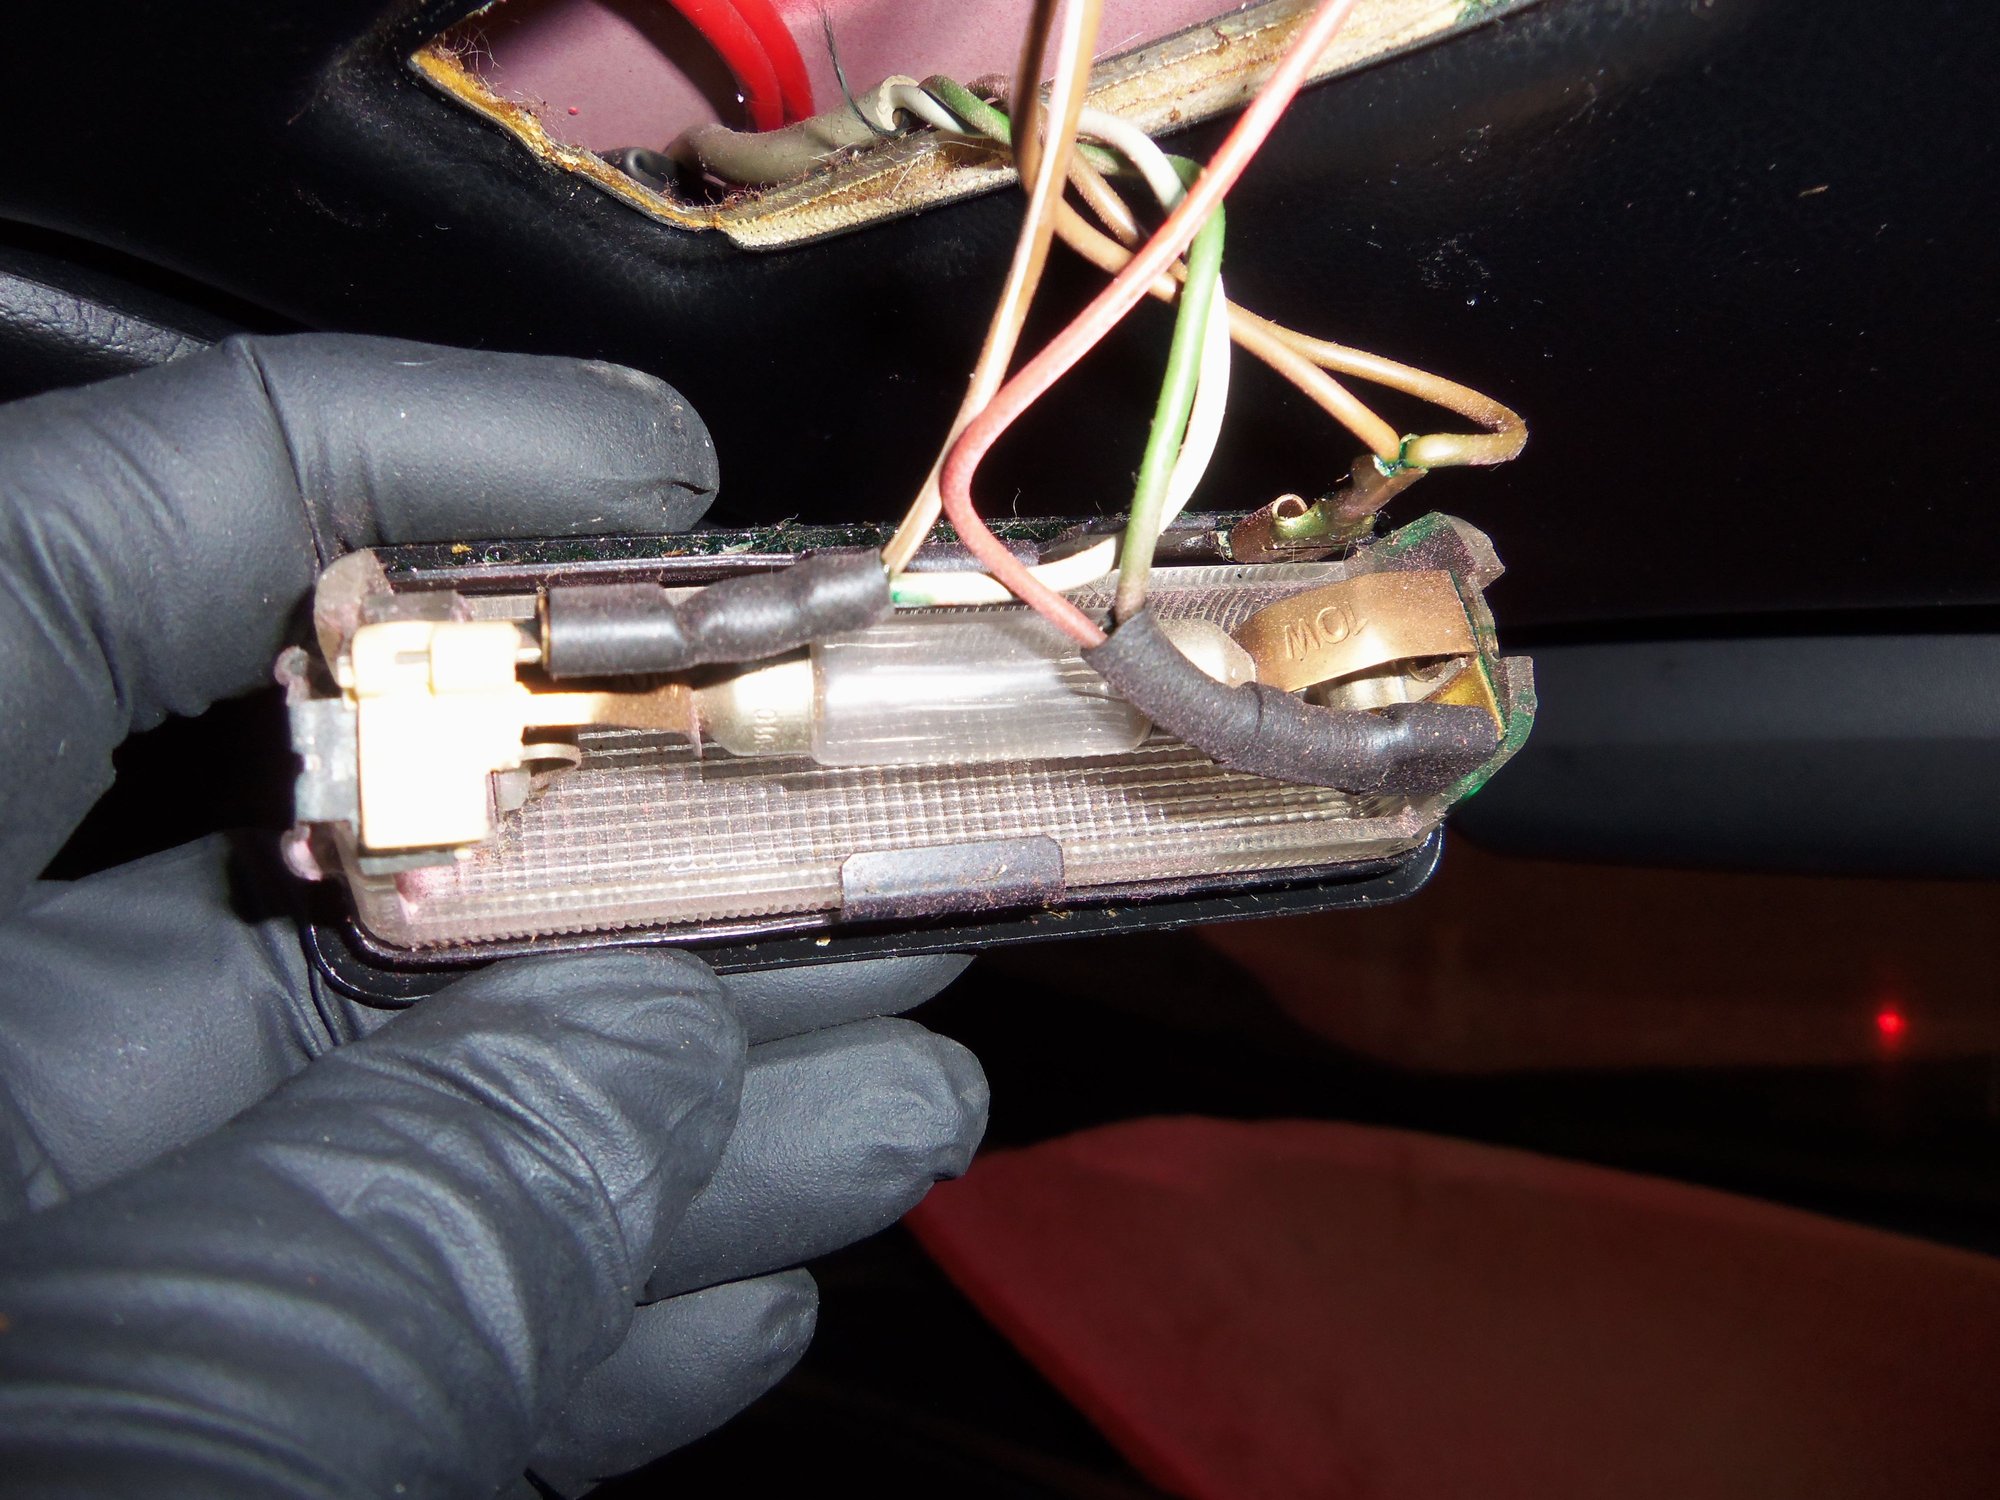
I pulled down the offending light and noticed heat shrink on two of the three wiring terminals.
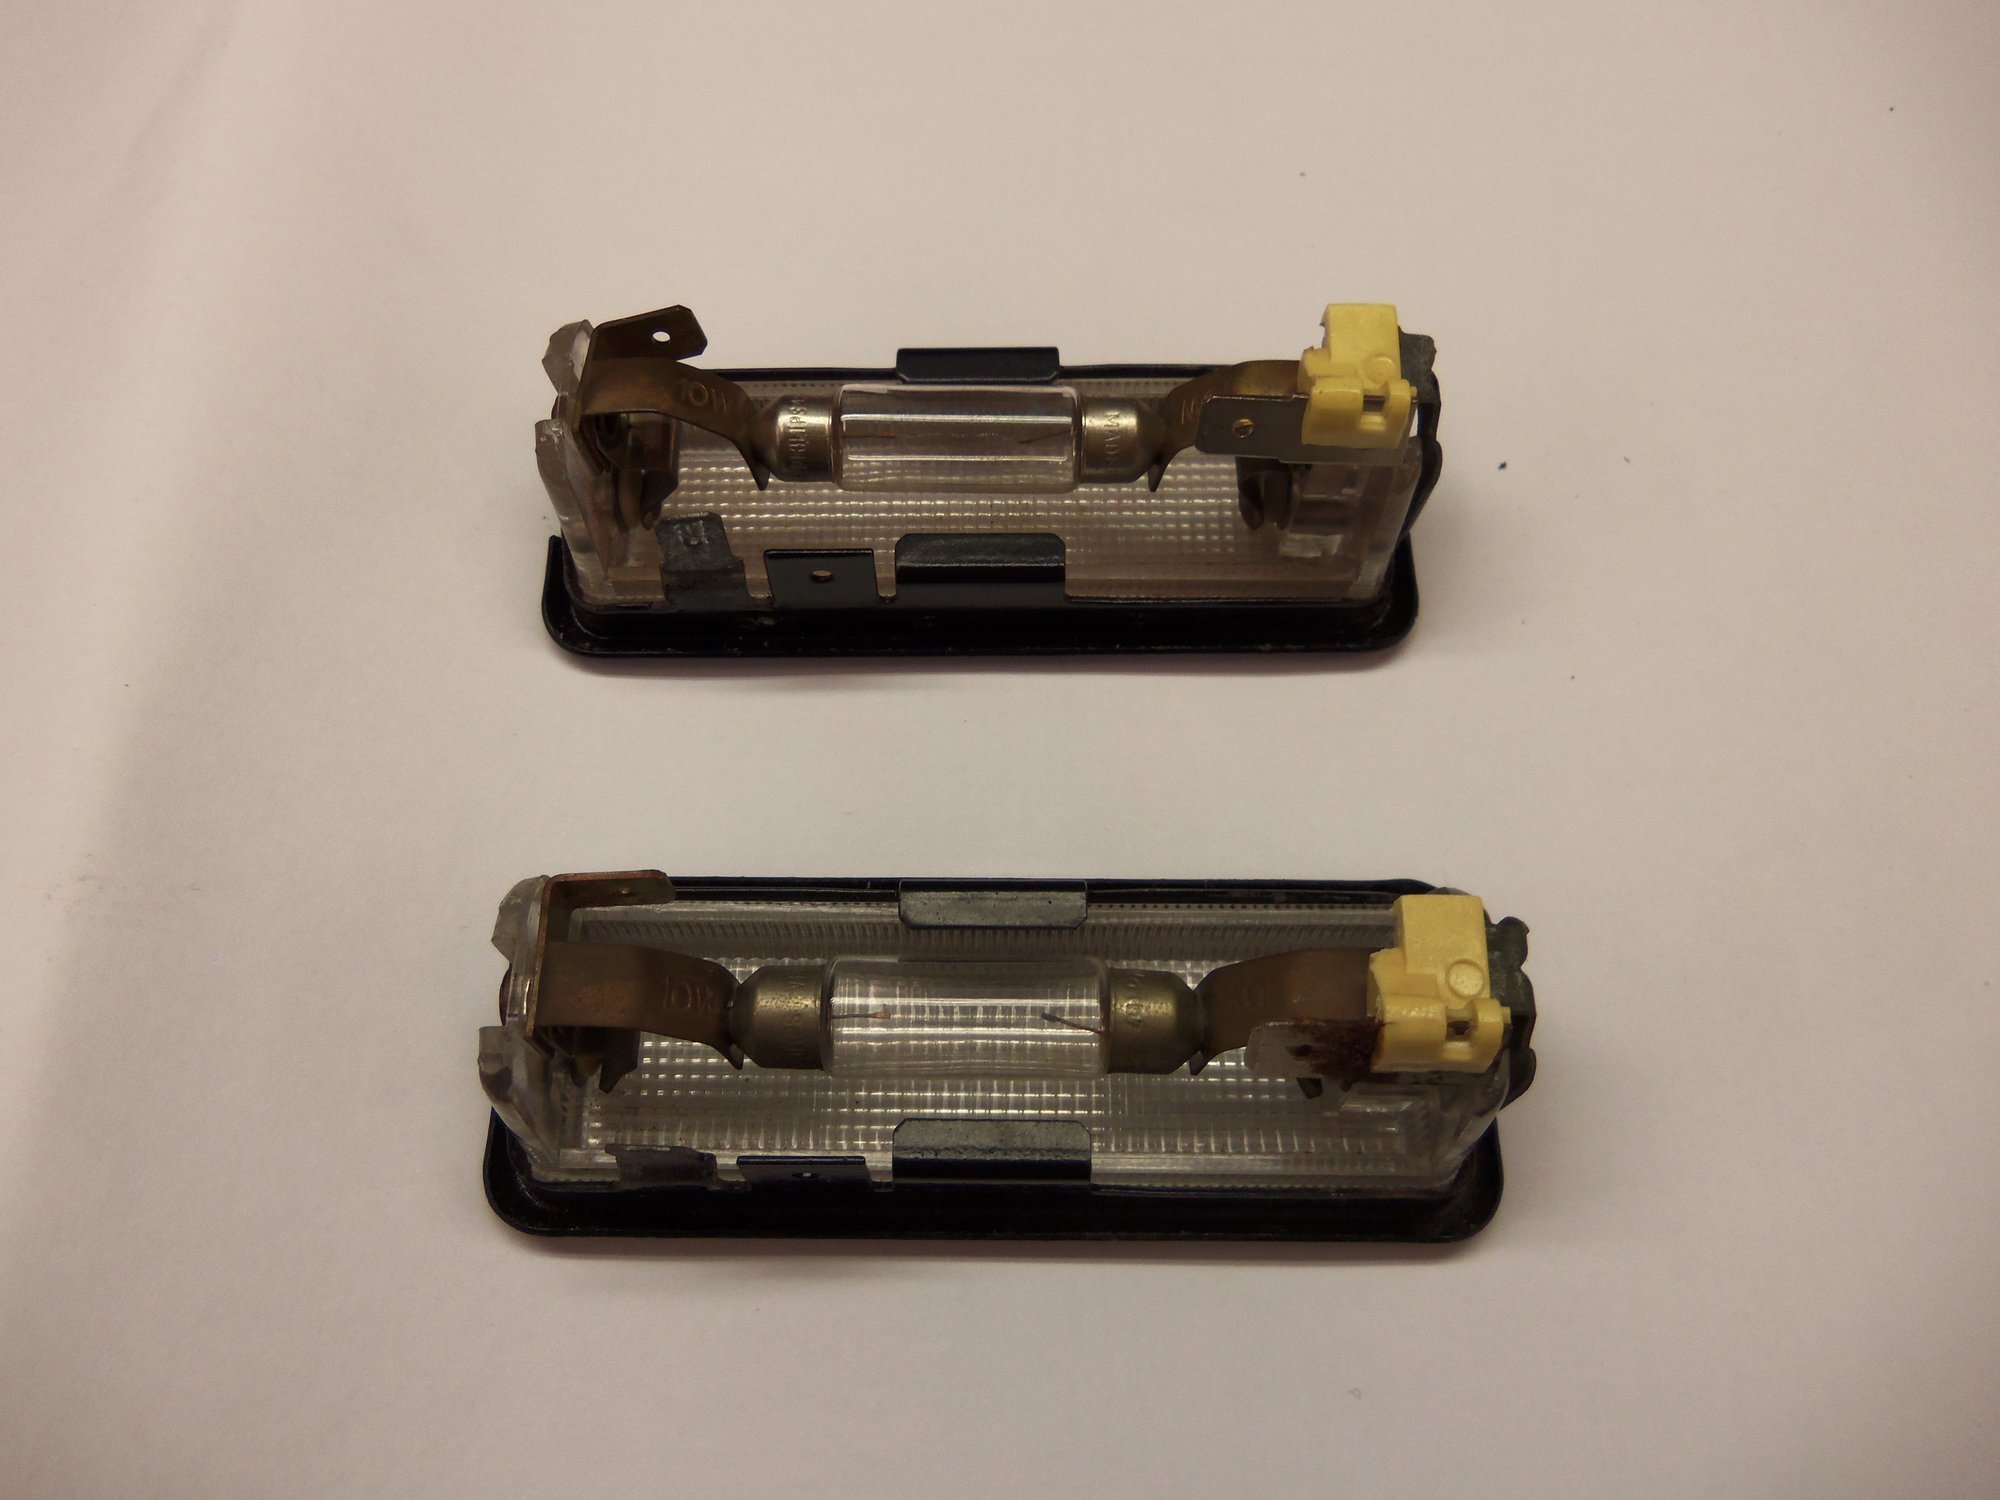
On the work bench, I compared the inop light with the one from 928 Intl. After a bit of playing, I figured out that the detents are determined by a ball bearing on a spring. My light was missing the bearing. Also turns out the bearing and spring provide a ground path to the bulb up to the selected tabs.
Where in the hell am I going to find a tiny ball bearing...?
I play with small engines as a hobby...AHA! I removed the choke blade lever detent ball from a derelict weedeater cube carburetor. Perfect fit.
I now have a working light again. And I have a spare.
The light is reinstalled awaiting testing. The CE panel is still out, though that is next on my list. I did put some heat shrink tubing on the brown ground wire 90 degree flag terminal.
Emboldened by this repair, I am going to investigate the light above the rear veiw mirror. It worked with the doors when I first bought the car. Now, it is always on unless in the middle position. I will figure out why...
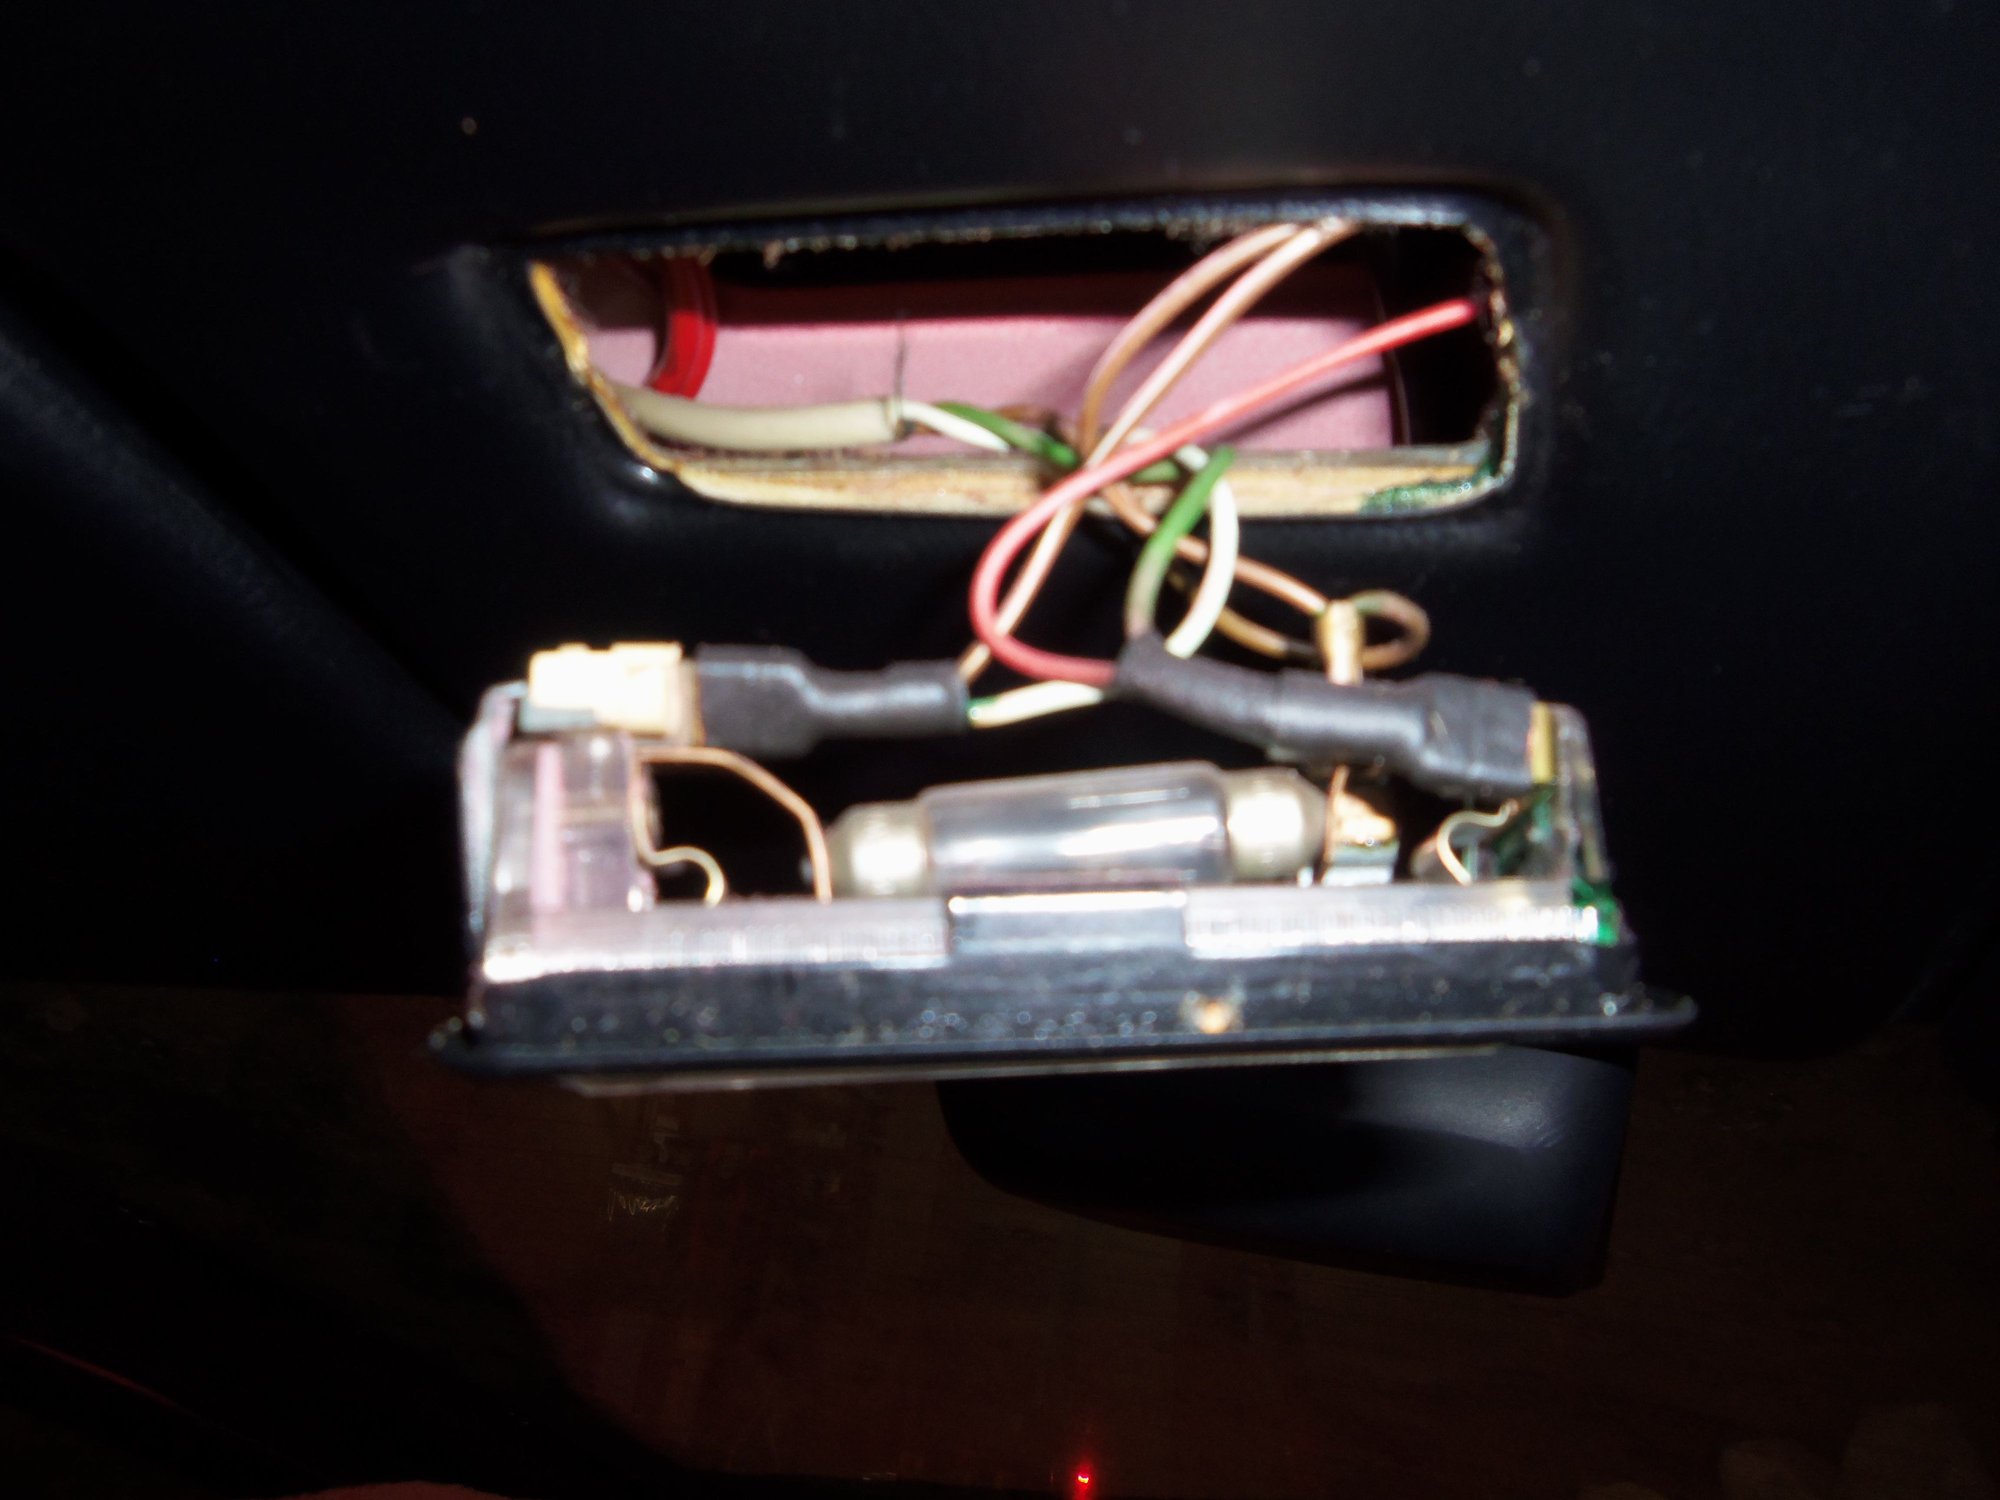
Did not know this was here...
Note brown ground wire 90 degree flag terminal does not have heat shrink tubing on it.
Green is constant 12VDC, white is constant ground, brown is switched ground.
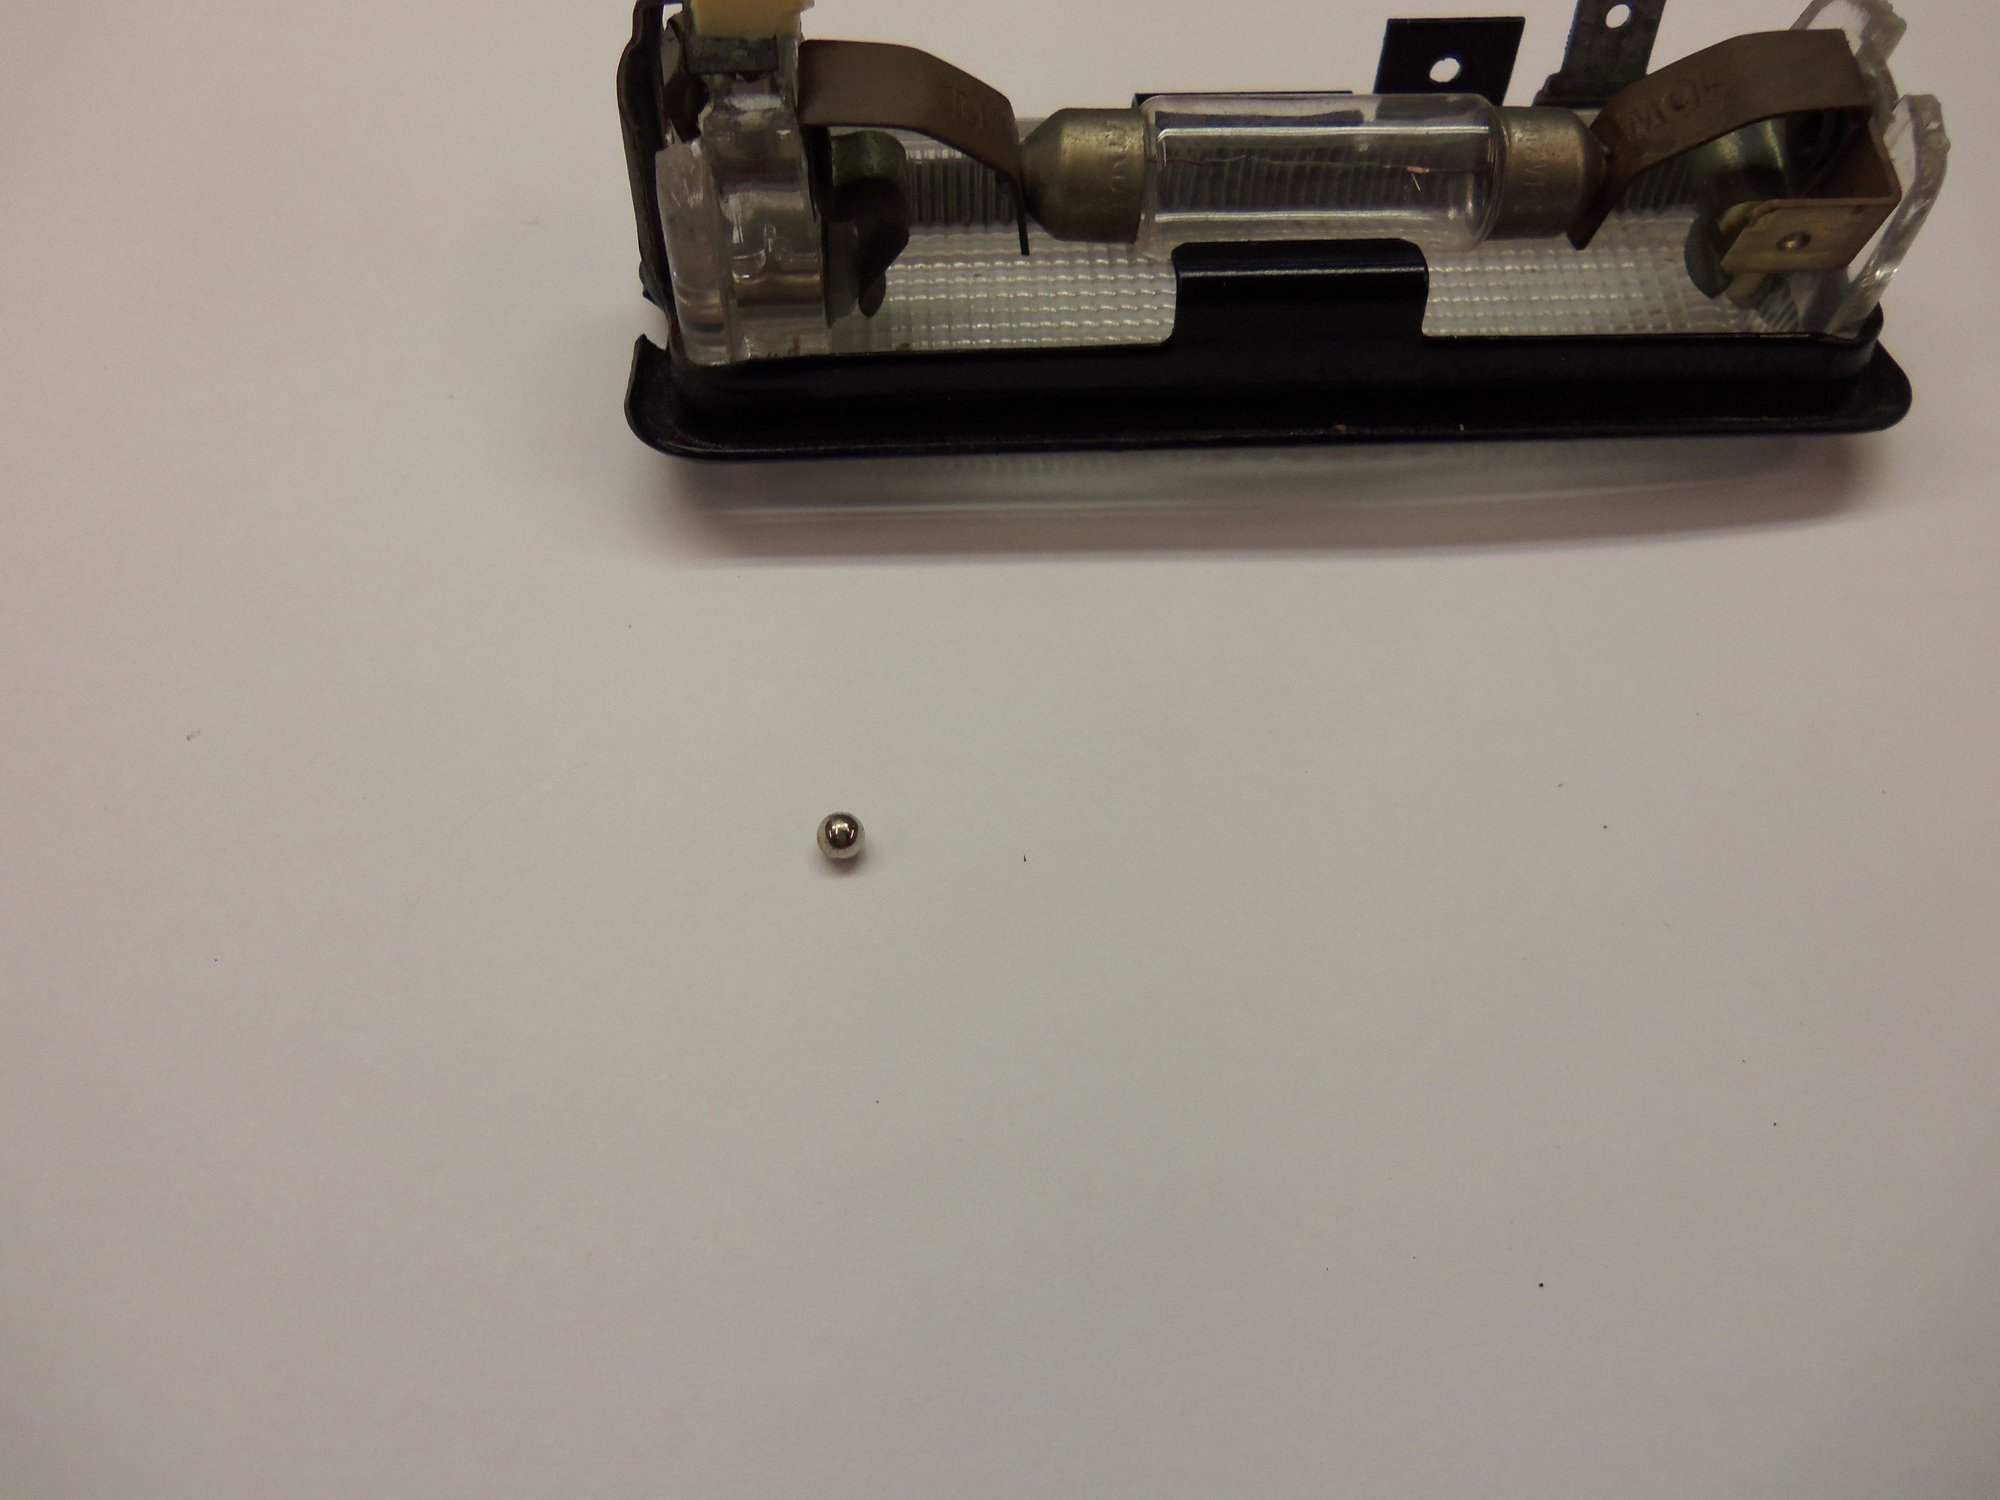
Inop light in the back, 928 Intl light in the front.
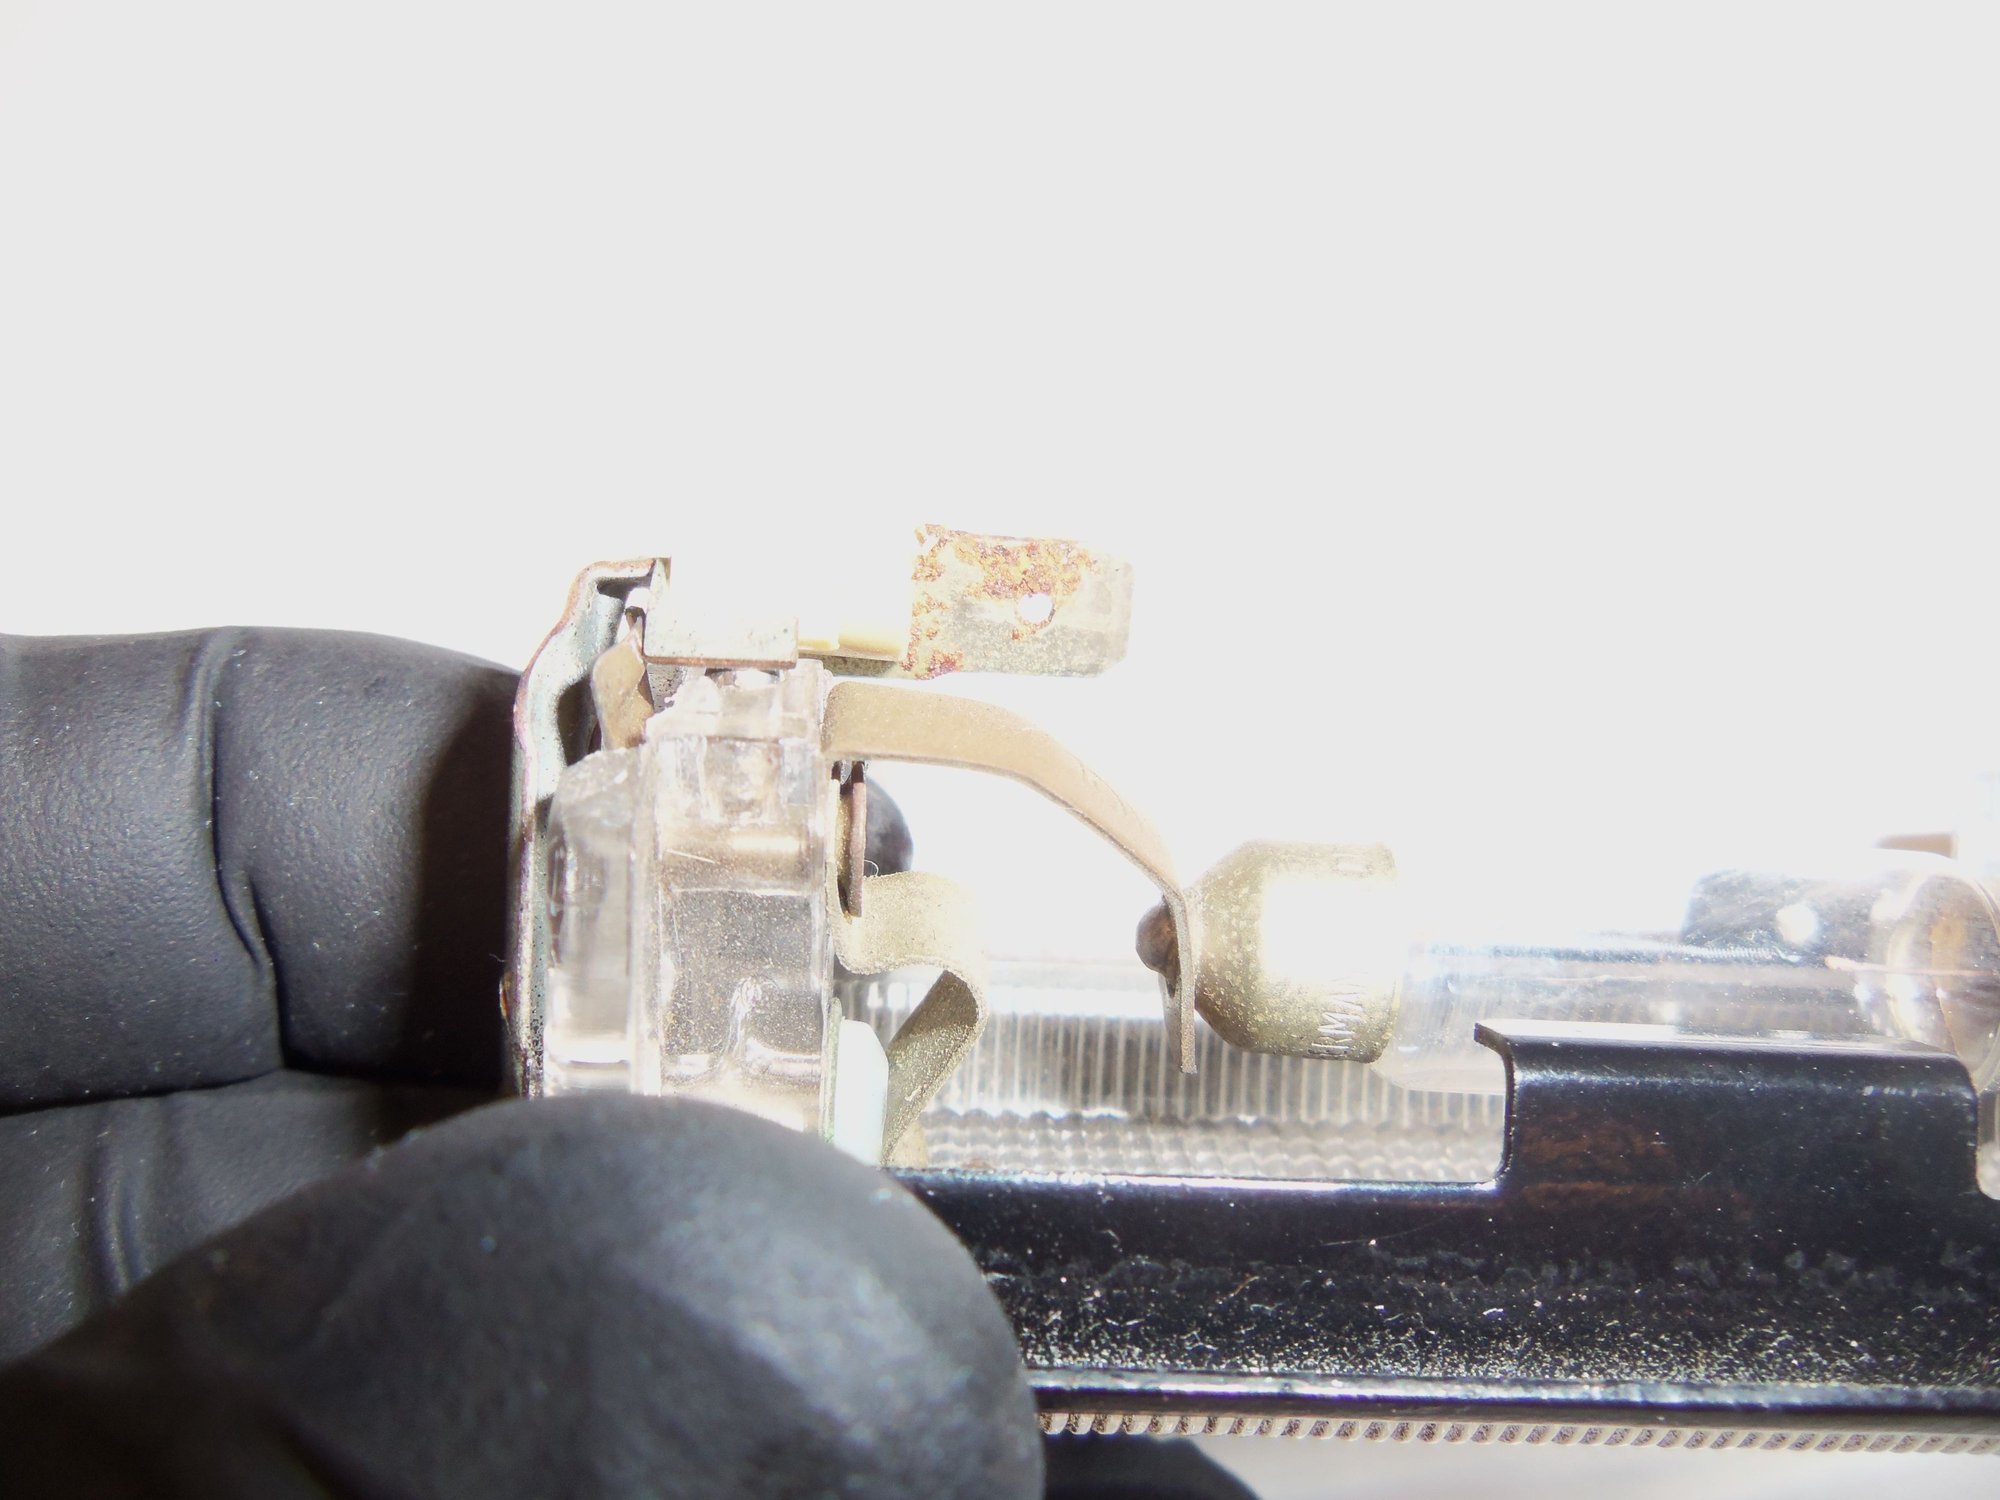
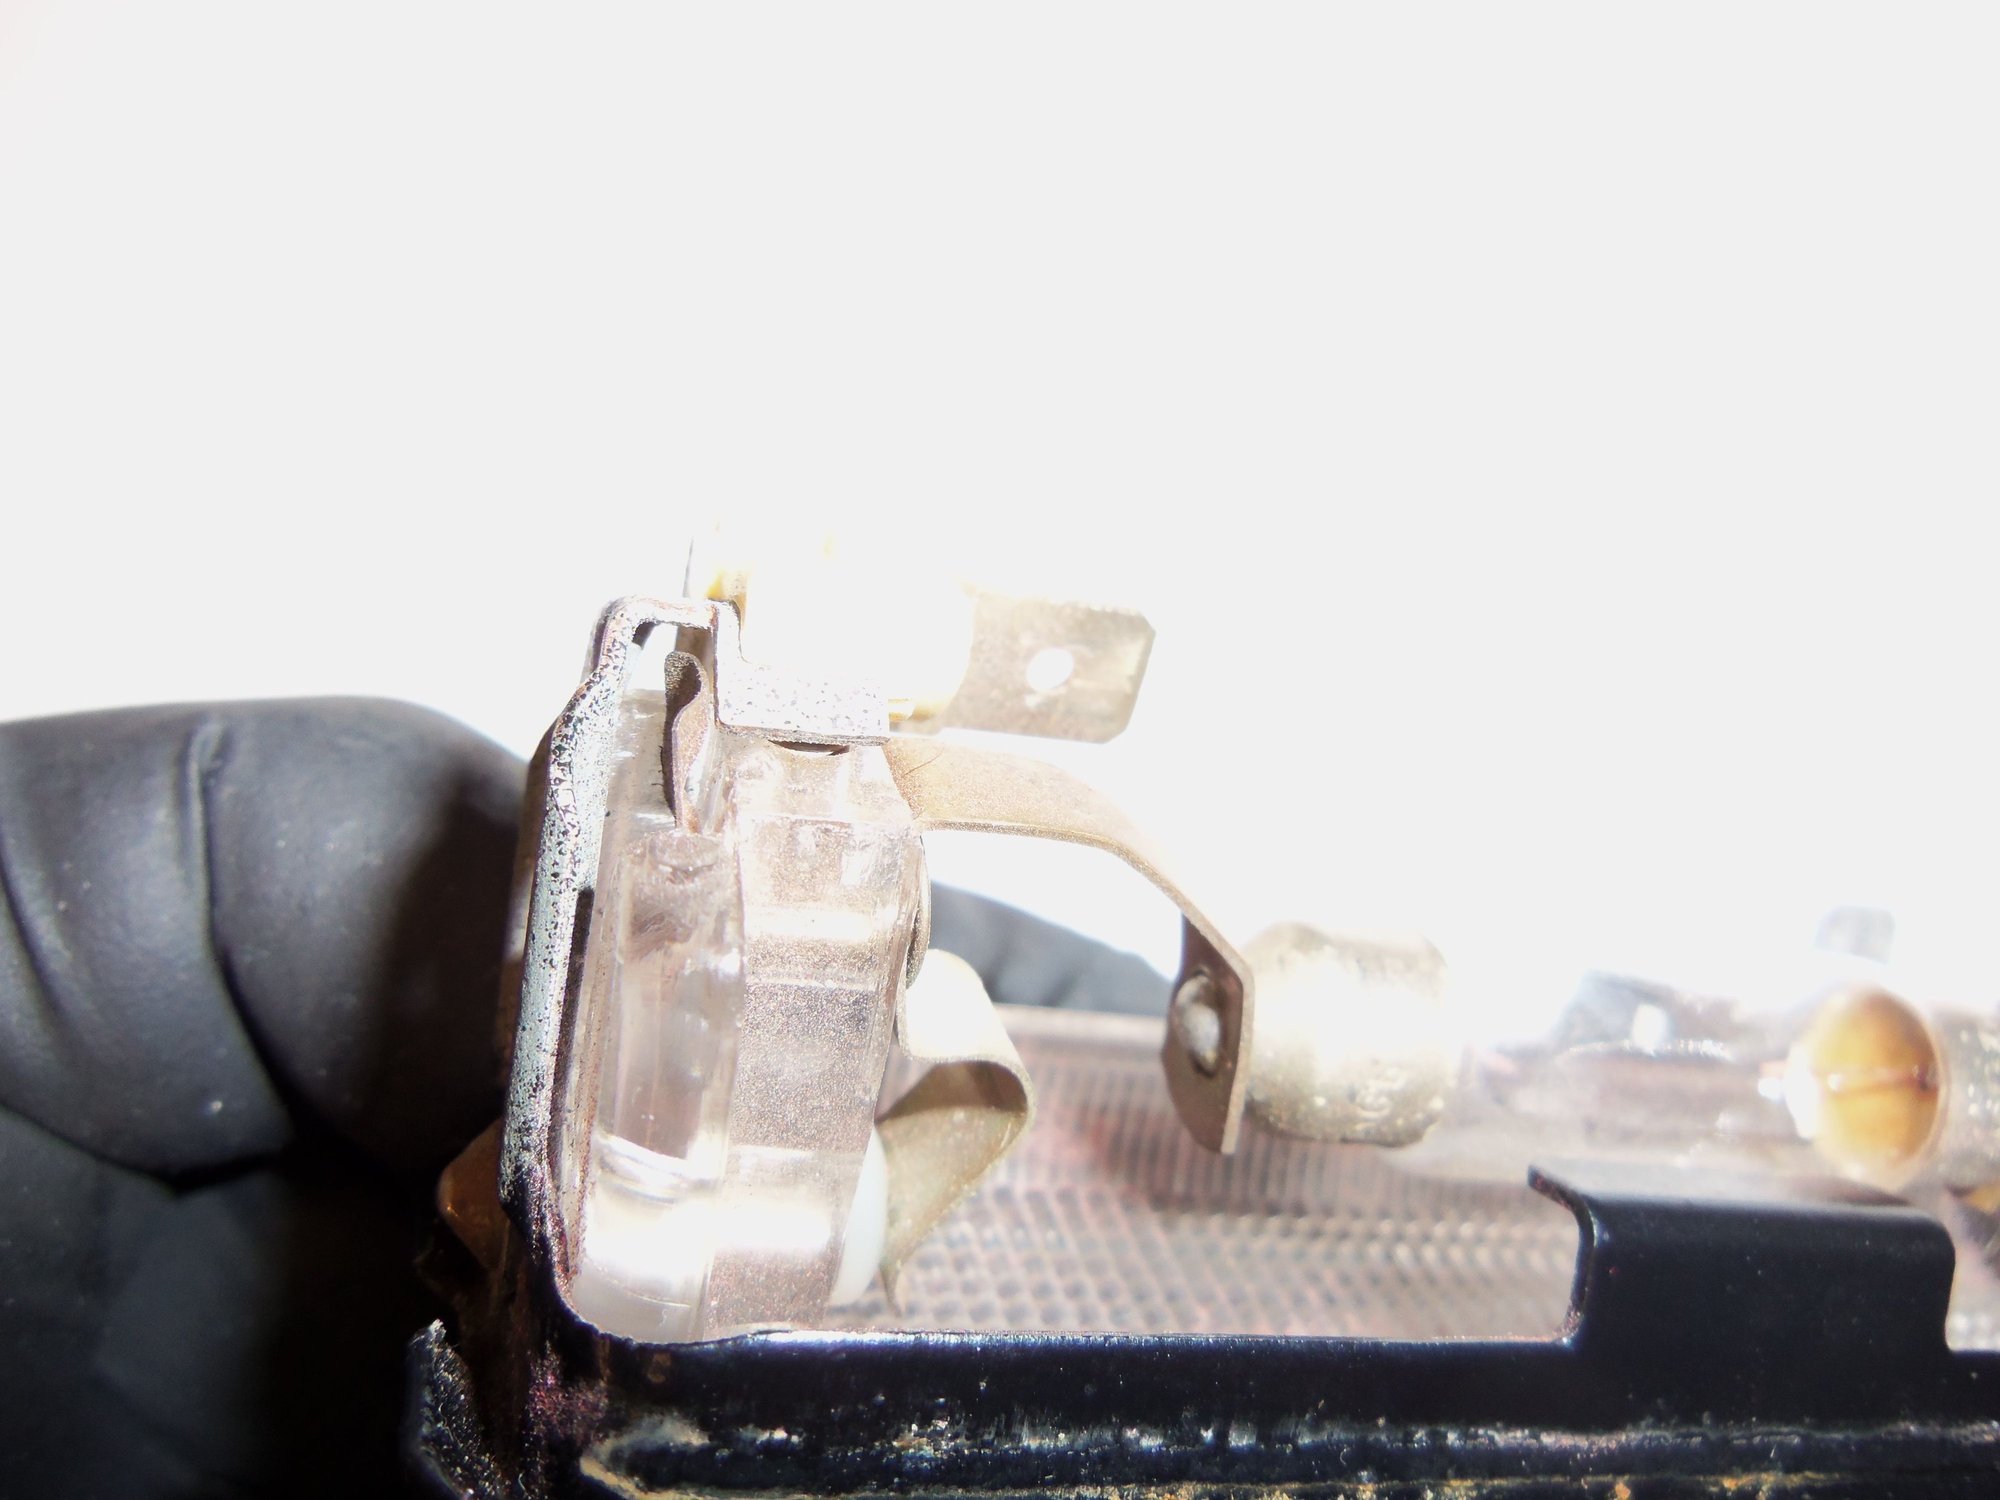
Look close, you can see the top of the ball bearing peeking out at the top of the plastic casting near my finger. This is the replacement light from 928 Intl
Look close in the same place on my inop light, you can see the hole for the missing ball bearing.
Ball bearing from the cube carburetor.
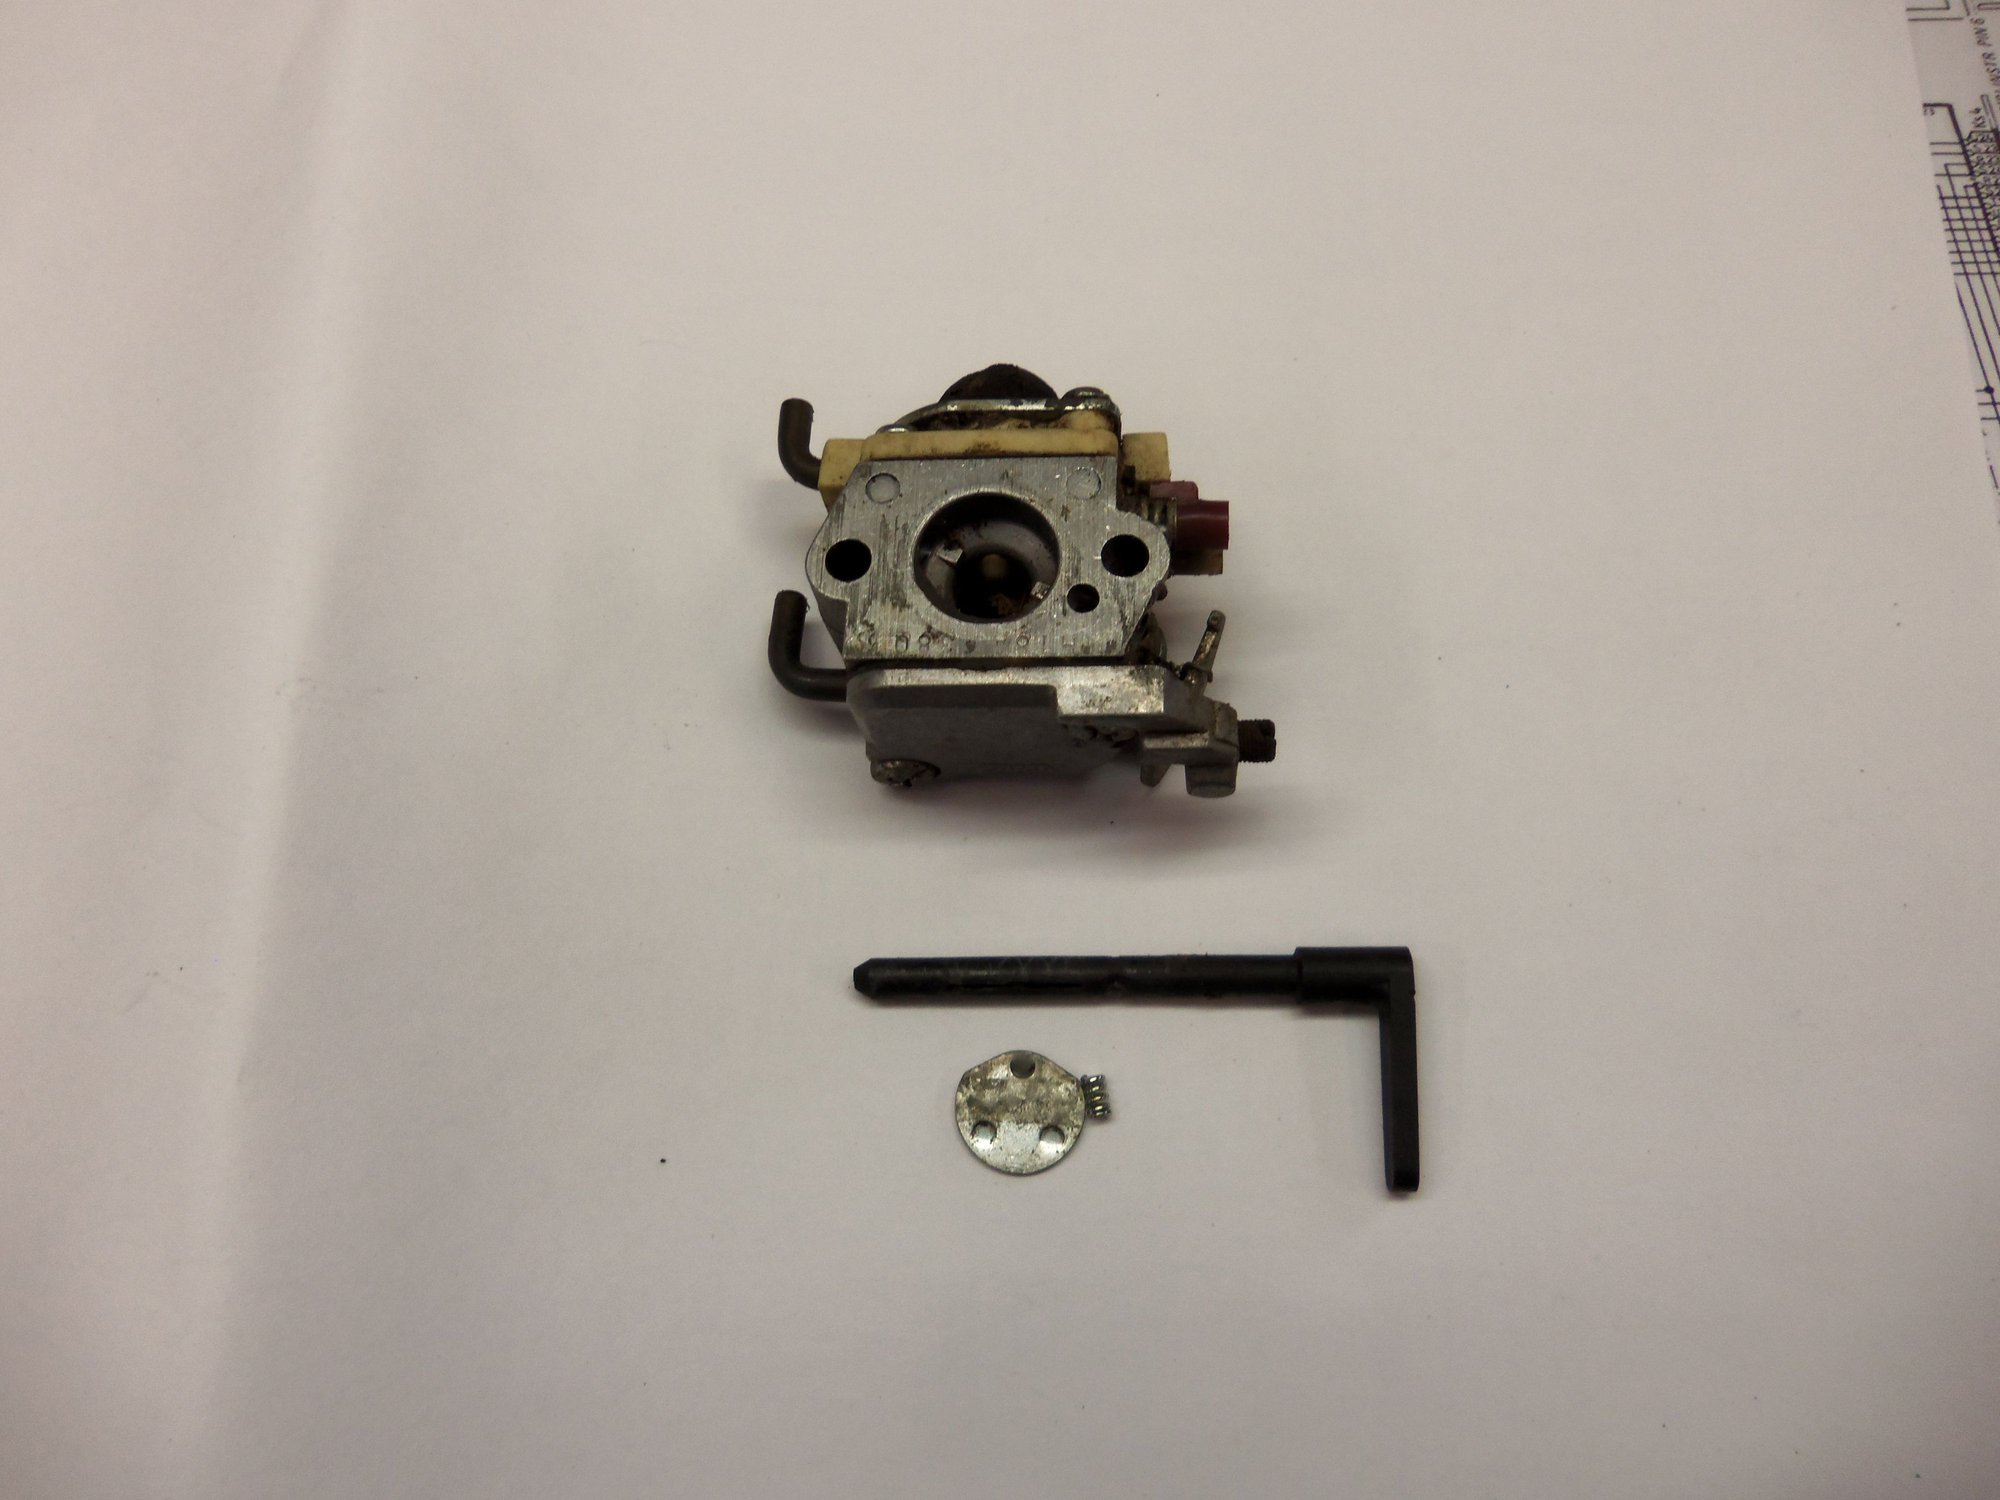
Walbro cube carburetor. Spring and ball bearing apply compression to the choke blade shaft. And now fixes the light in a Porsche 928!
...Emboldened by this repair, I am going to investigate the light above the rear veiw mirror. It worked with the doors when I first bought the car. Now, it is always on unless in the middle position. I will figure out why...
Seth K. Pyle
Well, first off, make sure you understand the lights and their operation.
Red is power, and is always hot.
Brown is ground and is how the "always on" part of the light works.
Brown/White is switched ground going to the door pin switches (and hatch switch) and is how the "on when door opens" works.
Presuming the other lights work properly, that would suggest that the switches work.
My guess would be that the switched ground wire is shorting out under the headliner.
Seth from the pictures your lamp is not wired correctly,
the ground wire (brown ) should go to the frame of the lamp.
The white wire should be (check to verify it is) switched and not 12V ,
NOTE the green wire should also be checked to verify that it is 12V positive.
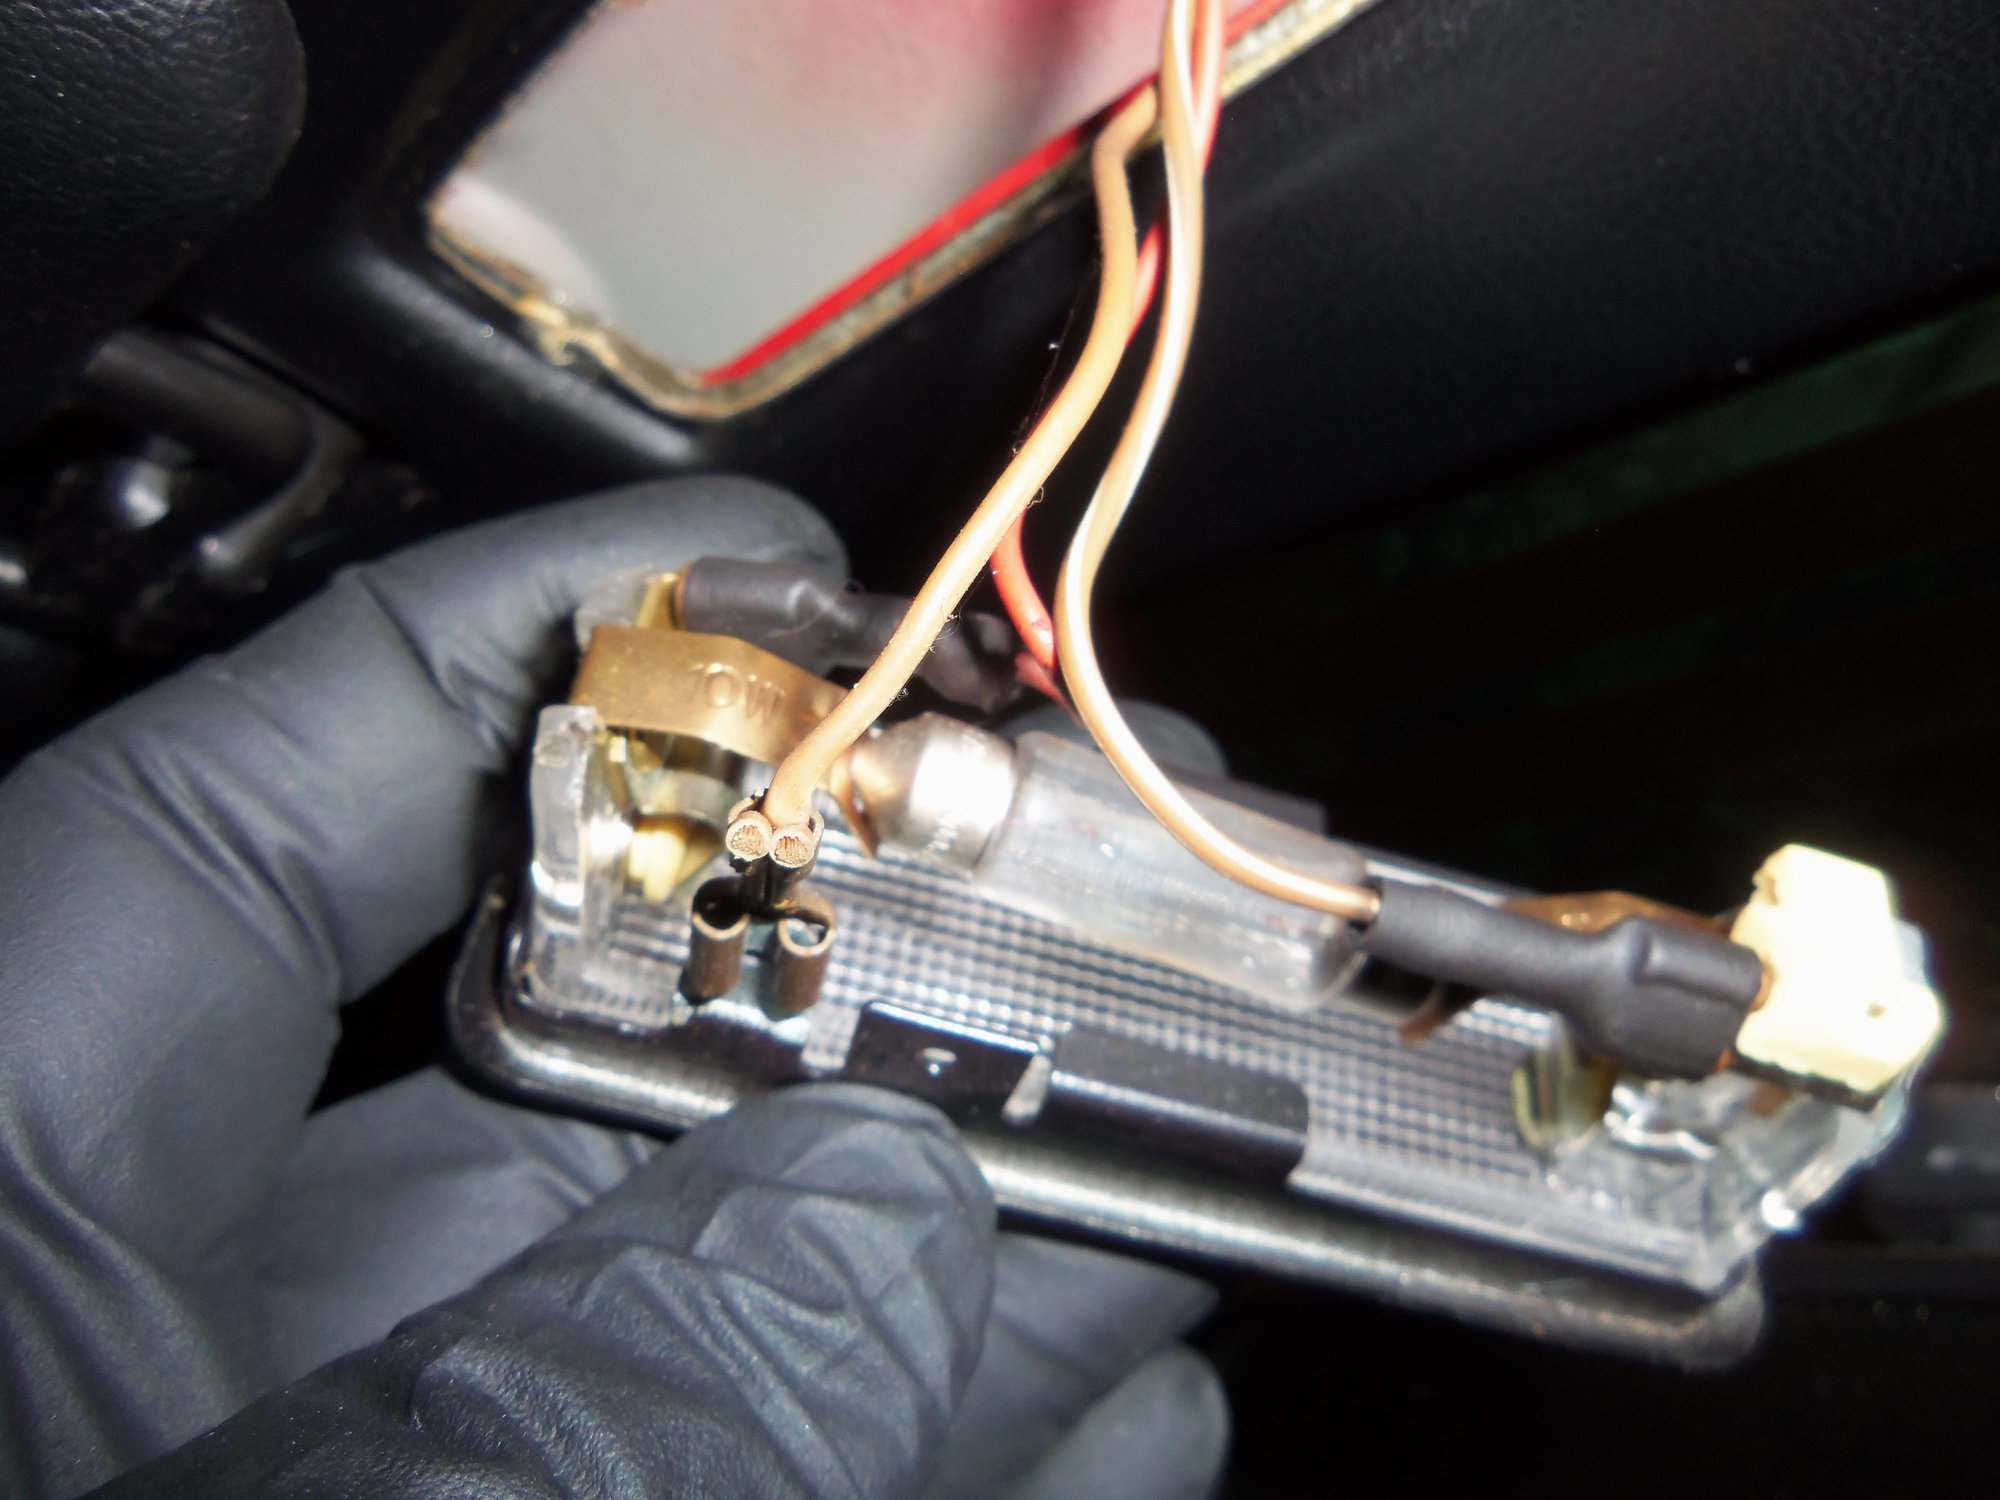
So in your 3rd picture,
Brown to the lamp frame.
Power to lamp end closest to the frame ground,
Switched ground to the lamp end opposite the power.
I am going to stay away from naming wire colors for hatch lamps,
as i have seen them miswired for switched and power a few times,
so use the volt meter to find power.
NOTE putting the switched wire to the light frame ground lug can cause other issues with lamp operation.
as the lamp frame is usually in contact with chassis ground and it can then ground the switched wire.
It would be best to remove all 3 of the lamps in the roof/hatch and make sure that they are all wired the same way.
NOTE it would be even better to replace these lamps with the newer VW lamps ,
if you go that route then make the new lamps come with the harness for the lamp .
NOTE the VW lamp will not fit into the rear most hatch lamp position
Wisconsin Joe: Thanks for the clarification of the wire colors. I understood the three position of the light. It just took a little realignment on my thinking to remember that in German, power is constant, ground is switched.
Look further ahead and you will see the colors mine is wired with...
V2Rocket: Ummm...no. I don't mind working on 2-cycle cube carbs. My ultrasonic cleaner makes short work of them. However, I think that would be a retrograde step for the Red Witch. I do like her organ pipes...
Mrmerlin: Thanks for the heads-up, Stan! I will verify all the wiring. I have read about the VW conversion and am keeping it in mind. As of right now, all three of my lights are serviceable and in good condition.
jeff spahn: Oops.
I have figured a few things out...see the next post.
I did not get the CE panel back in tonight.
However, I did R&R the other two roof interior lights. I have figured out the wiring. I have also verified it in the 1986 Lamps USA wiring diagram.
I am putting all this out here because I trust Stan's advice and want to run my setup by him for clarification.
On each light there are three tabs. One tab goes directly to one side of the bulb. That is where constant 12VDC is to go. On tab is part of the metal frame of the light. That is where constant ground is to go. The remaining tab is on an insulated plastic block at the other end of the light. This is where switched ground is to go.
On the rearmost hatch light, constant 12VDC tab has a green wire on it. Constant ground has a white wire on it. Switched ground has a brown wire on it. The colors match the wiring diagram.
On the front hatch light, constant 12VDC tab has both a red and a green wire on it. Constant ground has two brown wires on it. Switched ground has both a brown/white stripe and white wire on it.
Here is what Stan was pointing out to me. The grounds are swapped on my rearmost hatch light. The switched ground wire (white) is on the constant ground tab.
I will switch those in the morning.
On the front roof light between the sun visors, constant 12VDC tab has a red wire on it. Constant ground has a brown wire and two cut off brown wires on it. Switched ground has a brown/white stripe wire on it.
I had thought the rearmost light had been rewired with the wrong colors, but they match the wiring diagram.
When I removed each light, I cleaned it with Windex, then sprayed the metal terminals and such with DeOxit D5. I also sprayed all the wiring connectors with DeOxit D5. All the bulbs were good, and suprisingly(at least to me) were stamped 'Made in Germany.' I took that as a good sign and reinstalled them after cleaning.
All three lights tested well on the workbench with the power supply. The front light did not work in the switched ground position. I tweaked the copper wiper contact, and it worked fine.
I have thought about what I wrote in the earlier post, and can only conclude that I am starting to suffer from CRS. I had thought that the front roof light was always staying on. The more I think about it and try to remember, it had worked briefly, then wouldn't come on with the doors open anymore. It would work in the constant ground position. So, me having to tweak the contact makes sense. Either way, I did not find any evidence of wiring or terminals shorting to the body.
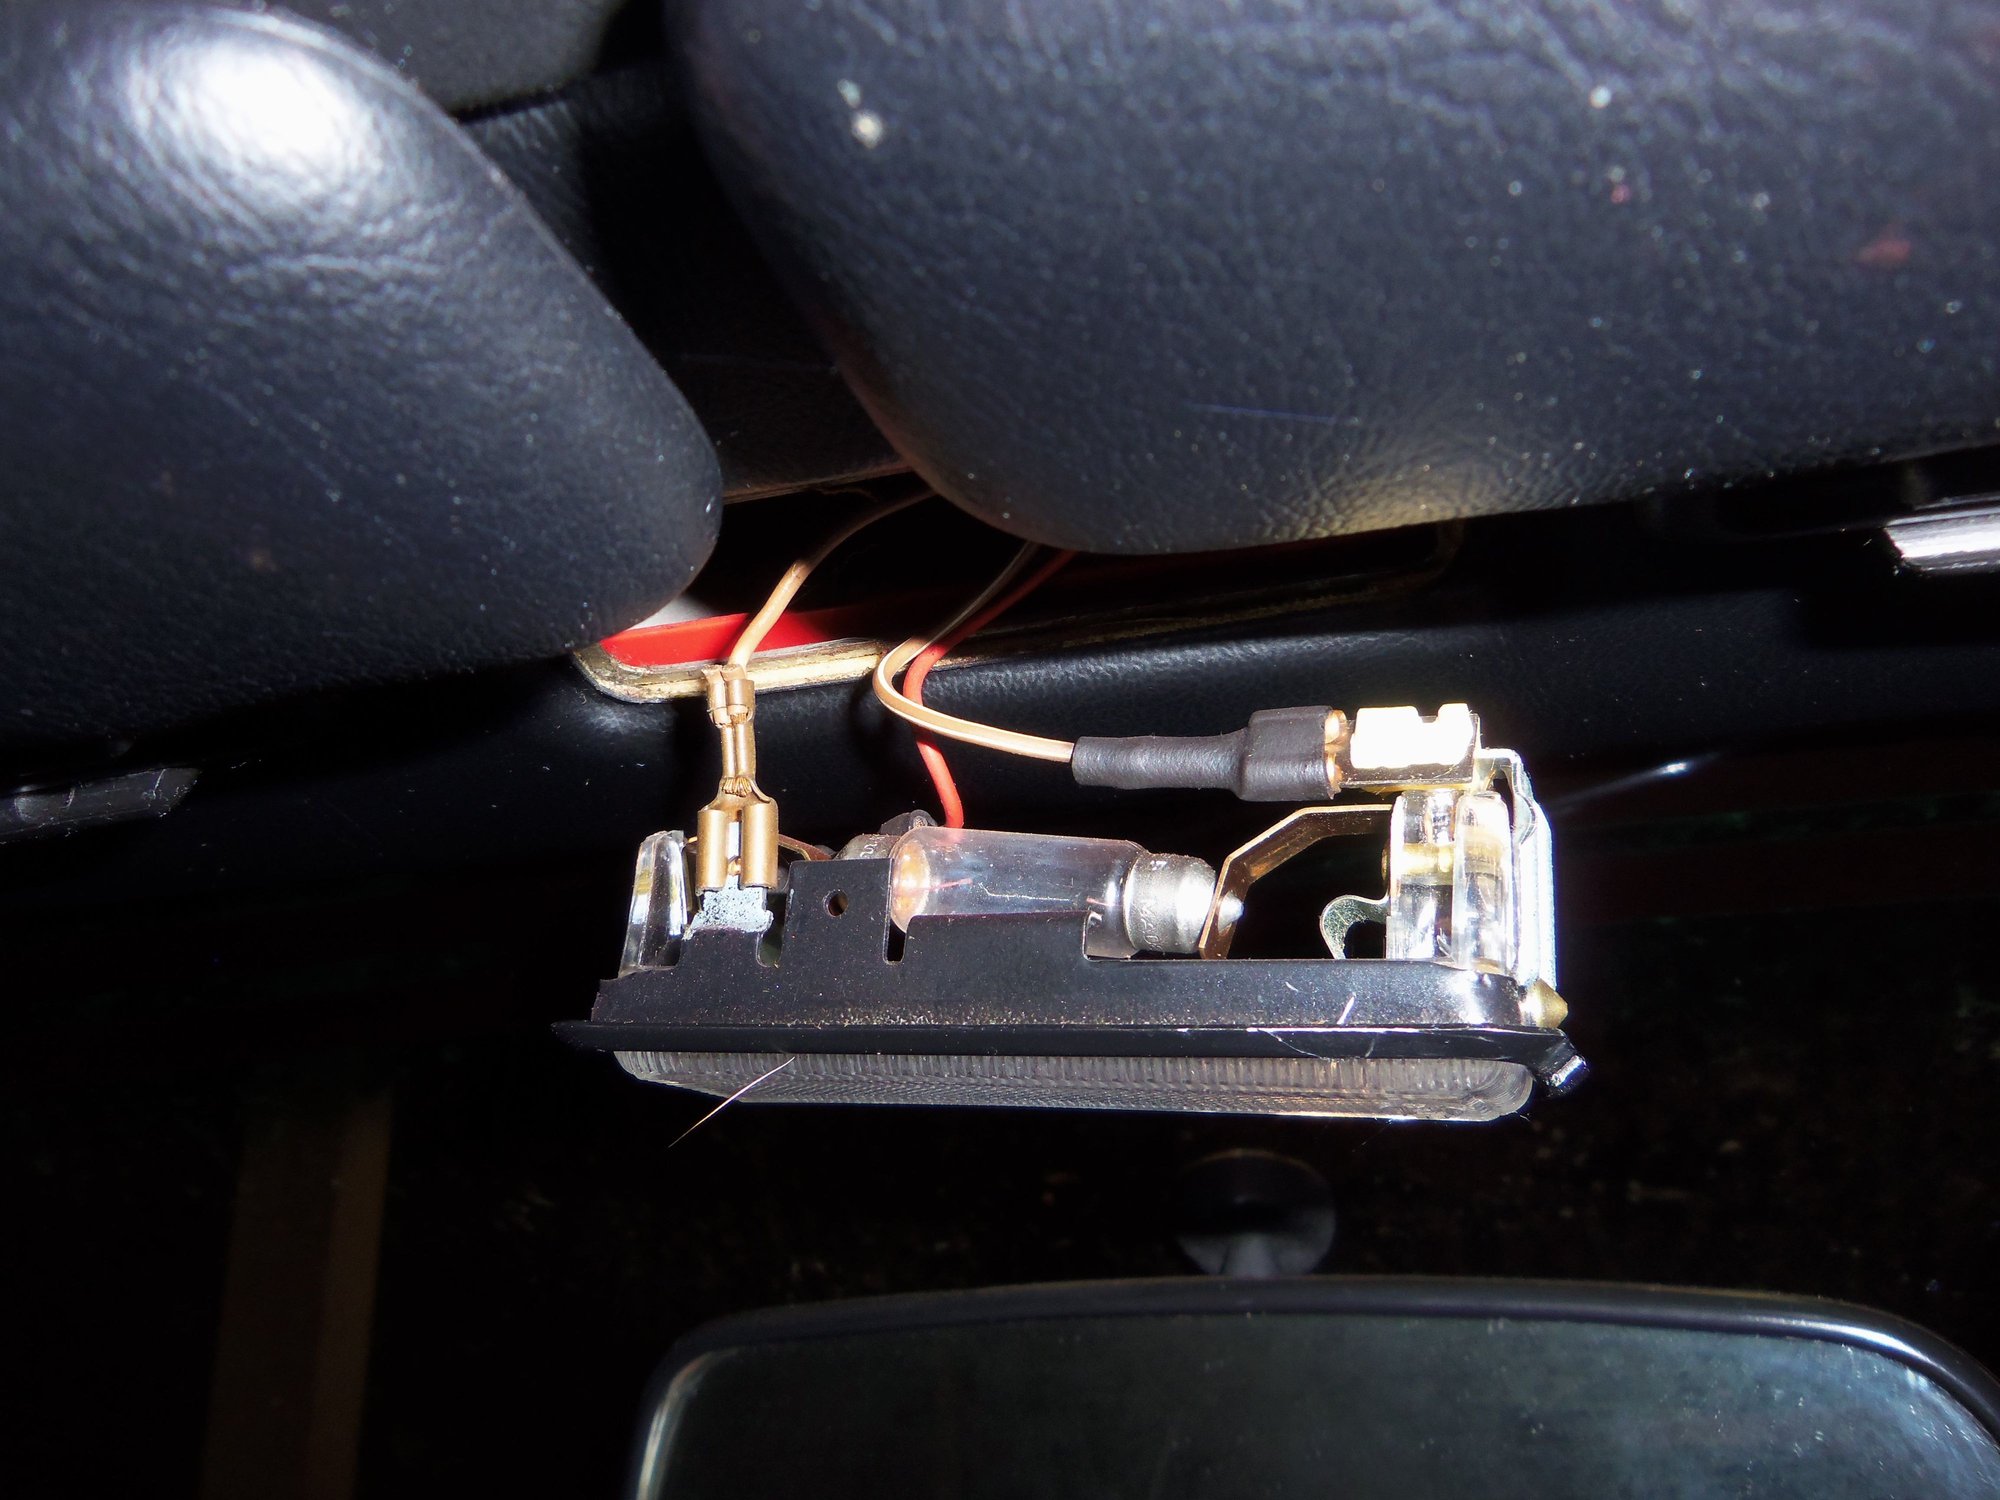
Rearmost hatch light. White and brown wires are in the wrong places.
Front hatch light. You can see where the white and green wires come from now. White and brown/white stripe wires and brown wires are in the right places.
Another, clearer view of the wiring for the front hatch light.
Front roof light wiring. Brown/white stripe and brown wires are in the right places.
Another view of the wiring for the front roof light. You can see the two cut off brown wires on the constant ground tab. Not sure why they were cut off.
In the morning, I am going to switch the ground wires on the rear most light, then finish installing the CE panel.
After testing the three roof lights, I will tackle the door lights. They work, but could probably use a cleaning.
FWIW usually the reason these lamps fail is due to melting.
that means the door is left open or the hatch ,and the lamps stay on for an extended period of time .
Then the plastic housing melts OR the car is dark colored and then left in the sunshine this can also melt the lamps..
If upon lamp inspection it appears to be melted replace the lamp as the plastic is now brittle and the hot wire can snap off the brittle plastic.
Best to leave all of the lamps off unless you need it.
the door lamps can be left in the switched position to operate when the door or hatch is open ,
OR replace the lamps bulbs with LEDs
Wisconsin Joe: Thanks for the clarification of the wire colors. I understood the three position of the light. It just took a little realignment on my thinking to remember that in German, power is constant, ground is switched.
Look further ahead and you will see the colors mine is wired with...
Seth K. Pyle
I don't know if it's a "German" thing, or just a way to address how to have the light be "always on" and "on when door is open" with a minimum of wiring.
It is somewhat counterintuitve and can be confusing if the way it operates isn't understood.
Sorry about the wire colors. I forgot that the roof/hatch is different from the doors.
I've had my doors apart a bazillion times (roughly) and can do mirror switches and light hookups with my eyes closed (figuratively speaking).
Unless you are prepping to have a concourse pure OEM car I'd just swap them out for the superior VW light assemblies and use LED bulbs instead of the dinosaur incandescent festoon bulb.
GT6ixer: Thanks! For what this little light cost, I'm not throwing one away until I have to.
Mrmerlin: That makes sense, Stan. Thanks! Mine don't look tooooooooo bad, but on one of them I can see the plastic has bent over the years.
I will make a note to not leave the lights on for any length of time. IE turn the rocker to the middle when working with the doors open. The dark interior and summer heat might be an issue. I have mildly tinted windows and a full set of fitted heat shield sun shades. We shall see...
I am going with LED's.
drscottsmith: Thanks! Sometimes its the little things that matter.
Wisconsin Joe: Not a problem. I am used to working on older American cars. I am capable of understanding this Porsche's wiring, I just have to make sure I am paying attention. Either way, thank you very much for your input and advice.
Randy V: Yep. I have already ordered a set of LED bulbs from SuperbrightLED's. I will look into replacing the fixtures with the VW lamps.
You have done an excellent job of rehabbing these - well done.
However as others have pointed out these are actually quite crap fittings - they will eventually break.
They are Hella parts designed for an ancient VW, they aren't specific to a Porsche 928 - and probably don't really belong there.
The alternate VW fittings mentioned have the advantage of coming in multiple colours (black, gray & beige), have enclosed connectors that do not short out, have a lens that pivots more easily in the horizontal (long) direction (works better with directional LEDs), and an overhang around the mounting hole that helps cover up the trim shrinking back from the opening (very common on leather headliner cars).
Basically the VW units are better in every way. You do need to chop off the connector and add pigtails to make one fit in the rear hatch location - but this too is easily possible. A great upgrade - Esp with good LED's - a battery saver!
Wiring Colours:
Roof & Doors | Hatch
============== Red | Green Brown | Brown Brown/White | White

 12-15-2016, 06:07 PM
 And I have a spare.