When you click on links to various merchants on this site and make a purchase, this can result in this site earning a commission. Affiliate programs and affiliations include, but are not limited to, the eBay Partner Network.
Hey guys, a couple of questions please...and thanks ahead of time.
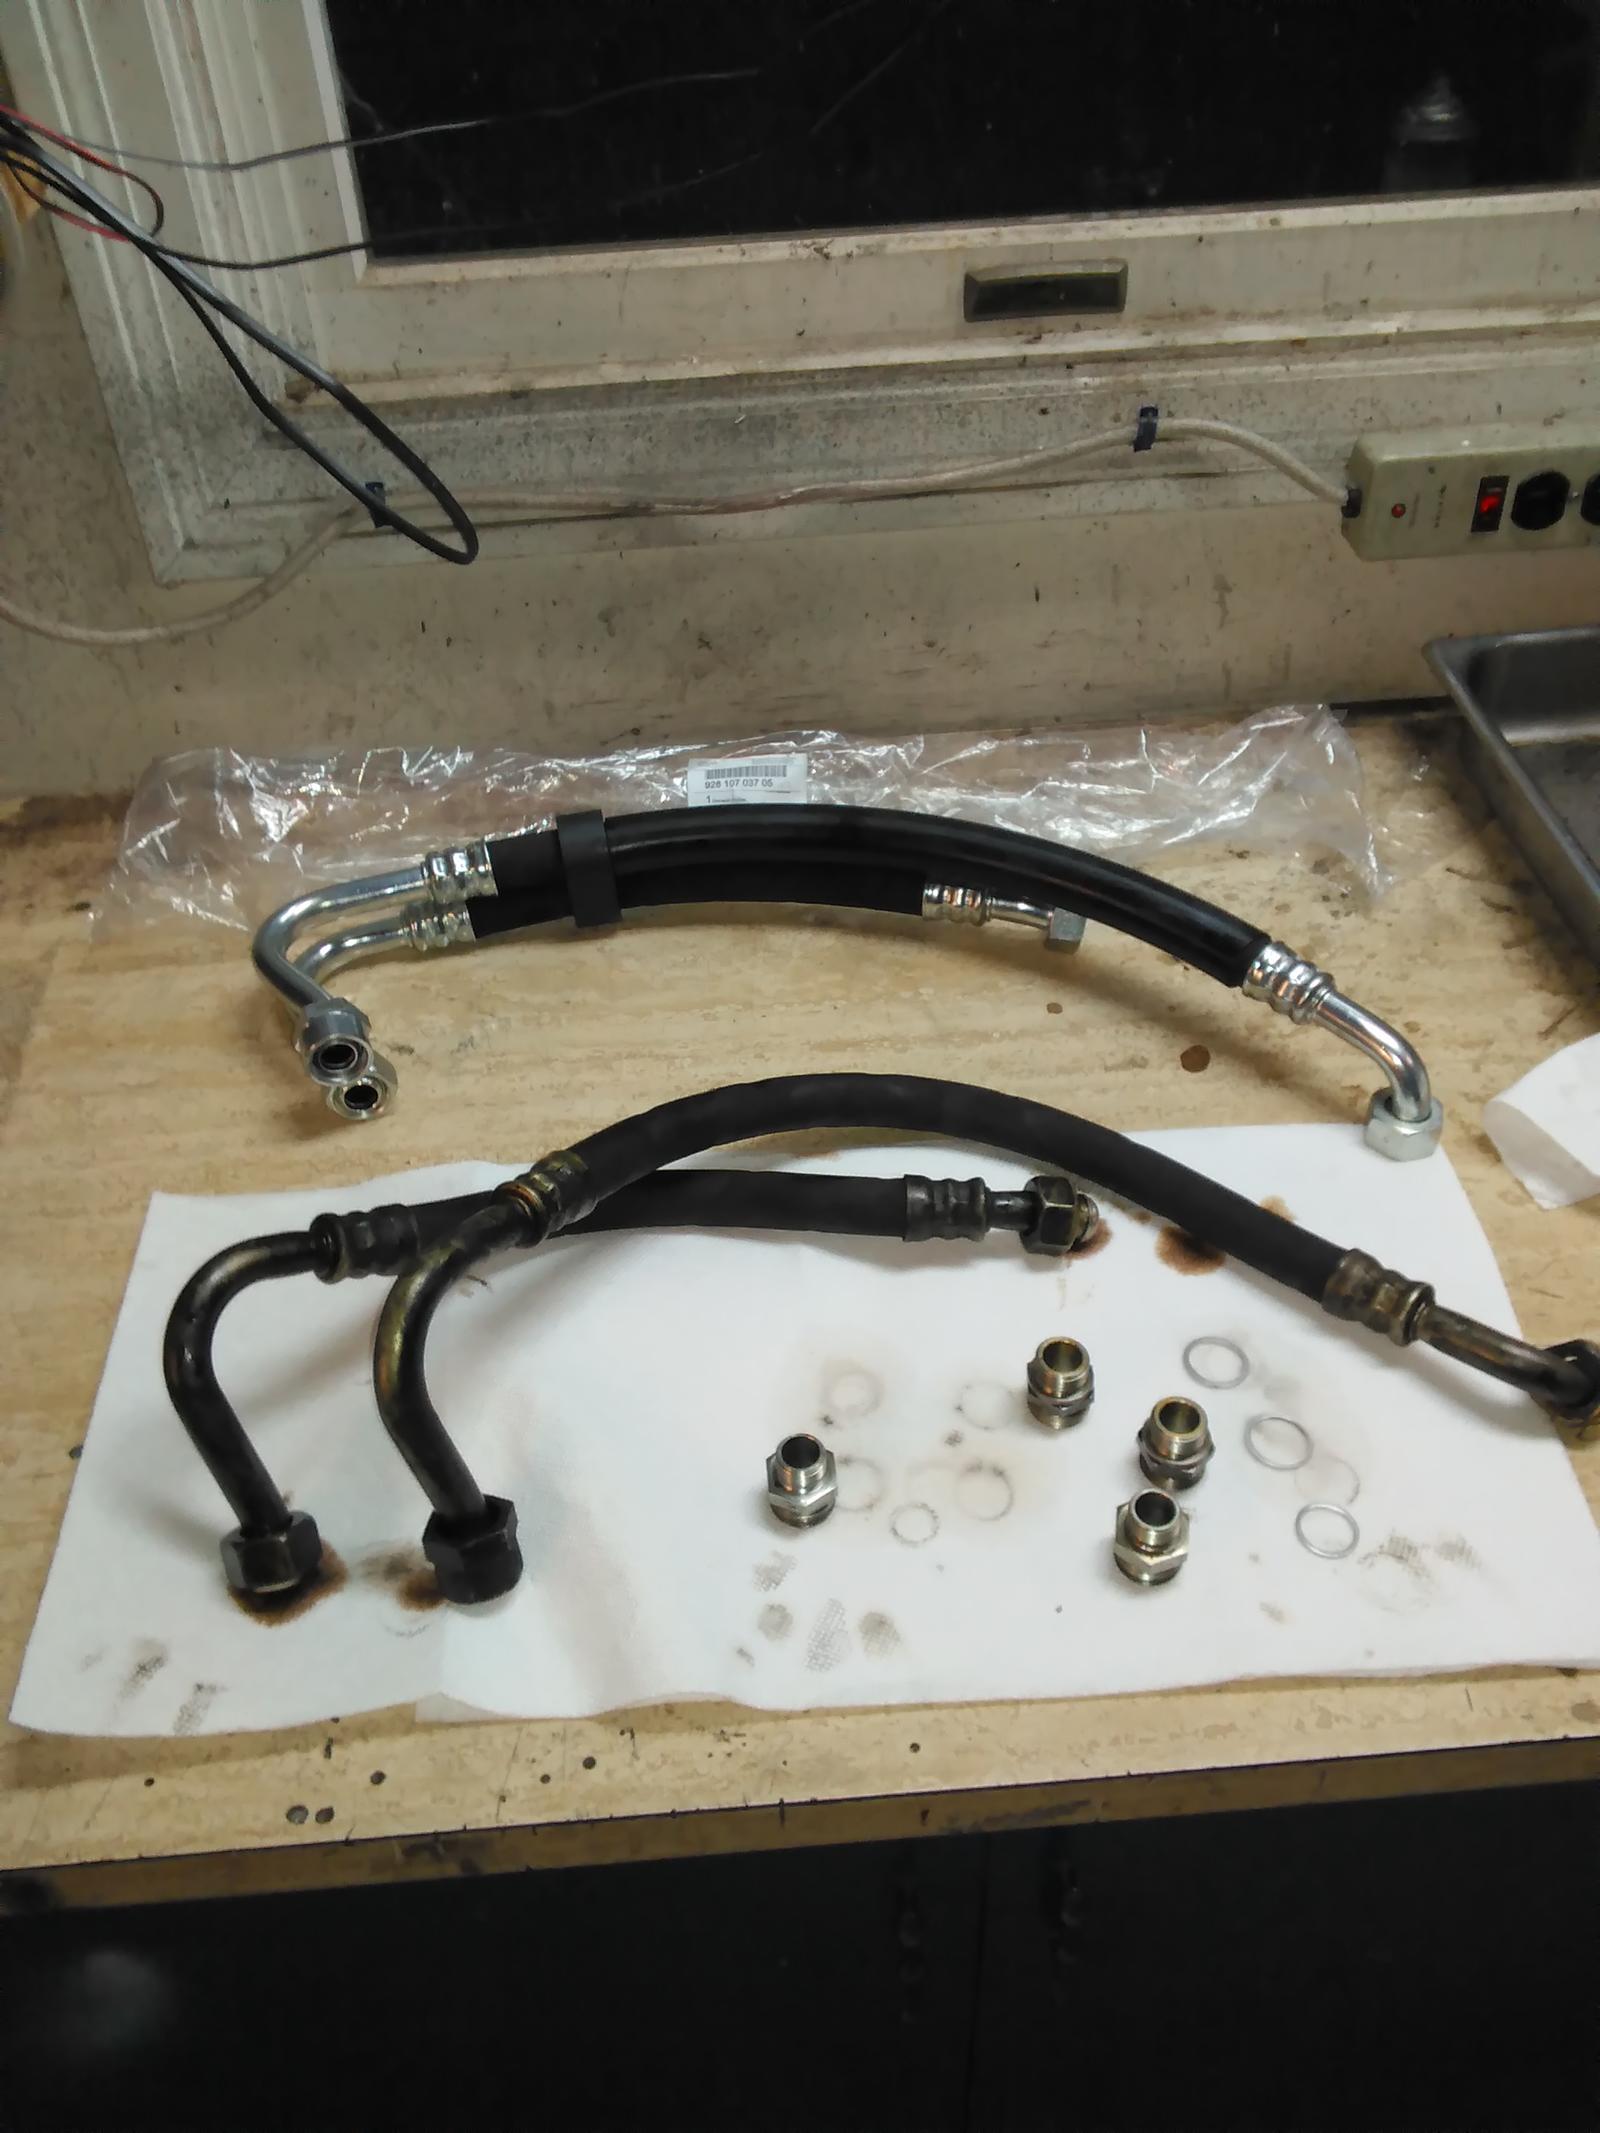
I just pulled, what I assume are the original, oil cooler lines.
Not bad, but pretty messy -- even with the oil drained.
What I noticed was that the replacement set I bought are, in fact a little different. The old set appear to be slightly longer (maybe 1.5 cm), and the new set have a rubber block that holds the lines together. All the fittings are still identical to the old set.
The new set have part number 928-107-037-05. Is this correct for a late 86?
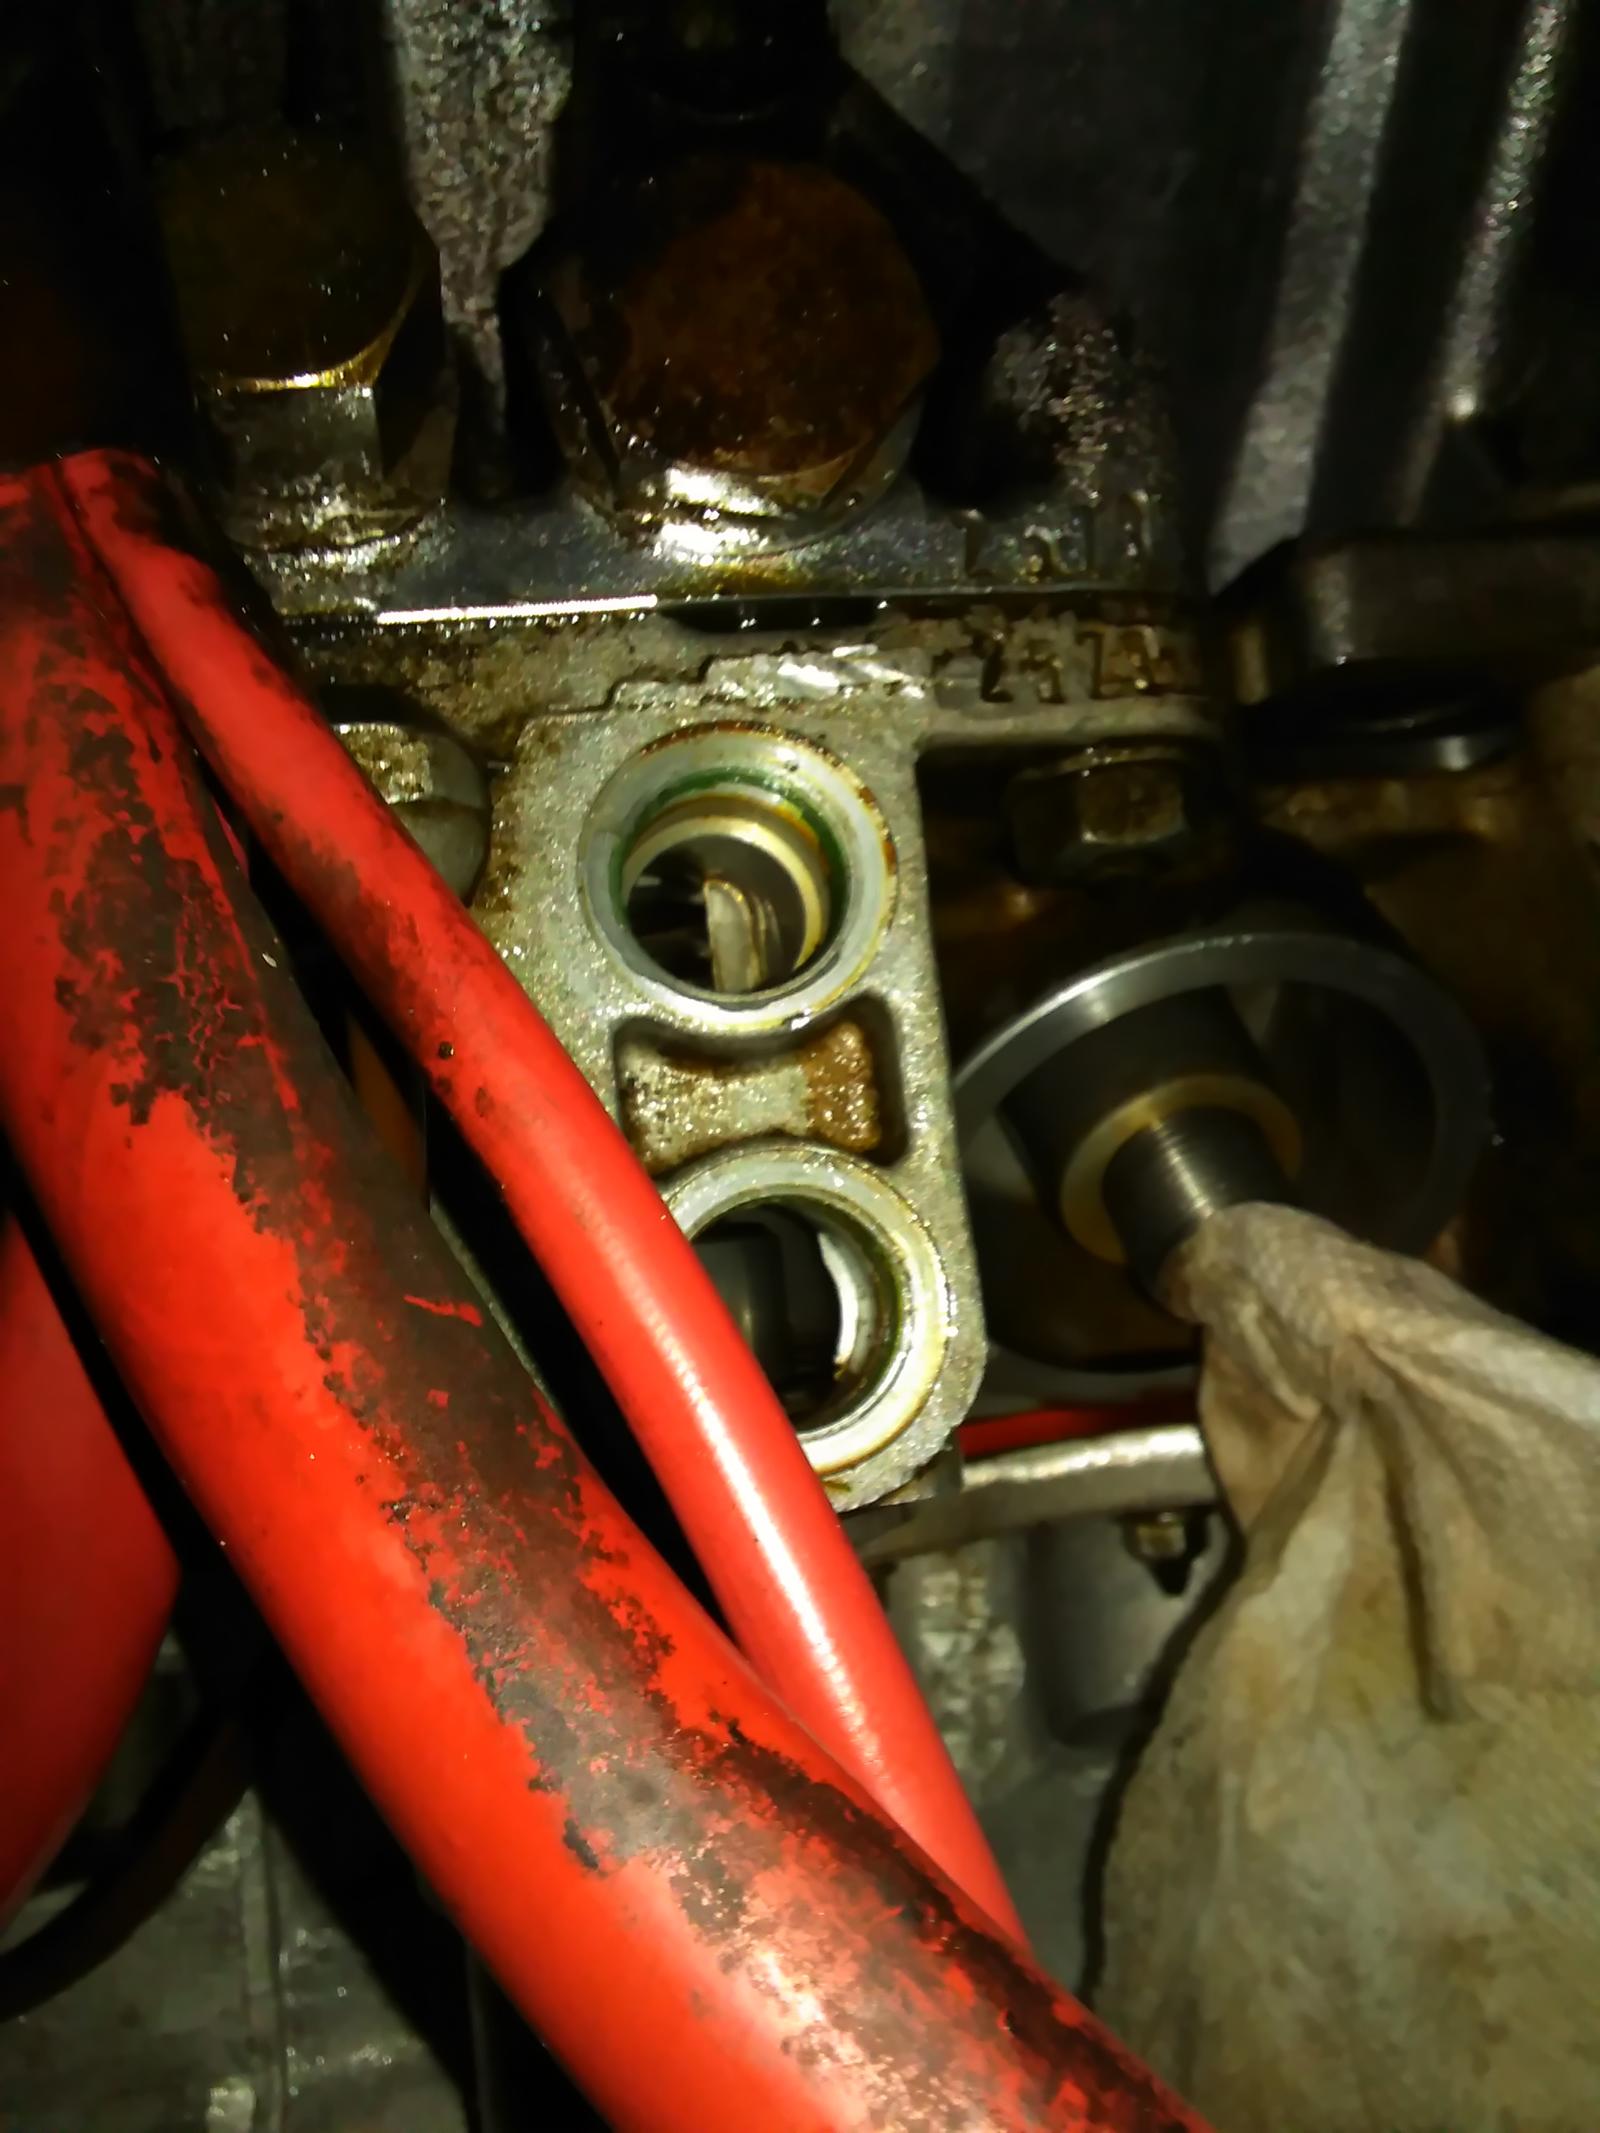
Second, the upper (return?) port on the engine block has a defect on the lip. The lip is slightly inset on both ports, which I assume is to hold the crush ring, but the upper one looks like some casting flaked off around the edge. The fitting still threads fine so I assume this is not a big deal right?
Third, it looked like the fittings...that go into the block and the radiator, had blue lock-tight on them. Is this correct to use as I put it back together?
Any anti-seize, or other products as I go, with the cooler line hardware?
I will be tightening by using counter-held wrenches, approximately the hand torque of fuel line connections...sound correct?
Well first of all the fittings in the girdle should have been counterheld and they should have stayed there.
The loctite you see is infact green loctite,
this is a permanent type and heat should be used before removing these parts.
At this point the chances are high that the oil will leak out of the fittings since the sealing surfaces have been damaged.
SO the common way to get past this is to clean the threads well ,
and then JB weld the fittings into the girdle,
also fit a new sealing washer to the part and then screw it in.
NOTE make sure to counterhold the fittings when installing the new lines,
I like to use anti seize on the inside of the B nut where it runs against the back of the bulb and on the threads of the fitting so it can be taken apart at a later time,
IIRC there are different lines you may have bought the early lines
I found the hose set you have to be ever so slightly longer than OEM and you'll need to pay special attention to the way the fittings are clocked at the block to get everything to go back together correctly.
Well first of all the fittings in the girdle should have been counterheld and they should have stayed there.
The loctite you see is infact green loctite,
this is a permanent type and heat should be used before removing these parts.
At this point the chances are high that the oil will leak out of the fittings since the sealing surfaces have been damaged.
SO the common way to get past this is to clean the threads well ,
and then JB weld the fittings into the girdle,
also fit a new sealing washer to the part and then screw it in.
NOTE make sure to counterhold the fittings when installing the new lines,
I like to use anti seize on the inside of the B nut where it runs against the back of the bulb and on the threads of the fitting so it can be taken apart at a later time,
IIRC there are different lines you may have bought the early lines
*****. Thanks Stan. Why must I crumple everything?
My initial problem was that even counter holding the fittings they moved a little in the girdle...then I figured I needed to pull them out anyway.
Thanks for the help.
The only part number I can find for an 86 is the one above, was there a variant?
Originally Posted by zekgb
I found the hose set you have to be ever so slightly longer than OEM and you'll need to pay special attention to the way the fittings are clocked at the block to get everything to go back together correctly.
Correct # 928 107 037 05 pair of oil cooler hoses used from 78 to 86 where the oil cooler was used.
Separate part numbers for the 87 to 89 hoses - 928 107 302 08 & 928 107 301 07.
Changed again in 1990 when they added the under radiator oil cooler.
__________________
Does it have the "Do It Yourself" manual transmission, or the superior "Fully Equipped by Porsche" Automatic Transmission? George Layton March 2014
928 Owners are ".....a secret sect of quietly assured Porsche pragmatists who in near anonymity appreciate the prodigious, easy going prowess of the 928."
Stan clarified a situation. I didn't heat the original fittings before disconnecting, but Bill Ball (I think) mentioned that a piece of aluminum thread came off when disconnecting the originals. So, preheating the original joints is probably a good idea.
Took a little time to pick the old green lock tight out of the threads but JB weld trick worked well.
I'm going to replace power steering lines and rebuild PS pump while I'm in there...
Took a little time to pick the old green lock tight out of the threads but JB weld trick worked well.
I'm going to replace power steering lines and rebuild PS pump while I'm in there...
Off topic, but looking at your before and after pics, I'm very impressed with your cleaning job. Just curious how you did than. By hand with a rag or did you use a solvent? please share. :-)
Glad you fixed it. Another fitting that should not be removed if at all possible is the screw adapter for the oil thermostat (in picture below, red arrow). These are very prone to galling, and then you have to cut the adapter out and clean the threads. You should always counterhold the fitting when changing out the oil sender.
I tried to fix a very small leak (not worth the outcome!) at this adapter and to make a long brutal story short had to cut it out and clean the threads. Same thing happened to Dwayne twice:

 11-25-2016, 09:29 PM


 George Layton March 2014


