When you click on links to various merchants on this site and make a purchase, this can result in this site earning a commission. Affiliate programs and affiliations include, but are not limited to, the eBay Partner Network.
I have been a big lurker on this forum for a few years now posting up here and there but nothing significant. So I figure since also of people here like garage reno's, I figured I would capture the progress of my personal garage reno. Maybe some of the info, challenges, and design ideas could answer or inspire others. I will outline my process on how I selected various items, equipment and placement/layout of these items. I will also share with everyone, what I used, who I used, and if you need a rough idea of how much something cost you're welcome to PM me about it.
So here's what I have accumulated so far and what I've decided in terms of the products I will be using:
4 post lift - Direct Lift: I bought this lift used from another member, it came with the caster kit (to move it around) and the metal insert kit so the lift can act as a solid platform.
Flooring - Swisstrax - I went with their Diamondtrax solid floor tile 15.75" x 15.75". Colors scheme, Black, Slate grey and pearl silver.
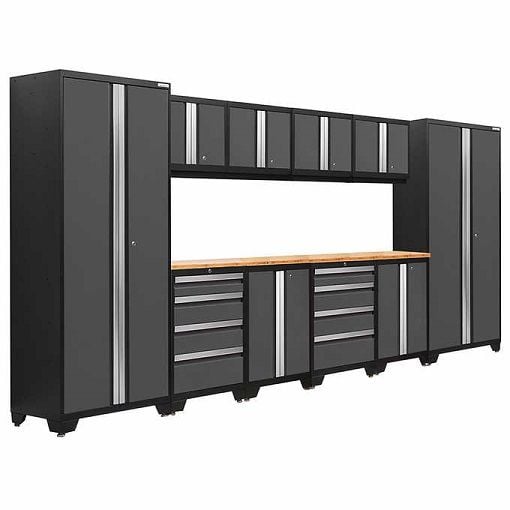
Cabinets - NewAge Products - Costco - 12 piece Bold series in dark grey with LED under cabinet lighting and bamboo tops
Work Table Top - Rona - 72"x 25.75"x 1.5" bamboo counter top
Work Table legs - NewAge Products - Performance Plus Adjustable table top legs
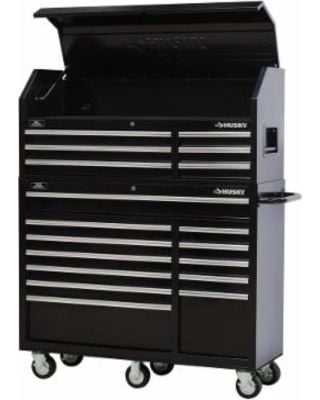
Tool Chest - Home Depot - Gloss black Husky 57" 18 drawer tool chest (putting in 2 tool chests)
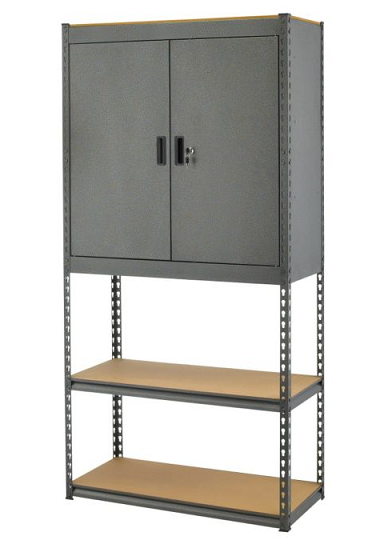
Cabinet with shelving - Canadian Tire - dark grey (I have 3, still deciding how many I will use)
Air compressor - Home Depot - Husky 25gal vertical compressor
Smart TV - still deciding on brand, will most likely be installing a 50"-55" led smart TV
Sound/Audio - still deciding, I might use an older JVC mini system or Yamaha system I have kicking around
High Lift Door Conversion - reaching out to installers right now
Garage door opener - Liftmaster 8500W
Ceiling - going to do a drop ceiling with drywall paneling
Walls - currently considering either a tongue and groove or shiplap wood paneling painted white
Fridge - deciding on a small beverage fridge similar to like those redbull fridges
Hand wash sink - going to try and fit one in there, just figuring out the location and plumbing
Lighting - 5K led lighting. most likely overhead strip lighting or pot lights or a combination of both.
Electrical - considering running a sub-panel specifically for the garage
I'm sure more to come...
Here is the link to my My Original Post when I first began thoughts of doing the garage renovation.
Lets Begin!
So just to give you some background.. I am a pretty handy person, I do pretty much my own stuff. I think the last time I brought a car I've owned to a mechanic/dealership was about probably 12 years ago and I've never hired a contractor to do any home reno's etc. I like the challenge and satisfaction of fixing, building, designing anything that I decide to embark on. To be honest, those that do know me, know that I am very frugal with things, but do understand that sometimes you get what you pay for.
With that being said, this garage reno along with most things I embark on will always be the struggle between cost/budget and quality (that i'm satisfied with). I'm sure that with most everyone, this is the case as well but I have to admit I really try and stretch the limits of that LOL.
So the plan of this garage reno was to fulfill a long standing dream of having a garage reno that was designed and built by me. Initially I wasn't planning on going with a 4 post lift as a scissor's lift would of been sufficient, but my GF (common-law now :P) was planning on getting her own little sports car, so I figured a 4 post was in order. Long story short, I have a scissor lift set up at my parents place (where I currently do most of my wrenching), bought a 4 post for my home as I was expecting to store 2 cars yet keep some space for a work bench, cabinets etc. The GF decided that she wants to wait 1-2 more years to get the fun car and opted to get a Tundra Pickup. This news was great! I now have an extra spot in the garage maybe for a fun track car, and a way to tow it to the track hahahah! But honestly if you're a DIY'er get a truck it will be your best friend. From this, you can probably tell that this garage will be mainly used for wrenching and storage, not for daily use parking.
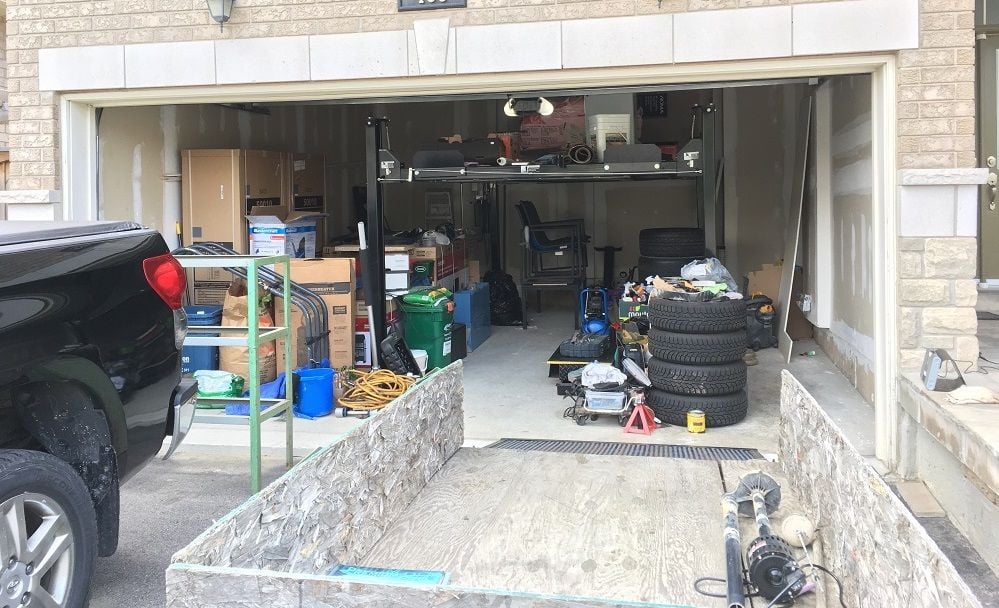
So lets start off with the garage in question. Here is a picture of the garage that's being reno'ed. Sorry for the mess this is actually cleaner than it was before, you can imagine how badly I want to complete this..
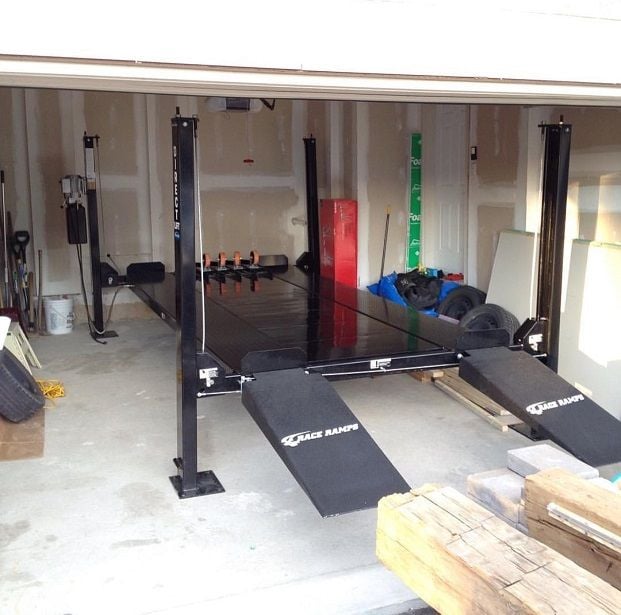
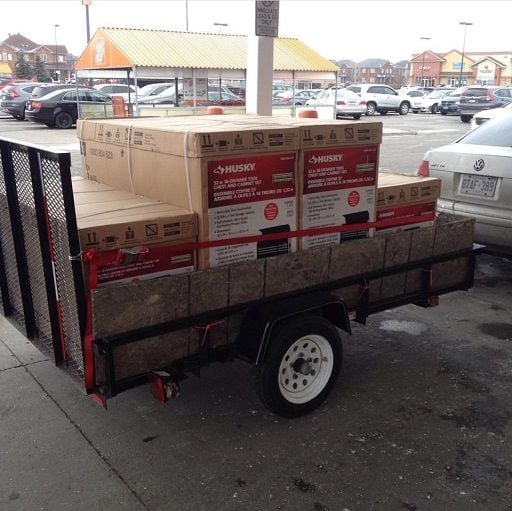
Here is the 4 post lift with center floor inserts (race ramps I did not keep). I picked this up from a fellow member, it was in excellent condition well taken care of. I had to disassemble the lift from his home and transport to my home. For those wondering if this is doable, it was totally doable. It took i believe 2-3 hours to disassemble and load into a 17ft moving truck I rented. I had 2 friends and my GF help me as some items were heavy, but disassembled easily with basic tools such as a ratchet, and some adjustable wrenches. Make sure you have some deep sockets or box end wrenches as some of the nuts sit deep on the threads. Get a set of furniture dollies as it useful to place them under the main tracks as I lowered them on to the dollies unbolted them and was able to maneuver the tracks easily with in the garage. Those tracks are the heaviest parts. Currently the lift sits in the garage assembled, but not leveled or fine tuned. I plan making some concrete leveling pads underneath each post to level out the lift, and I will be also bolting them to the floor. I personally feel that these lifts, no matter the situation should be leveled plumb and bolted to the floor to give you the best safety possible.
Last edited by Jsun; 07-13-2018 at 10:17 PM.
Reason: adding
Ok, so i just realized that I cannot add images when you edit threads. I guess I will just have to just update with new posts.
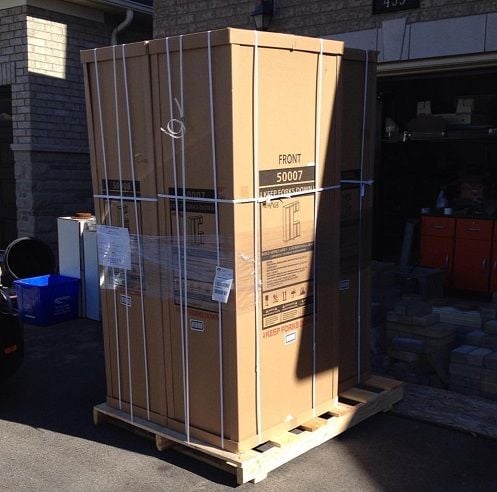
Here is some of the equipment that will be going into the garage. I went with 2x 57" Husky tool chests (I have a ton of tools lol) and the 12 Piece NewAge Bold 3.0 with bamboo tops. Initially I had purchased Proslat cabinets, but after doing the measurements I decided to go with the smaller NewAge cabinets. The Proslats were nice, built well but just a touch too big (deep). And I went with the Husky tool chests because I managed to get a smokin' deal on them from HD.. like cheaper than buying off the back of a truck hahaha. And finally I picked up 3x Mastercraft cabinets with shelving, sill not sure where i'm gonna put them, i'm gonna play with the layouts and see where they will fit.
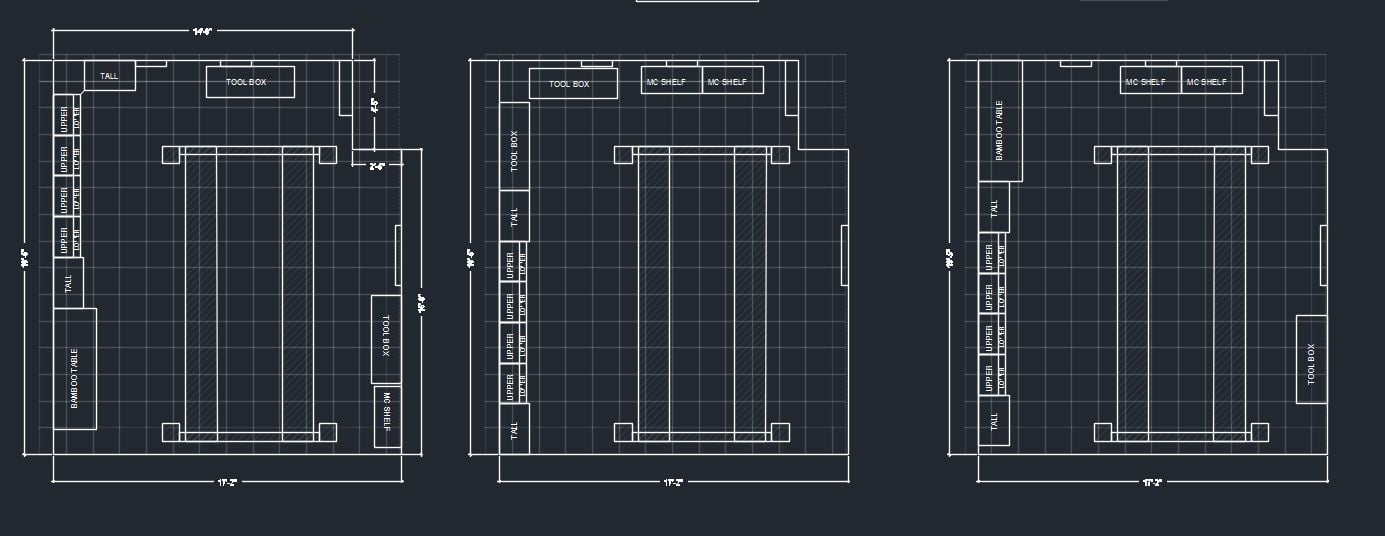
So after accumulating some of the items I wanted for the garage, I wanted to play around with some layouts to see where everything would best fit and work best for workflow. I had some ideas in my head based on the items that I wanted in there, but I wanted to get more of an idea of how everything laid out and compare side by side various layouts. So I tapped back into my AutoCAD days and whipped out the program, quickly drafted up some initial layouts to understand how everything would look like from a plan view, I used all the dimensions from the mfg to get the sizing of each item. AutoCAD helped out a lot in determining my spacing with the cabinets, tool chests, worktable, other cabinets in relation to the 4 post lift. I wanted to have the 4 post lift in a very specific position to maximize ceiling height, work space and equipment placement (more on this later). So here are some of the initial layouts in CAD, I later found out using a different program, a more efficient layout.
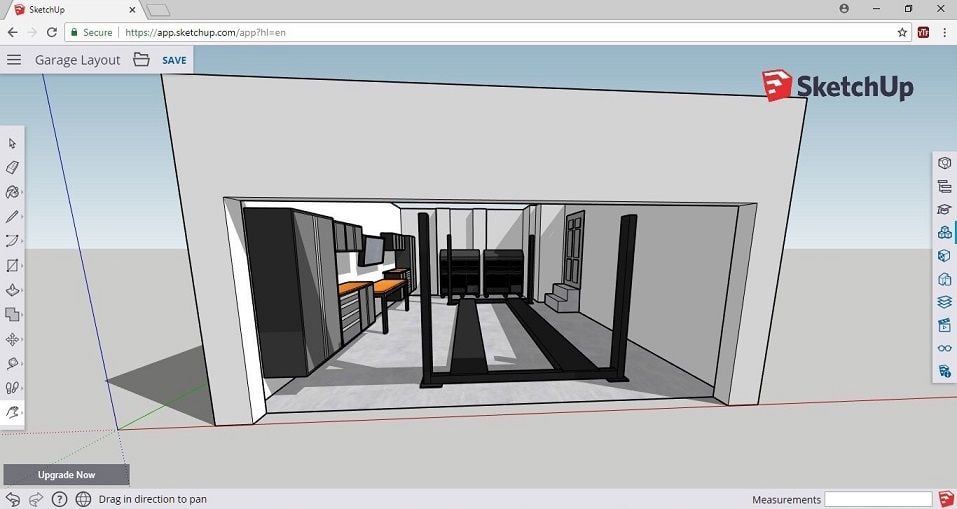
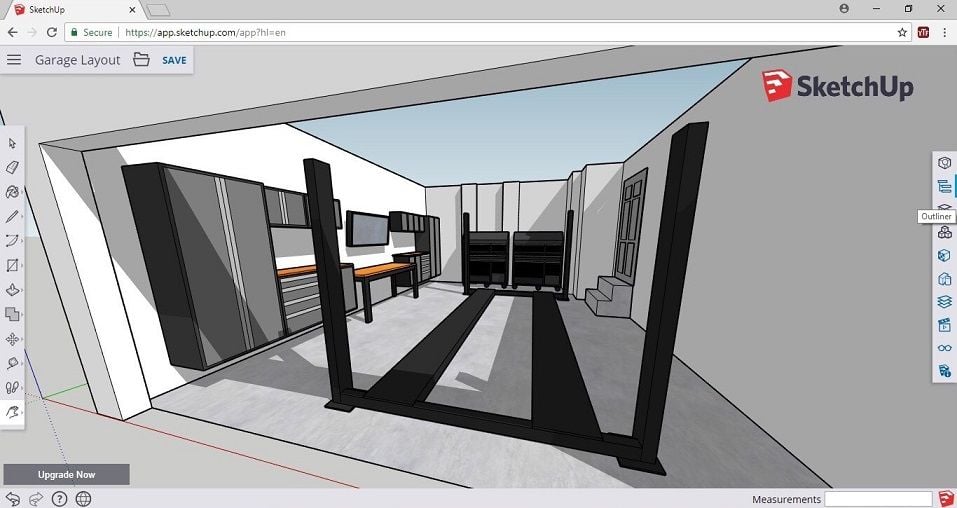
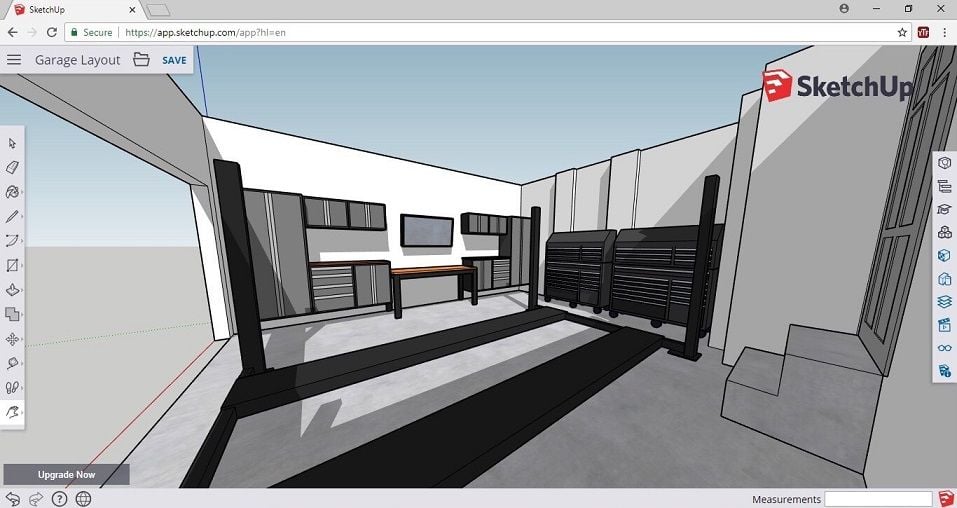
I felt that the AutoCAD layouts, though very helpful, were not giving me the real feeling of how the space was being used. I needed something that could give me a better feeling of the layout, something that gave me more perspective or the feel of passing thought the space. So I found a program called "SketchUp" its an online free 3D program that I thought was fantastic in giving me the understanding of my layouts. Its pretty powerful for a free online program, it has a database for 3D models as well that you can drag and drop into your sketch. For me the learning curve was minuscule as I have decent experience in 3D modeling, however this program is fairly intuitive and I think that a beginner could learn this program well in a few days with the youtube how-to tutorials. For these sketches, I just decided to model all the items myself, I had all the dimensions so it was easier for me than trying to find them in the database. Here are some screen shots from different angles to give you a feel of the space. I still need to add some more items (cabinets, compressor, welder, etc.) so still playing with the layouts. However, I think what you see here will most likely stay in place. One of the ideas that I want to go with is to wall mount the NewAge cabinets. I like the floating look, and it will most likely be easier to clean underneath as well.
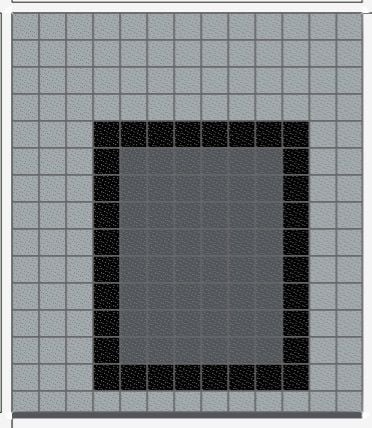
So as mentioned in my first post, I decided to go with Swisstrax for my flooring option. From the samples I received from RaceDeck, Costco's Motofloor (rebranded RaceDeck, but cheaper) and Swisstrax, I preferred the thicker and larger Swisstrax tiles. I found the Swisstrax to be more solid, the molding and coloring to be more consistent and even and the locking tabs to have a more "ease of use" snapping ability. As for the style, I opted to go with a solid tile "Diamondtrax" as I felt the pass through ones like the Ribtrax and FreeFlow from RaceDeck were not best suited for my application. If I were to use the garage to park my daily drivers, tracking in dirt constantly the pass through style would be beneficial as it would keep it cleaner and dry, I would hate to have to constantly be fishing for small screws etc. when dropped between the slots even though they are easily removed. So I wanted to keep the layout simple and the colors simple, I chose to go with a very neutral color scheme, pearl silver for the surround a black boarder and slate grey for the center. I figured the pearl silver would aid in brightening up the space where the black boarder will outline the lift area and the slate grey will mute any scuffs, stains that may occur in the working area. Here is that layout, obviously the colors aren't accurate but you get the idea. I used the layout planner on the Swisstrax site to generate the various layout for which I decided with the below.
Next up will be the ceiling and wall demo, and how I plan to approach increasing and maximizing the ceiling space, along with wall construction choices.
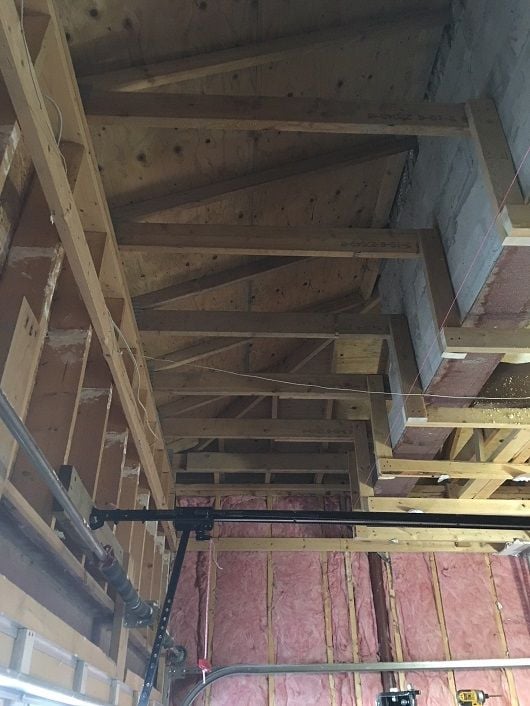
So here are some more updates. My garage ceiling sits at about 9' 8" at the lowest point (few inches gained at entrance due to slope). I took a peek up above the drywall ceiling to see if I had some more space up there as it appeared that there might be some, and I was surprised to find at least 3-4 ft more height in some areas. Makes sense as the builder wouldn't maximize the ceiling space, but rather run a simple straight ceiling. So since I have a room above the ceiling and it does not take up the entire foot print of the garage ceiling, I want to maximize the available space (height) in case I decide to put a taller vehicle on the lift and or to utilize the additional height for storage. My current 9' 8" ceiling is sufficient to get two sports cars to stack in the garage with a standard high lift garage door conversion. What I did notice is that beneath the room I can gain about an extra 2-2.5 ft in clearance height if I raise the ceiling, and in the other areas where the room does not occupy (to the front of and left side of the garage) I can go up almost 4ft, so out came the garage ceiling.
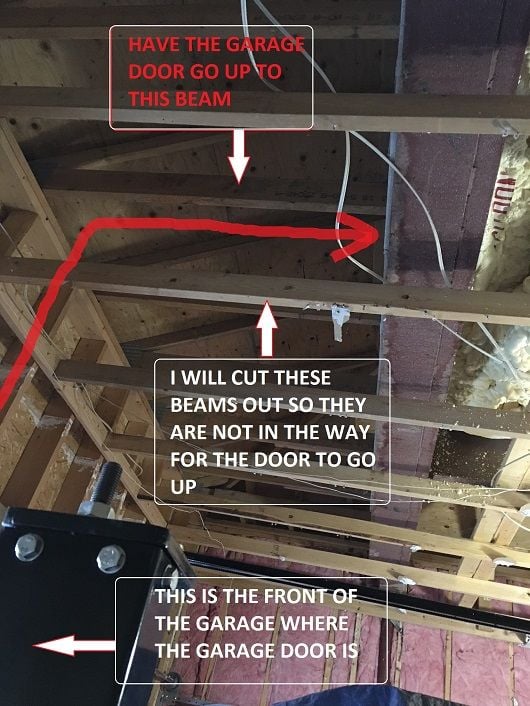
So I've consulted two companies that do high lift garage door conversions and wanted to see if there was a way to take advantage of the 4ft high by 5ft deep pocket in the front of the garage. What I want to do here is have the garage door lift into this "pocket" (if it fits) so that the garage door will not be in the vicinity of the car/directly over the hood/roof, where most standard high lift door conversions typically raise the door over the car (depending on where you place the lift). So I have temporarily re-positioned those ceiling beams that ran straight across this pocket and have them temporarily tied to the floor joist of the room above the garage so that the garage door contractors can confirm fitment, I will be removing sections the old ceiling framing and or relocating it higher to take advantage of the extra space above. Through all the measuring and checking the contractors did it has been confirmed the door can be converted to high lift and be placed in this pocket with no issues, Perfect!
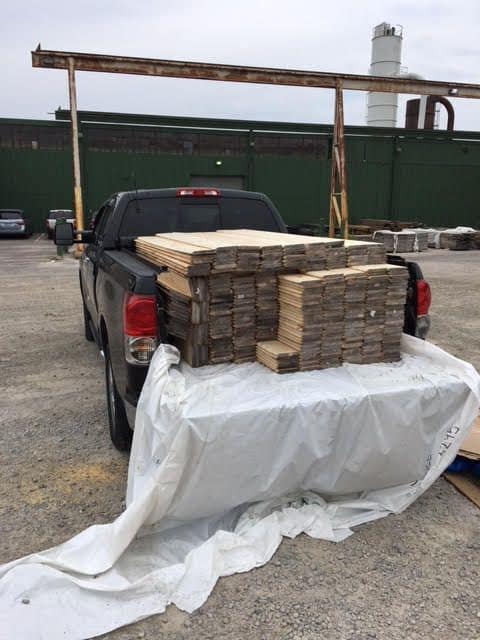
So the other area of improvement that I wanted to attack, was the garage walls. I hate how boring and delicate drywall is.. you can never hang anything off from it, from new the builder's unfinished state is always so rough and unappealing and I find that if you try and "finish" it it never seems to turnout great. So I've always wanted my garage walls to be more sturdy, appealing, have some character since I do a lot of car stuff and other things in my garage I wanted the space to be a combination of "showy" yet "functional". I've always loved the look of wall paneling, and I do like the look of wood grain. I figured lets do T&G wall paneling, this will give me the sturdiness, will be more appealing (at least to me) and if i decide to have the wood grain show through, some character. So off I went on a hunt for some T&G wood paneling. Within a few searches I found the perfect solution, 1x6 T&G spruce paneling for a killer deal, I only needed 550sq/ft of it but since I had to buy per skid bundle I ended up getting 850sq/ft lol! But for the price I managed to get it for, dry-walling would only be dollars cheaper.
I'm not sure how I want to finish the walls.. I'm debating on painting the walls solid white to maximize brightness, or maybe a two tone, racing stripe through the middle or variations of light grey to keep the brightness up yet add a touch of color as to not be white. Another option would be to do a whitewash on the wall to have some character of the wood come through yet keeping the brightness level up.
If you guys have suggestions on how to finish/paint the walls feel free to post your suggestions, i'm open to ideas.
 07-13-2018, 05:38 PM