When you click on links to various merchants on this site and make a purchase, this can result in this site earning a commission. Affiliate programs and affiliations include, but are not limited to, the eBay Partner Network.
Have you guys seen the Rampage Hydration System?
it's similar to progressive but cheaper and better in every way.
weve been using them in Carrera Cup and Australian GT racing for a couple of years and found them to be best.
You can find them here. https://rampage.store/collections/en...-drink-systems
Finished the unit a few months back, waiting on pumps from china, probably sitting in the port of Long Beach... I hope to have an update in the near term, plan to offer turn-key kits and possibly a DIY system. Moved to a standard DT connector vs. the motorsports connector shown before. Bulk of the unit is 3D printed so running on our SLS machines helps out with the economics, plus we can offer custom mounting solutions, and the newer Sigg Hot/Cold vacuum bottles if desired.
Speaking of 3D printing, I decided to give it a try this past year when I had some spare time on my hands. I picked up an SLS machine that specializes in printing abrasive filament like carbon fiber. I taught myself how to design using CAD (Fusion 360), and came up with a couple of items I thought could be improved on.
First part was a helmet mounted clip to hold the ear bud jack. I had been using a store bought cable tie mount that used double sided tape and some small zip ties. That worked OK but I decided I wanted something better. I used CAD to design a clip/plug holder that mounts to the rubber molding that runs along the bottom of the helmet shell.
The part is 3D printed out of a carbon fiber/nylon filament. It is very strong, I rolled my 2500HD over it without damage.
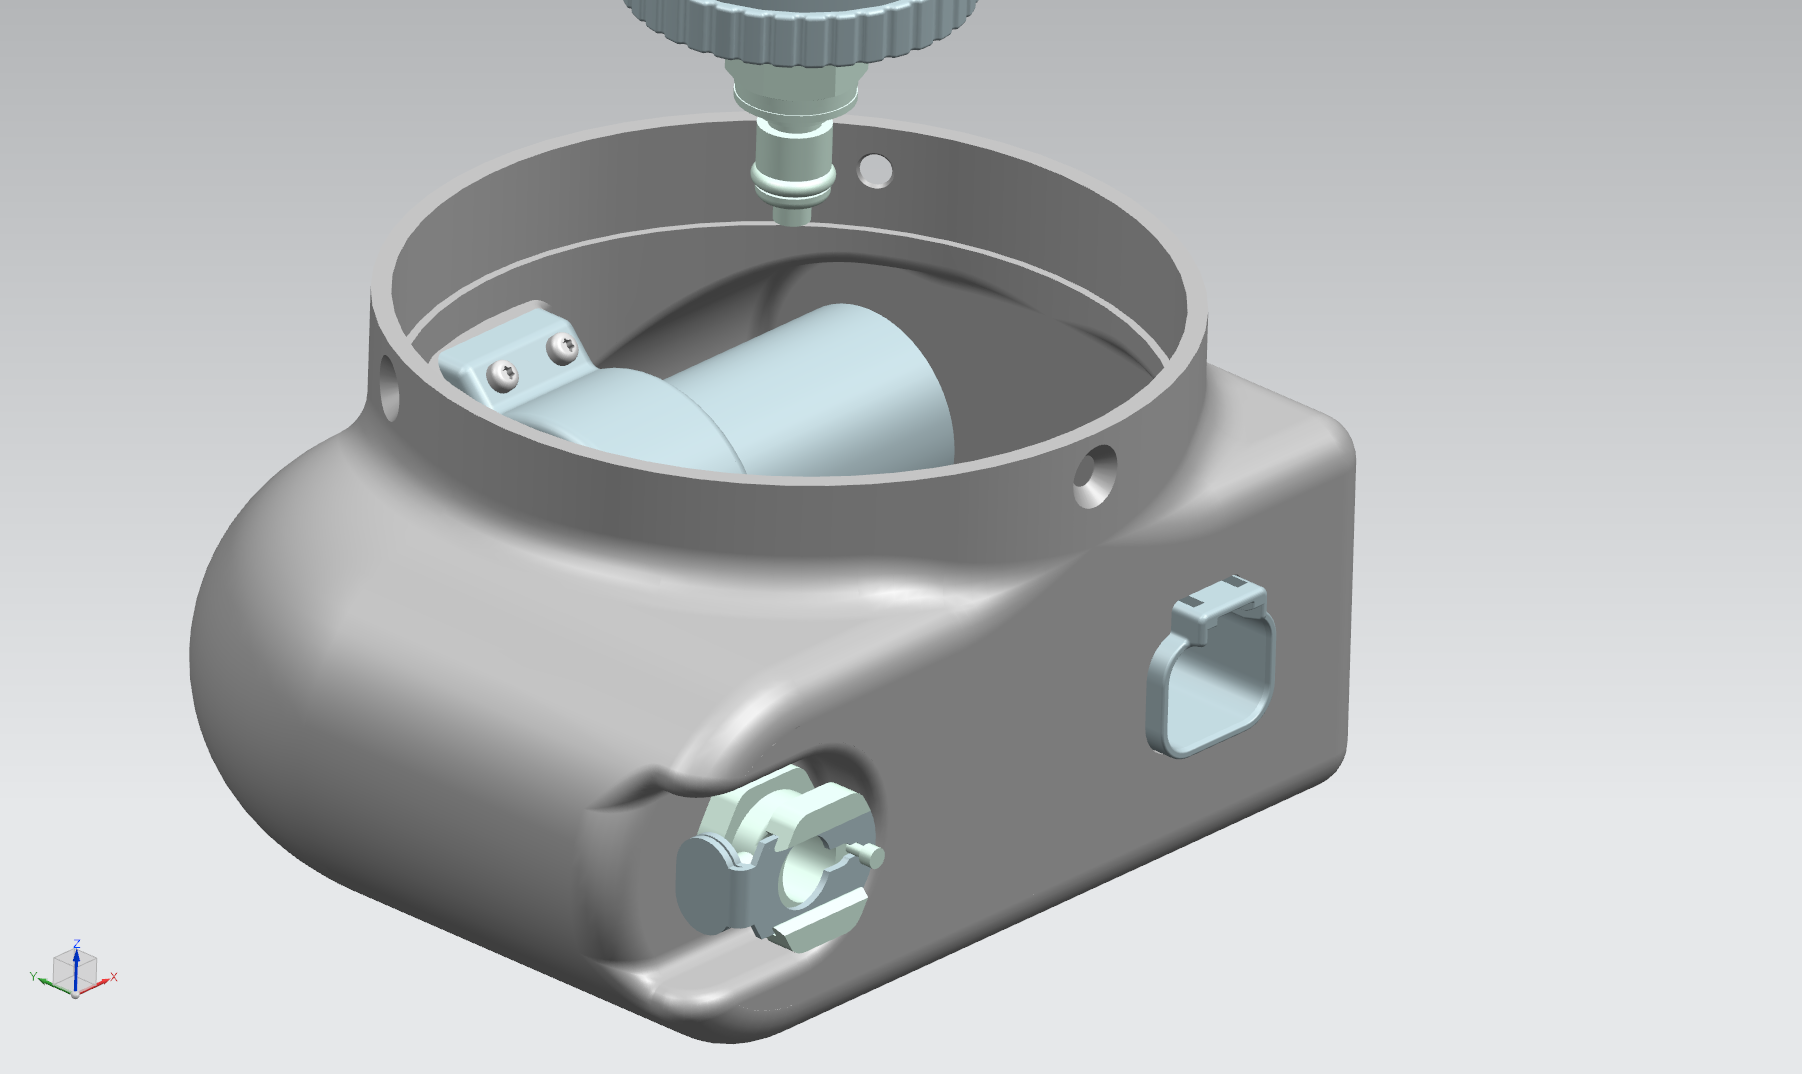
The next part was a roll cage mounted radio and hydration plug holder. I got the idea from pictures I had seen of the factory RSRs.
You can see the bracket and quick release in the top right corner.
I designed the part to fit a 45mm (1.75") OD tubing that is found on all 996.997 and 991 cups and 3Rs.
Here are some pictures of the final ready-to-race part:
This is the mount mocked up on a section of roll cage tubing with a Racing Radios radio plug terminal and a quick release fitting on the car side and a 3D printed plug holder ( custom helmet paint friendly), nylon quick release and a radio plug on the other. It's hard to see the nylon quick release because it is white and blends with the background.
I 3D printed dozens of prototypes of this part as I worked out the bugs and when I finally had a winner, I machined the parts out of 7075 Aluminum which is one of the tougher alloys. The parts have been ceramic coated which is impervious to practically everything, including brake fluid. All the hardware is stainless steel or titanium.
The first time I used my hydration system, I had a quick release fitting set up on the right side of my helmet and the radio plug on the left. I knew after that first outing, I needed to come up with a better solution. Now I route a 1/8" id tube from the helmet side plug holder through the coiled radio cord outside the helmet chin bar and in through a vent hole in front. This system puts radio and hydration in one place and a simple push to release if/when I need to get out in a hurry. The radio cord and the insulated hydration line is routed along the cage tubing behind my seat and up to the tubing that runs along the roof. This keeps it out of the way of everything including the window net. The external tubing route on my helmet makes it easier to remove, clean and dry after a session or leave off entirely if I don't need it
Anyway, I'm happy with the way it turned out and wanted to share the journey. I find it pretty cool to take something from an idea to a working part.
I have a Rampage in one car, and a Manthey kit in another. The Manthey kit is slightly more expensive but also much higher quality (ASL connector, carbon fiber bottle holder, nicer water bottles).
If you only do short sprint races, these types of setups are not really necessary. But if you do longer endurance type races, they really make pit stops faster and easier. Being well hydrated makes a huge difference in how you feel when exiting the car after 1.5-2 hours.
I'm not too familiar with the Rampage system having only seen the pictures on their website. I really like the Manthey kit. I believe the Progressive Motorsports pump and bottle arrangement is based on the Manthey design. The only thing I think could be improved with the Manthey system is the B pillar plug mount. In fact, I believe the slimmed down overhead design that Porsche switched too was in response to that.
The sticking point if you will, was the B pillar plug mount would get tangled in the window net when it was released during driver changes. If you look at a Manthey prepped car, you'll notice the window net even has a bungee cord stitched to the net to snap it back faster. By relocating the plug mount overhead, the driver can reach up while on the pit limiter and fully belted in, and disconnect,
that wouldn't be possible with the B pillar arrangement. Of course none of this matters to the club racer where driver changes are sedate by comparison. For the club racer, the advantage to an overhead location is a one point plug in and easy access in case of an emergency egress.
Like I posted earlier, I had a ridiculous arrangement in my car. As if getting in and out of a GA caged cup with the extra tall side bars wasn't bad enough, if you didn't think to drape the radio plug over that side cage before you got in, somebody would have to fish it out from the floor behind the seat. Then, somebody would have to go in from the passenger side and connect the hydration plug on the right side of my helmet because the center net made it difficult for me to reach it. Talking about a nightmare in an emergency egress not to mention what a PITB to everybody involved just to get in and hook up. This simple part eliminates all of that.
Agreed that hydration is more about endurance events from a racing standpoint, but it is nice to have when you are just putting in laps and pushing your body hard.
Here are a few more pictures of some earlier versions of the mount:
This one is fresh off the mill before polishing (you can still see the mill marks), and is paired with a plug holder that will accept a 20mm diameter radio plug. It is powder coated with flourescent orange. My thought at this point was to make the plug location stand out during a pit stop involving a driver change.
This is another bracket that has been hard anodized or anodize II. I went through quite a few finishes before settling on ceramic coating as the best.
And here is a bracket that is milled out of Titanium then ceramic coated.
An excelent example of overkill.
And finally, a couple of pictures of a since discarded version of the bracket paired with a 3D printed "prototype" of the holder
so for those that want a more simple and cheaper set up - we had a Longacre bottle and holder in our AER car bolted to the roll cage on the passengers side. ($69.99). We then plumbed it to an old windshield washer pump (I think from the 944 we were racing) with a switch on the steering wheel. This kept the water from flowing when you didn't want it to, and flowed the right amount when you pushed the button. I don't have a bite valve in my Roux helmet (which comes already plumbed for drink tube) and never had a problem.
Funny part was...I never thought I'd need water (still don't actually) but when I jumped in the car, they connected the water feed line anyway. During my stint, I was stuck in a 45 min long double yellow and it was HOT out. For whatever reason I realized I had water, pushed the button and was VERY happy!!
We've sold these a lot at the track when I tell that story - everyone is always asking how to mount it thinking gravity feed, but the small little washer pump does the trick.
The simplistic approach used by TransAm drivers in the late 1960's and 1970's was to have a small cooler diluted with Gatorade and ice connected with plastic tube, taped the plastic tube with a 360 degree loop to shoulder harness with enough telltale for inserting in driver's mouth. 💋 KISS.
I believe Mark Donahue used this setup because Warren Agor used it and he was on Mark's crew in 1968.


 06-14-2021, 09:51 PM