When you click on links to various merchants on this site and make a purchase, this can result in this site earning a commission. Affiliate programs and affiliations include, but are not limited to, the eBay Partner Network.
There are several threads on this including this one, However finding it wasn’t easy. So in order to put something out there which is easy to find here goes.
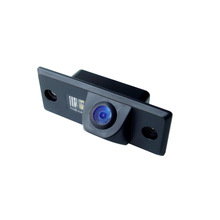
I installed a camera that just replaced the licence plate bulb with a half size led bulb and the camera. Nice and neat, but if you want to go drilling holes in your cayenne like the pro (!) above then go ahead.
I worked from front to back on a RHD (I live in the UK) 03 CTT. LHD should be very similar - its actually easier to get under the steering wheel footwell as there is more space and you don't have a glovebox to remove.
My Cable route - behind pcm/head unit, behind glovebox and up the 'A' pillar. Easy. There is a factory wiring harness in there to tie wrap the cable to and keep it out of the way of everything including the airbag. I removed the panel under the glovebox and the glovebox itself to Make the job easier but you don't really have to. The lower panel is sufficient.
First job, remove lower panel under glovebox (and glovebox if you want - takes minutes and makes feeding the cable into the space behind the pcm much easier). really good instructions on how to do that here. http://www.pelicanparts.com/techarti...eplacement.htm
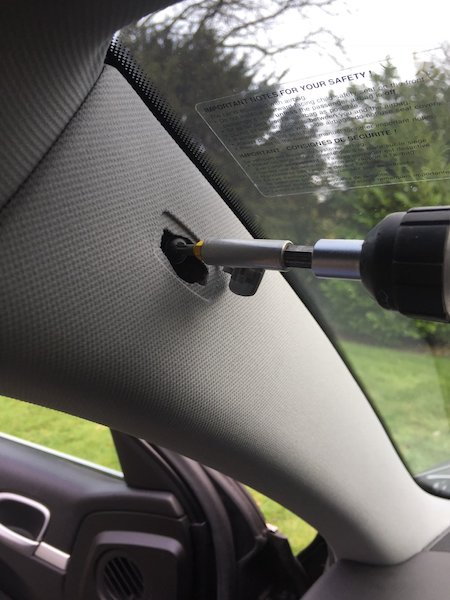
Then remove 'A' pillar cover (screw behind airbag cover).
So, now we need to run the cable through the headlining.
Move to the back of the car and open the hatch. (I was replacing my hatch shocks at the same time so most of the rear headlining was disassembled.)
You really need to remove some trim in order to get the cable to the hatch bracket. So do all of this first. Including the sticky cover over the hatch strut.
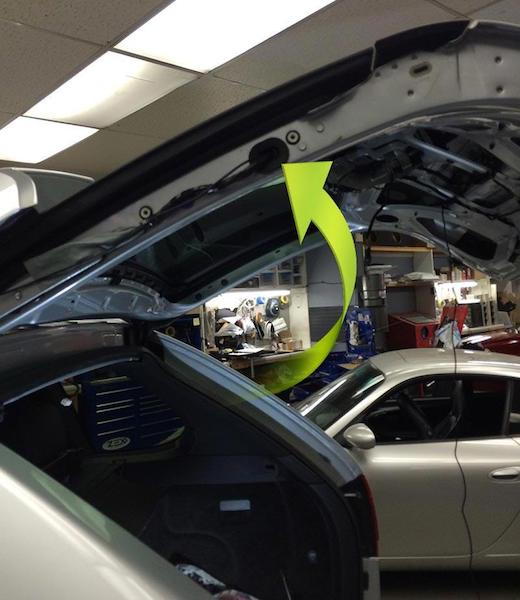
Working from the rear I carefully threaded an electricians' wire puller through the space you can see and it appeared by the a pillar. It took patience. If you get stuck, loosen the handles in the headlining and the sun visor.
Pull the wire through and bask in your brilliance.
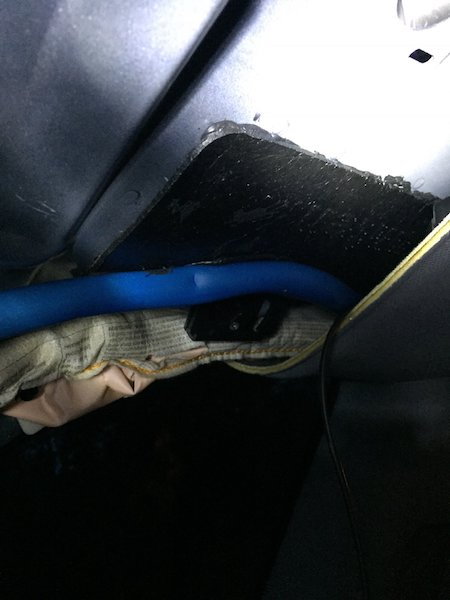
Now to thread it trough into the hatch area - the bit they don't show you in the diy.
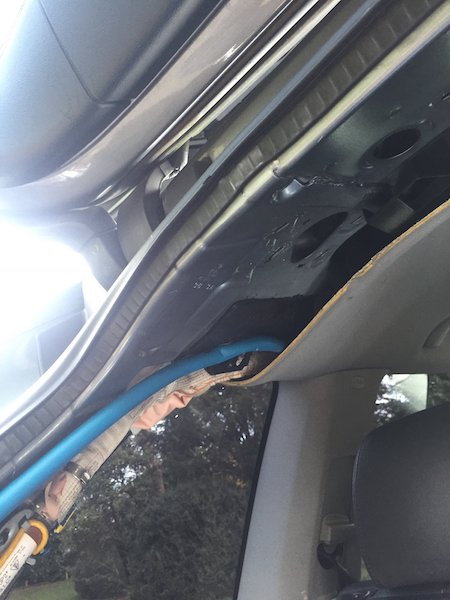
The cable needs to go through the void that contains the shock to get to the factory cable harness that is next to the hatch bracket then follow the harness along the hatch. A picture paints a thousand words.
The wire has to run through the hole that is exposed by removing the foam cover in order to get to the hatch bracket, and the factory harness that runs alongside it.
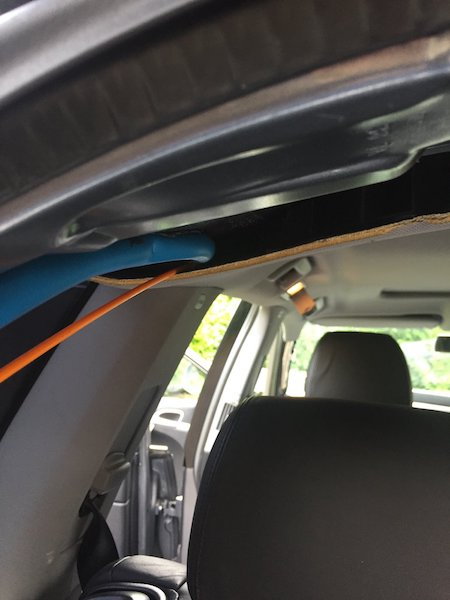
Easy bit now. Dismantle the covers over the hatch bracket and the plastic cover that goes down the side of the hatch. (DIYs at the beginning show this in great detail.)
Run the cable along the tailgate, through the grommet and into the hatch.
The next bit involves removing more trim. I removed the whole of the tailgate trim. You don't have to - if you refer back to the pro instructions in the first post they just remove the grab handle and partially detach the trim. Up to you, but it is easy to remove the trim completely.
Route the wire through the rubber grommet in the side of the tailgate to the area of that you want to mount the camera. Drill away or simply remove the licence plate bulb holder with a screwdriver, whichever you prefer.
So now hopefully you will have a cable running from the head unit to the number (licence) plate light.
The rest should be self explanatory, however for completeness I'll briefly talk about the wiring.
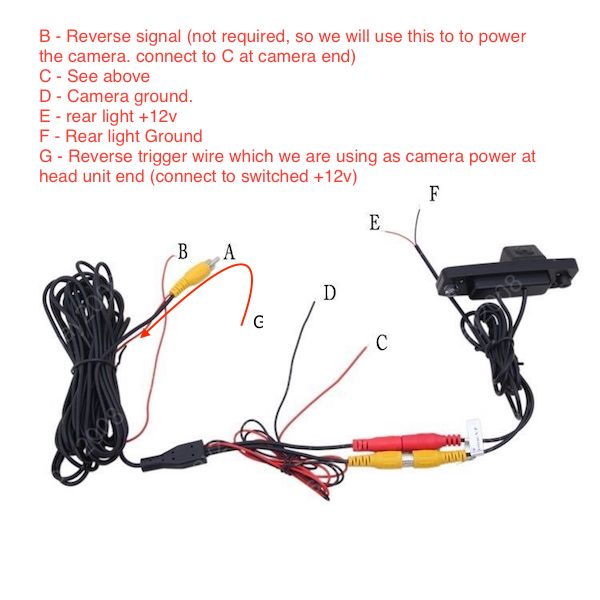
The camera wiring is a little confusing as there can be lots of wires at the camera end. I fitted a combined camera and led bulb. The bulb part needs power - positive and ground and is simply connected to the old wires that powered the old bulb (brown is ground).
The camera has an RCA jack which plugs into the end of the cable that you ran from the head unit, but the camera also needs power, so there is an additional positive and ground to power the camera, and finally a red cable that runs inside the RCA cable. This is for a reverse trigger.
Now the instructions that came with your camera will probably tell you that you need to run cables everywhere. - to reverse lights etc. Well you don't.
The Canbus contains a reverse selection signal, so that is available at the head unit. (See my aftermarket head unit install DIY). This just provides a signal to the head unit so that it switches to rear camera automatically when reverse is selected).
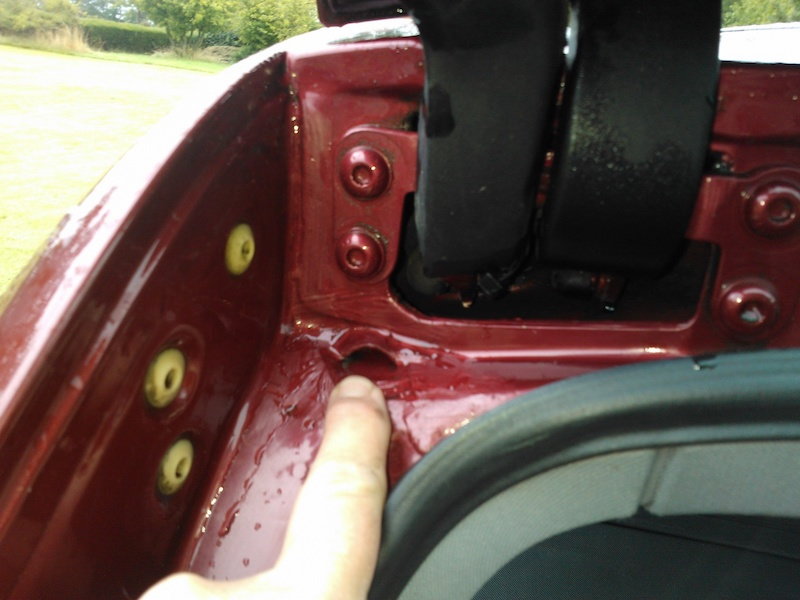
Ground is available in the tailgate - either the brown wire for the licence plate light, or, if you removed the trim, there is a chassis ground bolt right next to it in the form of a 10mm bolt that all the brown wires in the tailgate are fastened to.
That leaves one connection, the +12v to power the camera. Connect this to the red cable that runs along the RCA lead back to the head unit and you've solved all the problems. You can take power for the red wire from behind the head unit and don't have any more cables to run.
So, nice writeup then. Thank you! I'm about to tackle the head unit/backup camera, etc... in the next week or so. Let me ask as it appears I bought a similar camera to what you've installed. Did you replace the other license plate light to match the LED color on the one in the camera? I'm trying to figure out what bulb to buy that will match.

 11-23-2017, 09:24 AM