When you click on links to various merchants on this site and make a purchase, this can result in this site earning a commission. Affiliate programs and affiliations include, but are not limited to, the eBay Partner Network.
971 Panamera: Remove Rear Tailgate Trim PORSCHE logo
Hello,
just purchased the Rear Tailgate Trim with PORSCHE in Black from Suncoast. Looks like it’s four clips but also appears to have a central “stub” which would appear to accept a screw.
wondering if anyone has removed one of these before? It fits all 971 models. Trying to undertake the swap myself. My specific model is a 4S Turismo
I bought the black letters and scraped off the chrome ones. It looks like you can access the screws through the emergency triangle holding place. Do the holes line up with the piece that you received? You will like the look of a clean rear end.
They don’t line up with the center screw tab. I believe they are part of removing the entire liner which I’m looking to avoid. Yours looks nice!
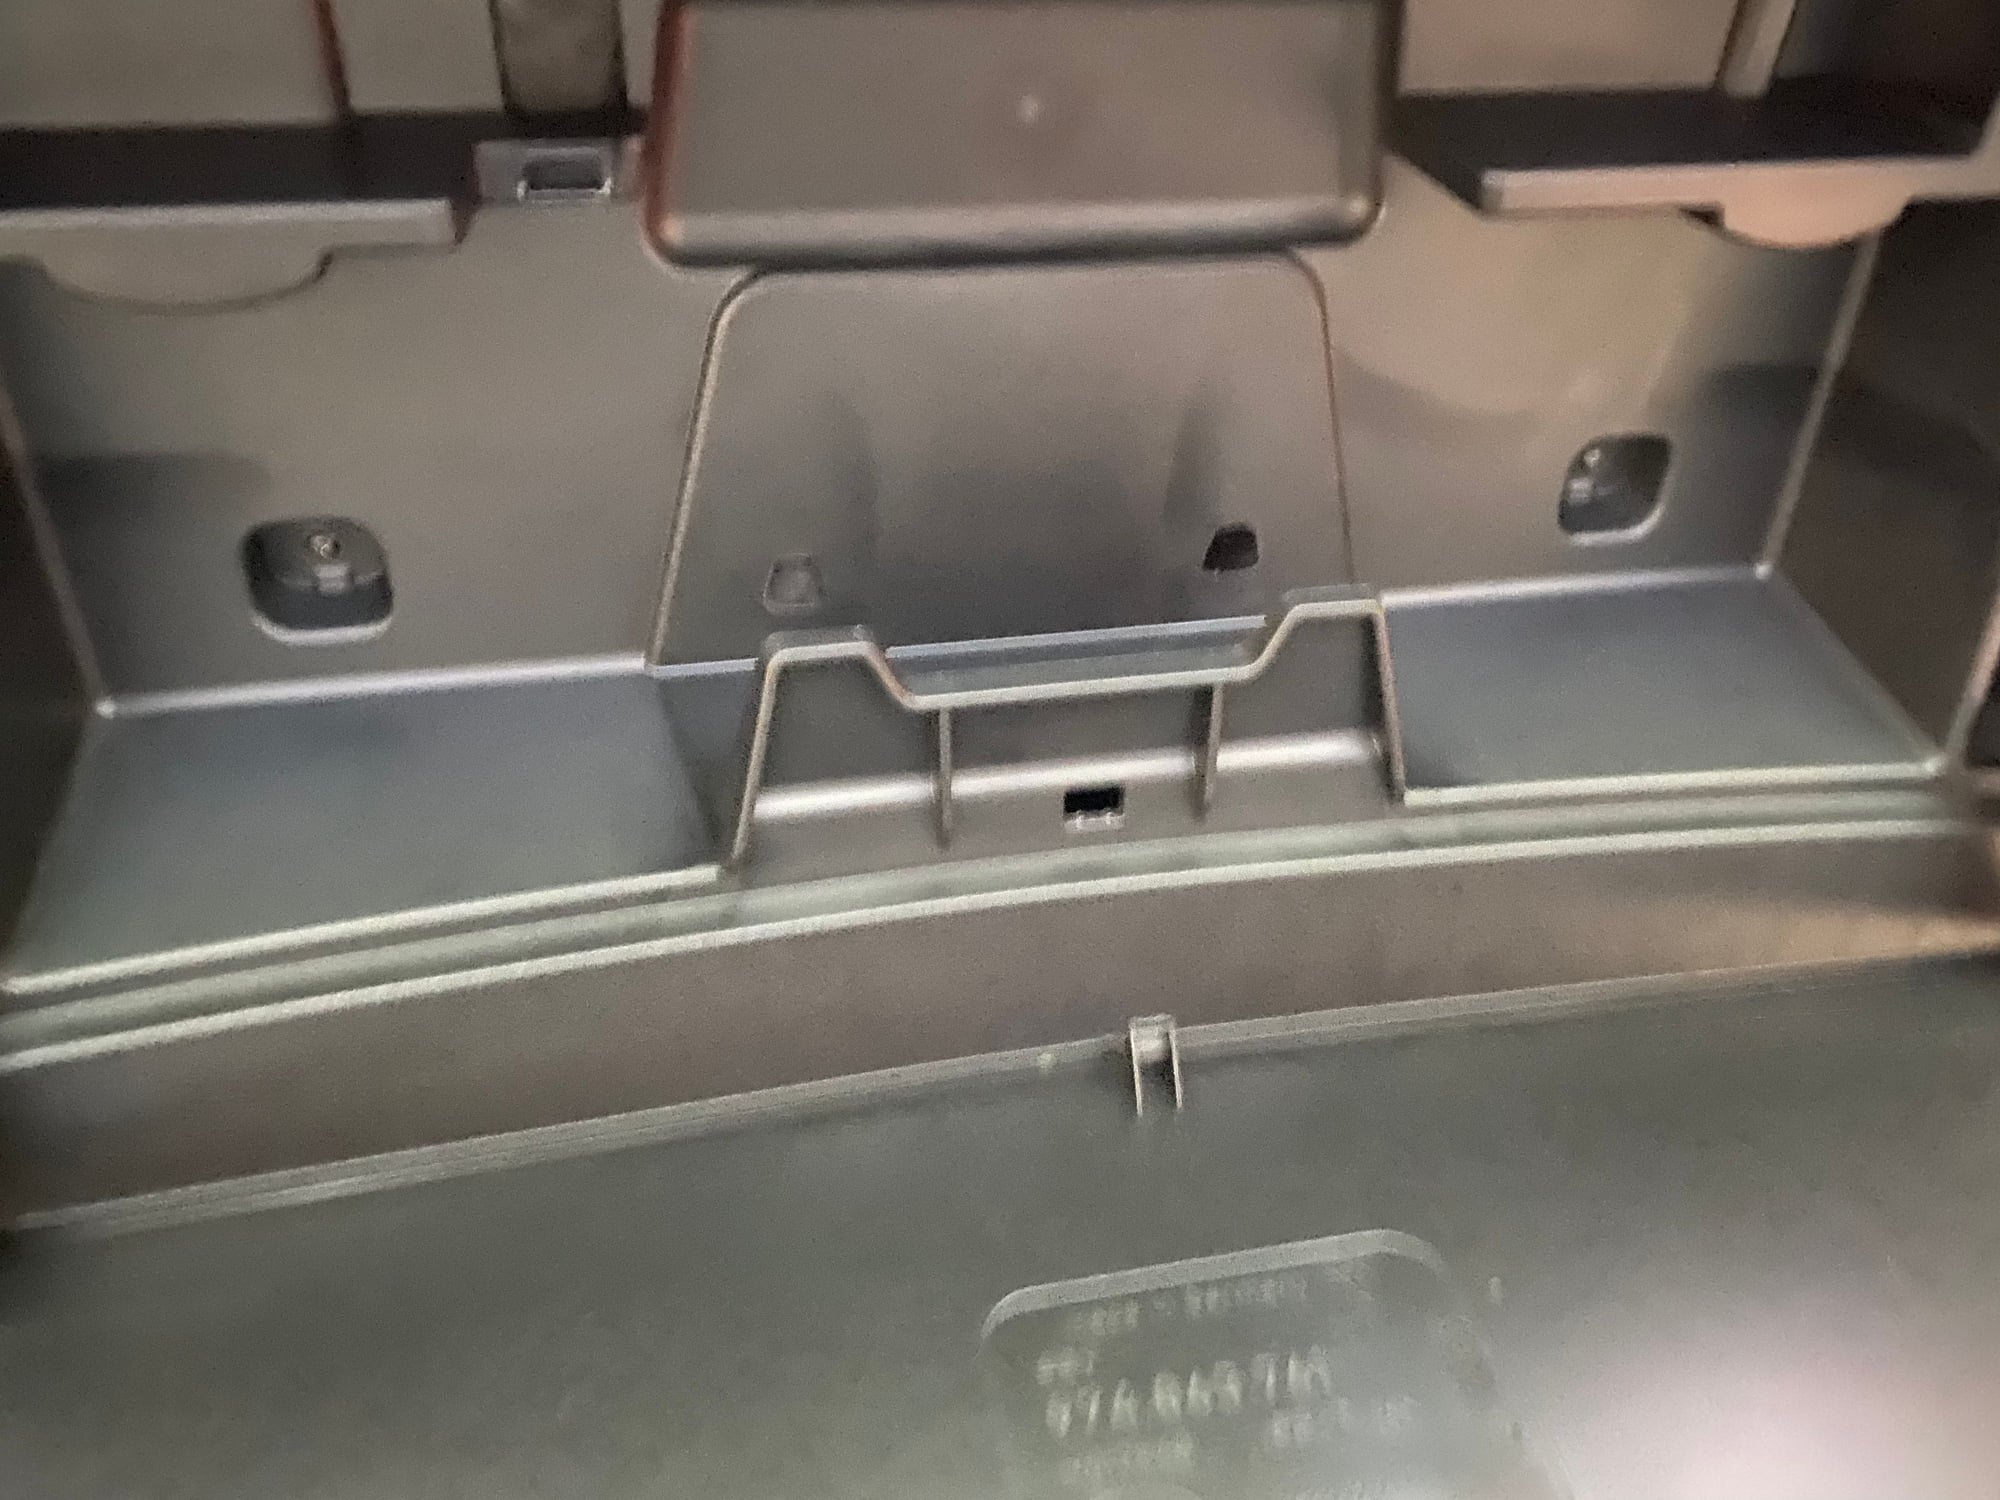
bTW can you send a picture of what is in that compartment in the lid? Mine is empty. Wondering if since no battery or Burmeister those things are under the trunk floor? Or the dealer owes me some emergency parts.
They don’t line up with the center screw tab. I believe they are part of removing the entire liner which I’m looking to avoid. Yours looks nice!
bTW can you send a picture of what is in that compartment in the lid? Mine is empty. Wondering if since no battery or Burmeister those things are under the trunk floor? Or the dealer owes me some emergency parts.
I was hoping you can get by without taking off the tailgate liner. There is very little info online to show you how. You can subscribe to the Porsche TIS ($14 for an hour) and look for schematics on how to take off the liner. It will be money well spent to minimize the frustration and chance of breaking other things.
The rectangular compartment there is for the emergency triangle. Sadly, they took it out for cars shipped to the US. If you do European delivery, you would have found it in there.
It is installed from the top. Raise spoiler, remove trim pieces above it, one bolt holds it in place plus metal push snaps.
When removing trim pieces note how they fit in so the center piece is flat.
Thanks for the advice and videos everyone. The sedan video gave me the confidence to pull on some stuff a bit. Great snap connectors none broke and all went right back in place.
skill required: 1/10
bravery required: 2/10
tools required:
Wife’s LEAST favorite butter knife and blue tape
T20 Torx bit
3mm hex
result looks amazing.
ill try to update with video as it does not seem to allow one on direct upload.
directions:
open panel on rear trunk
remove two t20 torx screws
remove both bump stops with 3mm hex release and pull
begin releasing rear panel from sides and/or pull down on the inner road triangle mount inside the flap to release panel.
disconnect the wires
pop out foam insert
unscrew central t20 torx which holds logo
release Porsche logo from sides by GENTLY prying on right and left side. It takes VERY little effort.
replace logo.
insert t20 torx mindful you are self tapping the plastic on the new logo bar.
reinstall panel.
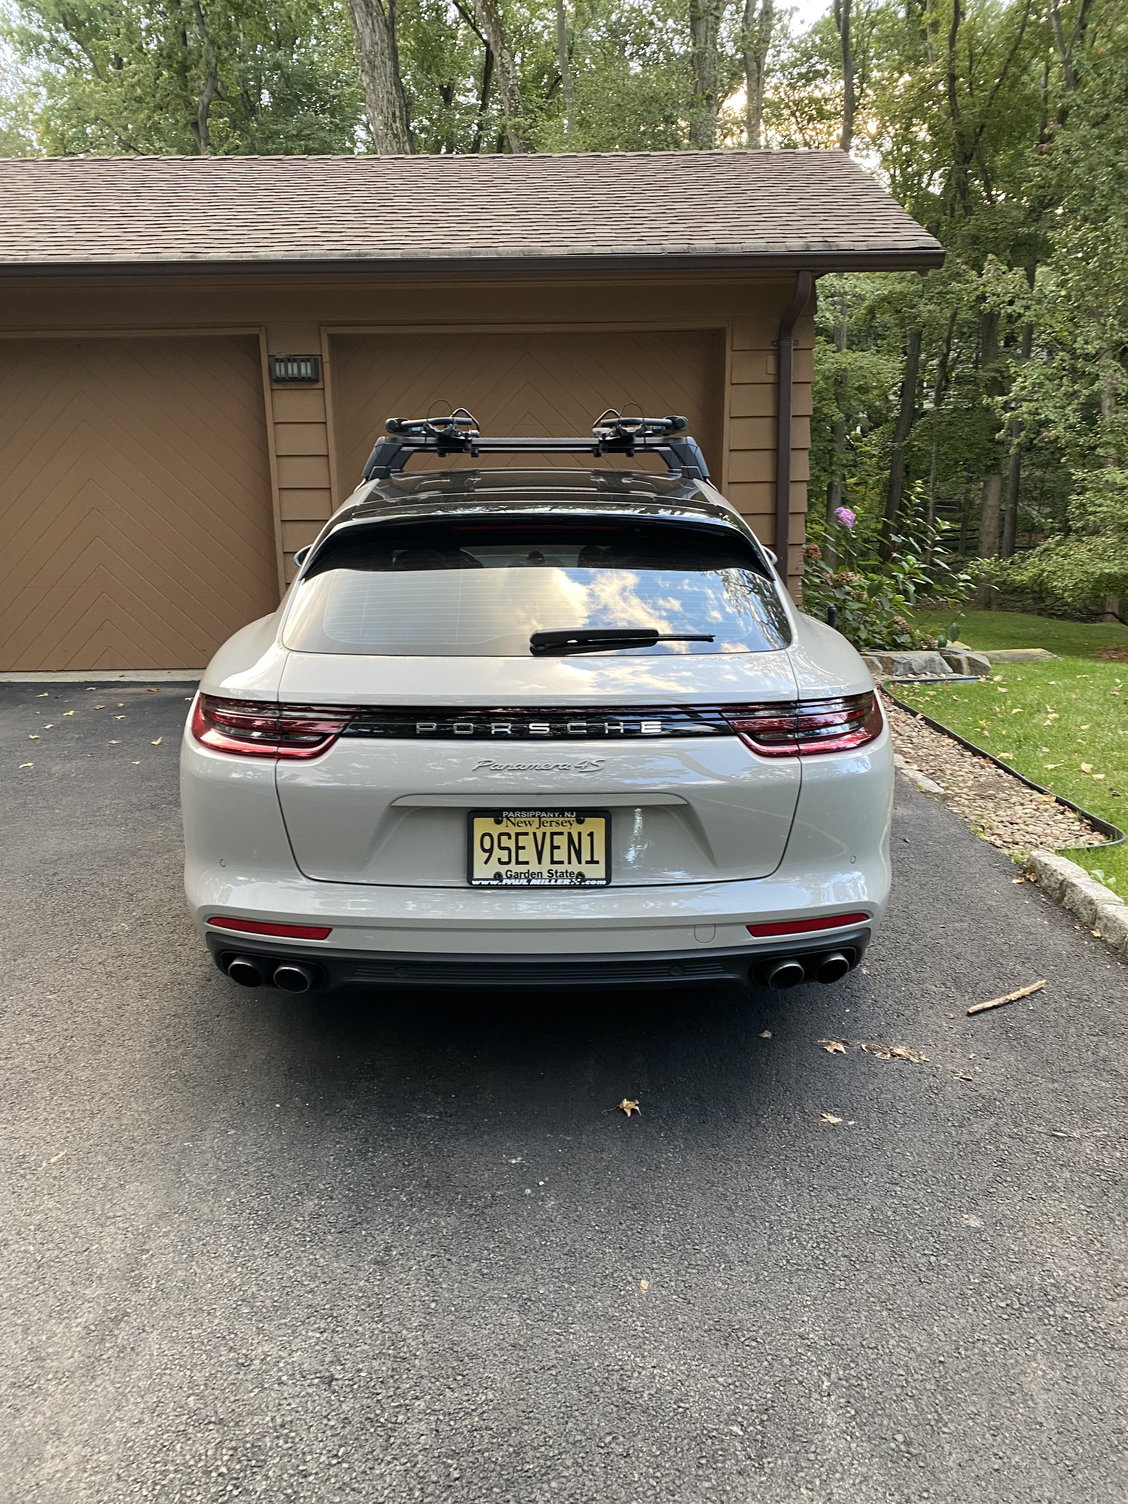
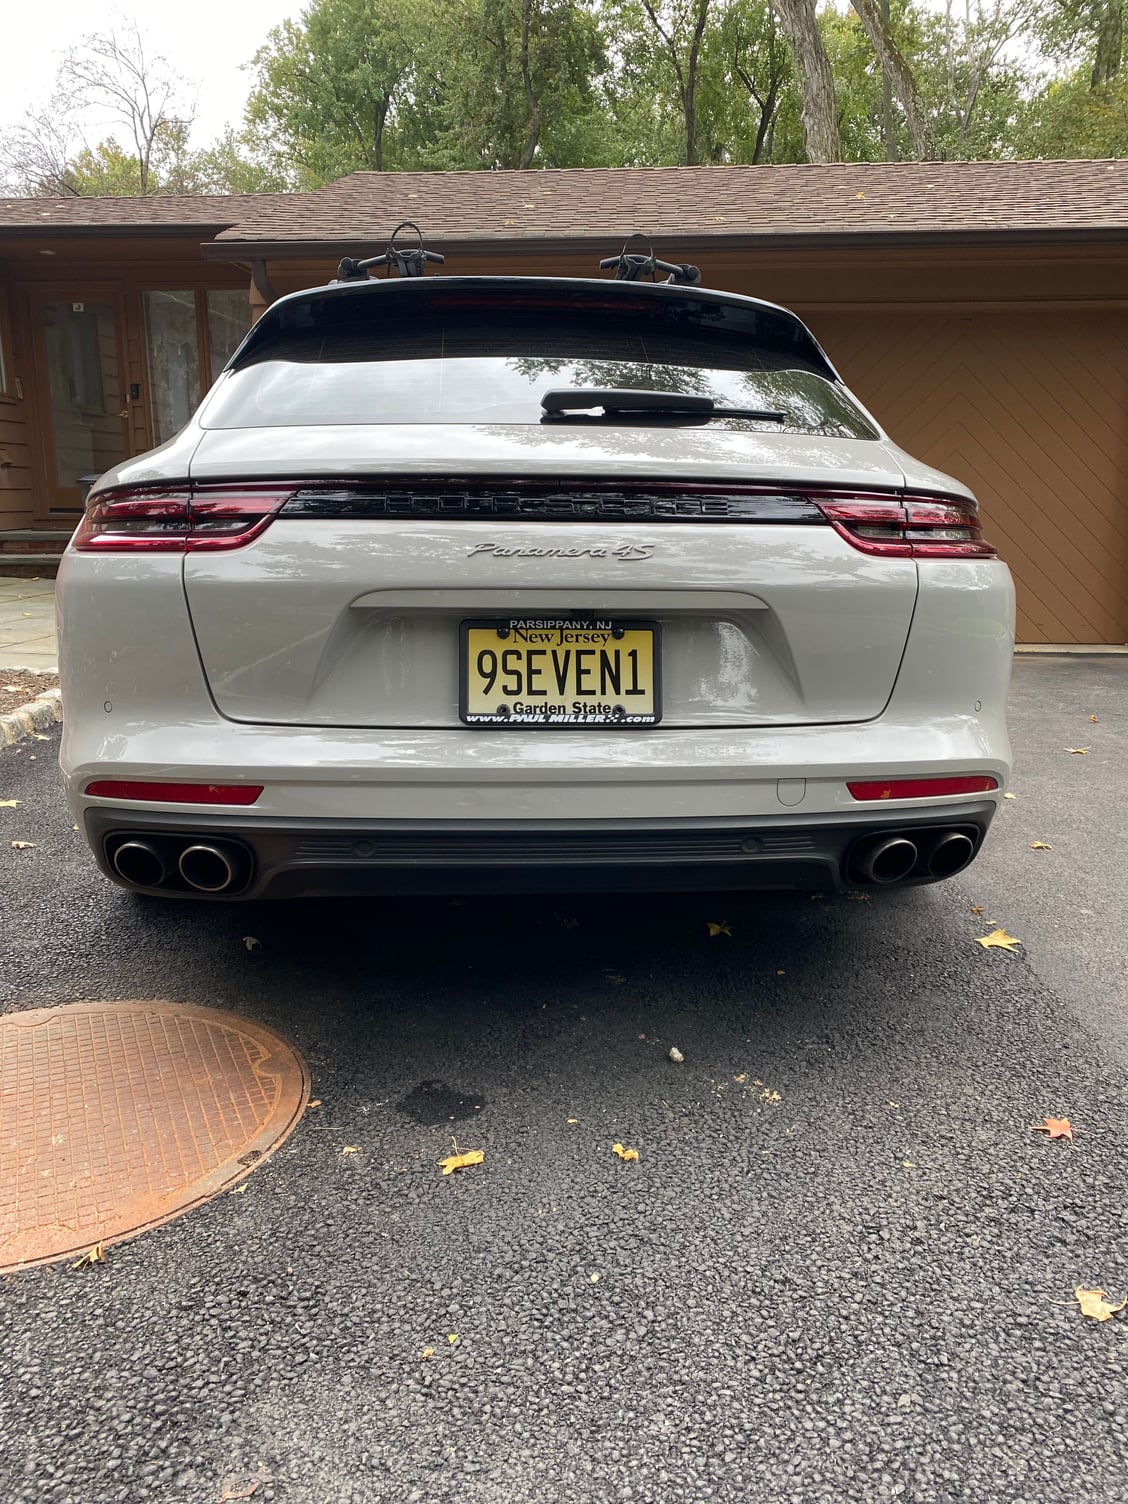
Admire at the rear of your Panamera while enjoying you beverage of choice!
Thanks for this thread. The "PORSCHE" panel on my new-to-me 2018 Panamera Turbo Sport Tourismo was scratched up. I first replaced just the letters (to go from chrome to black) but during that I realized how scratched up the panel itself was. The car only has 12K miles but the PO must have closed the hatch with his/her hand (assuming with jewelry on) rather that using the power close as I don't see how it could be so scratched up.
Anyhow this thread made it easy. I will say that I ended up drilling out the center retaining screw hold as trying to self tap it I felt like I was going to break it so I opened it up a little bit.
It is installed from the top. Raise spoiler, remove trim pieces above it, one bolt holds it in place plus metal push snaps.
When removing trim pieces note how they fit in so the center piece is flat.
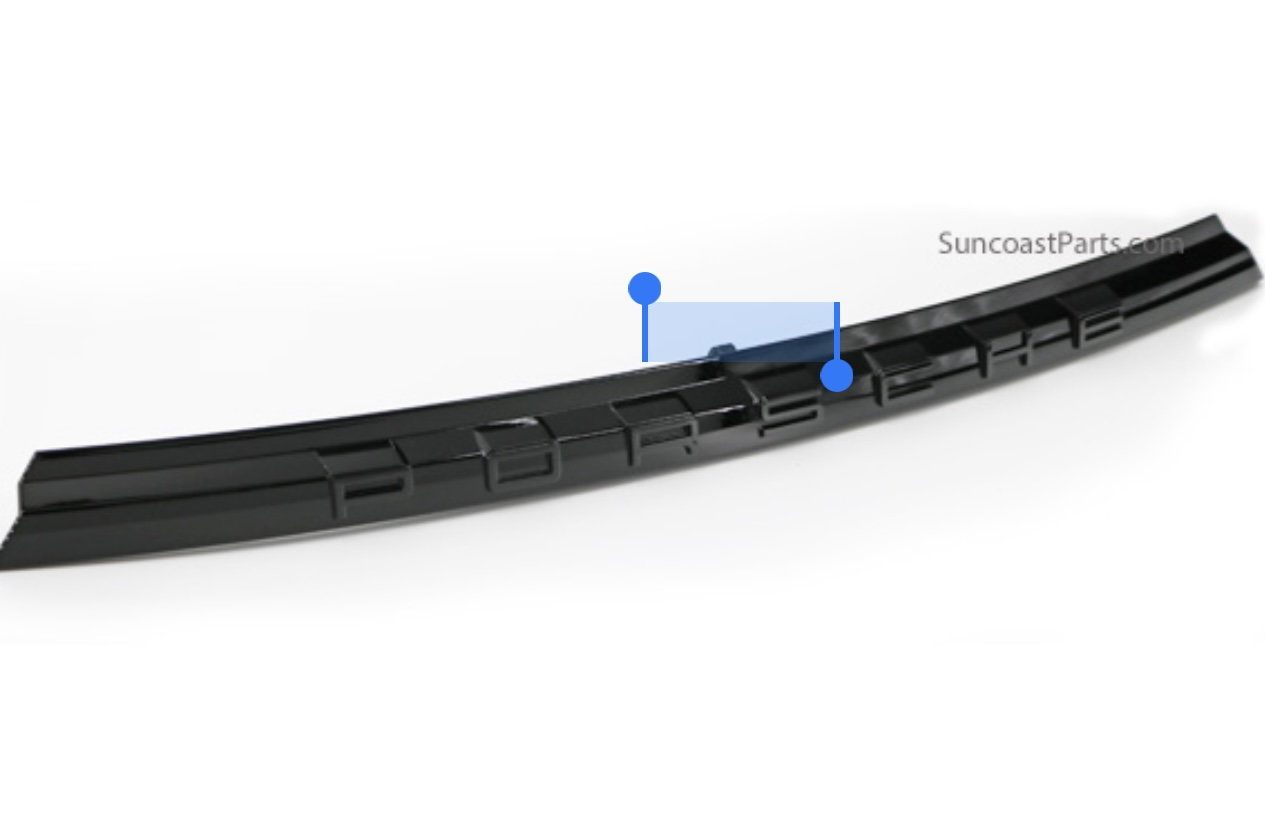
I stumbled over these instructions a bit. I wanted to put some info on for anyone who, like me, came looking for how to replace this trim piece in the future. My Panamera is the hatchback/regular version. Once you remove the trim pieces below the spoiler (held in by 2 T20 screws, 1 T25 screw, and 6 central pin push clips as in the video on this thread) there is no additional screw holding in the trim piece directly. It is held in by four clips and a metal horseshoe retainer which is held in place by this T25 bolt:
I spent quite a bit of time and busted knuckles looking for a screw here, but there wasn't one:
Instead there is a black metal horse shoe retainer held by the vertically oriented T25 screw arrowed above which lifts out freely once you unbolt that central trim piece. That horseshoe slides into the notches in the end of the protruding piece here, so remove it before popping the retaining clips on the back of the trim piece, otherwise it gets tight and thus my confusion. There is a screw hole in the end where the arrow points but that must by for ST models only as there wasn't a screw in mine. I hope this helps someone in the future!!
 09-29-2021, 08:21 PM