When you click on links to various merchants on this site and make a purchase, this can result in this site earning a commission. Affiliate programs and affiliations include, but are not limited to, the eBay Partner Network.
What is the cheapest way to install these new cup holders? I bought the cups few days, I think $600 for the installation is outrageous.
DIY would be the cheapest monetarily but most expensive time-wise. The whole center needs to come off, maybe there's a way to avoid some of it but having glossed through the official PPN procedures, a lot of the major pieces are interlocked. I ended up getting the dealer to cover part of the install since they were digging into the general area for some warranty work.
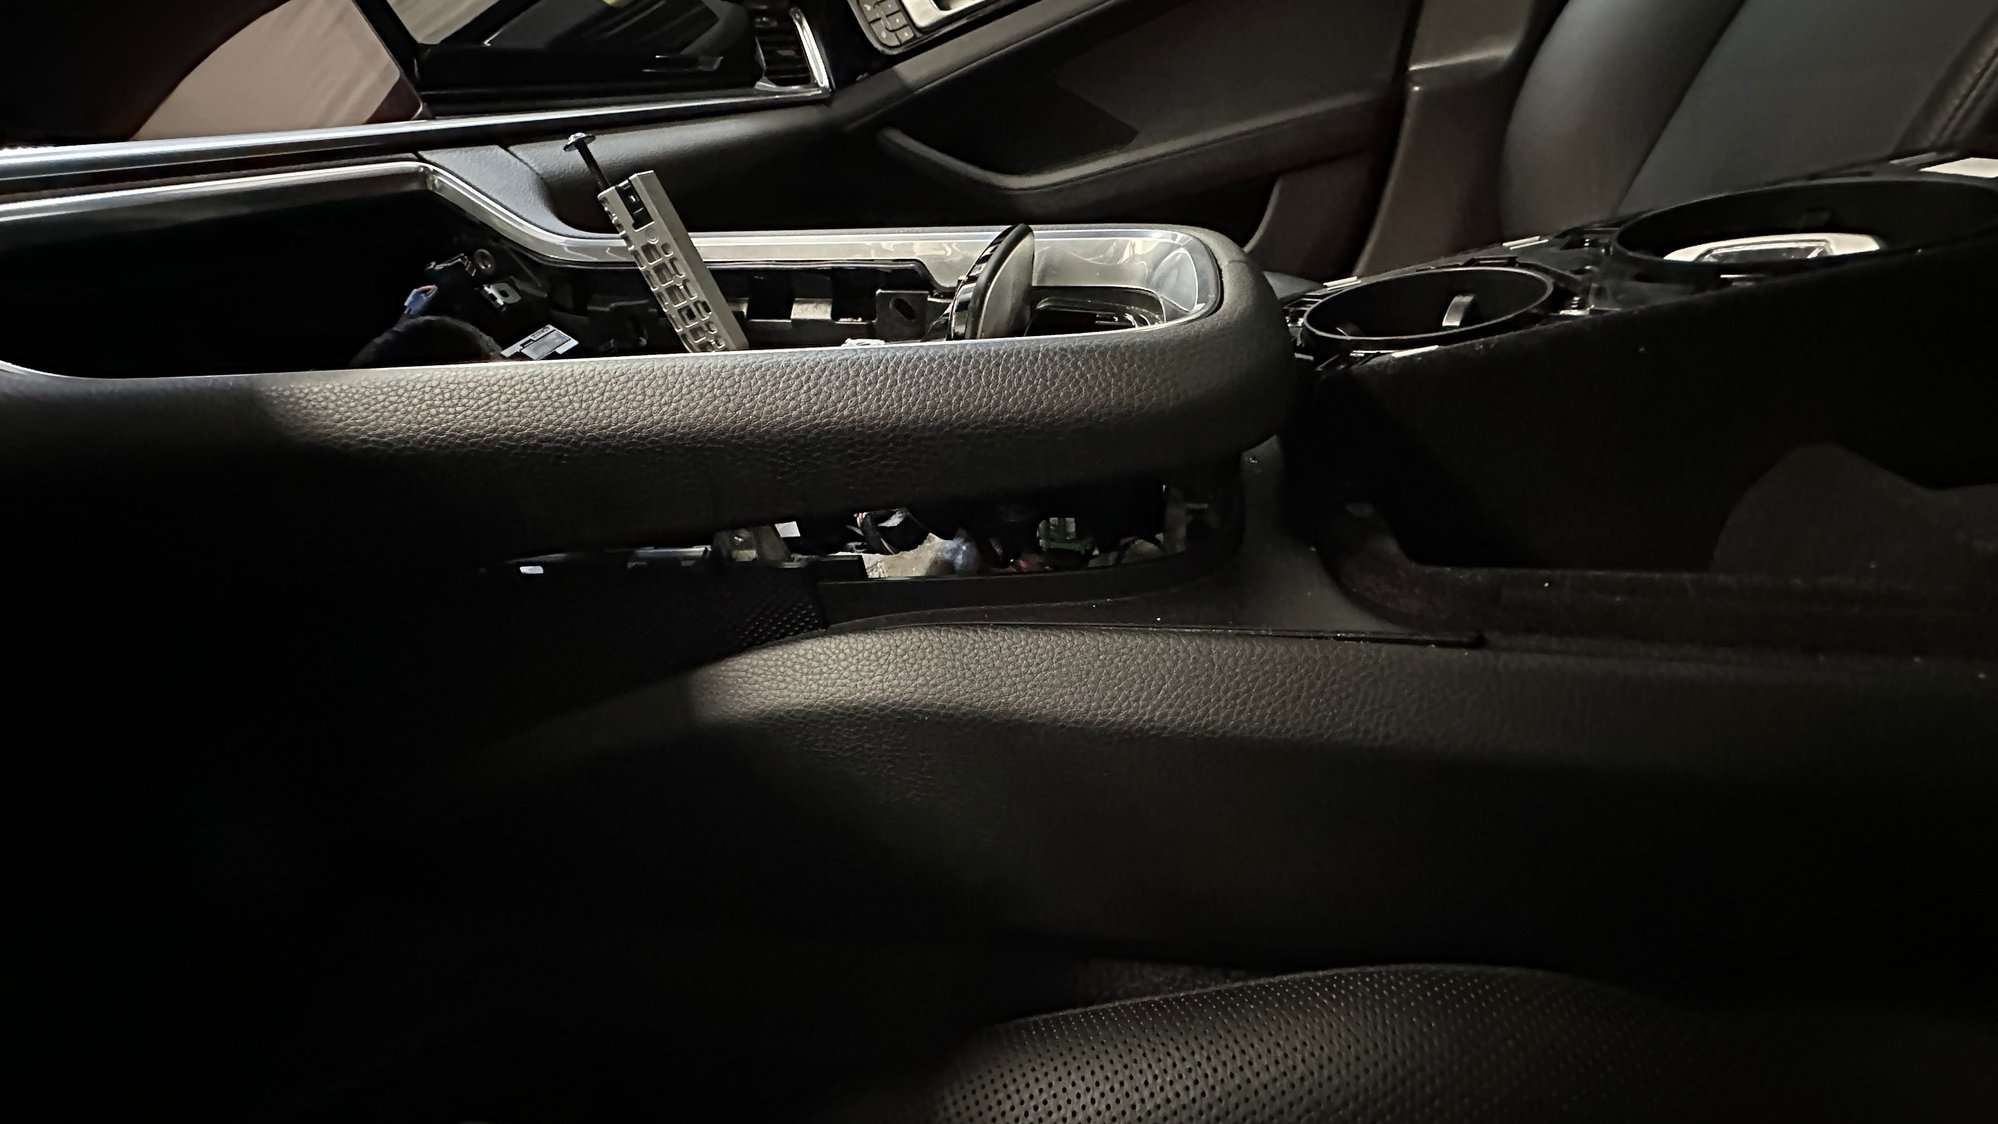
This entire area has to come out:
Porsche Worskshop Manual procedures in order:
855319 Removing and installing centre air vent
918819 Removing and installing console for telephone
681719 Removing and installing upper part of front centre console
912219 Removing and installing multimedia interface
68161910 Removing and installing cover for package box
68161900 Removing and installing package box
68301951 Removing and installing (front) cupholder
-- Then do all the above in reverse order.
$600 sounds outrageous - until you realize what’s involved. See my post earlier in the thread. I did this myself. At Porsche rates, for ~3 hours of labor(assuming they’ve done this before), $600 isn’t bad. It’s not hard, per se, but you do need access to PPN to get the documentation to learn how to disassemble everything without breaking anything. There are tricky steps for sure. Cheapest without using the dealer is to pay someone who has done it before with beer, or whisky! I’d be happy to help, actually, but if you aren’t in the Pacific Northwest, weeelllll, it gets a bit awkward.
Does anyone knows where the headlight fuse is located for porsche Panamera 971 ? I recently changed my headlight and I just confirmed that both the old and new headlights still works the problem is wiring or fuse.
Uh, @Mint201 did you mean to post that question here? It has nothing to do with what this thread is about? You will likely get a better response if you create a new thread for that question.
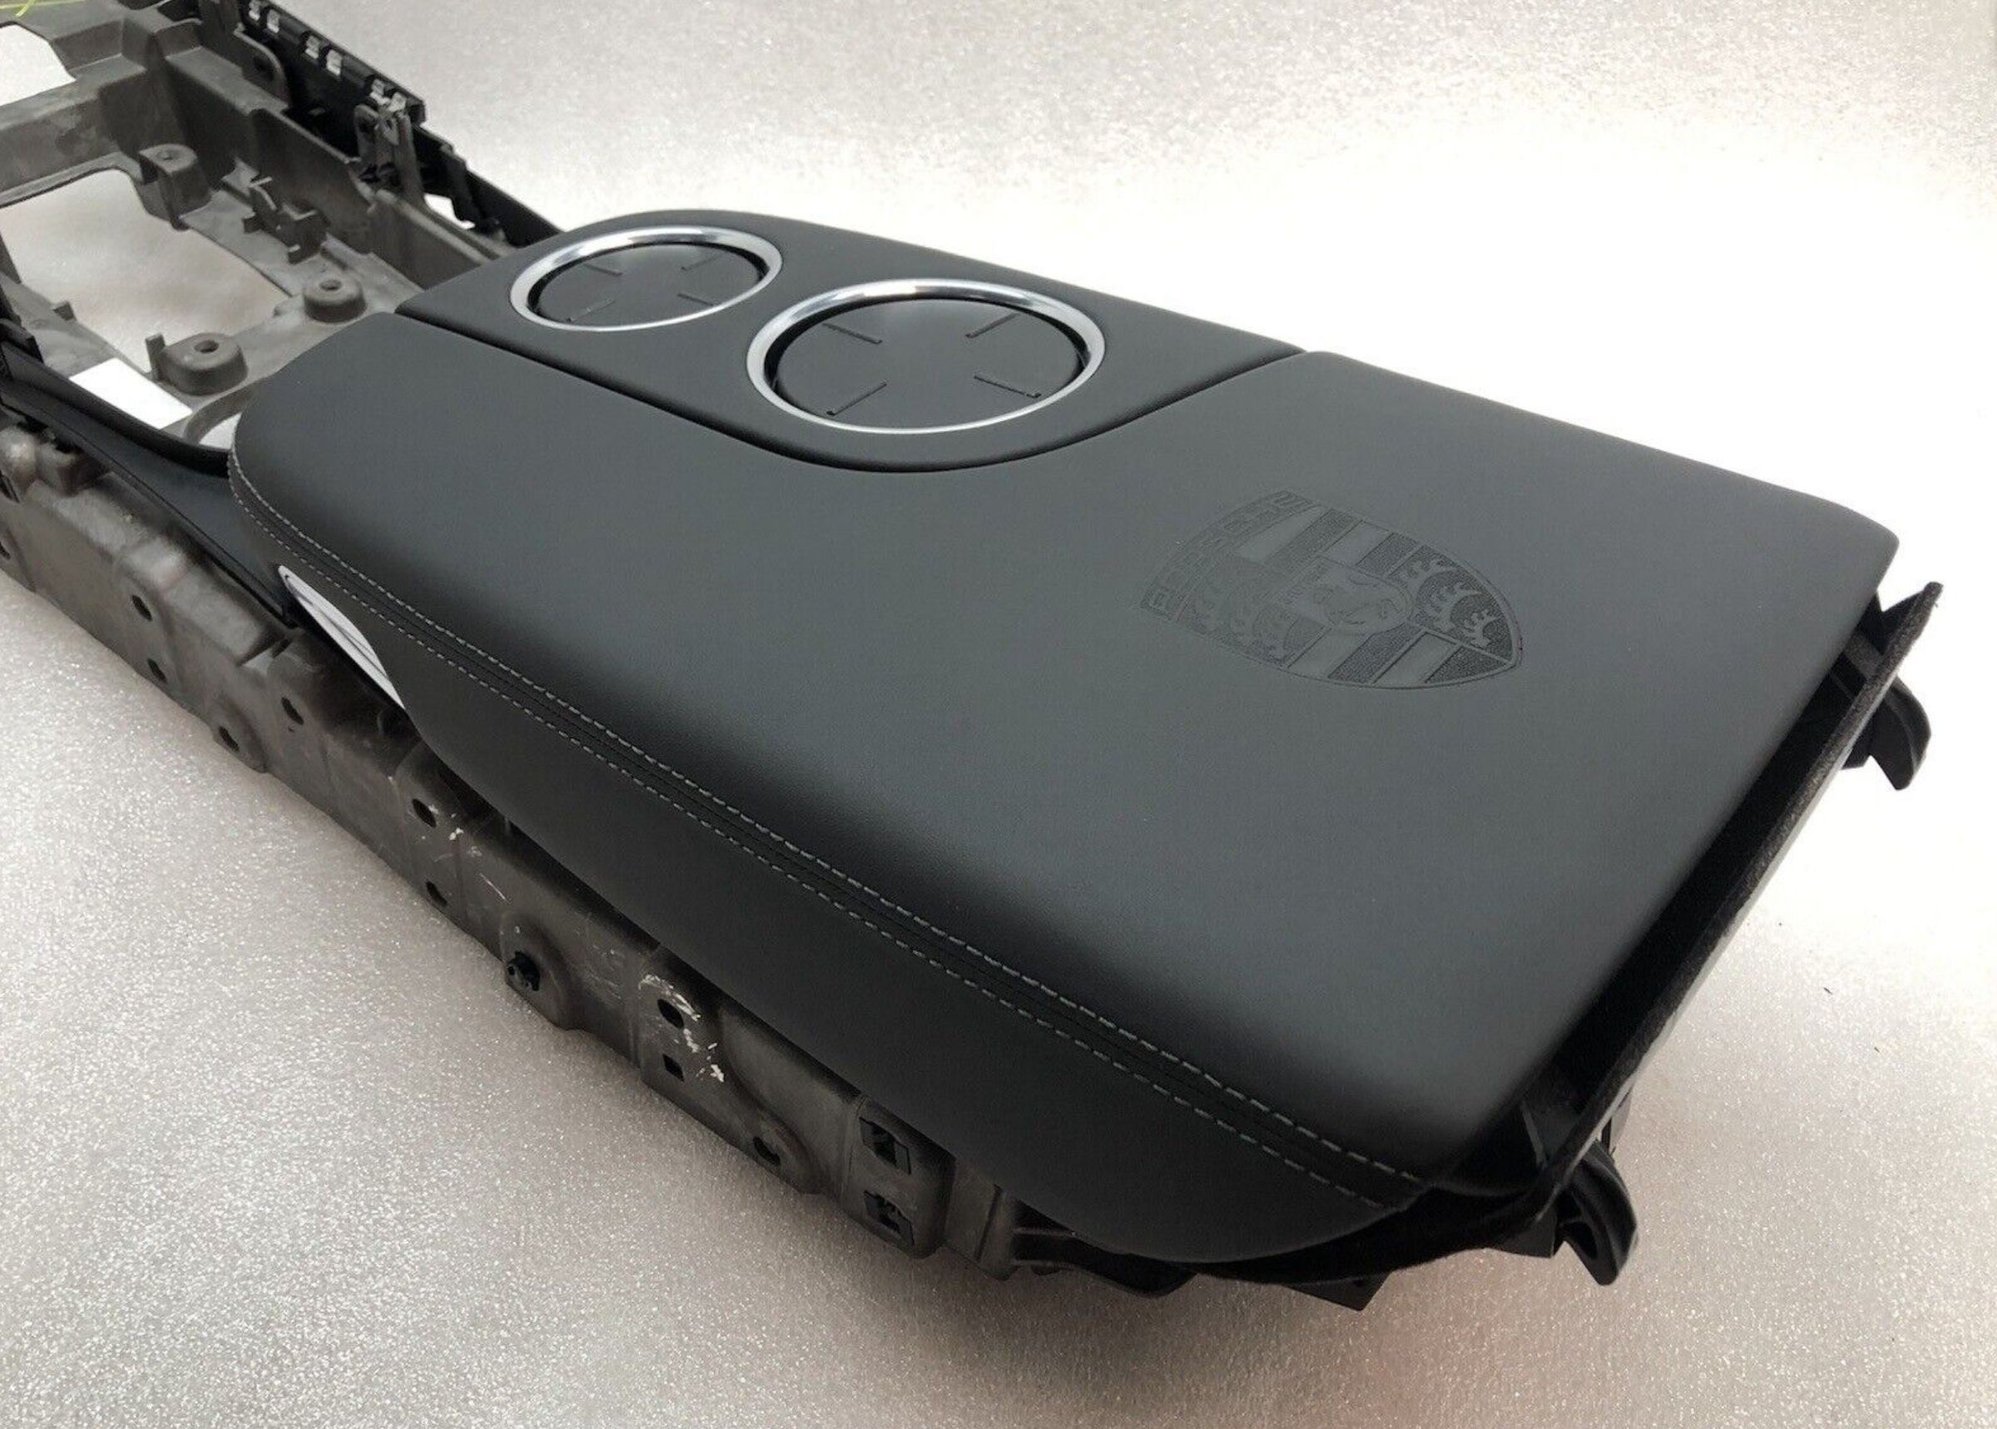
Bought the lid with porsche crest and closing cupholders from the heavy-smash salvage. They shipped the entire cage. They are in really good condition. Will have fun doing transplant during the holidays.
Bought the lid with porsche crest and closing cupholders from the heavy-smash salvage. They shipped the entire cage. They are in really good condition. Will have fun doing transplant during the holidays.
Looks great. Please do your best to document the process so others can follow. Thanks.
Cosmetic surgery accomplished, took me a bit over 4 hours, could have been shorter had I not forgotten to plug the connection to the cigarette 12V socket back after I mostly buttoned up.
The only reason you have to remove the whole front end console trim is to expose a cosmetic trim piece that is sitting between the front console and the package box. Porsche never made it easy for DIYers.
Here�s a recap of what I did, divided into two stages:
Tools needed: trim pry tools, Torx bit T20 (for all screws) and T30 (for the two screws inside the package box)
Stage 1: Removal of front center console trims.
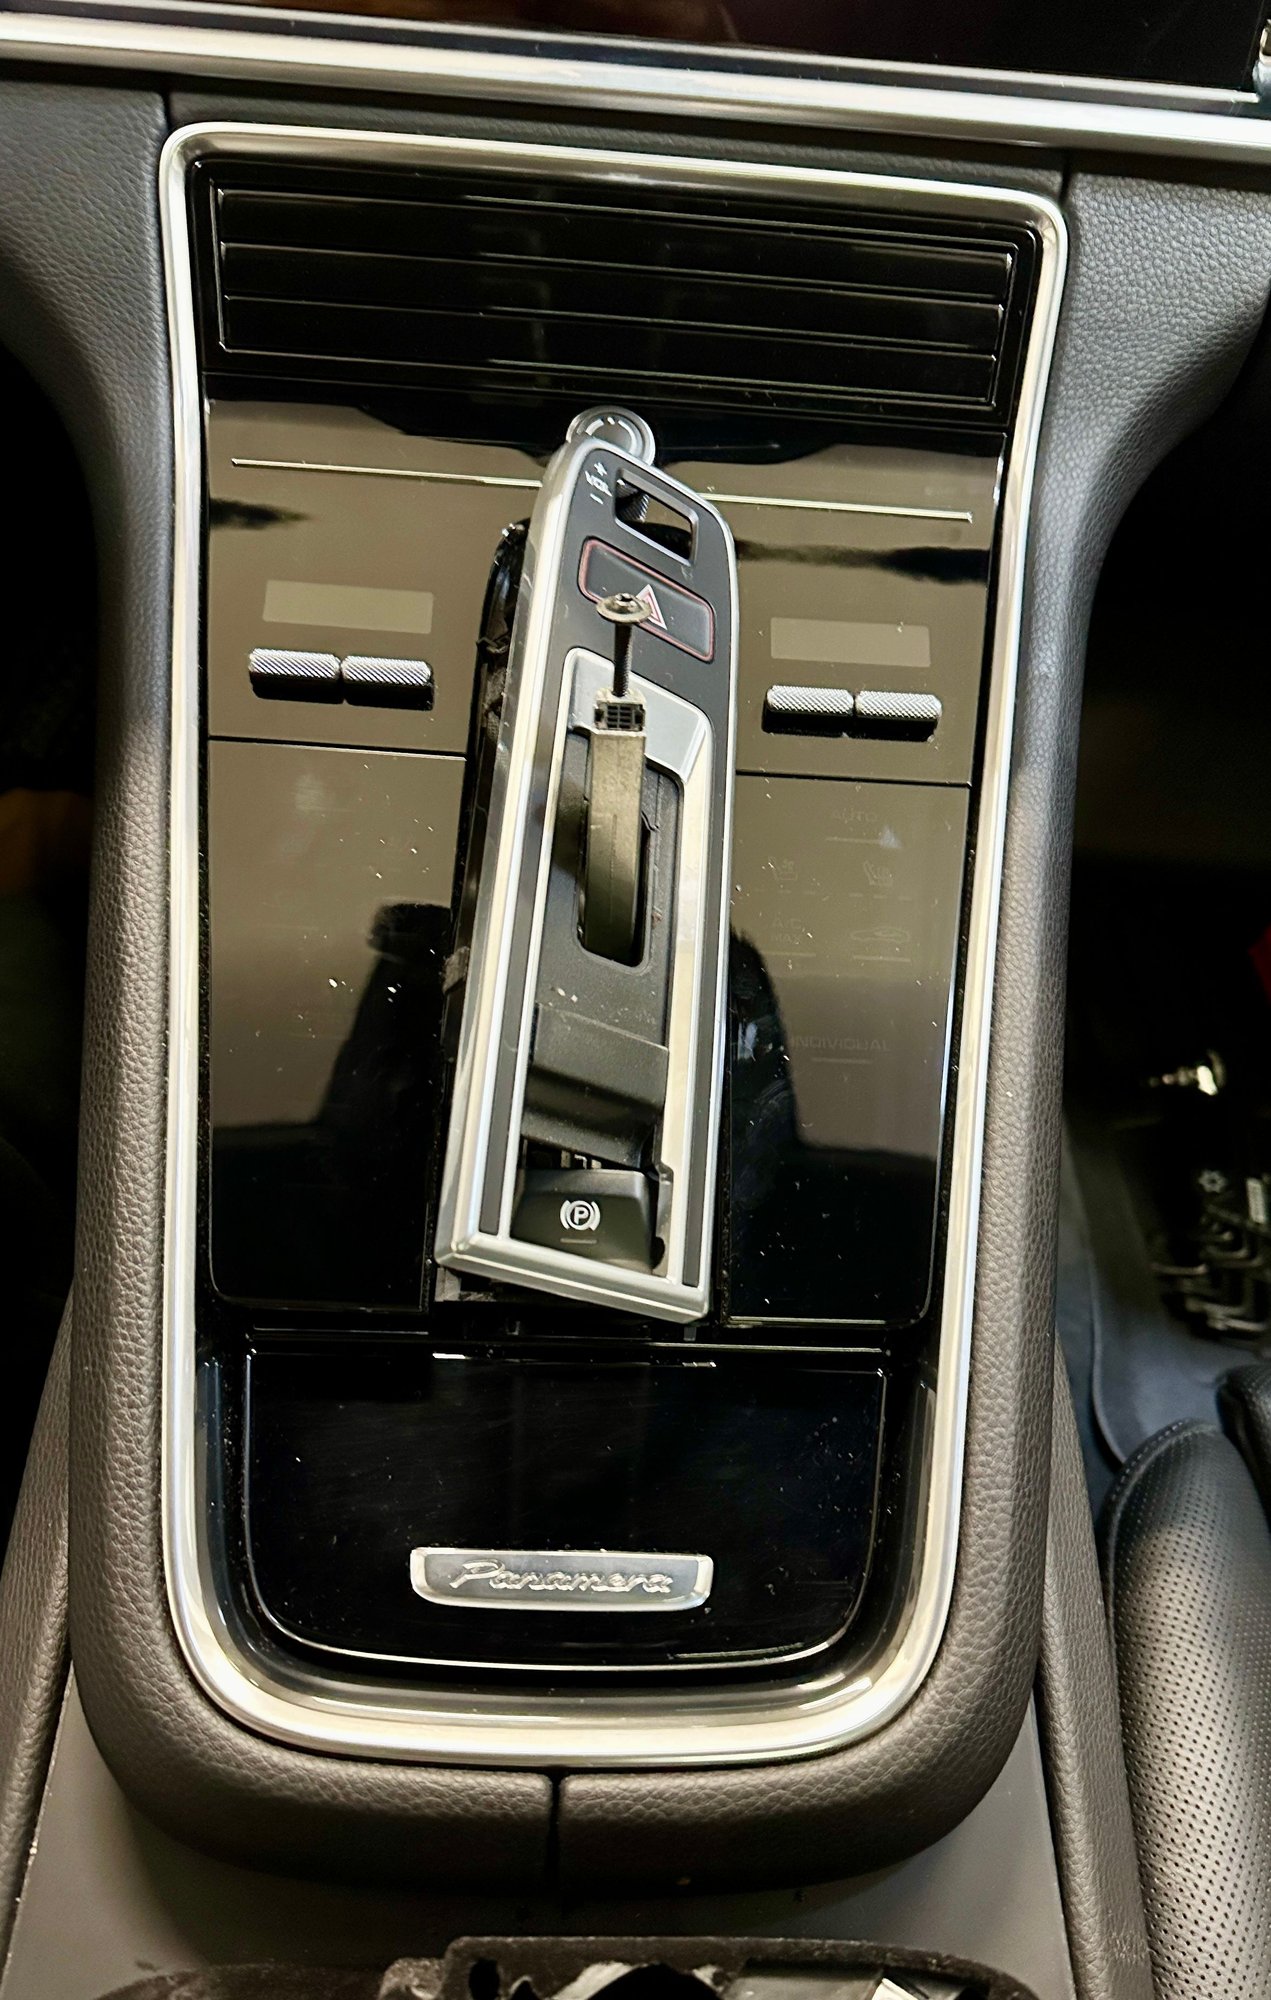
1. Remove shift knb - this is pretty easy, just pop the top cap. Start from the rear, pry it and lift up and forward to unhook it. Then there is a screw you need to remove, then pull straight up and out.
2. Lift the silver rectangular trim starting from the bottom. You can literally lift with your fingers, there is minimal resistance. Lift and swing up clear the shifter shaft, unplug from behind.
3. Remove parking brake actuator - remove two screws on top, then lift up and out. You may need the trim tool to pry it up a bit before pulling straight up. Unplug fron behind.
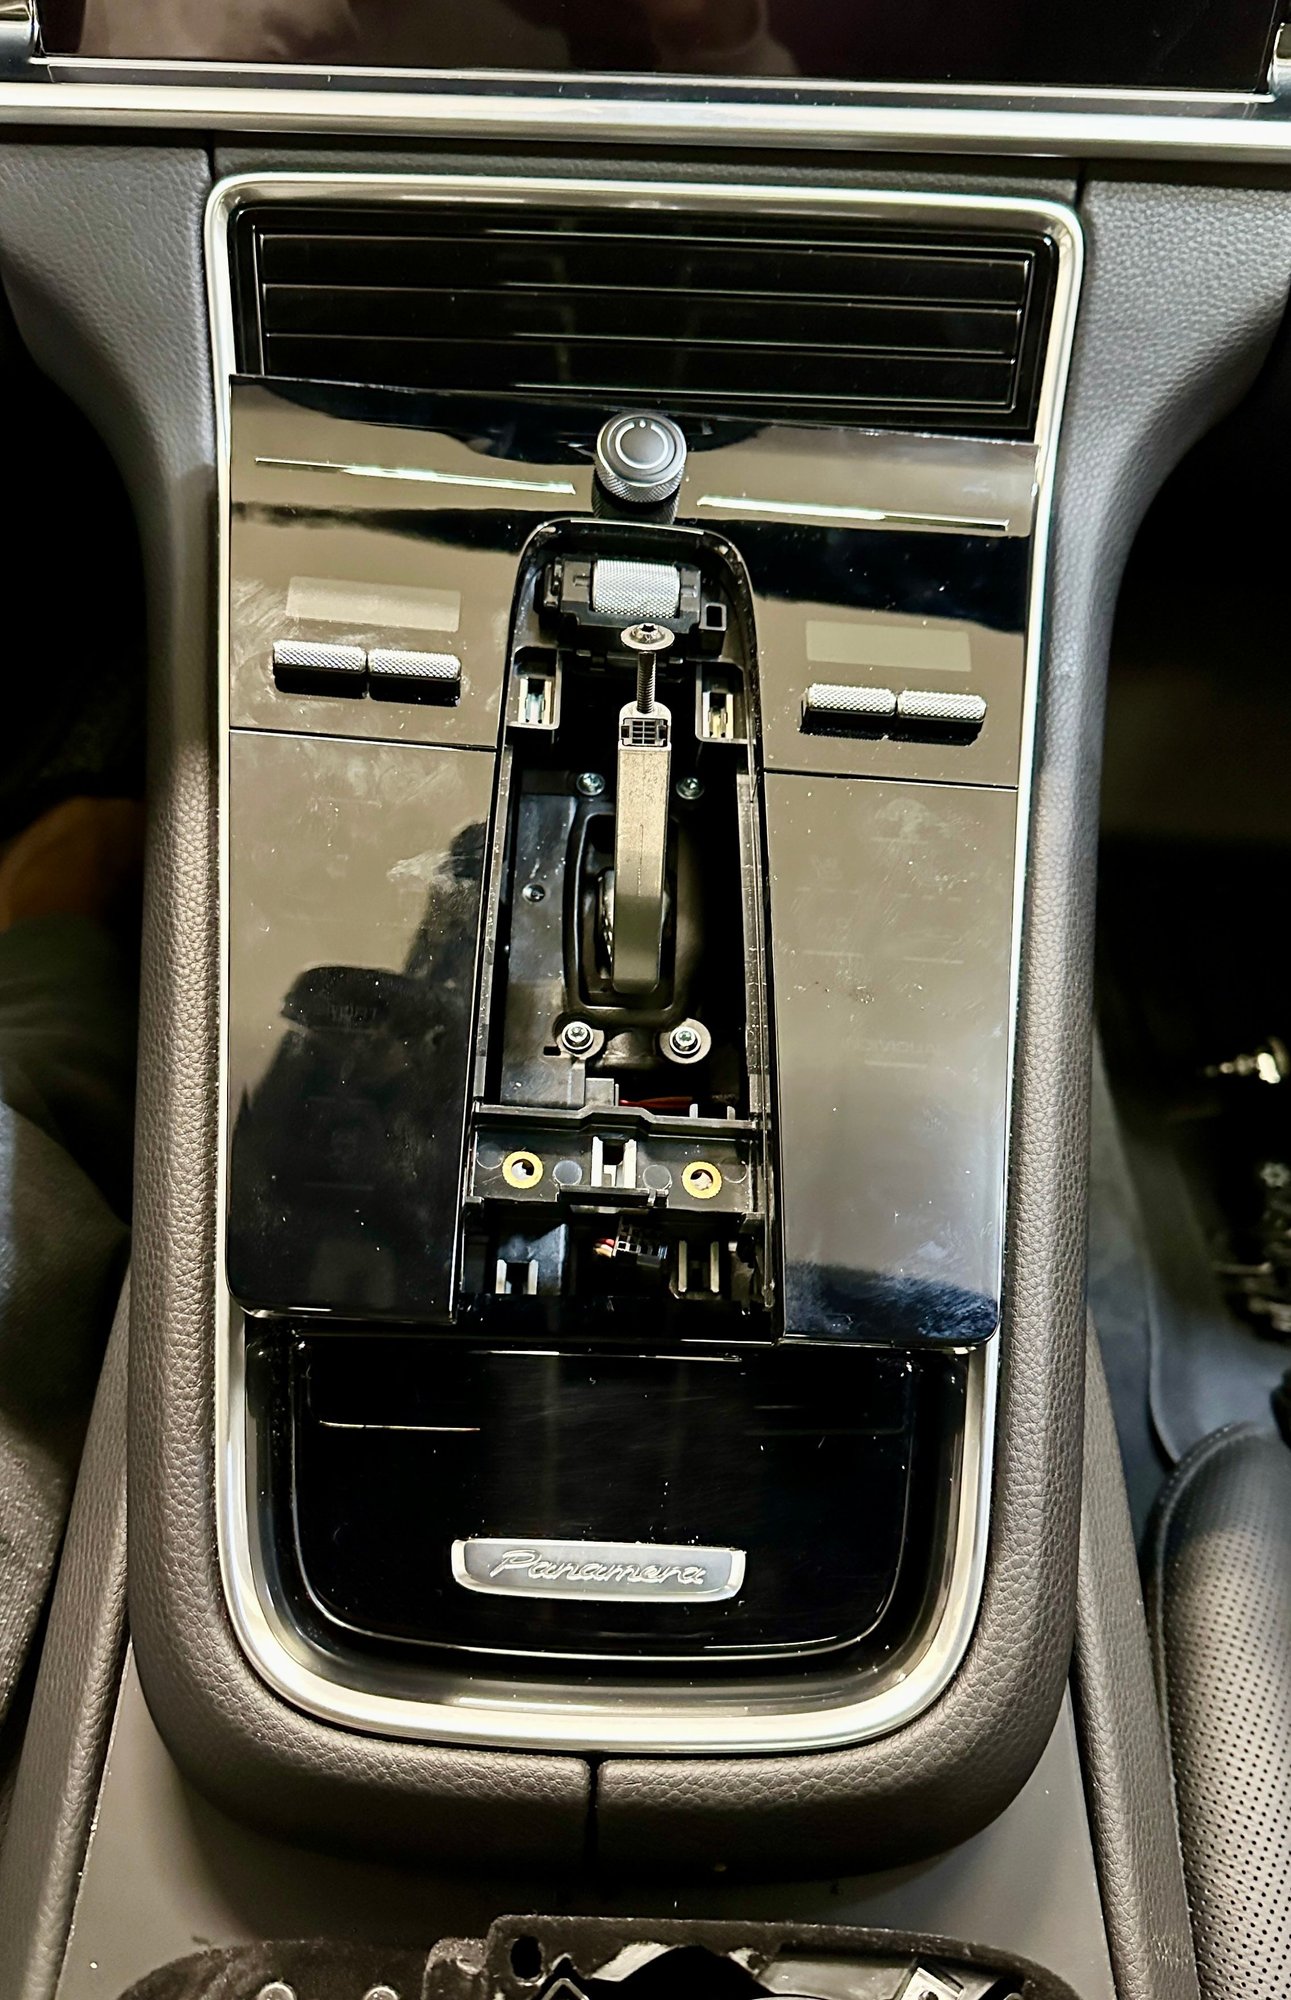
4. This is the fun part. Remove the �switch console control panel� - start by lifting up from the rear, try to get your fingers under towards the front portion of the panel, pull up towards you. Do this one corner at a time is easier. Once clear, unplug the harness from behind.
5. Remove the air vent - two screws at the bottom corners. Remove harnesses from behind, pay attention to the left and right harness, they are color coded.
6a. Remove the top cuphold trim, it just pops out. Sorry no picture on this one.
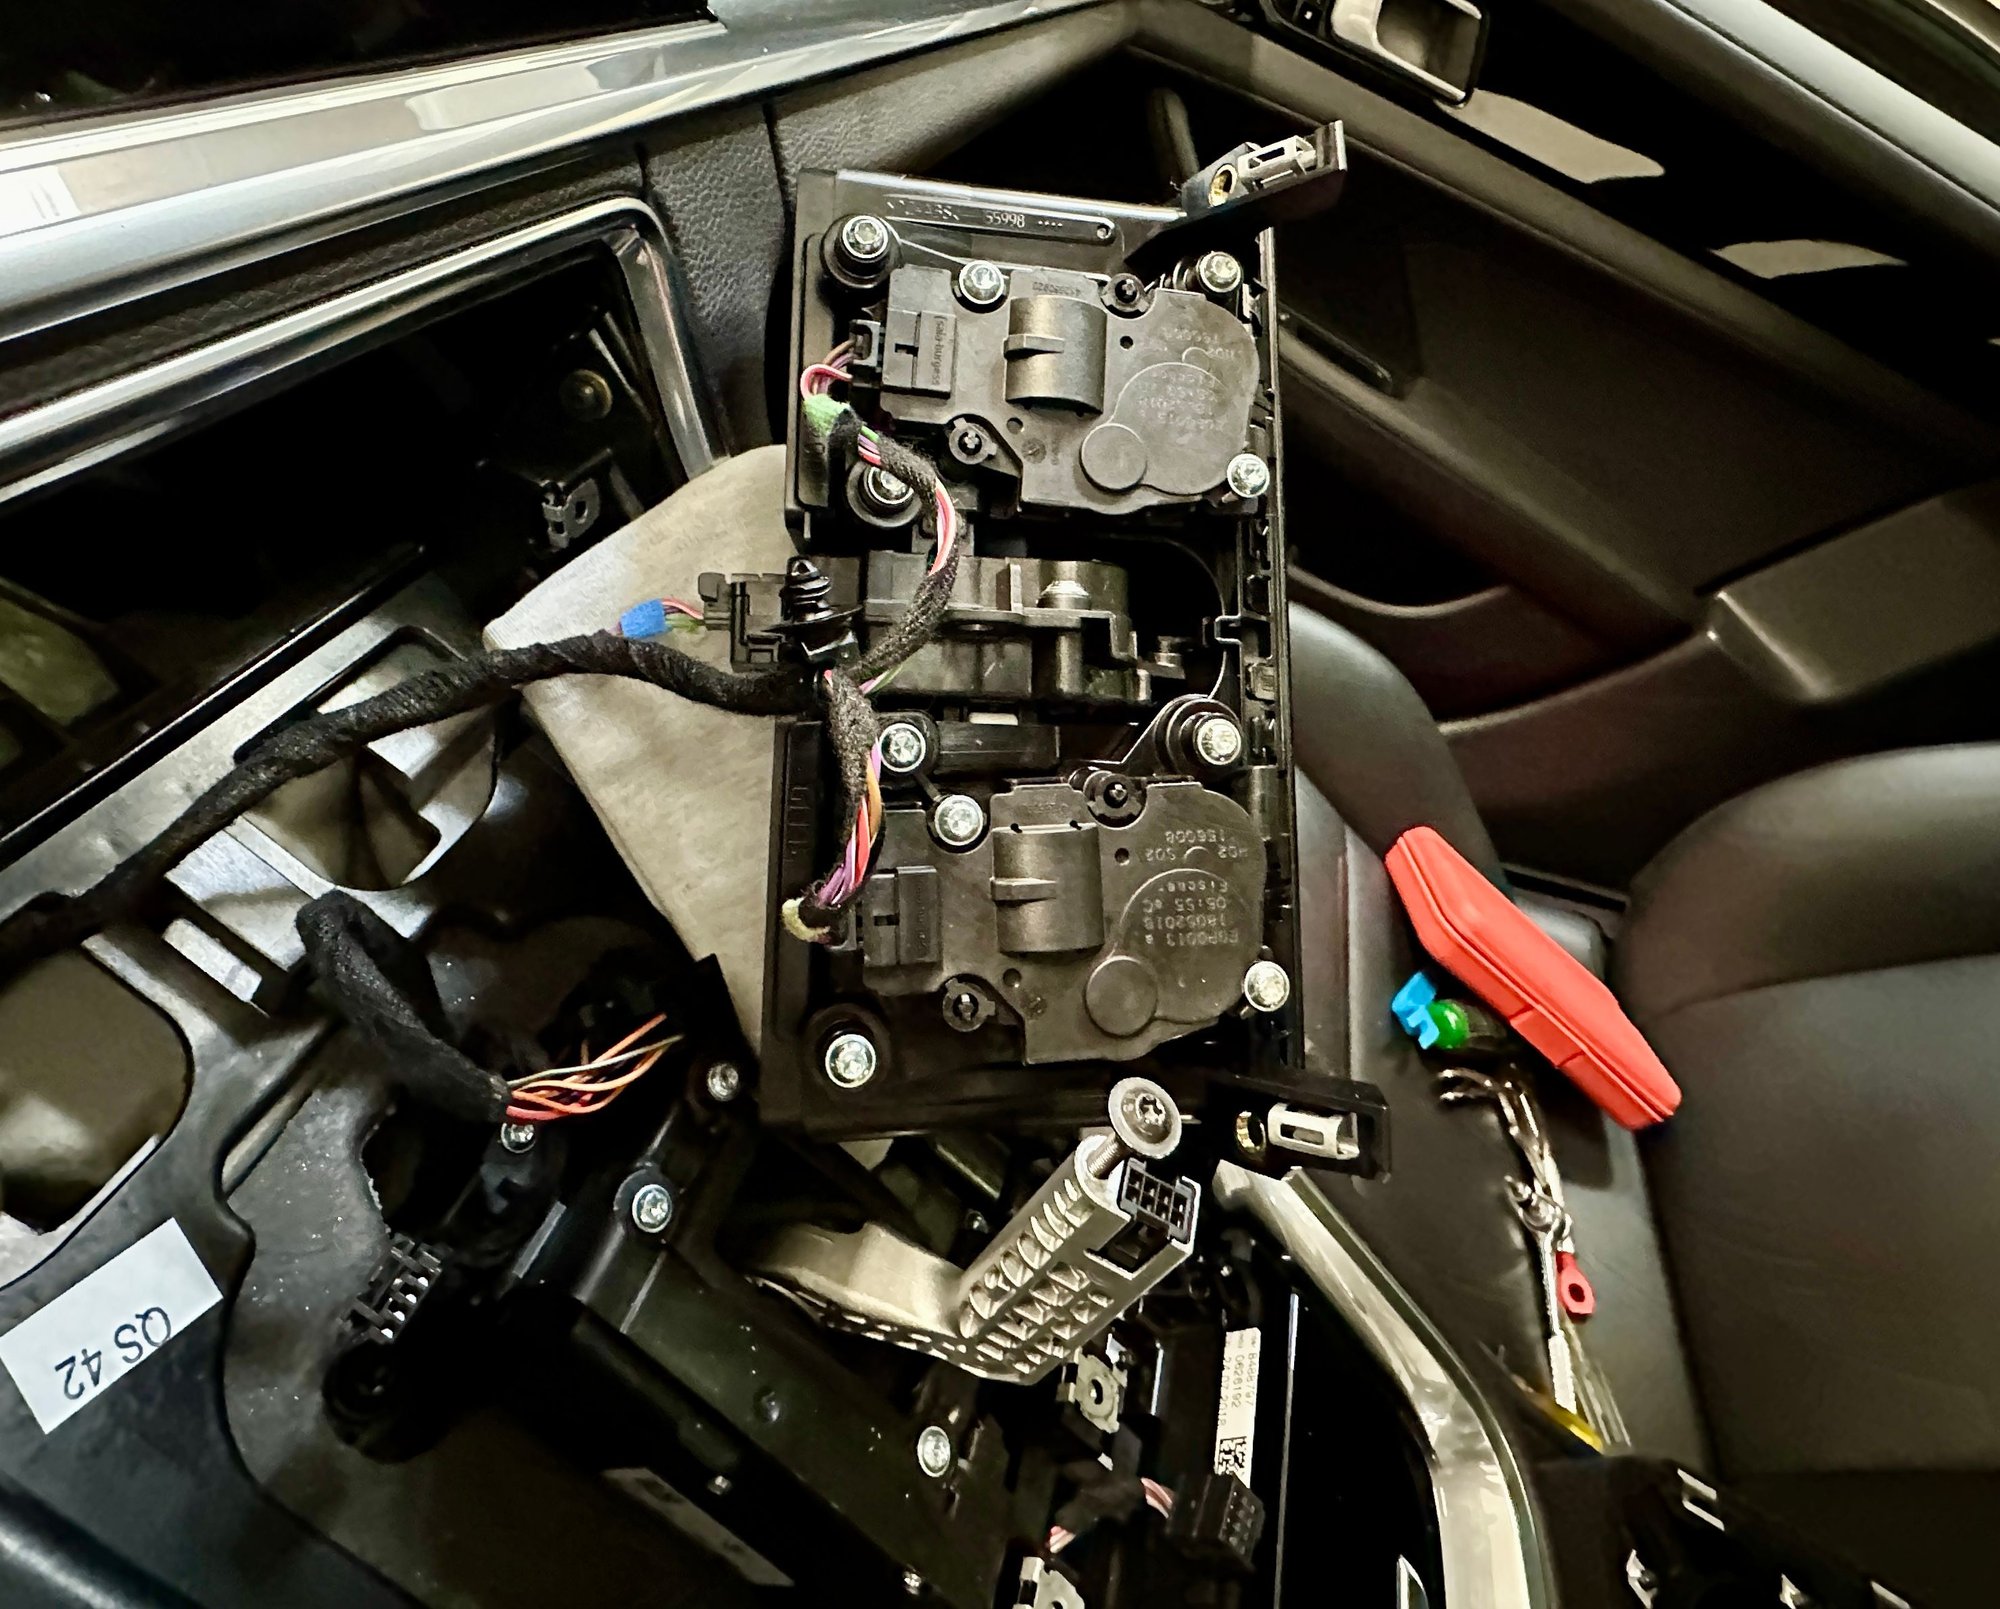
6b. Remove the console trim - it is secured by 6 screws (3 on each side). Remove all 6 screws, starting from the bottom, lift up and gently pull the trim towards you. Be sure to unplug the cigarette lighter harness if you have a smoker package.
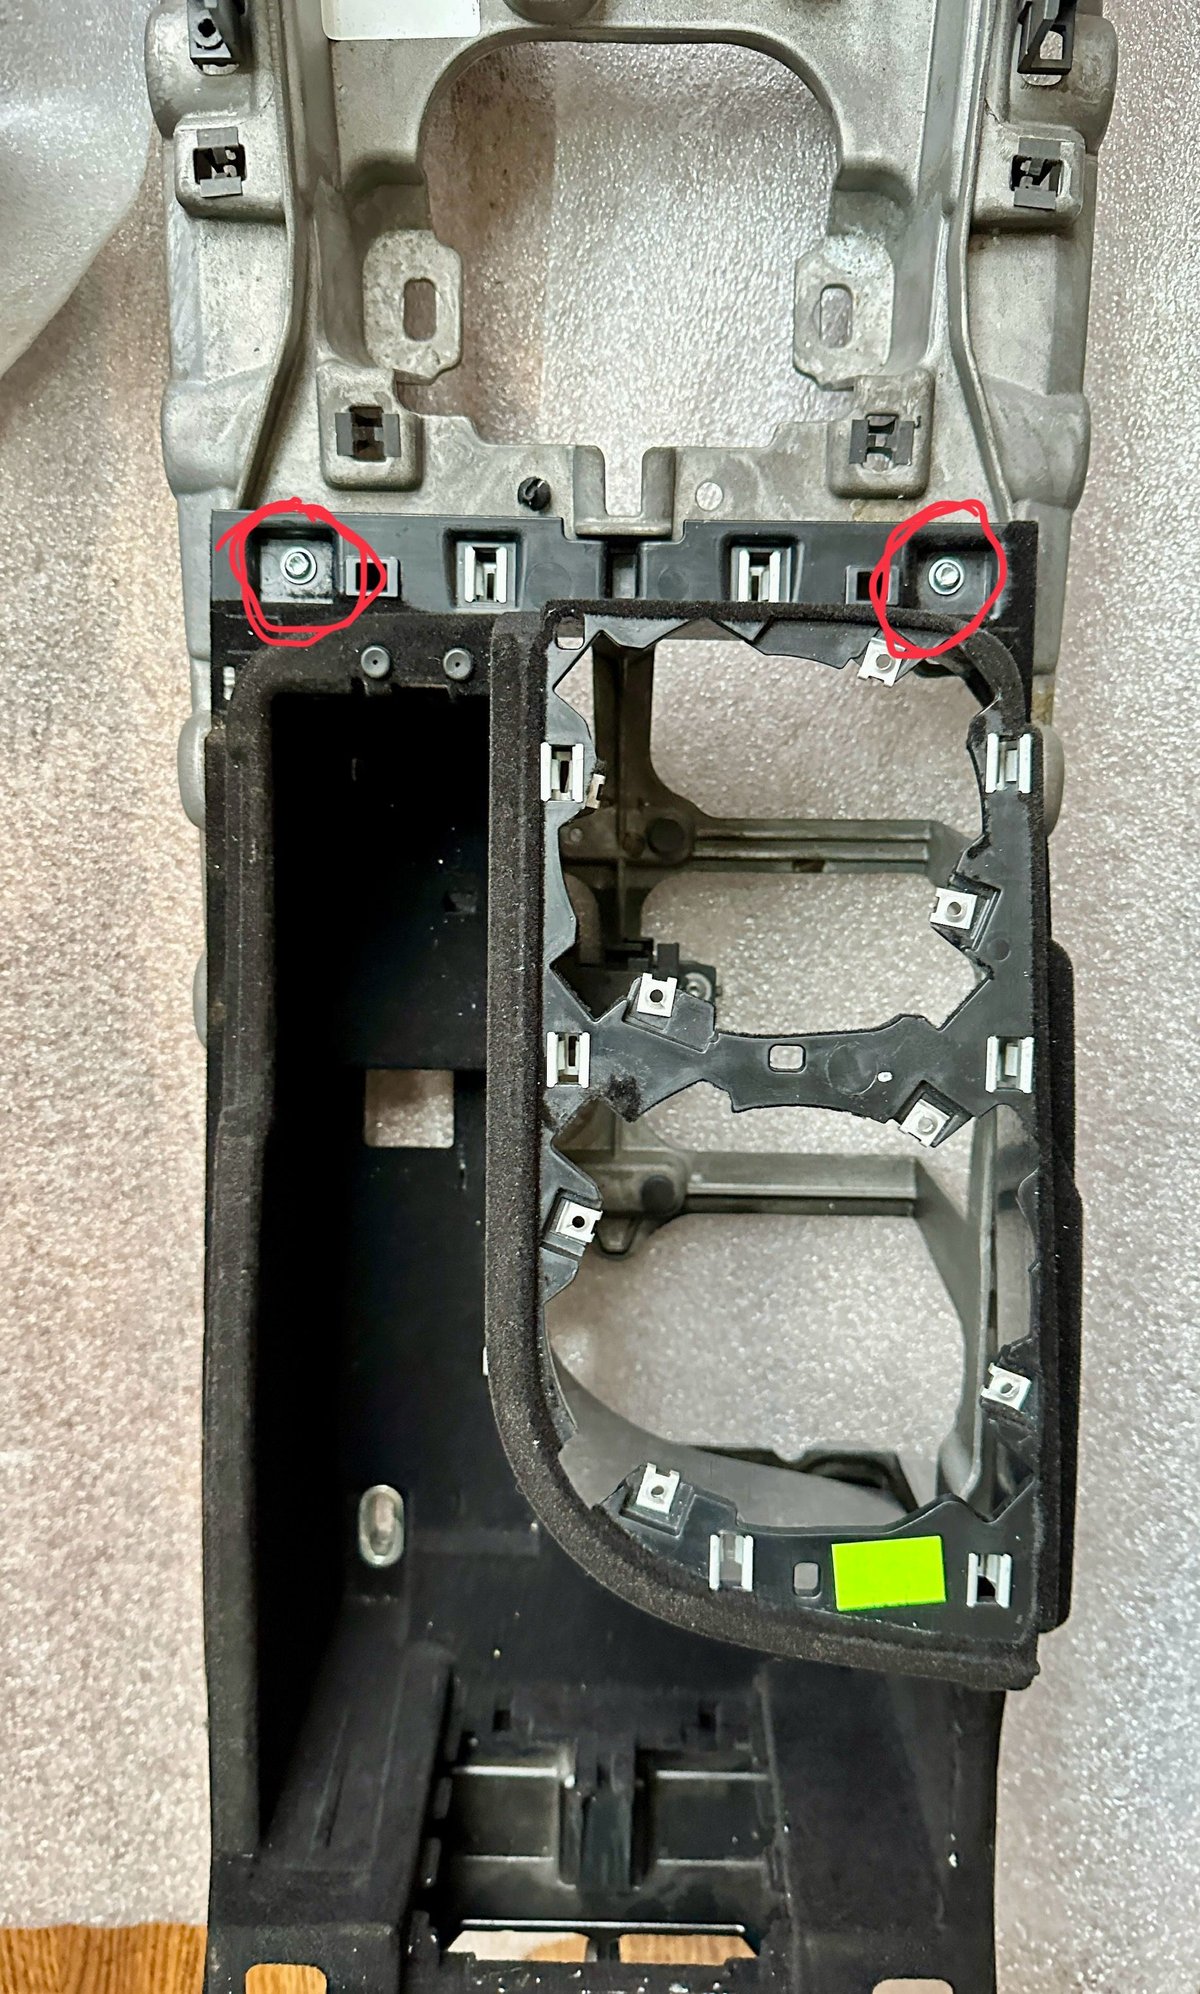
7. Remove the cosmetic trim piece (part circled in red) by lifting it up and out. This concludes stage 1.
Stage 2: Removal of armrest and under armrest package box
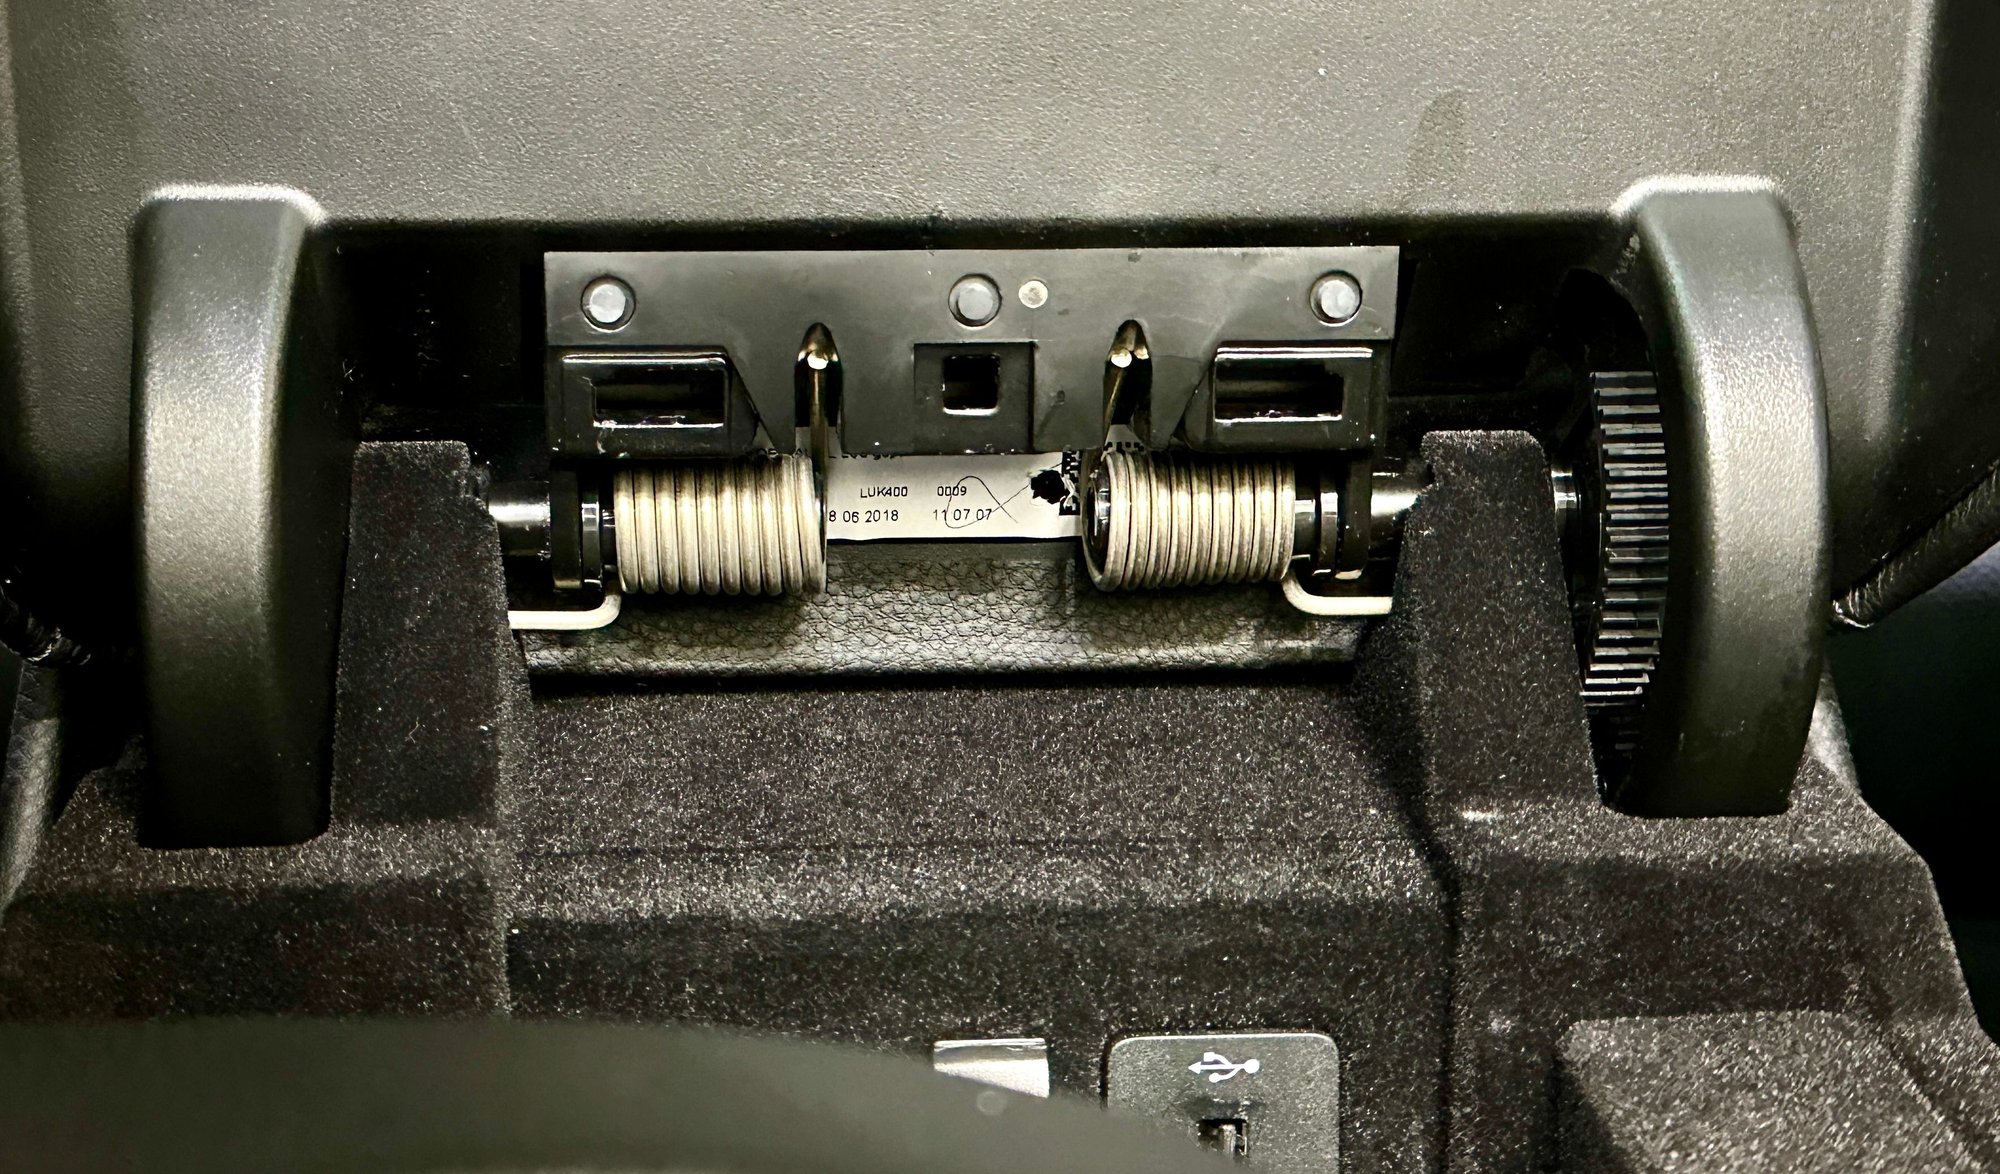
1. Remove armrest - pry out the trim piece and remove the spirngs. Disengage the spring by pulling it out of the resting area and inward. Then use a hook type tool to pull the spring inward adn out of the shaft. Then remove the shaft from the hinge (use a wise grip, it saves you a lot of cuss words)
2. Remove two screws.
3. Remove the rubber mats on the bottom of the package box. You will see one black screw (T20), remove that and lift up the telephone comartment, unplug the harnesses. Now the only two screws left are the T30 silverish screws. Remove them
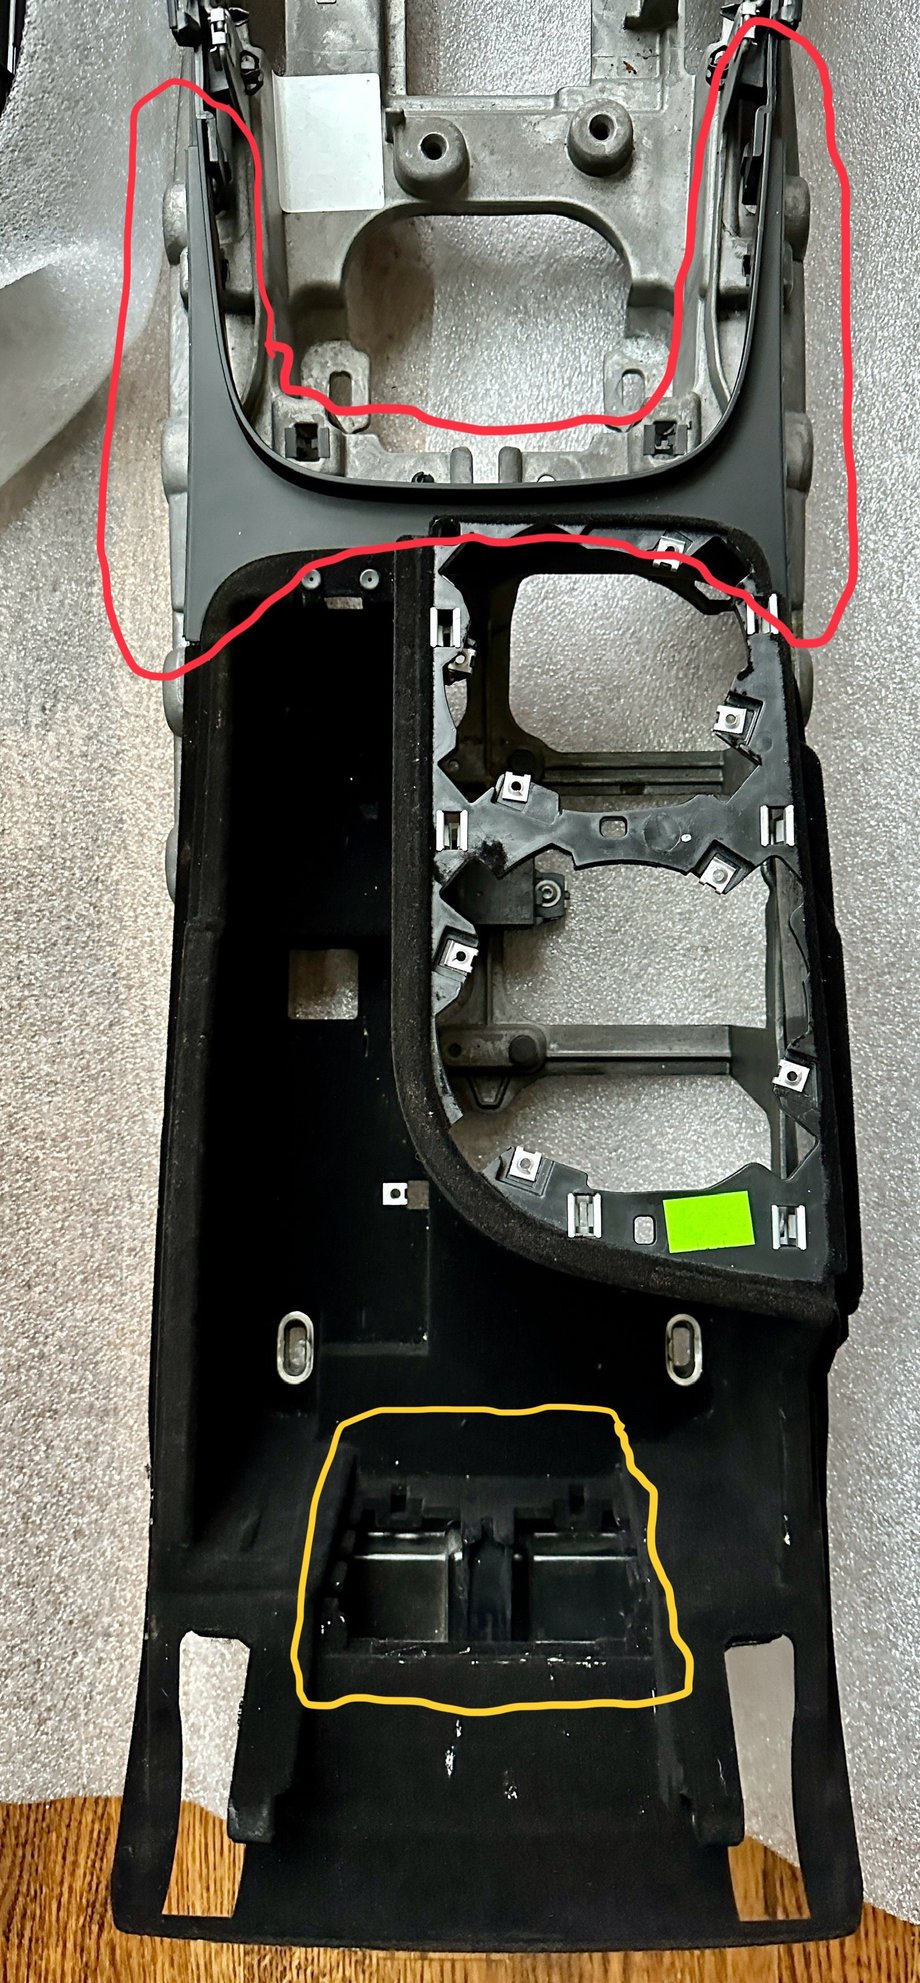
4. Lift the package box from the rear, then lift up. There are harnesses still plugged in from behind (12V, multimedia), unplug them and you can now remove the package box. You can also remove the entire multimedia/12v socket first (yellow circle) and unplug it that way.
5. Turn the package box upside down, each cupholder is secured by 4 T20 screws. It�s pretty self-explanatory.
6. Assemble everything in reverse order. Make sure you plug everything back, don�t be like me forgetting something and had to redo a few steps. Assemble the armrest last, it was a bit struggle to put the shafts back to the hinge (aligning them was a bit of a challenge) and then putting the springs back to the spot is another challenge and took a lot of patience.
Hope this helps. The trim pieces are actually pretty sturdy and it does not break easily.
I just follow your instructions and did it in 30 mins!! The hardest part was figuring out how to remove the armrest. I think if you have a video of it, it would be great. I just end up lifting it up and then unscrew it from there without removing the armrest, it took longer but I did it. I think if I know how to remove the arm rest I can do it in 20 mins tbh
I just follow your instructions and did it in 30 mins!! The hardest part was figuring out how to remove the armrest. I think if you have a video of it, it would be great. I just end up lifting it up and then unscrew it from there without removing the armrest, it took longer but I did it. I think if I know how to remove the arm rest I can do it in 20 mins tbh
Looking good, glad that worked out for you. I had to struggle getting that armrest off and back on so I didn�t think of taking a video.
Looking good, glad that worked out for you. I had to struggle getting that armrest off and back on so I didn�t think of taking a video.
ya i didn't bother taking it off LMAO. it looks like a nightmare. I just lift it , put a magnet on my screw driver and then take off the screw that way, cause there were some leverage on that part without breaking it. So I did it that way and did it up side down, it took longer but it works fine

 03-01-2023, 04:47 PM