When you click on links to various merchants on this site and make a purchase, this can result in this site earning a commission. Affiliate programs and affiliations include, but are not limited to, the eBay Partner Network.
This thread serves as a guide for any 60mm spring swap on the GT4. The rear is a bit tricky since the strut shaft doesn't quite clear the strut hat (without dropping the strut carrier). Other than that, it's a fairly simple procedure.
As with any DIY project, unfamiliarity with the tools and process can be dangerous. This post should be considered reference material only for those unfamiliar with suspension work. Perform at your own risk.
This is my new hardware setup:
F: Swift Z60-152-070 392#/in main, Swift 60mm spring coupler, OEM rear helper, thrust sheets
R: Swift Z60-178-100 560#/in main, OEM spring coupler, Swift H60-60-015 84#/in helper, thrust sheets
PREPARATION
Skip ahead if you want to wing it. This section was performed for my verification of the factory ride height settings and to minimize disruption to alignment while driving the "settle" period of the new springs. It also helped me dial in the factory ride heights on the second try.
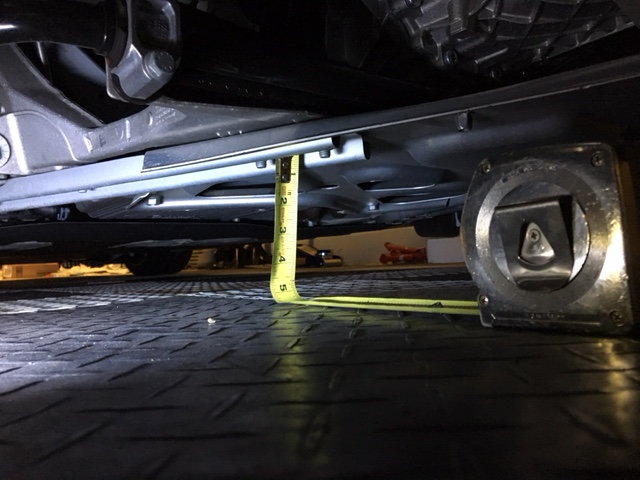
1. Mask around tire contact patch for consistent ride height measurements.
2. Measure ride height at factory recommended points.
3. Measure ride height at fenders.
4. Use fine tip Sharpie to mark/outline strut hat nuts.
INSTALLATION
1. Line up your tools for the job.
21mm box wrench (ratcheting is a plus)
16mm box wrench (ratcheting is a plus)
10mm box wrench (ratcheting is a plus)
9mm box wrench
7mm Allen socket
T30 Torx Socket
13mm socket
19mm socket and extension for wheel lugs
1/2" drive torque wrench that can hit 118ft-lb
3/8" ratchet and extension
*Optional* Metal pry bar for rear strut shaft compression
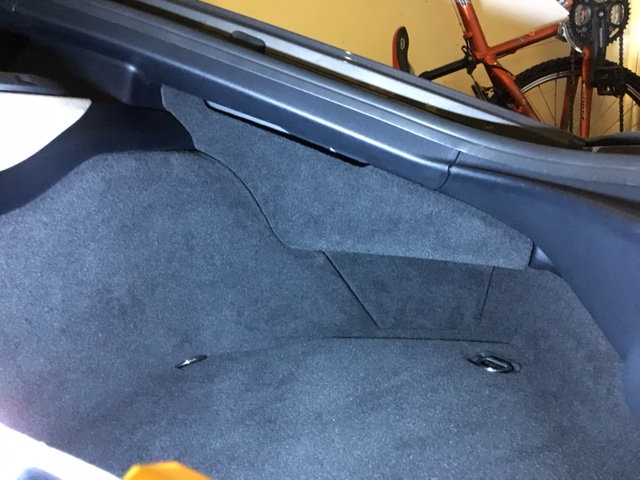
2. Remove the rear trim panels within the hatch area to access strut hats. There are 2x panels per side and the center aluminum hot dog that need to come out. Note the plastic guide pin caps and especially the metal pressure clips. Replace them onto the loose trim pieces before snapping the assemblies back in place.
Note the slot along the top of trim panel #1. Reach in there with your fingers and pop the fasteners by pulling the panel toward the center of the trunk.
Work trim panel #2 from the rear section by pulling toward the center of the car.
Here's a shot of panel #2 popped from its fasteners to get an idea of what you're working with.
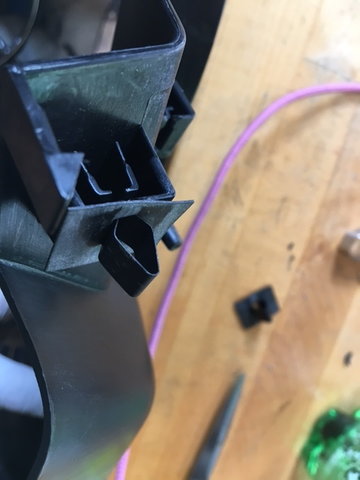
Use needle nose pliers to pull any stuck metal clips that detached from the trim piece and replace. These little buggers will make an annoying noise if not inserted correctly.
This is what you want:
Here's the loose metal clip:
Here's the slot in the trim piece you need to set the metal clip into:
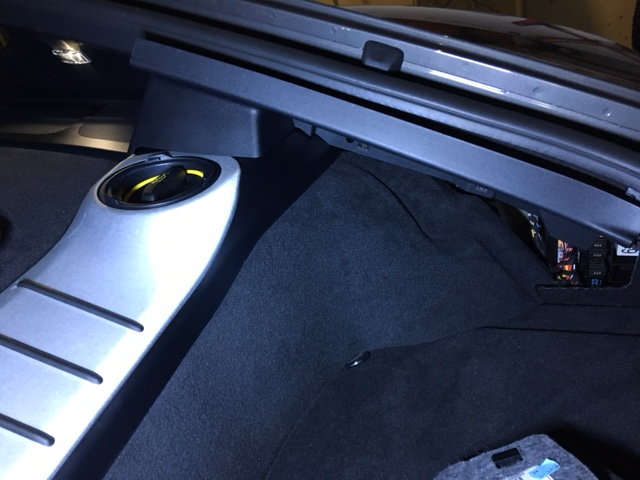
Remove the aluminum hot dog piece by pulling upward and slide it forward or place out of the way.
3. Raise rear end, support, and remove wheels.
4. Release parking brake.
5. Detach endlinks at the ARB adjustment ends using the 16mm box wrench and T30 torx socket. This is a good time to set to full stiff if you haven't already.
6. Use the 21mm box wrench and 7mm Allen socket to remove the strut nuts.
7. Lower the strut rod out of the strut hat and set the tip just outside of the hat. Here's where things get interesting. There's not enough clearance at full droop to clear. I didn't want to unbolt the strut carrier or lower arms because I didn't know the torque spec on these fasteners. I installed 2 lug bolts in the hub for a step and used my body weight to clear the strut hat. I used a metal prybar to guide the strut back in place when buttoning up the new springs. Feel free to share your approach here.
8. Loosen the 13mm nuts at the top of the strut hat within the hatch area. The hats will likely be stuck on the dome mount. Set the 2 inboard 13mm nuts flush with the strut hat bolts. Place a 13mm socket and extension over the nuts and tap downward with your palm or rubber mallet until the hat becomes free. Remove the strut hat and reposition the rubber O-ring if it moves out of place.
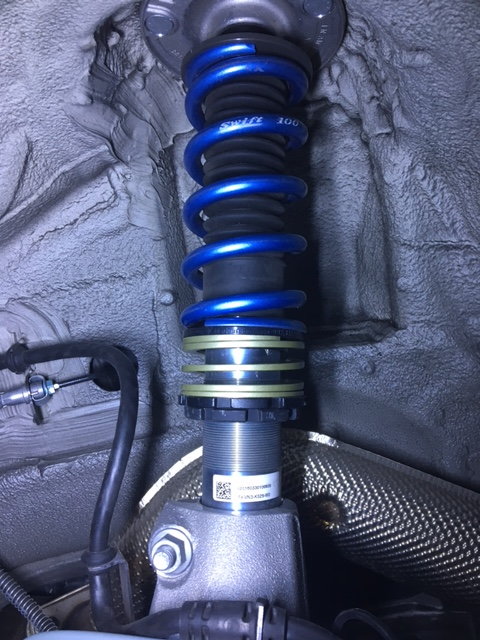
9. Feed the spring hat, main spring, coupler, and helper spring out from the access hole where strut hat mounts.
10. Place the new 60mm springs on the strut in the same orientation as the factory configuration.
11. Install the strut hat and snug the 13mm nuts.
12. Slide the strut rod into the strut hat and install the 21mm strut nut.
13. Connect the endlinks (blue Loctite), torque to 37ft-lb, and install the wheels.
14. Set parking brake and lower car back down.
15. Torque the 13mm nuts to 24ft-lb and 21mm nut to 59ft-lb.
16. Replace all the trim pieces opposite of removal. The worst part is behind you.
17. Break the front wheel lugs.
18. Raise the front end, support, and remove wheels.
19. If not done already, remove plastic access panel in the frunk by popping up at the two finger recess spots. If you did the sharpie outline prep, you're a step ahead
20. Disconnect the levelers at both sides using a 9mm box wrench and 10mm box wrench.
21. Remove the endlinks at the ARB adjustment ends using the 16mm socket and T30 Torx socket.
22. Remove the 21mm strut nut and lower the strut rod out of the hat.
23. Loosen the 13mm nuts and remove the strut hat.
24. Feed the spring hat, main spring, coupler, and helper spring out from the access hole where strut hat mounts.
25. Install the new 60mm springs in the same orientation as the factory configuration.
26. Fasten everything up at the front end in the reverse order as removal. Torque specs are similar to the rear.
27. Perform trial and error ride height process. The spring seat heights will vary depending on spring rates, lengths, and personal preference. I added 1/8" to factory spec ride height all around to account for springs settling and to maximize ground clearance.
28. Torque all wheel lugs to 118ft-lb and go for a test drive.
Very smart sneaking the springs off without having to remove the struts,I'm impressed.
Ive done many spring swaps over the years. I always took the strut out, takes a lot longer not counting the time for an occasional trip to the ER.. thanks carl
Very smart sneaking the springs off without having to remove the struts,I'm impressed.
Ive done many spring swaps over the years. I always took the strut out, takes a lot longer not counting the time for an occasional trip to the ER.. thanks carl
Funny l just remembered trying to set the ride height on a 94 F355 I had. Had it in the air with the wheel off and a spanner on the spring perch . Couldn't get it to break louse so I was leaning on it with all my weight and the wrench slipped off the spring perch . when it did my face slammed into the brake disk. Spent the next few hours in the Er getting 28 stitches in my chin. An inch heigher and it would have broken my teeth off. Lesson learned, be careful when working on suspension. Carl
What made you go with the 392# front spring vs. the 448# that Tarett uses in their parts kit?
All the feedback I've read told me the Tarret rates completely cured the outer shoulder tire wear issue. Every mod is a compromise of sorts so I decided to scale back the front rate in order to battle the natural understeer felt from this platform and retain some ride comfort. The combo I settled on is closer to the front/rear spring rate ratio from the factory. Surprisingly, this mod isn't as harsh as OEM springs in the SPASM setting. I don't mind swapping to the front 448#/in springs if I notice a problem at the track. It's a very simple swap.
I also wanted to have more usable stroke up front.
Looking back after the install, the 7" length 392#/in main and no helper up front will also work. This nets 4.3mm more compressed spring length when compared to my 6" 392#/in main with helper and coupler. Usable stroke is the driving force and my considered 392#/in lengths show:
Usable stroke spec - (free length - compressed length) = GT4 usable stroke from static
3.5" - (6" - 4.2") = 1.7"
3.8" - (7" - 5.2") = 2"
5" 448#/in:
2.8" - (5" - 3.44") = 1.24"
Originally Posted by 4carl
...my face slammed into the brake disk. Spent the next few hours in the Er getting 28 stitches in my chin.
Thanks for your humility in sharing your story. This definitely drives home the message of "at your own risk". I'm glad you've recovered from the incident and are still going strong in the sport!
Last edited by MVEED3; 02-01-2017 at 04:03 PM.
Reason: Added detail
In theory, with his install method and if you can get the ride height and front strut bolts in the same spot, you should be able to retain your alignment settings. Love it.
In theory, with his install method and if you can get the ride height and front strut bolts in the same spot, you should be able to retain your alignment settings. Love it.
That's one of the perks! I appreciate the appreciation.
Great install guide! Just completed this myself. A few comments:
1) In the rear, I needed to disconnect the sway bar mount as well as the brake line attachments near the upright to give the suspension enough freedom to move. With that, I didn't need too much force to be able to pop the strut out of the top bearing and it was easy to maneuver.
2) In the front, I didn't need to disconnect the levelers. They had plenty of movement range.
While I was installing the Porsche Motorsport strut tower support plates today, I dropped one of the front struts, took the spring off, and measured the free stroke of the front damper before it hit the internal bump stop. The measured travel was ~75mm. This means there is only 75mm of total travel available, 35-40mm of which is taken up by static weight of the car as it is lowered to the ground.
Knowing that there is only 35-40mm of actual strut travel left to absorb bumps, combined with the relatively low stock front spring rate, helps explain why we have seen the strut tower issues on the GT4 that have not been as common on 991 GT3s which have the strut tower housing and camber plate part numbers. Going with 400 - 450 lbs/in springs in the front will not only improve handling but will also add safety factor for the strut towers.
Last edited by FLACHT6_pilot; 05-16-2018 at 01:21 AM.
I installed the Tarett springs on the car today using MVEED3's great instructions.
Like he said, getting the rear struts in and out of the top mount was a little tricky!
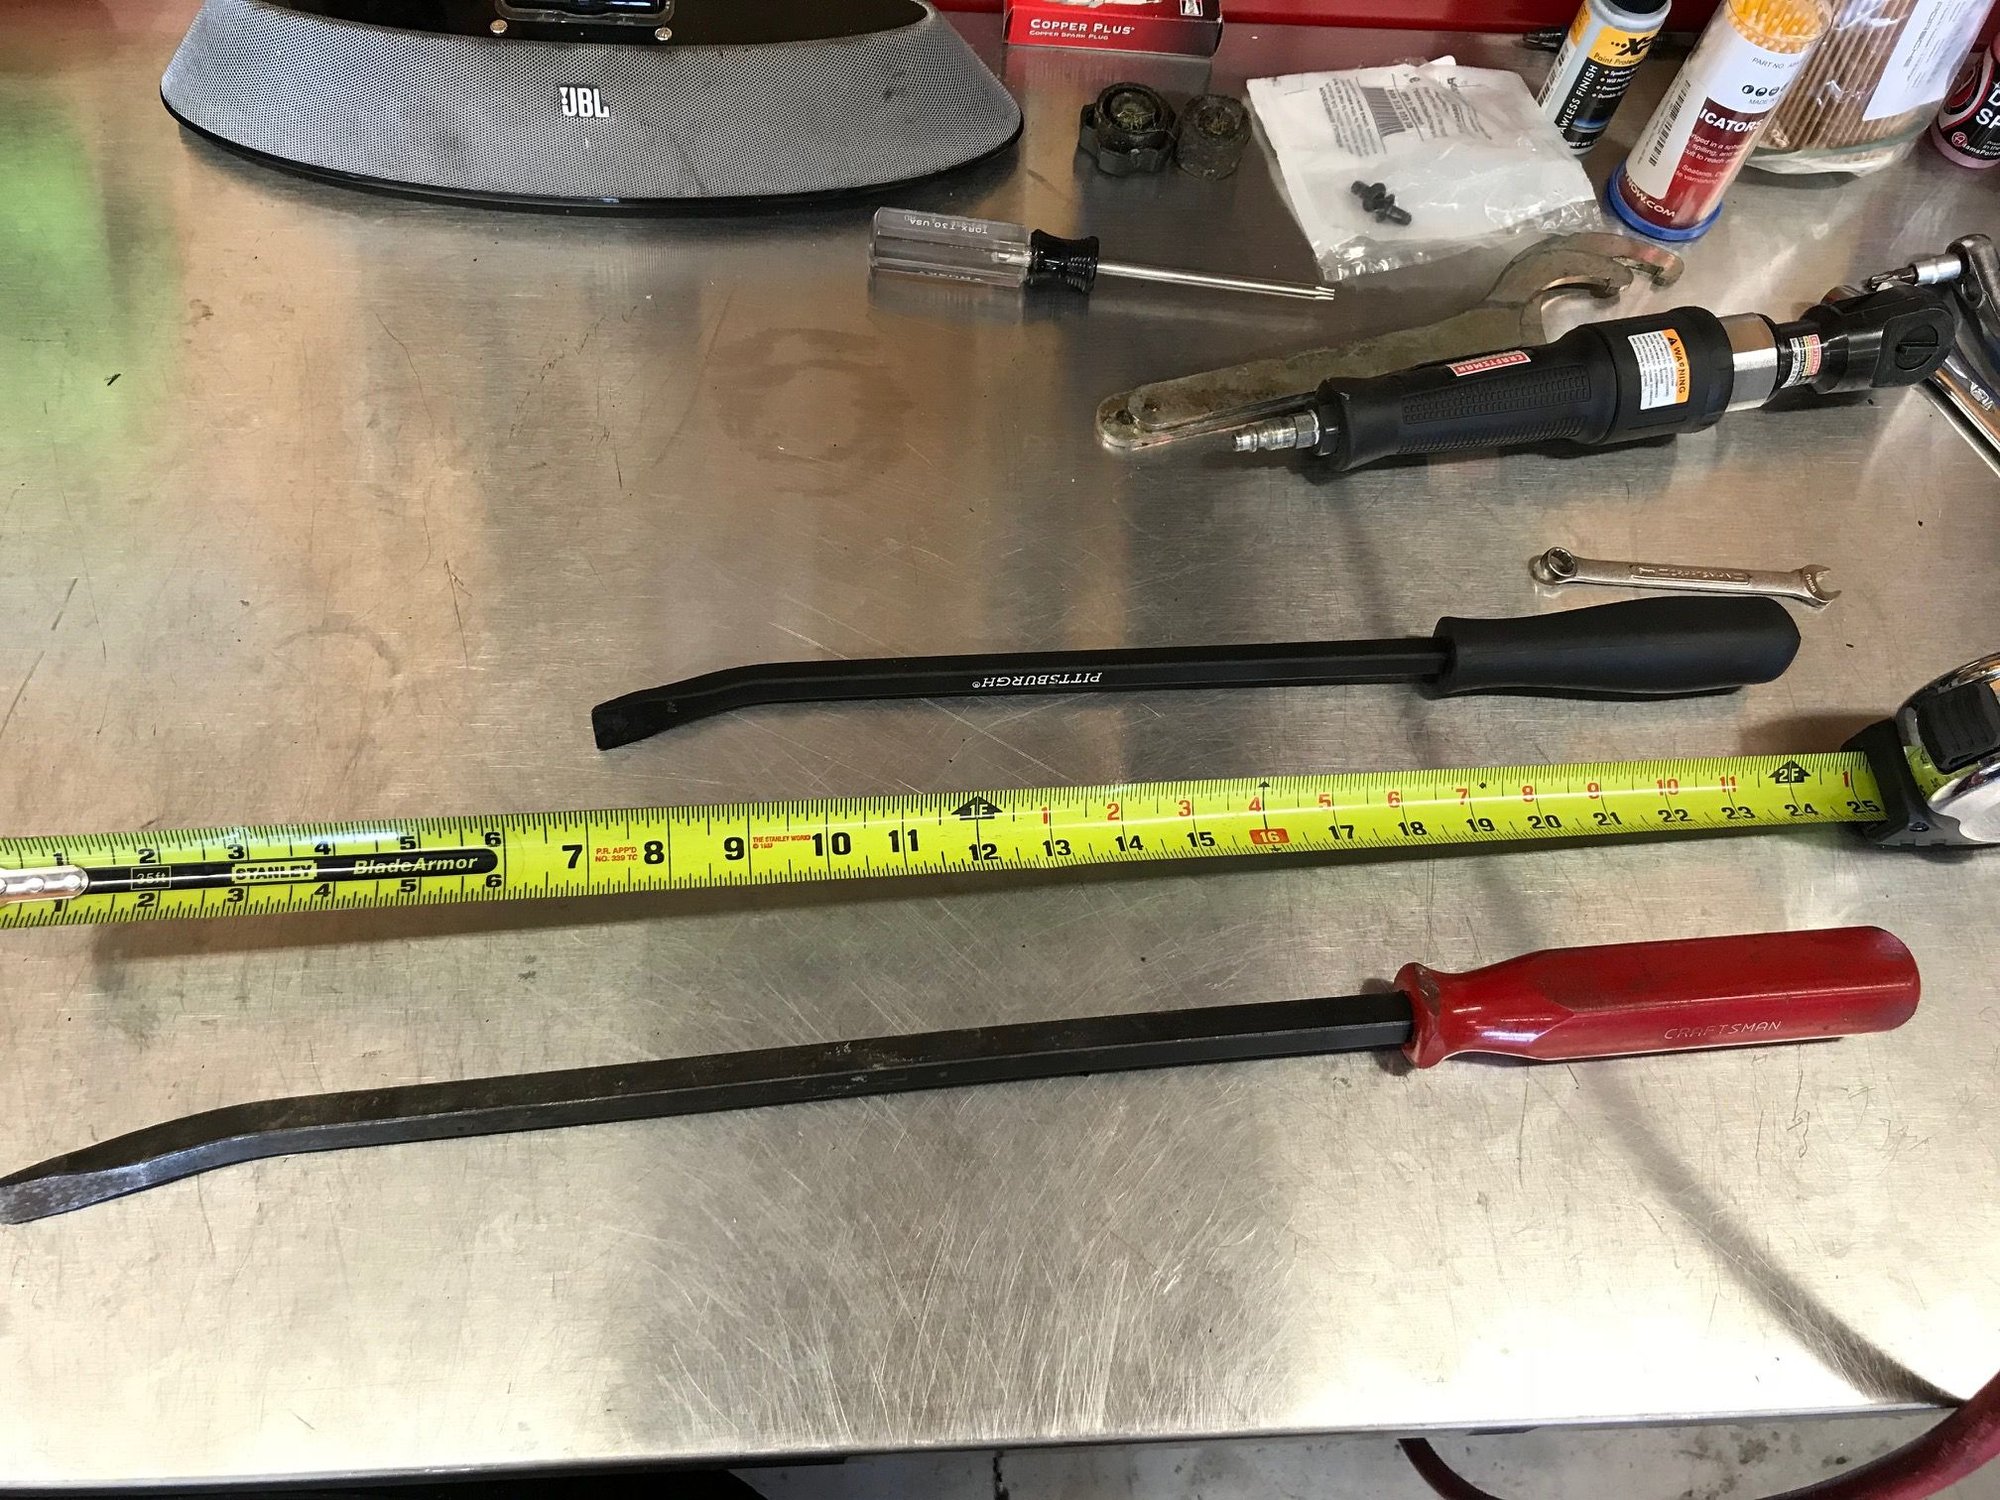
For me it was all about having the right size prybar for the two different situations. To get the strut out of the top plate I used a 2 ft prybar and pushed down on a block of wood on top of the rotor. Pushing down with my full body weight the strut came out of the mount fairly easily. I'm a fairly big guy and for once the extra lbs came in handy.
To get the strut back into the top mount I used a smaller prybar that I could get fully inside the wheel well. It took a little maneuvering but finally went in.
Large prybar and a piece of wood - strut comes out easily
Ride height with the Tarett springs was very similar to the stock springs. There rear was virtually identical, the front was sitting about 5mm lower with the Taretts. A couple of turns up on the front adjusters and it was good to go...
I installed the Tarett springs on the car today using MVEED3's great instructions.
Like he said, getting the rear struts in and out of the top mount was a little tricky!
For me it was all about having the right size prybar for the two different situations. To get the strut out of the top plate I used a 2 ft prybar and pushed down on a block of wood on top of the rotor. Pushing down with my full body weight the strut came out of the mount fairly easily. I'm a fairly big guy and for once the extra lbs came in handy.
To get the strut back into the top mount I used a smaller prybar that I could get fully inside the wheel well. It took a little maneuvering but finally went in.
Large prybar and a piece of wood - strut comes out easily
large and medium prybars
You won't need a pry bar if you simply disconnect the rear sway bar from the subframe. The rear toe links hit against the sway bar, which is what is blocking it from dropping down. I know because I *JUST* took my GT4 back to stock and removed this Swift spring setup from my GT4 yesterday in prep for sale.
On that note, if anyone is looking for an optimized set of Swift springs that have even more front bump travel than the Tarret set (which is what I was optimizing for), drop me a note! I'll eventually list them for sale.

 11-04-2016, 07:15 PM