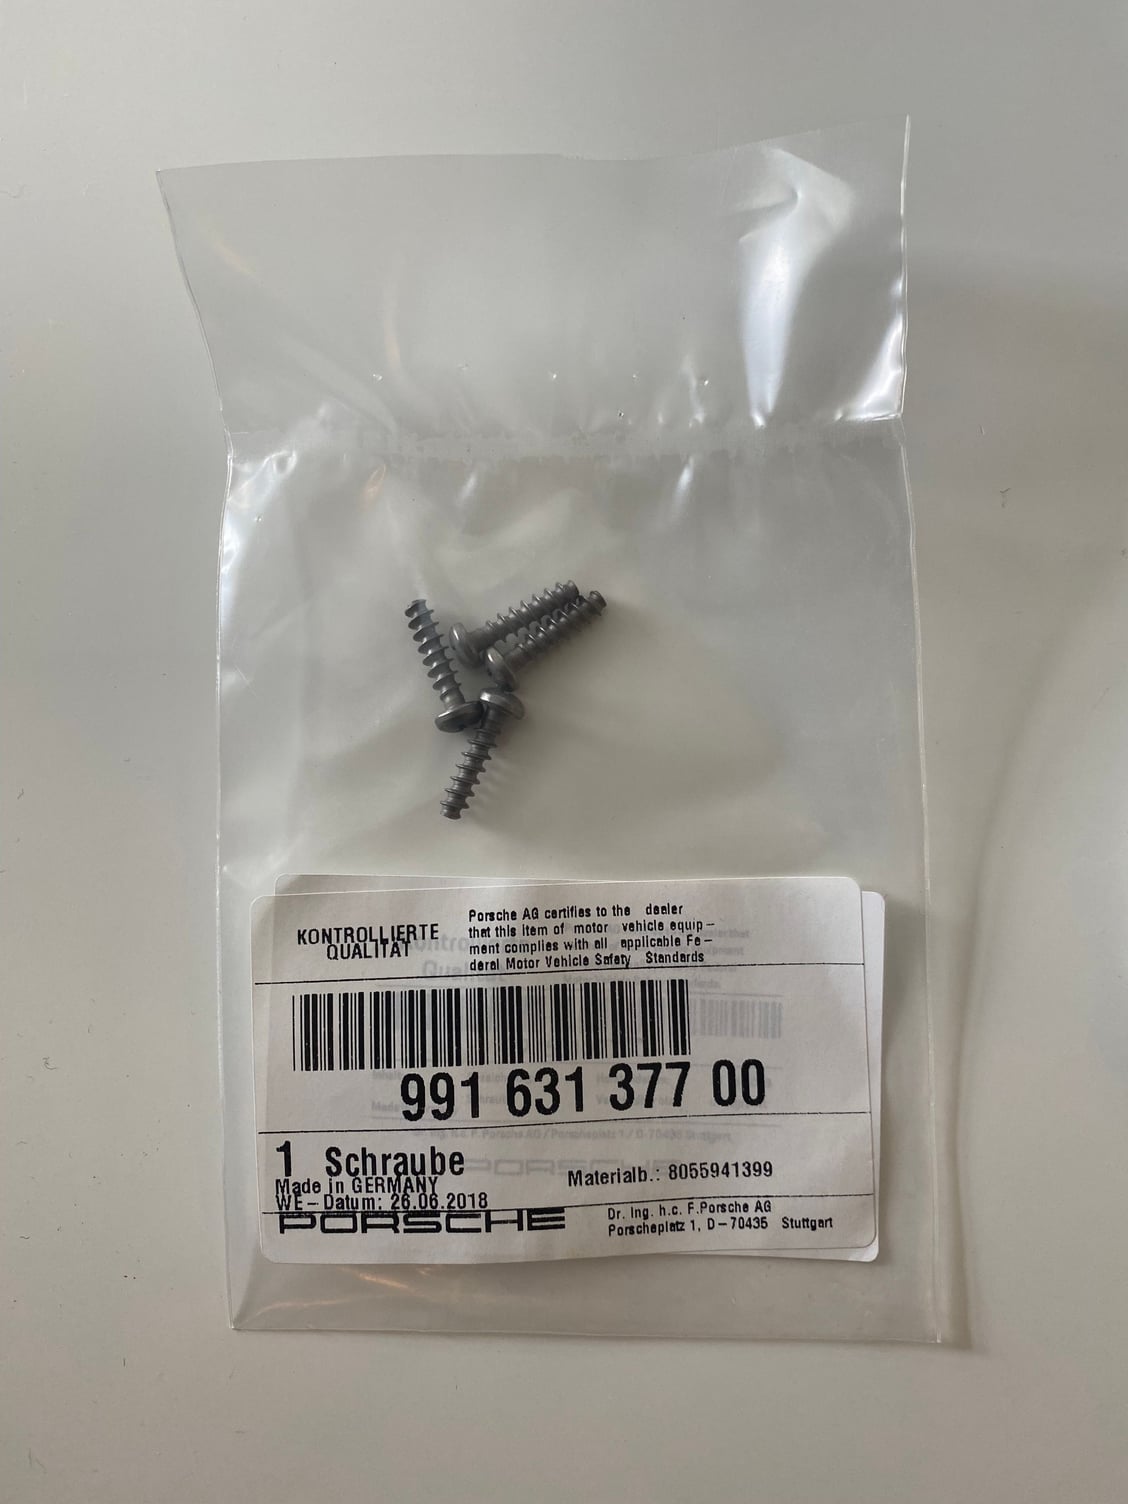
Free: Headlight Access Panel Screw Sets
#1
Rennlist Member
Thread Starter

The short: I ordered replacement screws for the low-beam access panel on the headlights (part no. 991-631-377-00). There's 4 screws on each headlight, so I ordered 8 screws. Little did I know, part no. 991-631-377-00 is actually a set of 4 screws, so I ordered 8 sets of 4, not 8 total. I only need 2 sets, so now I've got 6 extra sets just…sitting here.
The longer: I replaced the stock 25W low-beams with 35W OSRAM Xenarc Night Breakers + upgraded ballasts. Inexplicably, the screws for the low-beam access panel were one-way security screws that were an absolute pain to remove. I’ve watched several videos on 981/991 headlight removal and I’ve never seen anything other than Phillips head screws, so it was a surprise, to say the least.
I ordered the stock part, but—as explained in the “short” bit above—didn’t realize they were in sets, so now I’ve got a load of extras. I figure if my headlights came with security screws, there might be others out there with the same issue; I've got enough for 6 headlights, i.e. 3 cars. Offering my extras here for free, I just ask for a couple bucks to cover shipping.
#2
Addict
Rennlist Member
Rennlist Member
Hi burnergt4 - This is really nice of you. Seeing as I can't afford your GT3 muffler setup, I'll have to settle for taking a set of your screws! I'd like to try the bulb upgrade (and thanks for doing the write-up!). I'm assuming you haven't had any negative consequences from the upgrade (smoking, excessive current draw), is that correct? I'll PM you for contact info exchange. Thanks!
#3
Rennlist Member
Thread Starter
Hi burnergt4 - This is really nice of you. Seeing as I can't afford your GT3 muffler setup, I'll have to settle for taking a set of your screws! I'd like to try the bulb upgrade (and thanks for doing the write-up!). I'm assuming you haven't had any negative consequences from the upgrade (smoking, excessive current draw), is that correct? I'll PM you for contact info exchange. Thanks!
As for the bulb swap, nothing has gone wrong since they went in (knock on wood). There was initially a "Check left dipped headlight" warning on the dash after the install, but it quickly went away and hasn't reappeared; I went back in and snugged things up just to be sure. From what I understand the system is really sensitive to changes in voltage, so if there was anything wrong I'm sure it'd be throwing errors to let me know.
So in all they've been working great, and as far as I can tell the focal point on the 35W bulbs is identical to the stock ones, so no need to re-aim anything. I went for a drive last night on the Palisades Parkway (lots of deer out there right now, so visibility at night is a must) and they're not a massive improvement per se, but they're definitely a step up from the stock bulbs (which are really the equivalent of taping a couple flashlights to the wings, if we're being honest).
And I'm sure you saw it in another post I'd made (edit: here's a link), but the only sticking point (other than the security screws) is that you've got to bend a tab on the bulb housing in order for the D3S bulb to fully install. I didn't take photos, but see here for a really good explanation (the whole thread is worth a quick skim for this project).
Last edited by burnergt4; 07-08-2021 at 04:30 PM.
#4
Addict
Rennlist Member
Rennlist Member
^^^^ That's absolutely terrific, thanks! Re your comment about flashlights taped to the wings, I can't believe we used to drive around at night with those old sealed beam headlight units...remember those? Talk about no visibility!
The following users liked this post:
kwikit356 (09-09-2023)
#7
Rennlist Member
Thread Starter
You want to remove the larger piece on the end (which is used to grab onto stripped screw heads) and just use the forked bit. You need to apply a good amount of even, direct force onto the screw while removing it, and go slow, otherwise you risk stripping material off the screw head. Each screw probably takes about 3-4 minutes to remove, but once they’re off you can replace them with the Phillips head screws I have listed above. I actually still have 2 extra sets if you’re in need of any.
Trending Topics
#8
If you get a one-way screw remover / installer bit, you can back them out. I got this one in a pinch from my local hardware store, but it worked perfectly: https://amzn.to/3phtR8M
You want to remove the larger piece on the end (which is used to grab onto stripped screw heads) and just use the forked bit. You need to apply a good amount of even, direct force onto the screw while removing it, and go slow, otherwise you risk stripping material off the screw head. Each screw probably takes about 3-4 minutes to remove, but once they’re off you can replace them with the Phillips head screws I have listed above. I actually still have 2 extra sets if you’re in need of any.
You want to remove the larger piece on the end (which is used to grab onto stripped screw heads) and just use the forked bit. You need to apply a good amount of even, direct force onto the screw while removing it, and go slow, otherwise you risk stripping material off the screw head. Each screw probably takes about 3-4 minutes to remove, but once they’re off you can replace them with the Phillips head screws I have listed above. I actually still have 2 extra sets if you’re in need of any.

Just ordered the parts listed

