

Mark this thread as Unsold
For Sale: Aluminum Jack Pads (Set of 4) 964 993 996 997 944 911 Cayman Boxster
 10-23-2013 | 01:25 AM
#1

Thread Starter
Drifting
Joined: Nov 2010
Posts: 2,026
Likes: 2
From: Grand Rapids, Michigan
SOLD
I happened across these in my toolbox tonight and no longer have my 993.
I've used these numerous times and they still look new. They fit in the underside frame slots. Simply insert and a quarter to half turn is all that is required. There is no better feeling than knowing you aren't going to damage the underside of your car when using these.
$55 Shipped USPS Priority.
Last edited by C2Cab95; 10-23-2013 at 12:06 PM.
 10-23-2013 | 01:06 PM
#6
Thread Starter
Drifting
Joined: Nov 2010
Posts: 2,026
Likes: 2
From: Grand Rapids, Michigan
Ebay. There are several Porsche parts suppliers, like Automotion, Maxspeed, should you prefer them over Ebay. Shop around though... Some are going for $25+ per pad.
I see they now offer polyeurethane jack pads now. I'd imagine they could be pretty durable, and an option for those **** about marring the underside of their car with the aluminum pads.
I see they now offer polyeurethane jack pads now. I'd imagine they could be pretty durable, and an option for those **** about marring the underside of their car with the aluminum pads.
10-23-2013 | 04:35 PM
#7
Drifting
Joined: Dec 2012
Posts: 3,195
Likes: 2
From: PNW
Trending Topics
10-24-2013 | 10:49 AM
#11
Rennlist Member
Joined: Jan 2013
Posts: 177
Likes: 8
From: Chicagoland
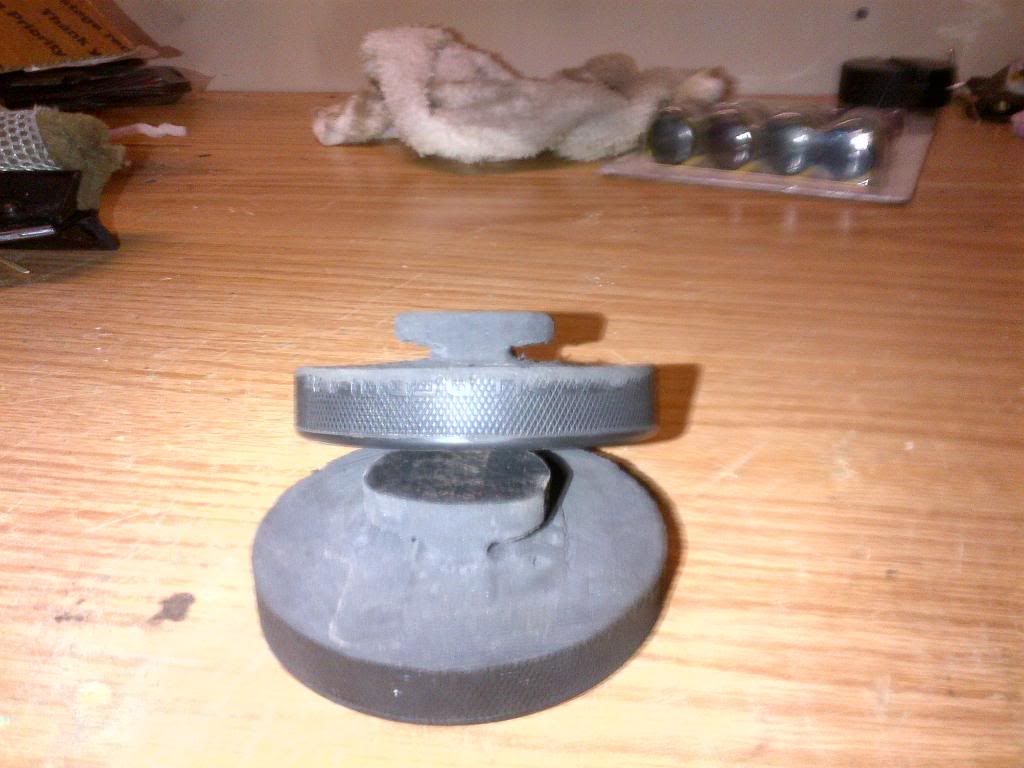
A quick walk thru of my process�
1. I placed the puck (without modifications) under the frame where the hole is and then jacked up the car with the puck between the jack and the frame. The hole in the frame left an impression on the puck. No need for measuring. Tape can hold the puck centered while you mess with the jack.
2. I have a drill press, so this is easier. I drilled small holes (~1/8� bit) around the outline of the hole about half way thru the puck. Smaller bits will mean less smoothing later, but more drilling. Your call.
3. I used a coping saw to cut in from the side of the puck to the ring of holes. I was able to remove the top half of the puck, while leaving the �center post�
4. I used my bench-top belt sander to smooth out the center post and ensure it fit into the frame.
5. I was bored and I am bit peculiar with stuff, so I used the sander to smooth the new face around the center post. This is totally optional.
6. I used the coping saw to undercut the center post to create the lip for the post the stay in the frame after the 1/4 turn.
7. Test fit and done.
Note for step 3�My prototype was made by drilling a multitude of holes around the center post (ie. Swiss cheese) and cut the material away with a utility knife. This was NOT safe so I went to the coping saw. If you don�t have a coping saw, this is an option but a dangerous one. In both photos, you can see the very bottom of the �shaping holes� next to the center post.
A bench vice is a necessity for holding puck during cutting.
(turn on laywer)..Some of the activities could lead to personal injury. Use all measures possible to ensure safety. If you are not comfortable with some of the steps, you cannot do them safely or you do not own the tools required, then don't do this. (laywer off)
I like the idea of the aluminium posts and almost bought them from eBay. But I like to tinker and figured I would try this. If they did not work, I was going to eBay and buying them. Just remember to remove them when done. The black puck is harder to see than bare aluminium. An orange puck would have been cool, but I had black ones in the garage.
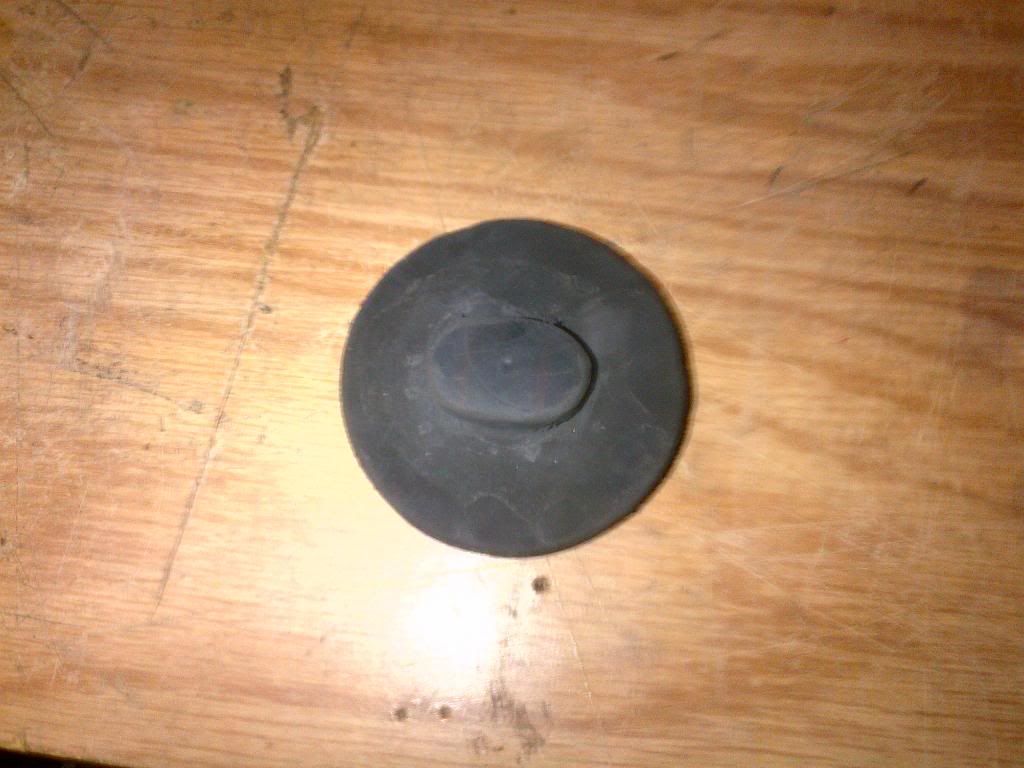
