When you click on links to various merchants on this site and make a purchase, this can result in this site earning a commission. Affiliate programs and affiliations include, but are not limited to, the eBay Partner Network.
So this past weekend was the second time I've started to scratch the diy surface on our Cayenne. I replaced the valve cover breather/diaphragm hoping the old one was the source of our vacuum leak (it wasn't of course) and while I was at it, decided to remove the belly pans and do an inspection of the bottom portion of the engine. I confirmed my Cayenne doesn't have the LN Engineering oil filter setup, which I will be ordering tomorrow, and noticed a heck of a power steering leak. I suspect the shaft seal to be at fault as it's only leaking from the front, which seems to be a fairly common issue. While making my junkyard run on Monday, I managed to procure a used power steering pump and planned on rebuilding it and then swapping it on in the next month or so. After a bit of goggle-ing and searching parts websites, I was disappointed to find that neither Porsche nor any aftermarket companies offer a seal kit for it. Having rebuilt a 944 power steering pump in the past, I figured I'd just go for it anyway and worse come worse have my hydraulic shop at work match me up some seals.
Between last night and tonight, I tore the pump down and realized it's a pretty simple KYB vane pump. I spent a little more time tonight doing some research and I found it. This same style pump is used on Mitsubishis, Subarus, Eagles, and probably quite a few more makes as well. No Porsche doesn't offer a seal kit, but there are seal kits available. Gates 348840 or Edelmann 8721 is the seal kit for it. They're available from Rock Auto for not quite $11 and technically you'll find them under a '92 Eagle Talon or a '96 3000GT. This link is a good write up of how to rebuild it although there are some differences and you'll likely have a couple o-rings leftover. I will try to post some pictures as I put it back together and give some Porsche specific tips as well.
Coming from the 944 side, I wasn't surprised to find an equally as knowledgeable and friendly group here on this side of Rennlist. Yall have been a huge help and hopefully this will help return the favor a bit. Thanks again.
pictures please. I tightened it up a bit and stopped the leak but I know I was only buying time.
It's be helpful to know which kit your bought, which seals needed and pictures. I probably will rebuild the one I have rather then purchase spare so planning it out would be very helpful.
Thanks for posting!
Sounds good, @reachme . I'll trade you trailer wiring info for power steering pump info, haha.
I ordered the seal kits yesterday and they'll be here next week. I ended up going with the Gates kit 348840 purely because Gates is a reputable brand and I hadn't heard of the other two brands they offered. The junkyard pump I got has some pitting on the shaft where the seal rides so I'm going to do my best to smooth it out, but I fear it may damage the seal as it spins. Anyone have some pump cores laying around I could purchase for cheap?
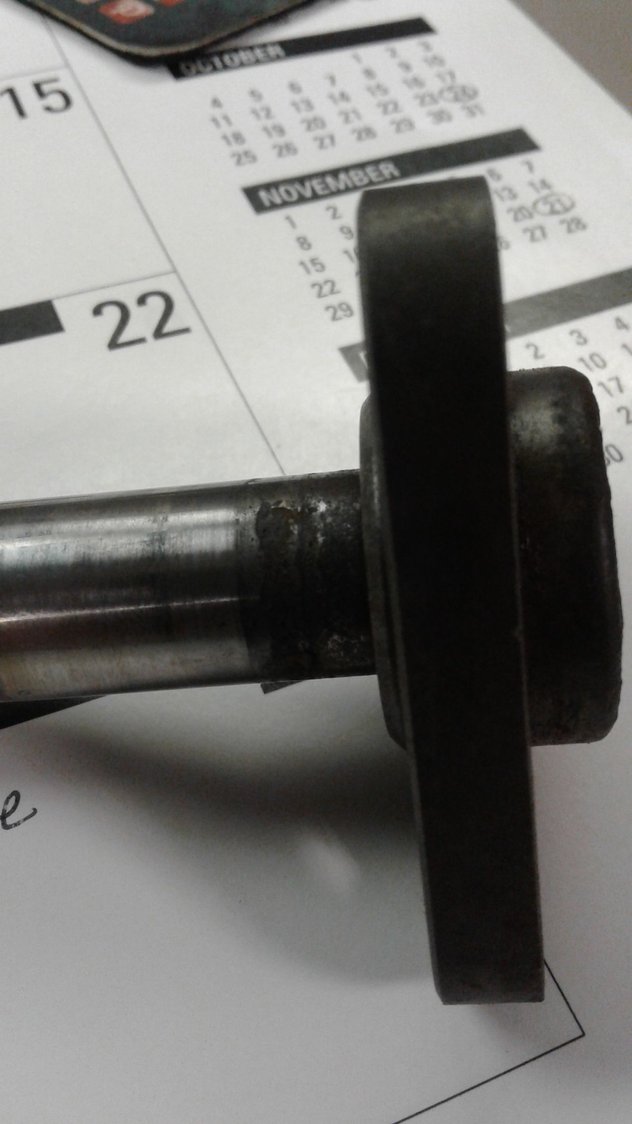
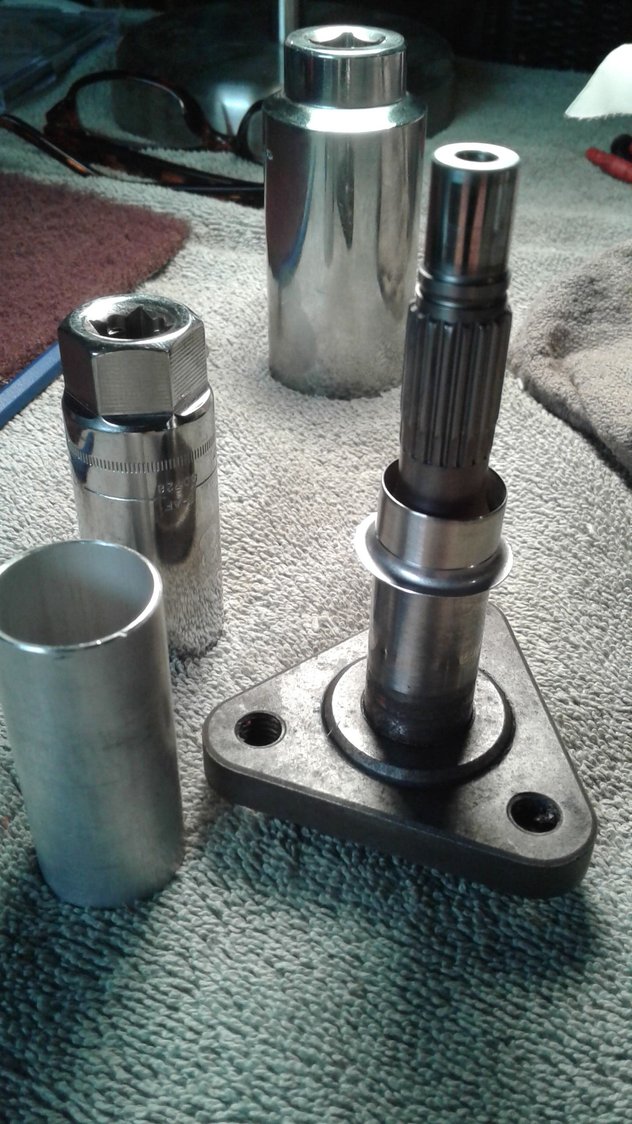
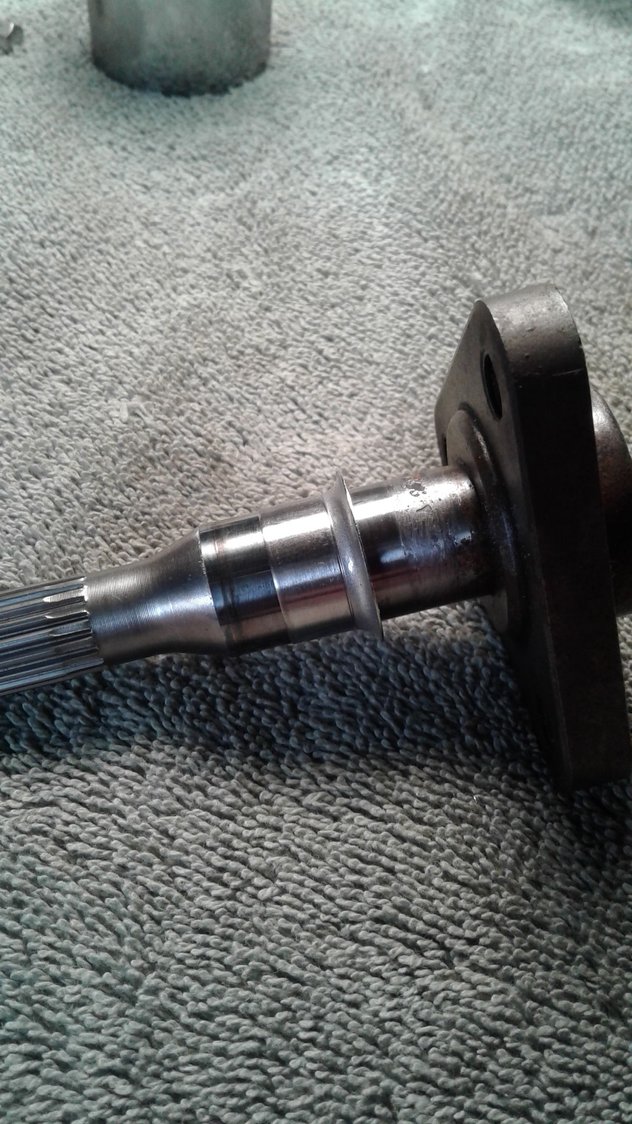
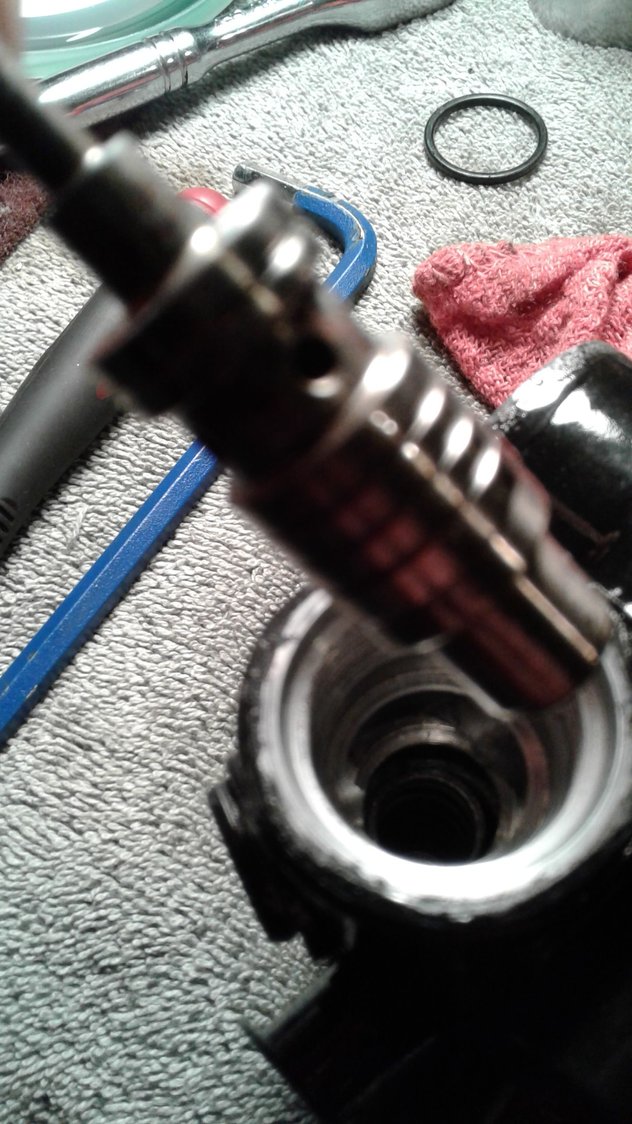
The seal kits came in yesterday and Gates 348840 is in fact the correct kit. Everything is identical, but it does have a couple extra seals like I thought. The pictures are a little dark, but as you can see, the shaft has significant pitting where the seal rides and I didn't want to put it back together like that. This pump appeared to be leaking around the shaft, which I think is what's wrong with my 955's current pump, so I didn't want to take any chances. We use speedi sleeves or wear sleeves here at work to repair crankshafts, pump shafts, etc. and I decided to go that route to make sure I wouldn't have any issues once I get it rebuilt and installed. The shaft measures .667" or 17mm (a shade under 17mm to be exact) and since CAT doesn't offer a speedi sleeve that small, I found SKF offers 99068. I just ordered some today through Advance Auto so between the seal kit and speedi sleeve I'm sitting at like $40. Once the repair sleeve comes in, I'll carefully drive it onto the shaft and begin the rebuild process. More details to follow.
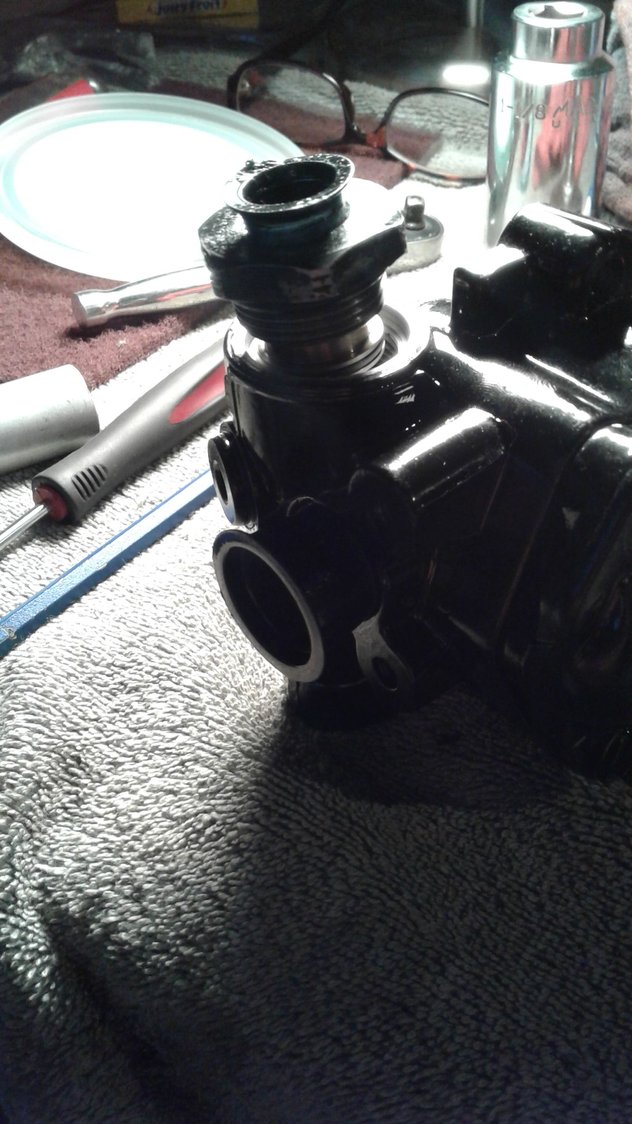
Alright, so I finally finished rebuilding the pump this past weekend. It's all pretty simple, but it did take me a little longer than I thought. I snapped a bunch of pictures while putting it back together that should help anyone attempting to do the same. One main tip for this job is to do your best to keep dust and lint out of the pump. The shop rags I used were linty as all get out so I had to go back and clean everything with a well washed towel that wasn't shedding cloth fibers. I, unfortunately, didn't document disassembling the pump because I didn’t know it would even be rebuildable until I got into it. I will provide all the necessary detailed steps for both disassembly and assembly though.
Tools Used:
- 1 1/8th socket
- 6mm allen wrench
- 12mm socket
- Torx T40 bit
- spark plug socket
- misc. seal picks
- misc. flat head screwdrivers
- hammer
- pliers
- large washer or hub nut
Parts Used:
348840 - Gates Seal Kit - Rock Auto
99068 - National Speedie Sleeve (.667") - Advance Auto Parts - only needed if shaft is damaged/worn where shaft seal rides
Pentosin CHF11S - Rock Auto
Disassembly:
Step 1 - Drain as much power steering fluid as possible.
Step 2 - If not already taken off, remove 3 pulley bolts with T40 torx bit and remove pulley.
Step 3 - Remove the four 12mm bolts on rear of pump, keep rear of pump vertical so the vanes don't slide out.
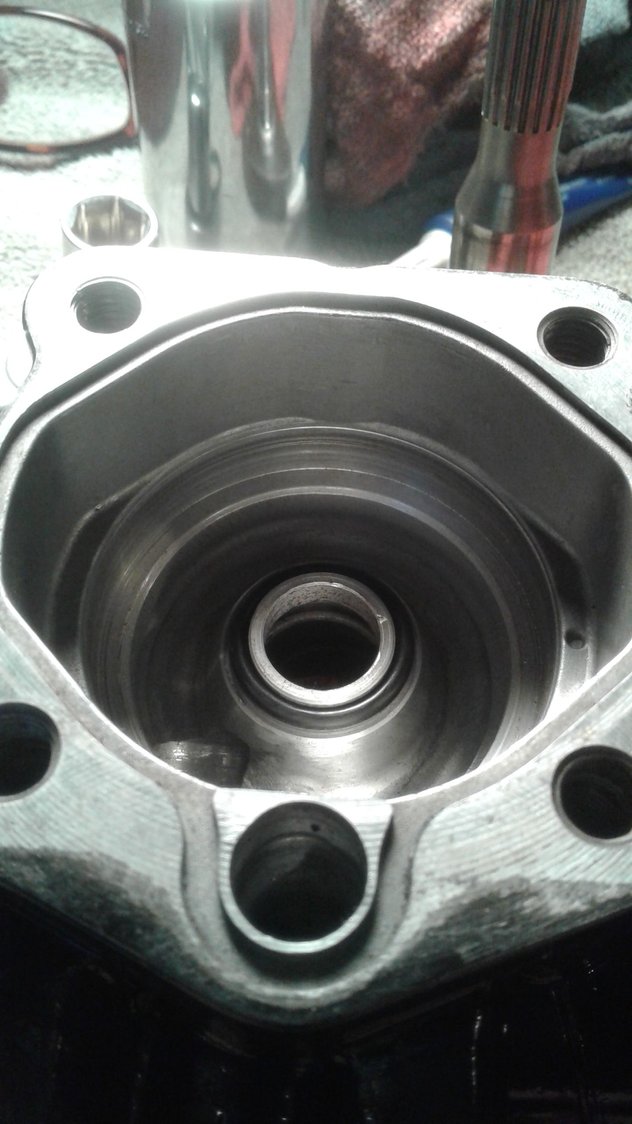
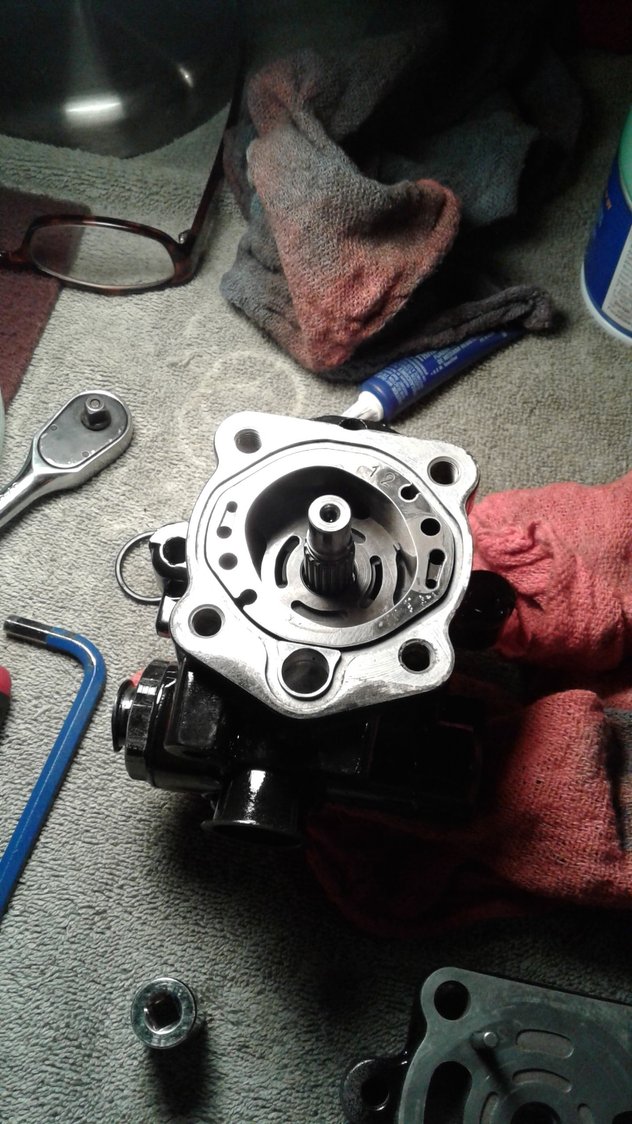
Step 4 - With rear of pump vertical, remove rear cover straight off, you may need to wiggle the cover back and forth a bit to get the dowels freed up. The vane ring will probably come out with the rear cover, that's ok, separate them later. Once the rear of the cover is off, this will expose the vanes and what I'm going to call the vane rotor. The vanes are prone to slide out, so do your best to make sure they stay in place and in their original position. Also, remove the rear cover o-ring if you haven't already.
Step 5 - Using a pick and a screwdriver, carefully pry the small retaining ring out of it's groove. It may be helpful to put the vane ring back in place to keep the vanes from sliding out of place.
Step 7 - Place a clean, large washer or a large nut (I had a VW Golf hub nut laying around I used) on top of the vane assembly and turn the pump over and pull the vane assembly out. The large washer or nut will give the vanes something to sit on and help keep the vanes from falling out. Once the assembly is out of the pump, set it washer/nut side down so the vanes will stay in place and you'll know which way to reinstall it.
Step 8 - Remove pump shaft, simply pull it out of the front of the pump.
Step 9 - Using a pick, pry around the shaft seal and remove it from the front of the pump.
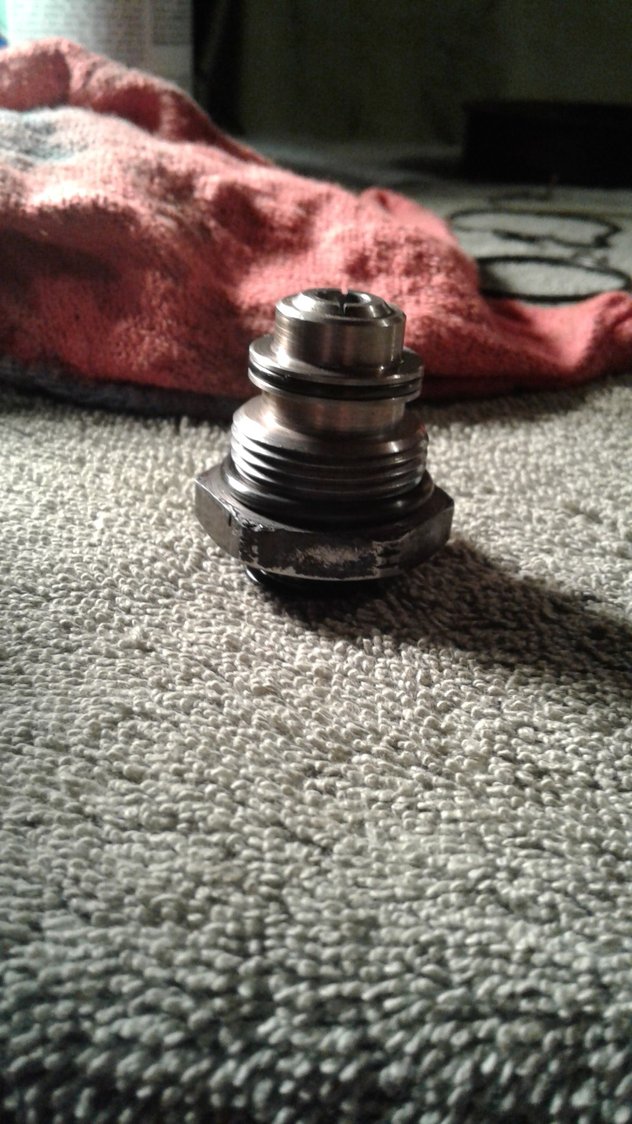
Step 10 - Using the 1 1/8th socket, remove the outlet/pressure side port/nut. I had to use an impact to get mine loose, but if I had a vise, to hold it, a breaker bar and a socket would have been sufficient. ***Remove o-rings off of the plug, but save the small o-ring as the seal kit doesn’t include the correct size. Mine was in good shape to reuse and I’ll figure out the correct size of o-ring when I rebuild the pump currently on my 955 and update this post.
Step 11 - Once the port is removed, pull out the shuttle valve down inside. Next, use a pick to pull out the spring below the shuttle valve.
Step 12 - Use the 6mm allen wrench to remove the plug next to the outlet port. This really could be done at any time and could be done earlier to help drain the pump.
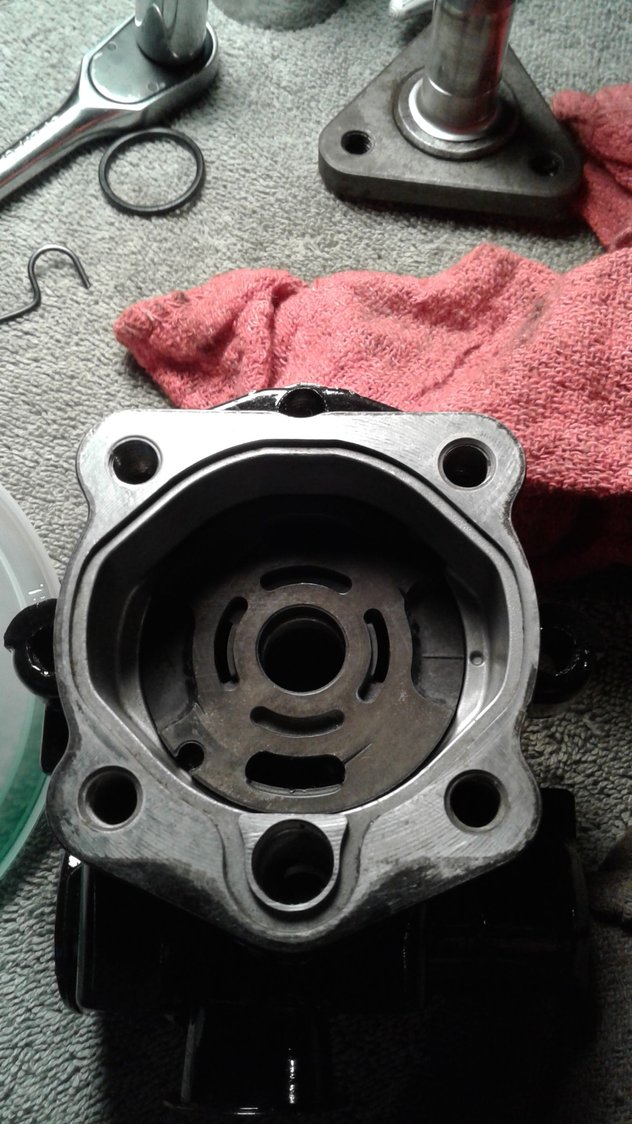
Step 13 - Turn the pump back over with the rear facing upwards. Using a flat head screwdriver, place the end of the screwdriver through the slot in the vane/pressure plate and twist to get the plate to loosen and turn. Once it frees up, twist again and pull upwards as you twist to remove the pressure plate. There is one o-ring on and one o-ring under the pressure plate, remove both.
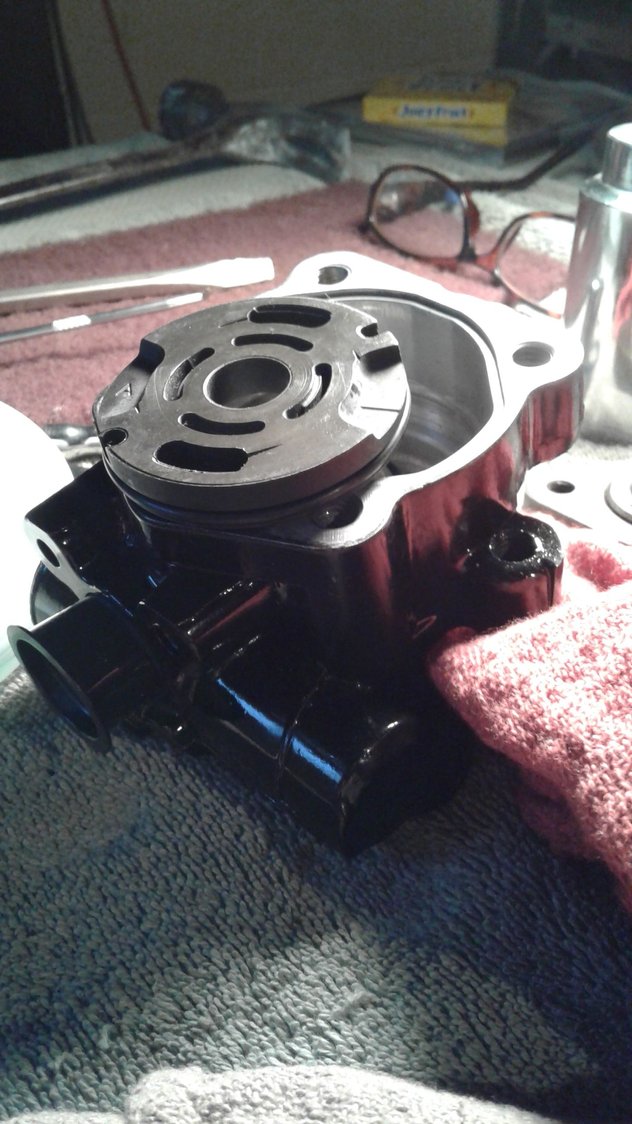
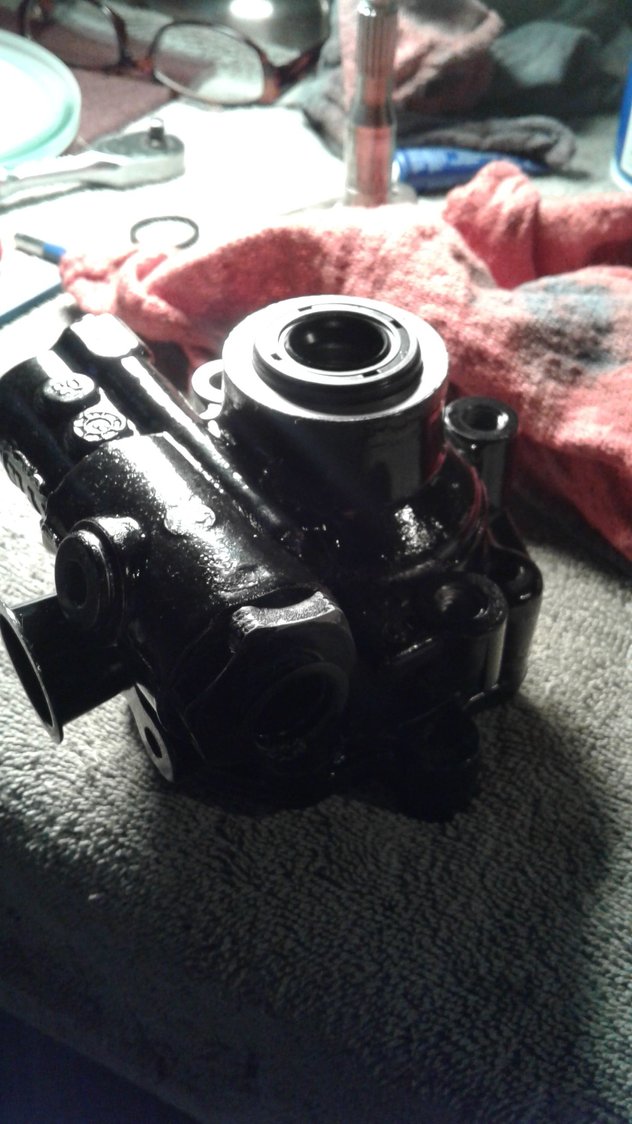
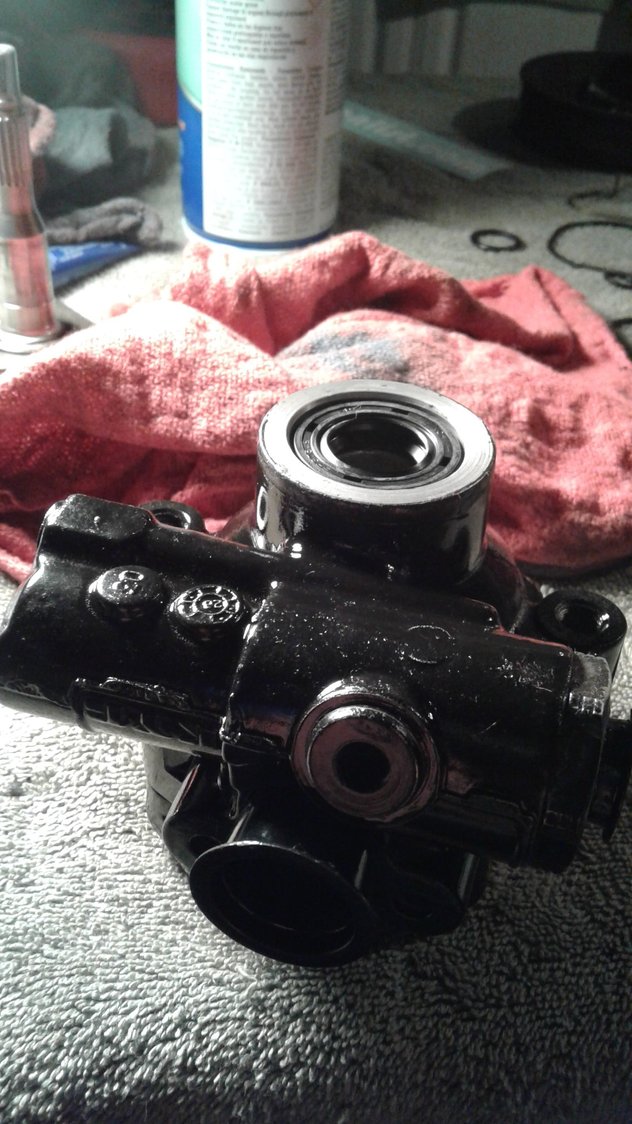
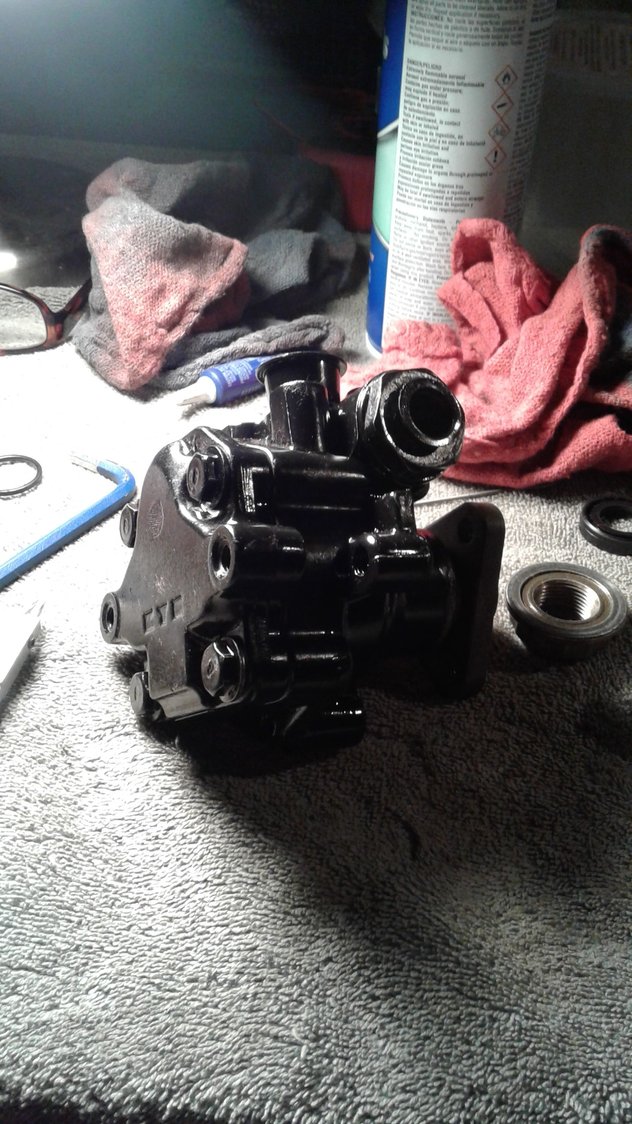
Step 14 - Now that the pump is fully disassembled, thoroughly clean all parts and prep for reassembly. I put a quick coat of paint on mine while it was apart, if you do so, of course, make sure to tape or plug all ports in the pump.
Assembly:
Step 1 - If your pump shaft is worn, use an abrasive pad/wheel to smooth down the pitting and imperfections. Don’t take off too much material, just enough to smooth it up a bit.
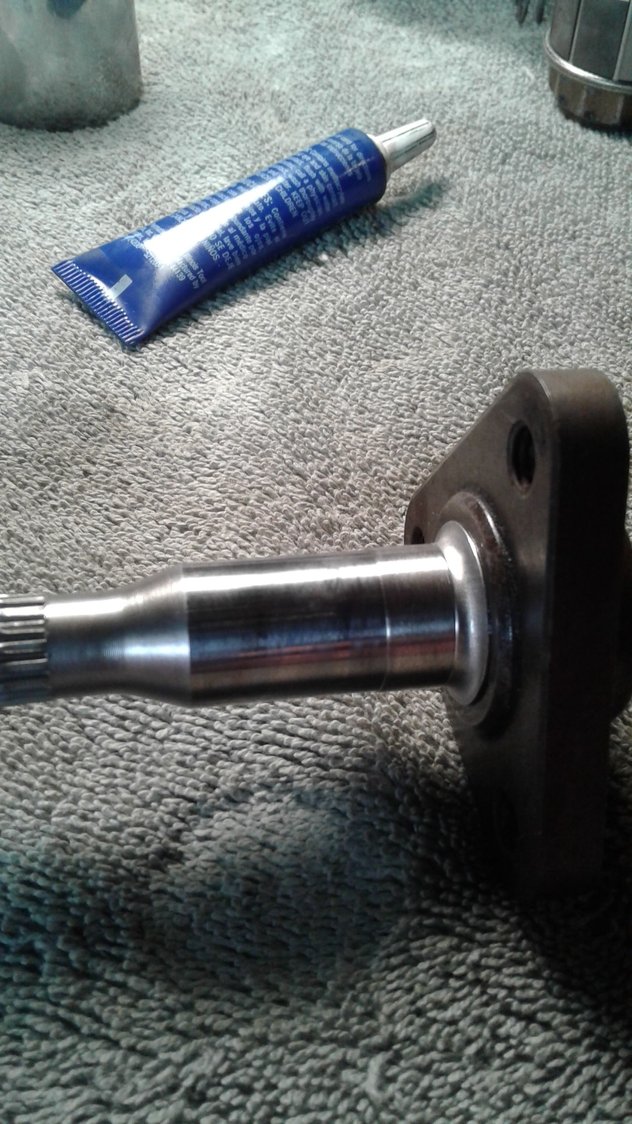
Step 2 - Slowly drive the speedi sleeve onto the shaft using the provided installation tool and the spark plug socket once the installation tool drives past the top of the shaft. Drive the repair sleeve all the way to the bottom of the shaft, until the flange meets the back of the pulley plate. The sleeve instructions call for some sealant to be put on the shaft where the sleeve and the shaft will mate.
Step 3 - Take some new Pentosin and oil the inside of the pump where the shaft seal will seat to aid in installation. Press new shaft seal in with your fingers and/or with the spark plug socket if necessary.
Step 4 - Turn the pump over and put the new o-ring on the inside of the pump and put the new o-ring on the pressure plate as well. Again, put a little Pentosin on the outside of the pressure plate o-ring to aid reassembly.
Step 5 - Press the pressure plate into place with your fingers, making sure the line on the pressure plate lines up with the dot on the inside of the pump. If it shifts a little while reinstalling it and doesn’t line up, put a screwdriver into the slot and twist until it does line up.
Step 6 - Install new seal and old thin seal back onto outlet port. Carefully roll the o-ring over the threads of the plugs till it seats up against the nut portion of the plug. Slide spring into the bore first, then the shuttle valve, and finally thread the plug back into place and tighten it. The pin end of the shuttle valve should stick through the bottom of the plug.
Step 7 - Replace o-ring on plug and reinstall the plug.
Step 8 - Install shaft into pump. If you used a repair sleeve on the shaft, turn the shaft while carefully pressing it through the new shaft seal to keep from damaging the new seal.
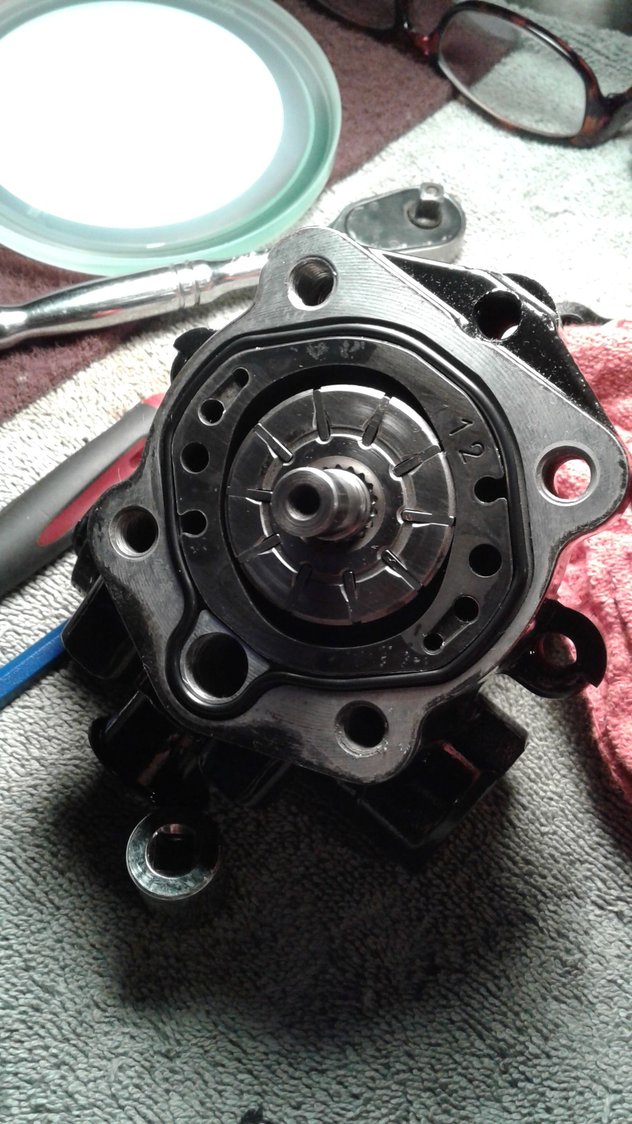
Step 9 - Set vane ring into the back of the pump and slide the vane rotor assembly back onto the shaft. If the vanes still want to slide out, it may be easier to turn the pump upside down while you reinstall the vane rotor onto the shaft. The vane ring and rear cover will only go together one way, so you may want to dry fit it to make sure it’s in the pump correctly. On my pump the numbers on the vane ring face outwards.
Step 10 - Reinstall the retaining ring onto the shaft. The one that comes with the kit is a hair smaller, but once you get it back in place, use a pair of pliers to squeeze the ring to make sure it seats well.
Step 11 - Put the rear cover o-ring around the vane ring and makes sure it stays in place.
Step 12 - Reinstall rear cover and tighten 4 bolts.
There are 2 blue o-rings, a tiny black o-ring, and two medium black o-rings that are extras you won’t use. Also, feel free to pour a small amount of new Pentosin in the newly assembled pump to lubricate everything and keep it moisture resistant till it’s installed. I used some small plastic plugs to plug up the holes while painting and to keep contaminants out until I install it. I can be long winded sometimes so the above procedure is probably too detailed for this simple task, but hopefully this will help anyone who wants to rebuild their pump for a fraction of the cost of a new or reman option. I don’t think I left anything out, but let me know if there are any questions.
 02-07-2020, 12:13 AM