When you click on links to various merchants on this site and make a purchase, this can result in this site earning a commission. Affiliate programs and affiliations include, but are not limited to, the eBay Partner Network.
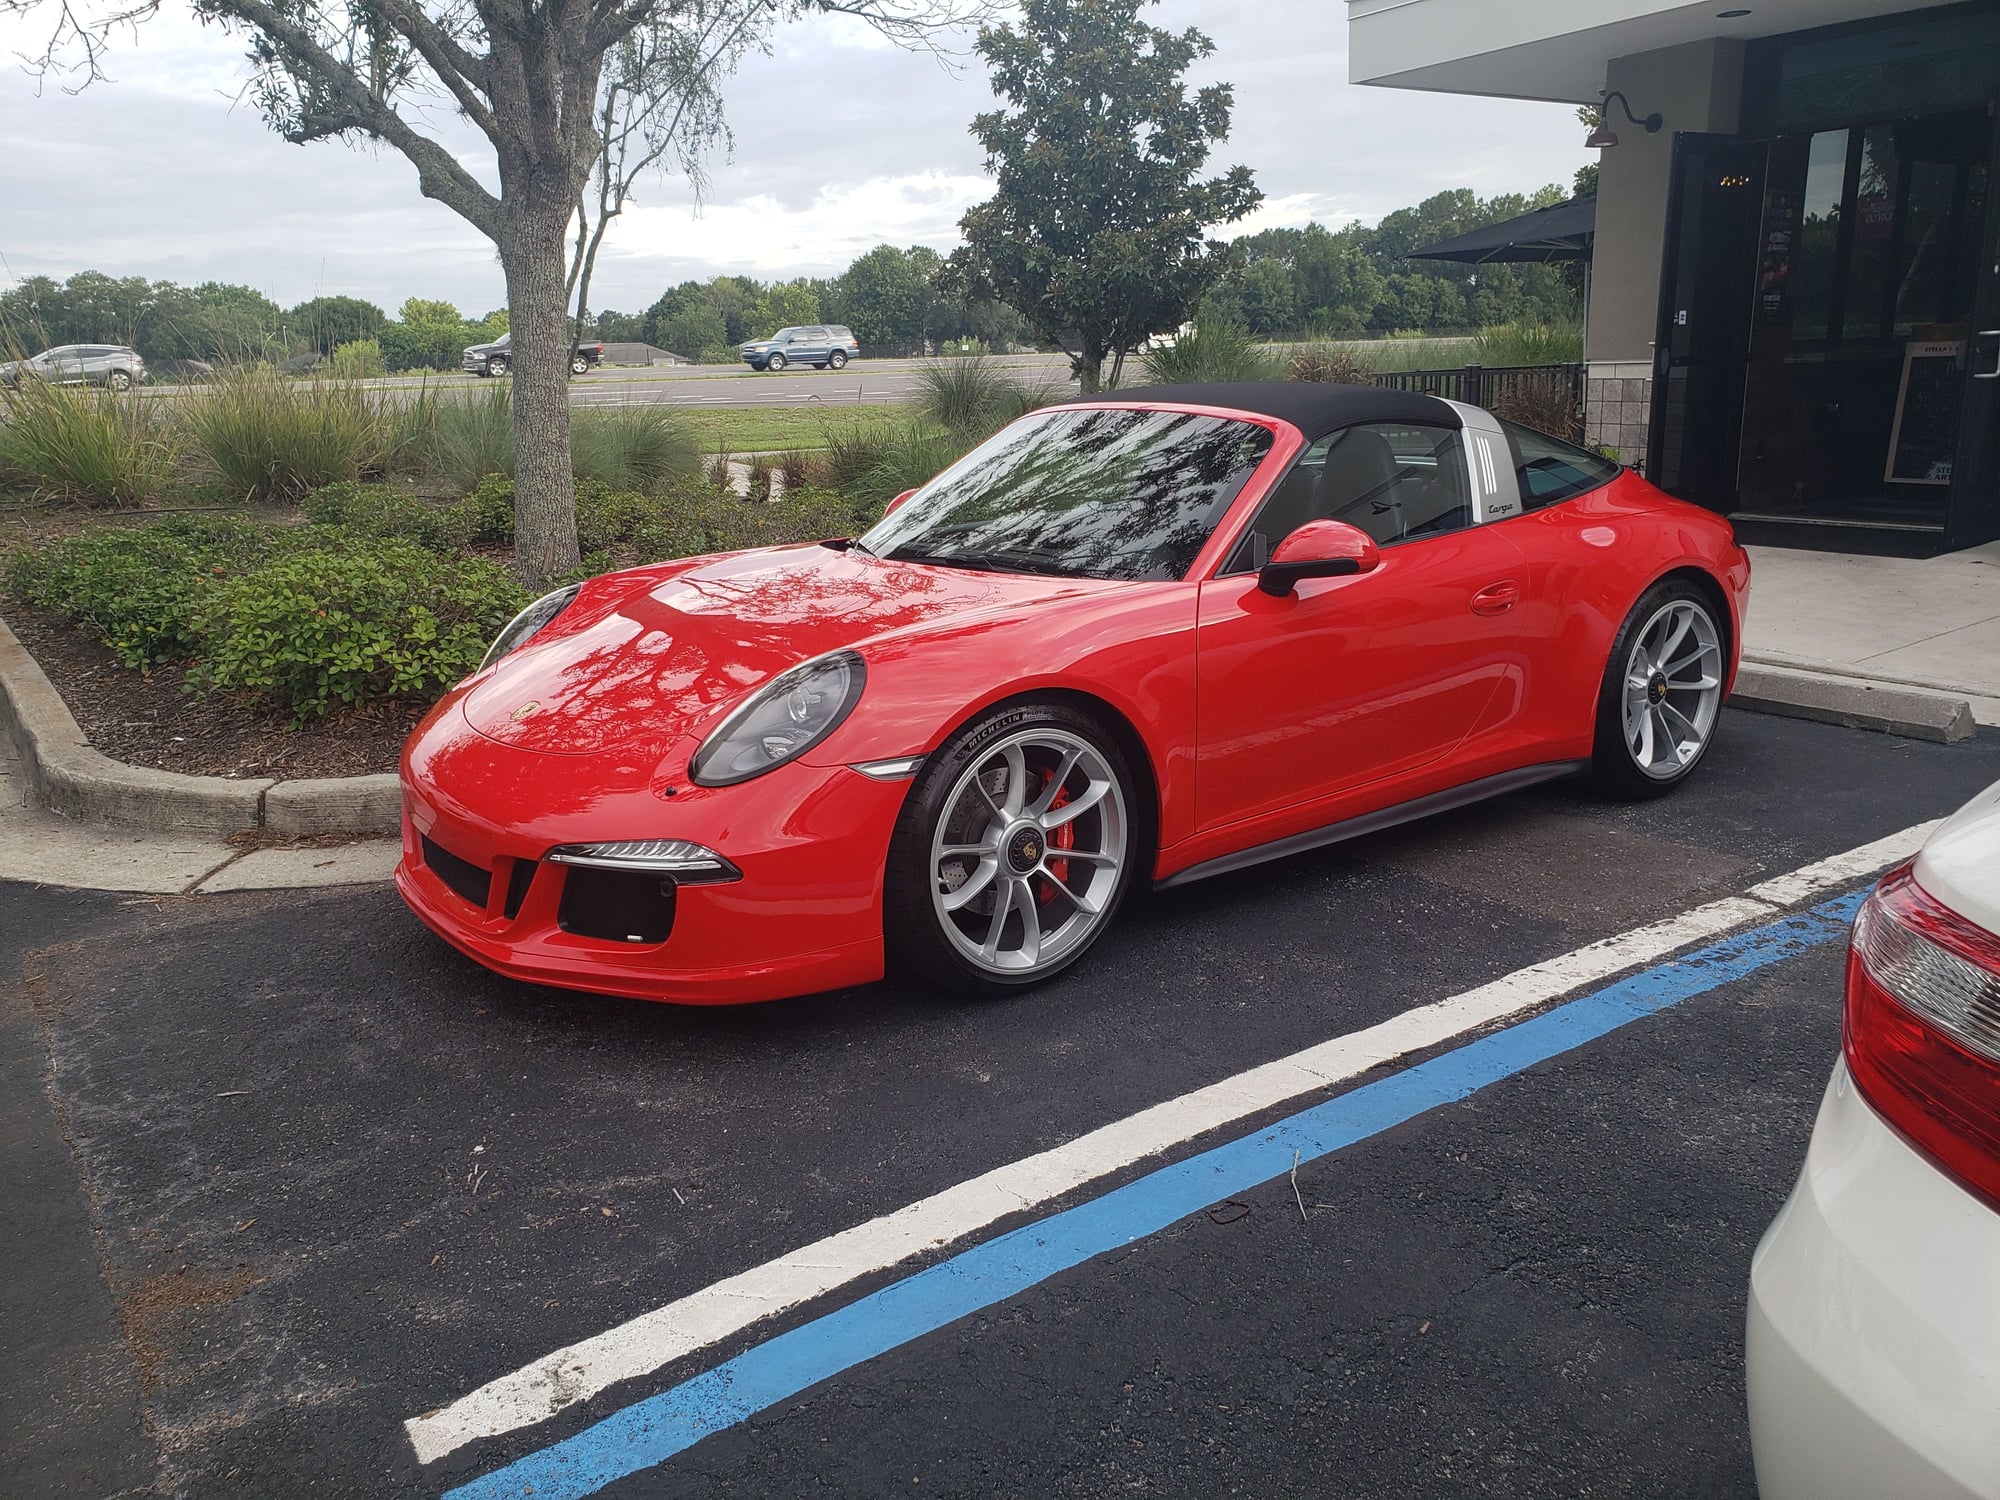
So, I wanted to do a mesh grill install on the front bumper as a winter project a 2013 991.1 C4. I saw a deal from Suncoast ($675) on adding a center Radiator that made my decision even easier as I couldn’t stand that plastic filler in the center of the bumper. I figured since I was planning to take the bumper off as might as well complete it all in one shot. BTW, I am not a fan of those Mash grill kits that are held by a zip tie or clips in my opinion it will never look OEM, and it just doesn’t look right despite of all the advertisements. I know many people probably would be happy with that.
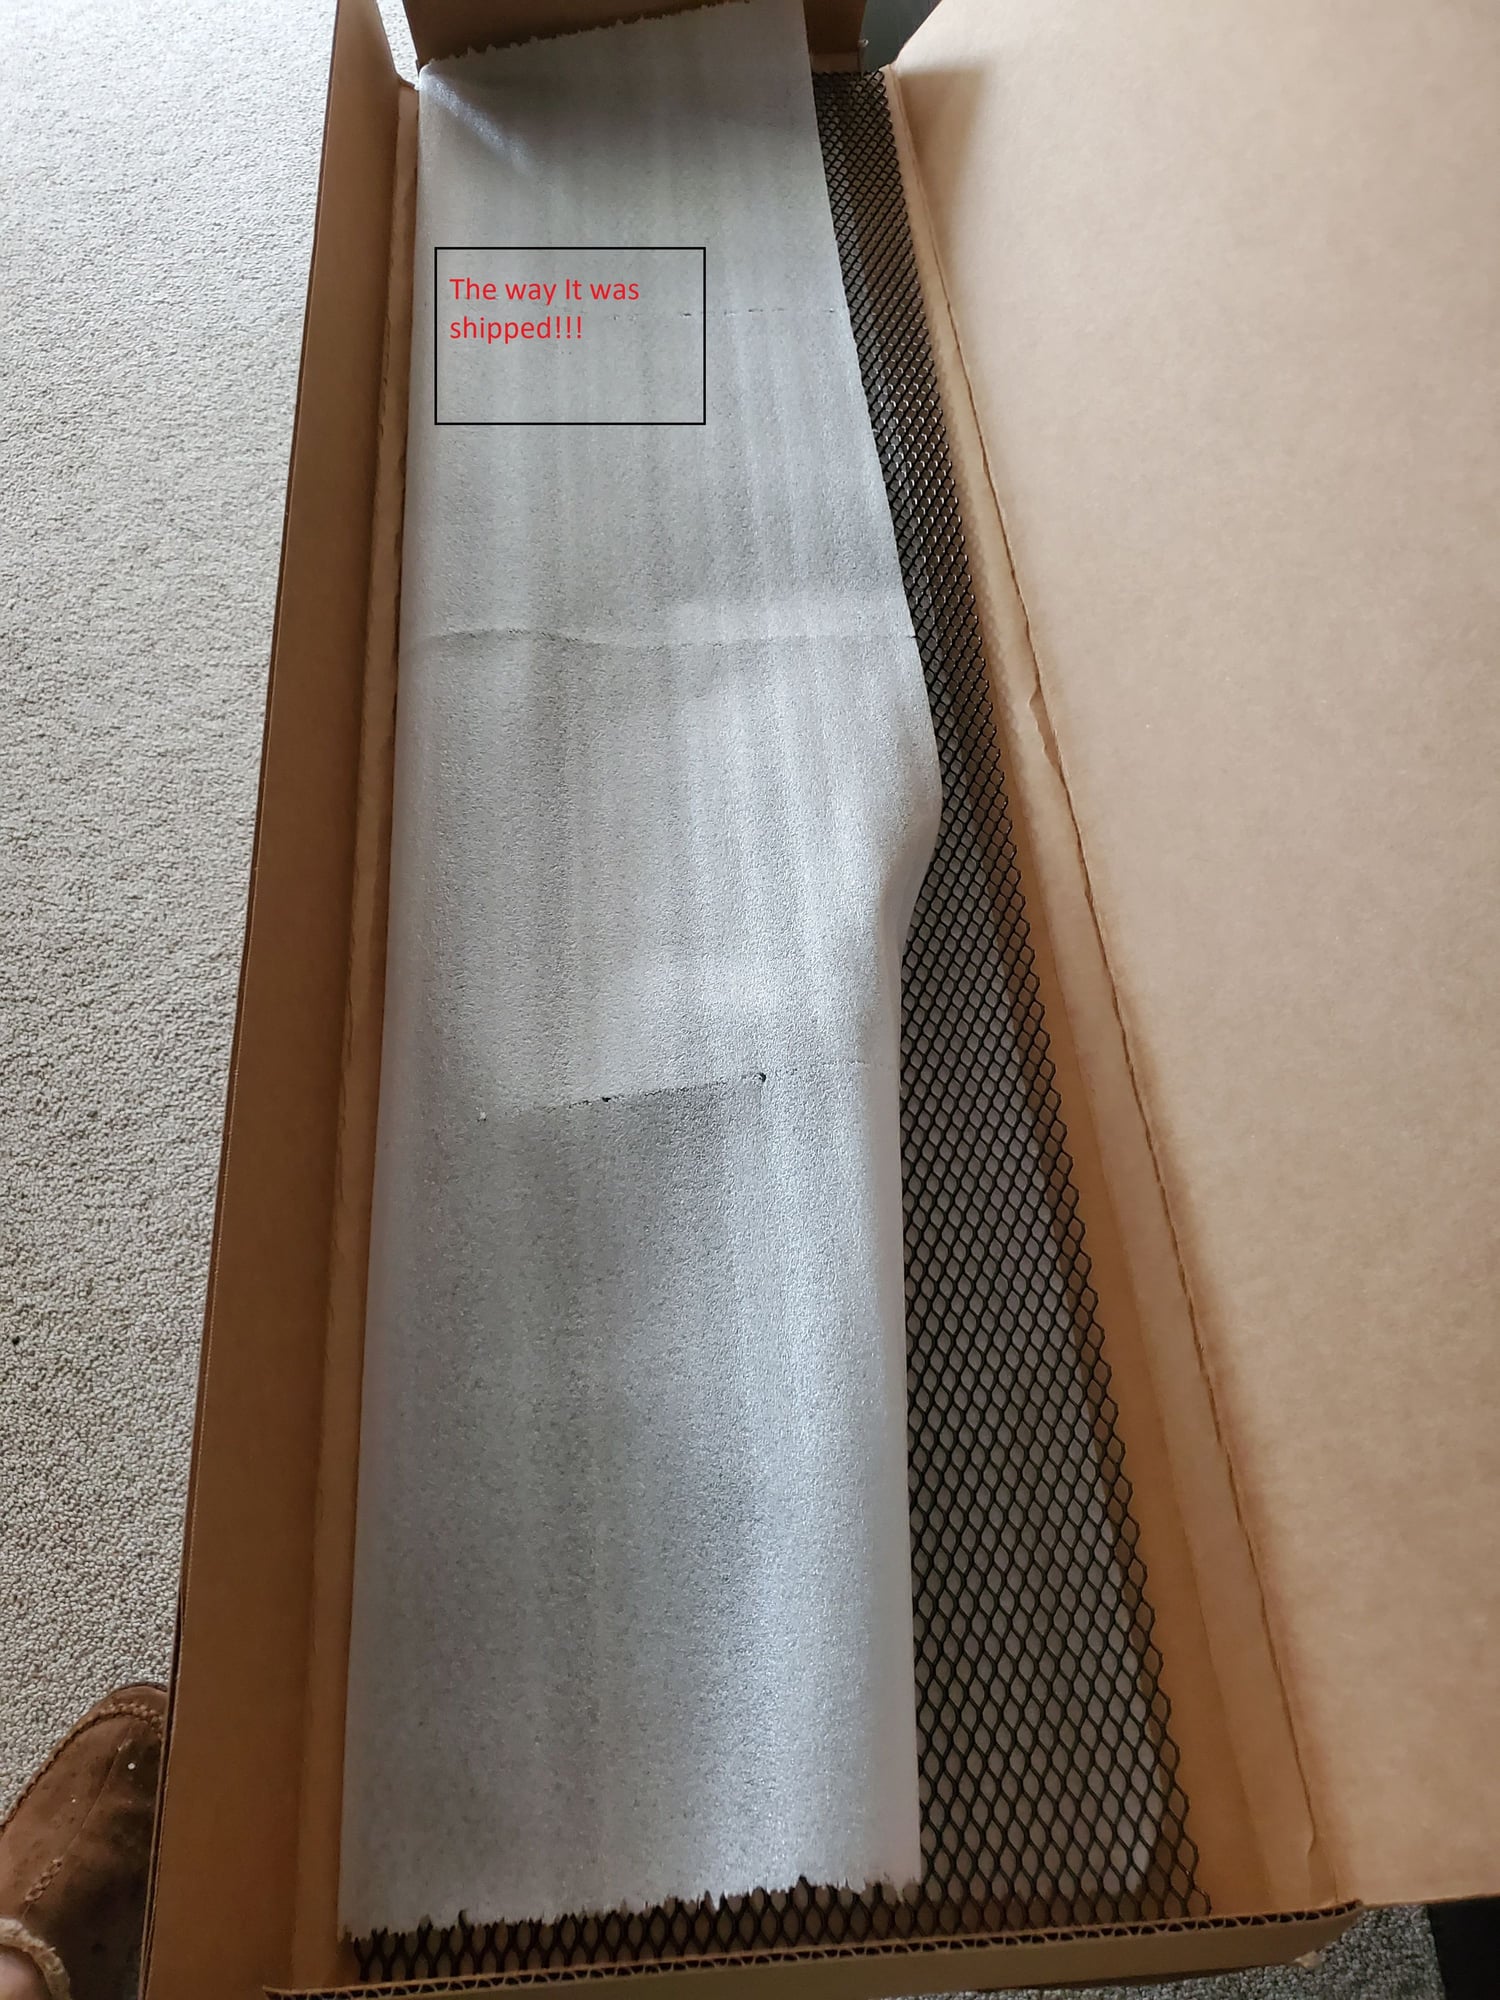
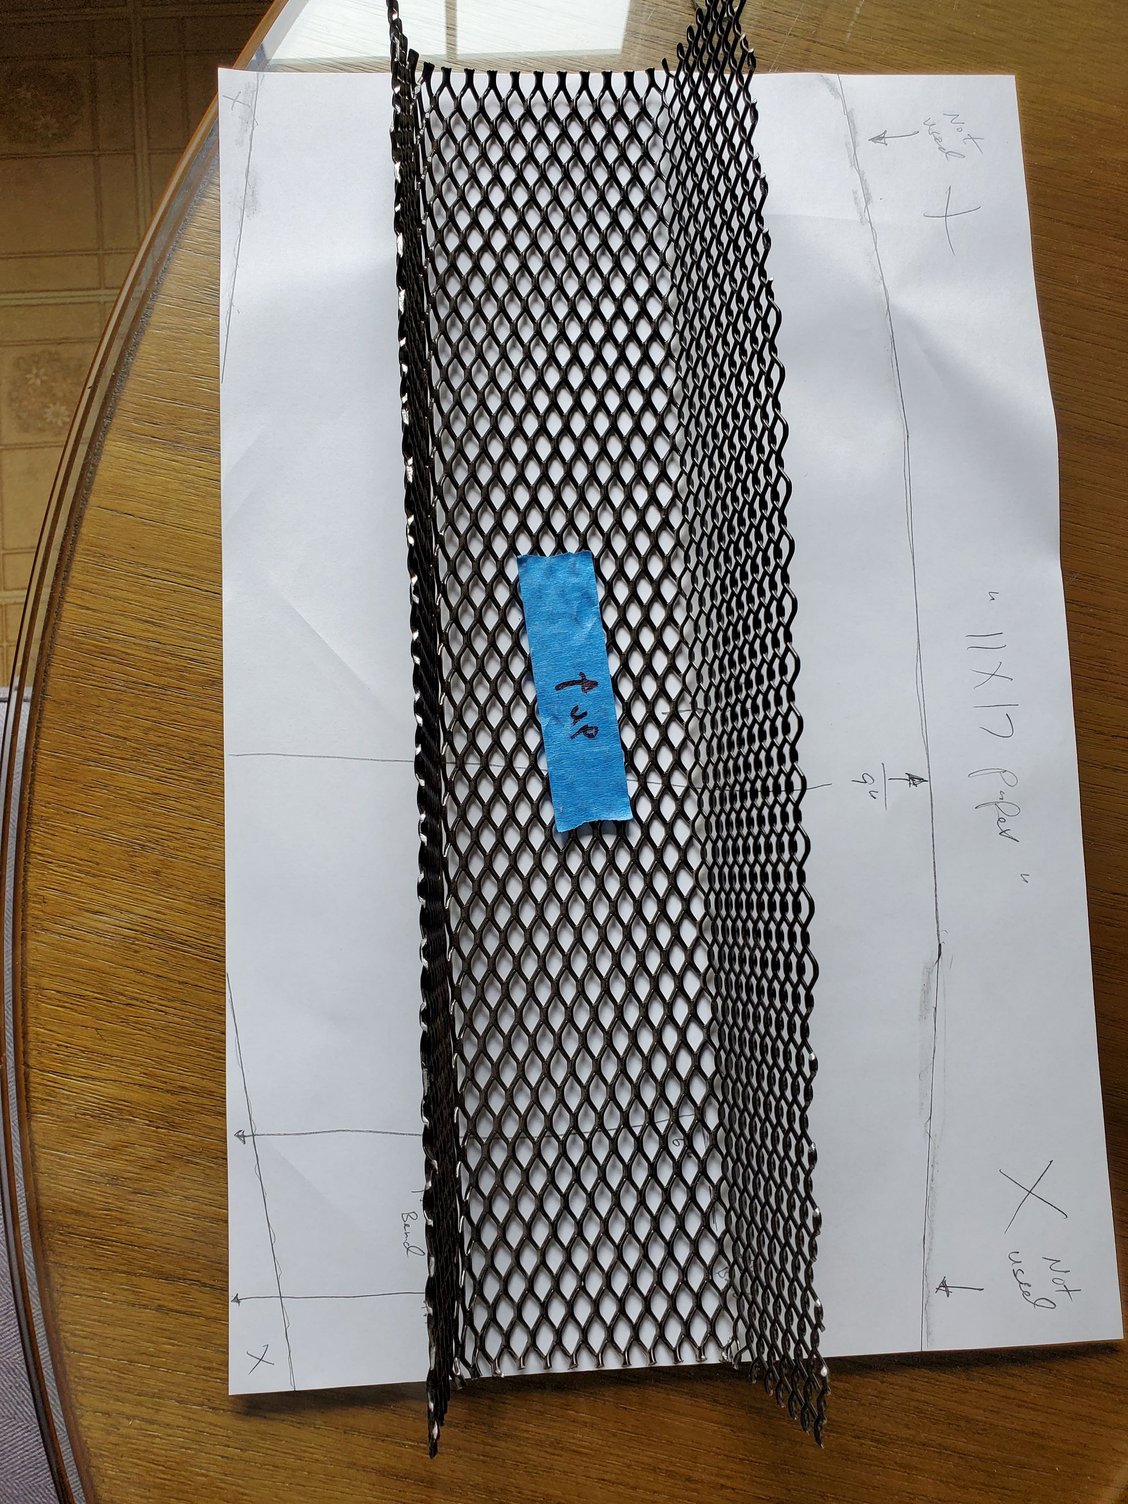
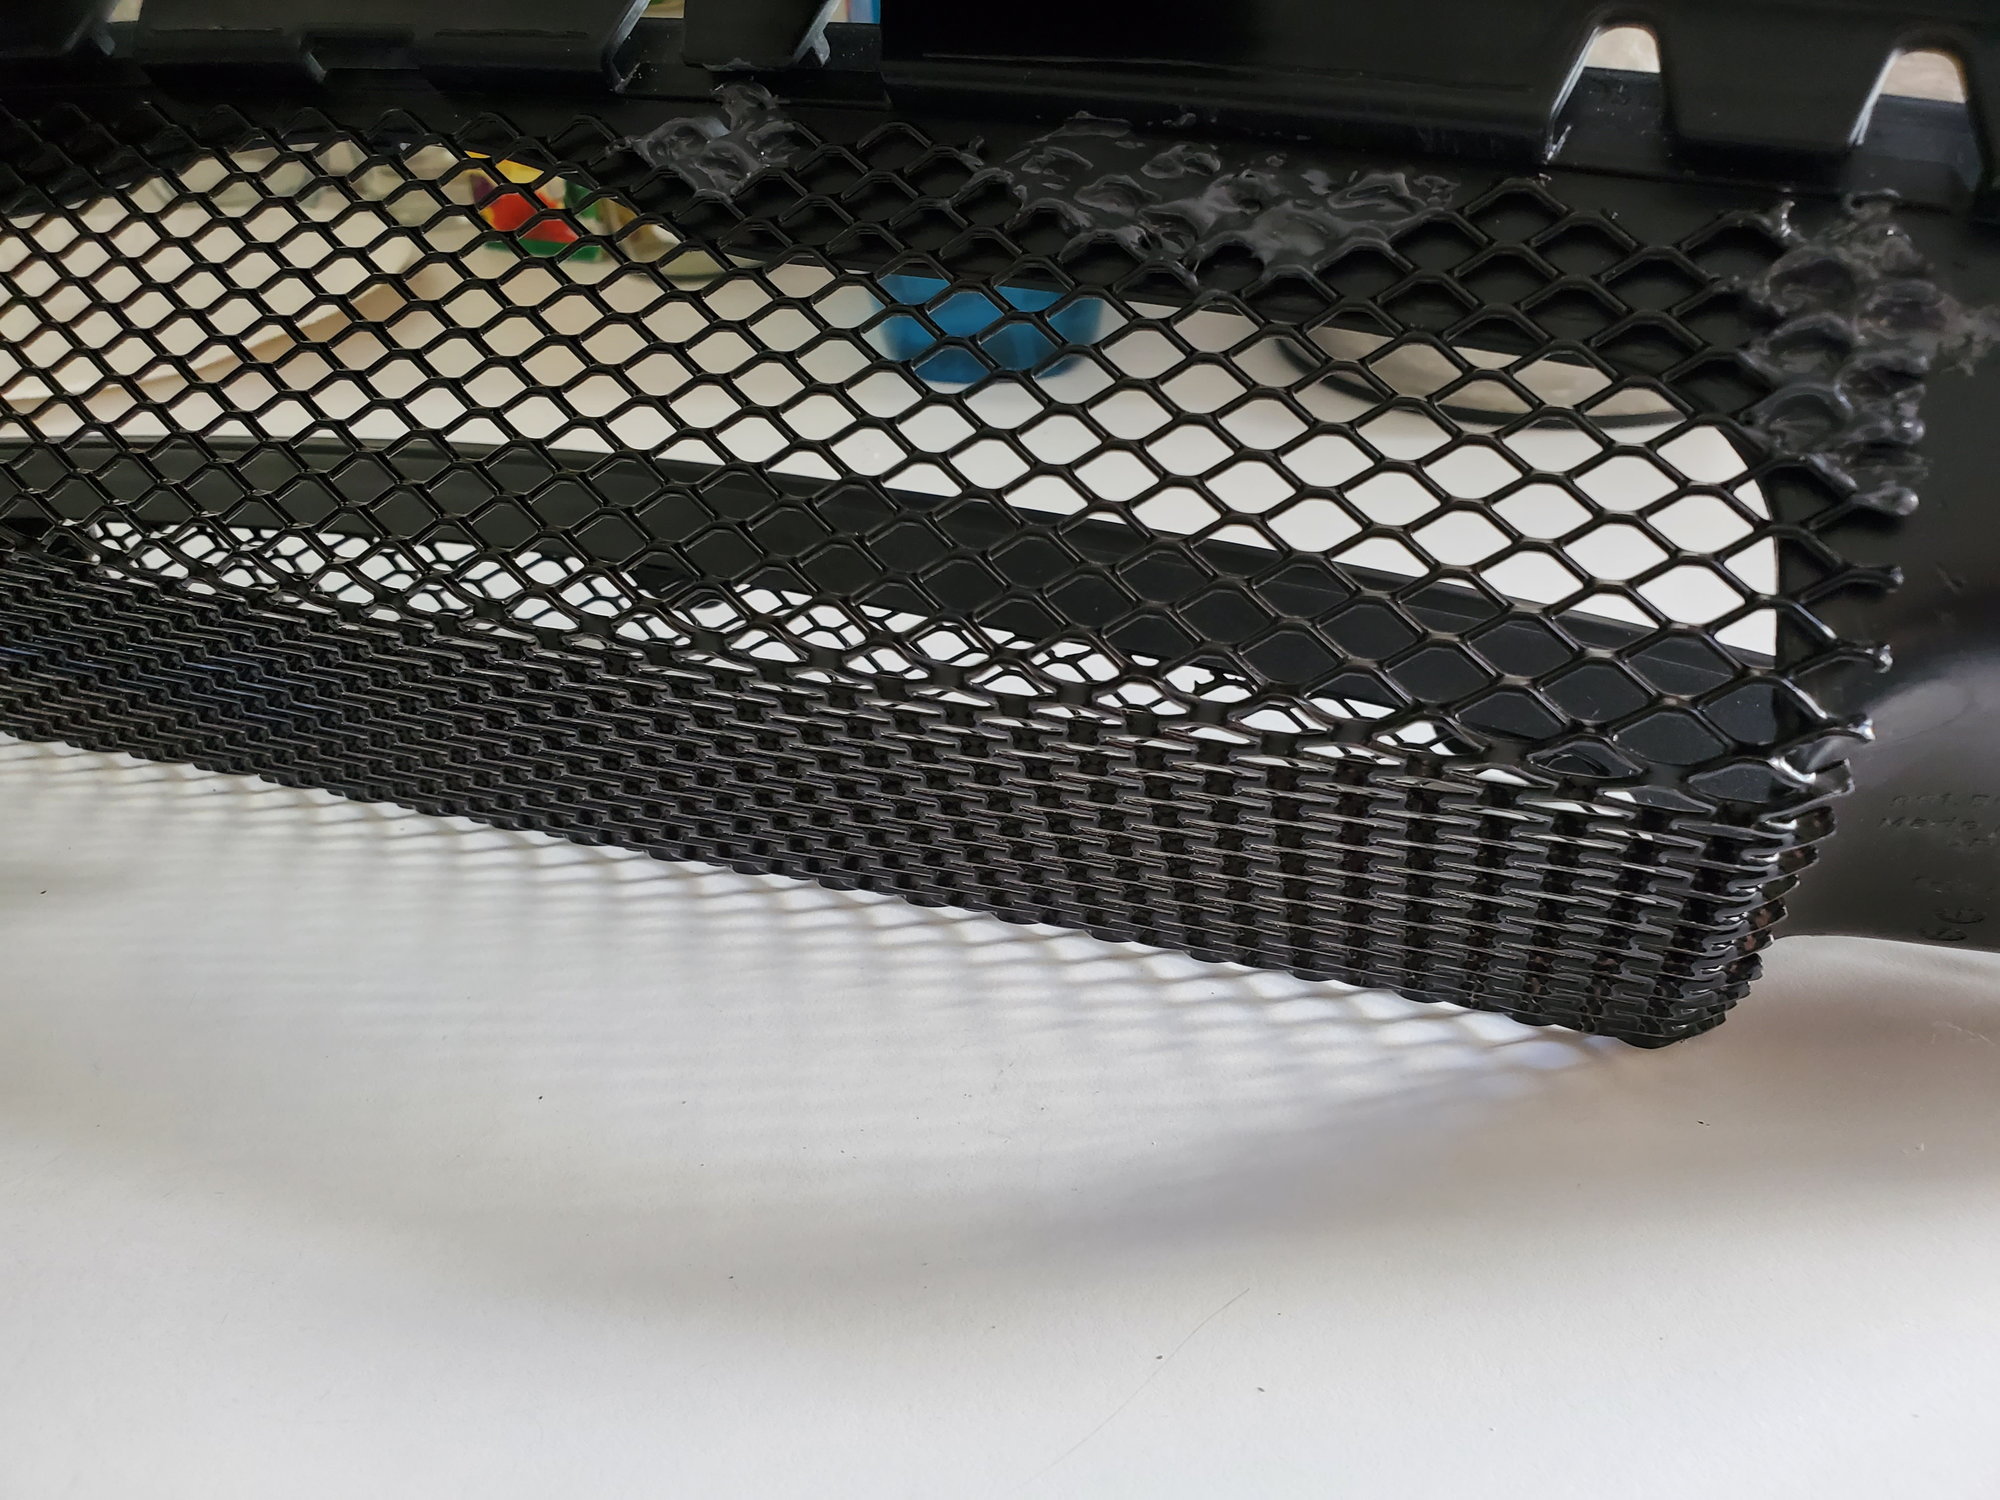
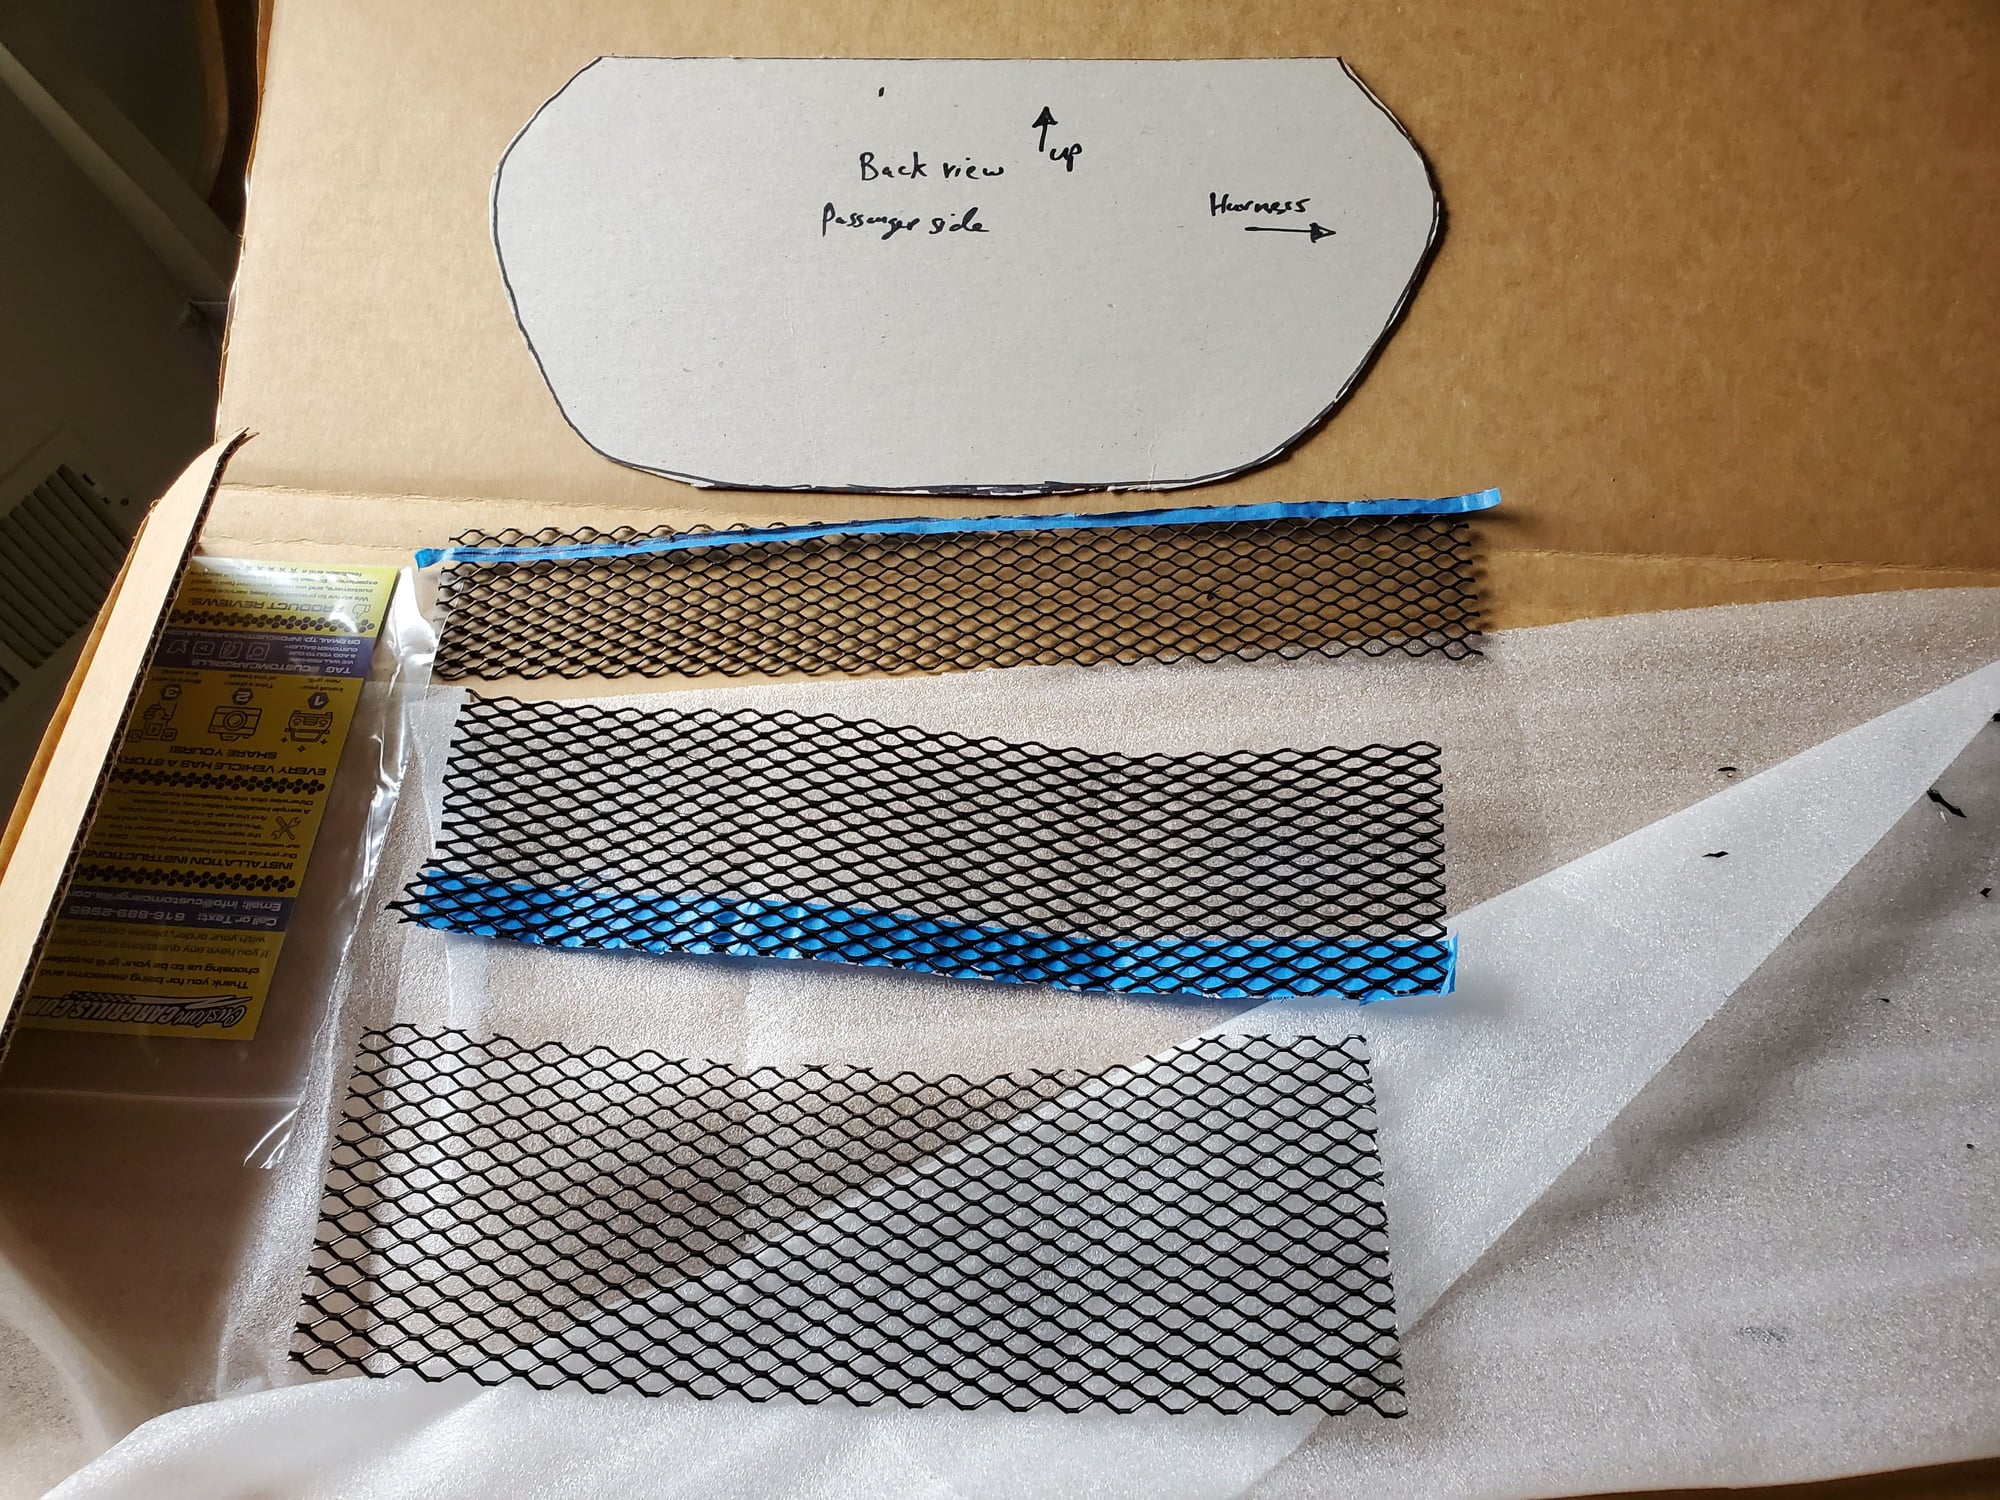
I did a lot of research on getting a good quality mesh grill as Amazon and others were not meeting my expectations which I ended up returning several of them. I also didn’t want to buy a ready to install kits like the ones from (Rennline for $300) or (Pelican parts $275) as they may still need to be fabricated to fit properly see the YouTube link below which shows what Rob had to deal with. I also couldn’t justify paying for something that I can create at a fraction of the price and so I found Customcargrills.com they have a nice selection of products and patterns with detailed specs to choose from and the quality is top notch. I bought a sample and I was very impressed and so I went ahead and purchased it and arrived as you see in the pic, packed solid and flat sheet ready to be fabricated. This was just enough material to do the end vents and the center. You can buy the next size up if your bumper is a different version, but this was enough material for a standard bumper. Keep in mind, this material is pretty sturdy so it’s takes some force to bend which is a good sign of a solid product.
12in by 48in Hexagon XXL Grill Mesh sheet Gloss Black ($65 shipped)
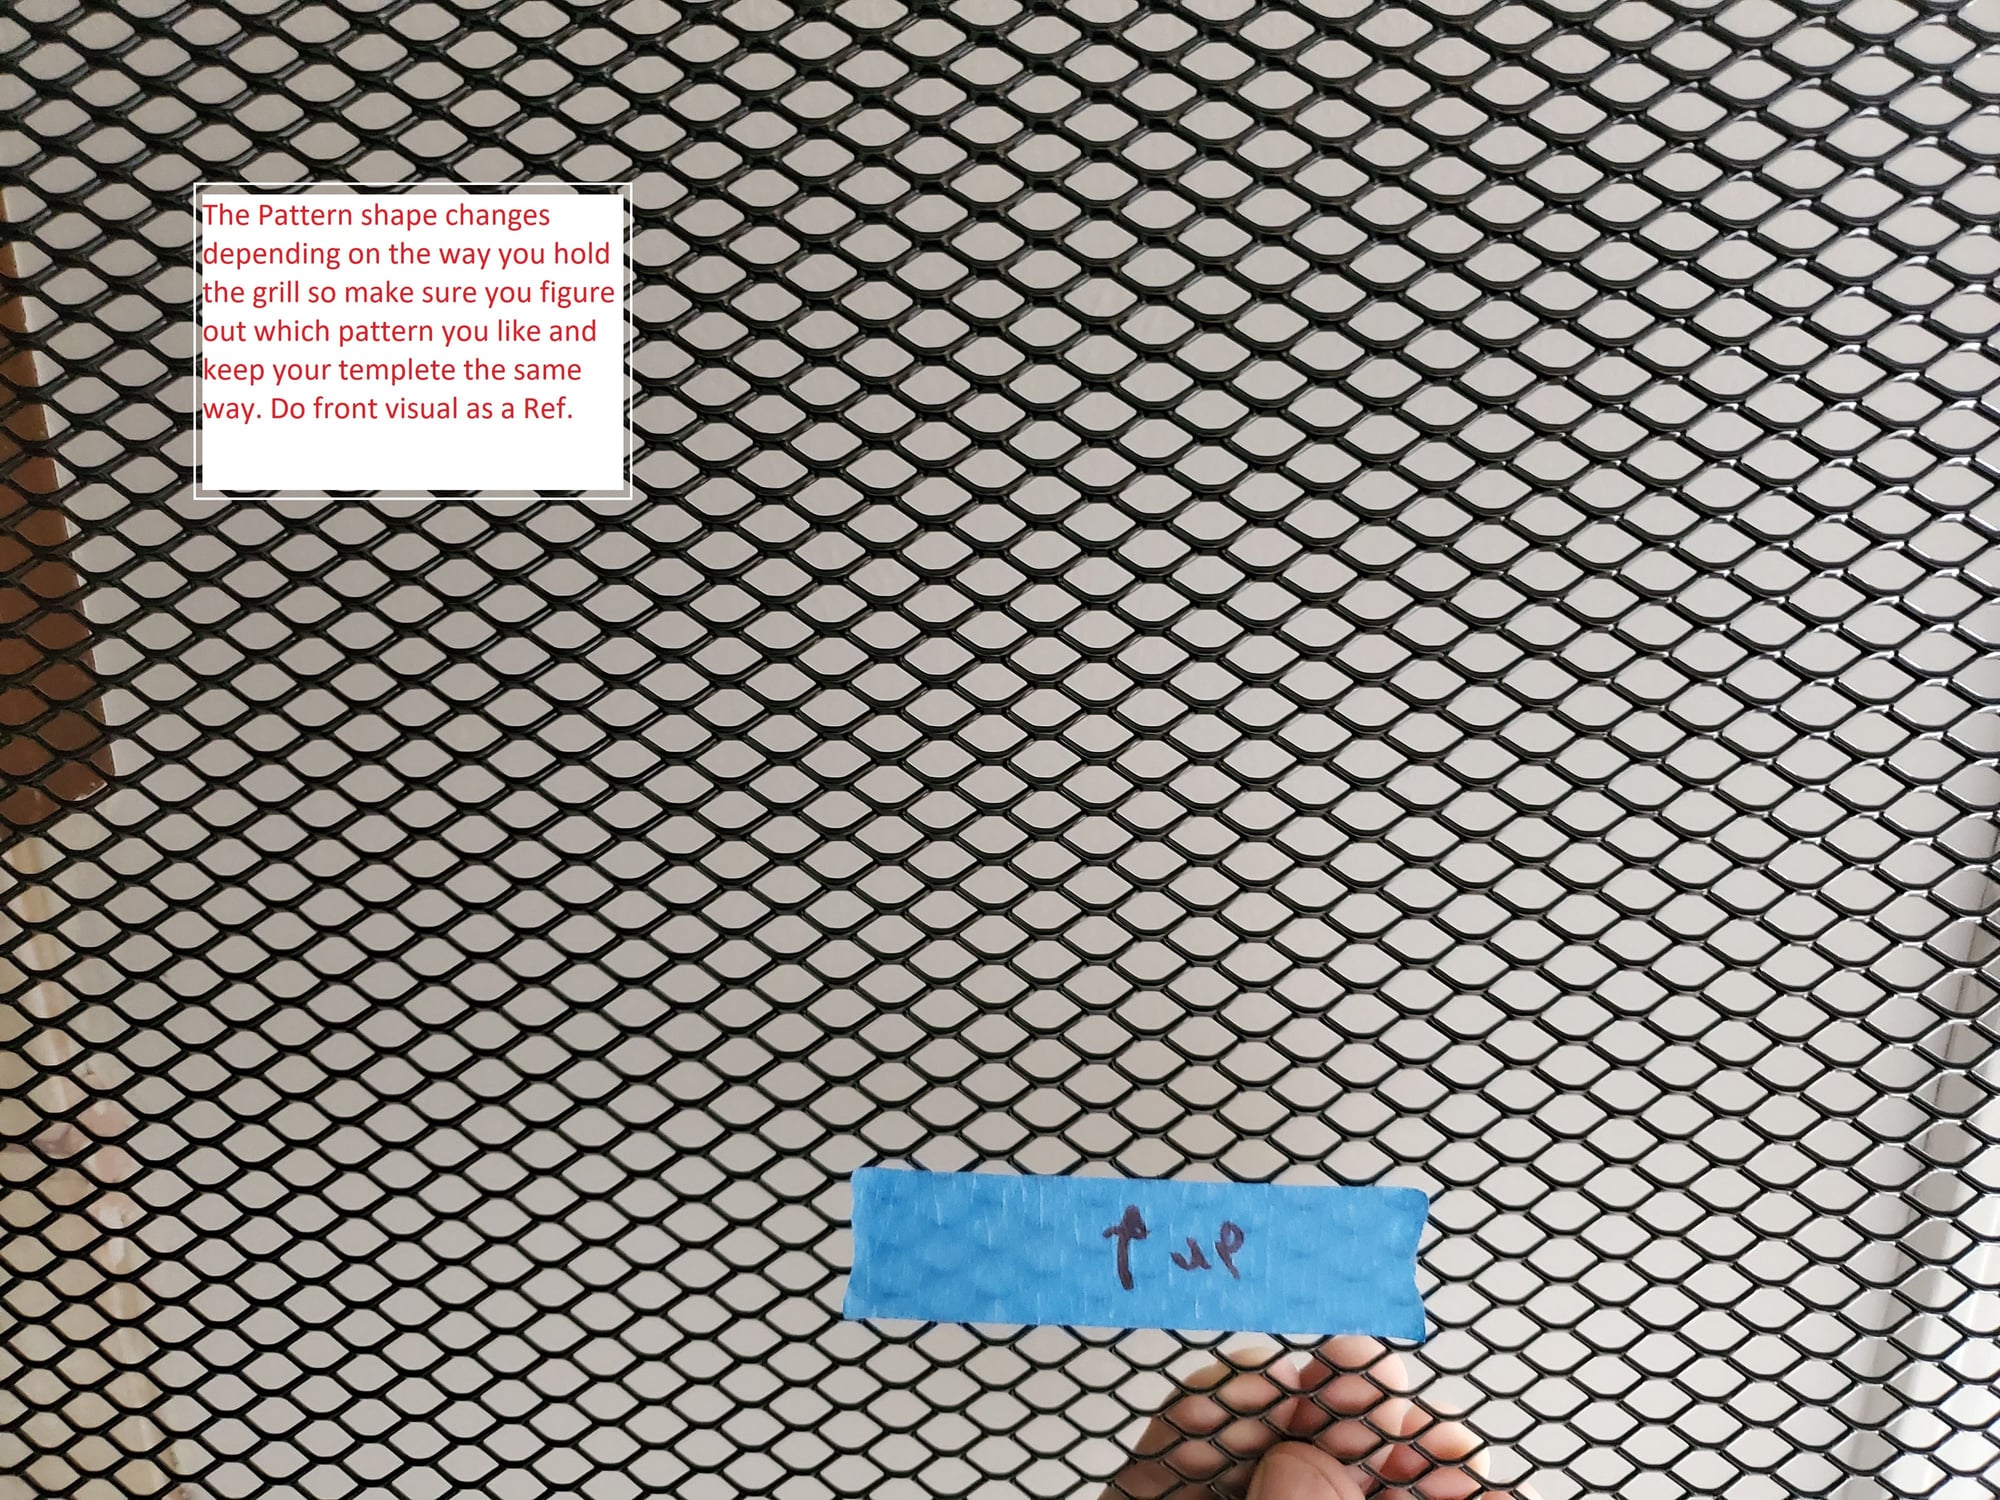
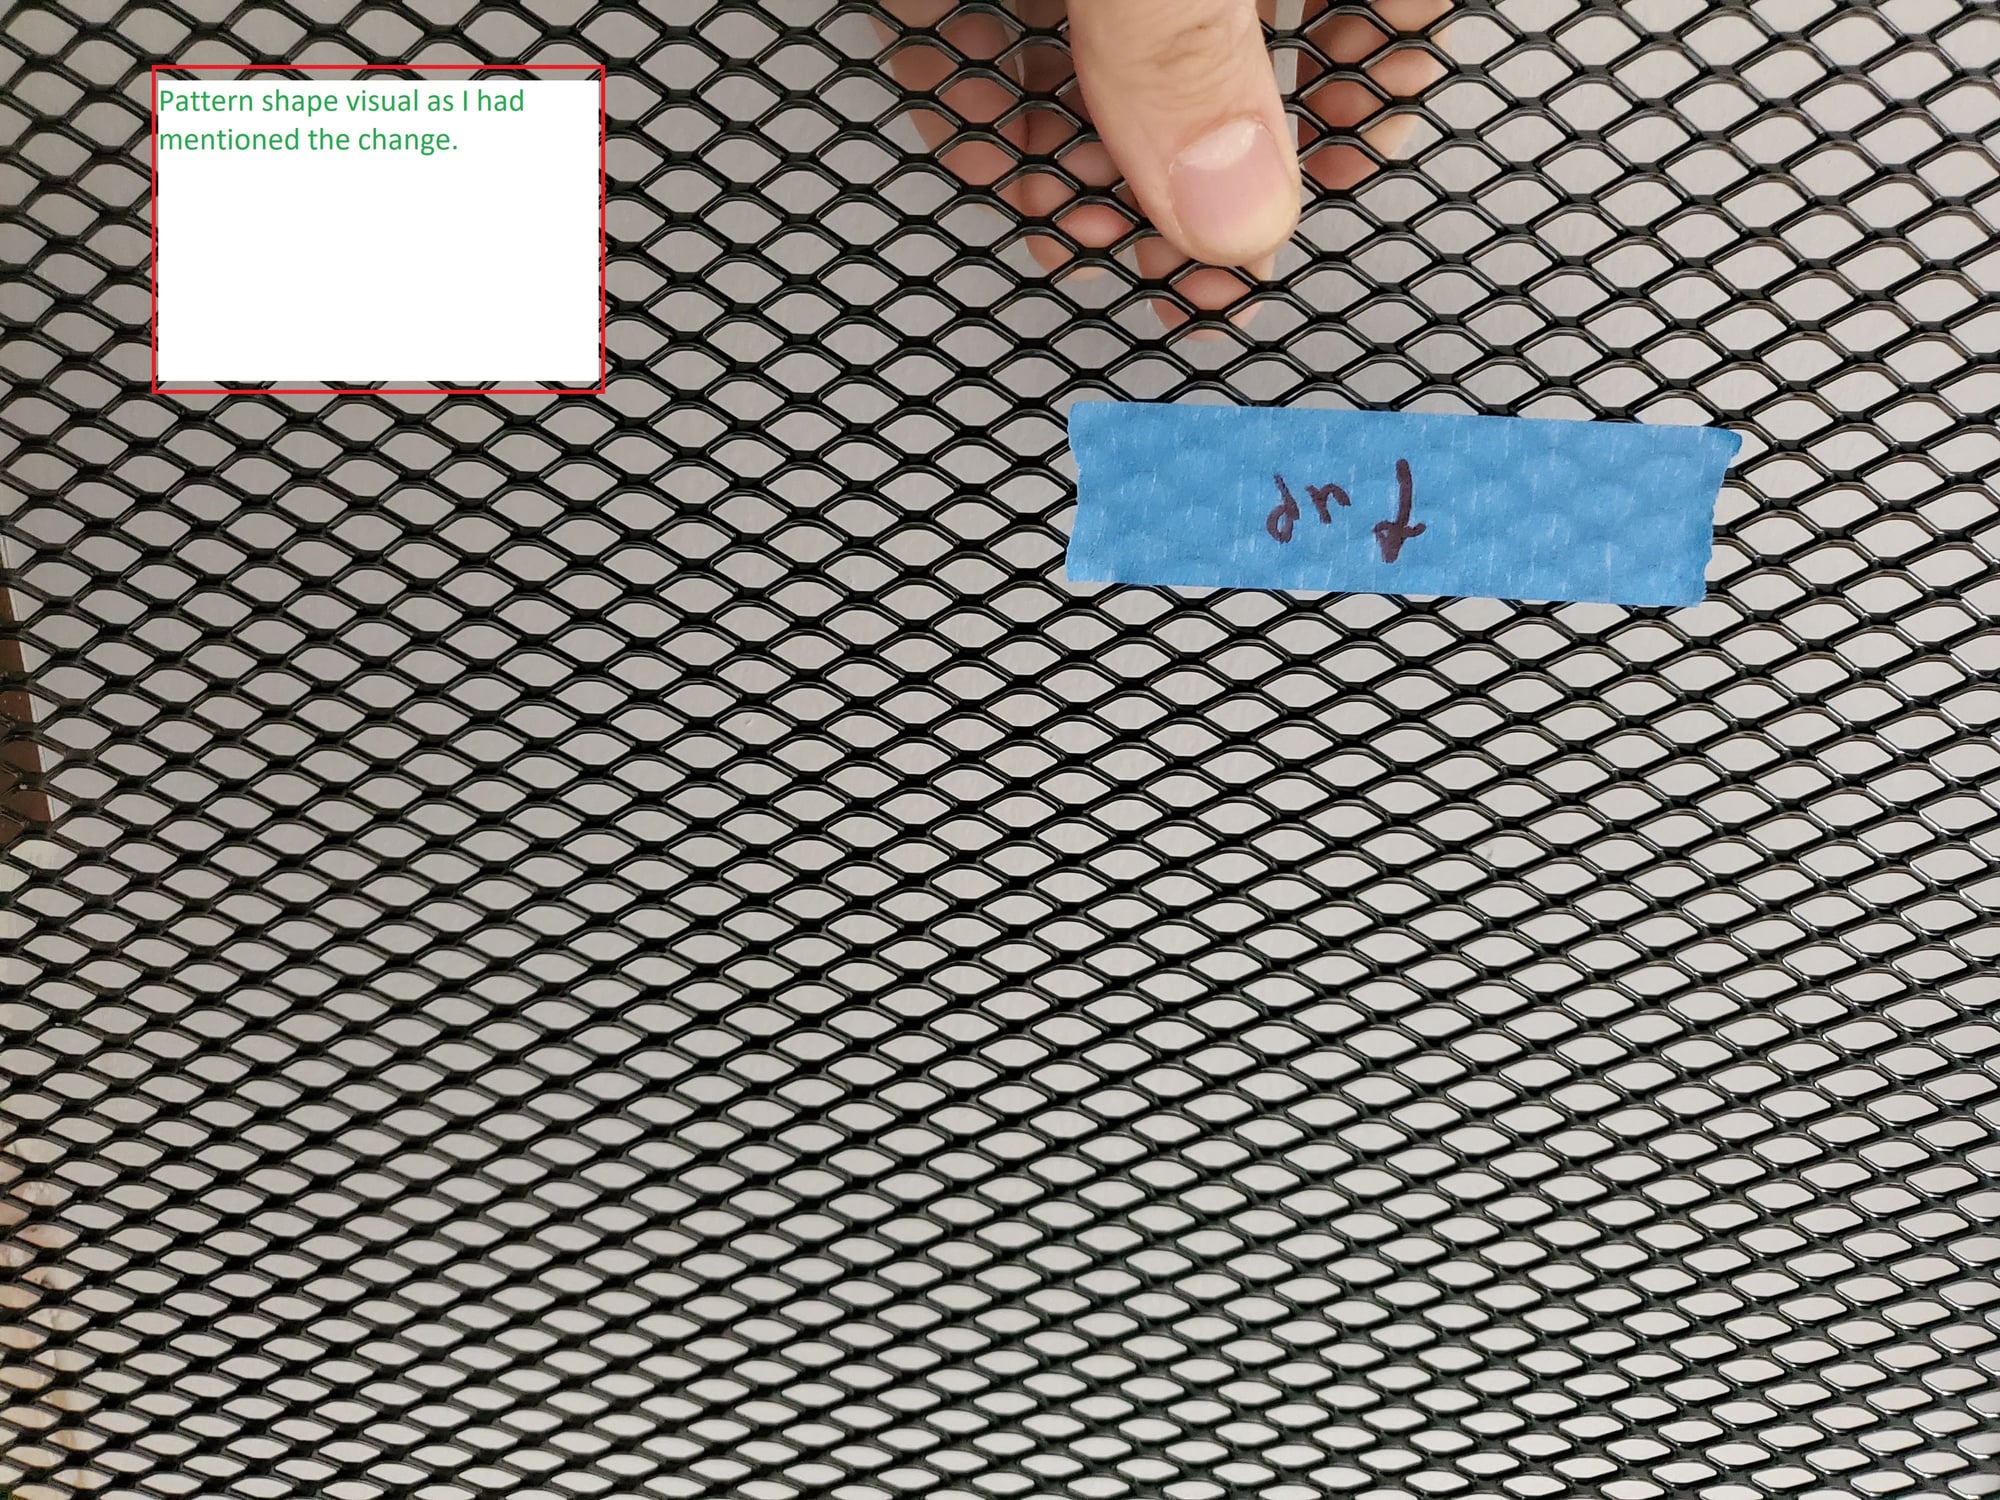
ATTENTION: VERY IMPORTANT
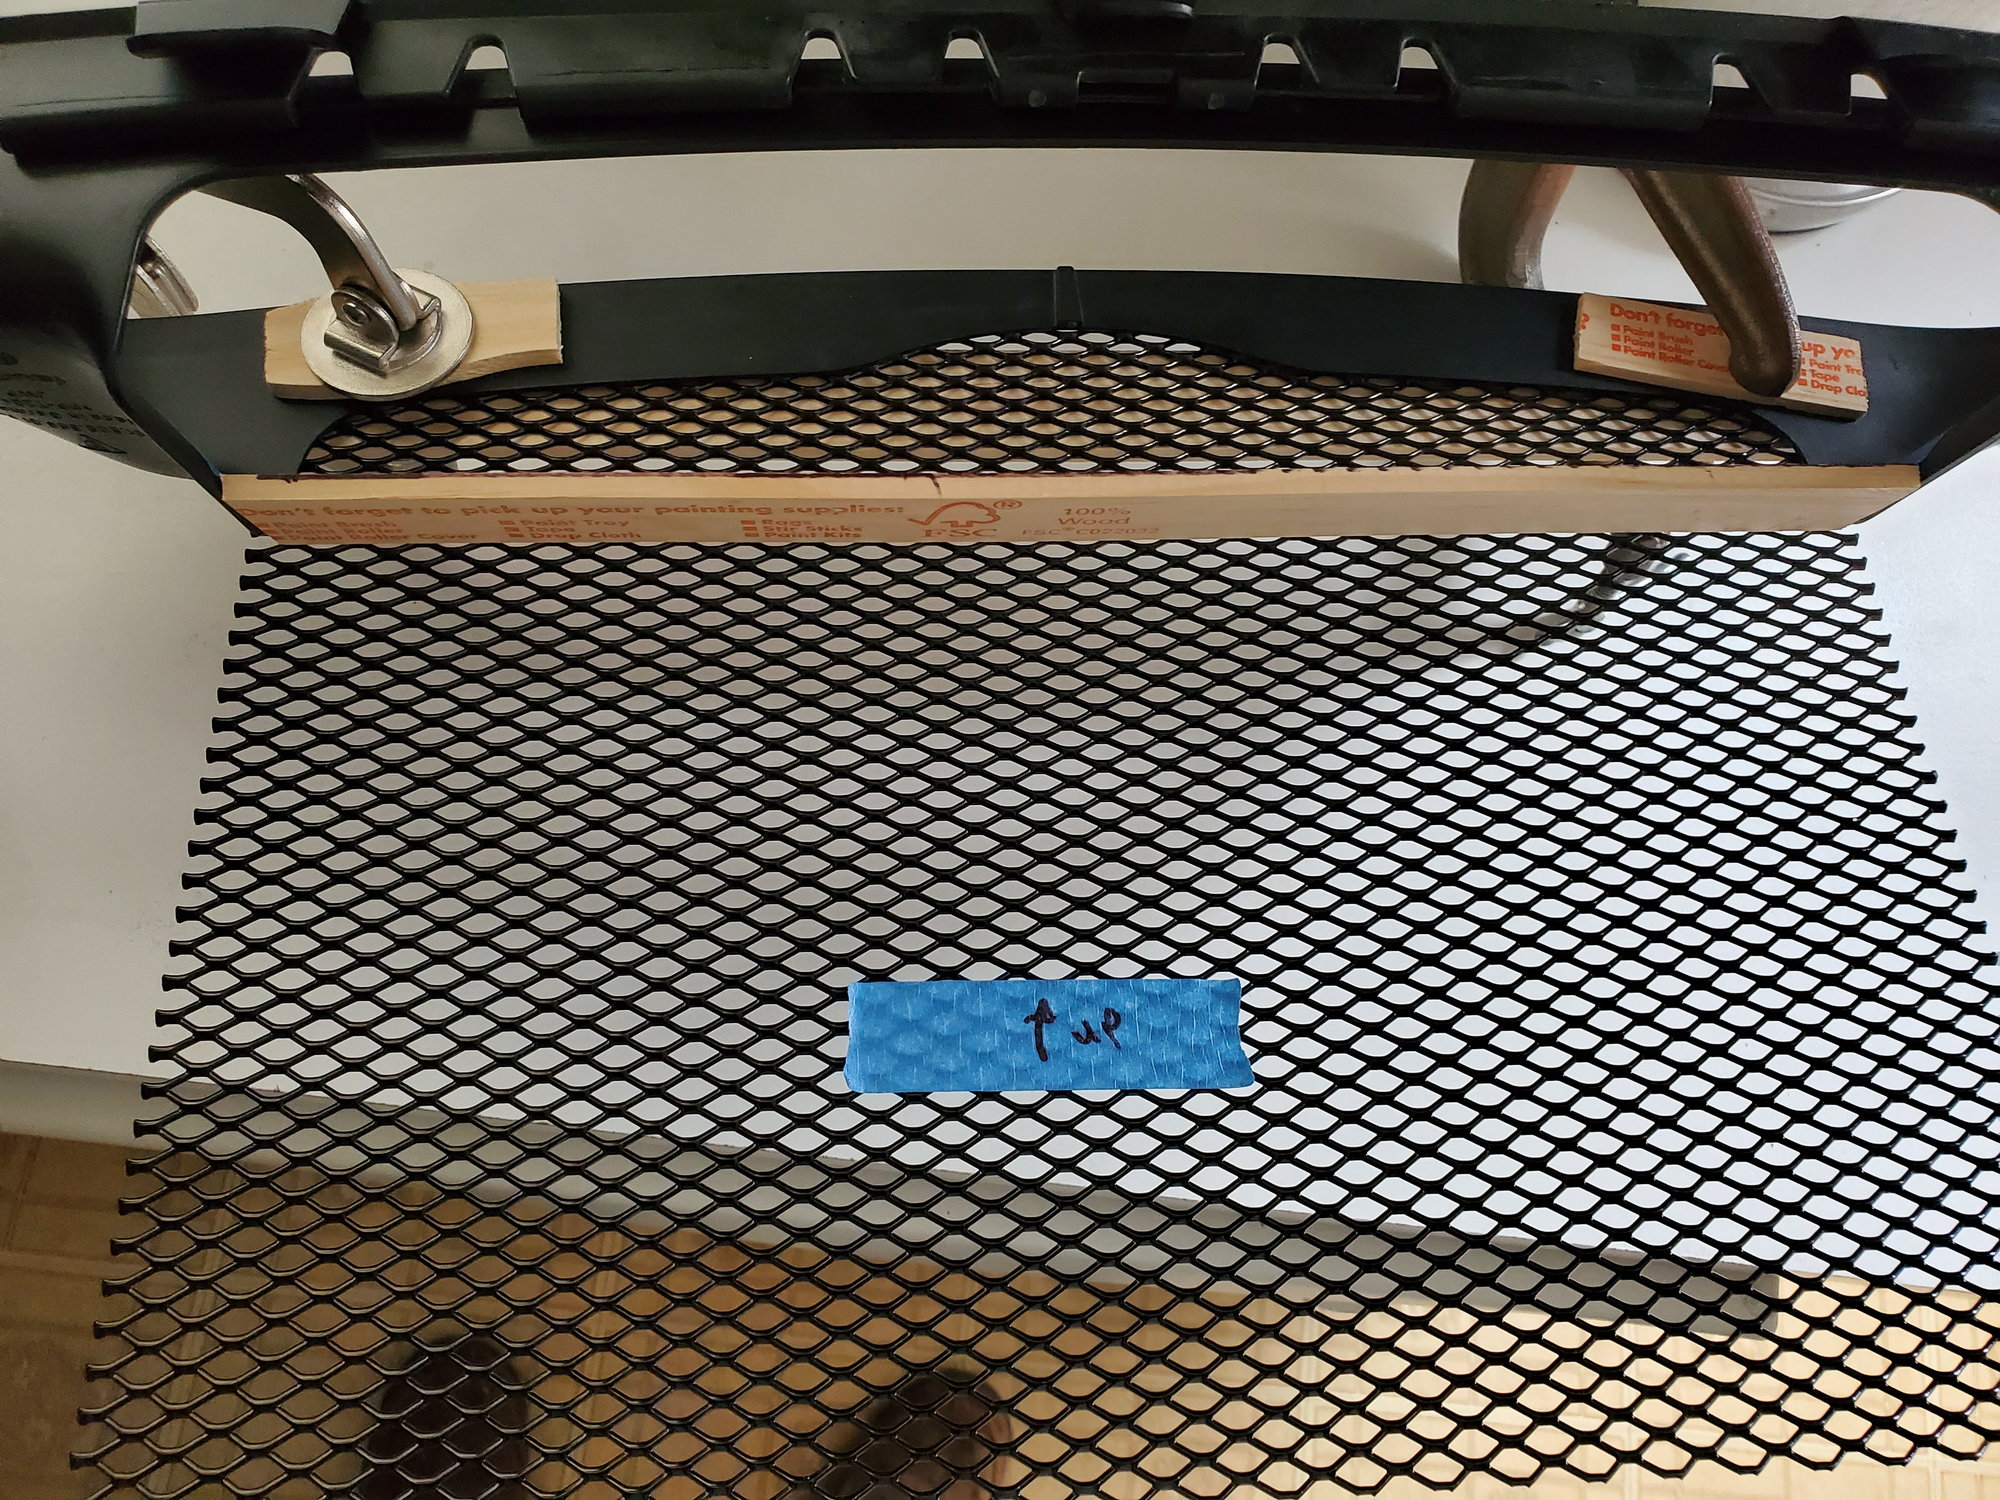
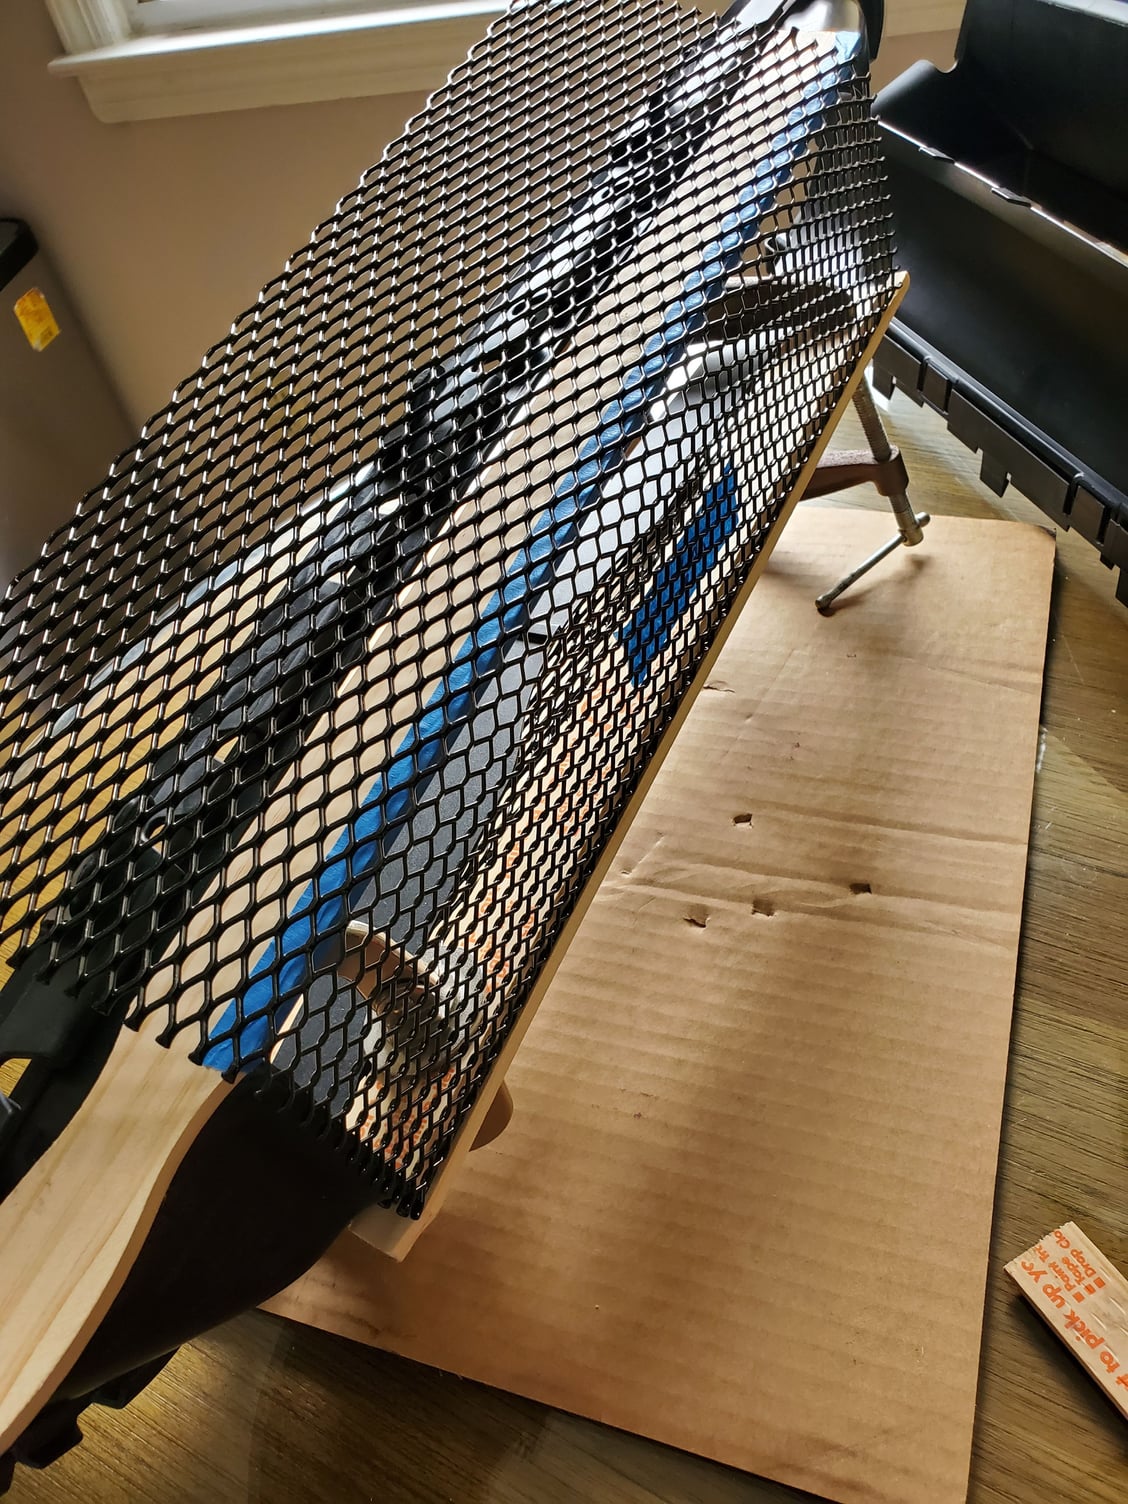
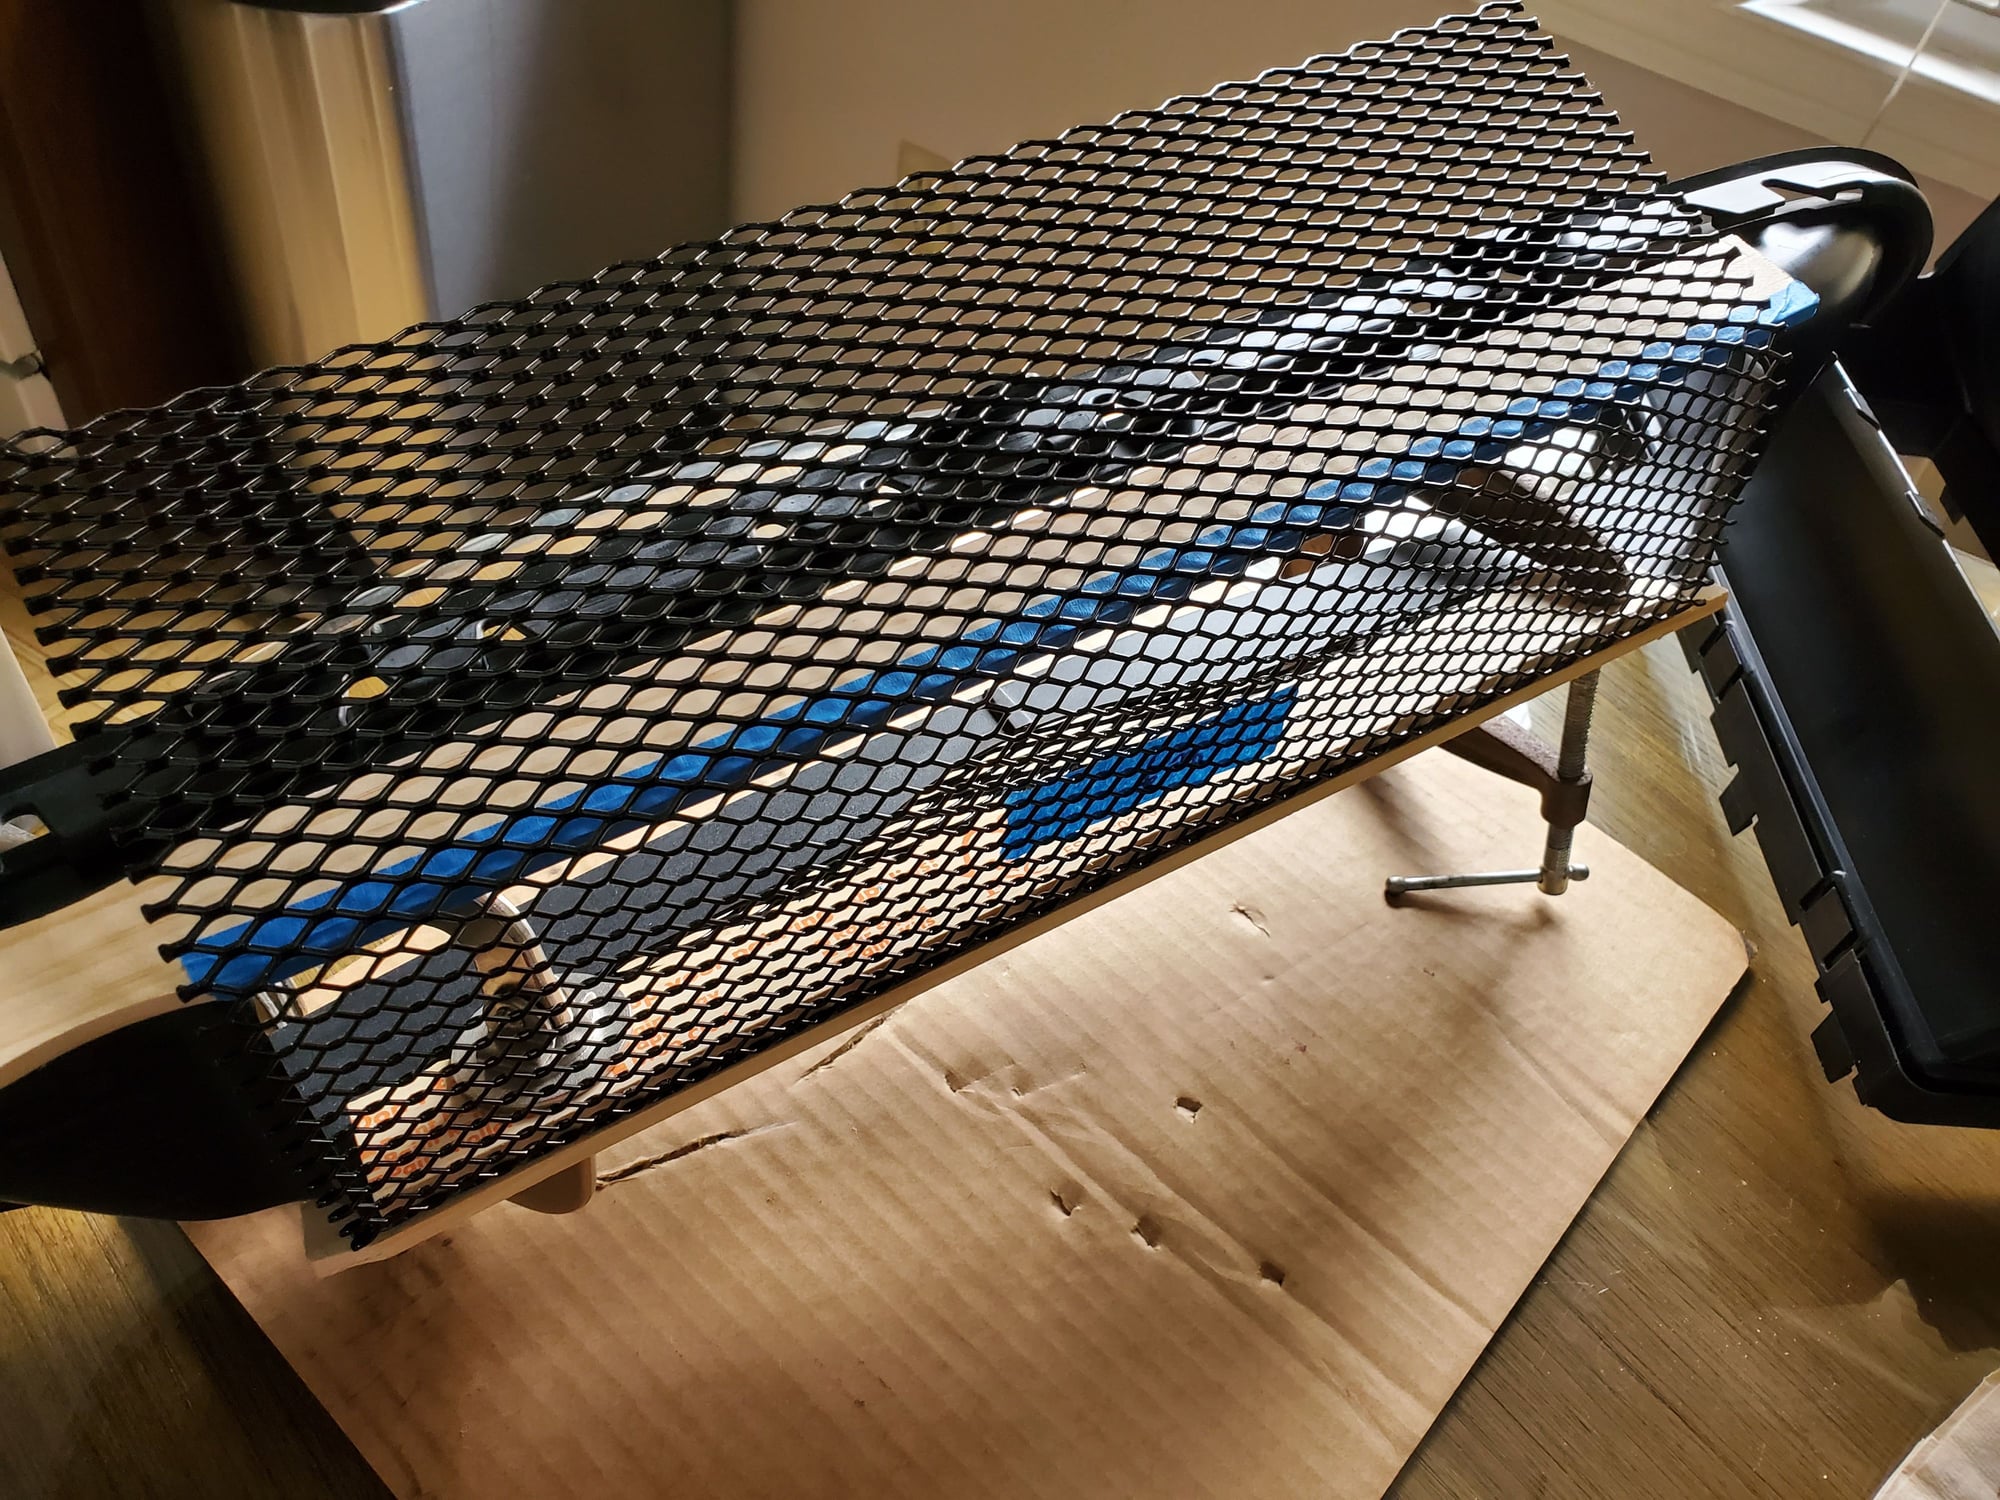
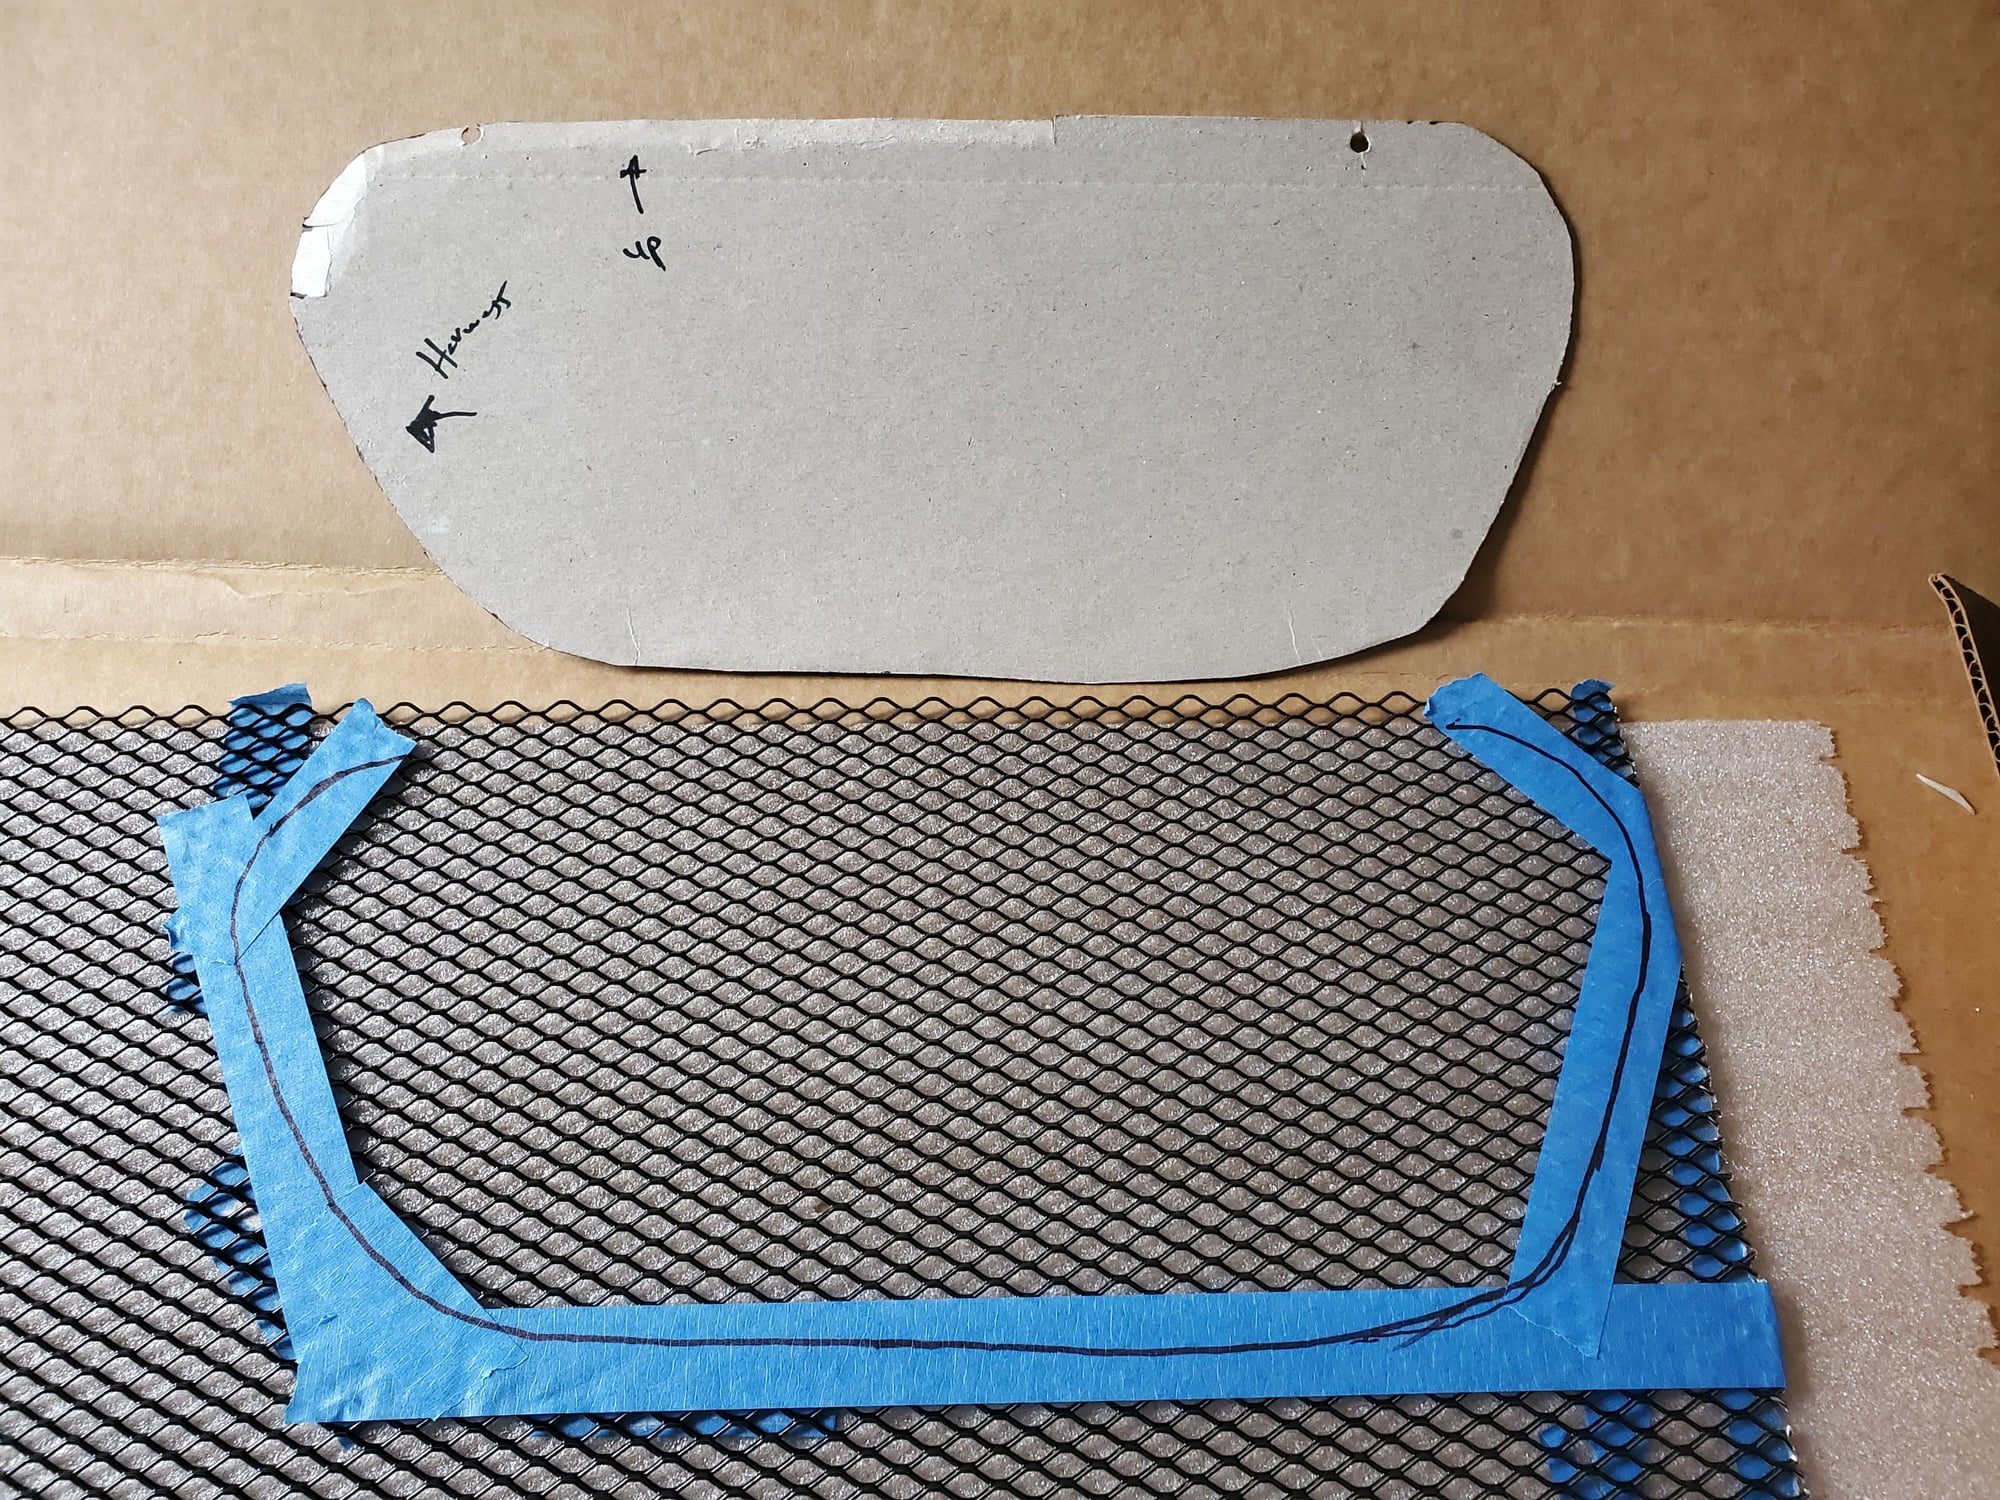
The mesh sheet is same on both side, but if you flip it upside down it will have a different visual effect so make sure you pick one side and mark it and make sure you do a visual by holding it and then flip it upside down and do another visual, you will see the patterns will look different. In my case it showed a diamond pattern and when I flipped it the shape was the Haxagon so keep this in mind and keep that pattern reference for your template layout and finally double check the layout before your final cut.
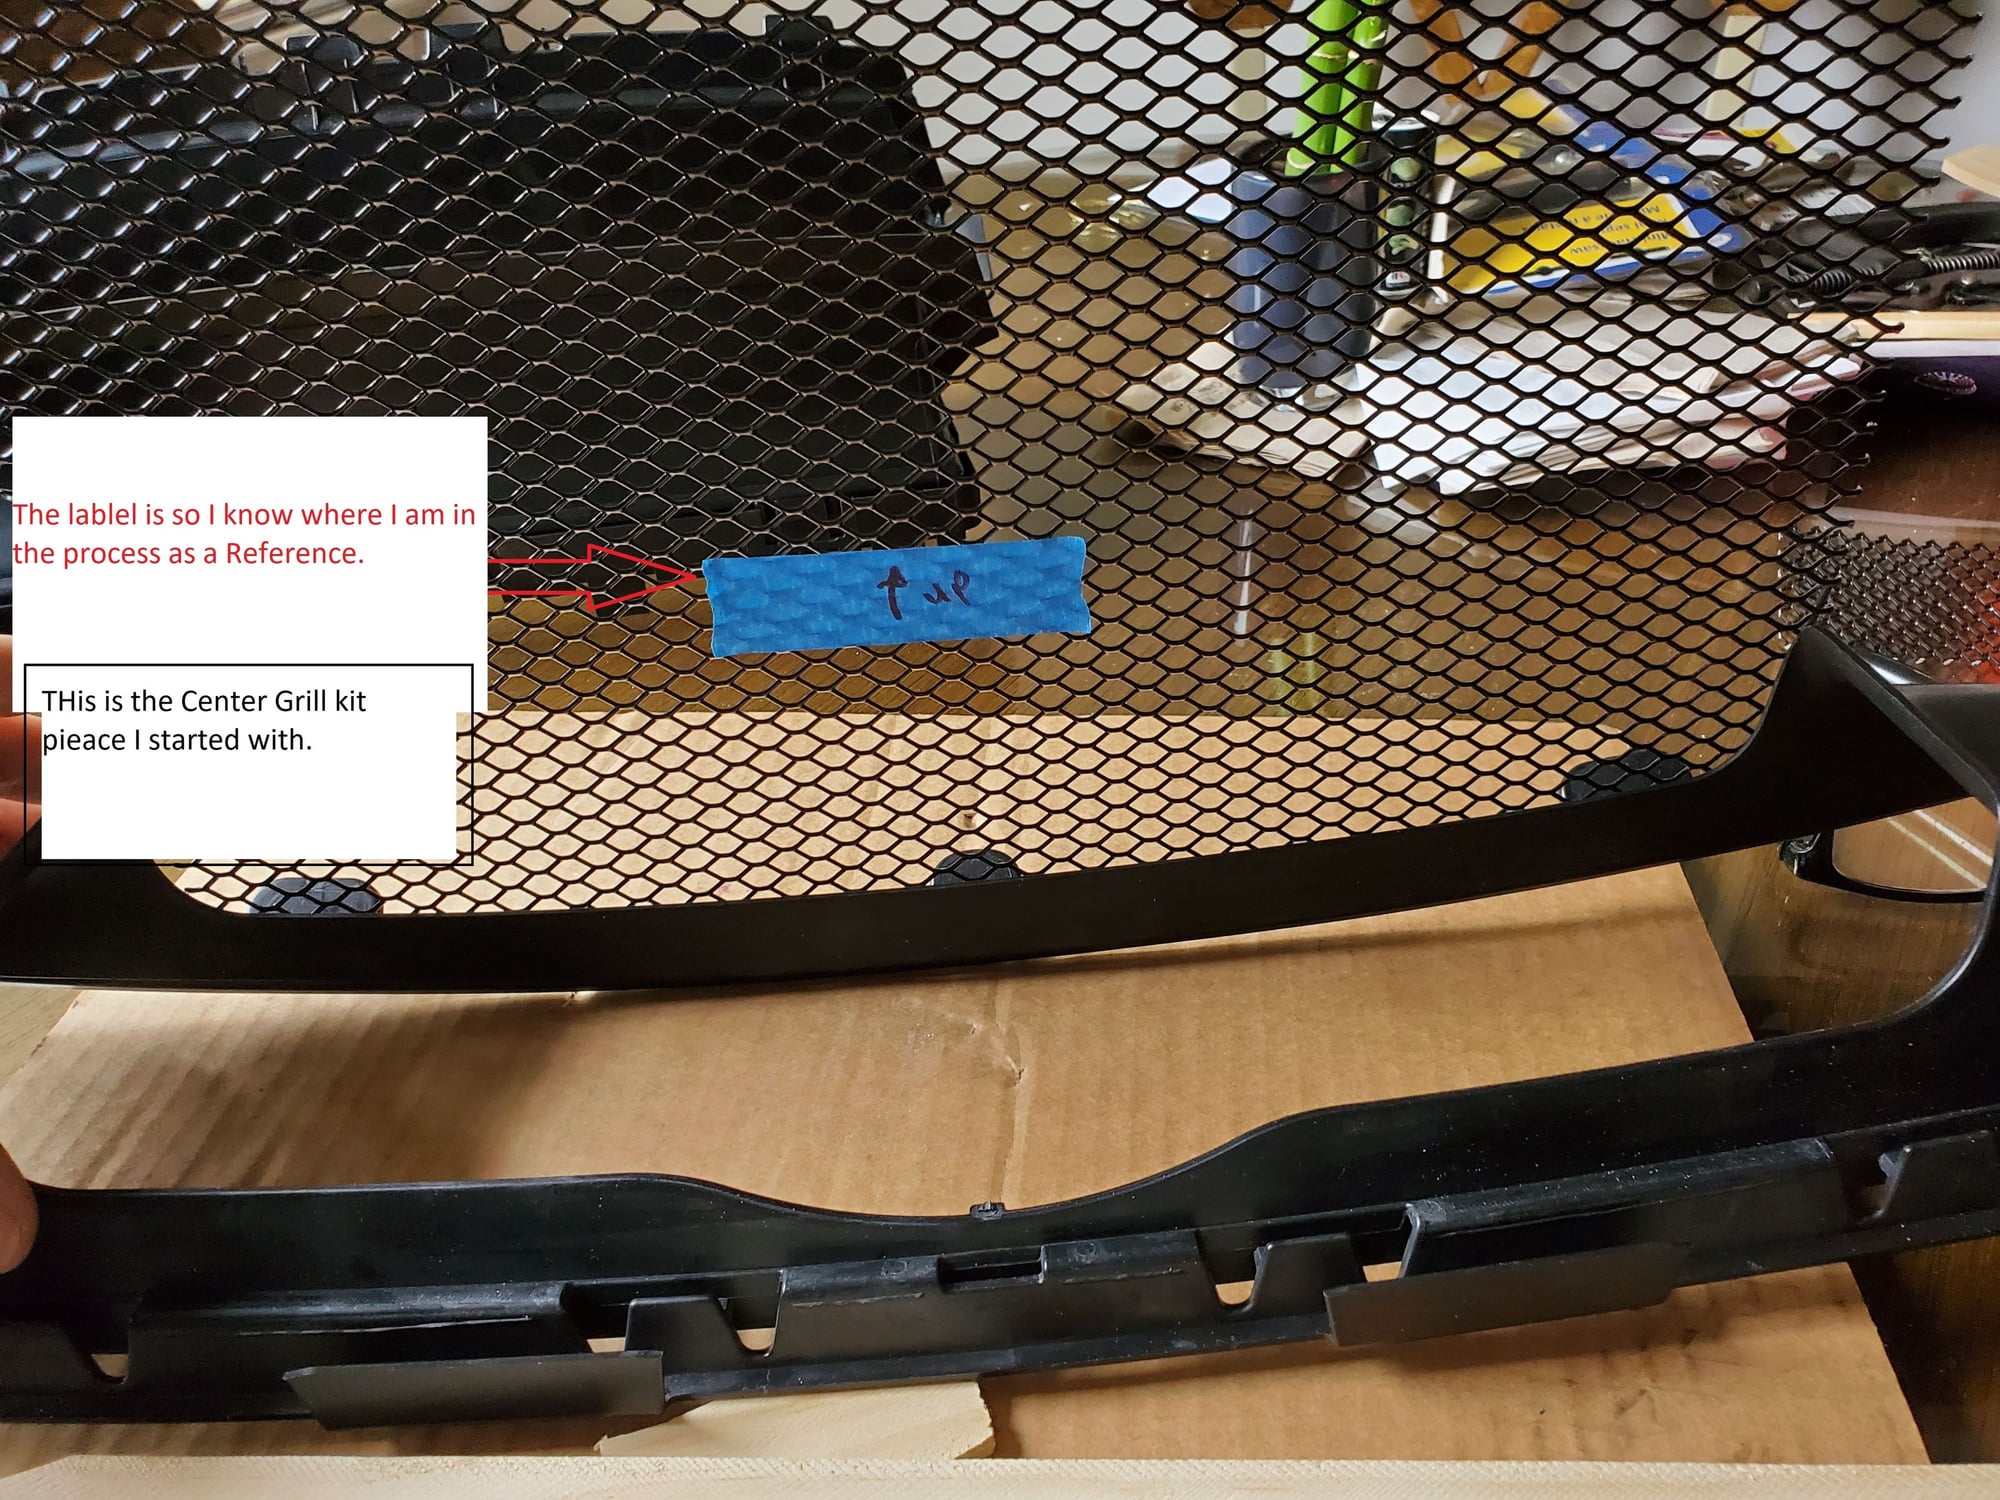
Center Grill
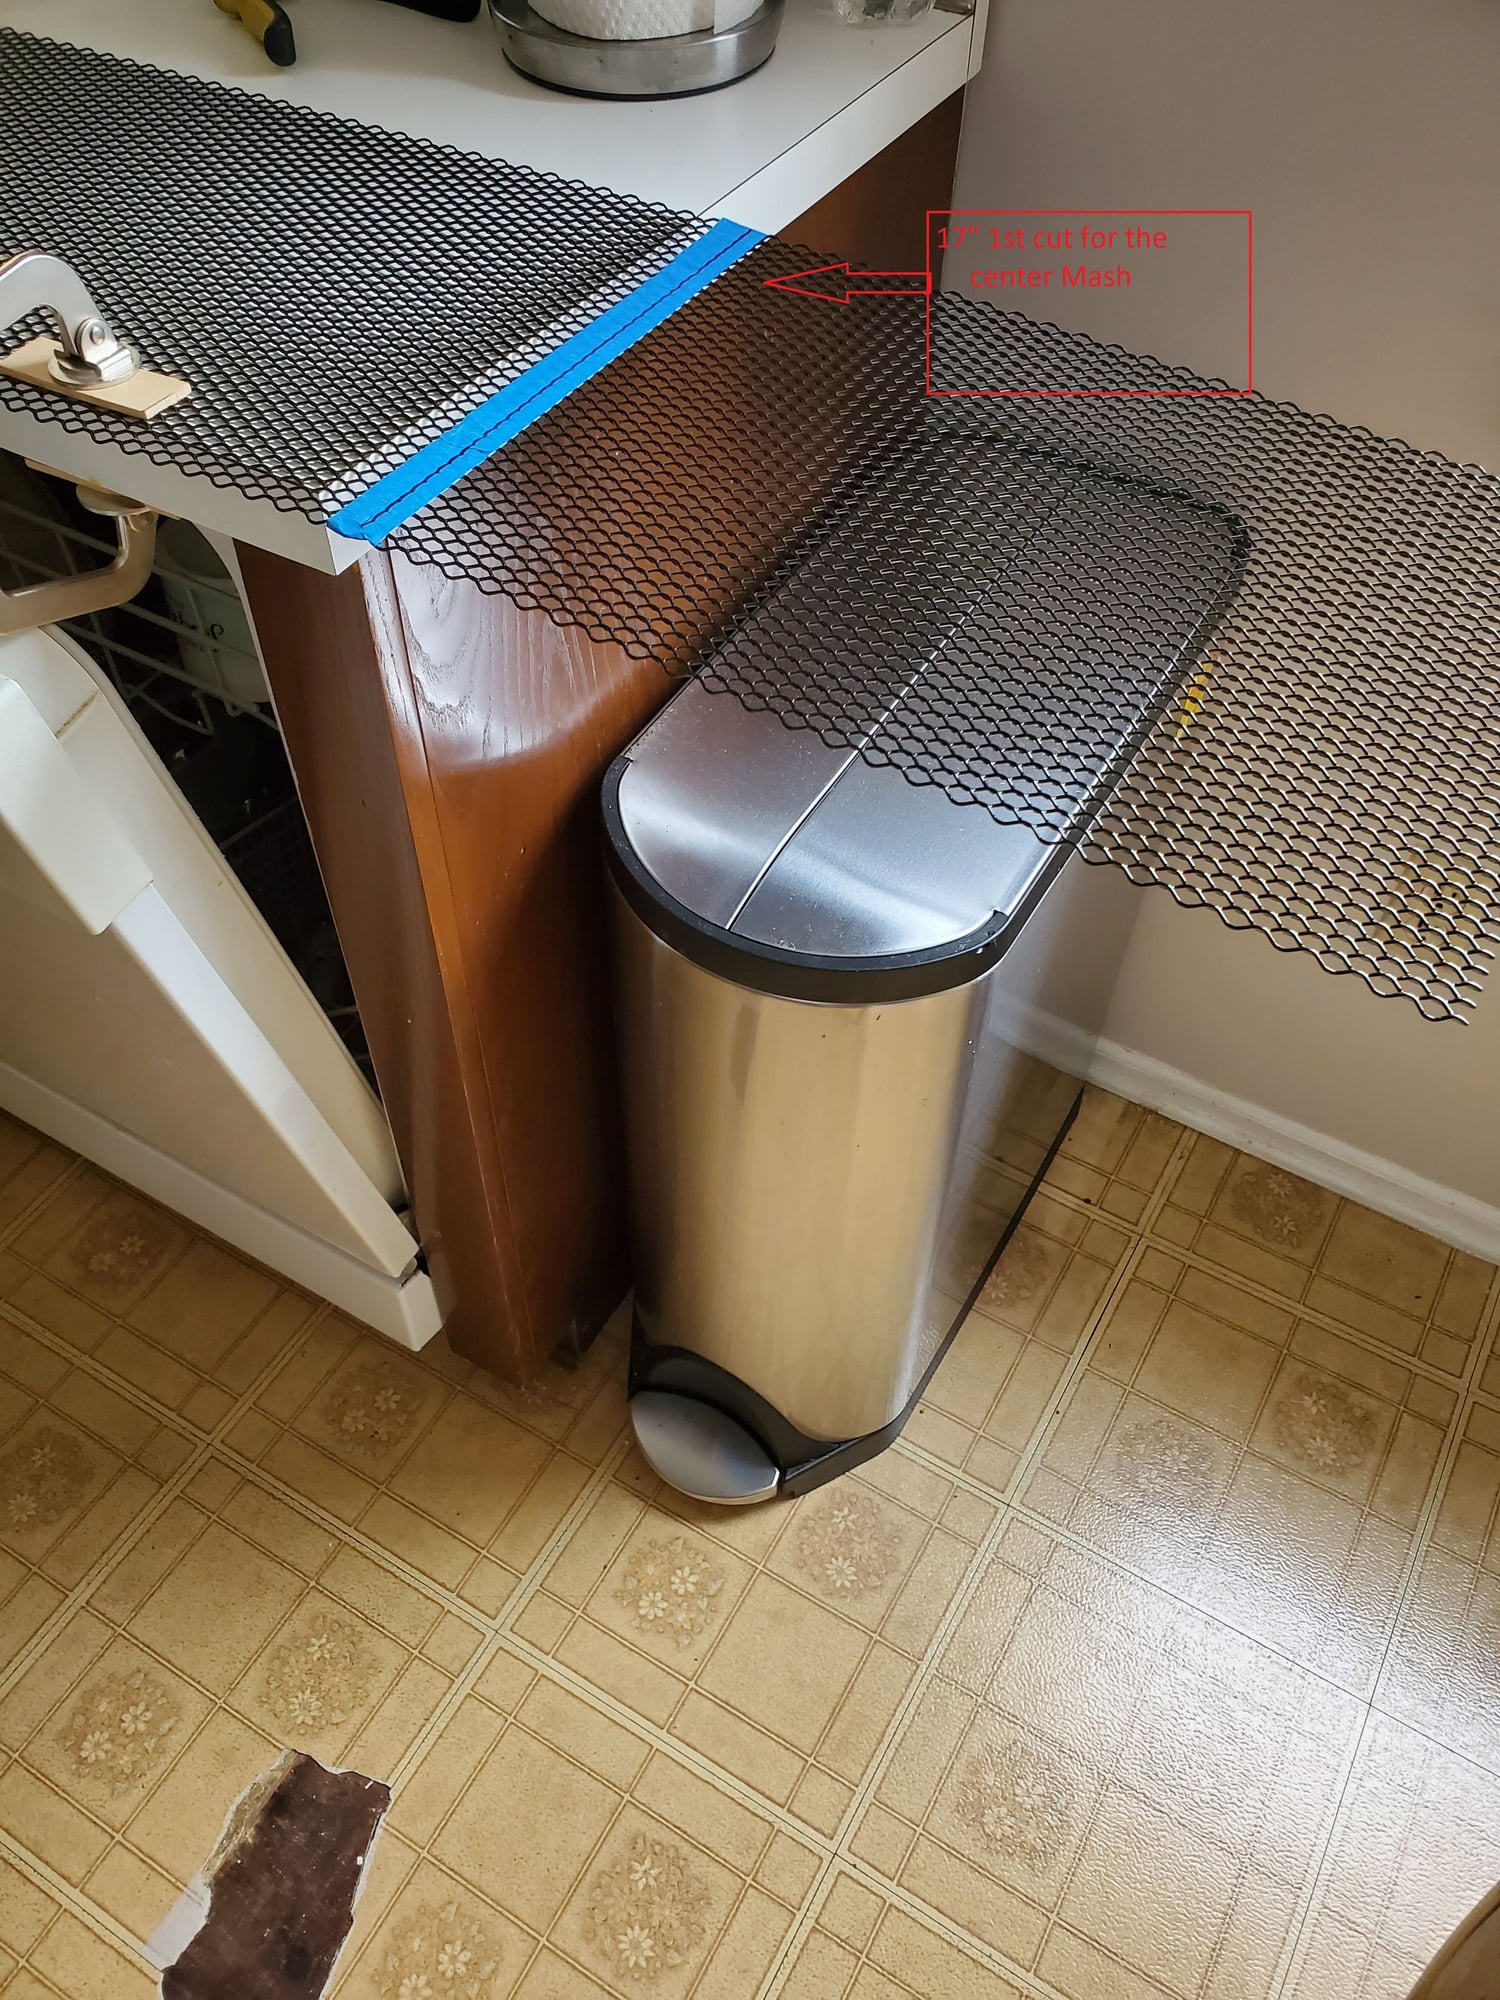
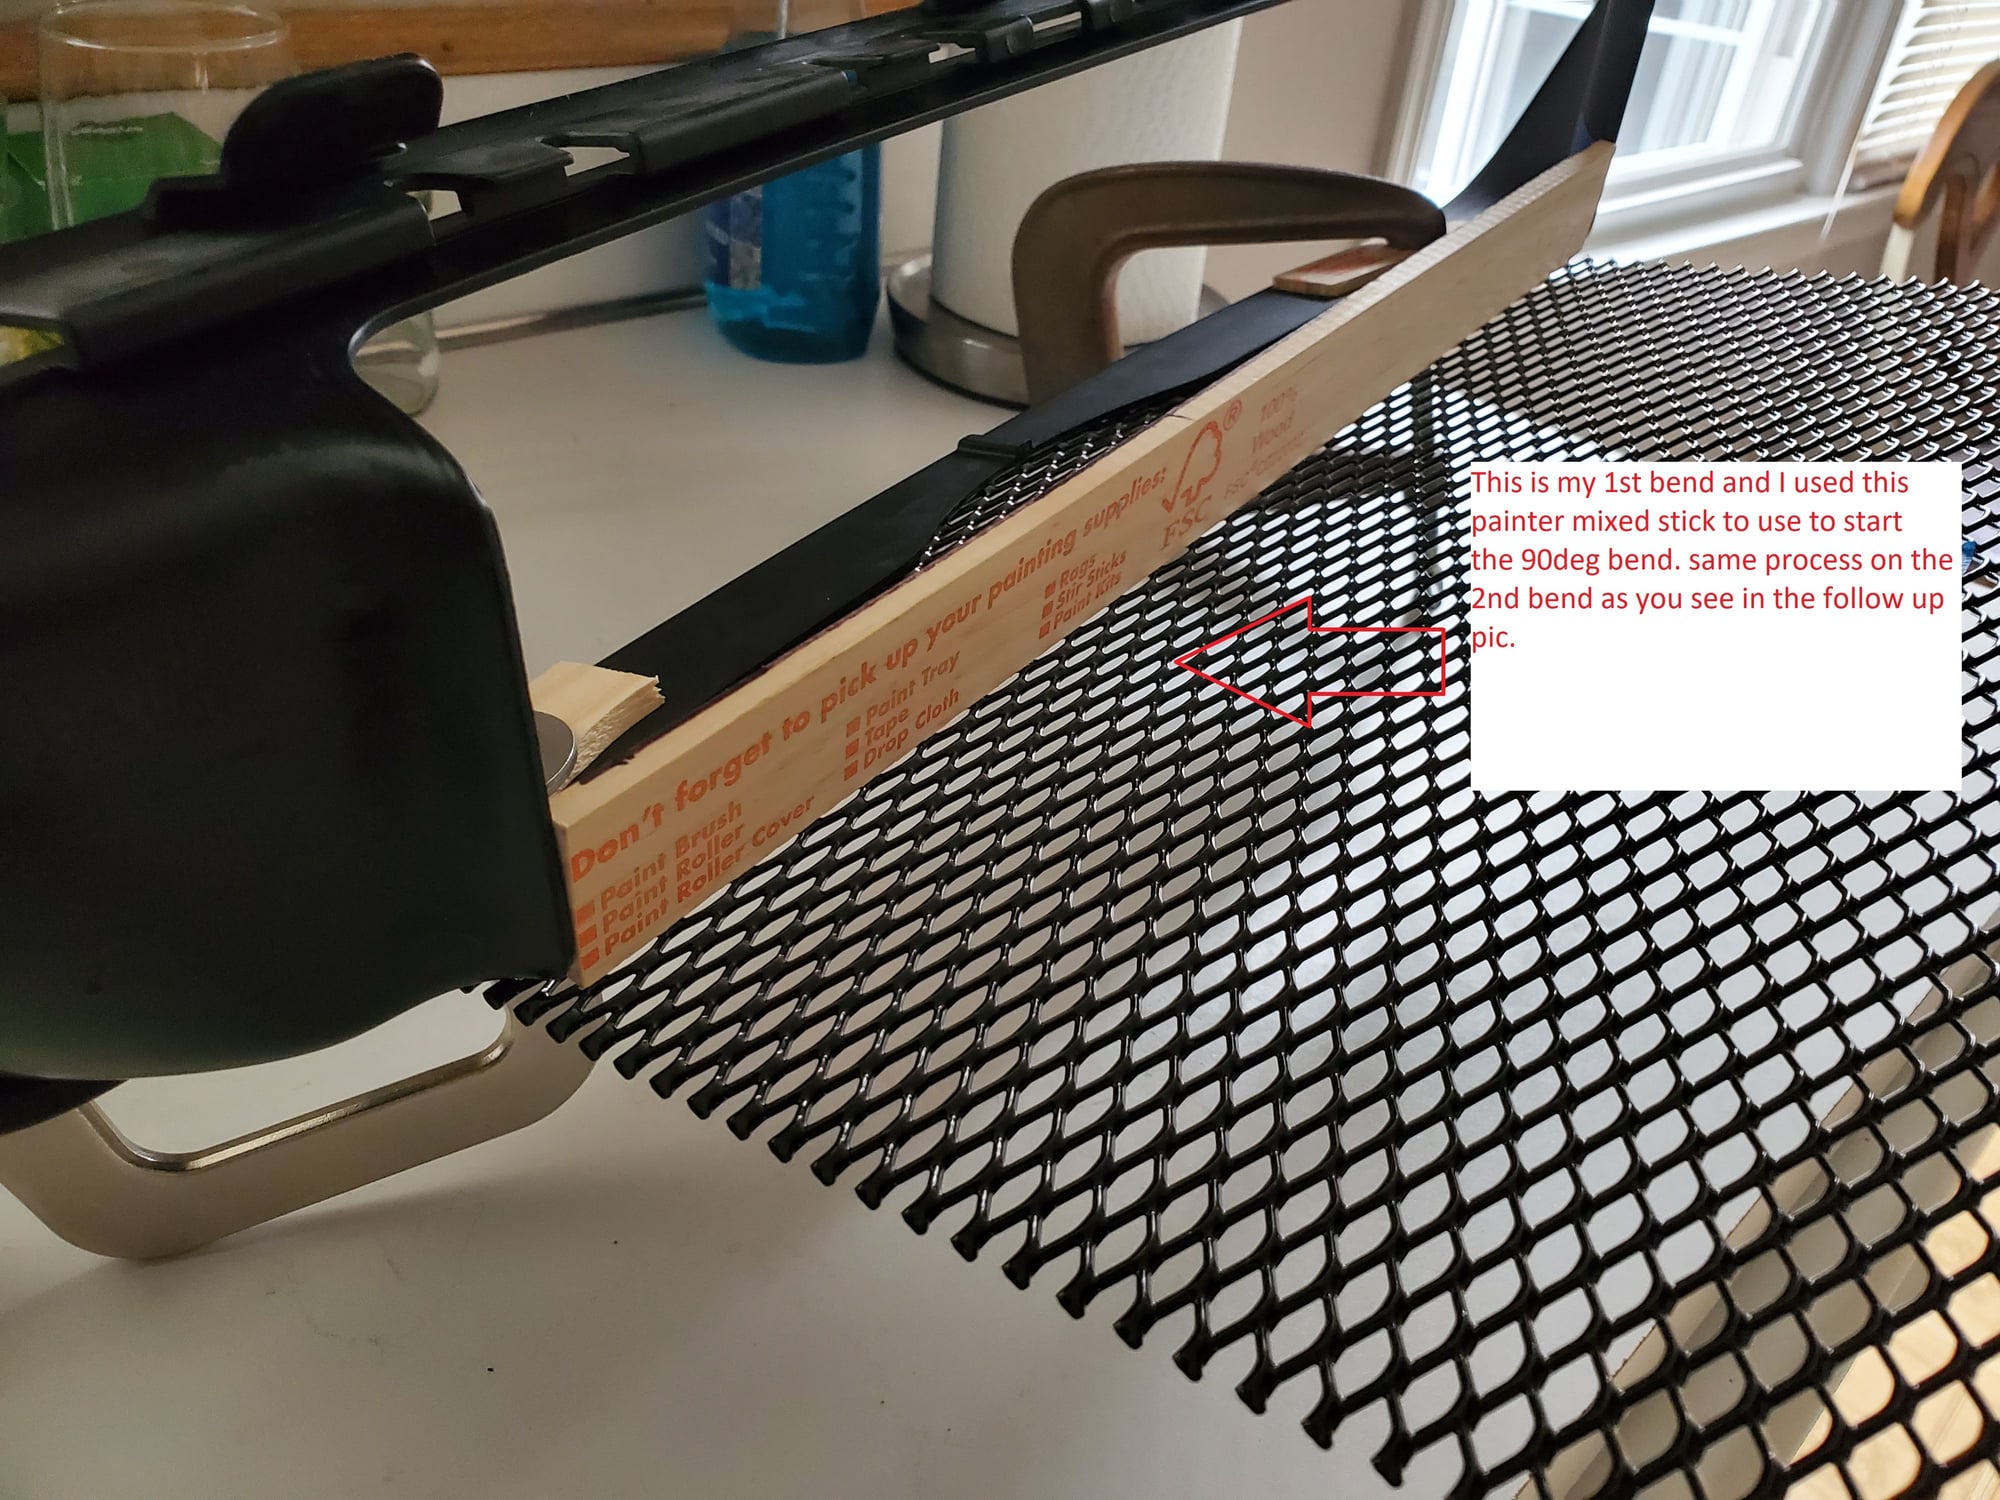
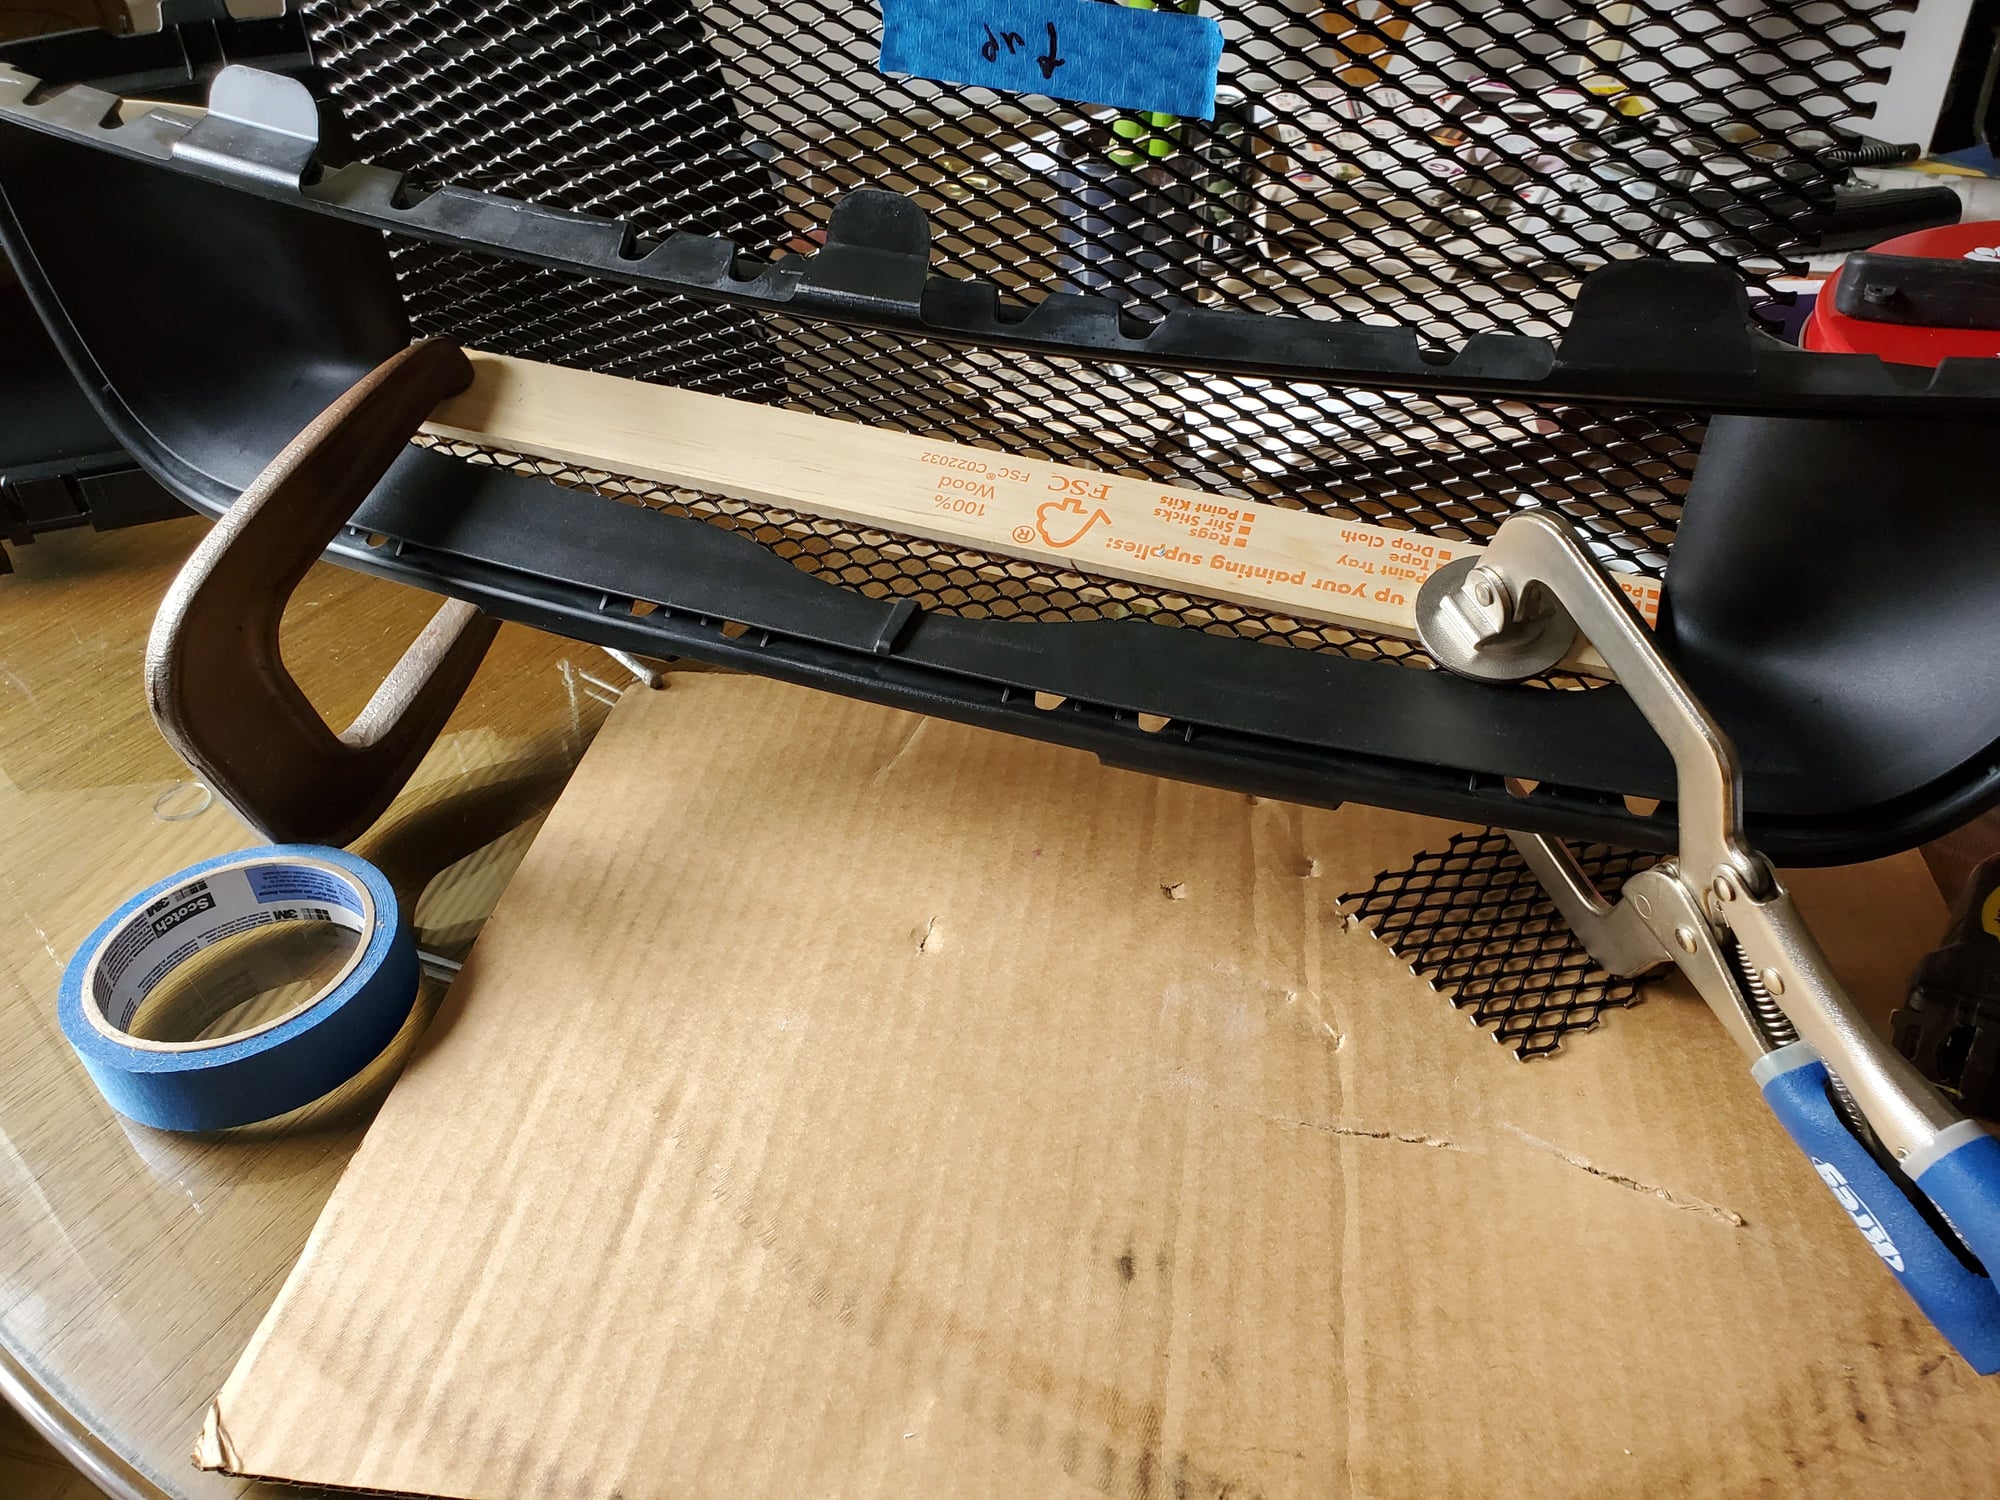
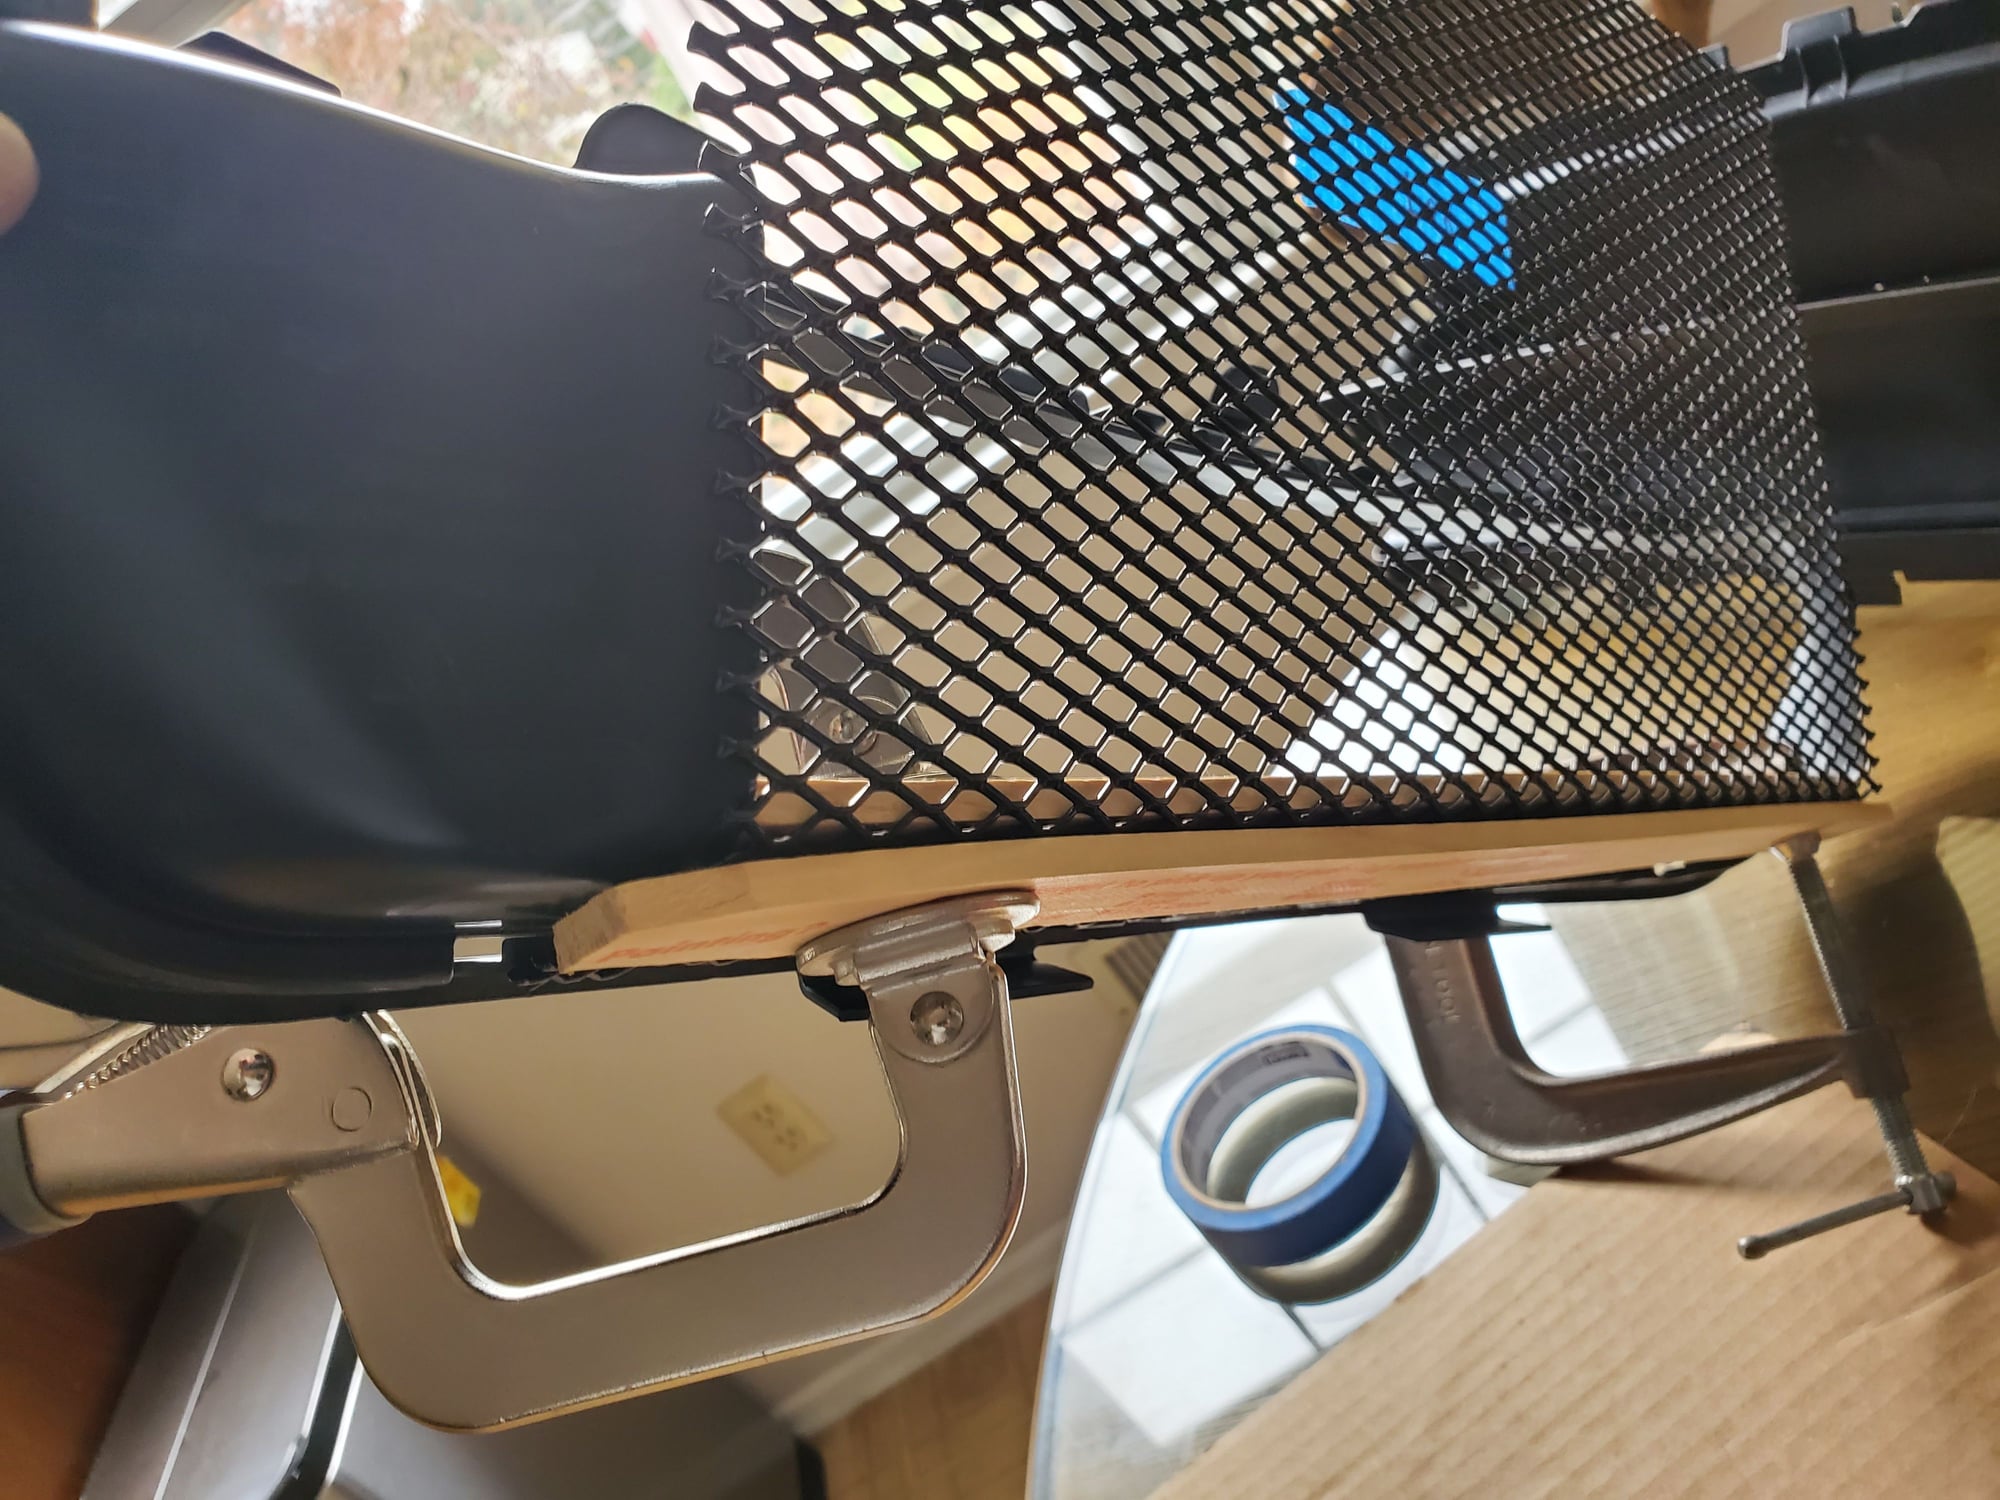
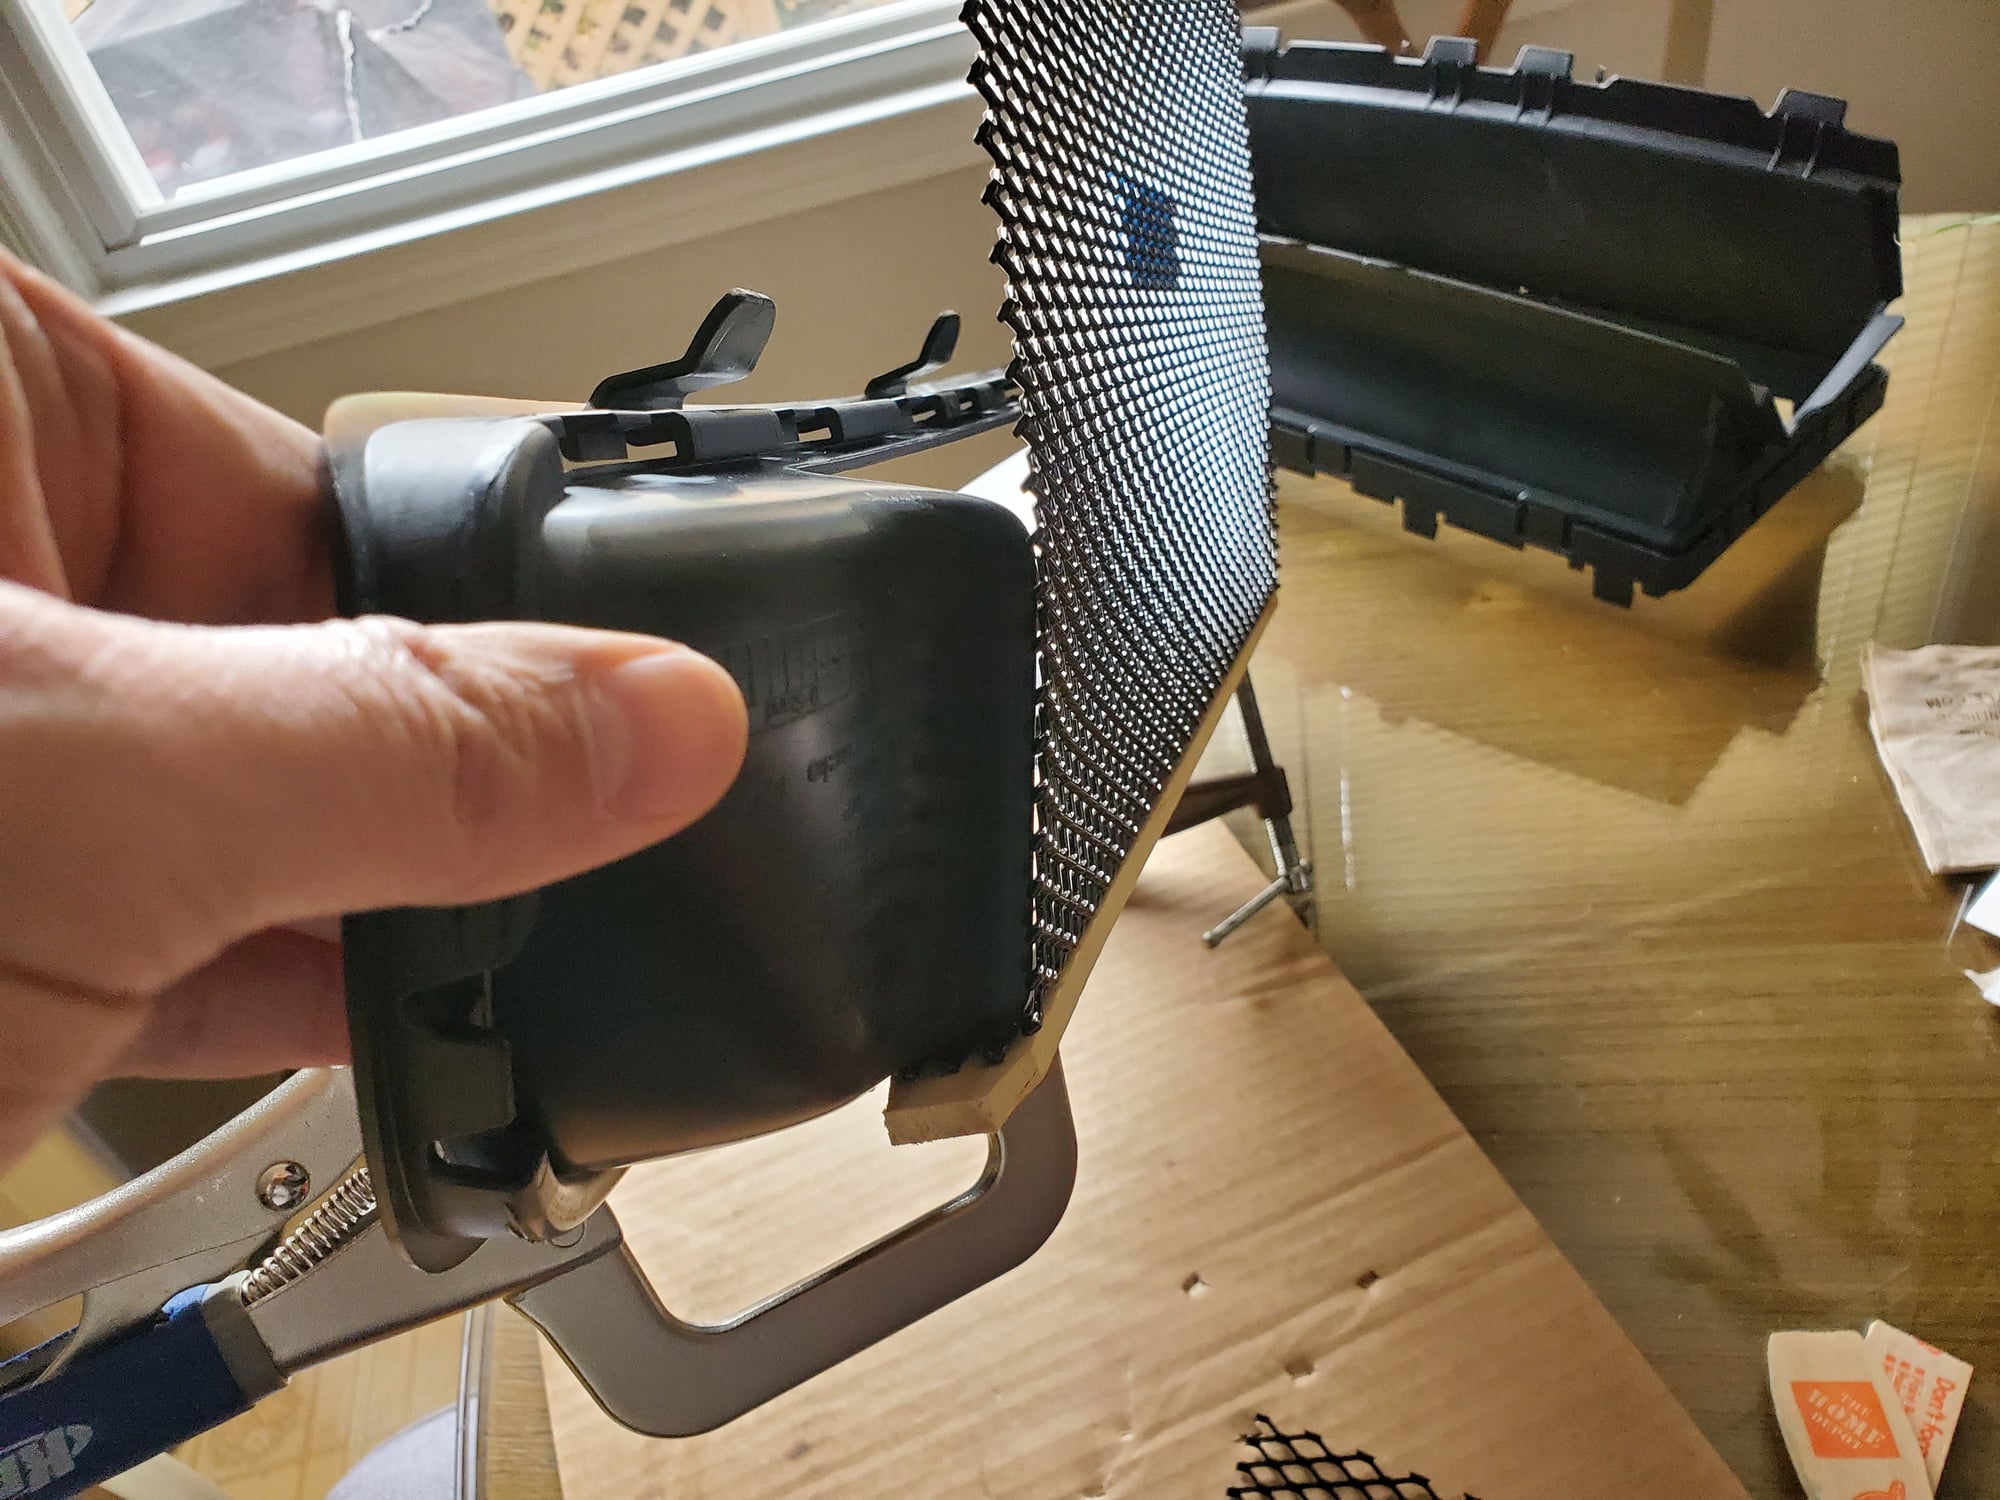
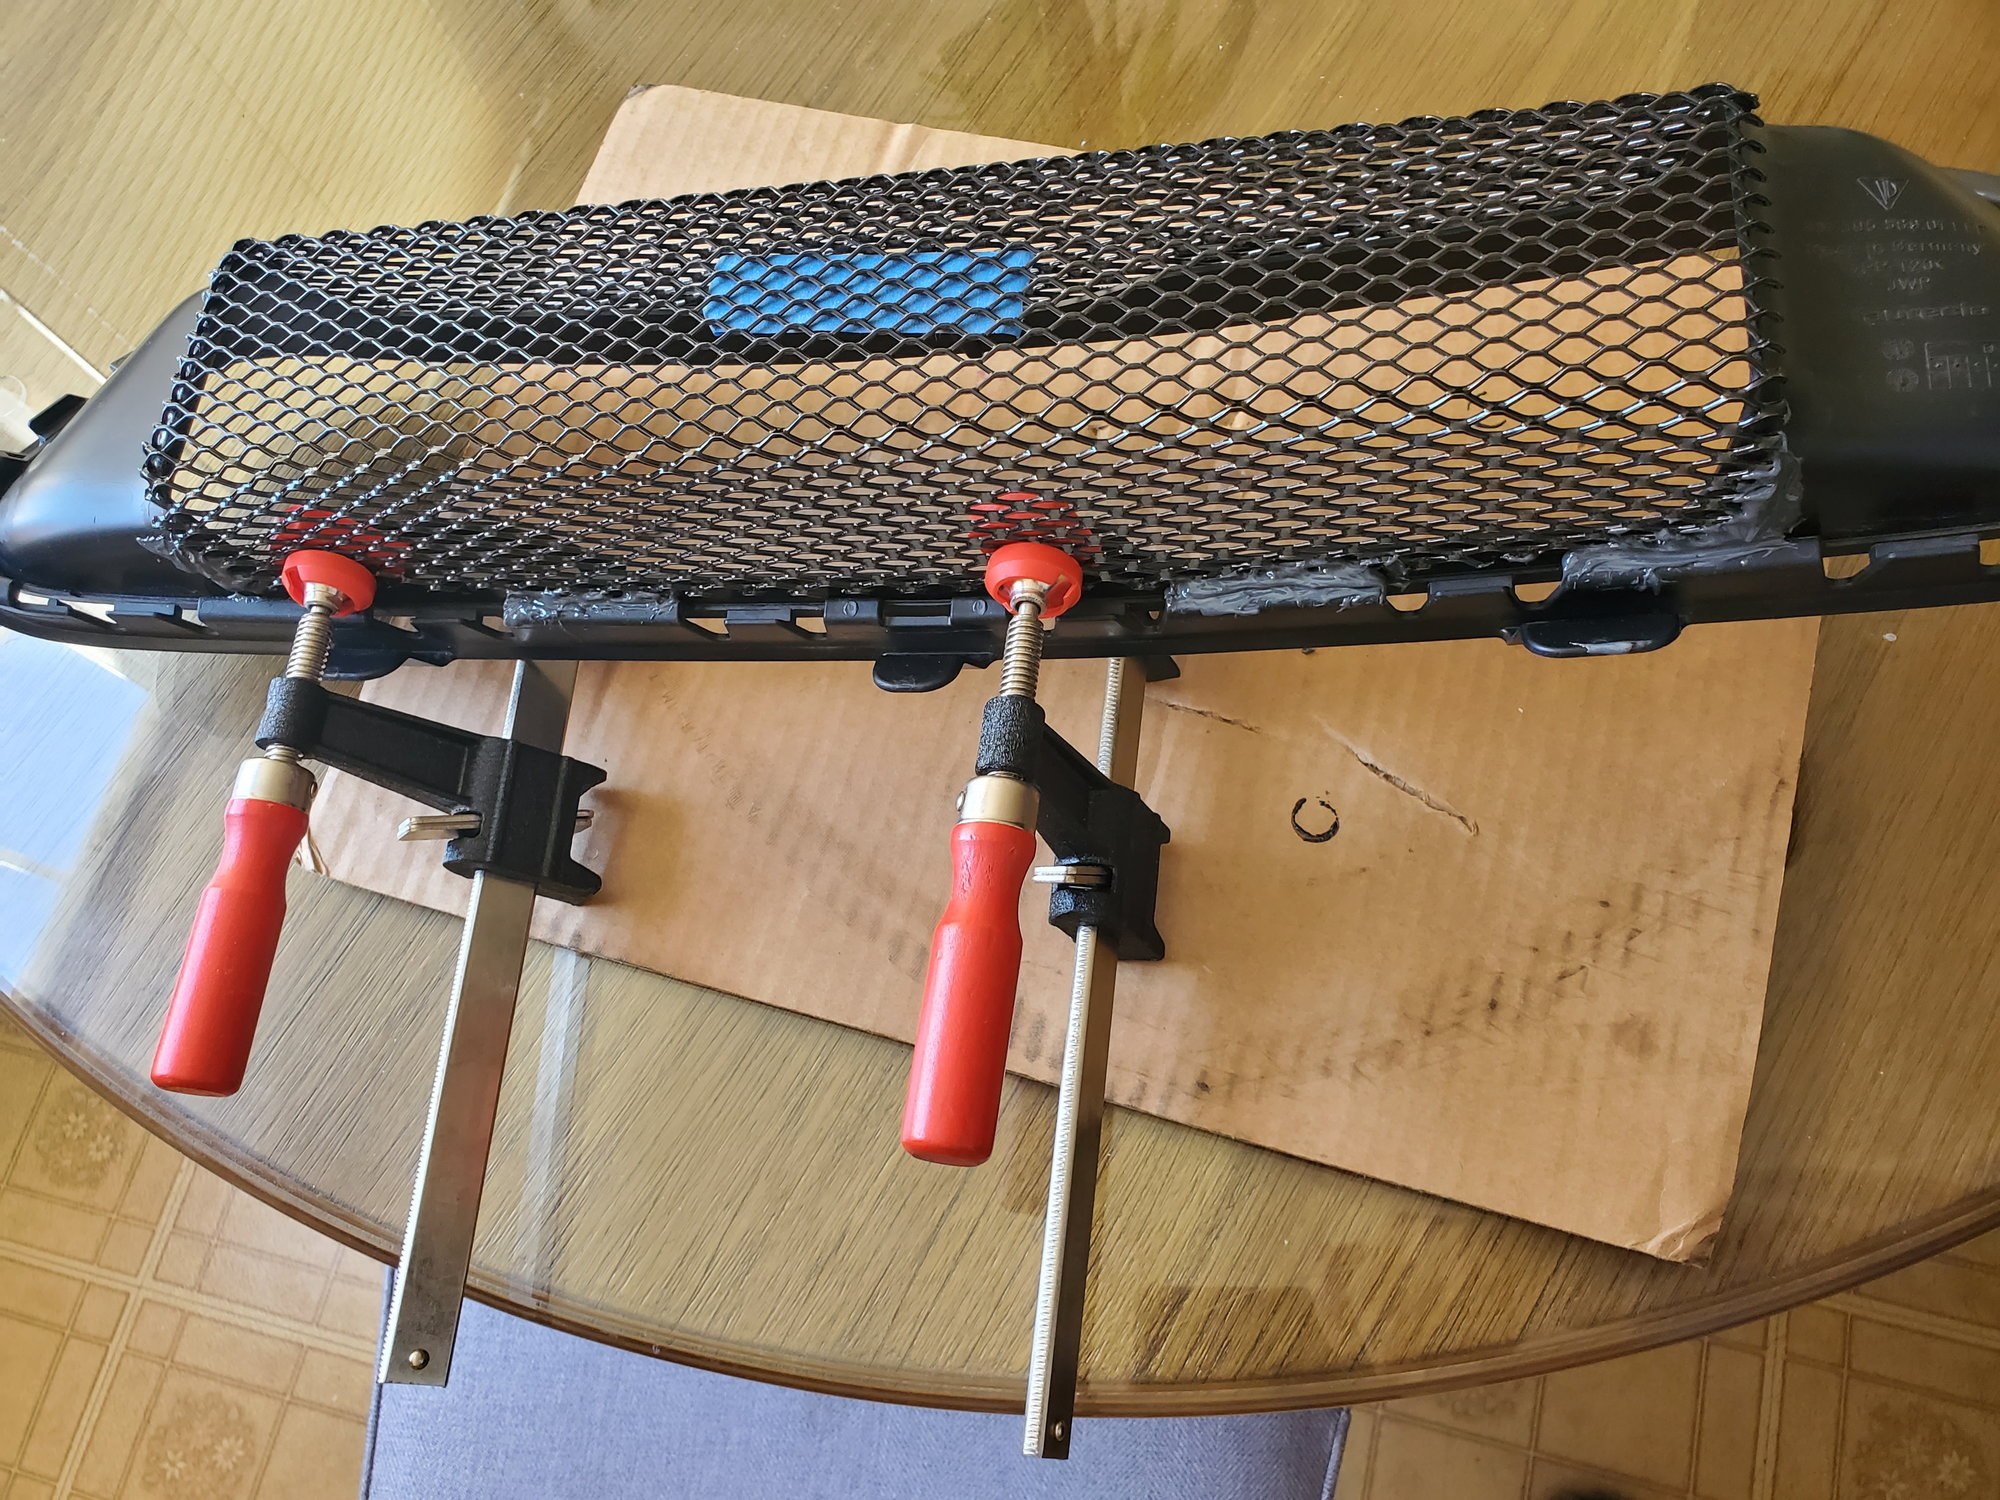
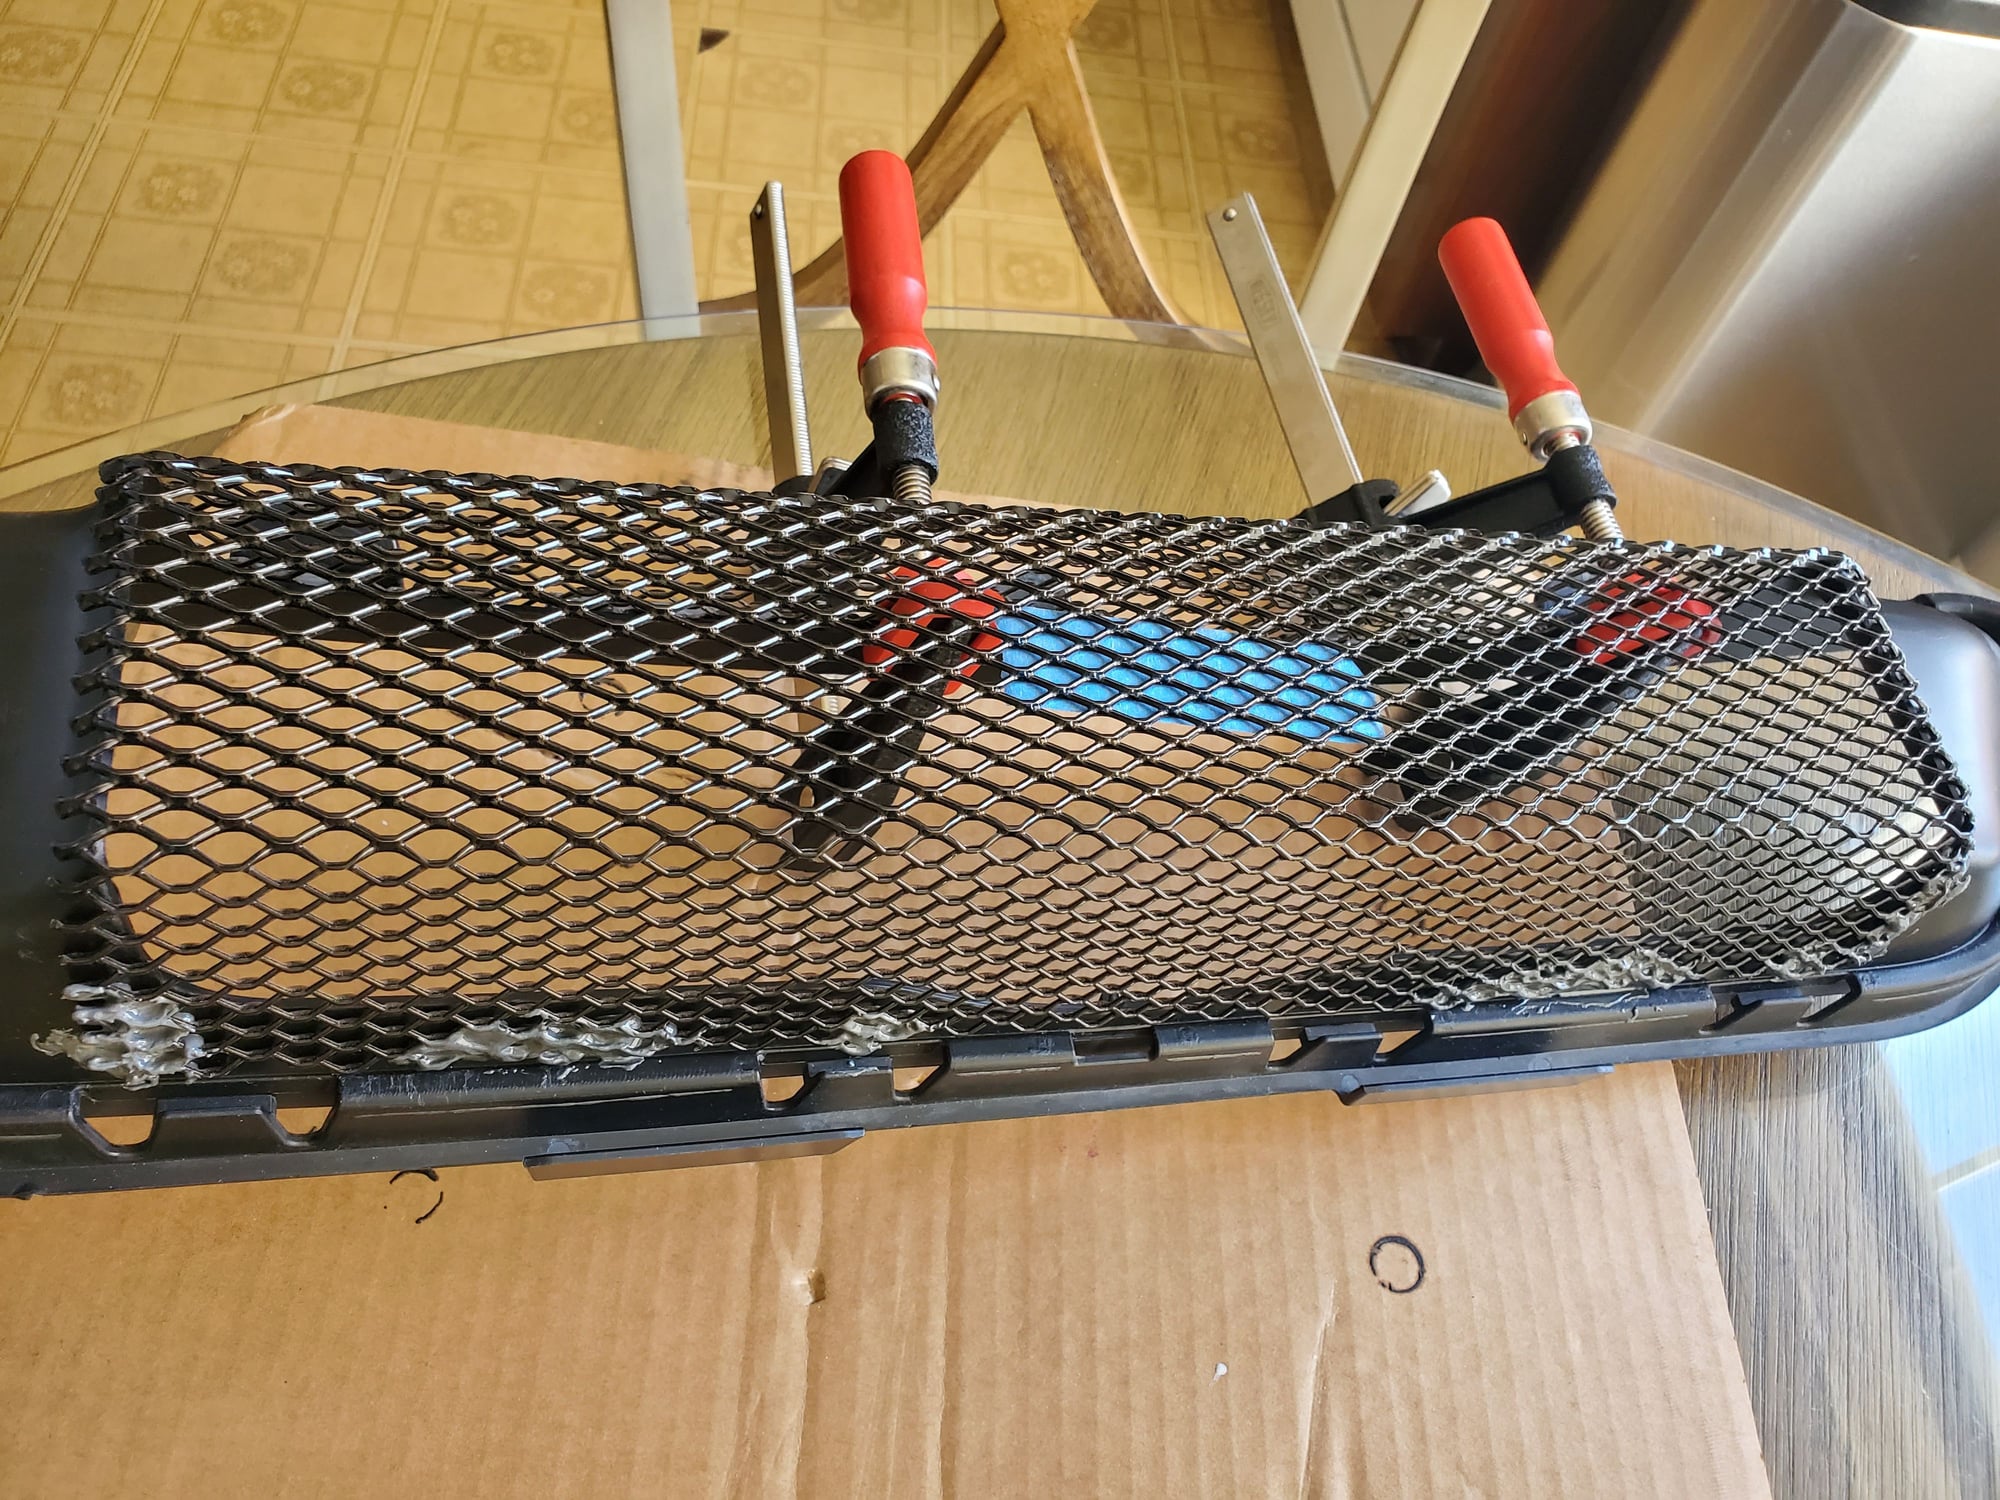
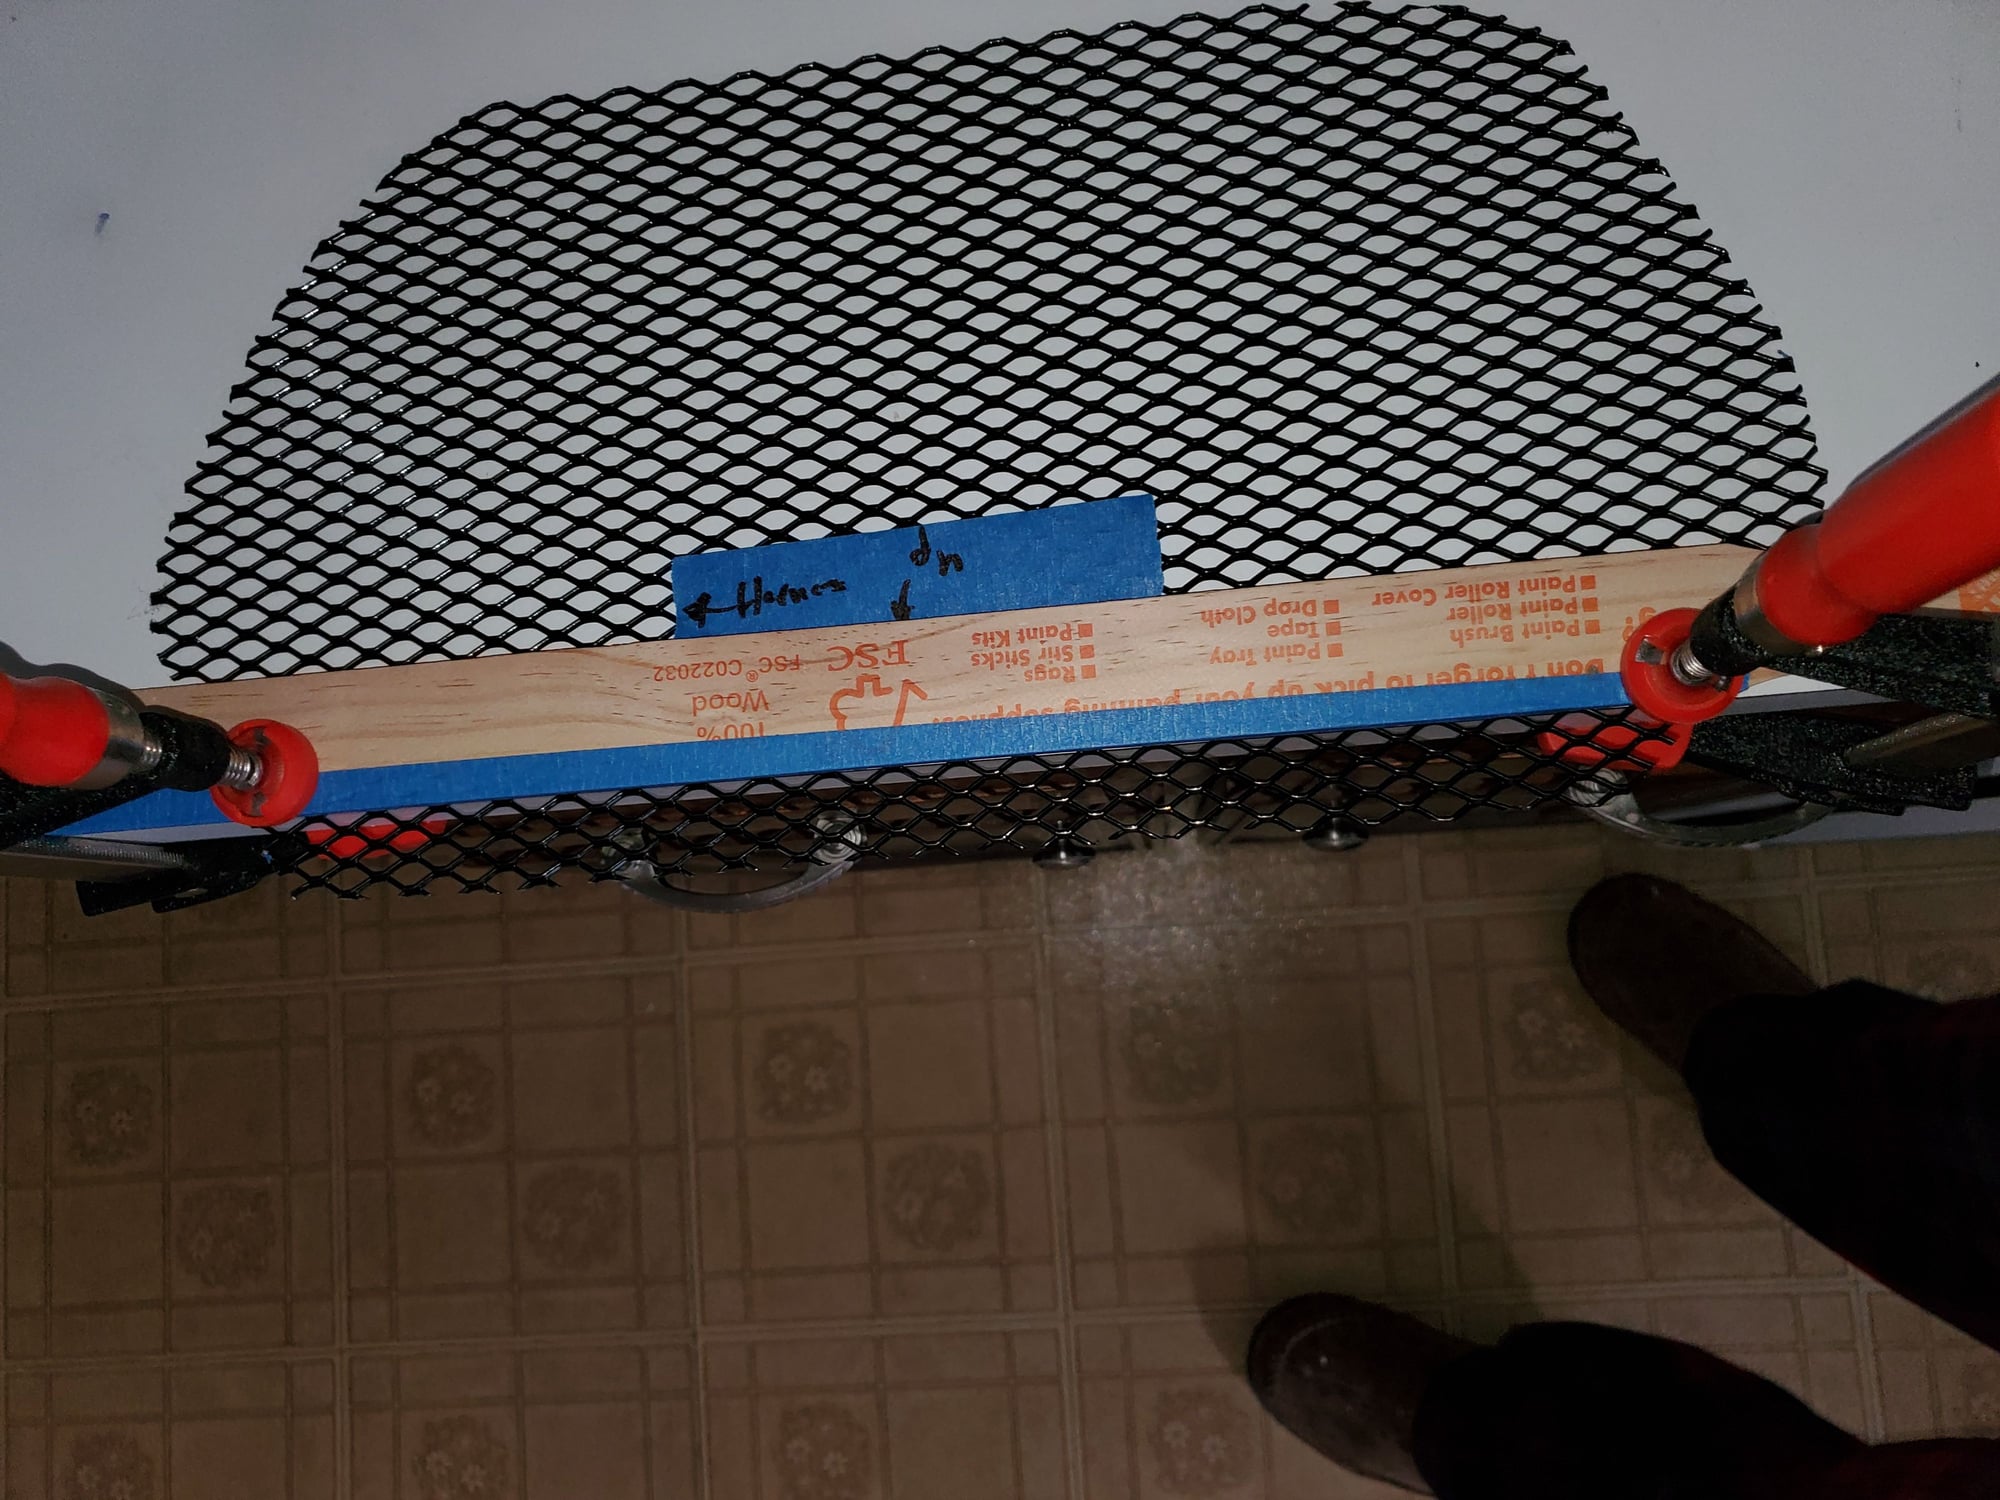
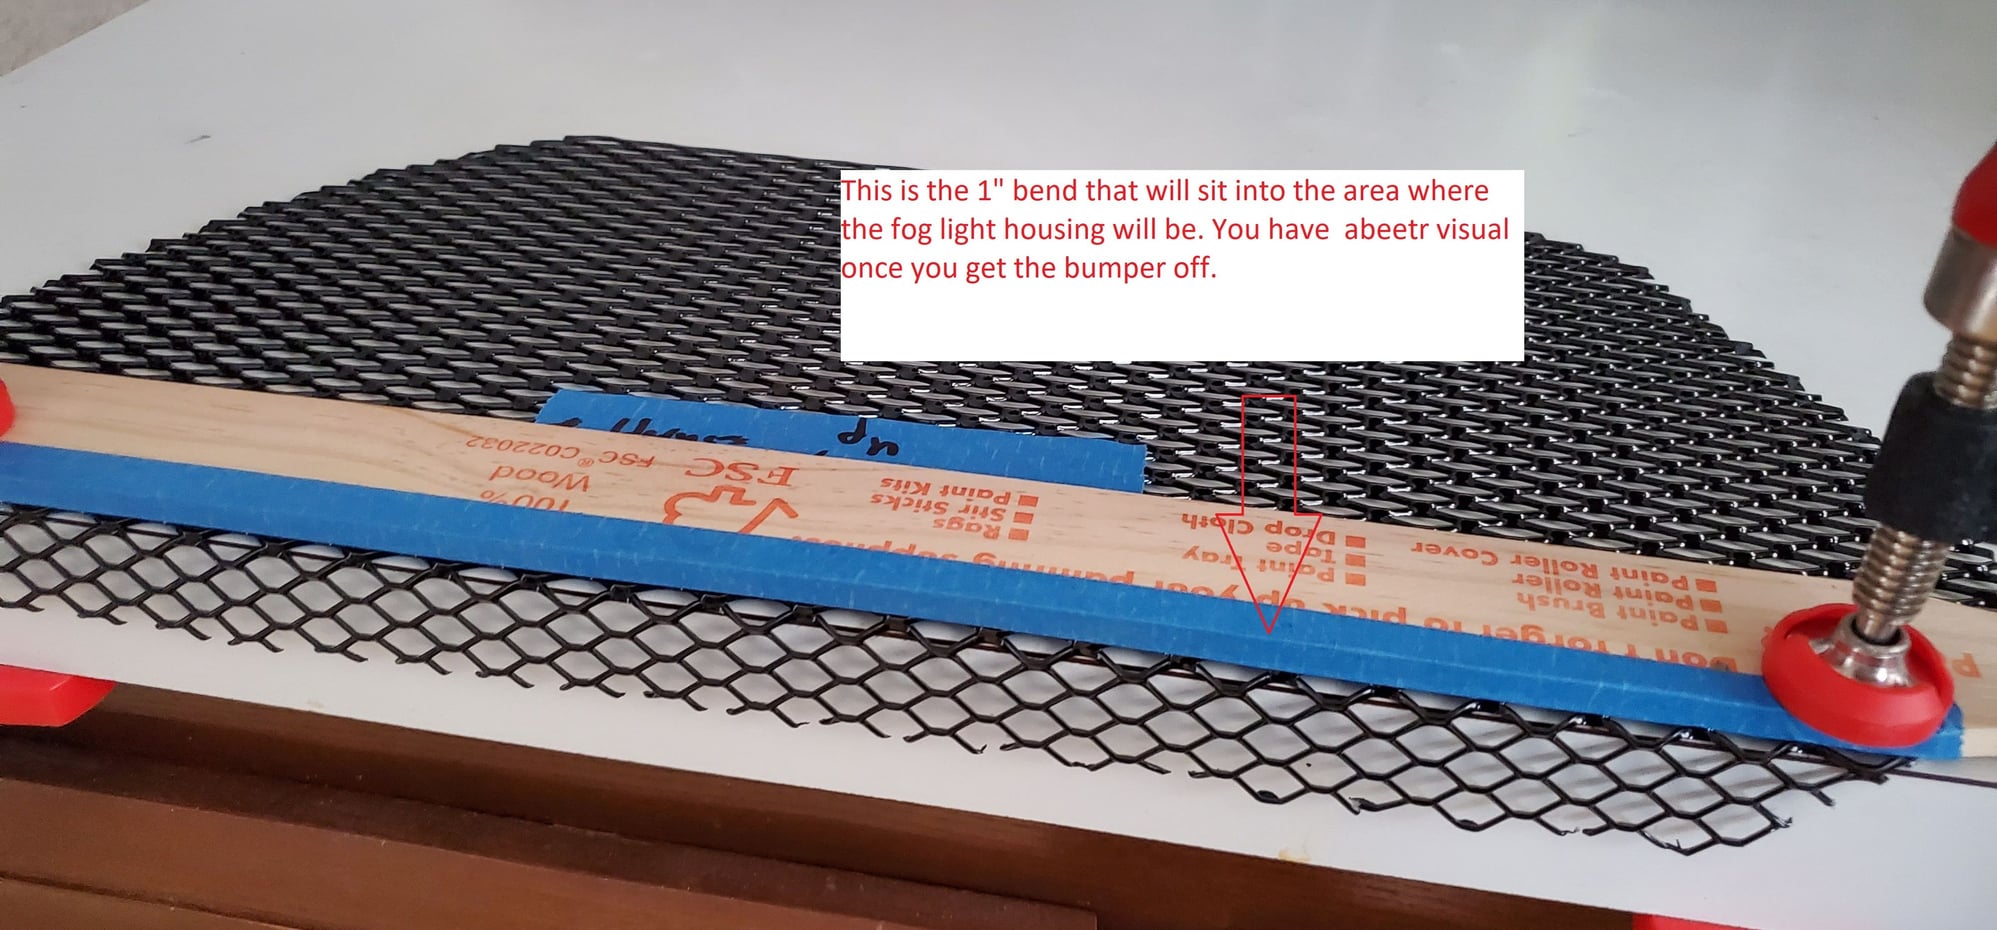
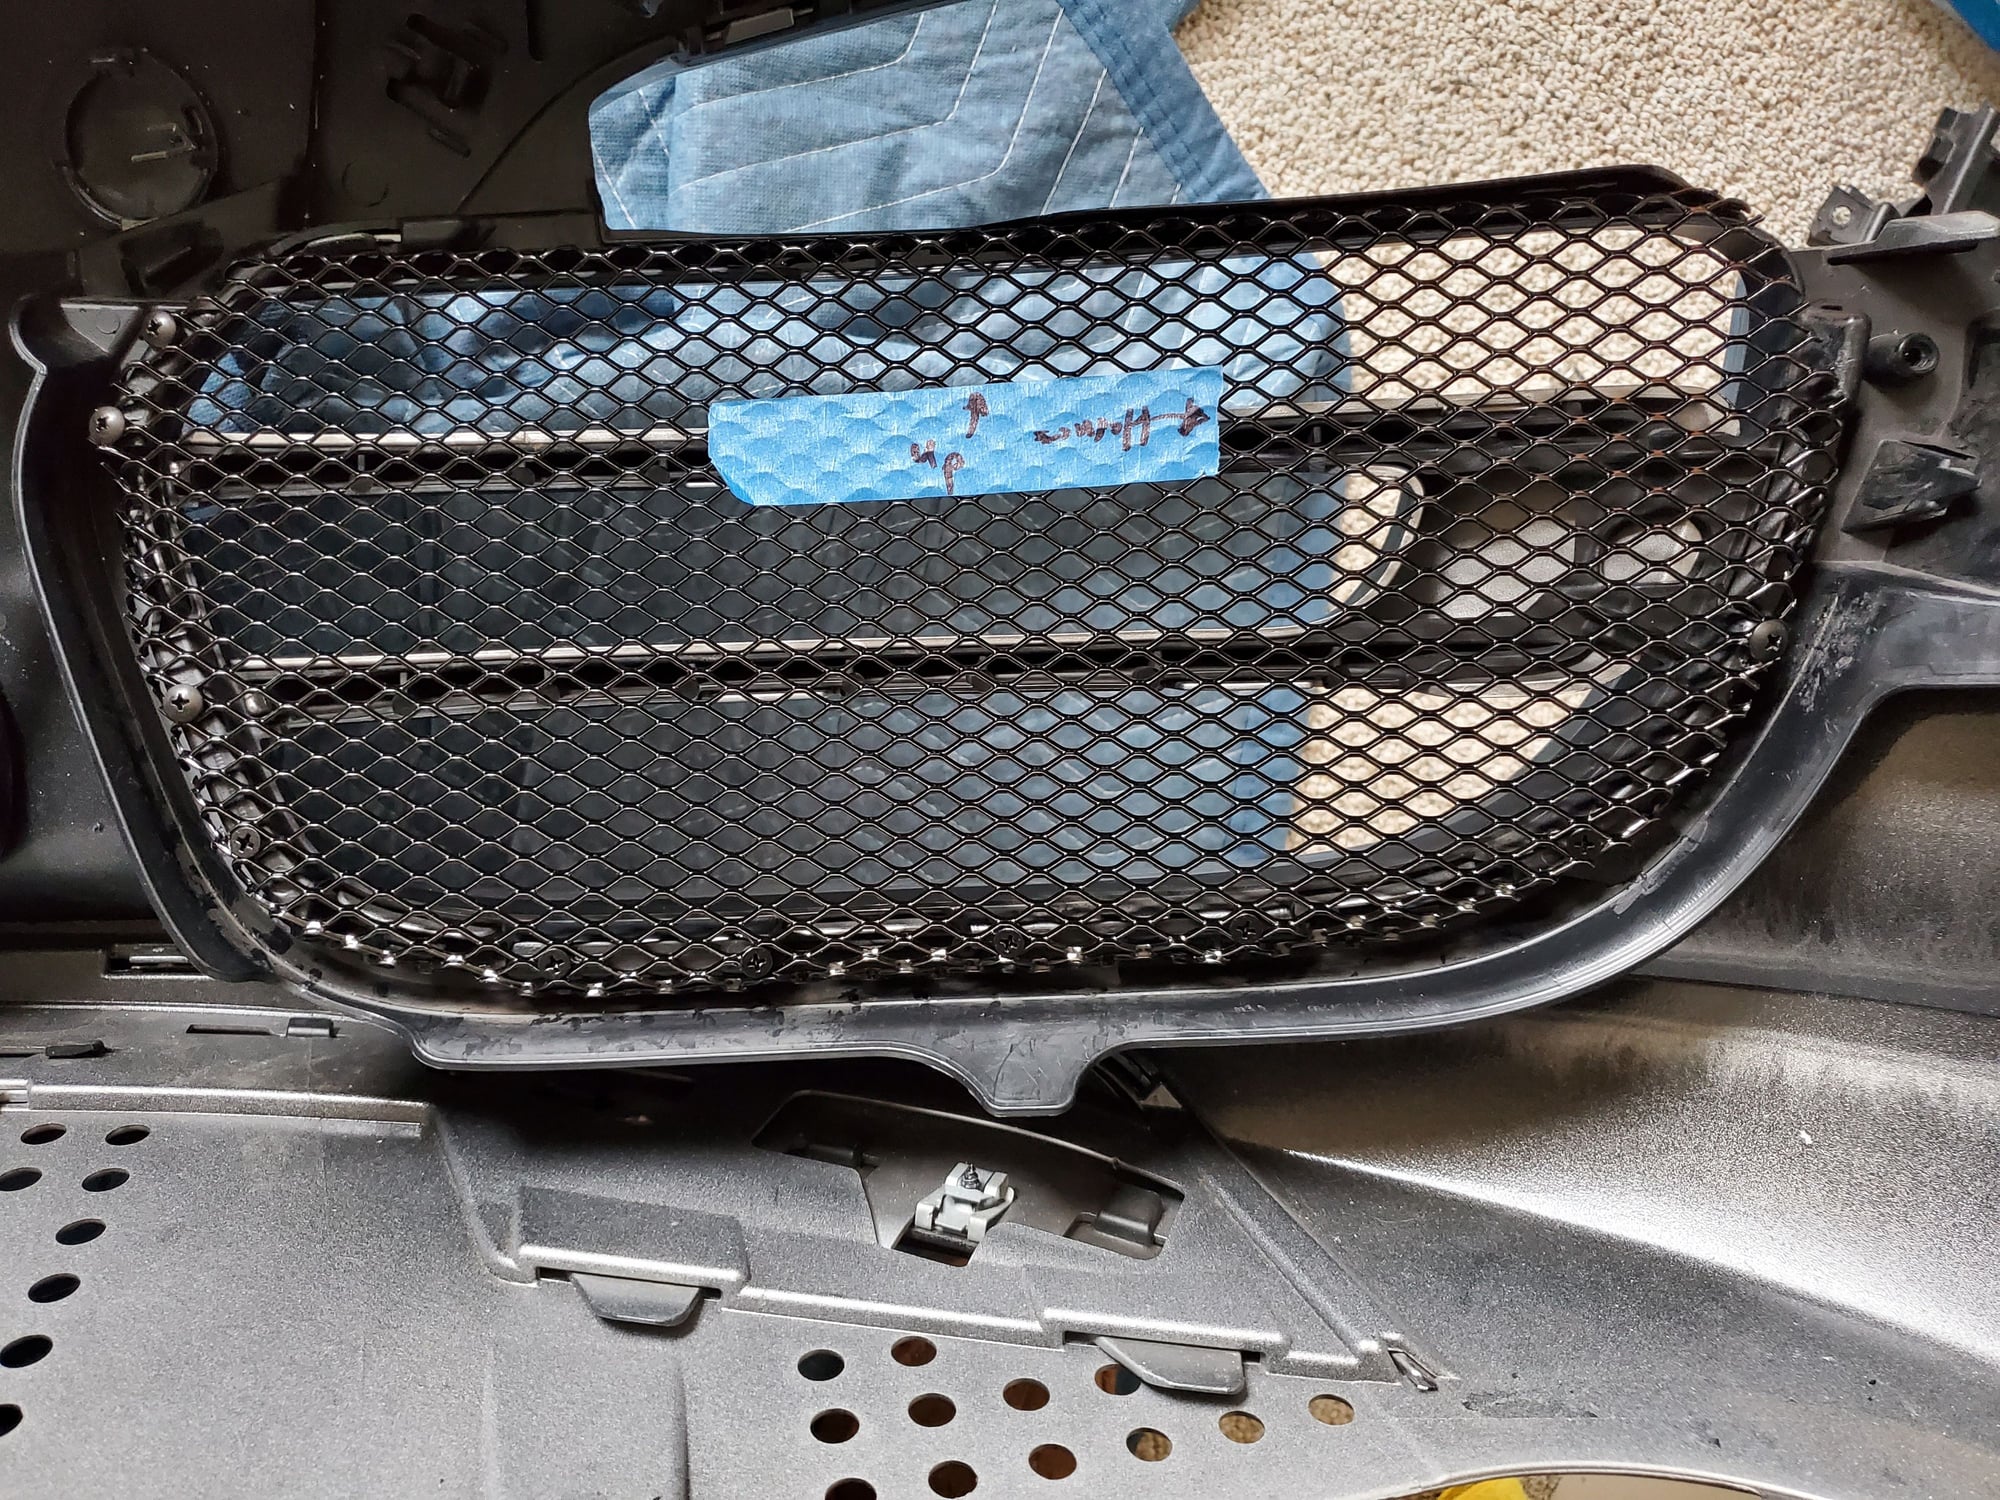
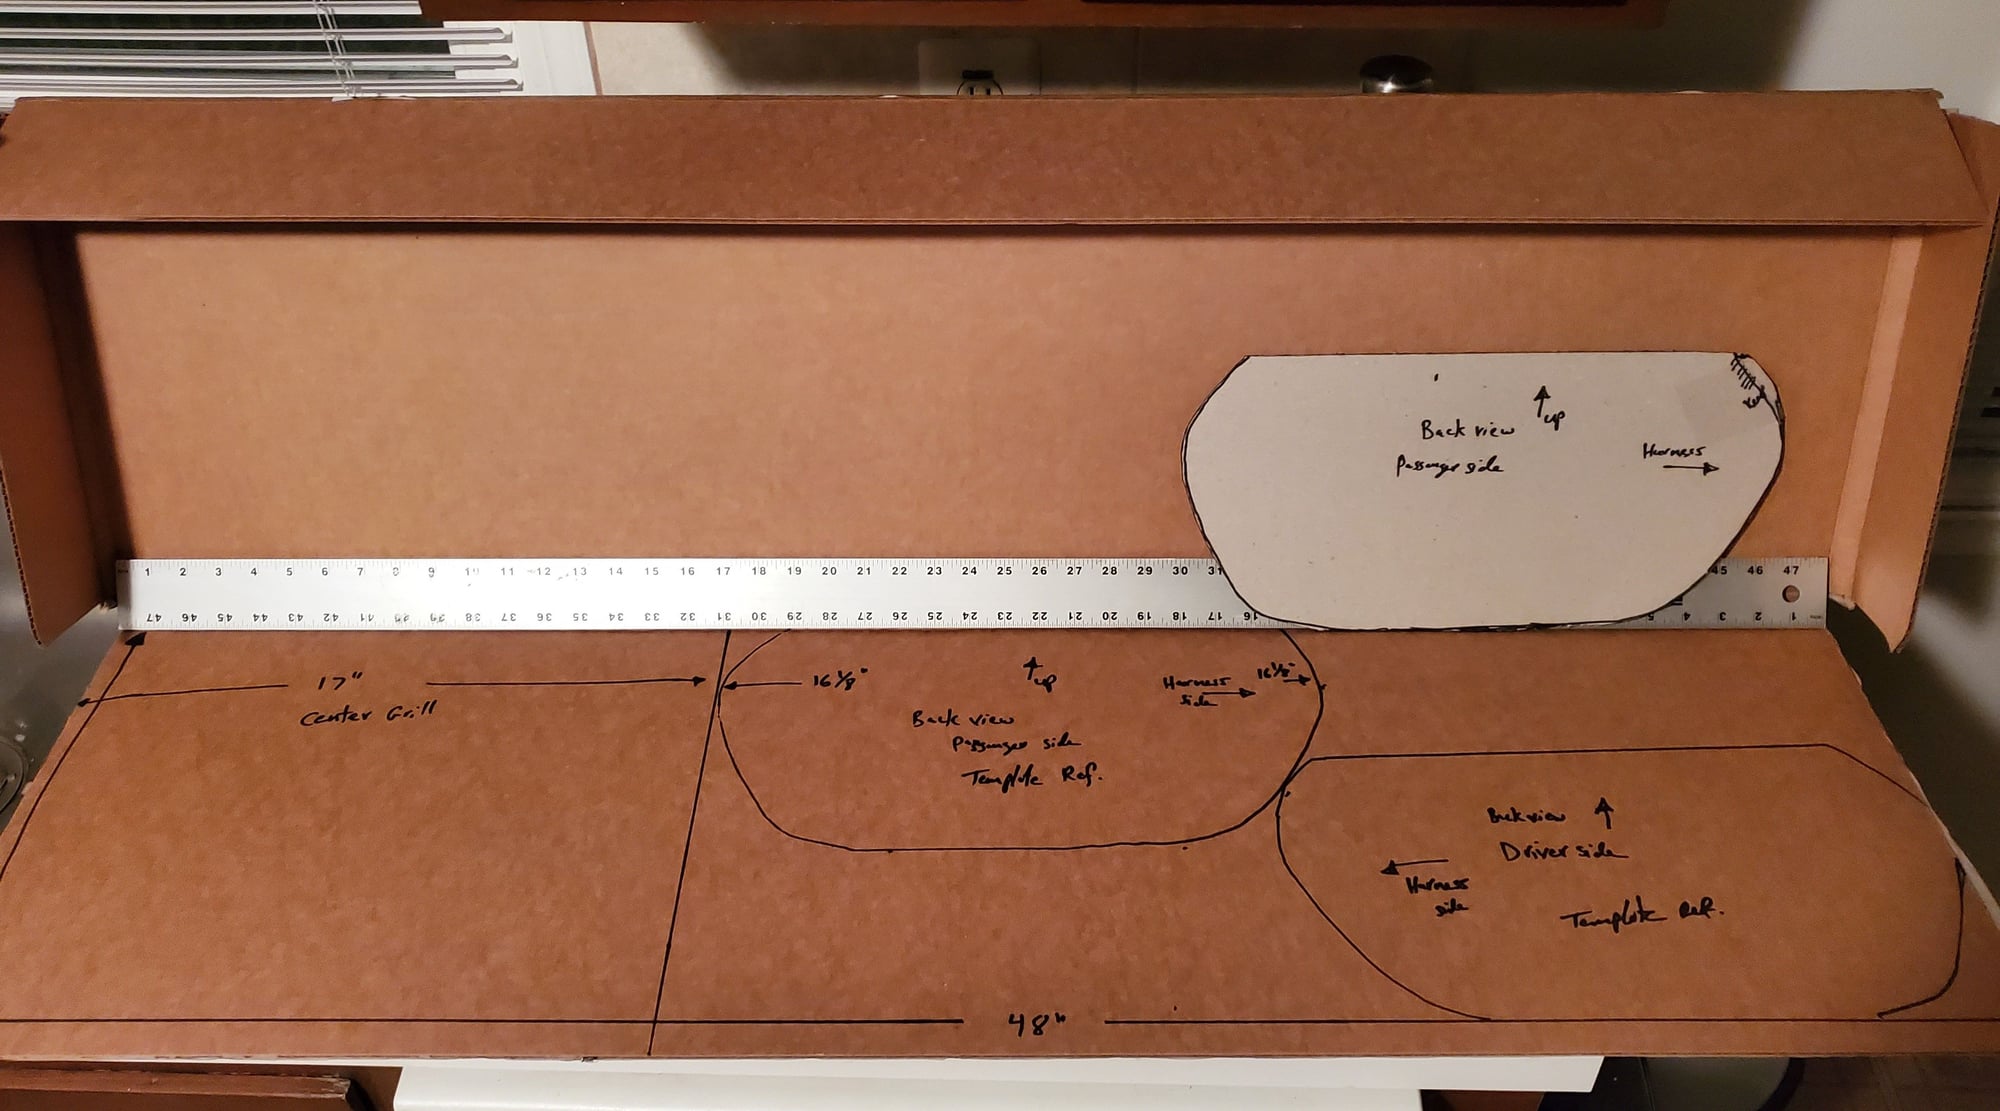
I started the project by doing the center of the bumper the kit from Suncoast which already is in hand as you see from the pics. This was probably the trickiest one to fabricate since you have to do several bends to follow the shape of the plastic mold and the mesh. See pics as I have demonstrated what I had done to make it shape without compromising the integrity of the material and the form. I made measurements to show you the dimensions where the bends will be so see the PDF attachment for details 11x17 paper. Once the shapes takes place and you’re ready to bond the grill to the plastic molding. I would suggest to rough up the area where the bonding material will be applied in order to have a solid bond between the plastic and the mesh grill. I forgot to do this step and it seems like it’s holding up pretty good after it cured. Keep in mind I did the bonding process in several steps starting with the top section and letting it cure 24hrs and then move to the bottom as you see in the pic. At this point the center grill kit is ready to be installed once the bumper is removed.
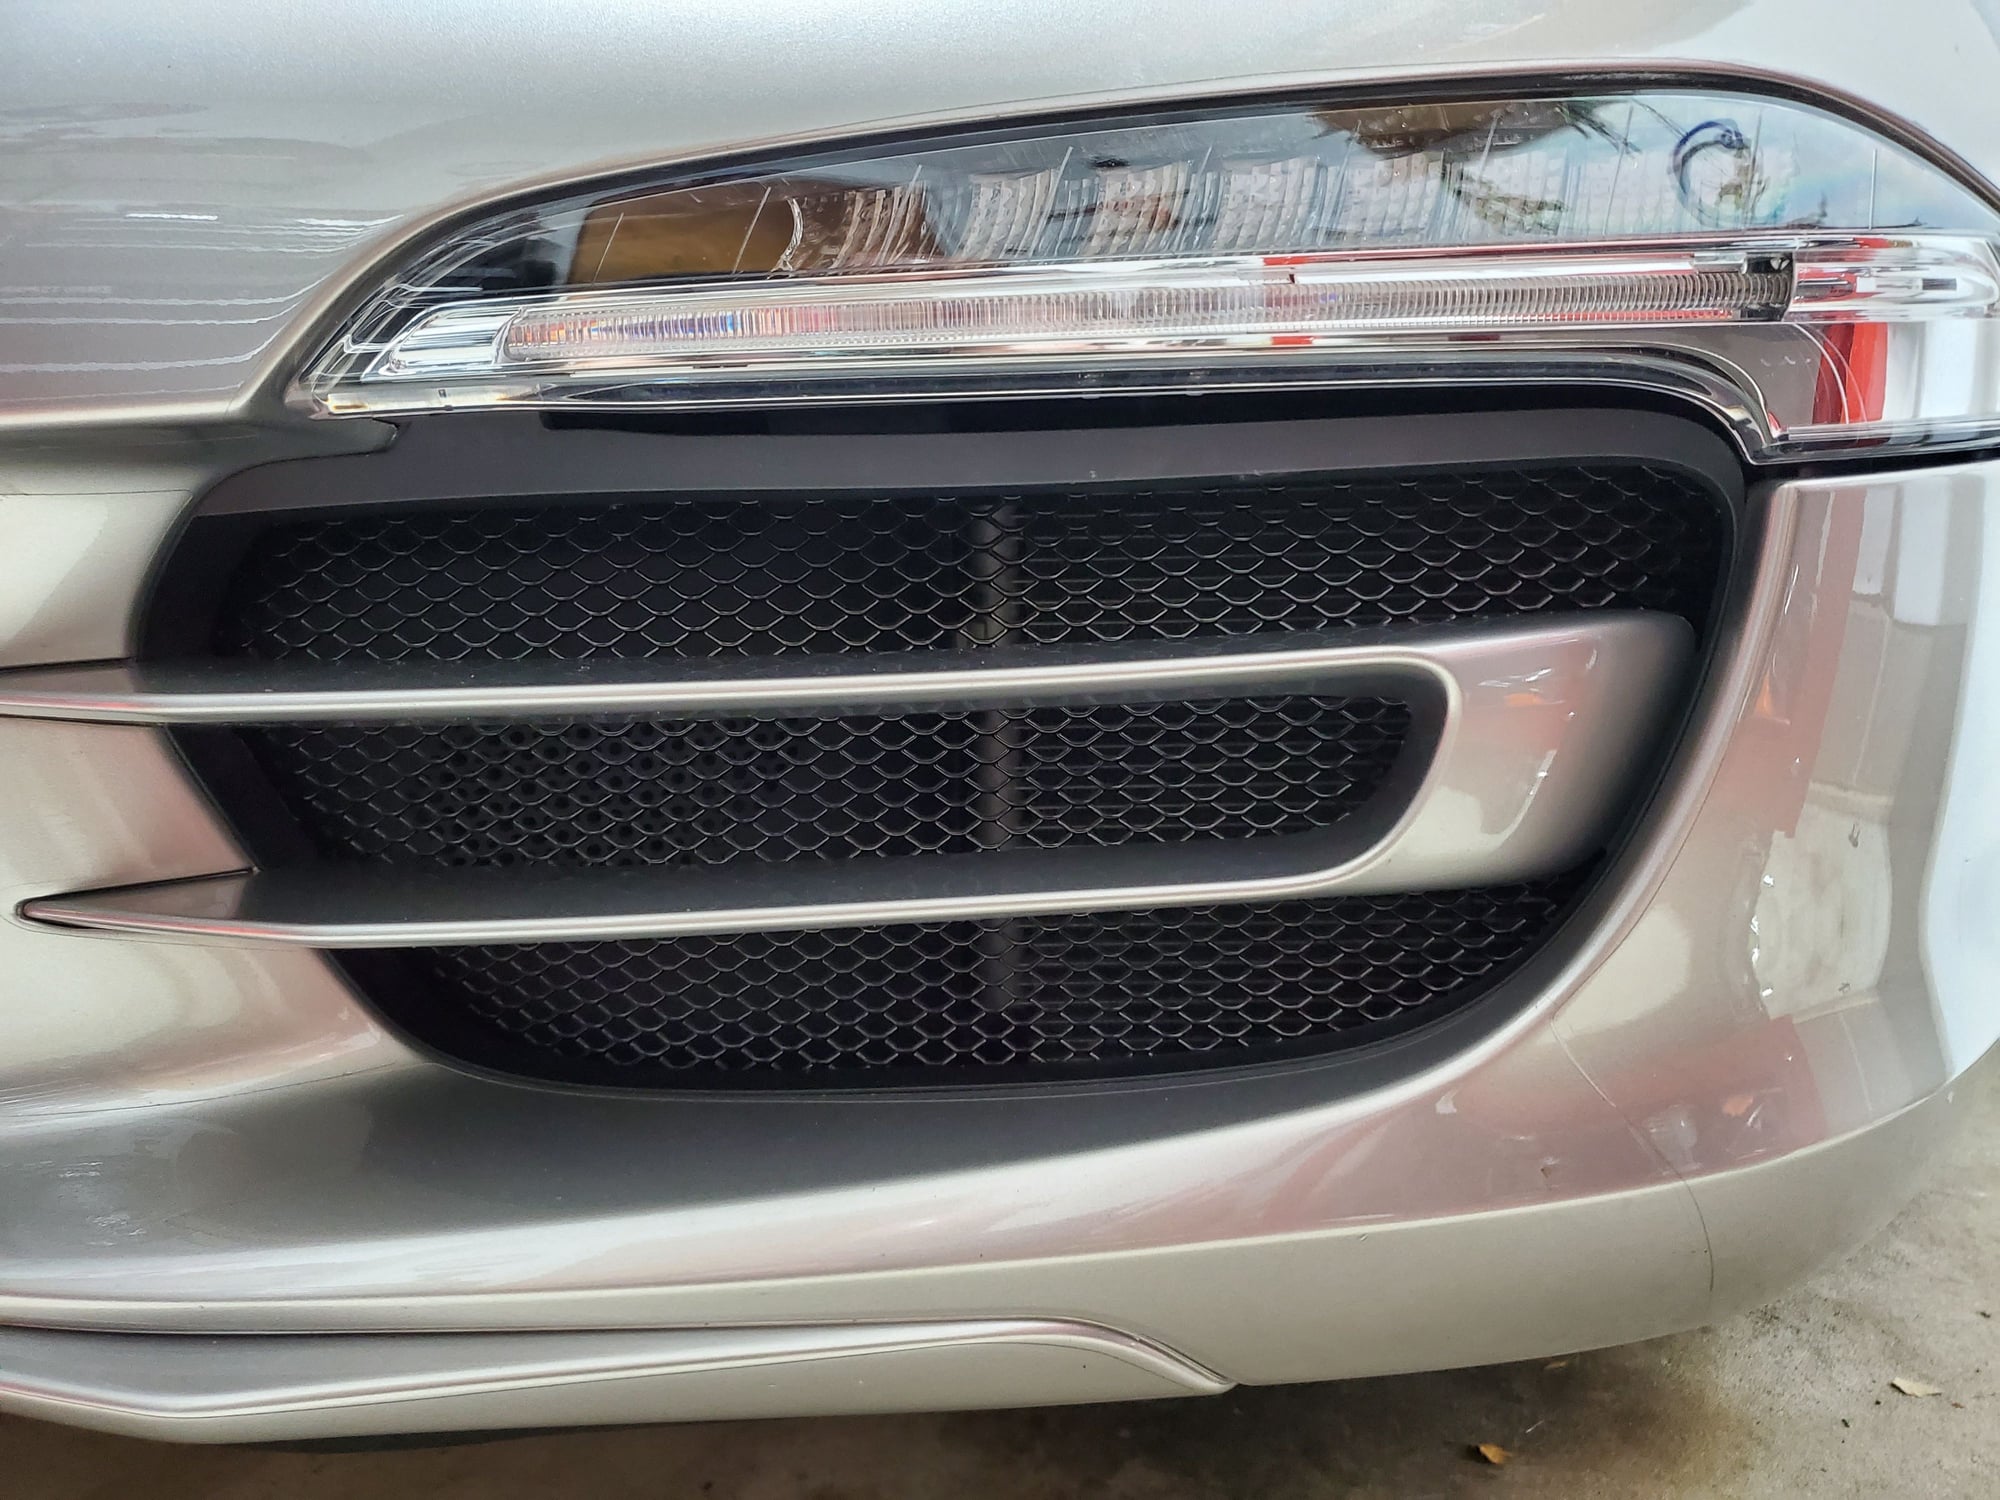
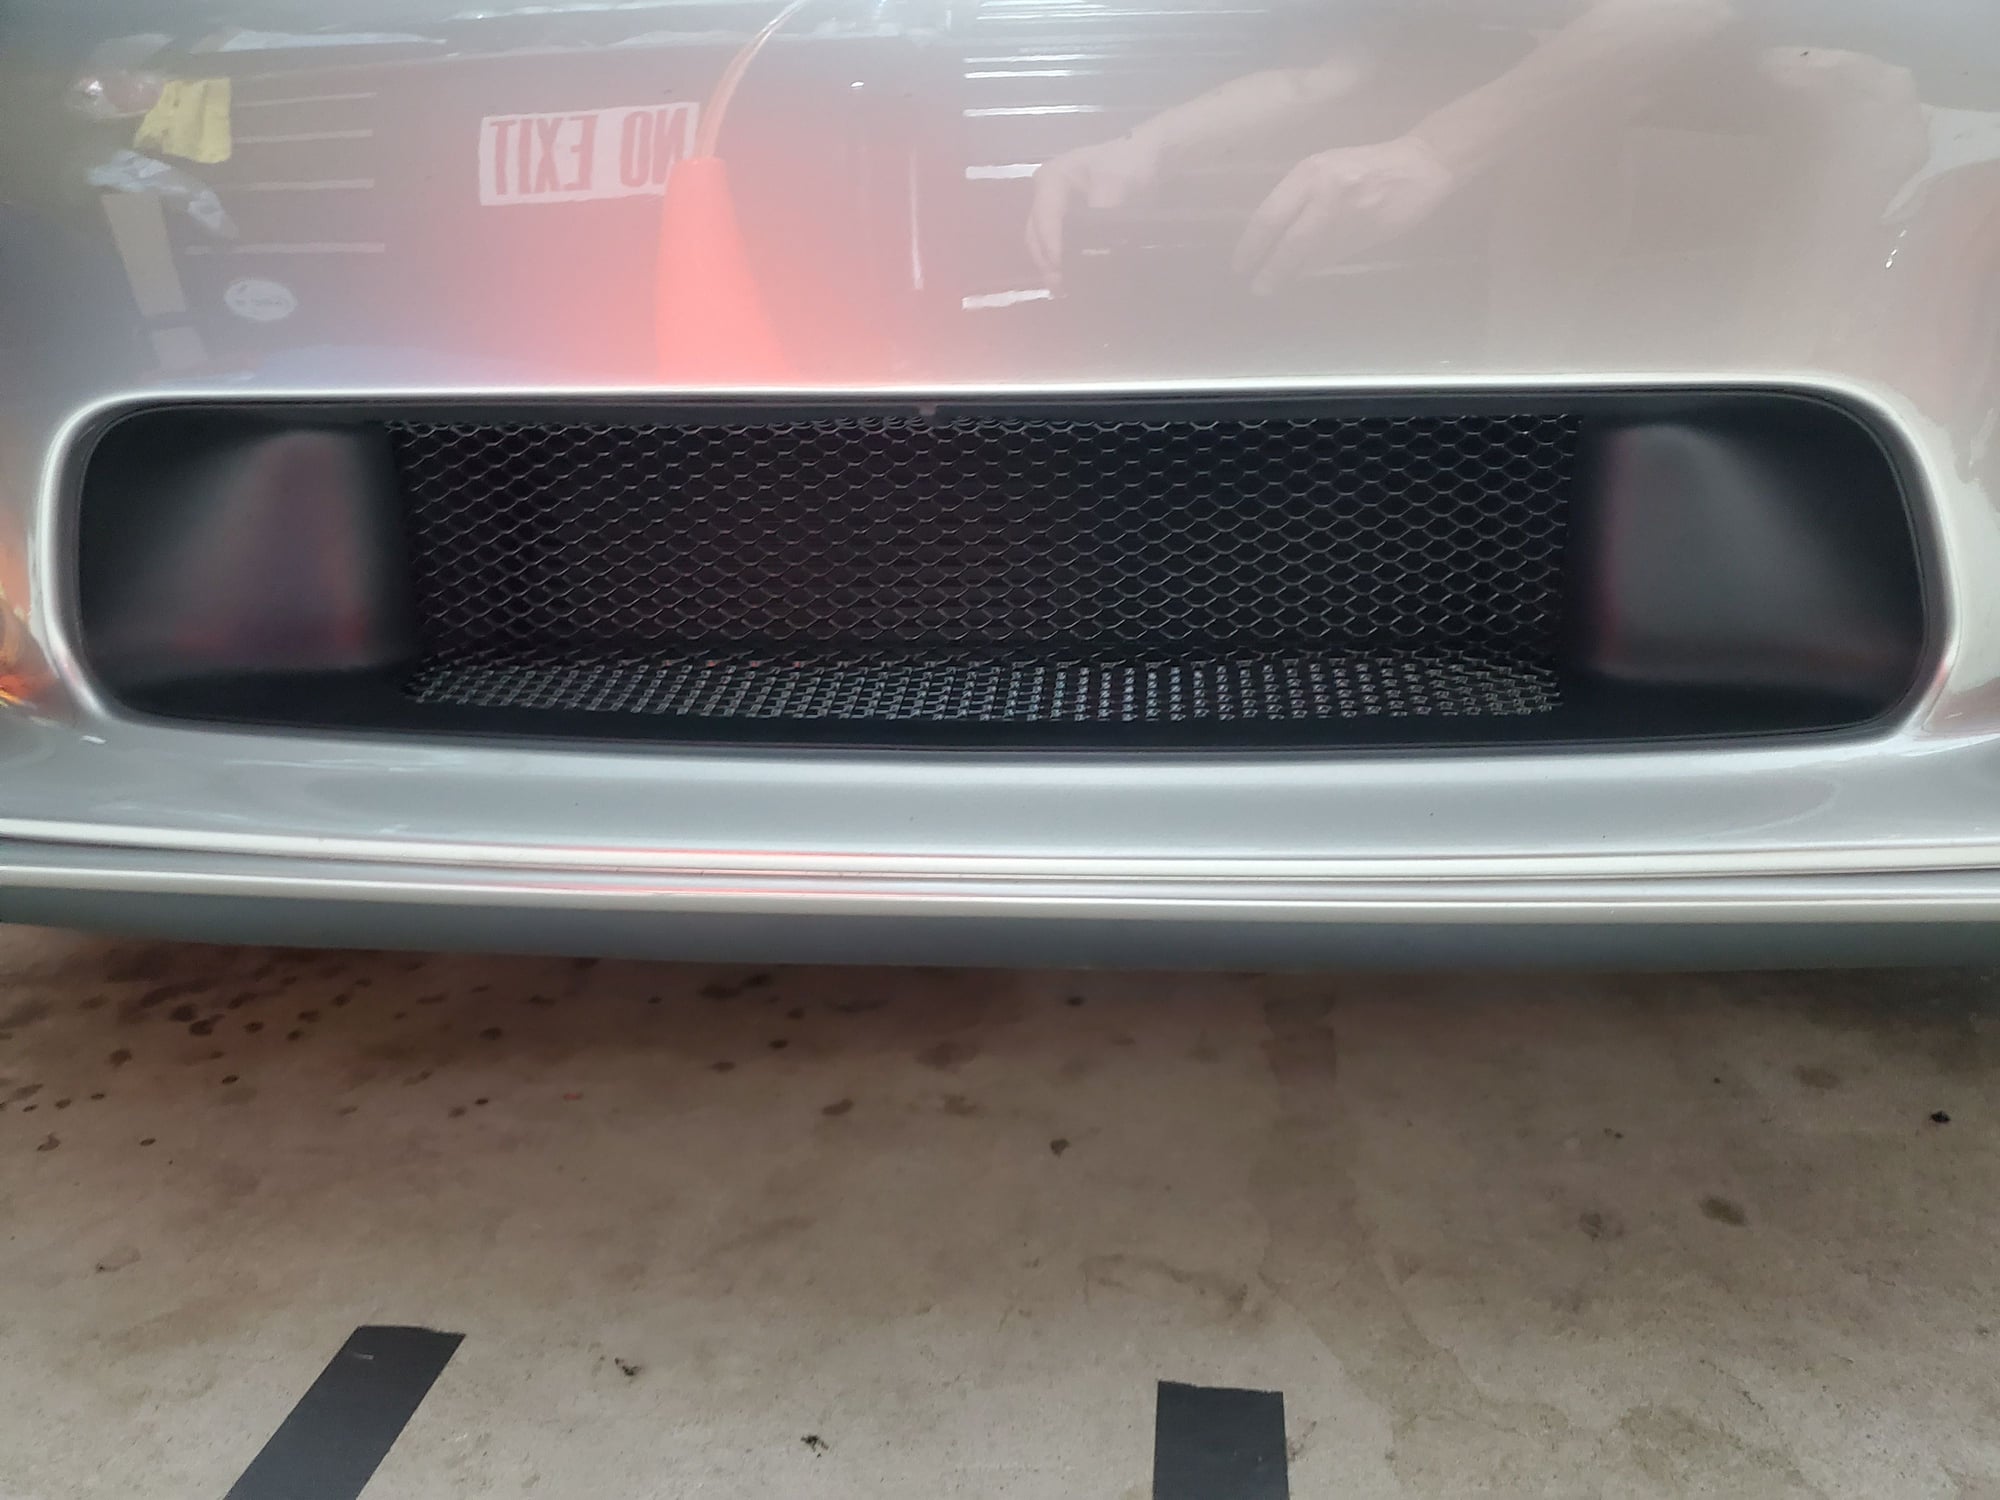
The End Grills
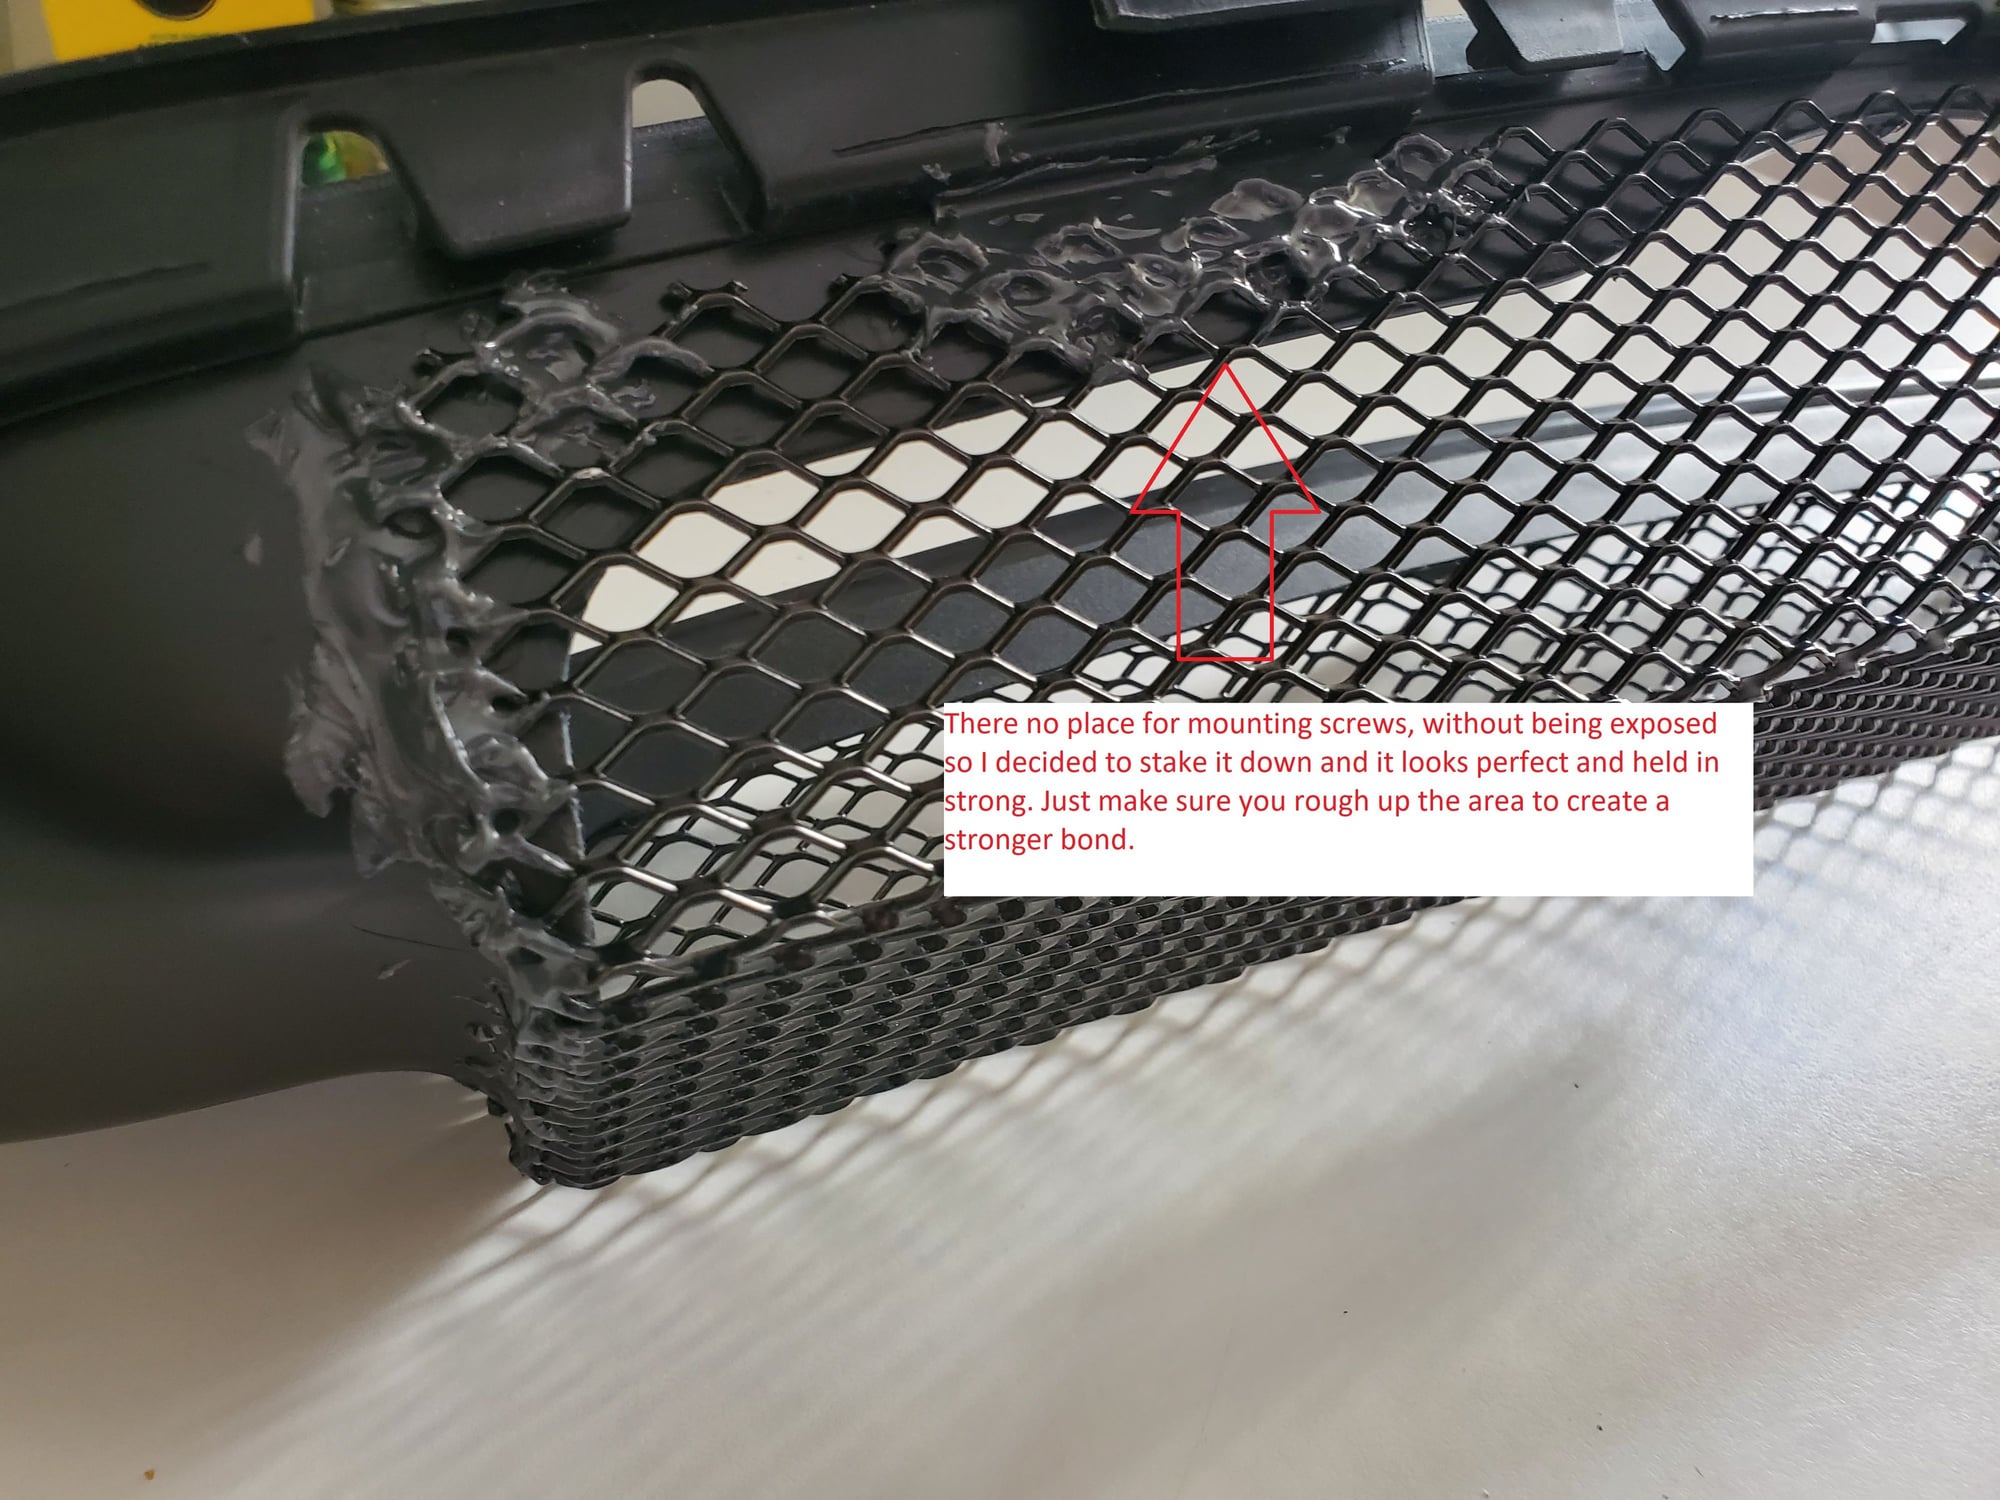
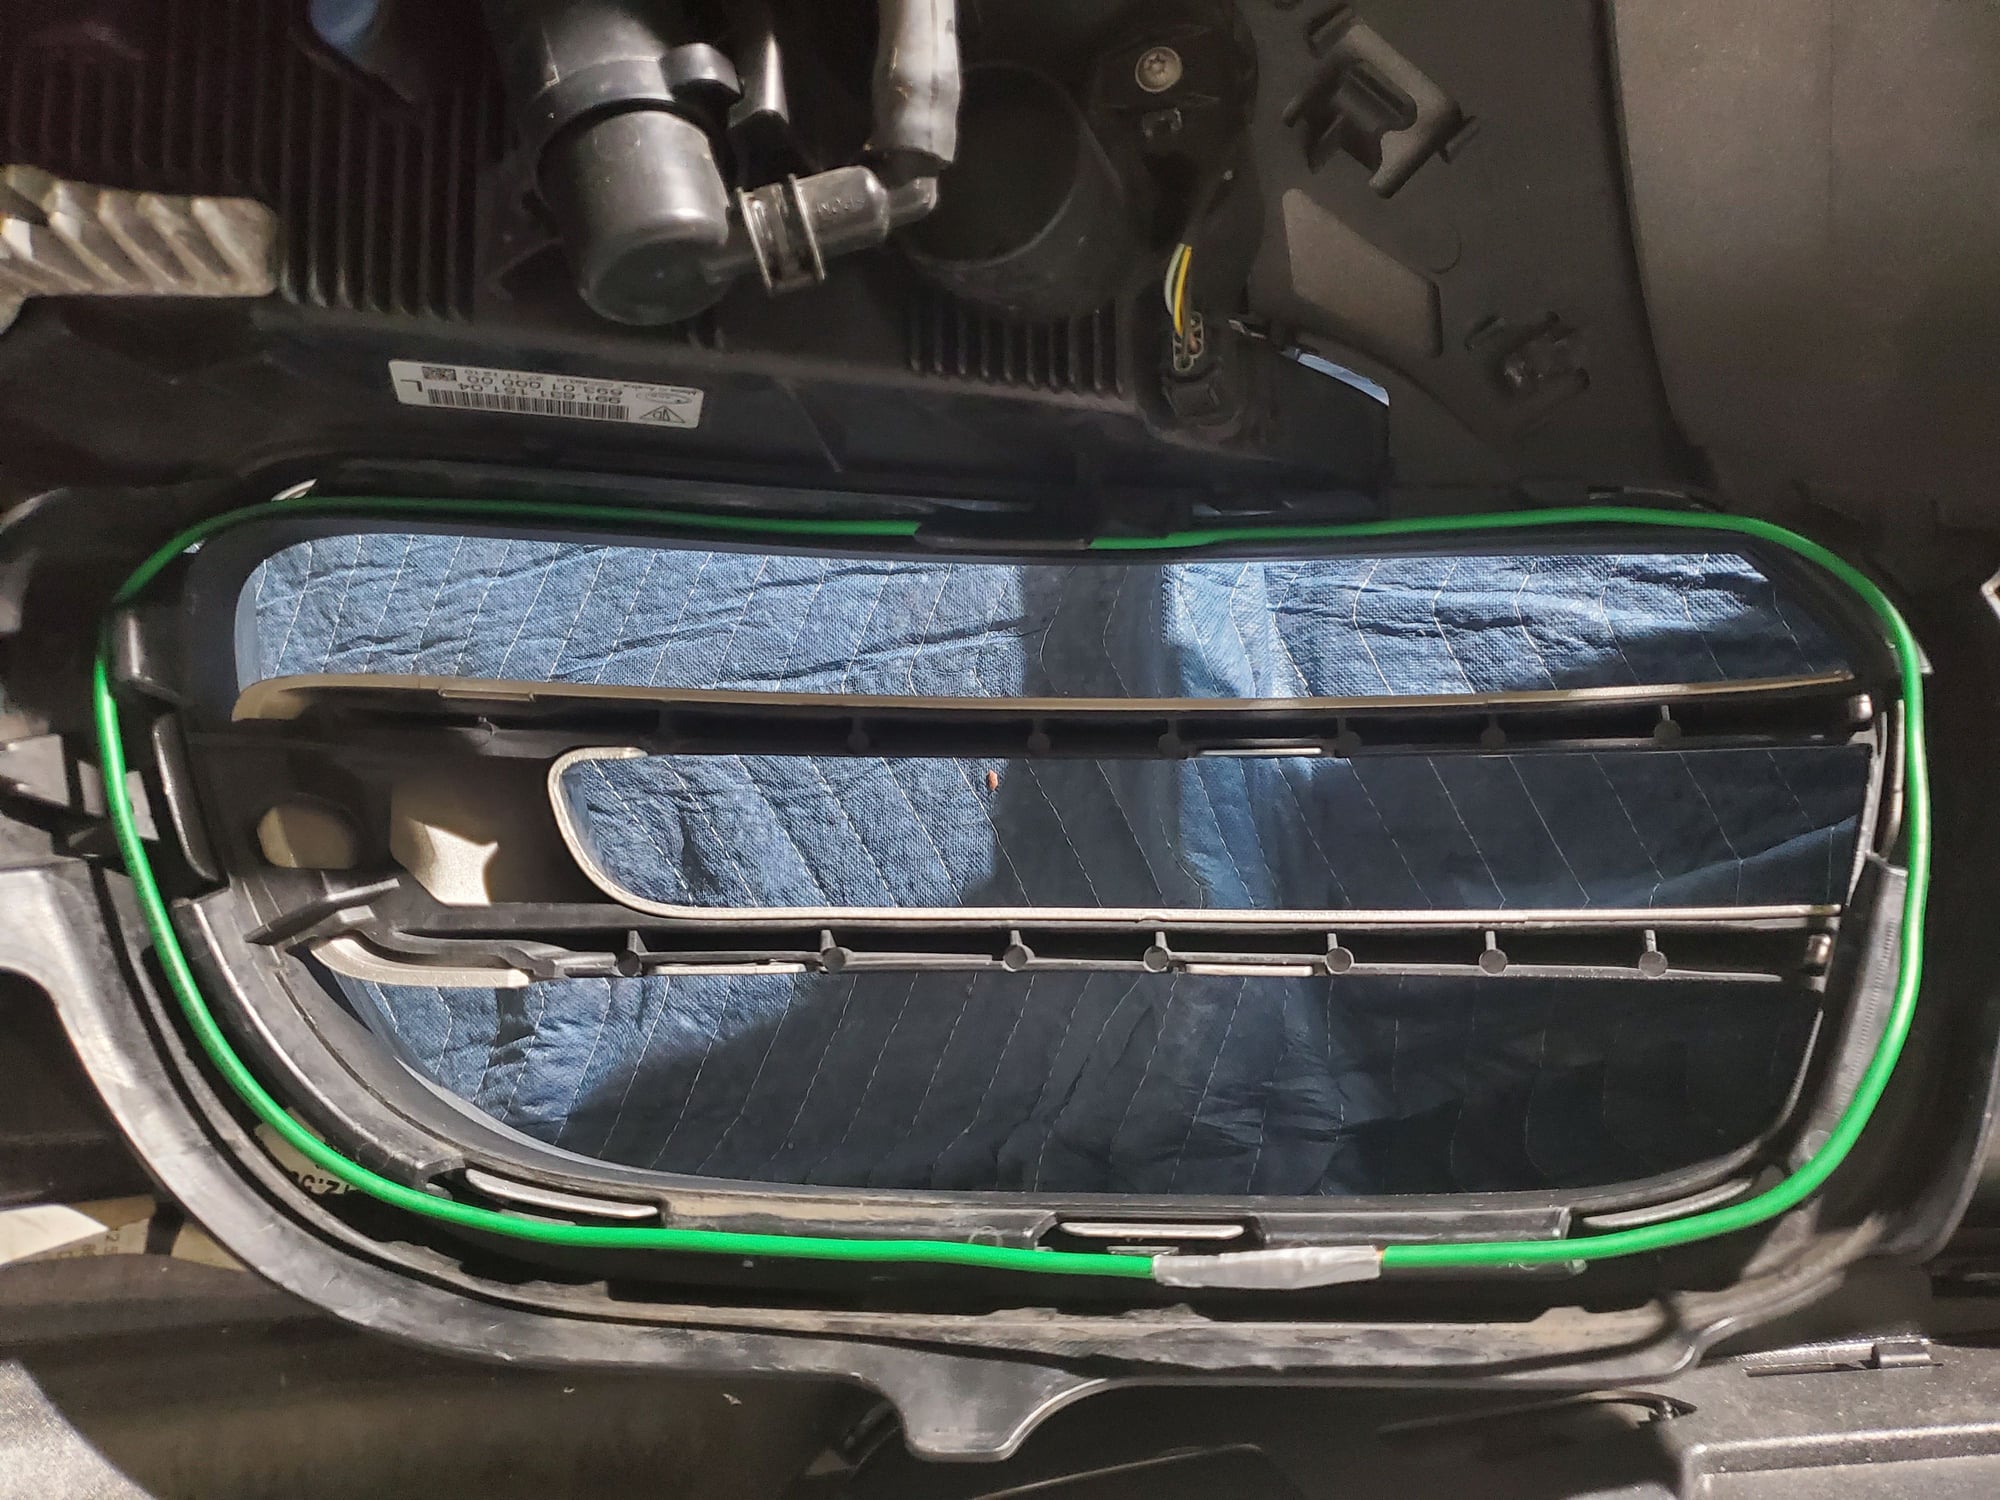
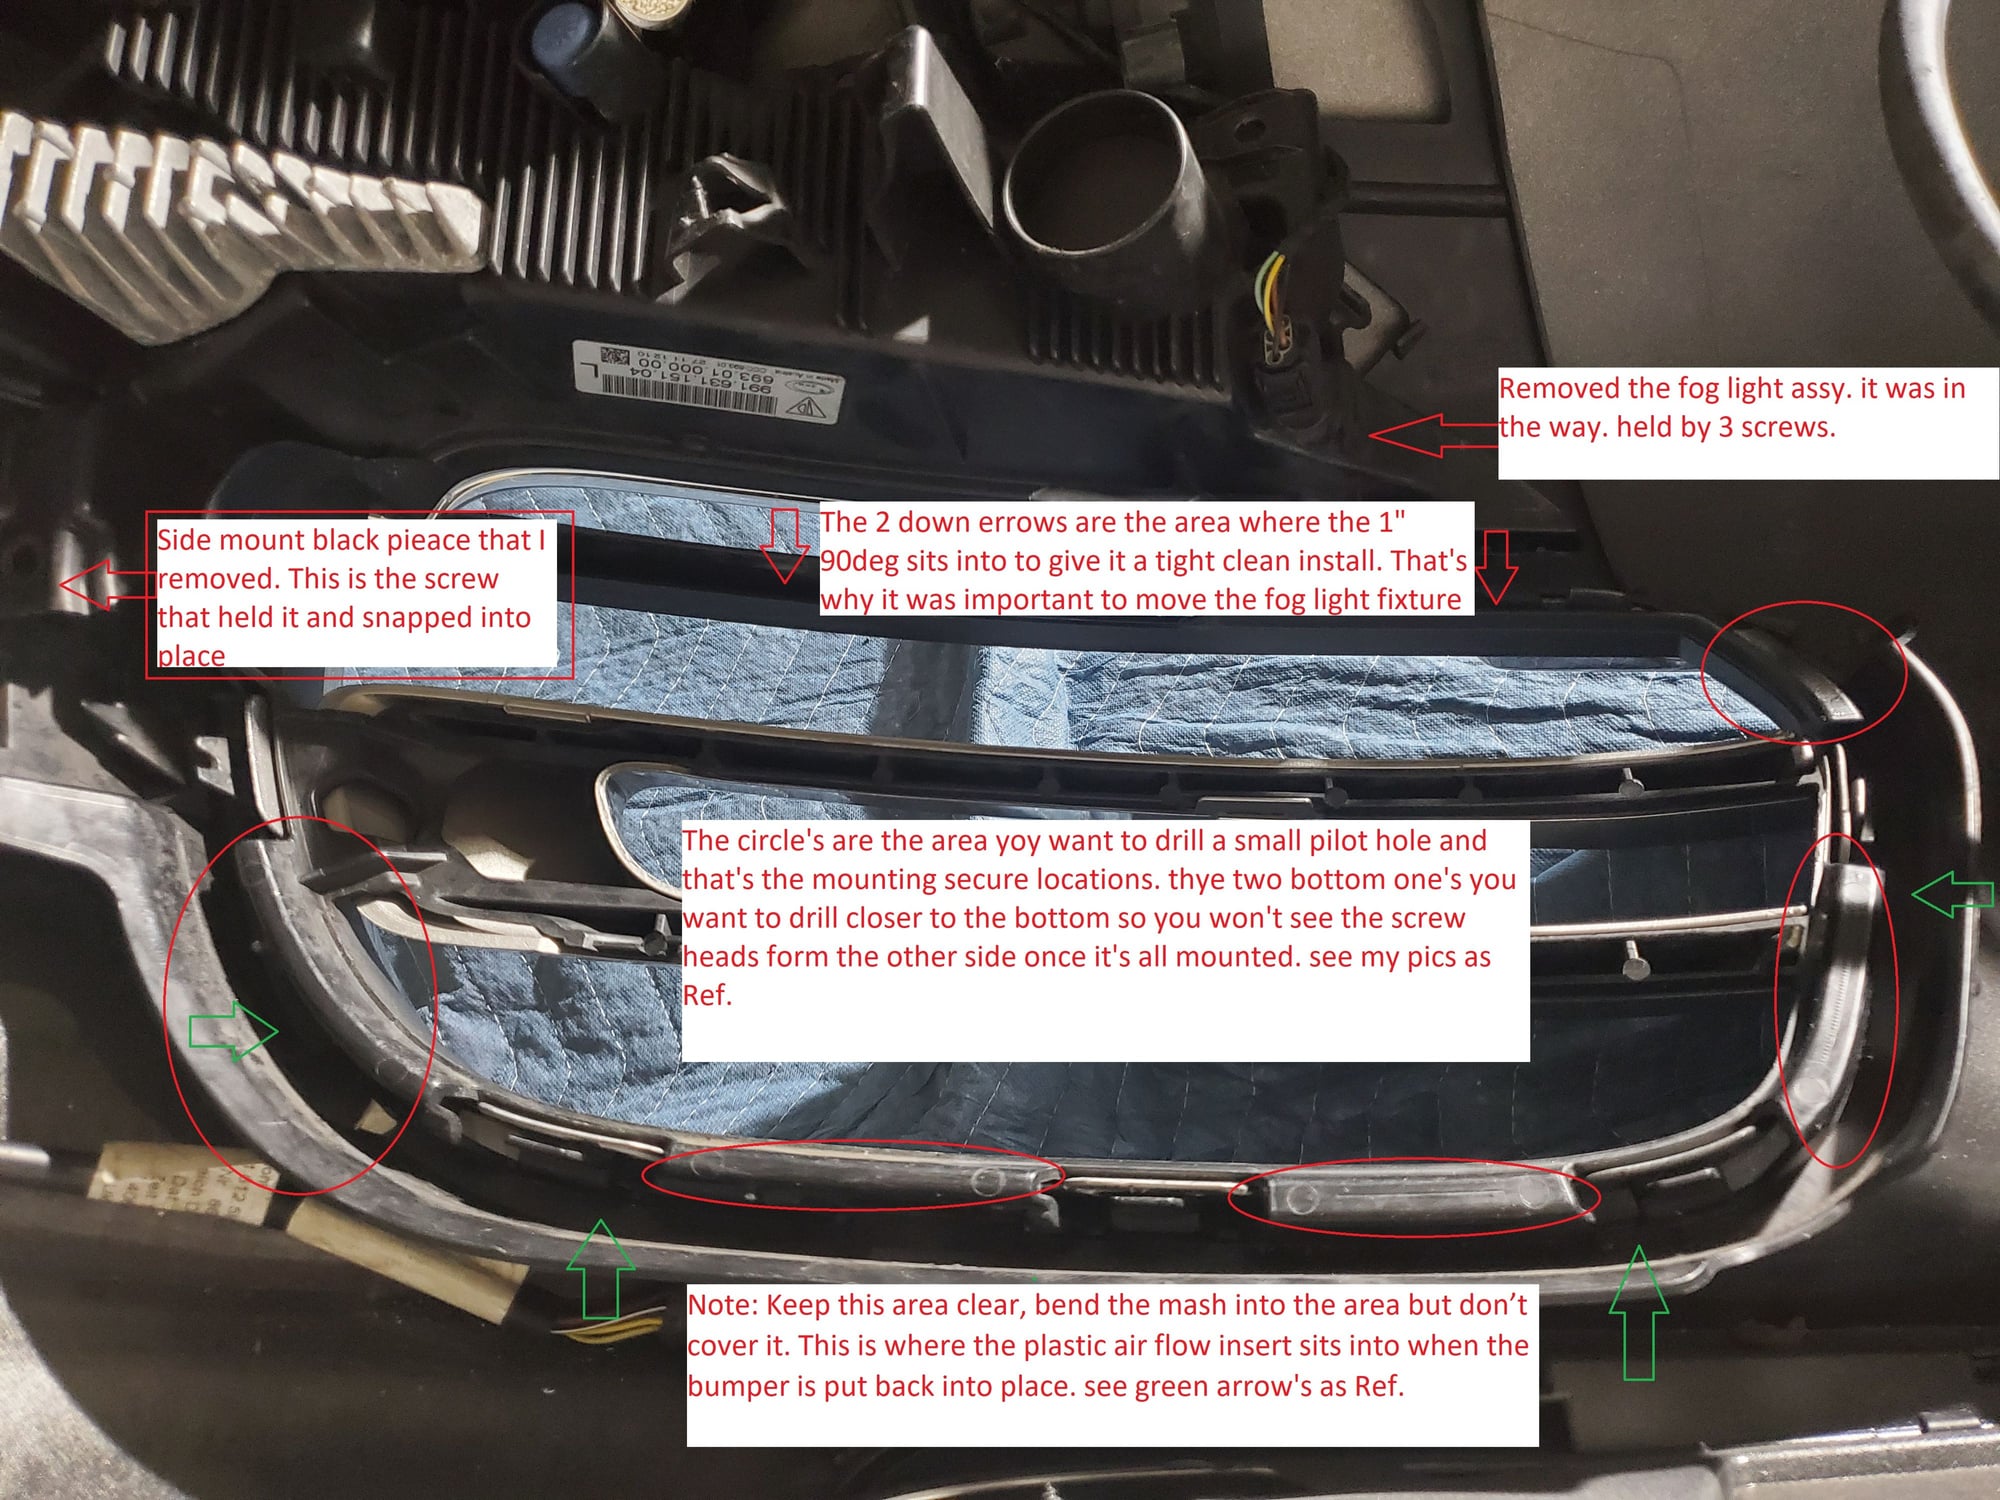
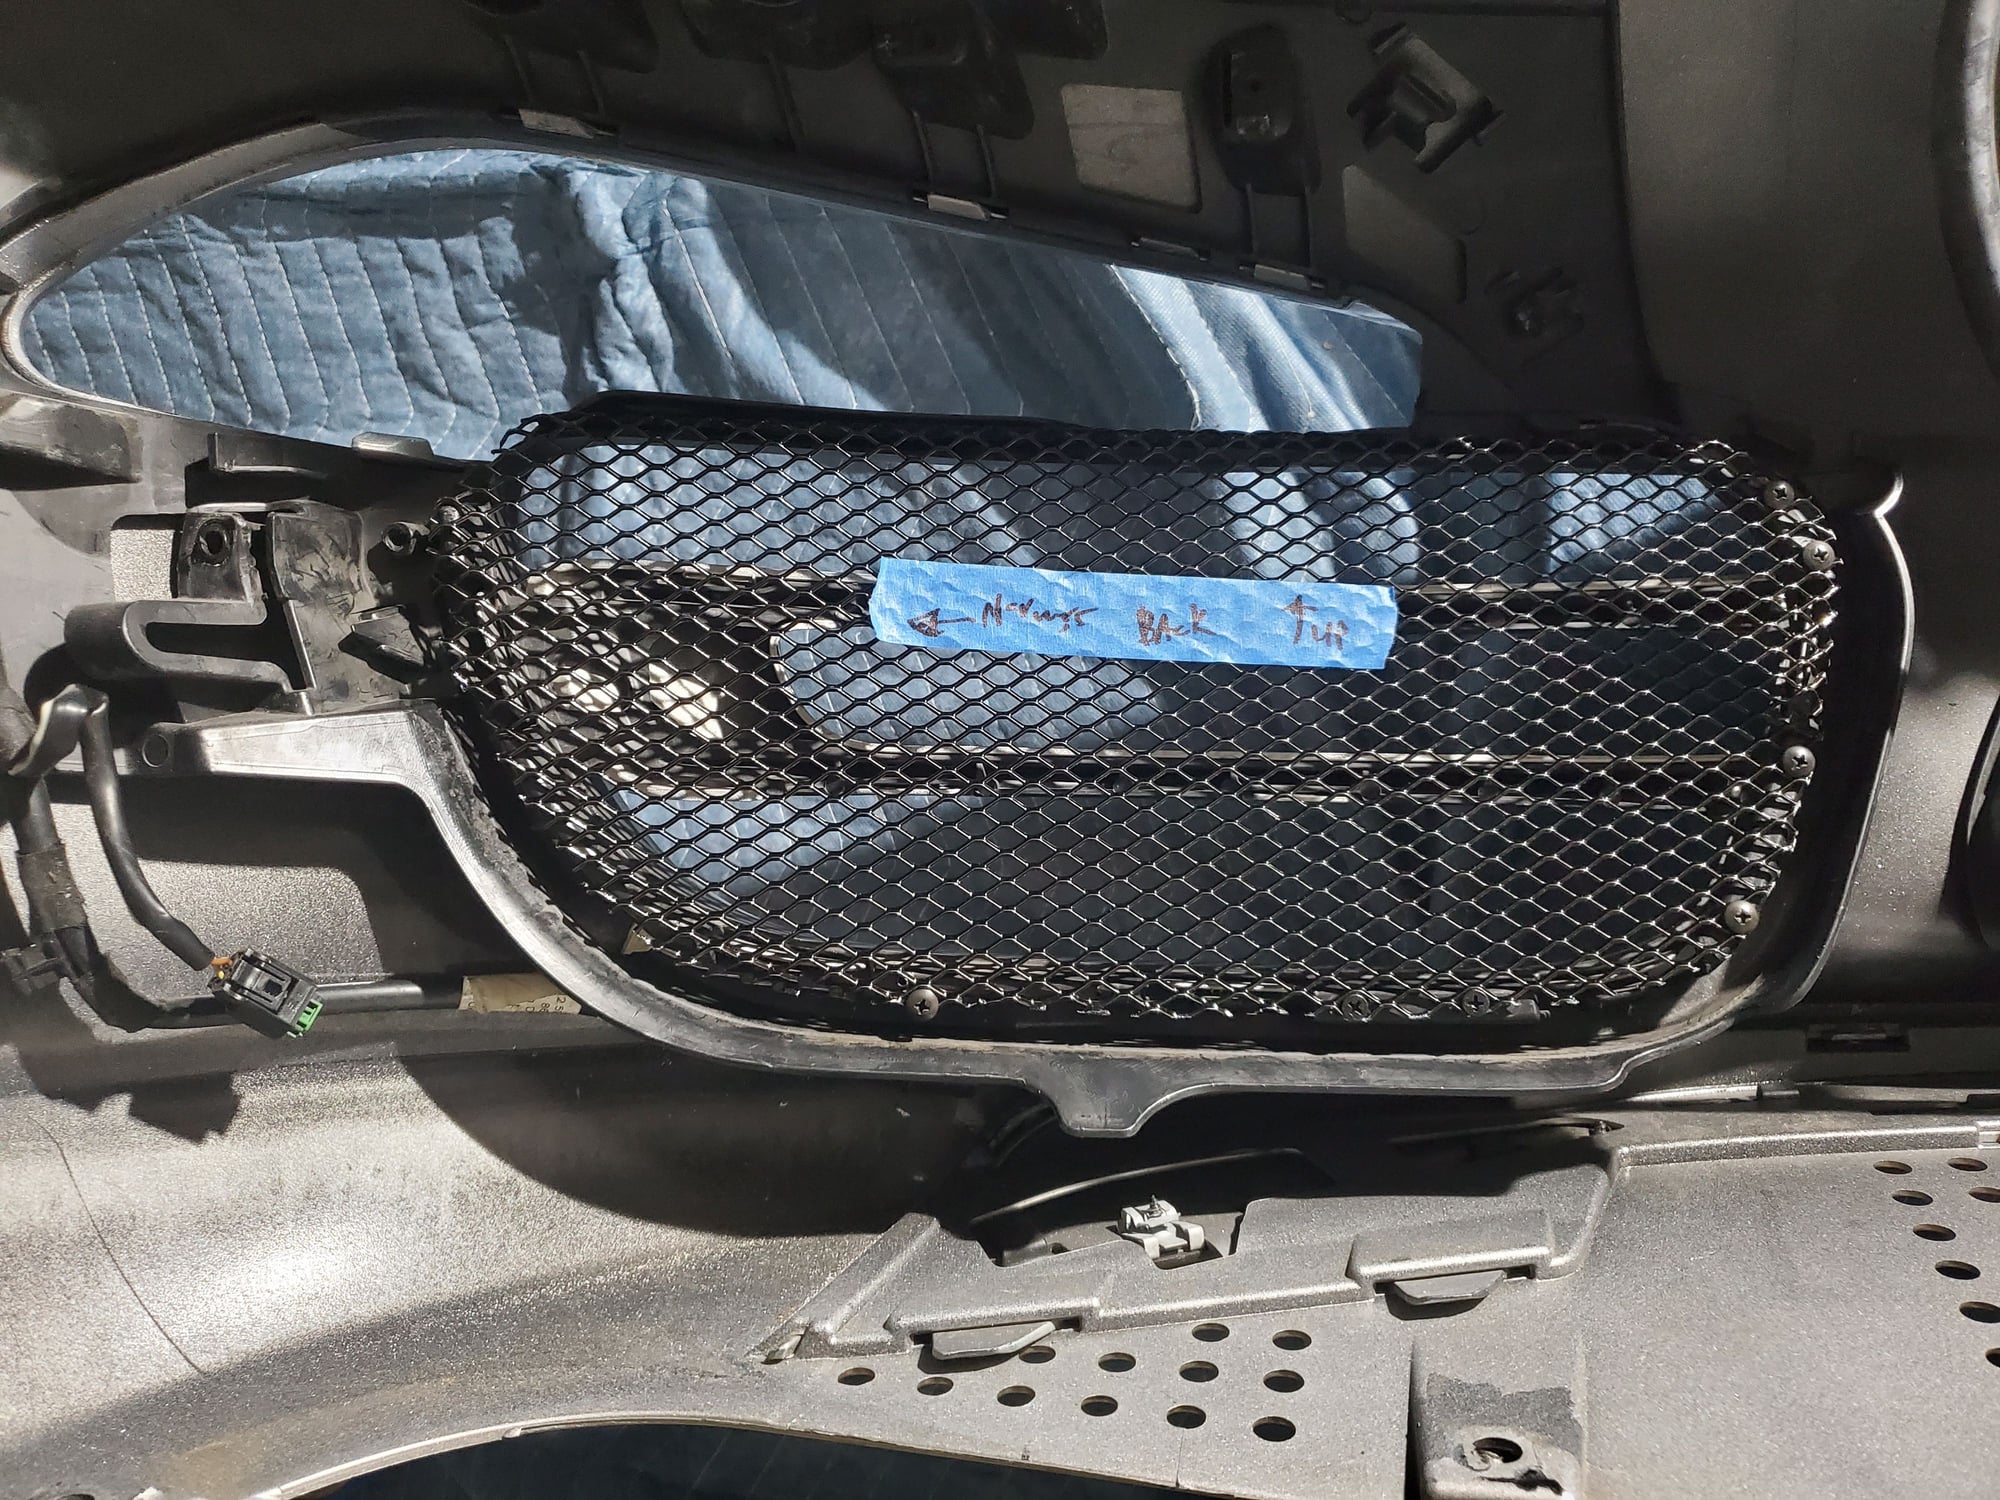
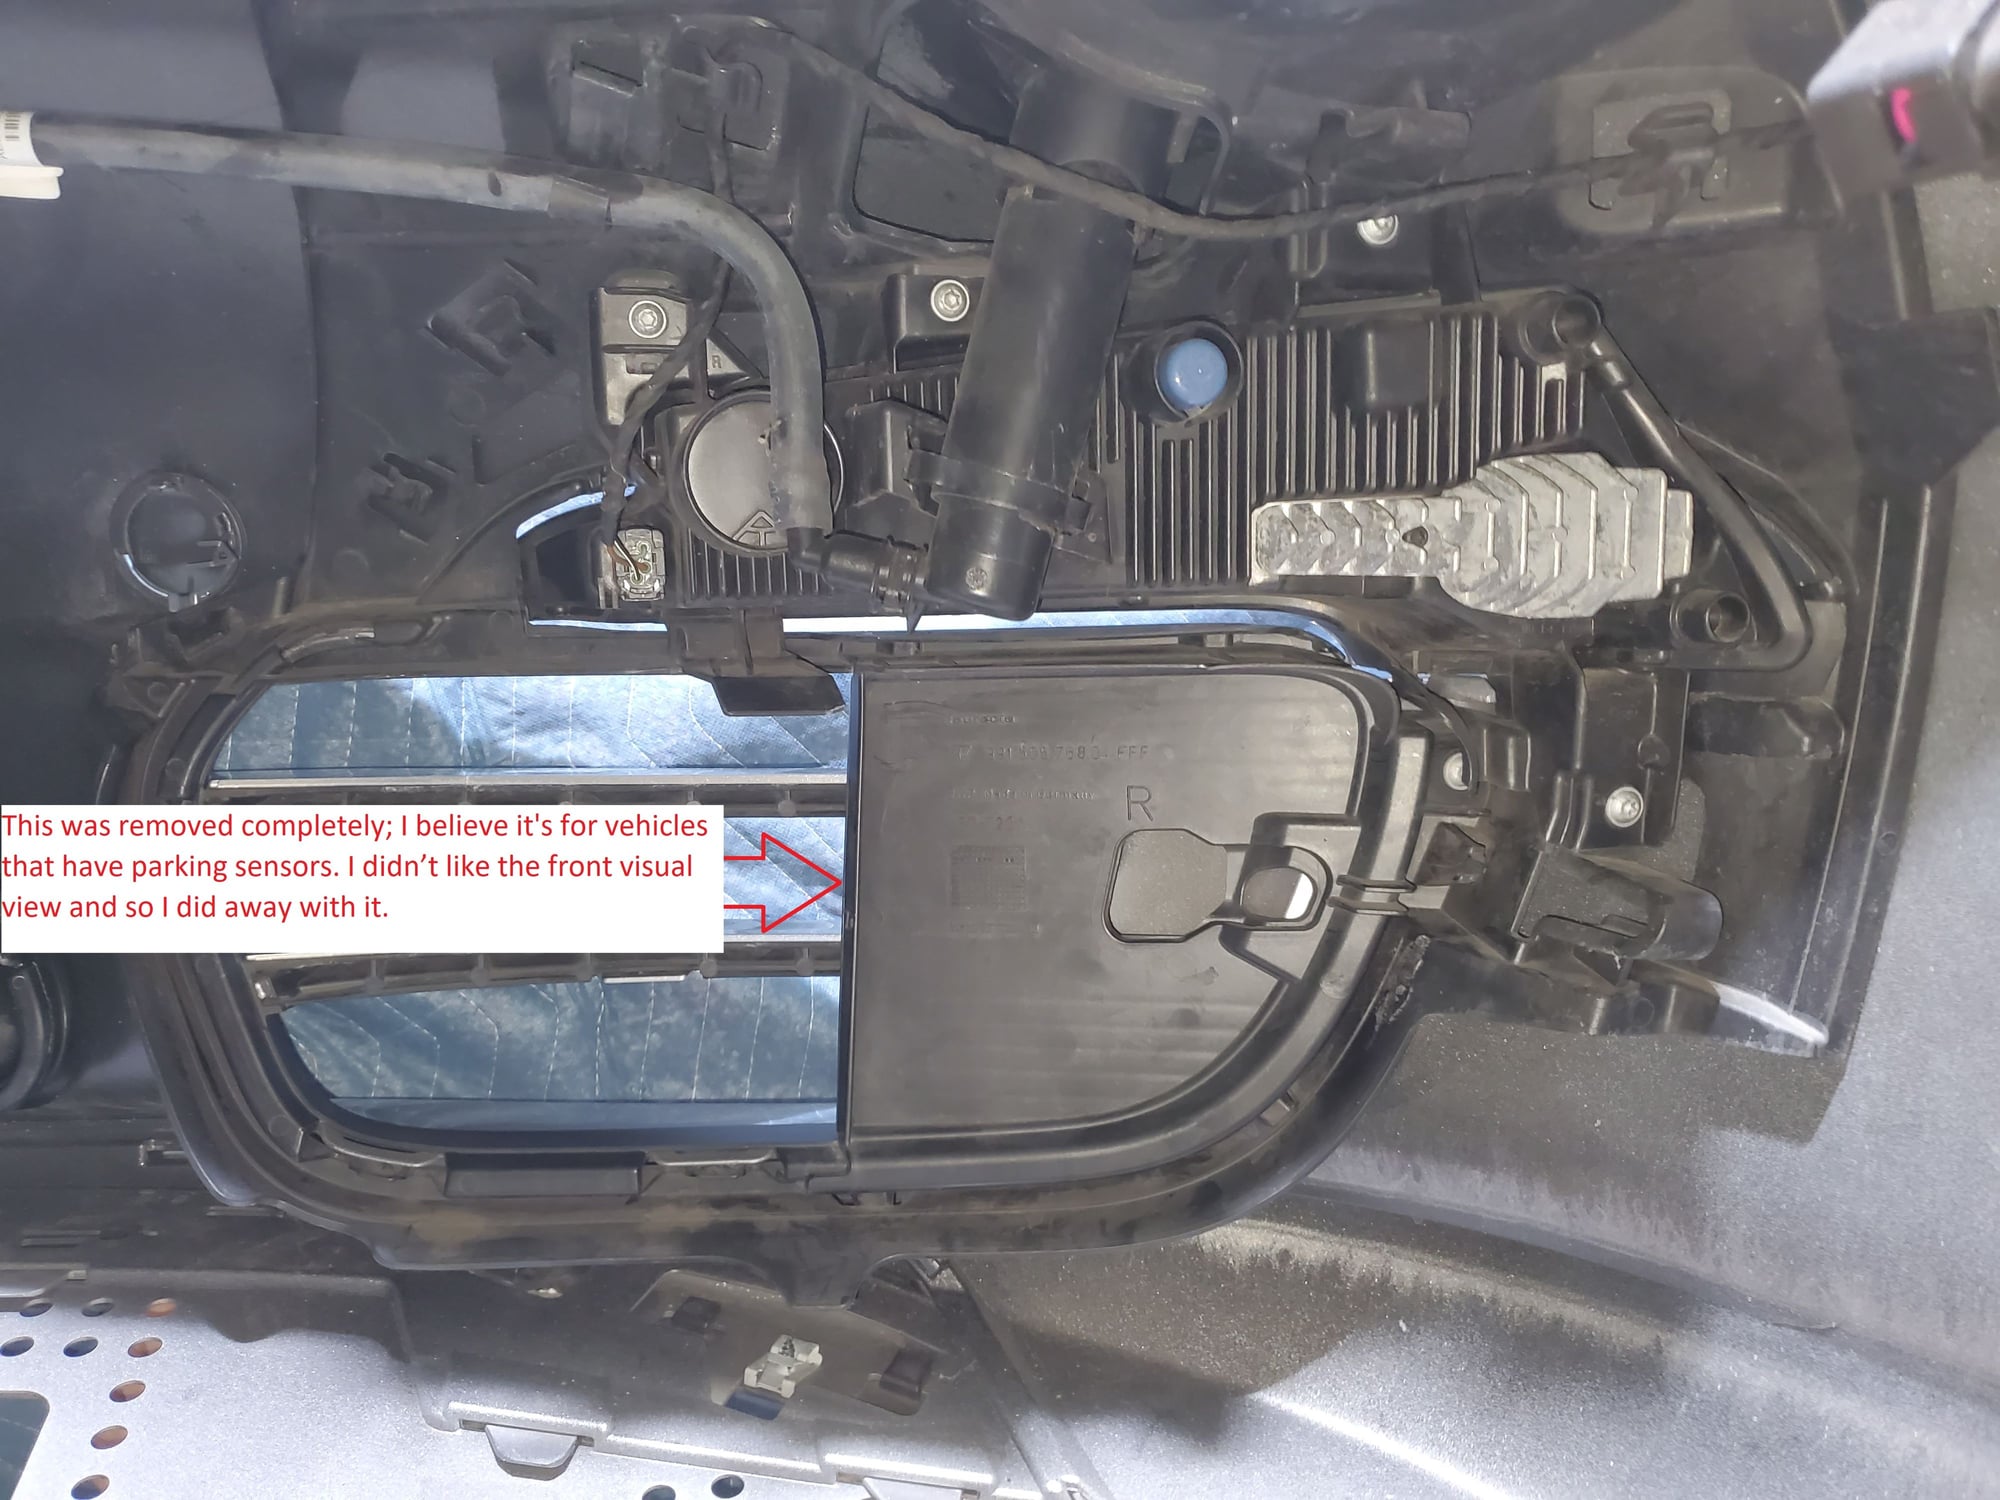
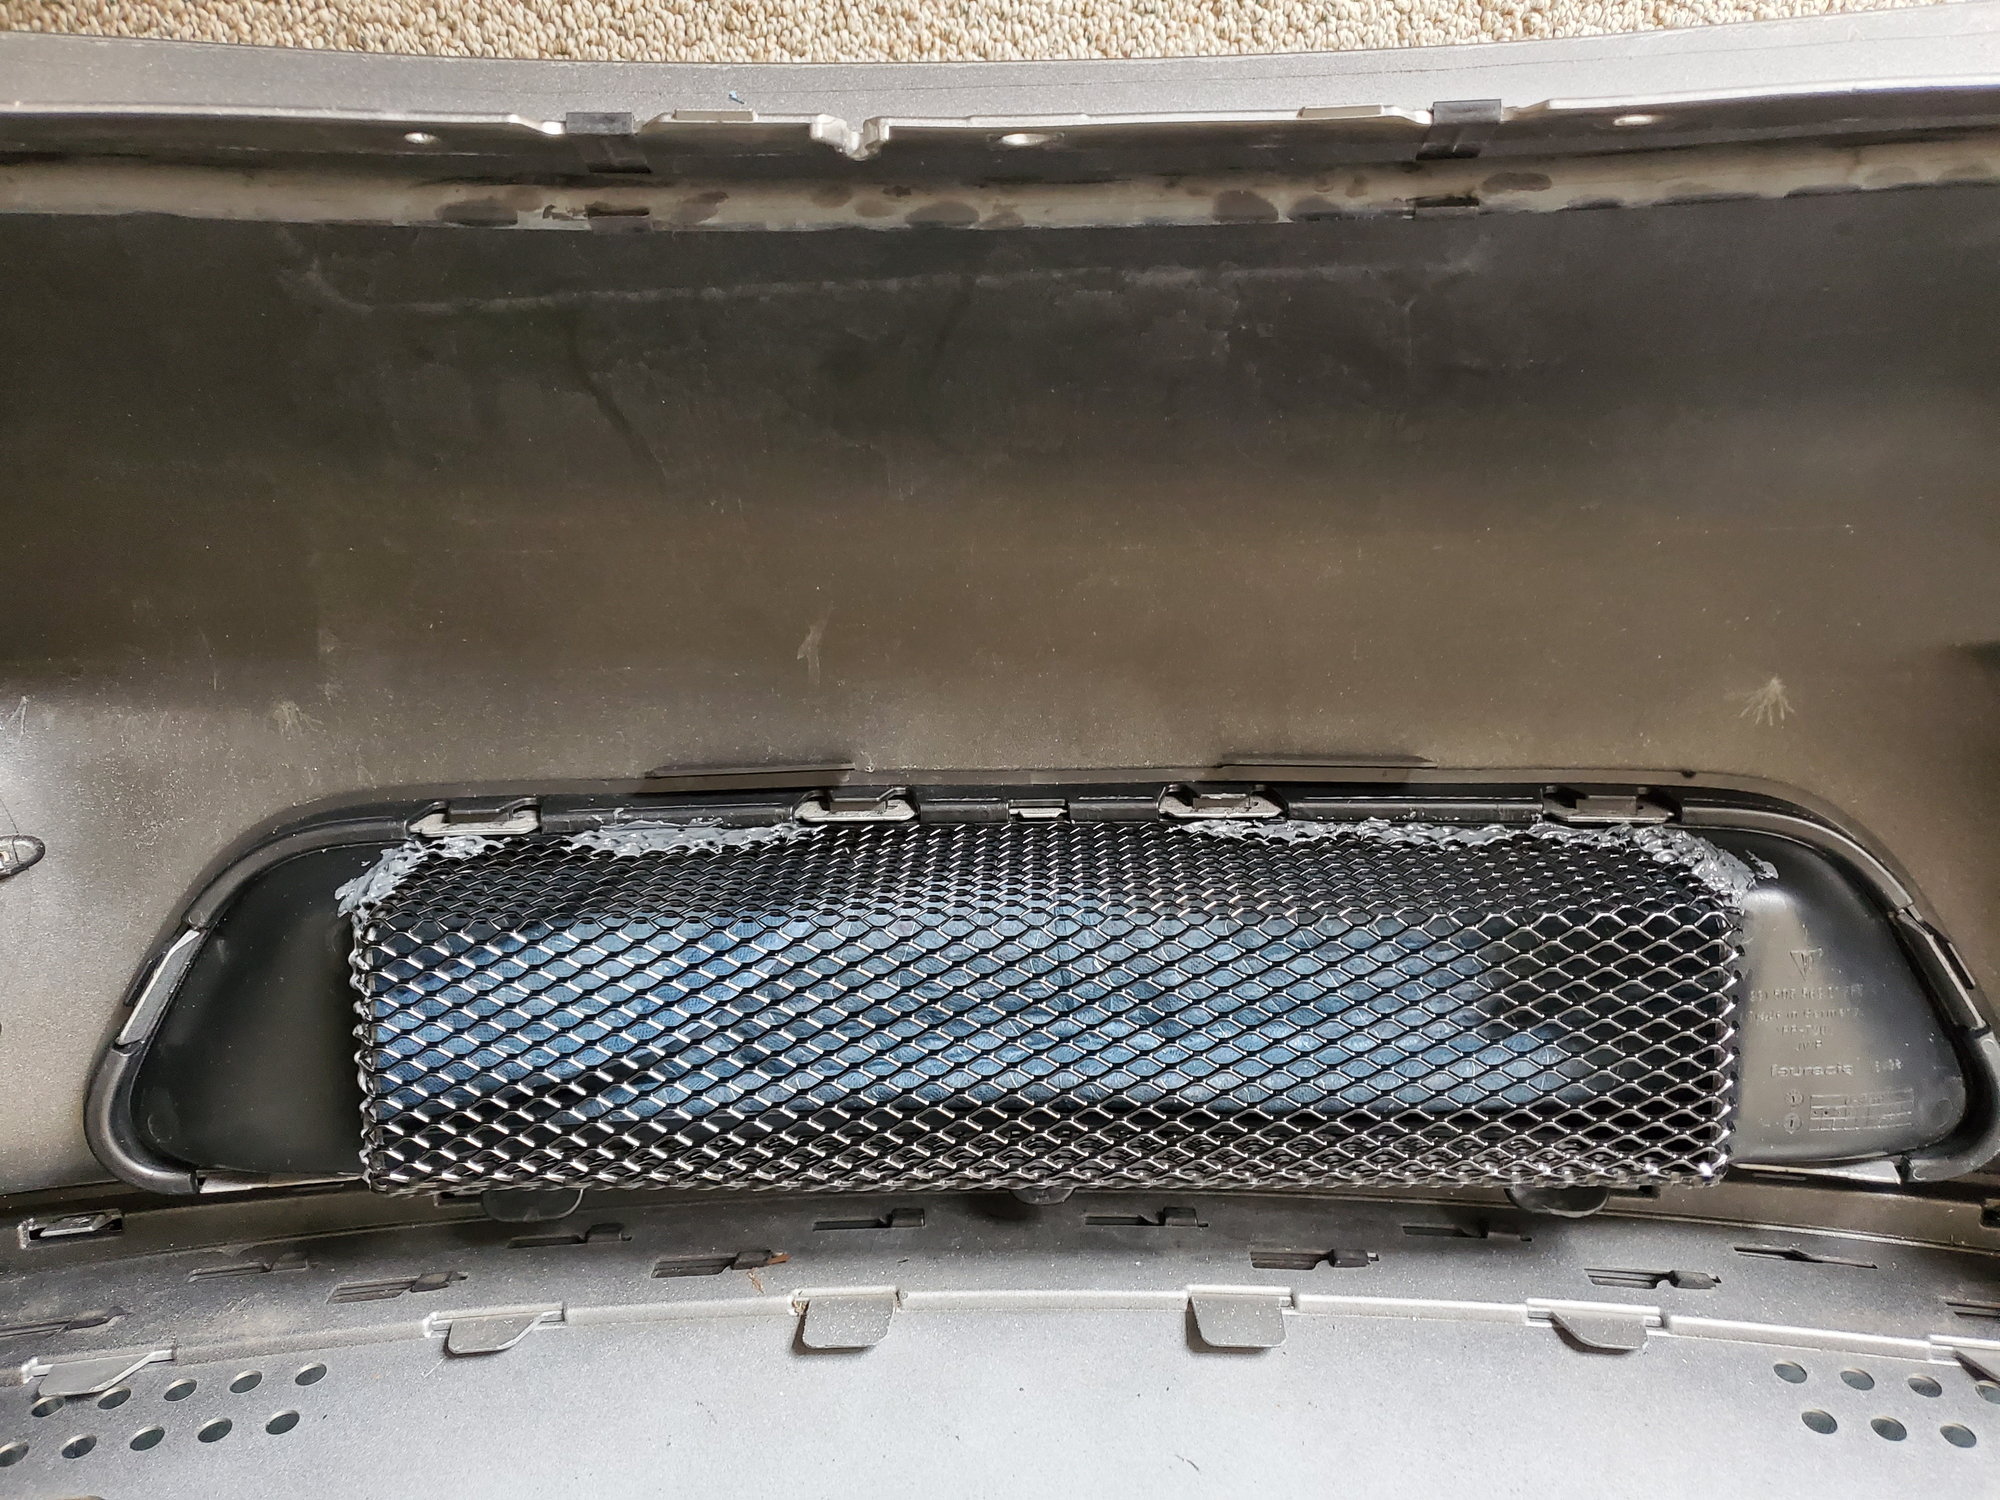
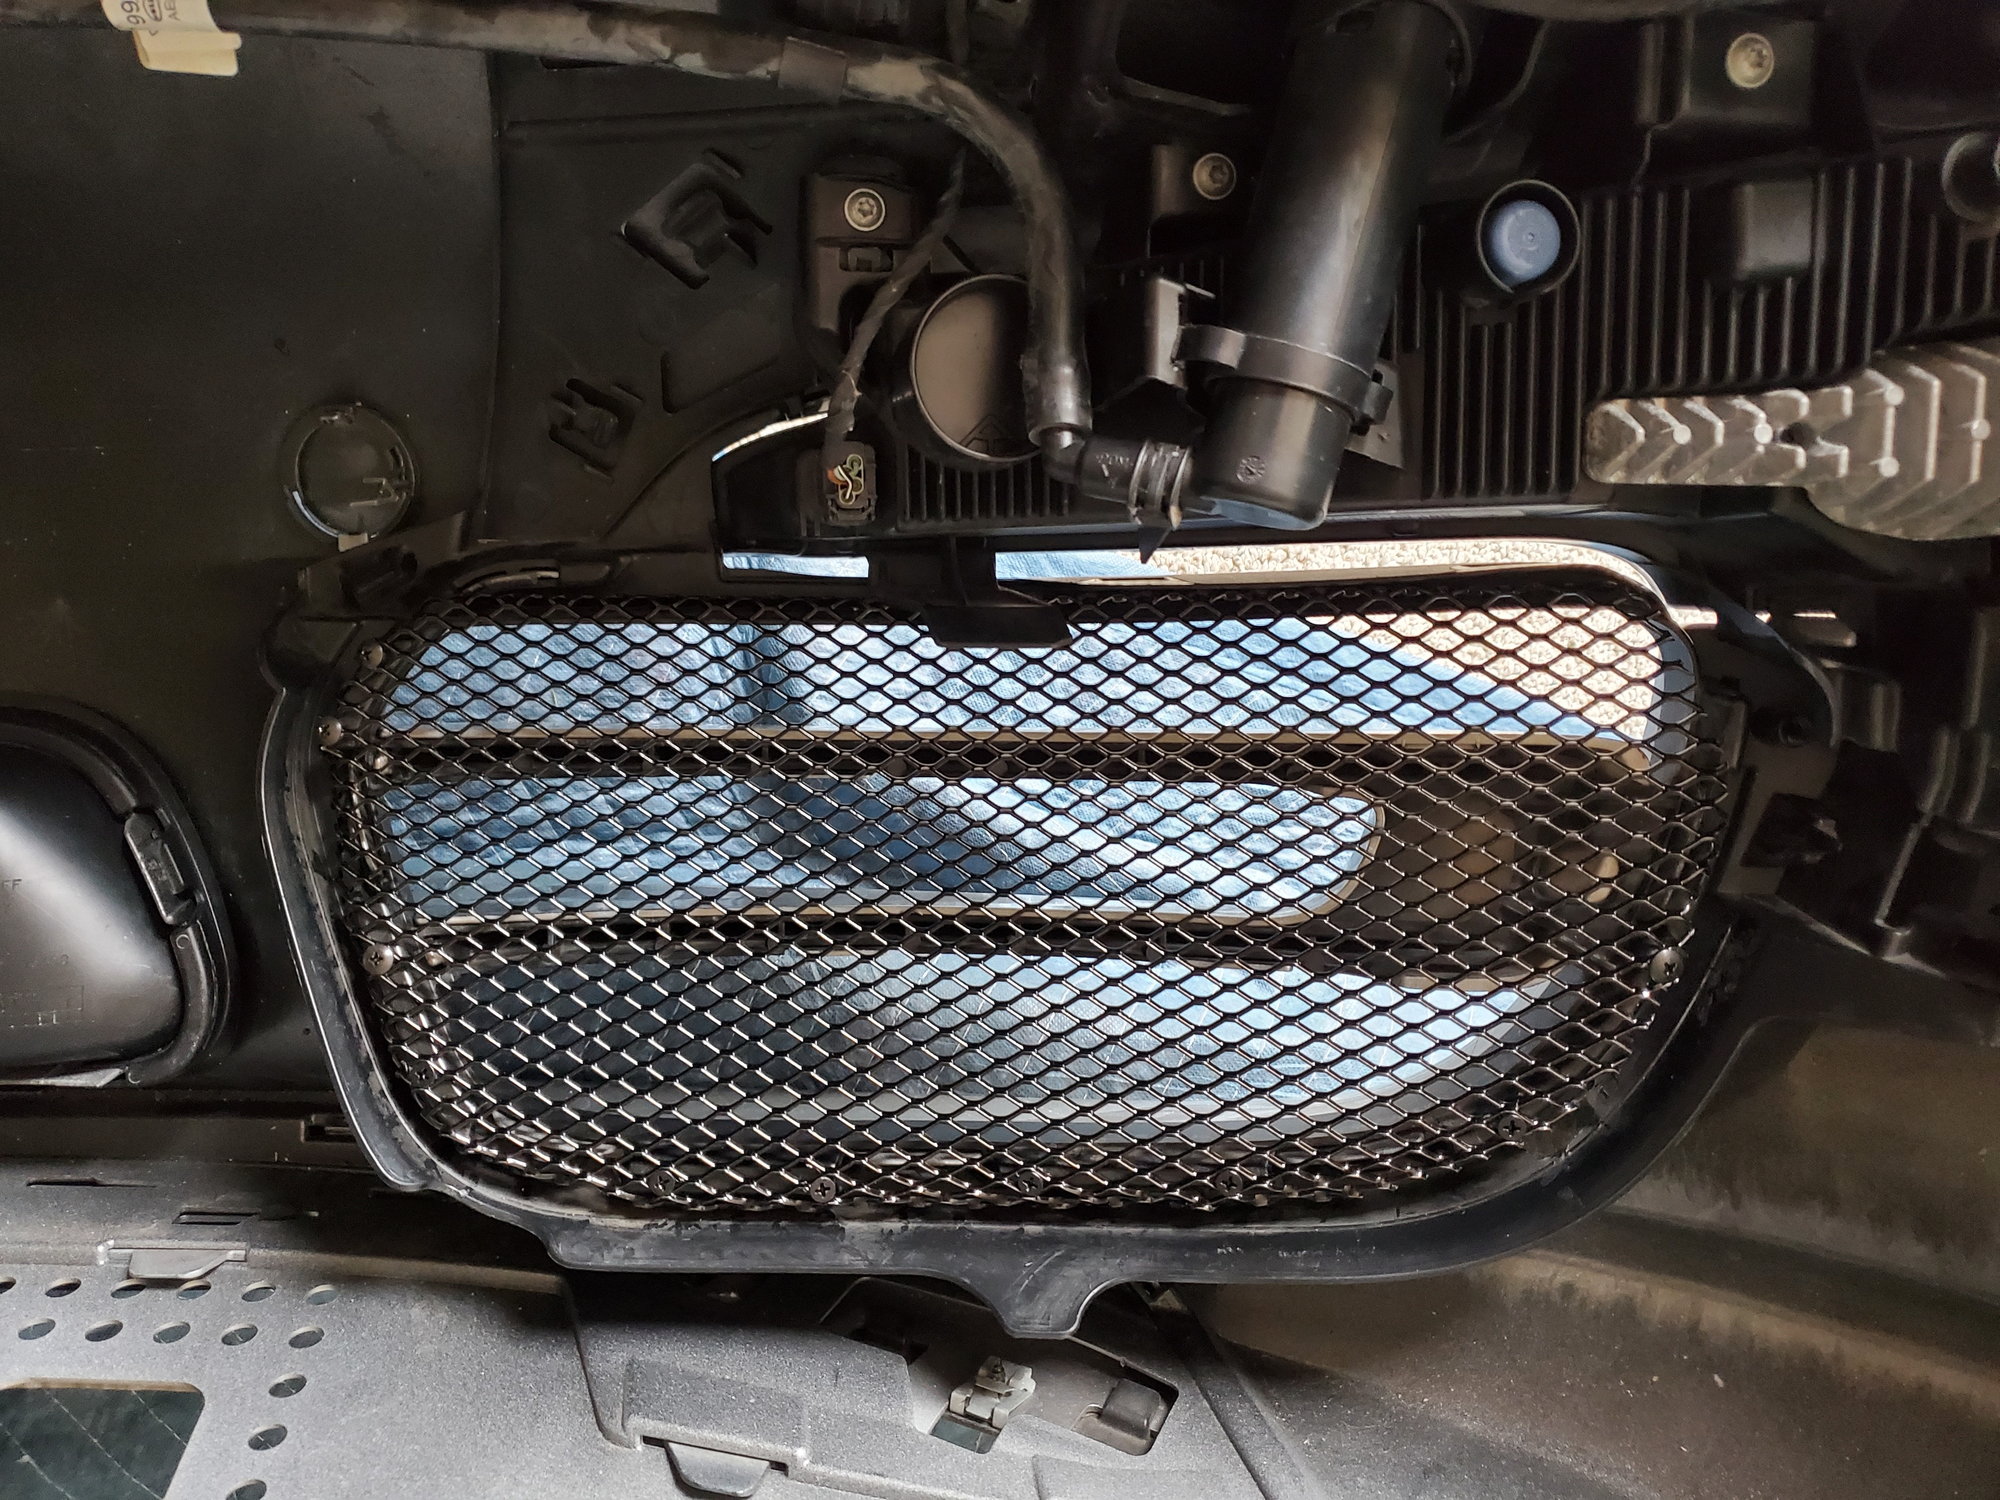
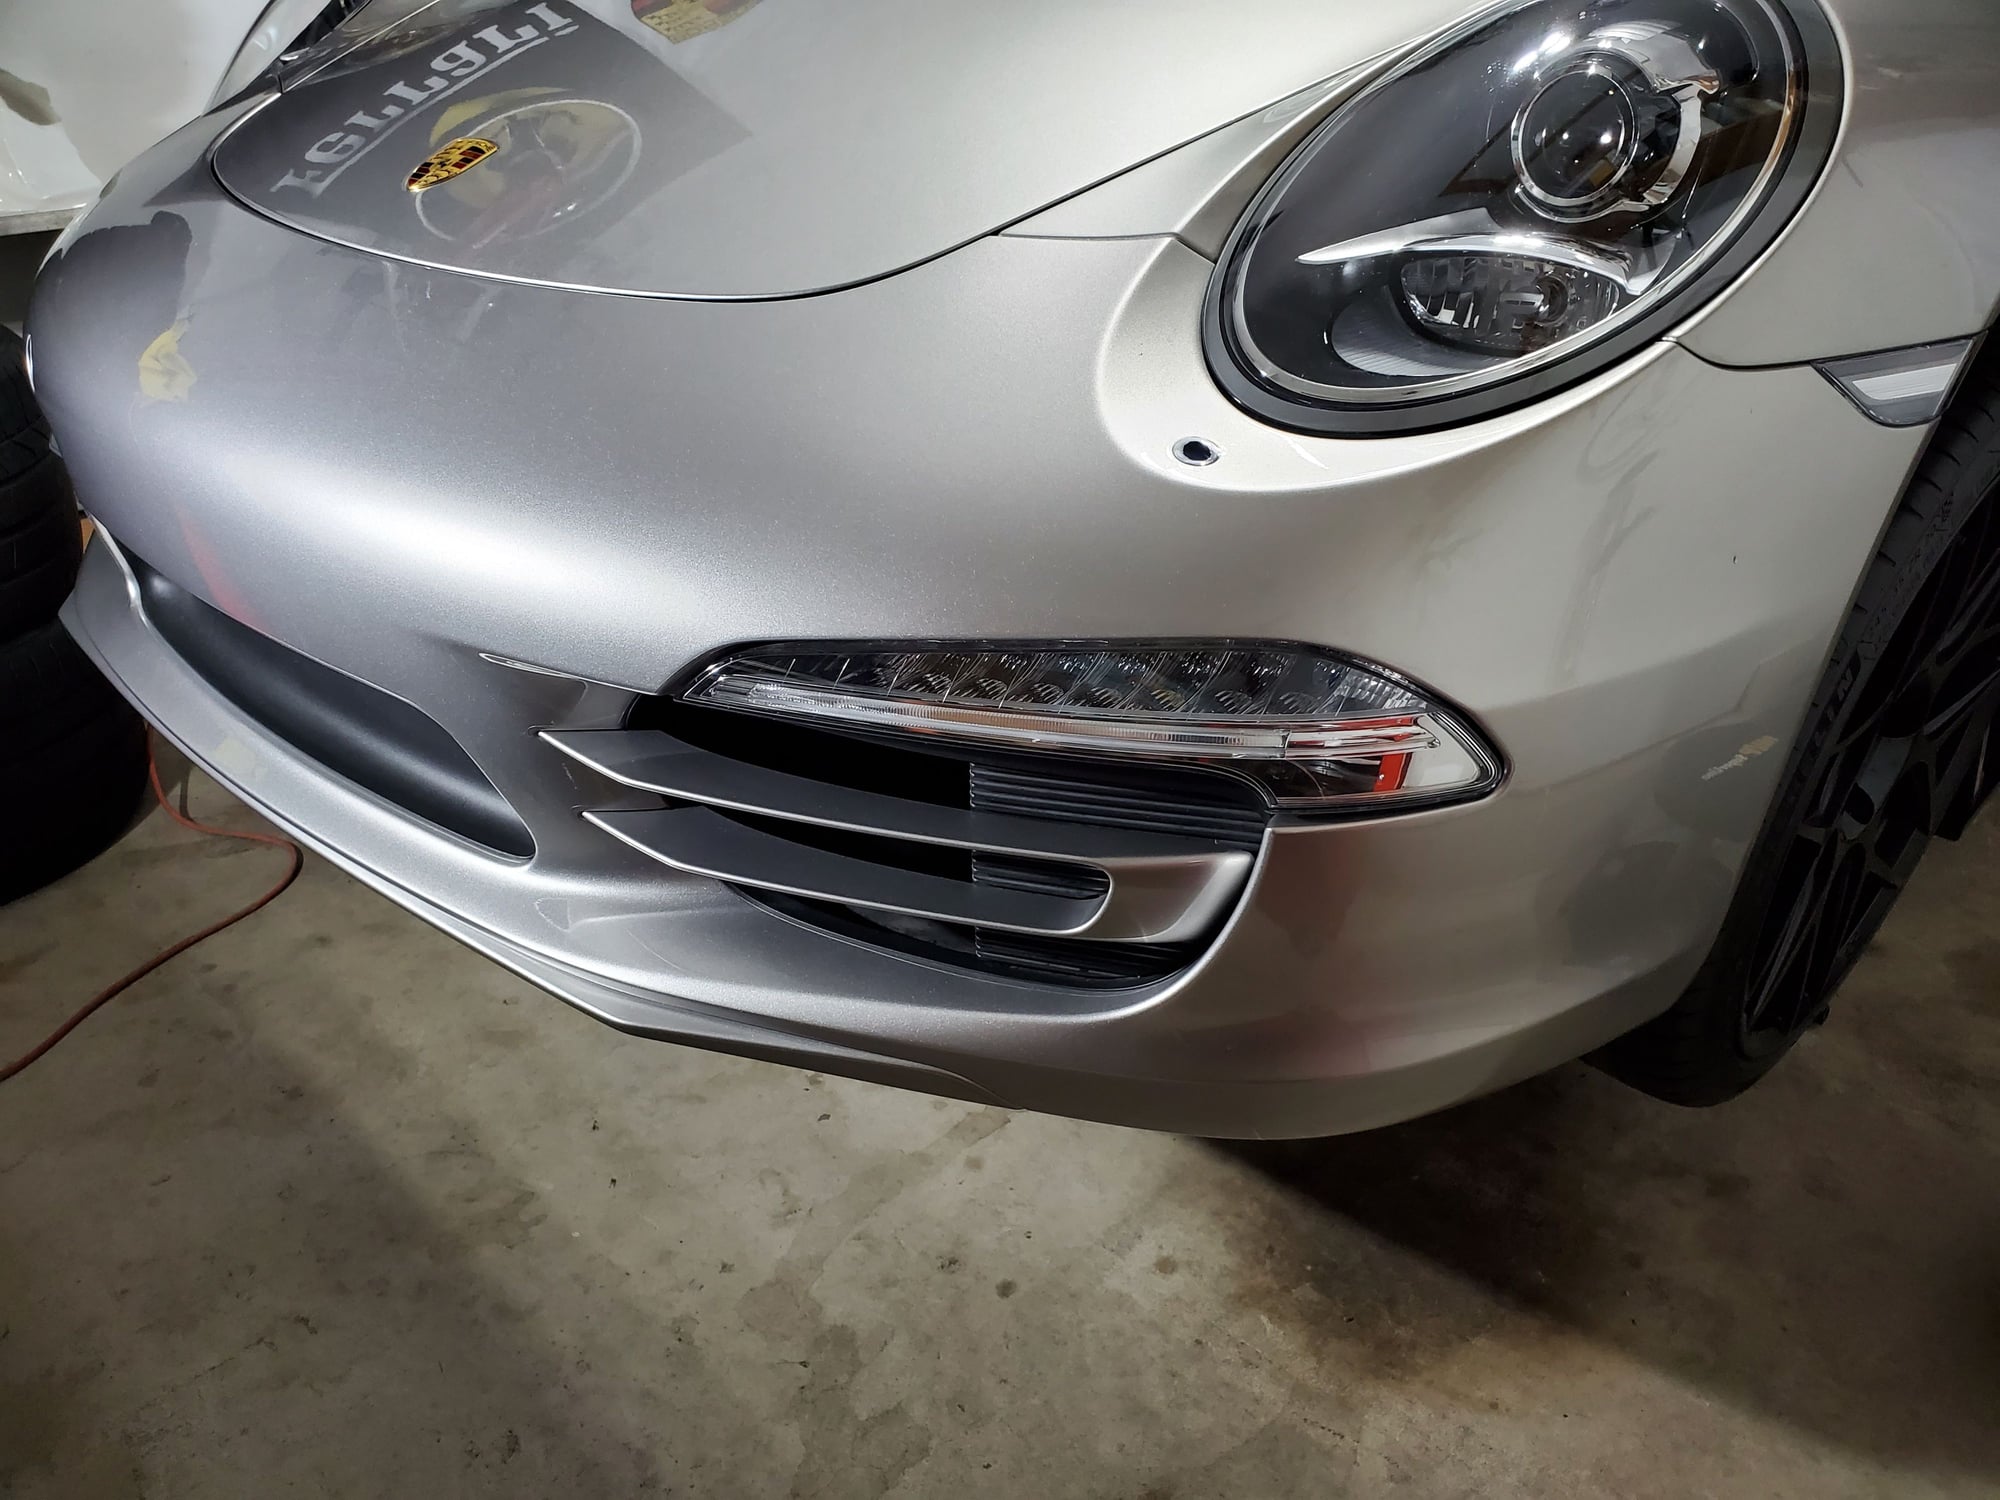
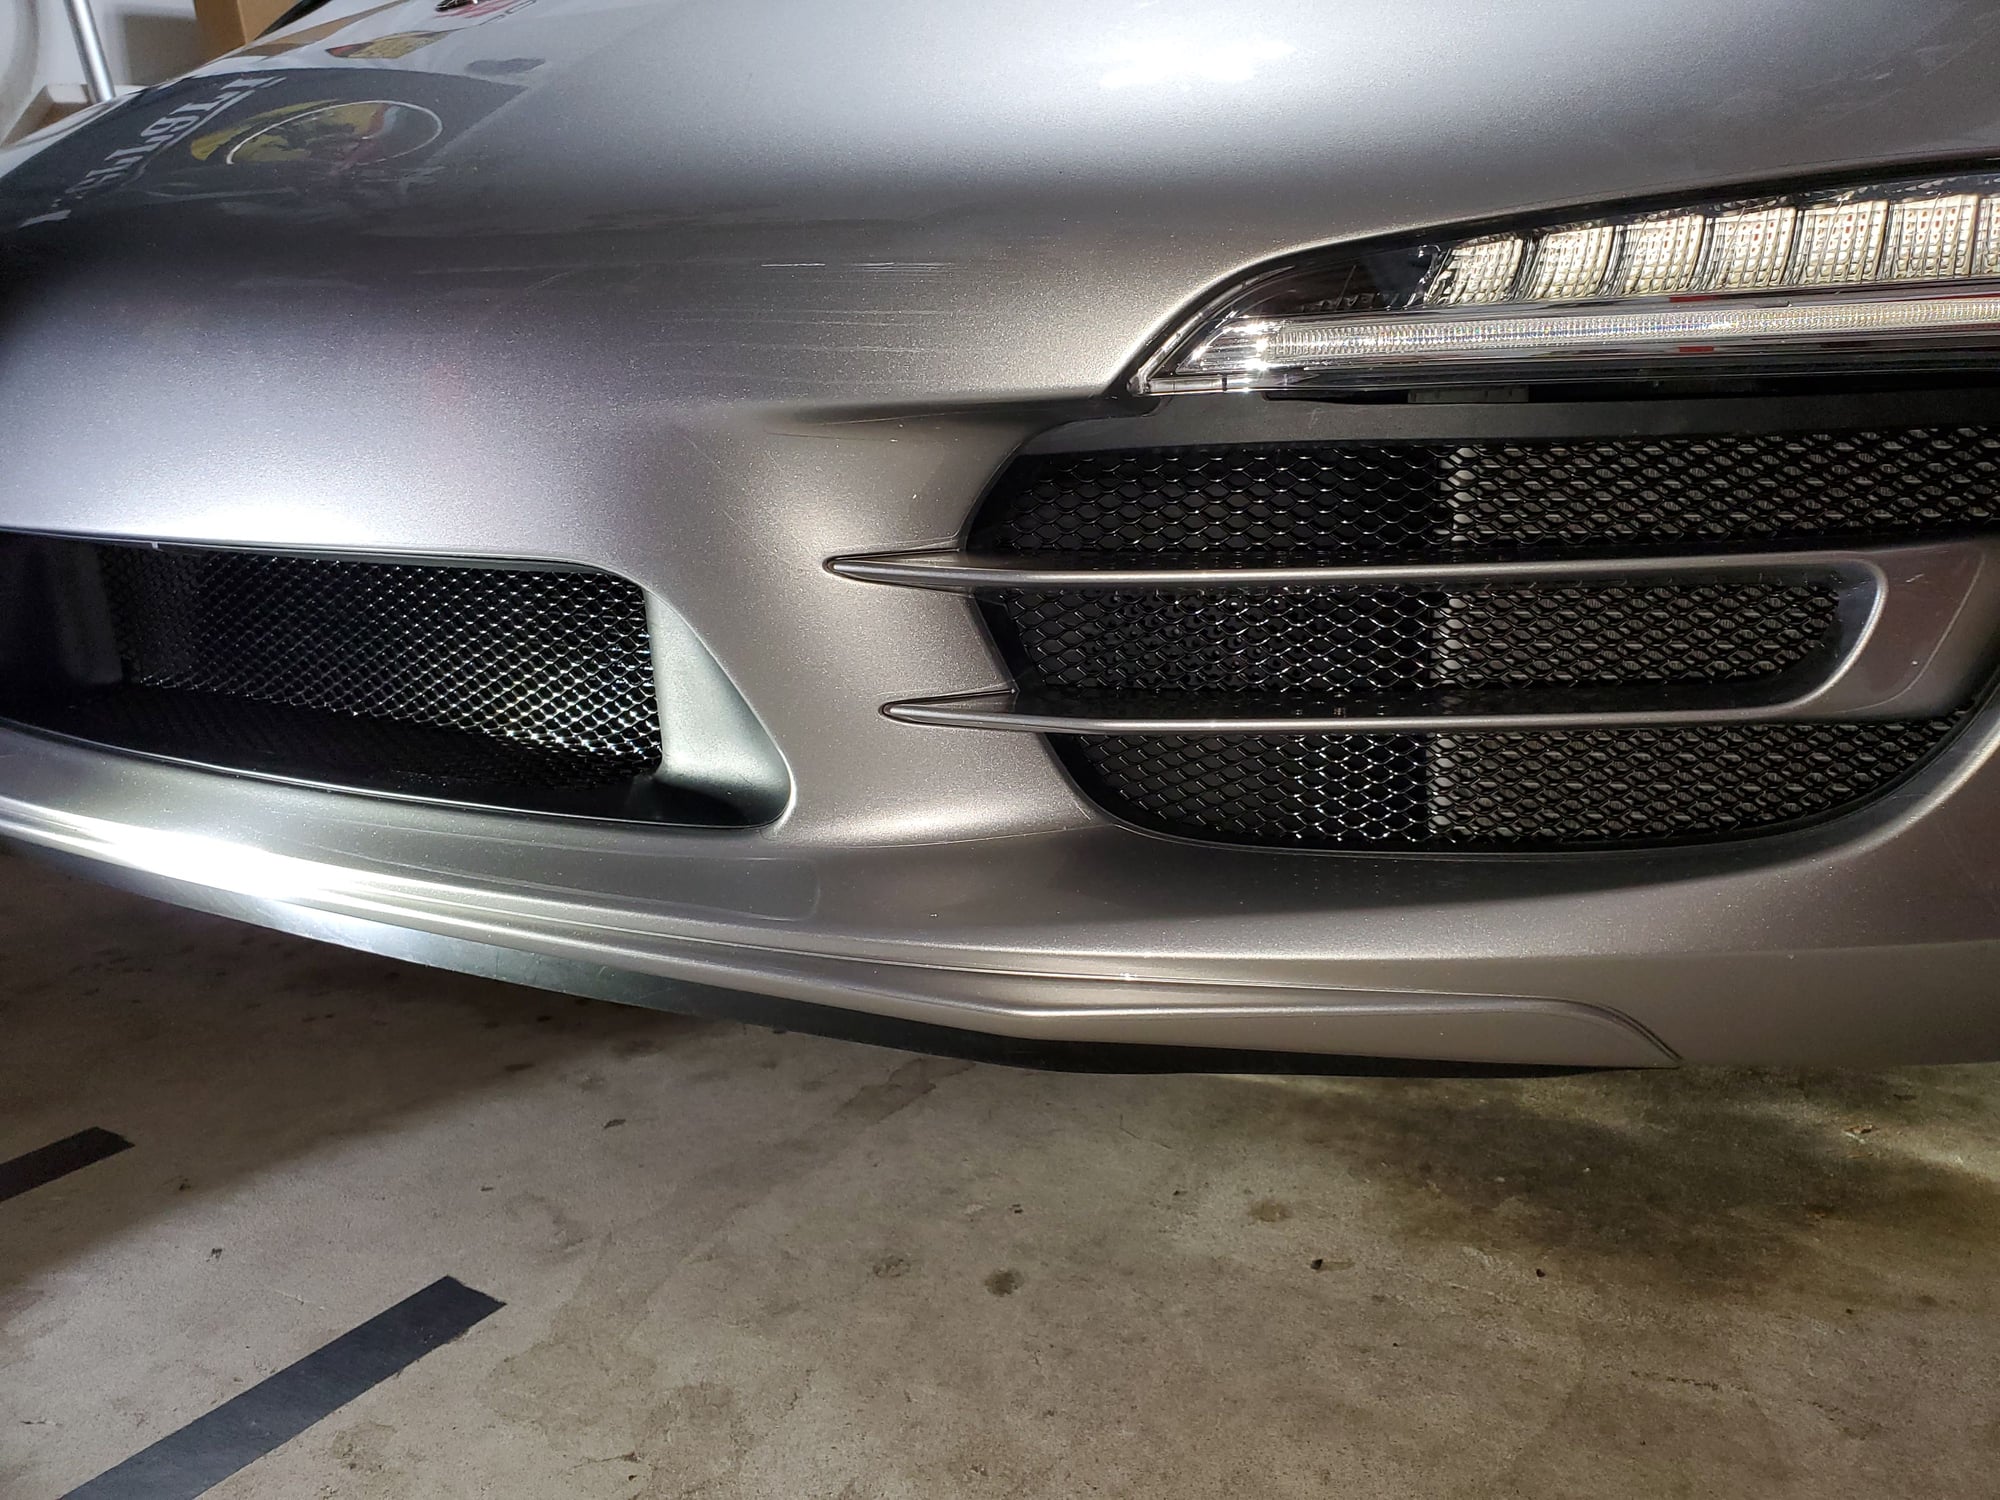
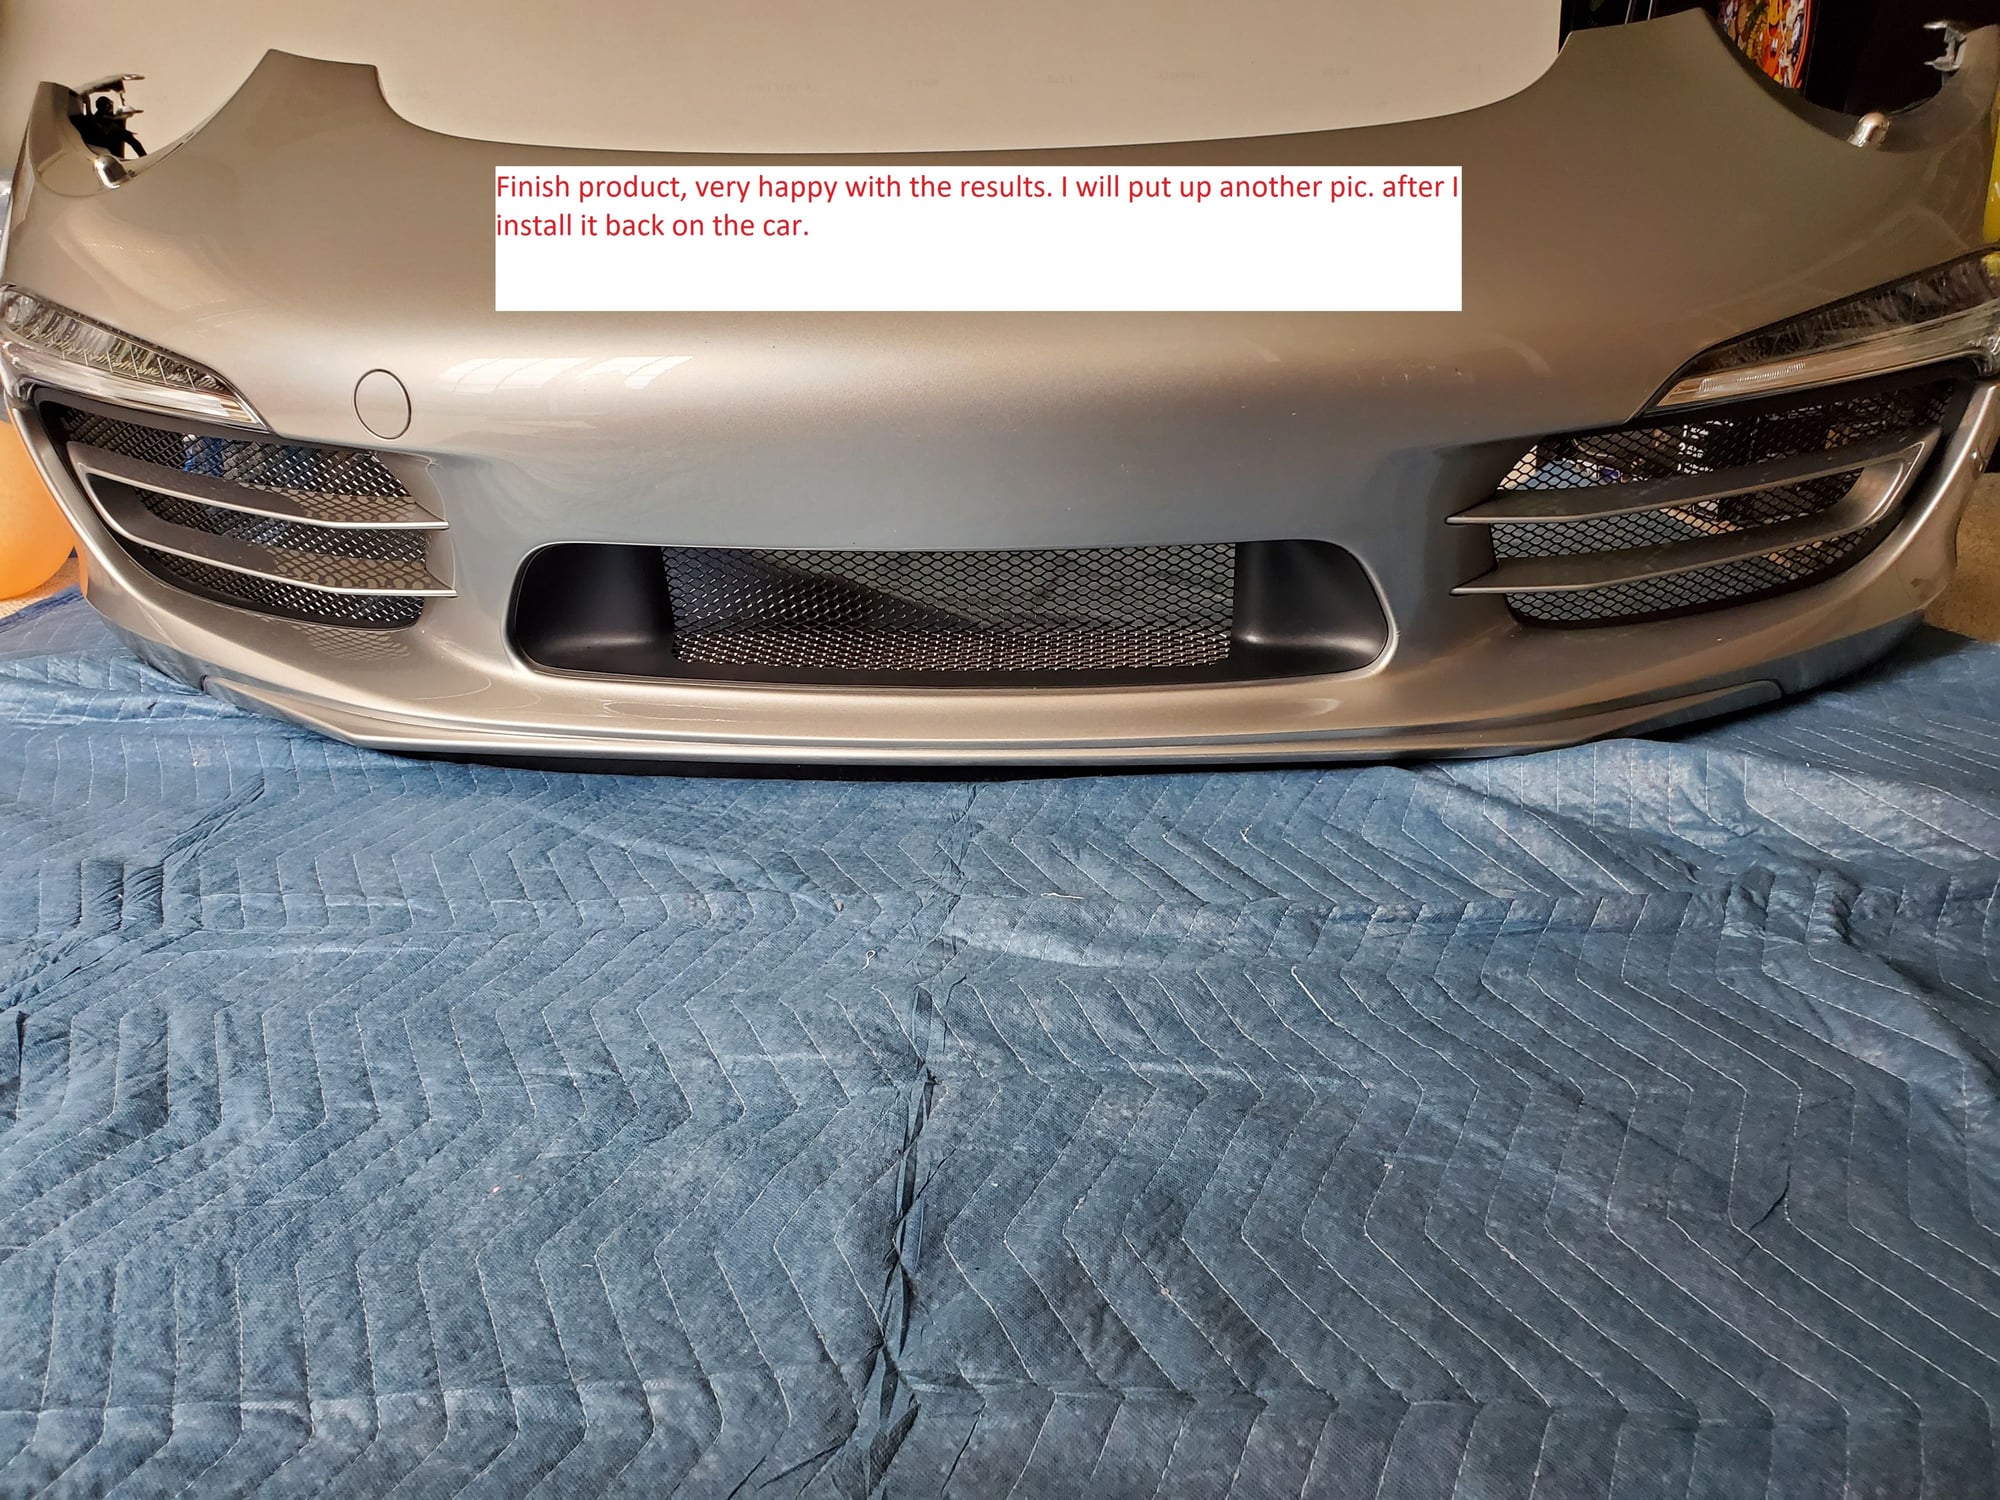
At this point you are ready to remove the front bumper, I have attached the YouTube link below. I decided to also remove the headlight washer housing which is held by side clips and the fog light housing held by 3 screws as well as a side trim (black plastic trim) which is some kind of air reflector of some sort or parking sensor which I decided I didn’t want it back on, as you will see in the before and after pics. Now you have a better area to work on without anything getting in the way primarily the top section which is part of the fog light housing. I have attached several pics of the area illustrating the coverage and access to how you want to proceed on configuring the mesh and what area needs to be trimmed and fold into place. My suggestion is to lay it down and visually oversee the entire area and trim the excess material a little at a time, remember you can’t put it back so make sure you pay attention to the area your trimming. Look at the picture I have highlighted the area that you want to cover and start the fold over process. I am also including my template the 11X17 PDF file you can print it and use a cardboard to make a template and go from there. My bumper is a standard version so if you have a different version, you will need to make a new template. The final template will be laid down on the mesh sheet to outline where you need to cut out the final piece (see pics). Once you have a final piece formed into place and you’re ready to screw it down, check the locations (see pics) that are suitable for drilling a small hole not going in too far and use small black screws to hold down the mesh in place. Just be careful not to drill holes too close towards the opening, reason being the screw heads will show from the other side of the bumper, mostly for the bottom location this is important. I used smaller screw heads in this area to solve this (see pics).
Conclusion: These were pretty much the big factors on tackling this project, I am sure you can figure the small details as you go along. I just wanted to share the important stuff and hopefully this will help you achieve the final product and the satisfaction of doing it yourself. DIY is always fulfilling.
If you are planning to add the 3rd Radiator as I have, see the YouTube link below which covers mainly on the coolant flush/Refill. I had an issue with the coolant Vacuum kit which didn’t hold vacuum and I just poured new fluid and ran the car until it got to temp. and kept an eye on the reservoir added coolant and also watched it spill out the over flow as the system was pushing the air out which is very messy. I also had the purge opened by putting the clip in the vertical position. I ended up turning off the car letting it cool down and check the levels and added fluid but just half way and I will run it up hot again and see where the levels will be and also to see if all the air is out by monitoring the reservoir level and the over flow. I did this in the driveway so I can hose down the coolant spills. I am still working on it as this is my 1st time taking a shot at this so any suggestions are appreciated it. Some members already helped out as I made a thread on getting some advice.
Tools/Items required:
· Mesh Grill Customcargrills.com
· C clamps
· Rubber Mallet. Helps to finalize the shape for the 90deg straight bents. If needed
· A flat piece of wood for bending the edge/C clamp usage. I used a painters mixer Home depot, the bigger one’s as they are also long and thicker. See pic
. Snipping tool.
· Bonding Material. I used this stuff, it works really well. (JB Weld 82655 2oz).
. Screws bigger size. 8 X 1/2'' Truss Head Screw. I had these so you not need them.
I ordered a kit from CustomCarGrills a couple of months ago which for the time will be used as a template just to see how it'll look on another material I bought.
And since Porsche has grills on other 911s, there is no reason why they could not have done that for the rest of them, or at least make it an accessory with the usual factory fit and finish.
I ordered the center grill from ZunSport. I love the look of yours for sure!!!! I figured with the center radiator I better do it.....nicely done for sure!
It wasn't that bad, as long as you have a plan and no fear to take on these crazy but rewarding projects. I love the fact that everyone here shares their stories and knowledge which helps with tackling some of these projects.
Love the car, and the front sport grill. Its hard to see the mesh in this picture, and it looks clean. Fundamentally the process is the same for most of these bumpers, so if anyone is looking to add the mesh look I would suggest to go for it.
I just received my Zunsport center grill and it doesn't fit properly. Side grills are great but the center not so good! I plan on sending it back and doing this mod!
Did custom grill on my 991.1 gts very happy (ignore cigarette butte picked up on road)
Fls do you have any close ups posted anywhere of your grill guards? I to have a 991.1 Gts and have been looking for an outside the fin alternative so I was curious as to what you did there. My understanding was none of the production aftermarket grill guards fit outside the fins and you could only get the behind the fin version for a 991.1 Gts. Maybe that has changed.
I just received my Zunsport center grill and it doesn't fit properly. Side grills are great but the center not so good! I plan on sending it back and doing this mod!
I wasn't overly impressed by Zunsport, Rennline, etc after viewing their videos and those of customers on Youtube. I guess it depends how picky you are.

 12-25-2021, 07:17 PM