When you click on links to various merchants on this site and make a purchase, this can result in this site earning a commission. Affiliate programs and affiliations include, but are not limited to, the eBay Partner Network.
So I decide to tackle another project and share it with the enthusiast on here. My original plan was to do a brake bleed and I was also thinking on painting the Calipers as a winter project. I figured why not do both now and get it over with, plus winter wouldn�t be an ideal time to paint as the temp. Would be inadequate for proper bond and cure.
I couldn�t find anything online on removing the Calipers, mostly were about doing rotor and pad replacement so this was a little challenge that I decided to take on. I have attached multiple pics throughout the process to share. Please feel free to share your thoughts and experience�s.
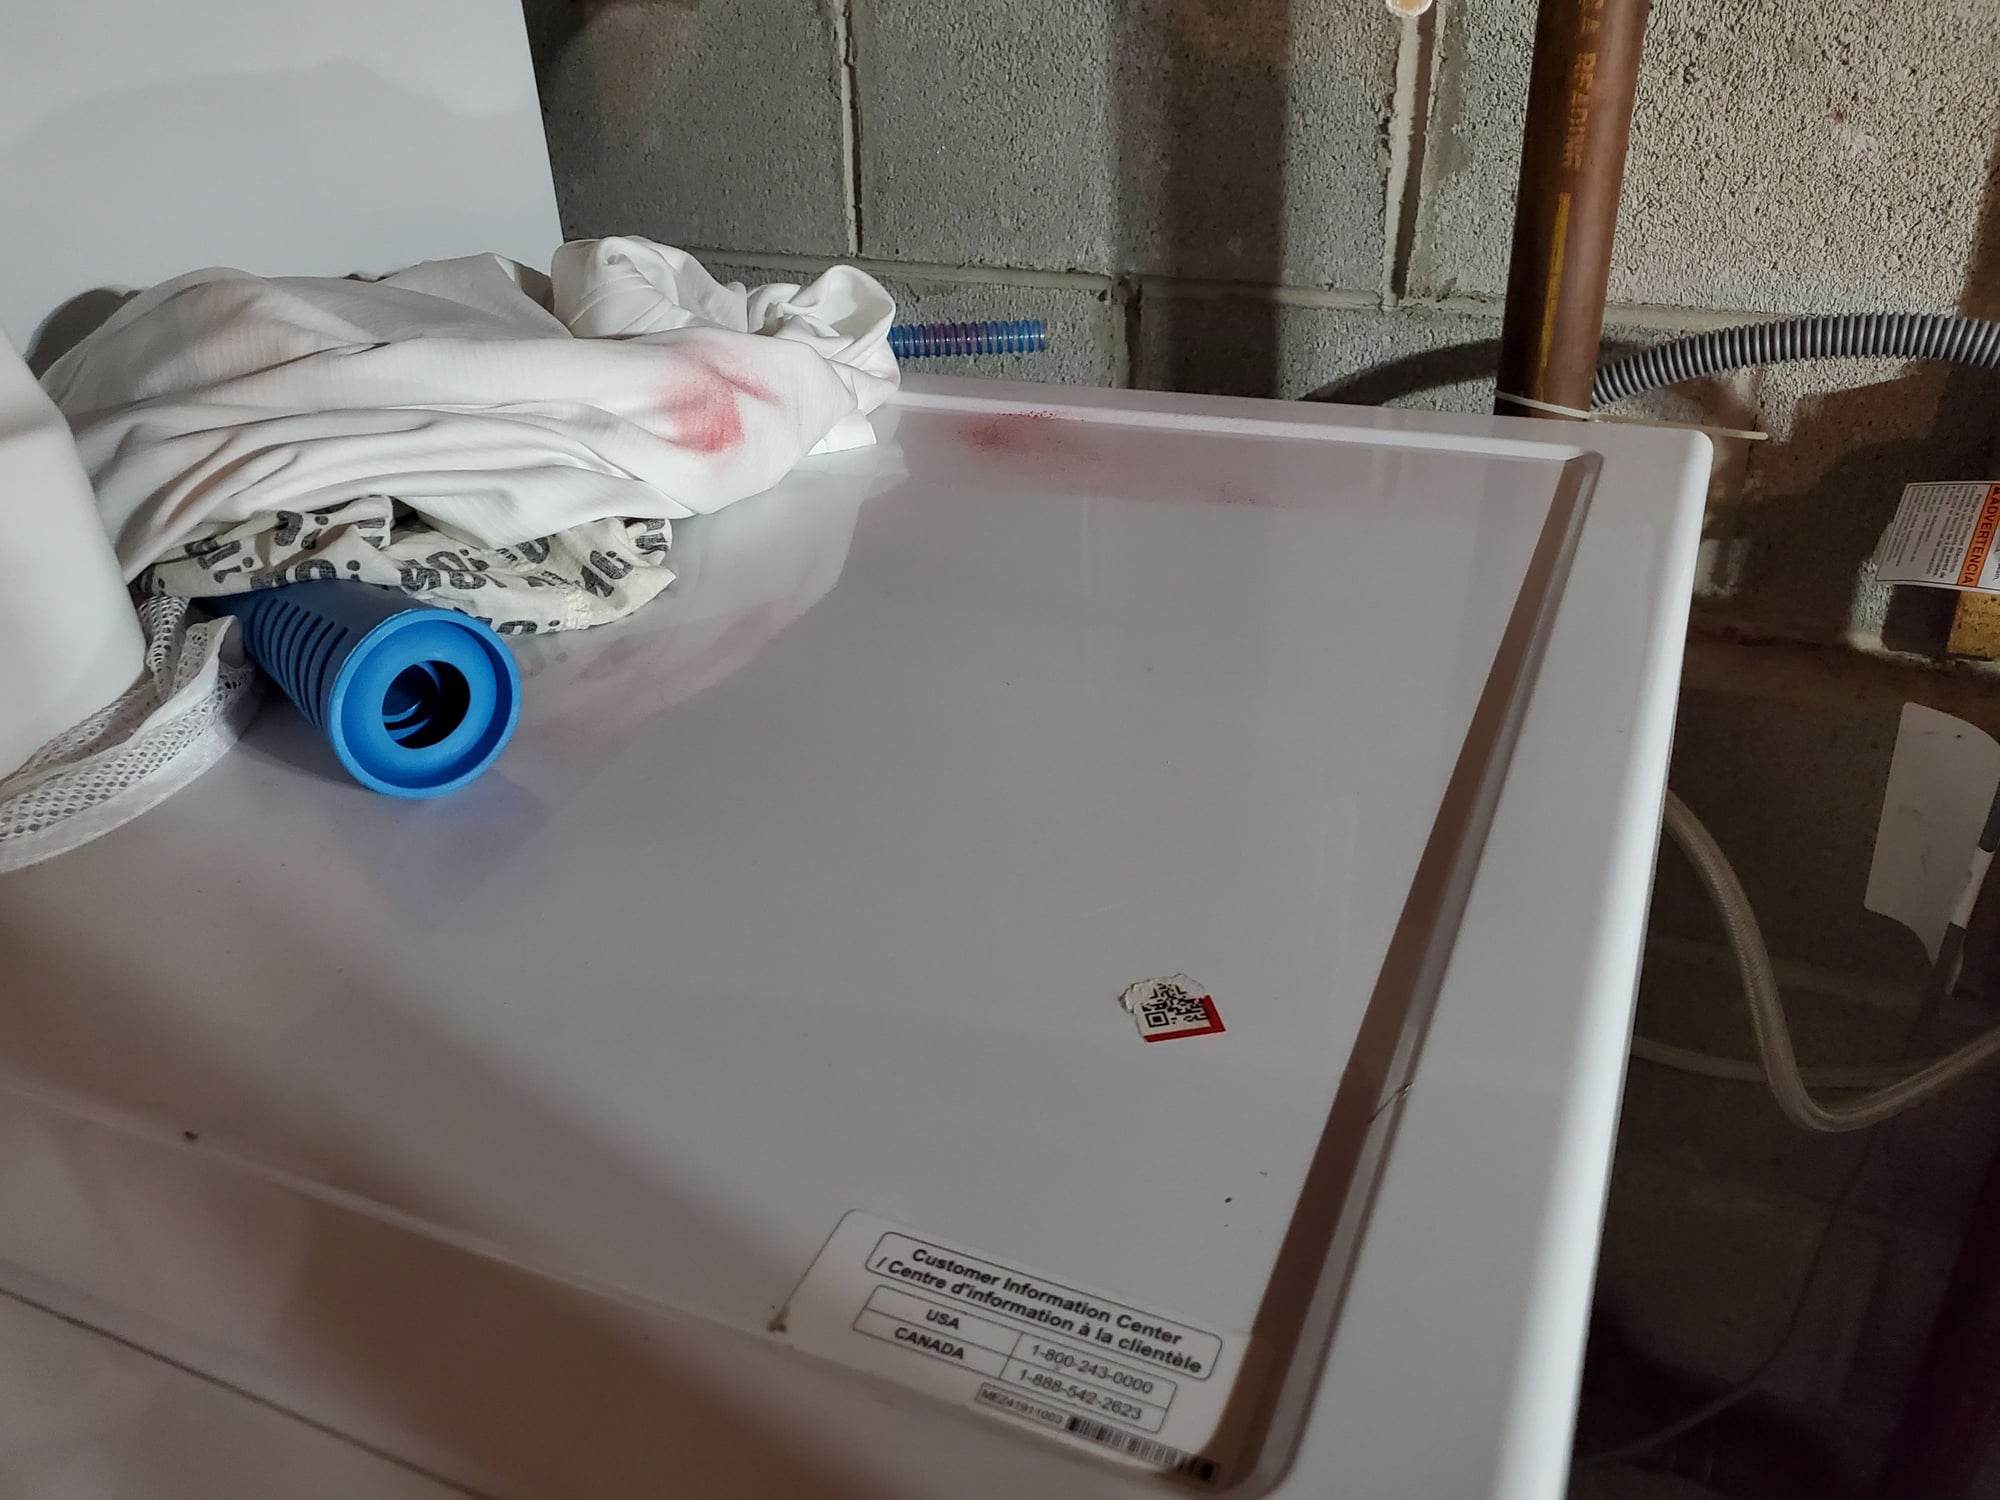
IMPORTANT: Keep your rags with brake fluids away from the vehicle paint
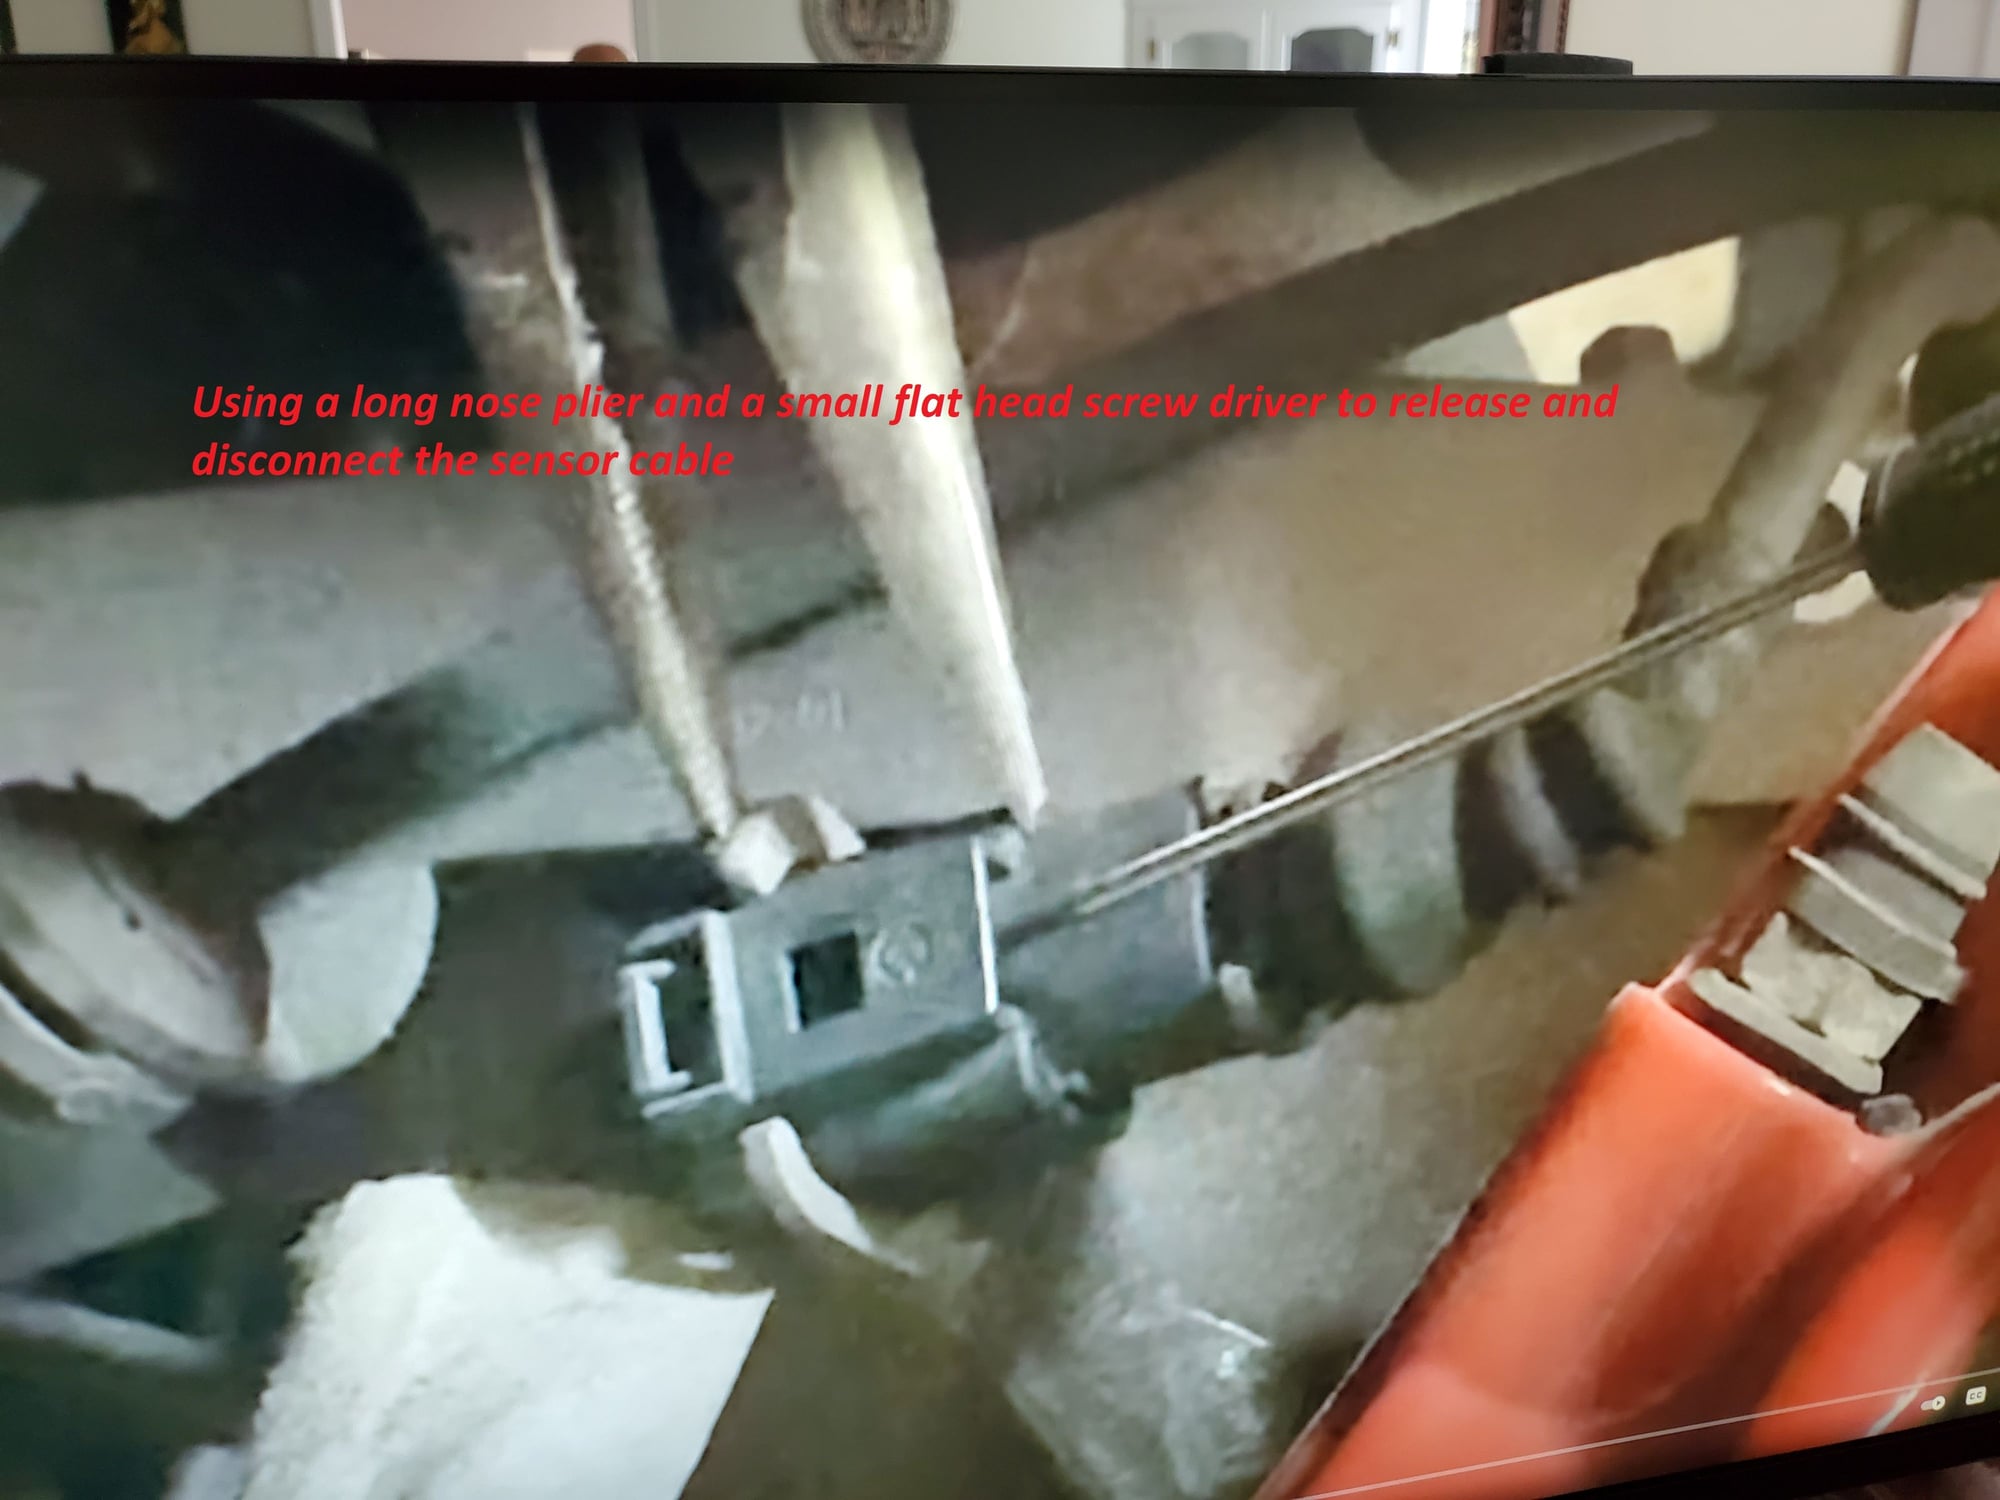
Front Calipers: are super easy to deal with and to remove. Disconnect the sensor cable from the harness, I tried to remove the sensors from the brake pads and it broke off, so from what I had read they don�t really come off easy and if so it will be partially damaged. I suppose to the heat as they bond to the pads. So for the rest of the calipers I only disconnected the sensors form the connector and left it intact to the pads (see pics). This ended up working well without sacrificing the sensor cable replacement. I ended up purchasing replacement sensors anyway to have them on hand. I will list all the items accordingly for your reference. By the way, the sensor connector seems to be a pain to disconnect, I�ve seen video on YouTube on a brake pad replacement and I took a screen shot to share here, it looks simple, but I had a bit of a struggle to do it. YouTube video link.
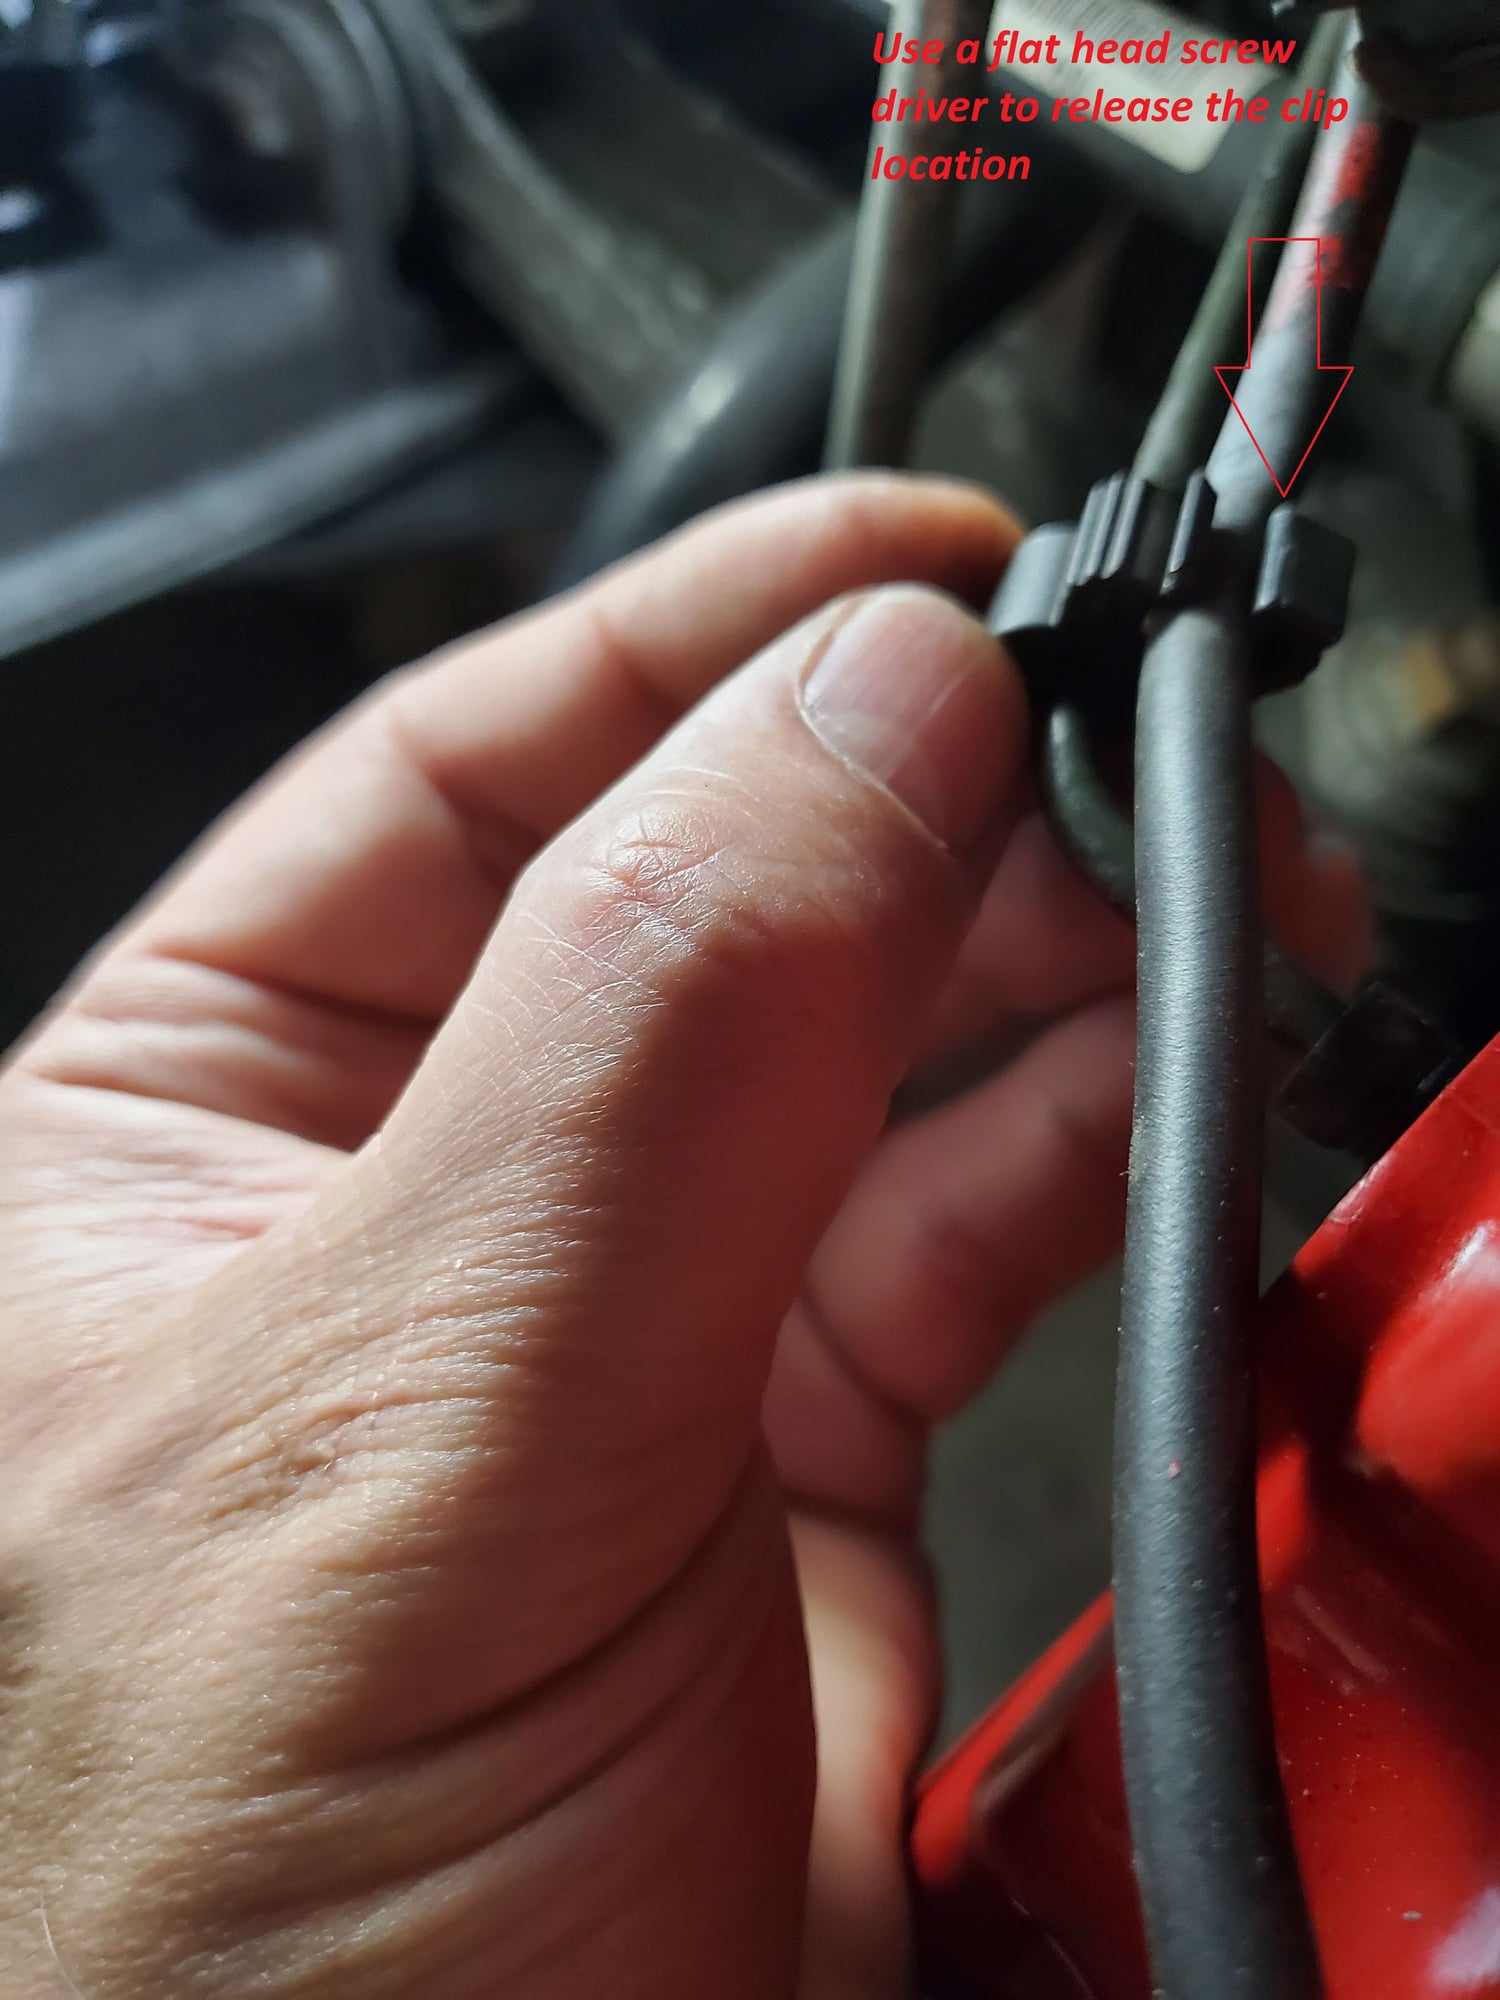
1. Disconnect sensor connector and the little black organizer clip that just acts a wire management which is holding the sensor cable and brake line. I used a small flat head screw driver to release the clip (see pic) YouTube is pretty good showing it.
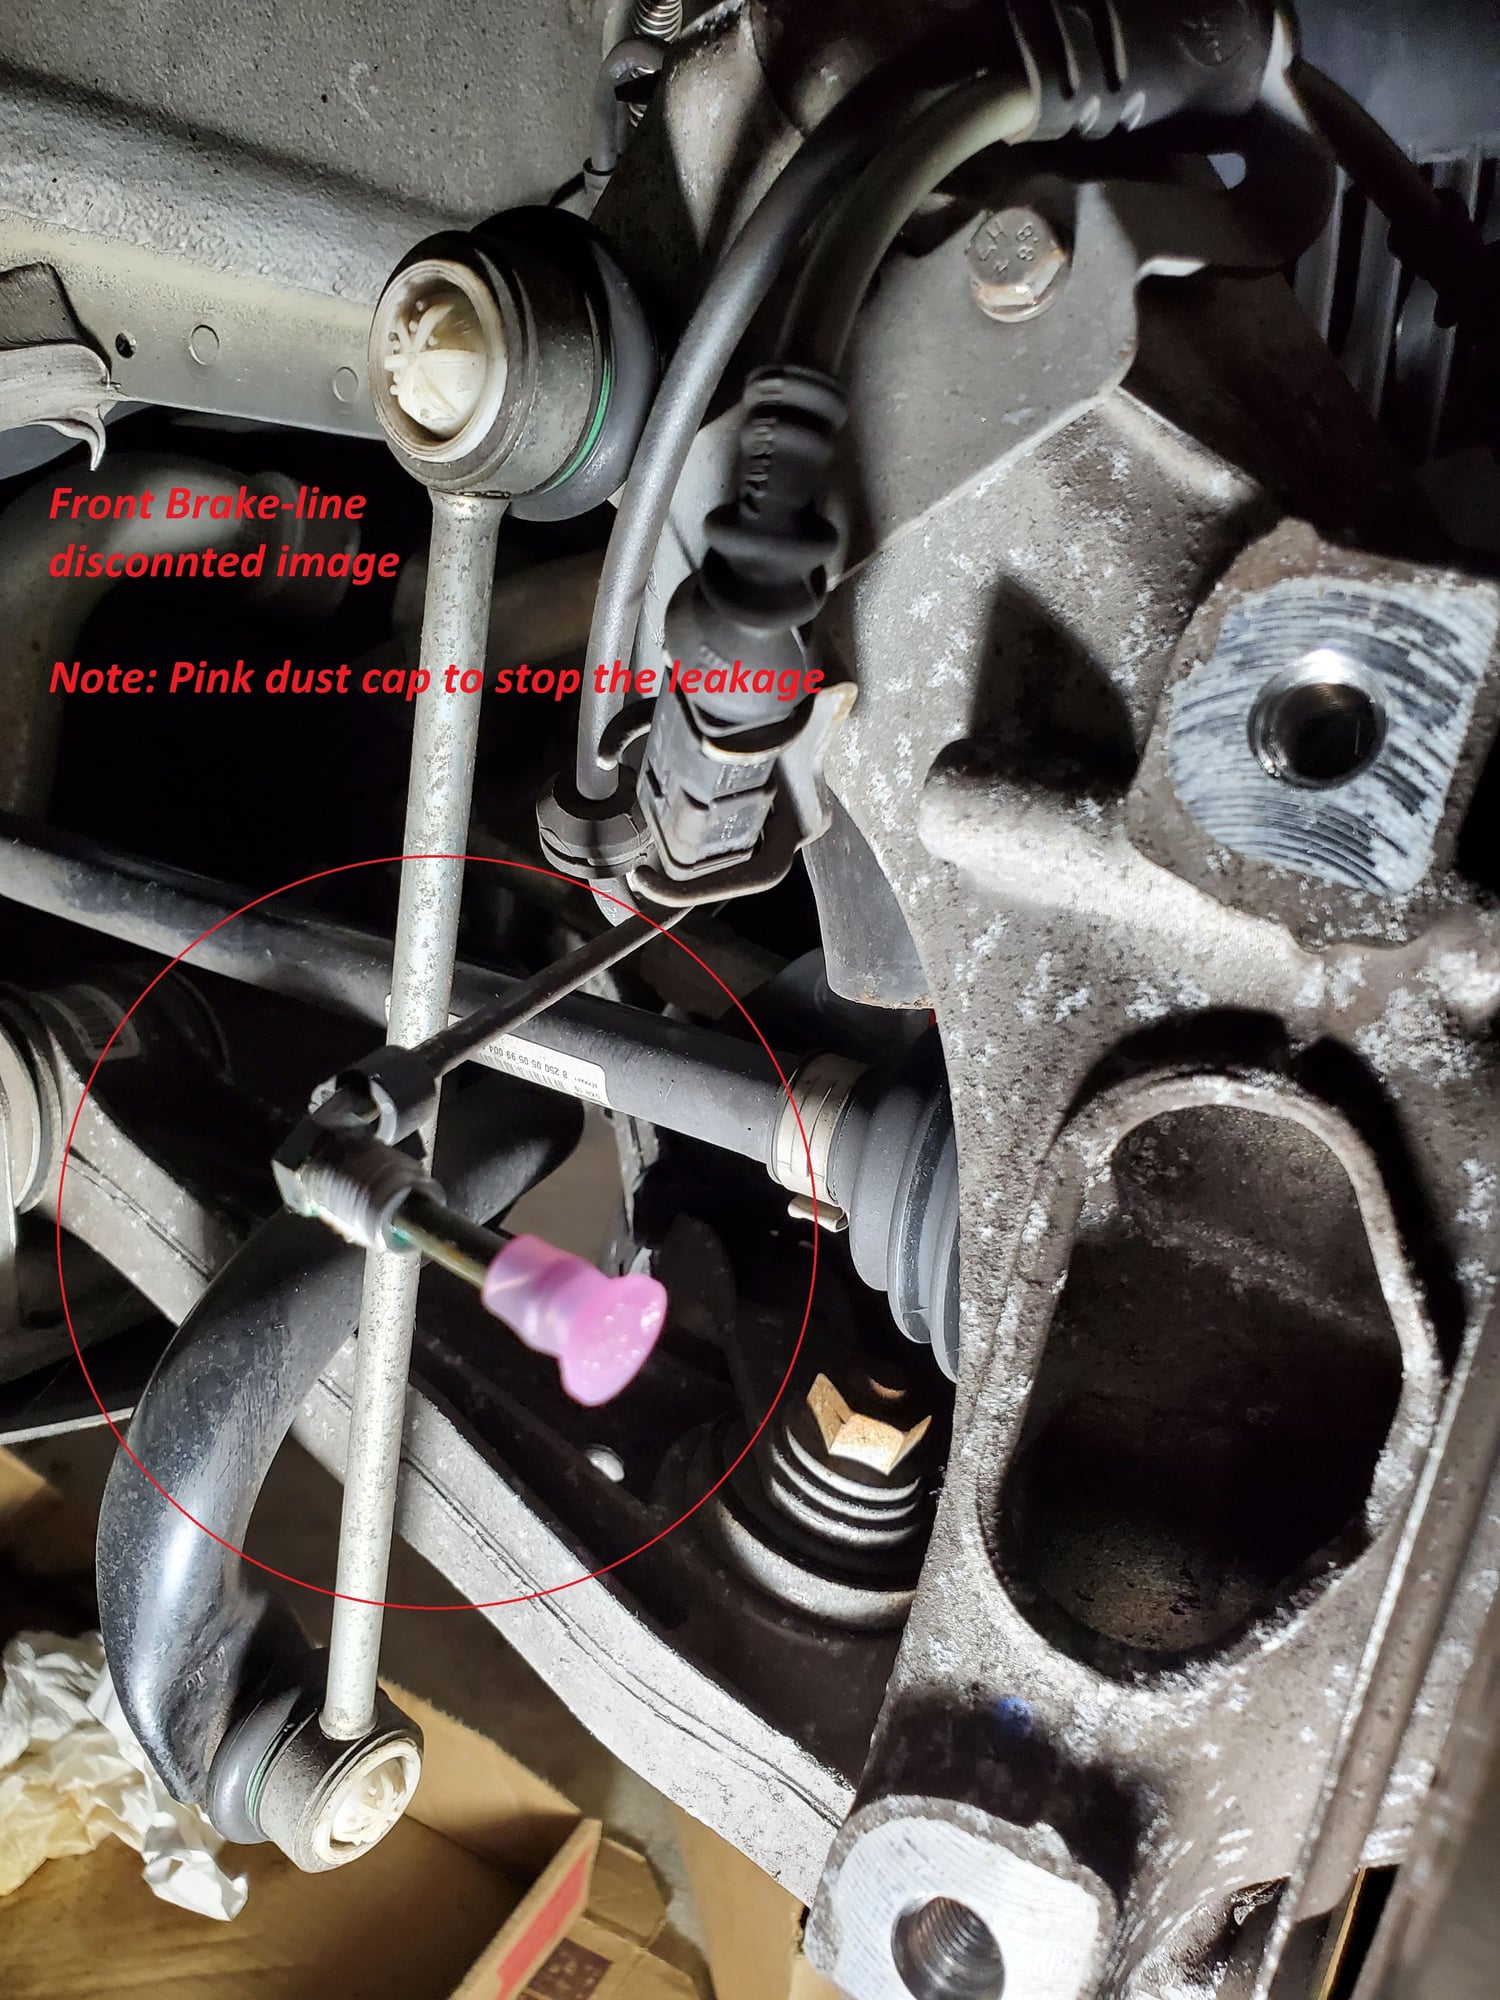
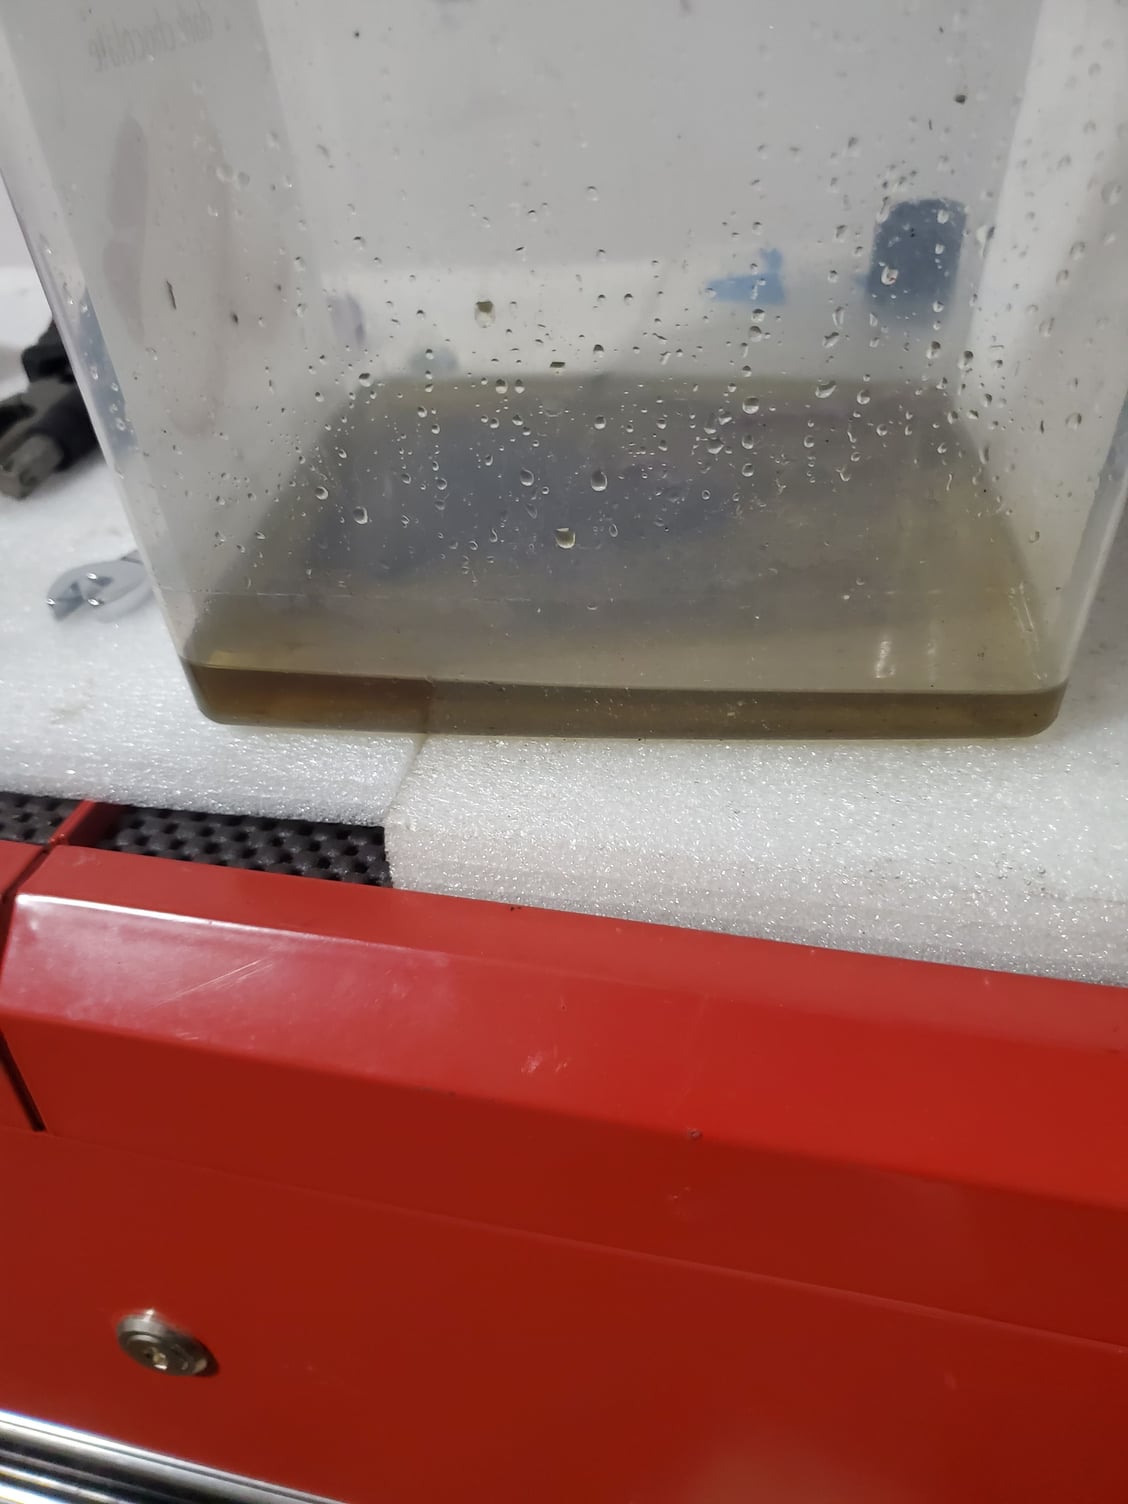
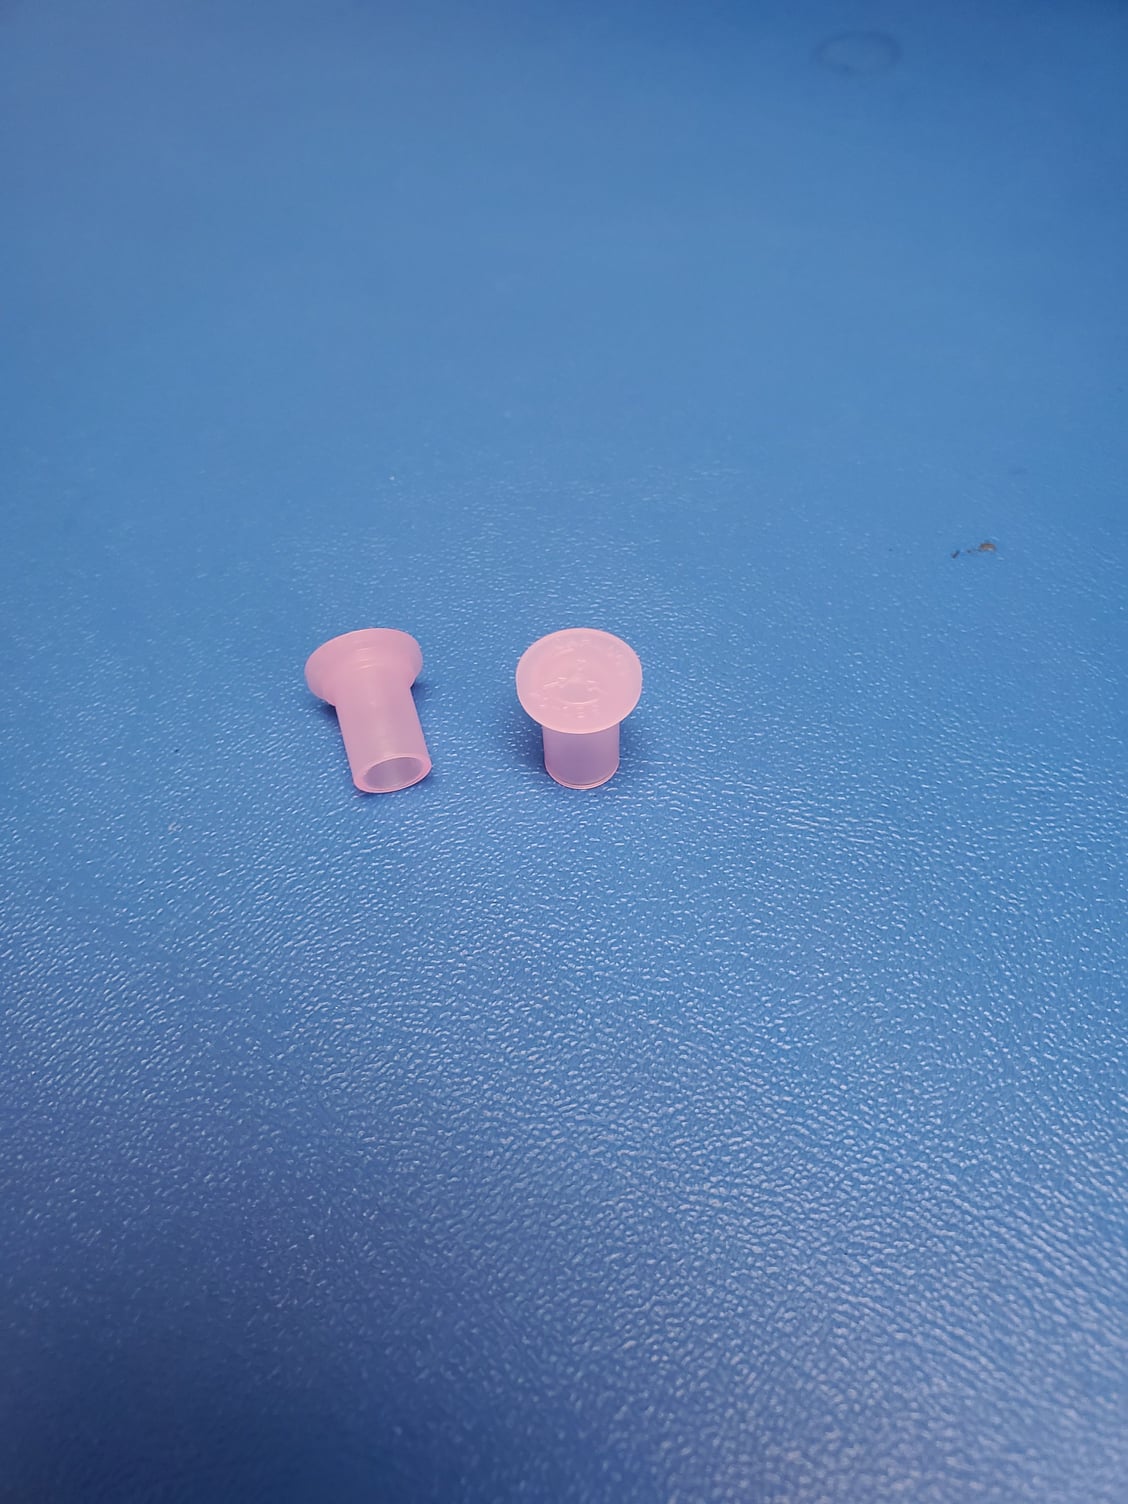
2. Using a 10mm open end wrench, loosen the brake line and disconnect. Once disconnected, slightly pull it away so you have room to cap it with the proper item to stop it from leaking fluids. I used dust caps that I got from work and ended up working perfect. The dust cap fit pretty tight and the opening of the dust cap measured 0.25in as a reference. (see pc) CAUTION make sure to put something underneath the caliper as the line will start to drip out brake fluids, but don�t freak out it�s a slow drip but messy. I wore latex gloves.
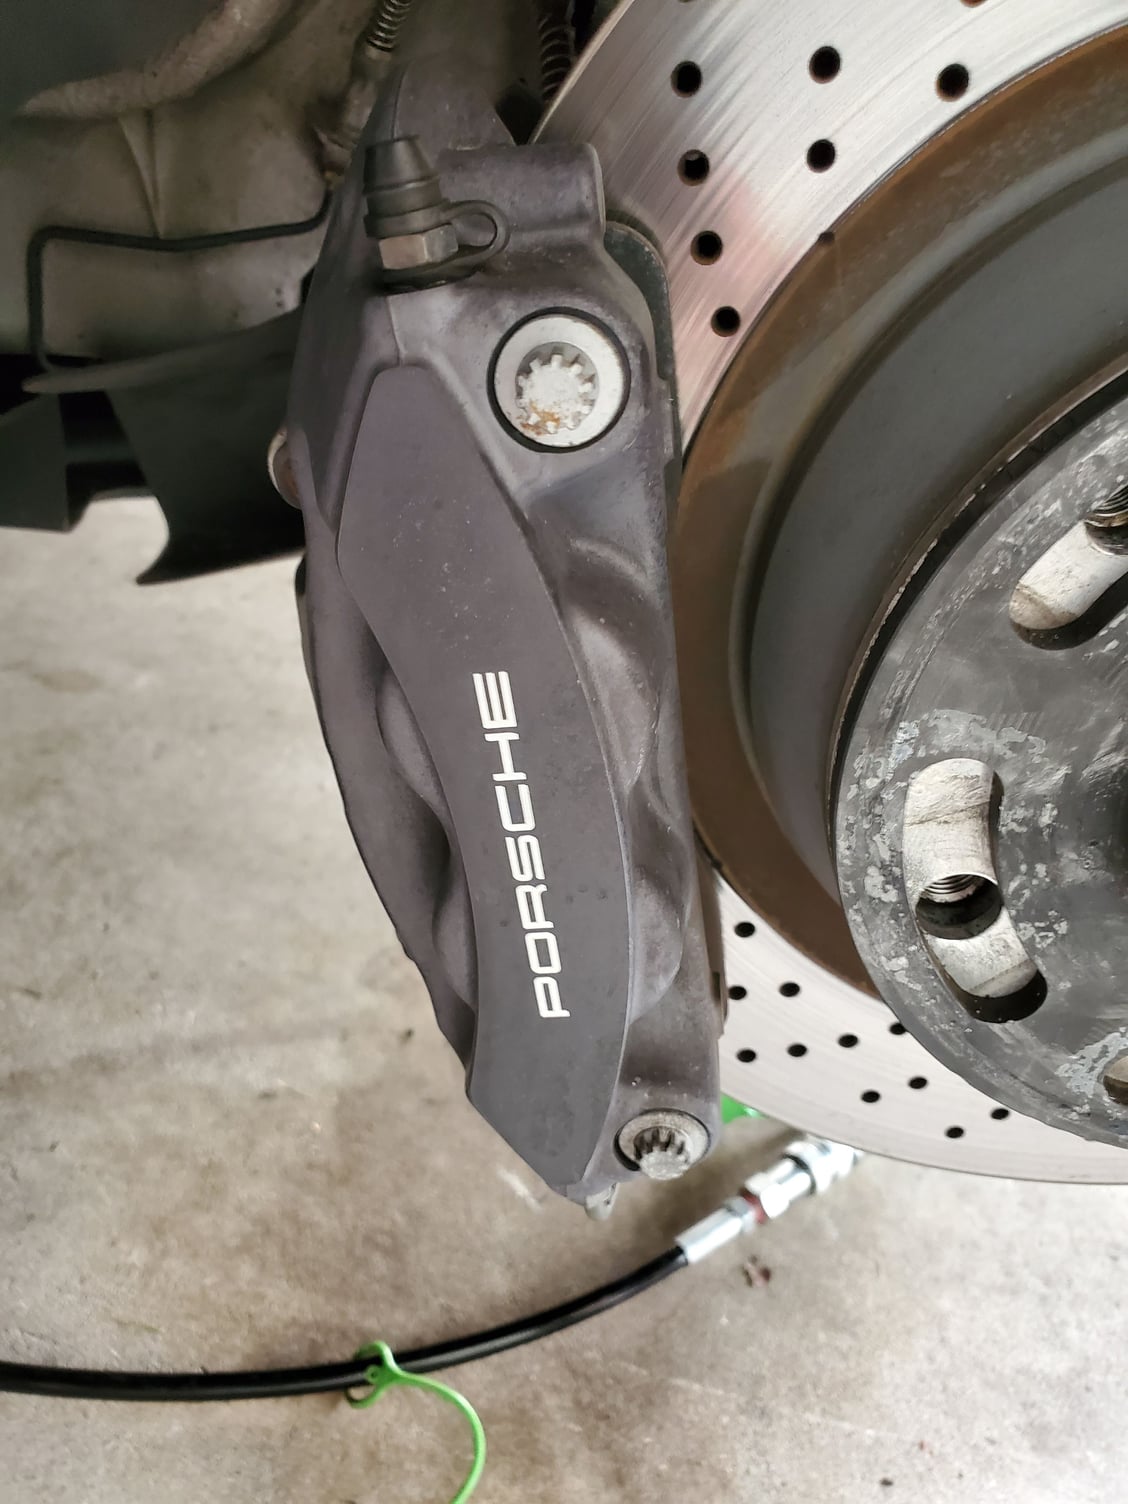
3. Now the caliper is free, remove the 2 star socket Bit screws size T55. Don�t worry about it falling on the ground, they are tightly held by the pads, just use a little force to pull it off. Repeat for the other side. Take the caliper and squeeze the pistons one at a time to release the remaining fluids out of the caliper, make sure it�s pointing into the drain container. Wipe down, use a cap or just masking tape to seal it. You don�t want any debris to get in the there. Repeat this step for the remaining calipers.
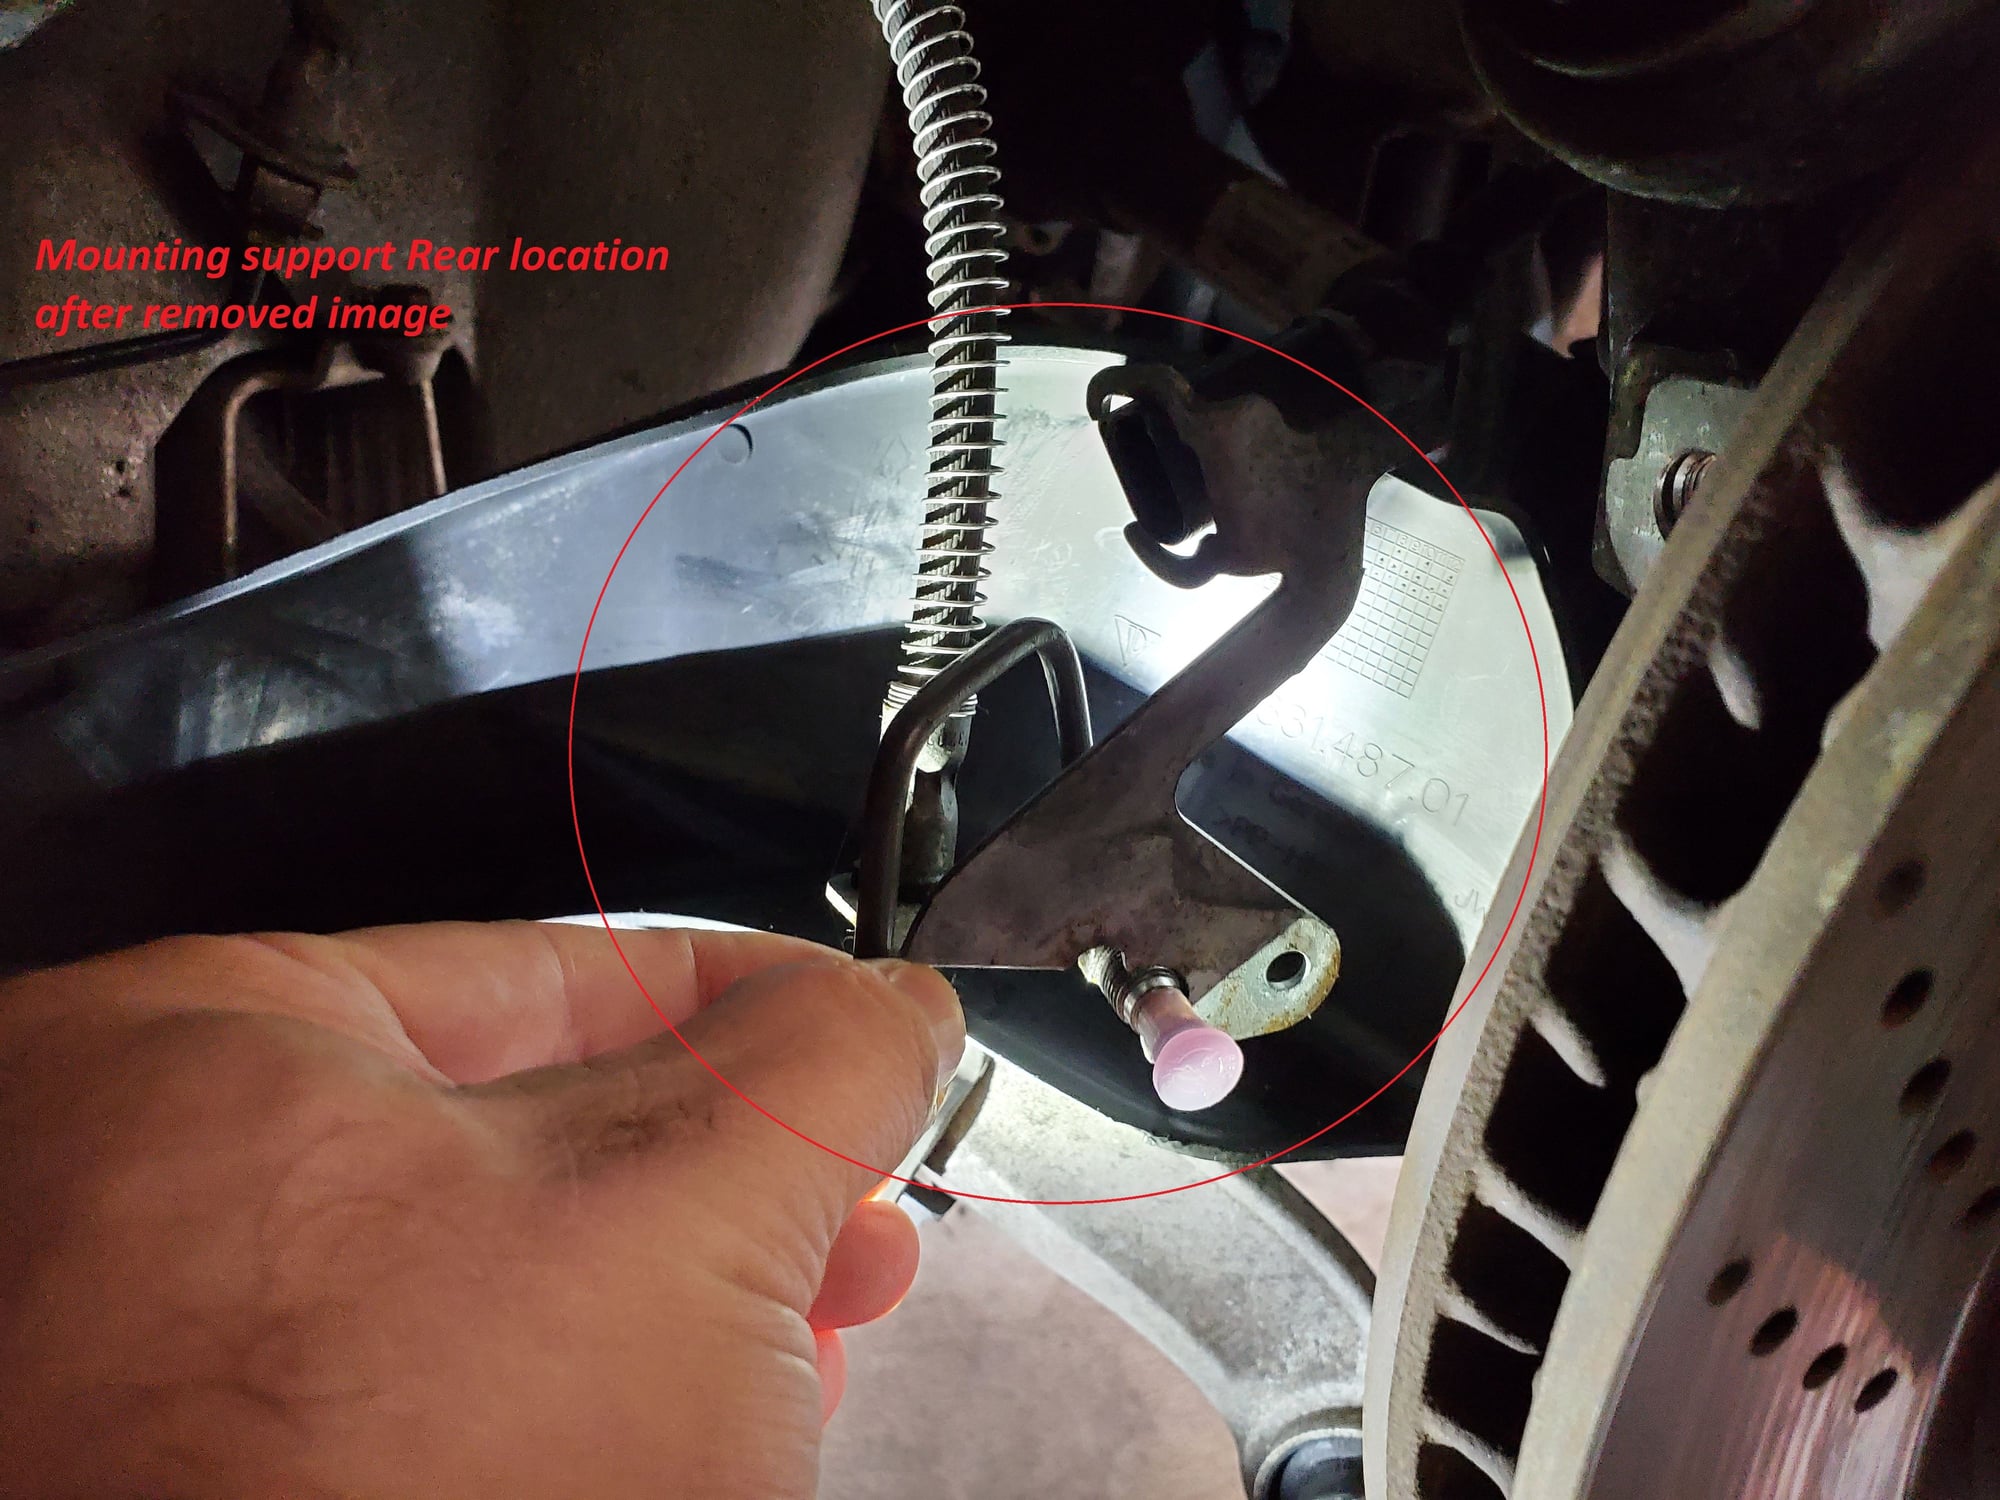
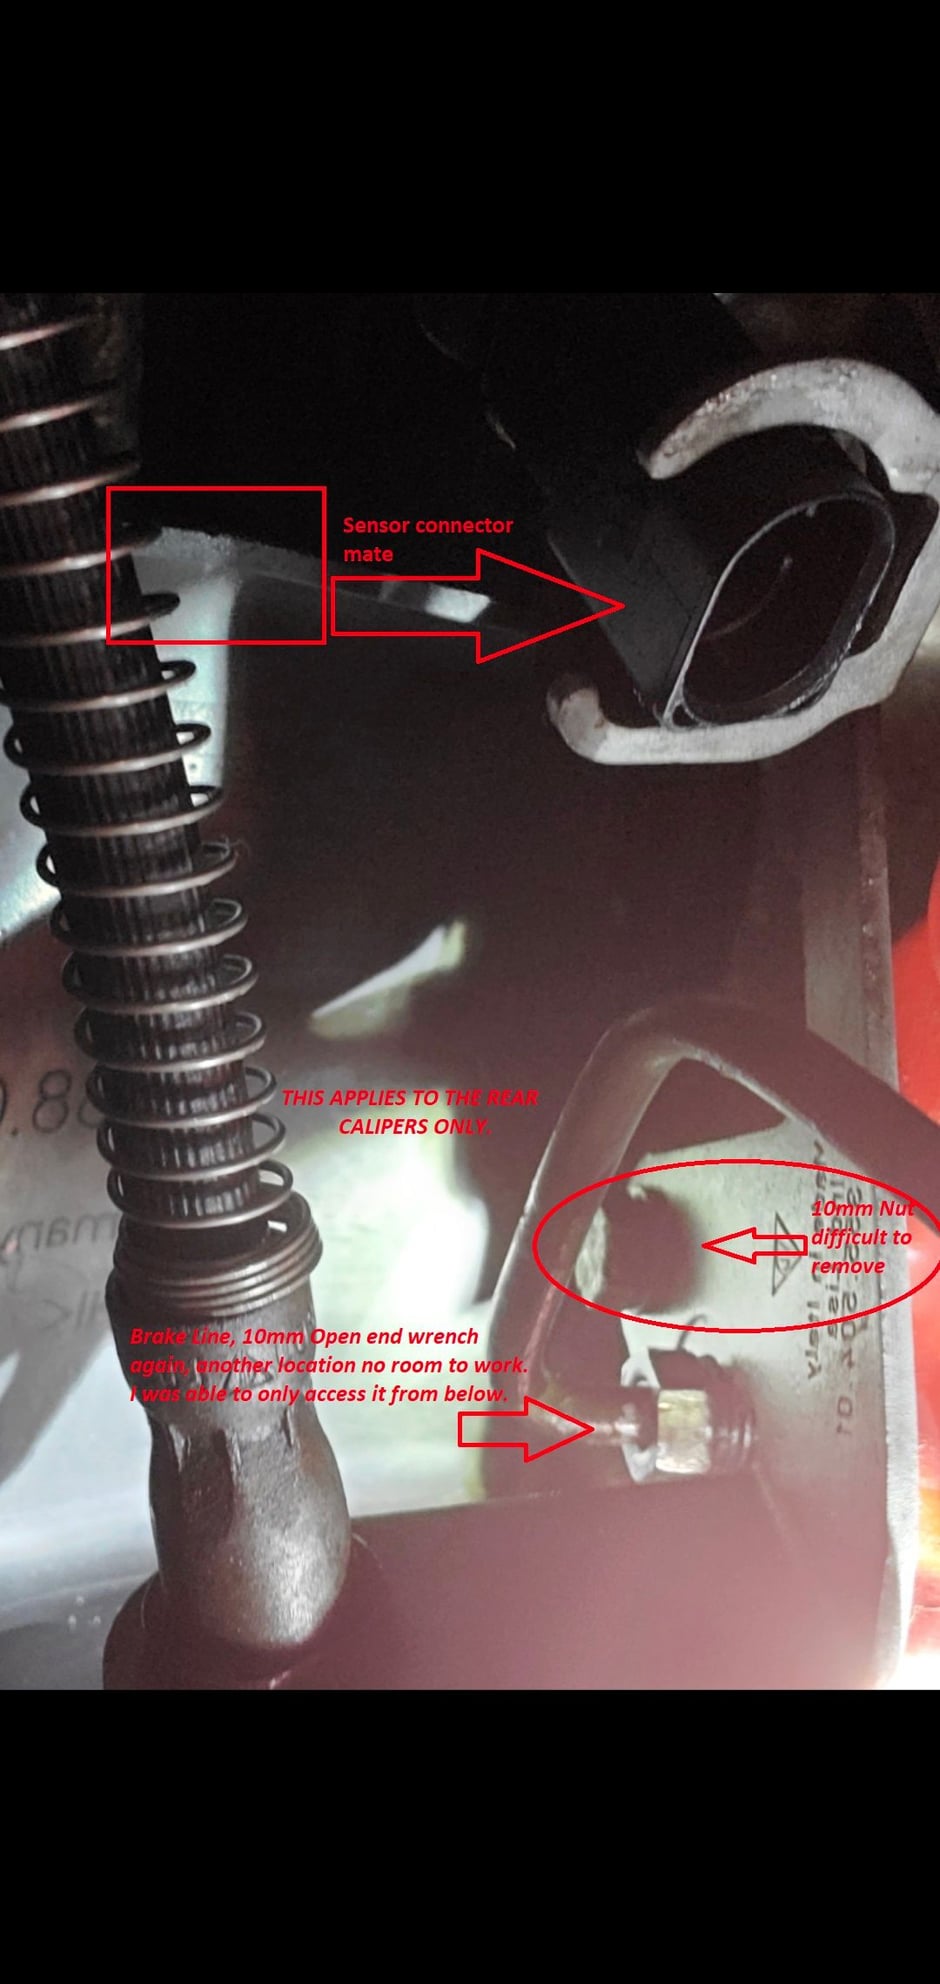
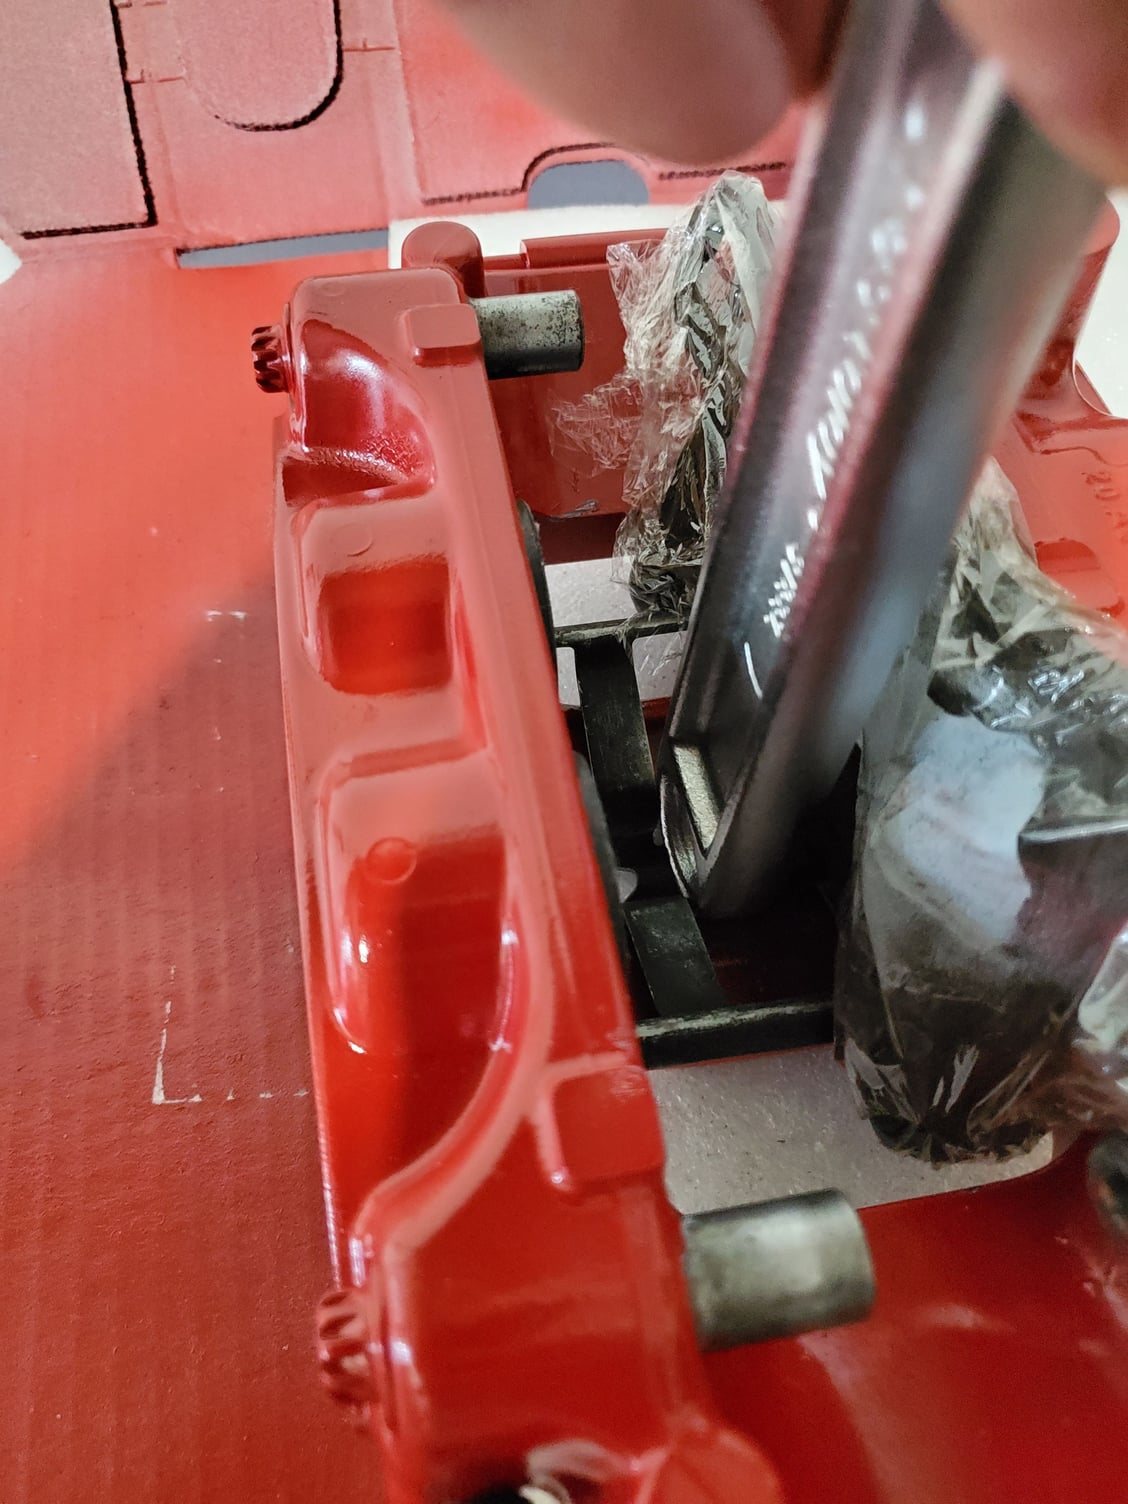
Rear Calipers: are a bit difficult to address. As you see in the (attach pic) it is a bracket that supports the brake line and the connector�s which is mounted to the rear of the caliper with a 10mm nut and there is a black plastic liner that it�s in the way of getting the socket in there in order to remove. I ended up losing the plastic liner clip in the front to loosen it enough to give me a bit of room. (see pic)
1. Disconnect sensor connector
2. I guess you have 2 options to attack this, 1. Remove the caliper and go to step 3. Or option 2. Loosen the caliper bolts, remove the 10mm bolt that�s holding the bracket, then disconnect the brake line, remove the caliper bolts and remove completely. I did the 2nd option
3. You may want to use some sort of a box to put underneath side of the caliper once removed can use to rest it on, then disconnect the brake line Using a 10mm open end wrench. This is also a difficult position to try to get the wrench in place and work, not a lot of room from below.
4. Use an item to stop the brake line from leaking.
What makes it so difficult is the support bracket, it just don�t leave much room to work.
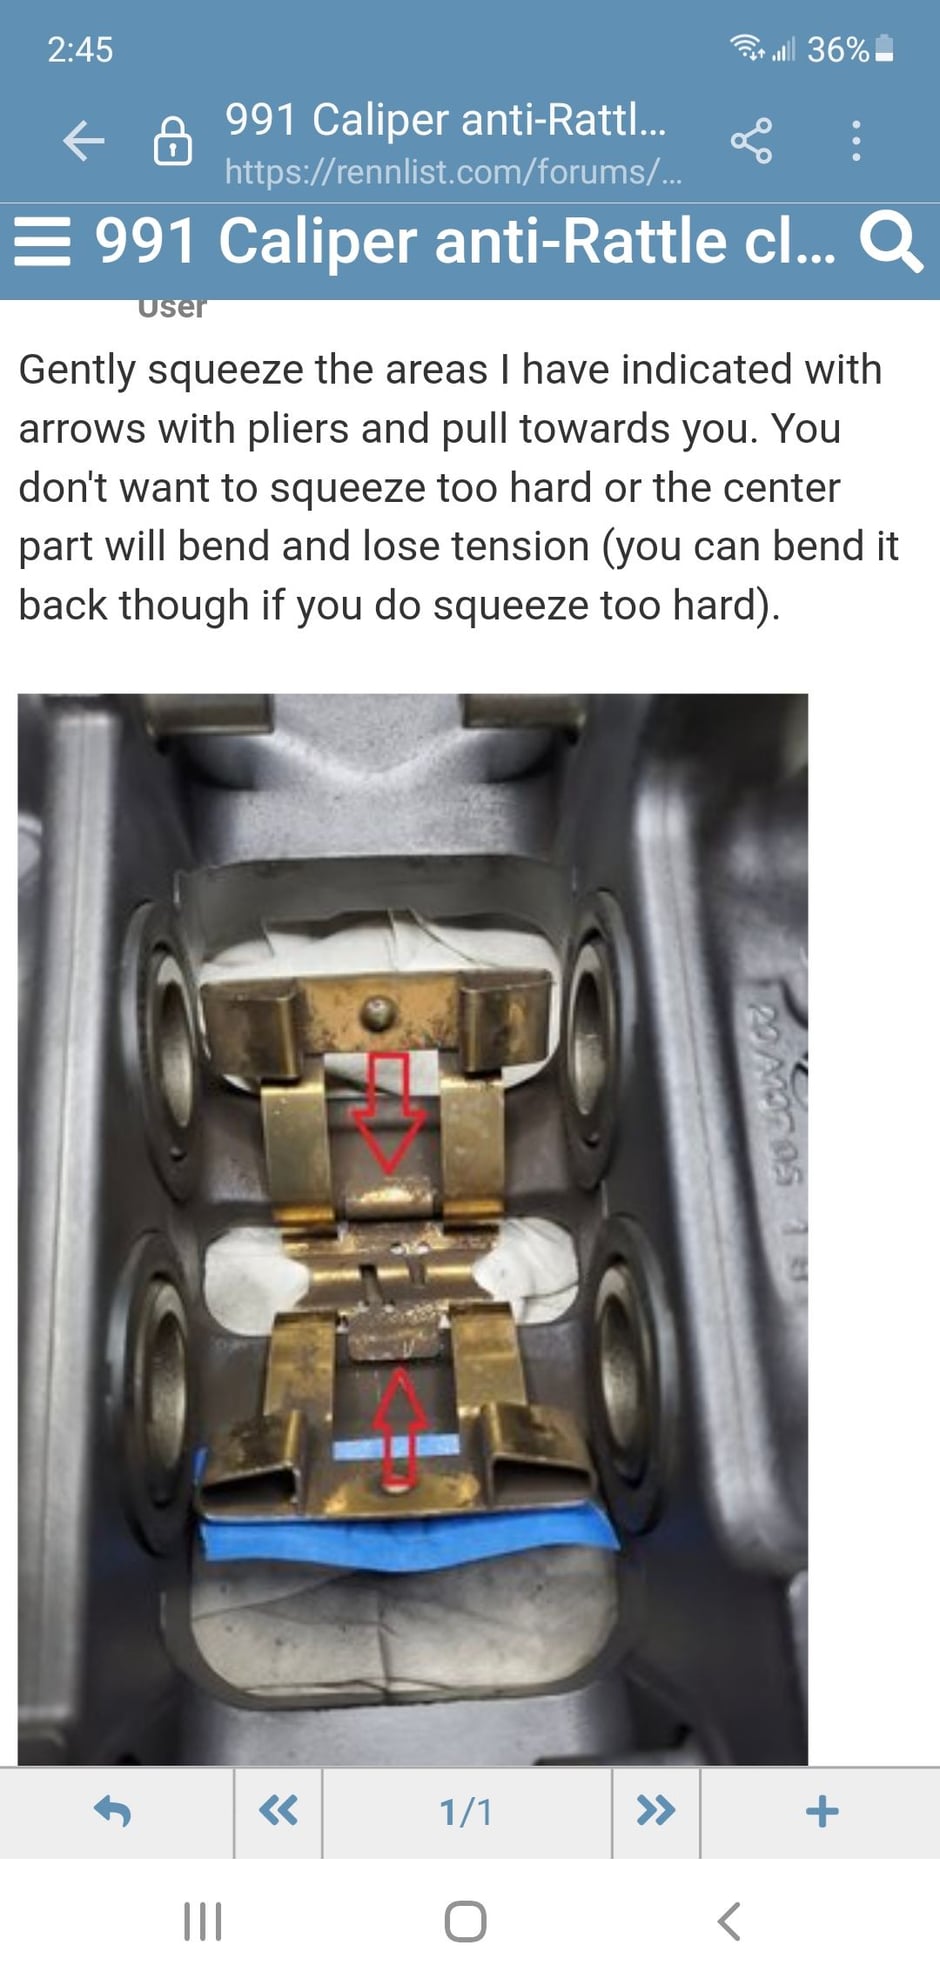
Now the Caliper Prep: As you see in the attach pics, I decide to keep the sensor�s attached on the remaining brake pads, for me it was more difficult because I couldn�t figure out how to remove the Anti-Rattle clips, so the connector and the brake pads were going for the ride. I did however reached out on Rennlist for help on how to remove them and several members came to the rescue, specially XXXX took my photo and showed exactly what to do. My Thanks to everyone that supported the cause. (see pics). If you remove the clip you can now remove the pad with the senor out of the way, leaving you with just the caliper.
At this point you are ready to clean the calipers and I used Caliper cleaner with wire brush. The back side had some stickers form the factory which I sued a metal brush with the drill to remove. I have a pancake air compressor and I used it frequently to blow away debris.
Now, the calipers are clean I started wiping them with 3M Scotch Brite scuffing them down.
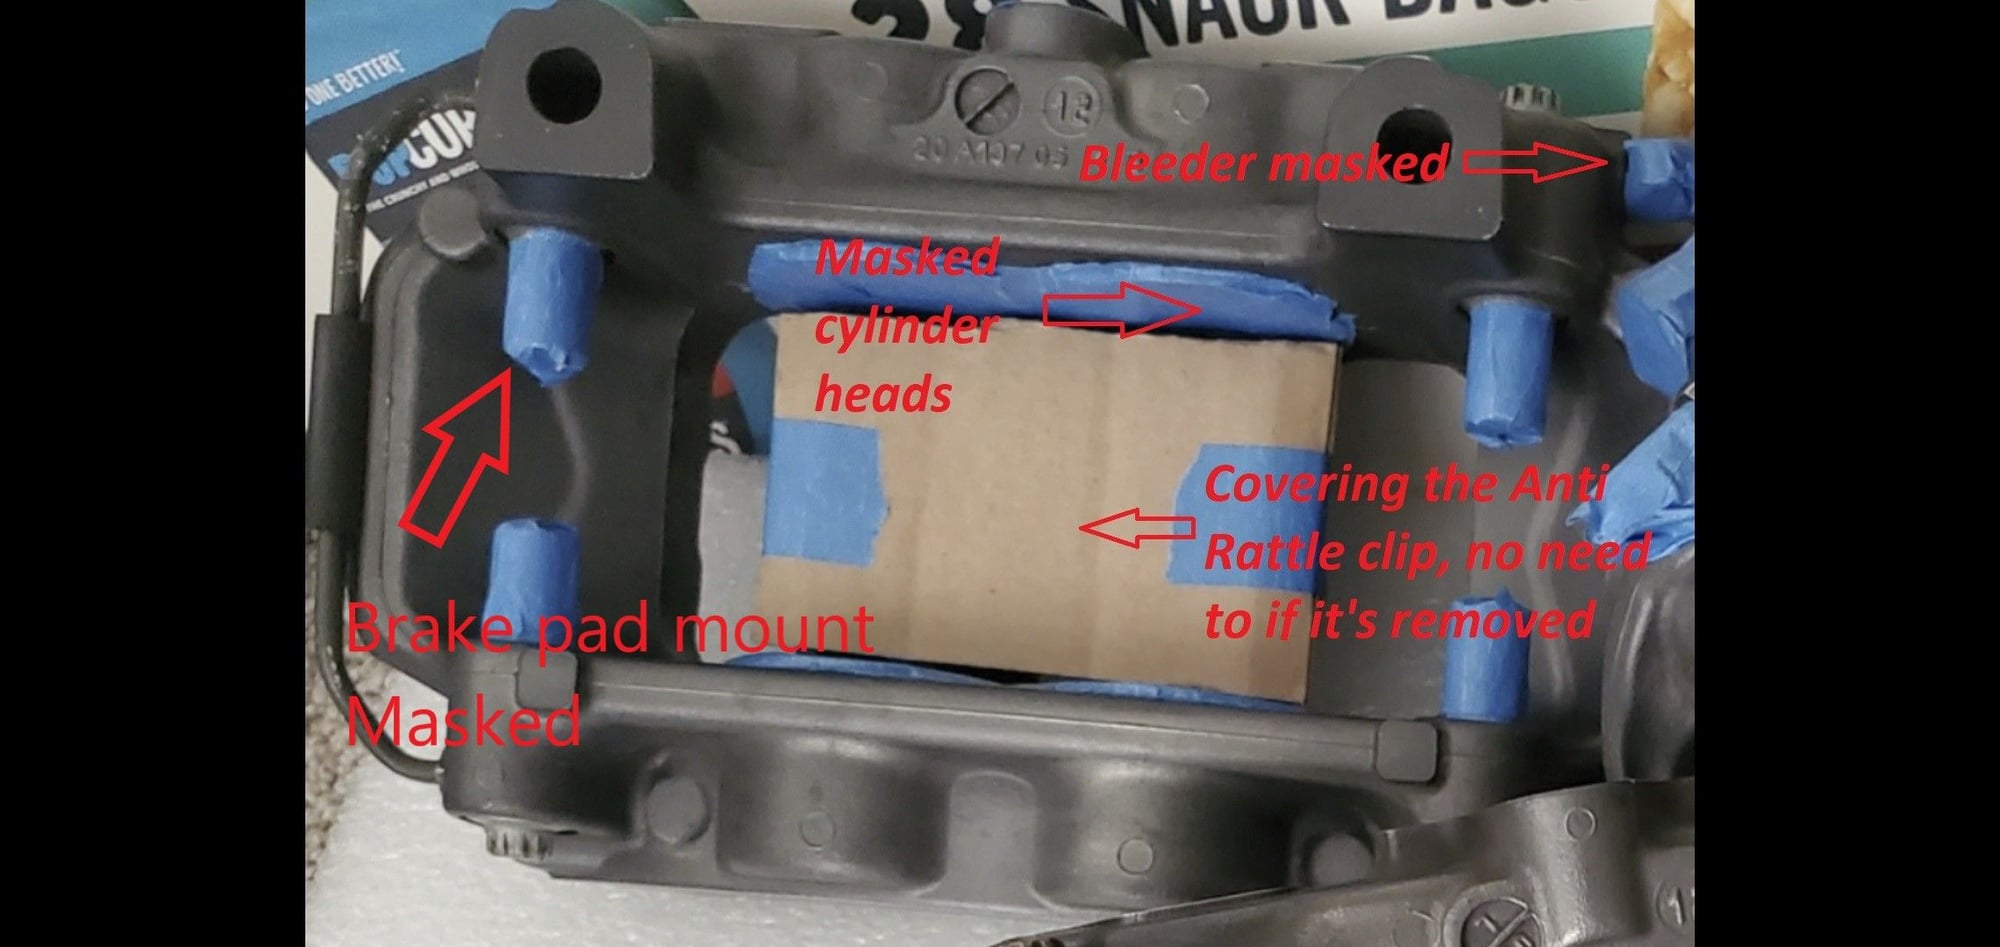
Next, wearing latex gloves I used 50/50 Isopropyl Alcohol and distilled water mix to clean the Calipers getting them ready for masking. I only masked the piston area, the 4 sliding brake pad bars, and the bleeding lines. In my case I didn�t know how to remove the anti-rattle clips so I had them taped. I did eventually remove them after the 1st coat of paint, my loss your gain, Lol
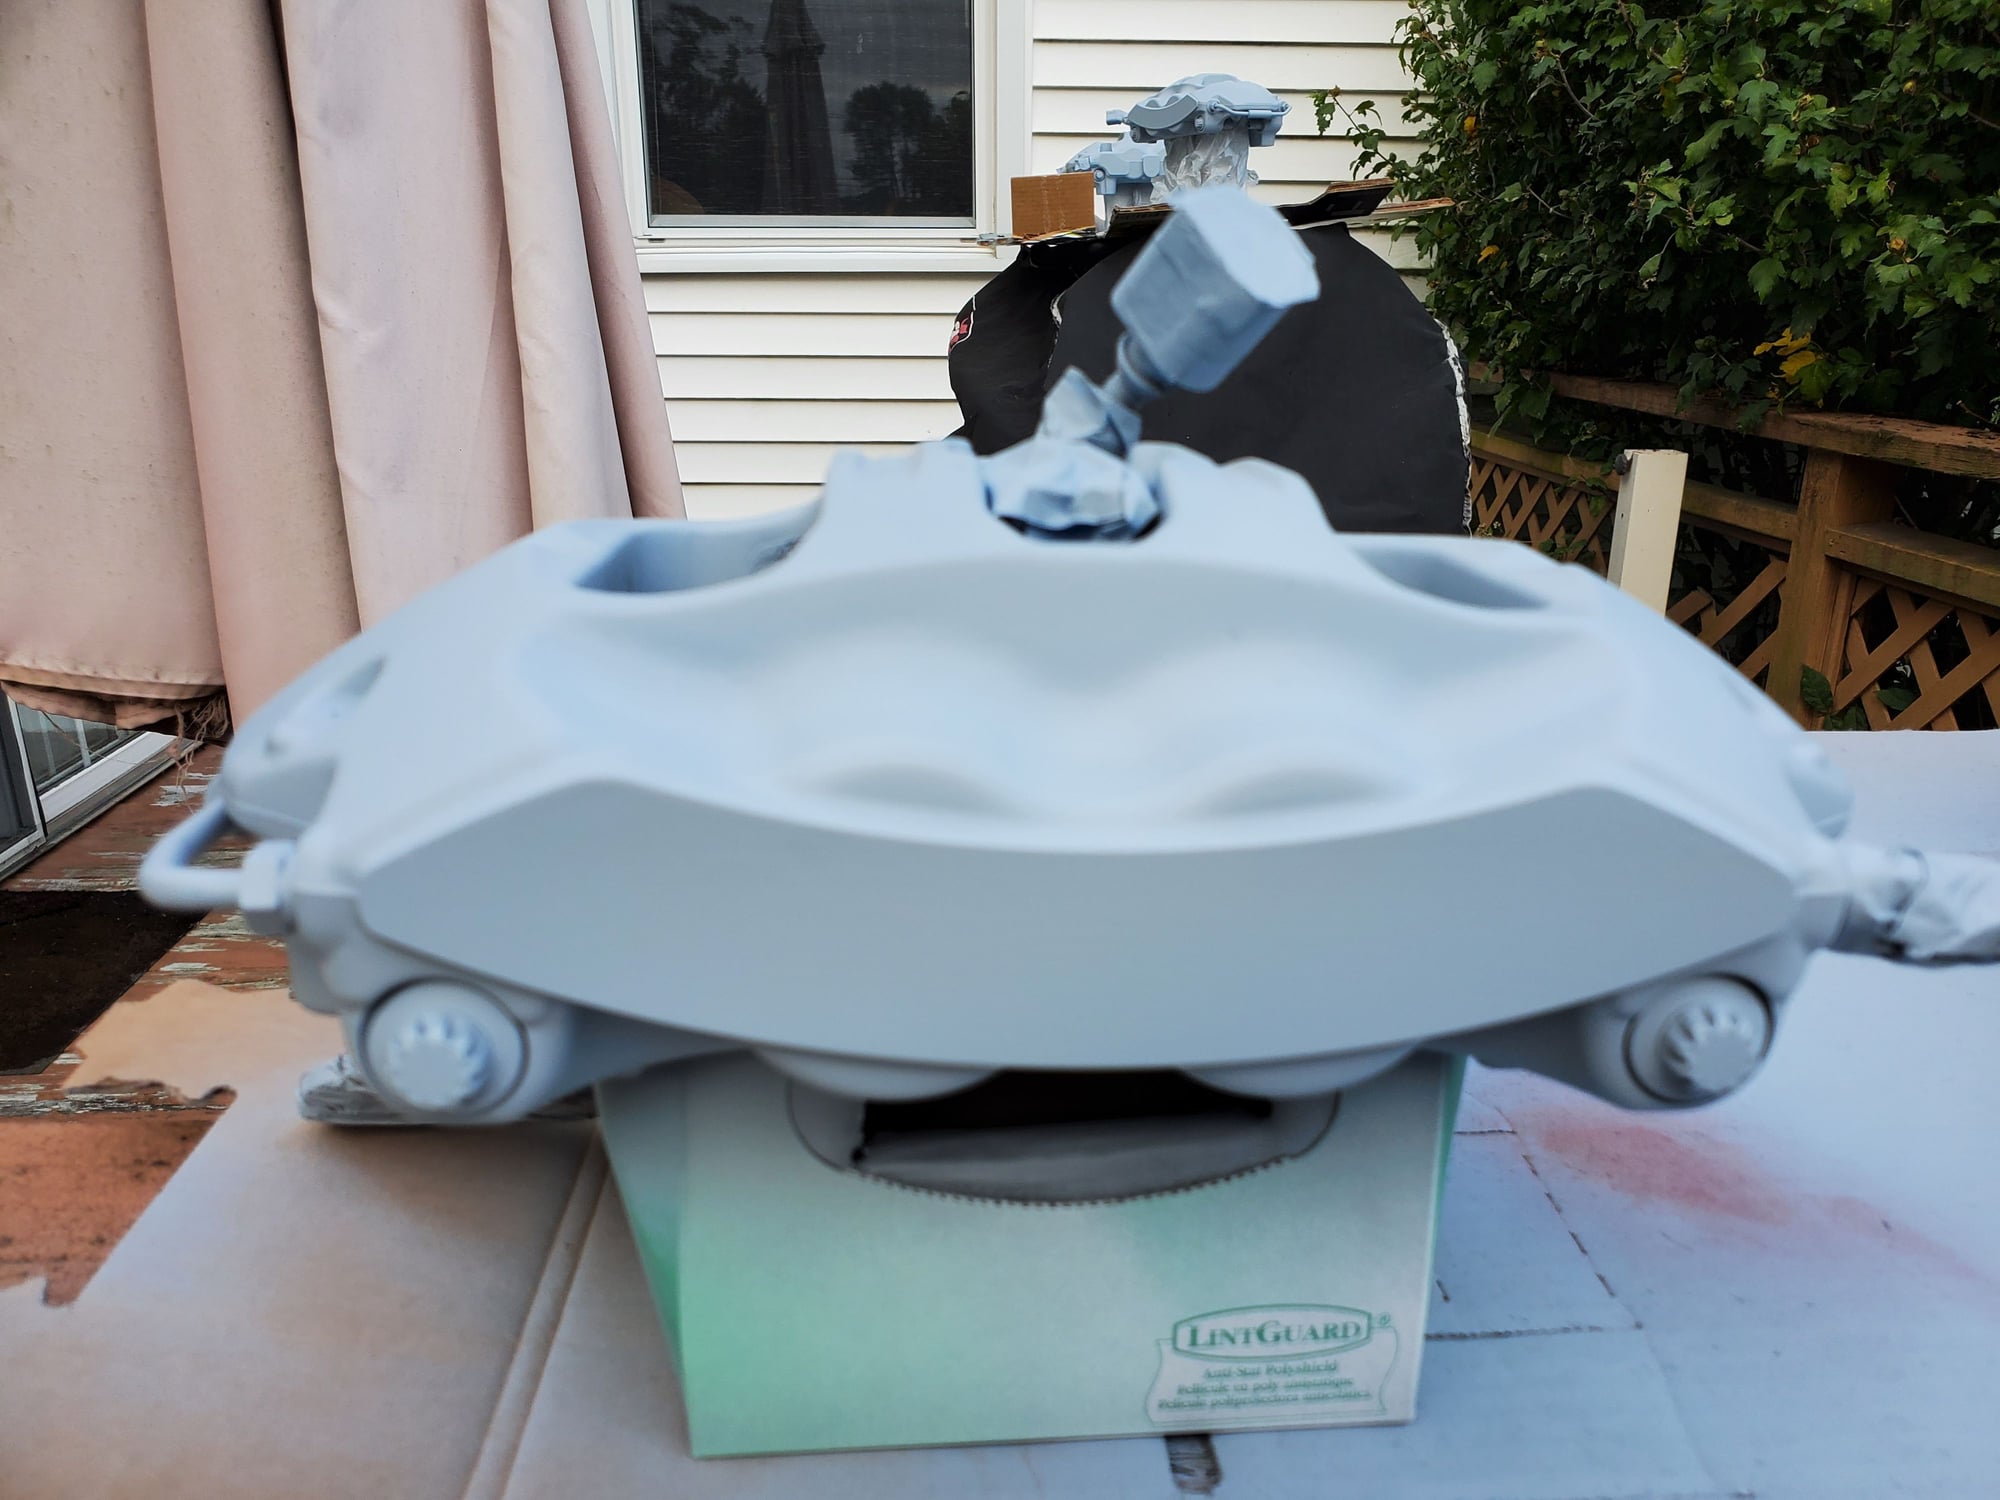
A quick wipe down with latex gloves on and 50/50 also use proper safety precautions when spraying this stuff by wearing a mask, I was fortunate enough to take advantage of the weather and low humidity to PRIME them outside with quick dry time. I did 2 full coats of prime. (see pics) I didn�t have an option on hanging these, so I went alternative and that was to use a small box that had the dimensions to the opening of the caliper area so I can keep them up a little. Once I coated the top side after it dried, I flipped the calipers to finish the bottom part. Same process for painting.
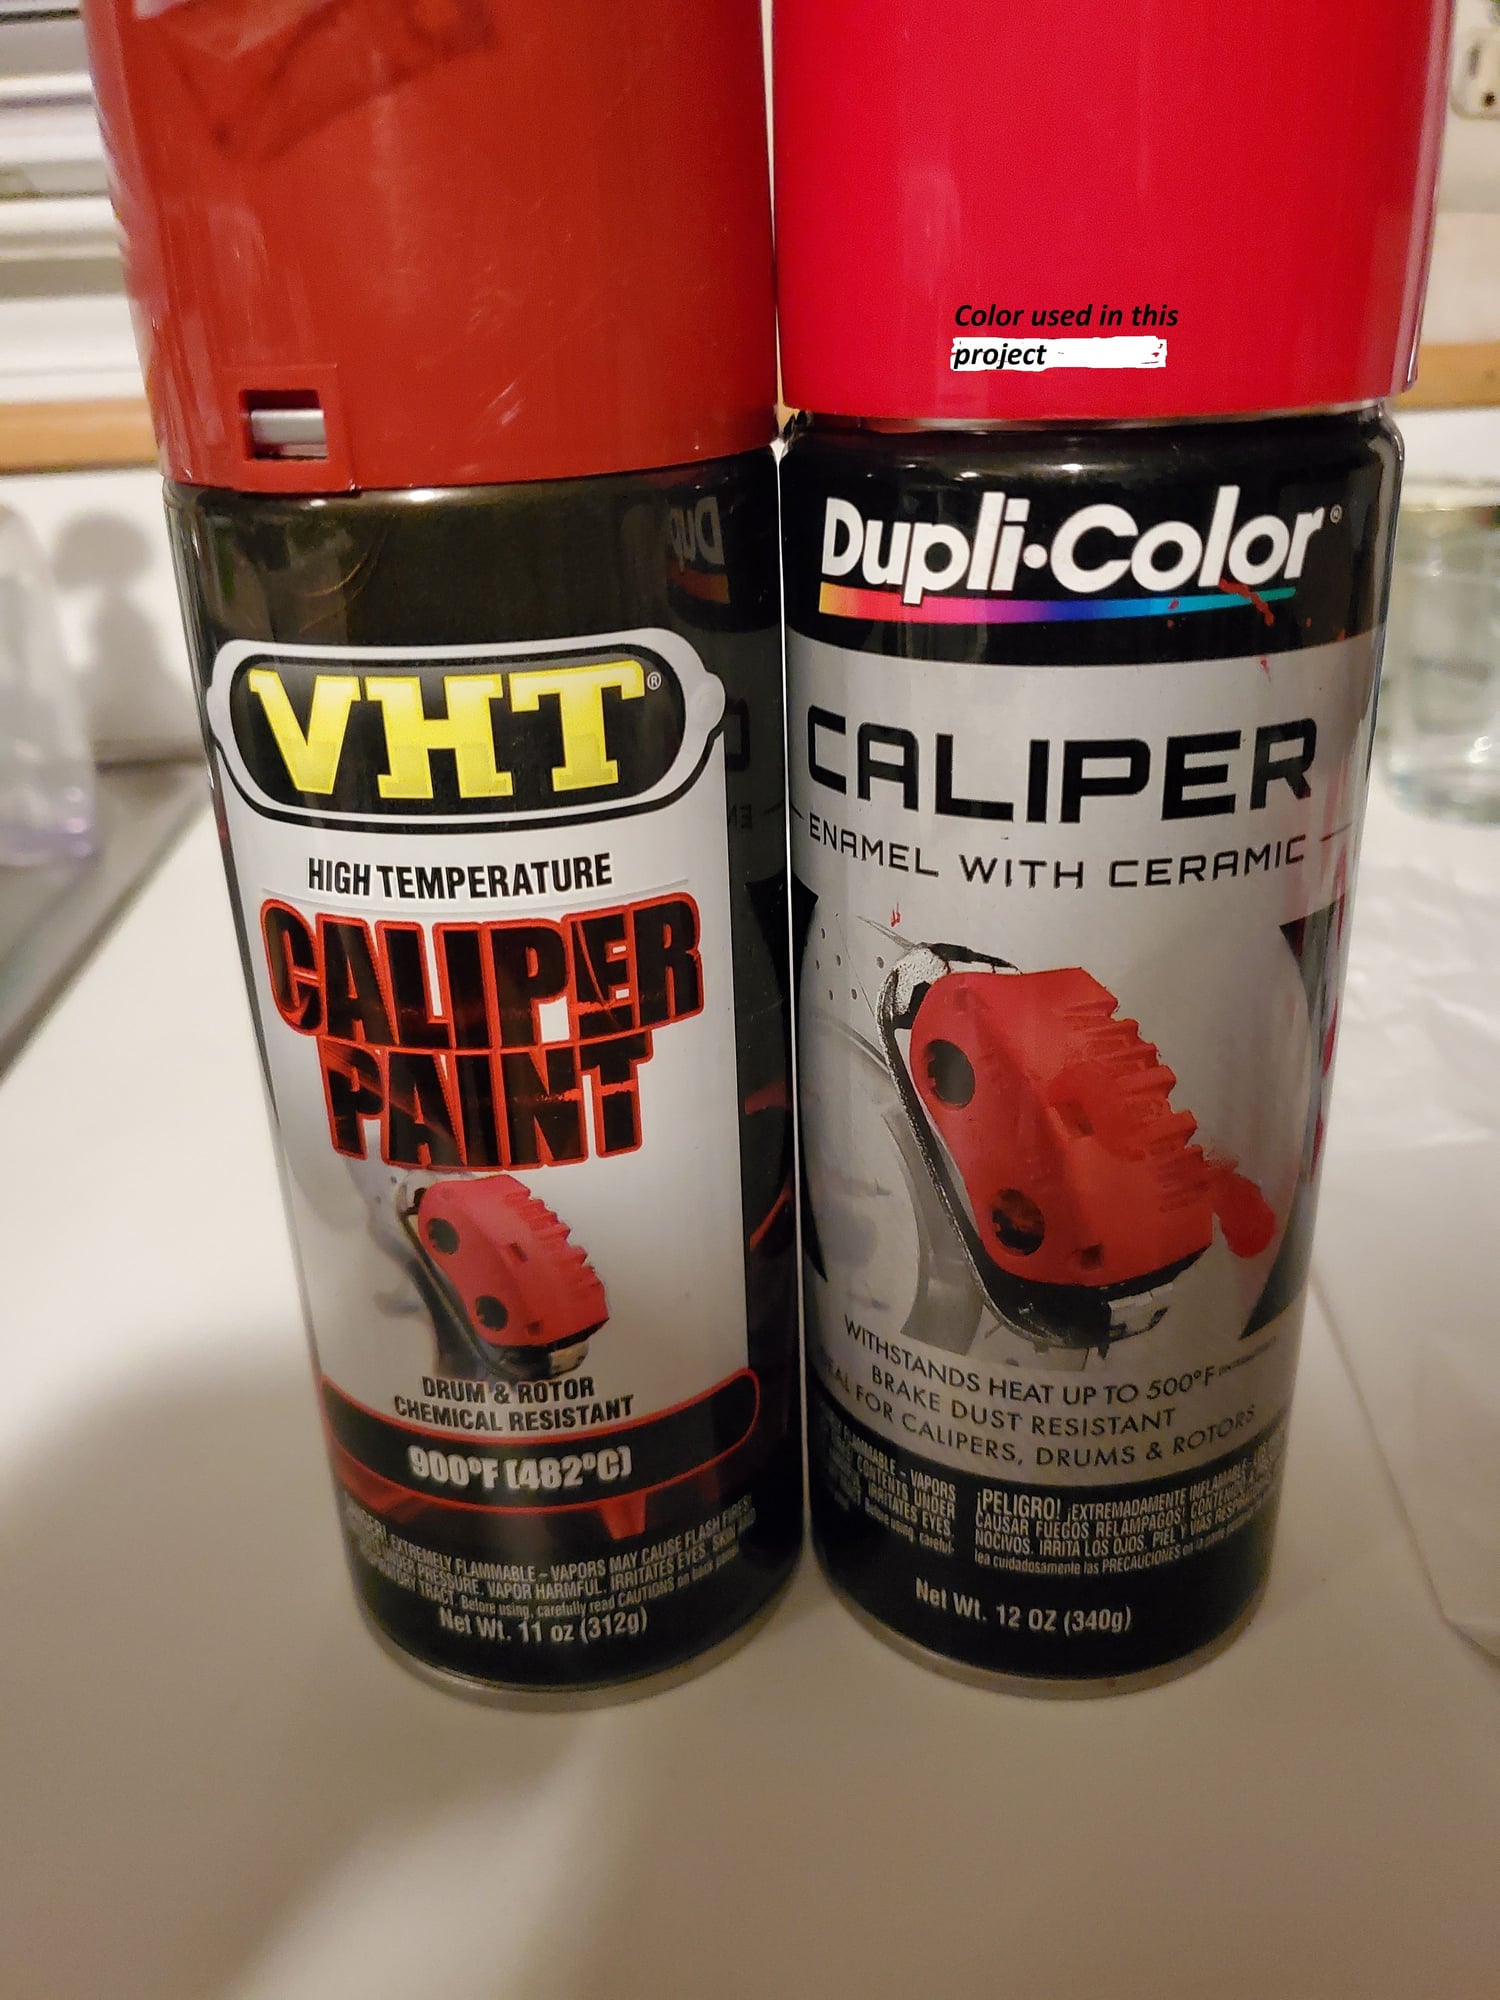
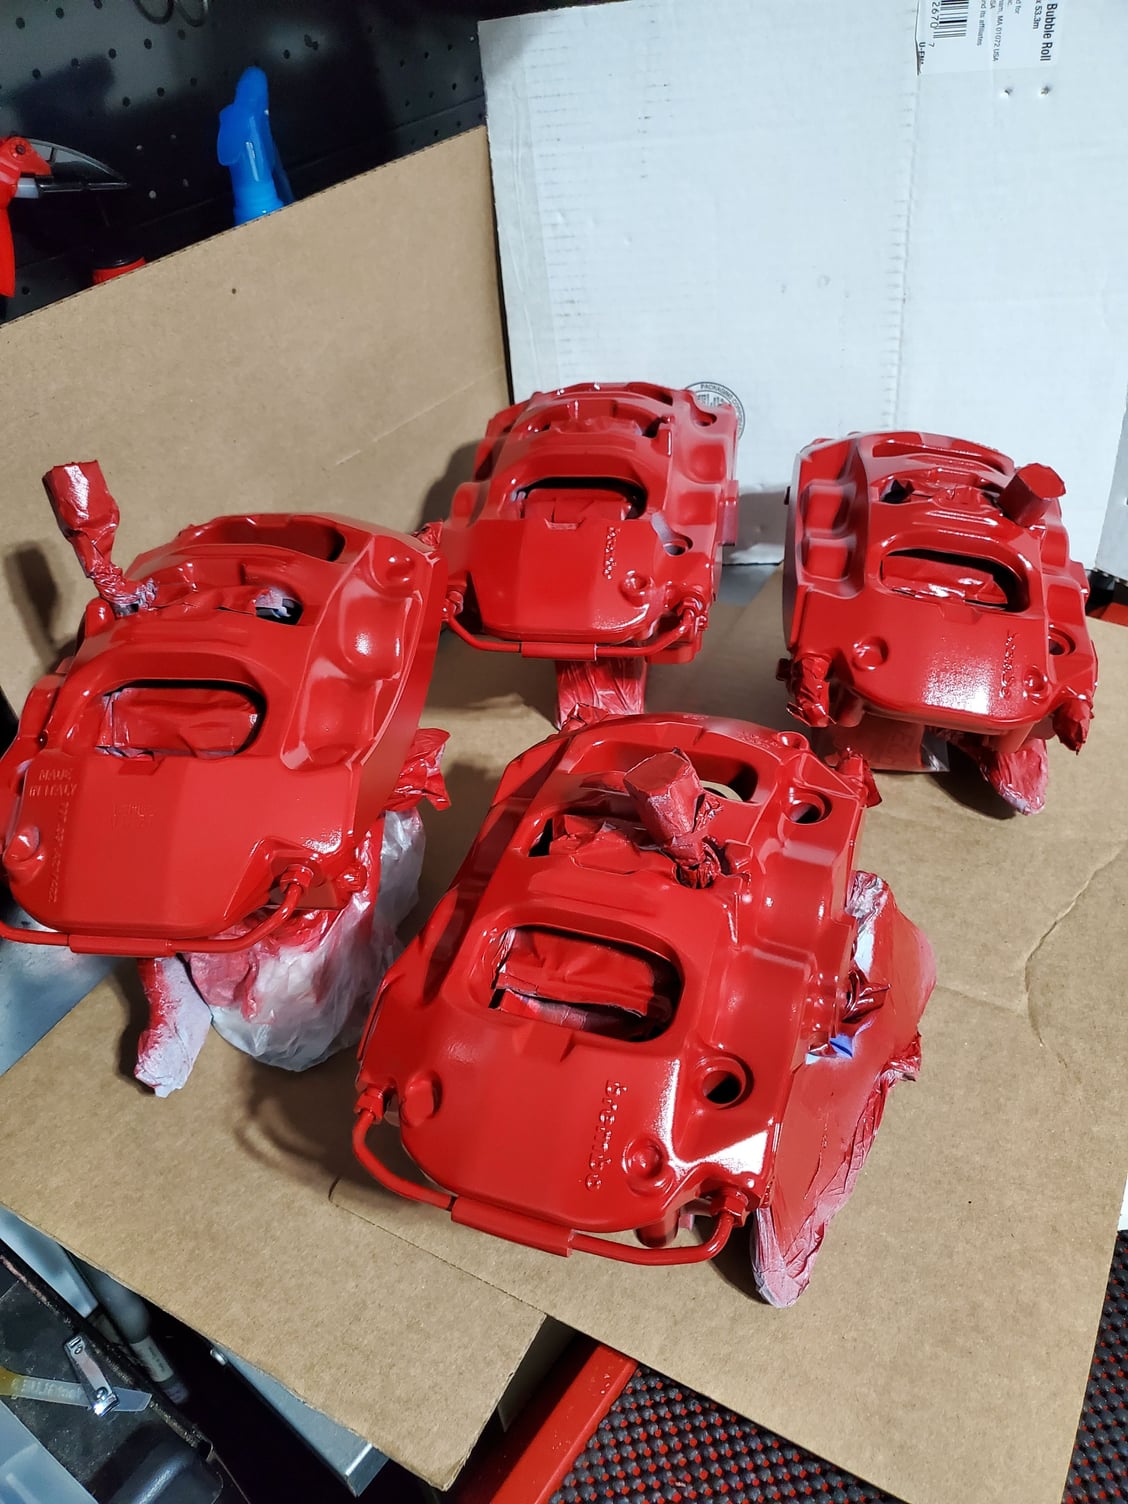
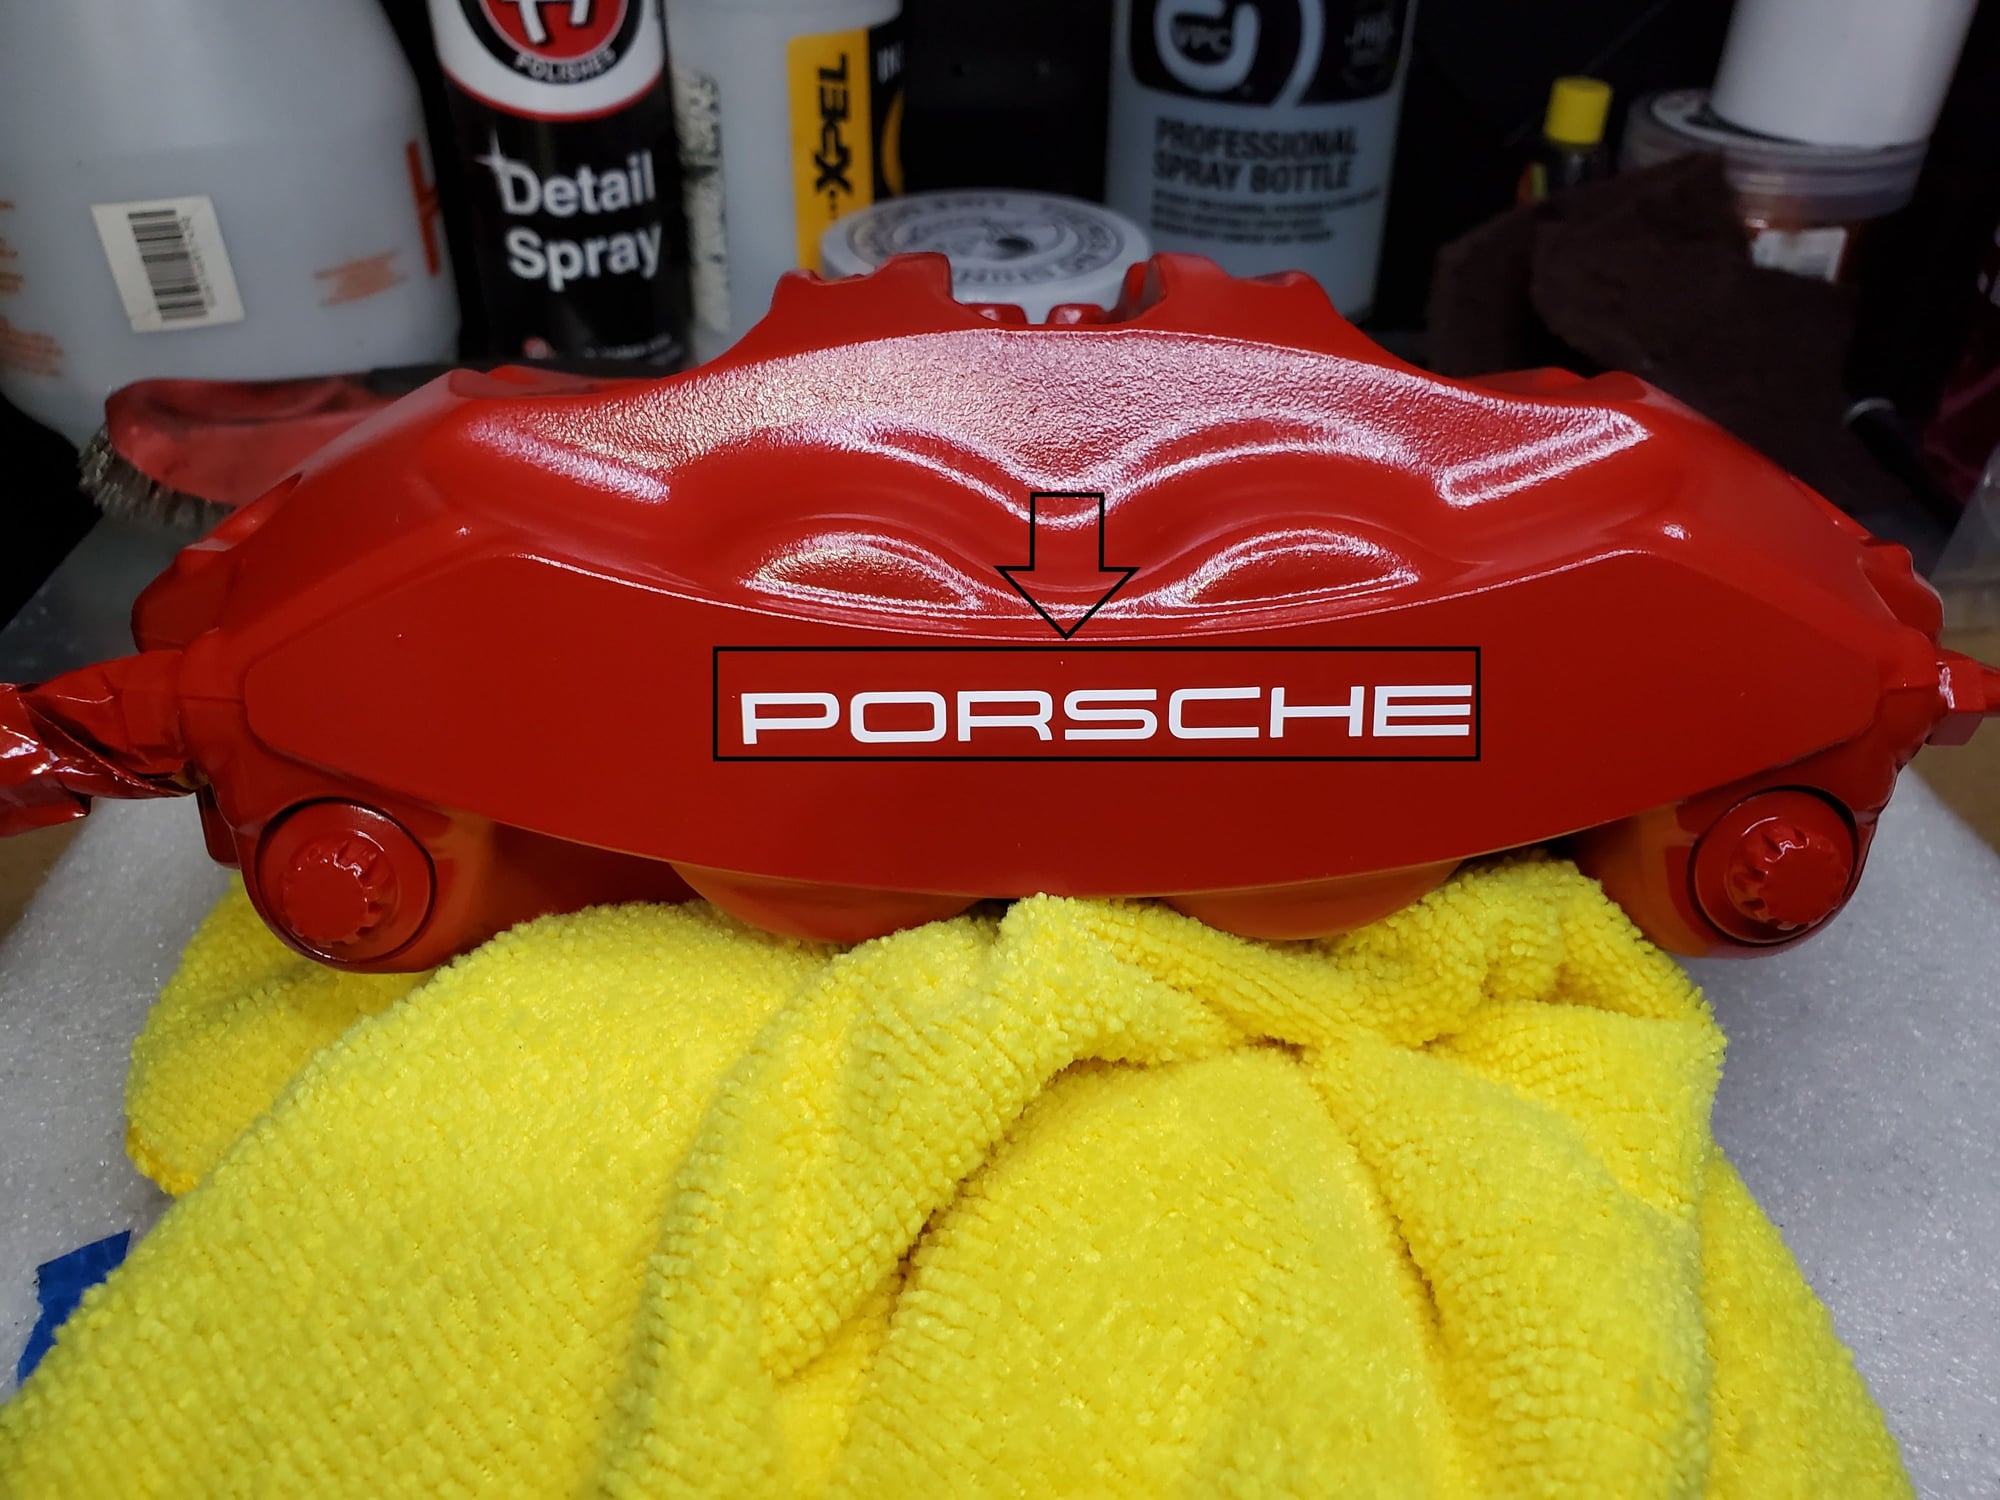
Started the paint process, I only used 1 can to do the entire job. Be patient and let the paint dry before applying the additional coats (15min). Started with light 4 coats all around, and 2 additional full coats mostly in the front where the decals are facing out. (see pics). I didn�t use VHT paint even though I had purchased it, I thought it was a bit darker red so I went with Dupli color instead which is also sold by Suncoast. (see pic) for comparison.
During the last coats I was dealing with a little high humidity so after I paint them, I brought them into my basement where I have a dehumidifier set for 50%, It helps with the paint to dry and cure properly.
It�s time to put the Anti-rattle clip back on, one member used a back of the handle of a 3/8 adjustable wrench which is rounded end and gently hammer it back in, (see pic) It did work and don�t be alarm if the clip is not tight like before. I believe these clips don�t hold their tension once they are removed in the sense of tight fit. Once I installed the brake pads in the tension was tight. Make sure you have something under the caliper so you don�t scratch the paint when putting the clip back on. I used a piece of soft foam. NOTE: If you had removed the pads with the sensors intact you need to slide the connector through the middle of the caliper before putting the anti-rattle clips back on.
You can now remove the masking tapes and lubricate the sliding locations of the pads and behind the brake pad�s facing the pistons using the paste listed below. Mount the brake pads and connect the NEW sensors if used.
Decals: I noticed people were complaining on Suncoast�s web site that the spray can was overpriced vs. going to local store, to be fair If you read the description, it does include the decals, for $26. My only problem with that is they charge $12 to ship, so now your approx. $40 with tax. I called Suncoast just to purchase the decals and it was $12 for set of 4, and $12 to ship. I told the sales person, can�t you just put it in an envelope and send it like reg. mail? He said they had bad experience with lost mail. I couldn�t justify paying $24+tax so I did my research and found this business out of England, see link and with Euro exchange the total was like $11 (Paypal) and that was for 6 decals, 3inch same as OEM. It took about little over two weeks to get them but well worth it.
I used the decal sticker top of the triangle part of the tape as a reference to lay it down on the caliper face with the �S� PorSche lined up in between the outer piston housing location. (see pics) It looks very close to the OEM location.
Once again, handling the calipers with latex gloves, placed them outside for 6 coat of clear coats. I use the entire can. Same application coat as paint.
Once dried, I was ready to install them back and get it ready for the brake bleeding process.
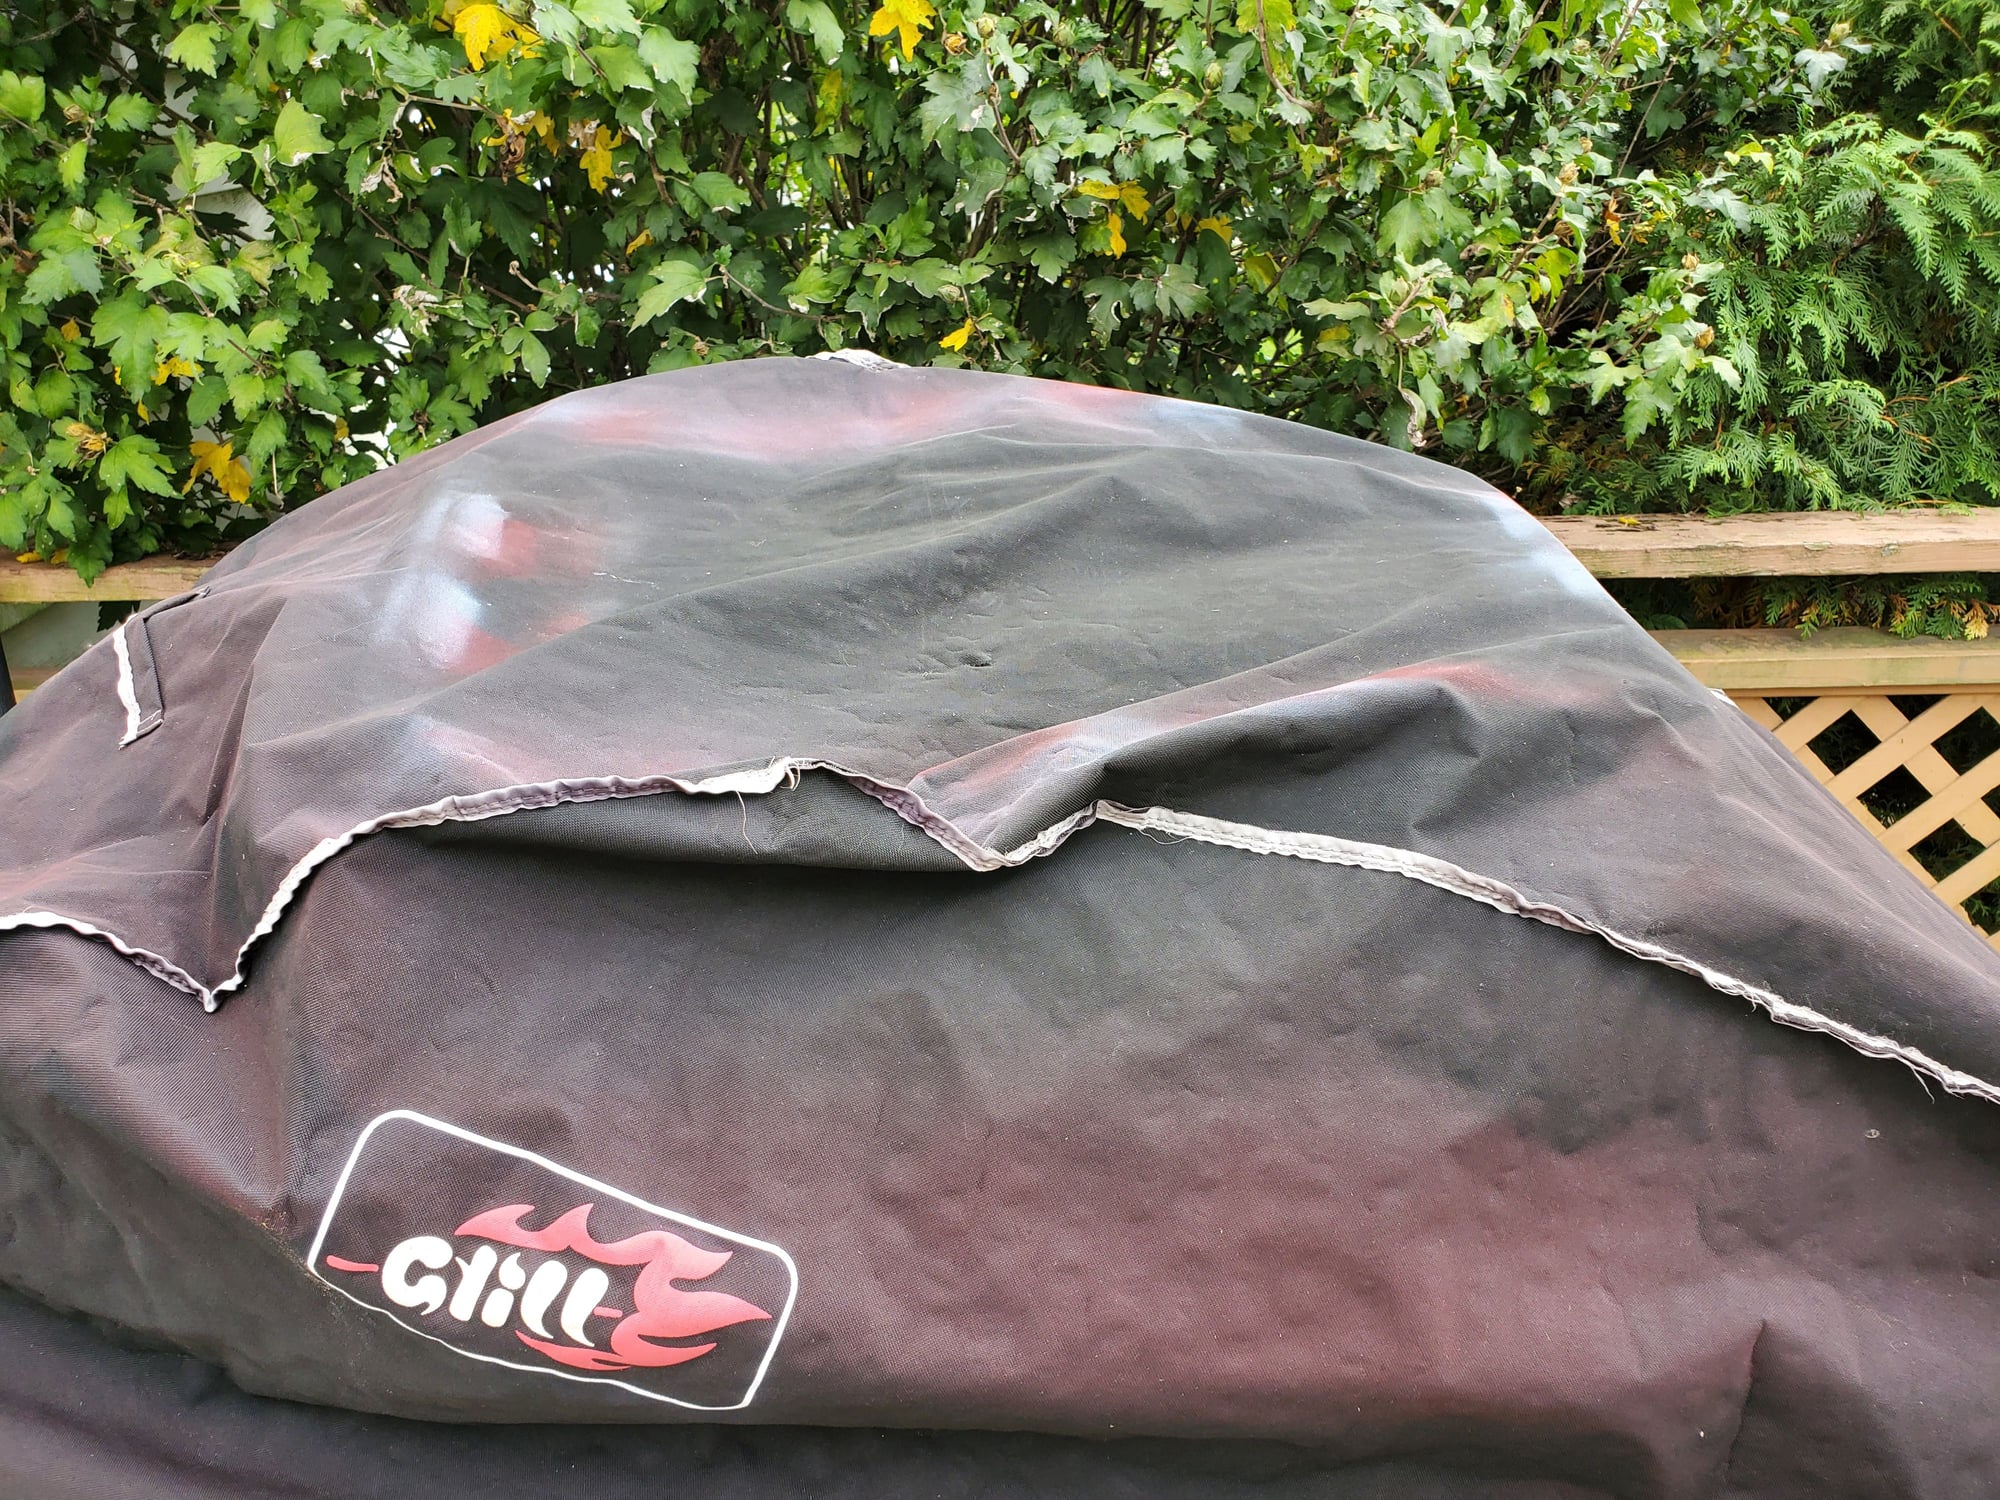
Like every project, you end up leaving some trademarks along the way. I ended up leaving a few on my grill cover, and the dryer in the basement also my white dry-fit golf shirt. (see pics). Lol
Tools/items used in this project
Quick Jack lift used in this project to lift the vehicle
5. Brake line stopper Amazon sells these but they come in pack of 4 with different sizes, I don�t know which size is correct for this brake line. I used dust caps and so I didn�t need to buy this.
10. Star socket bit T55: It�s recommended to replace these bolts each time it�s removed, and I only have 17Kmile on the car and with the next brake pad replacement I will end up replacing them then. (61ft/lbs torque on all 4 calipers).
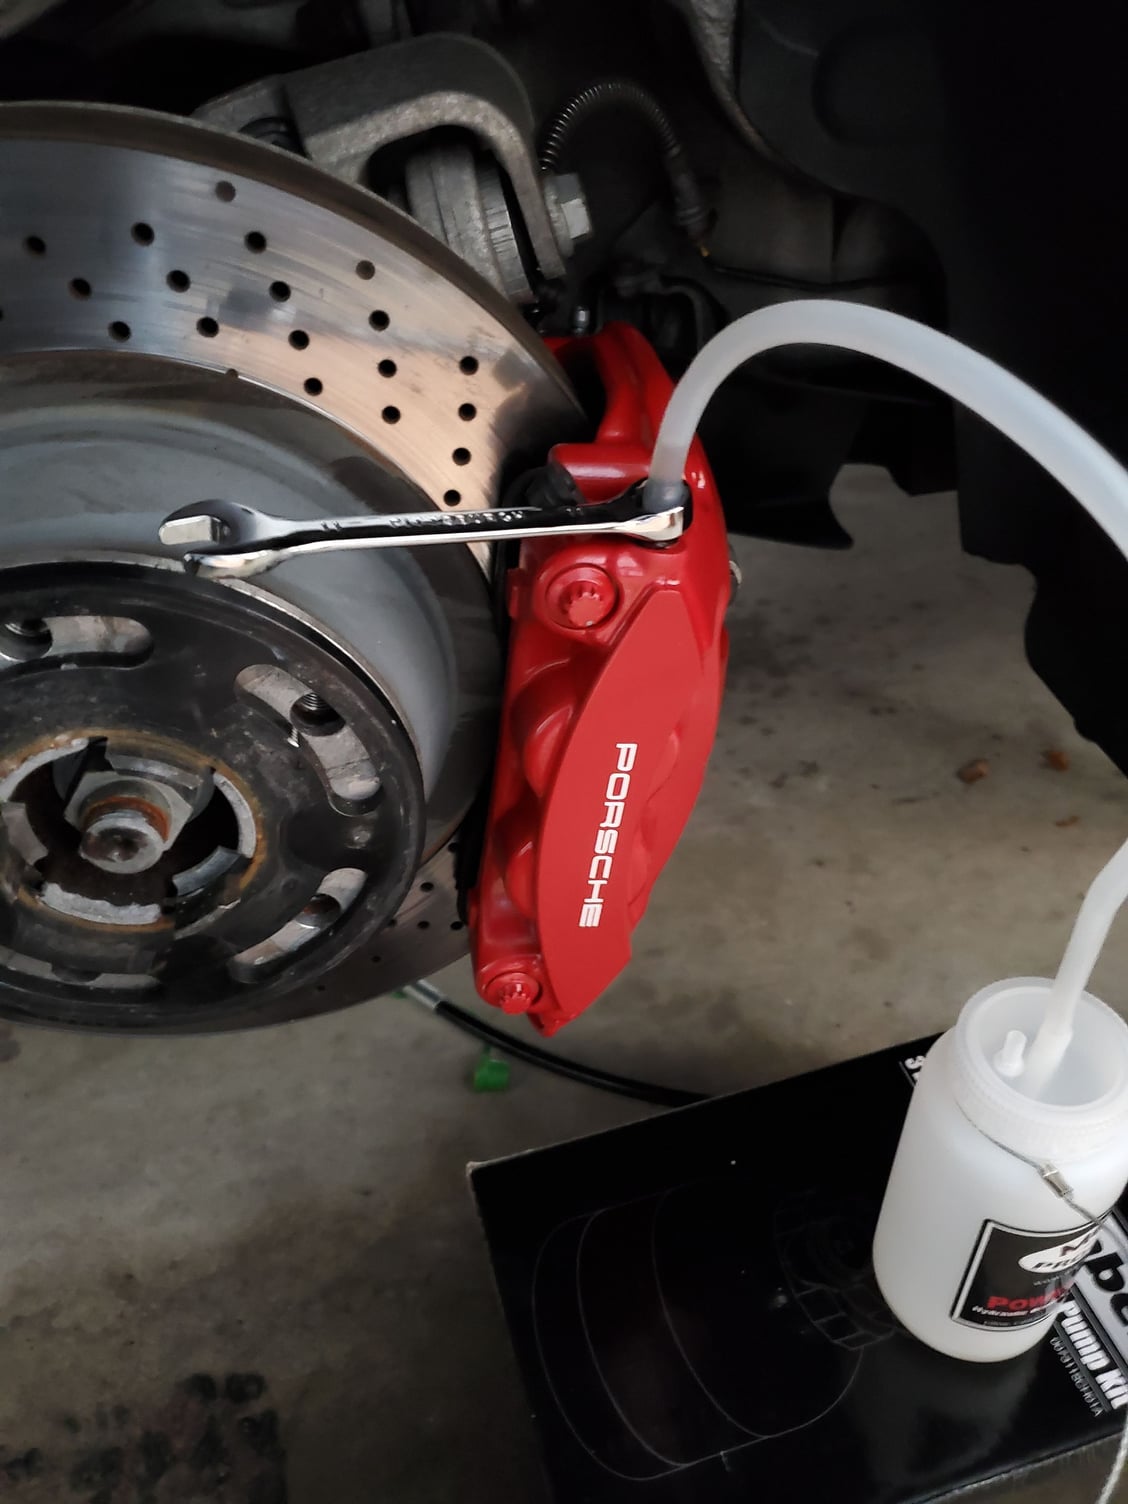
I would suggest this YouTube video, she did a pretty good job explaining all the details however Just a word of caution, I wouldn�t go pass 20psi. I did mine at 15psi and it was fine. Higher pressure could damage and or stress the hydraulics in the calipers. See link
I can say the pressure method works fine once the calipers were installed, just make sure the pressure pump kit is holding pressure and works flawlessly before connecting it up to start the bleeding process. As I had mentioned I had an issue with my pressure pump.
Parts for brake bleeding process
16. 11mm closed end wrench
17. 150ml Large Plastic Syringes to extract old fluids, this is 2 pk,
18. Schwaben all in one fluid filling system $85 (I didn�t go with the Motive brand as I saw the YouTube video (see link) she had bad experience with it) Update, I had an issue with this one not holding pressure also without even being connected, it has a shutoff valve and it was closed when tried to pressurize. Ended up buying one from Amazon, plus it csme with fluid bottle kit.
19. Motive 1820 brake fluid bottle kit, you won�t need this if you buy the Amazon link in step 18.
20. Porsche DOT4 brake fluid 1 liter, I ended up buying 2 and used 1.7 Liters, I was seeing bubbles during bleeding mostly on the right rear and left rear so I drained more and therefore needed more fresh fluid.
This is to monitor the moisture over time of the brake fluid it works well. Keep in mind to remove the battery each time you want to use it, this way it is not reading last stored readings of some sort.
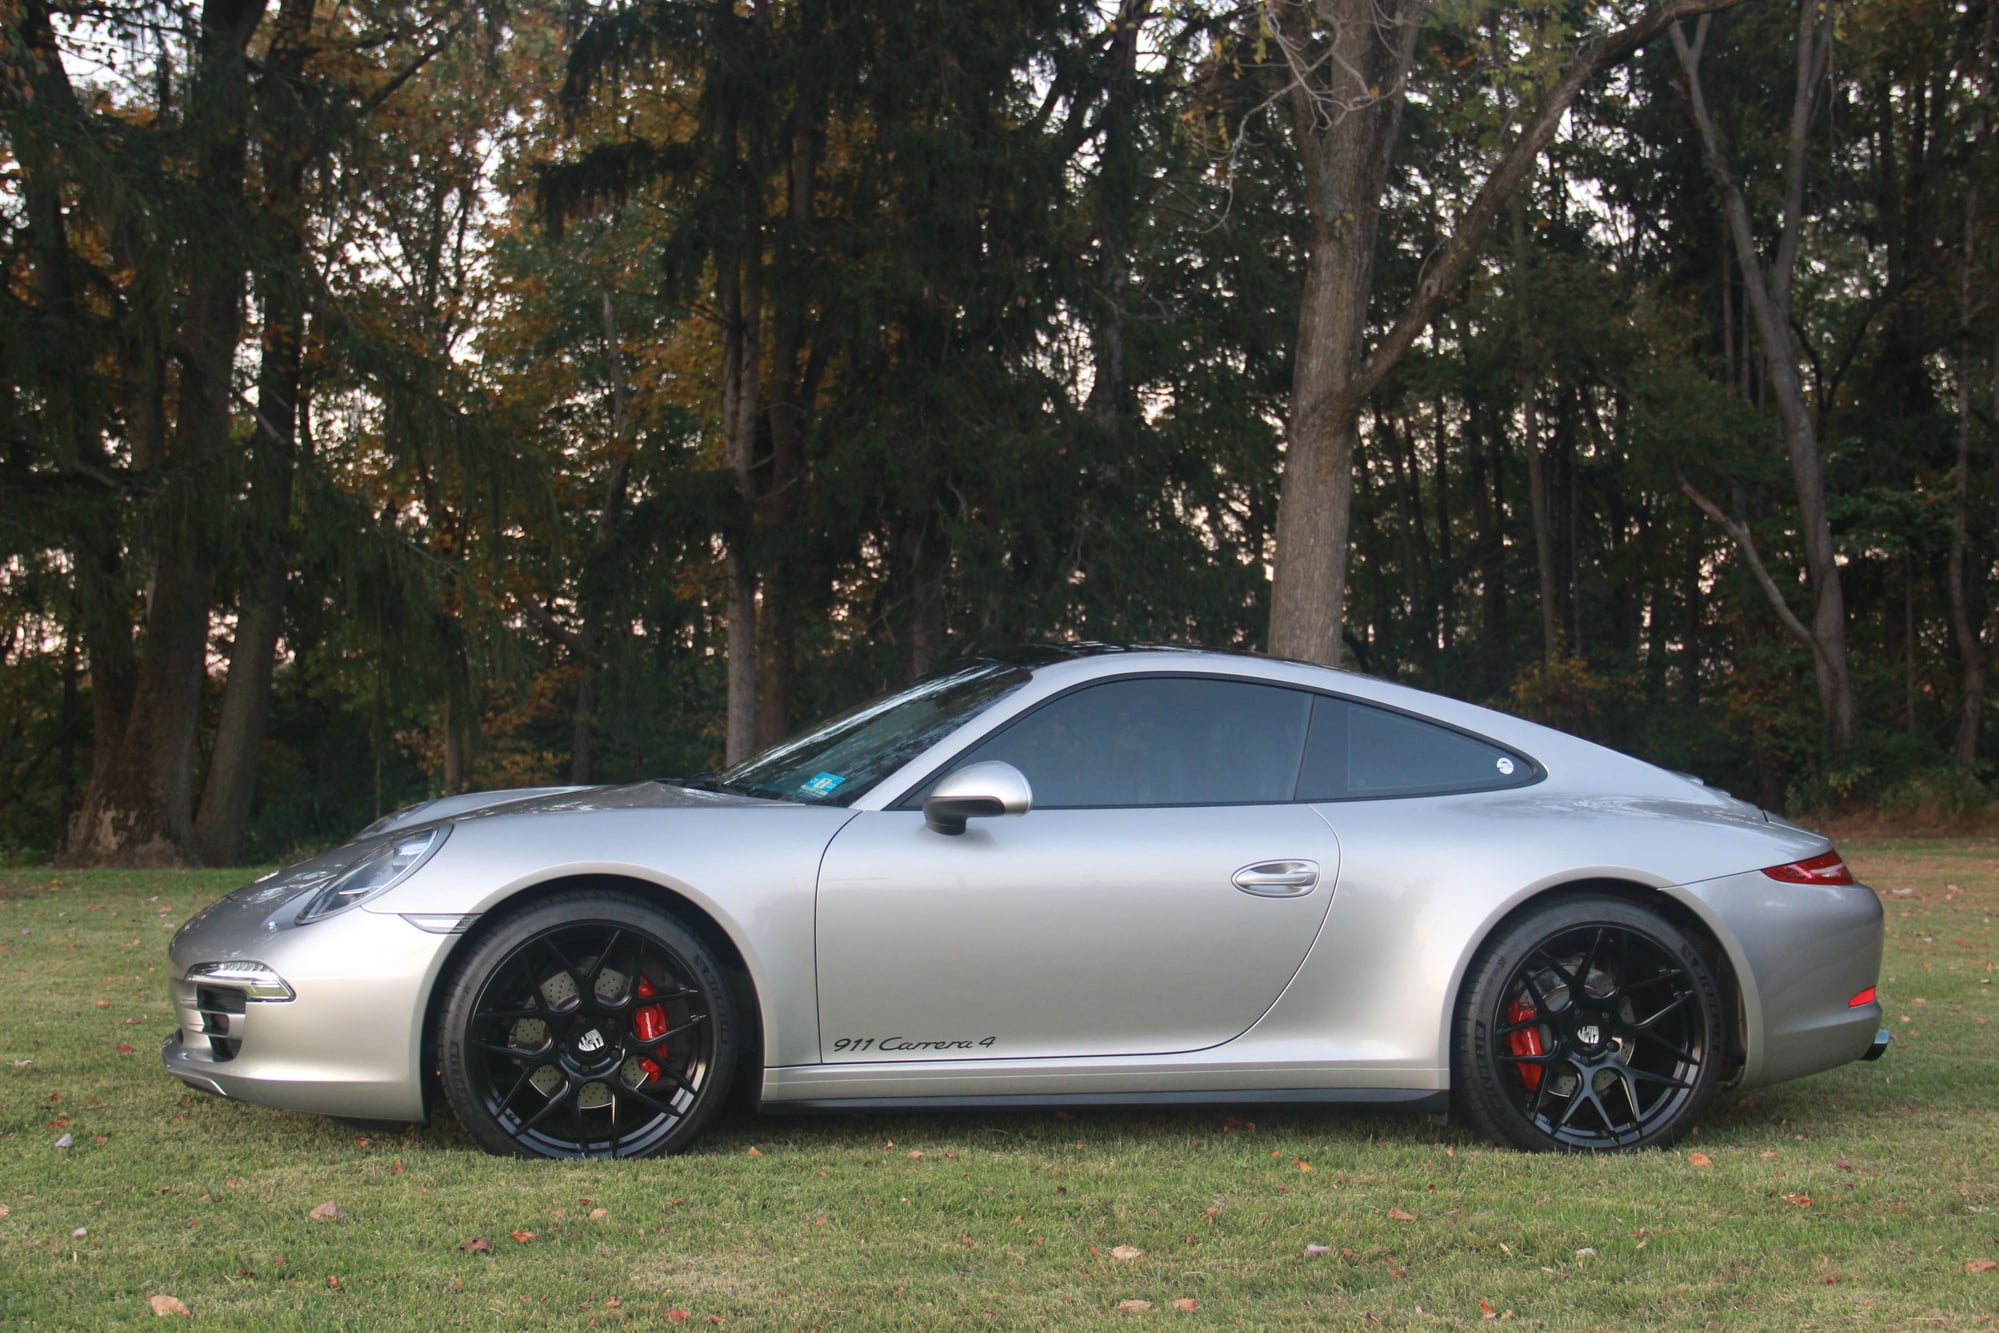
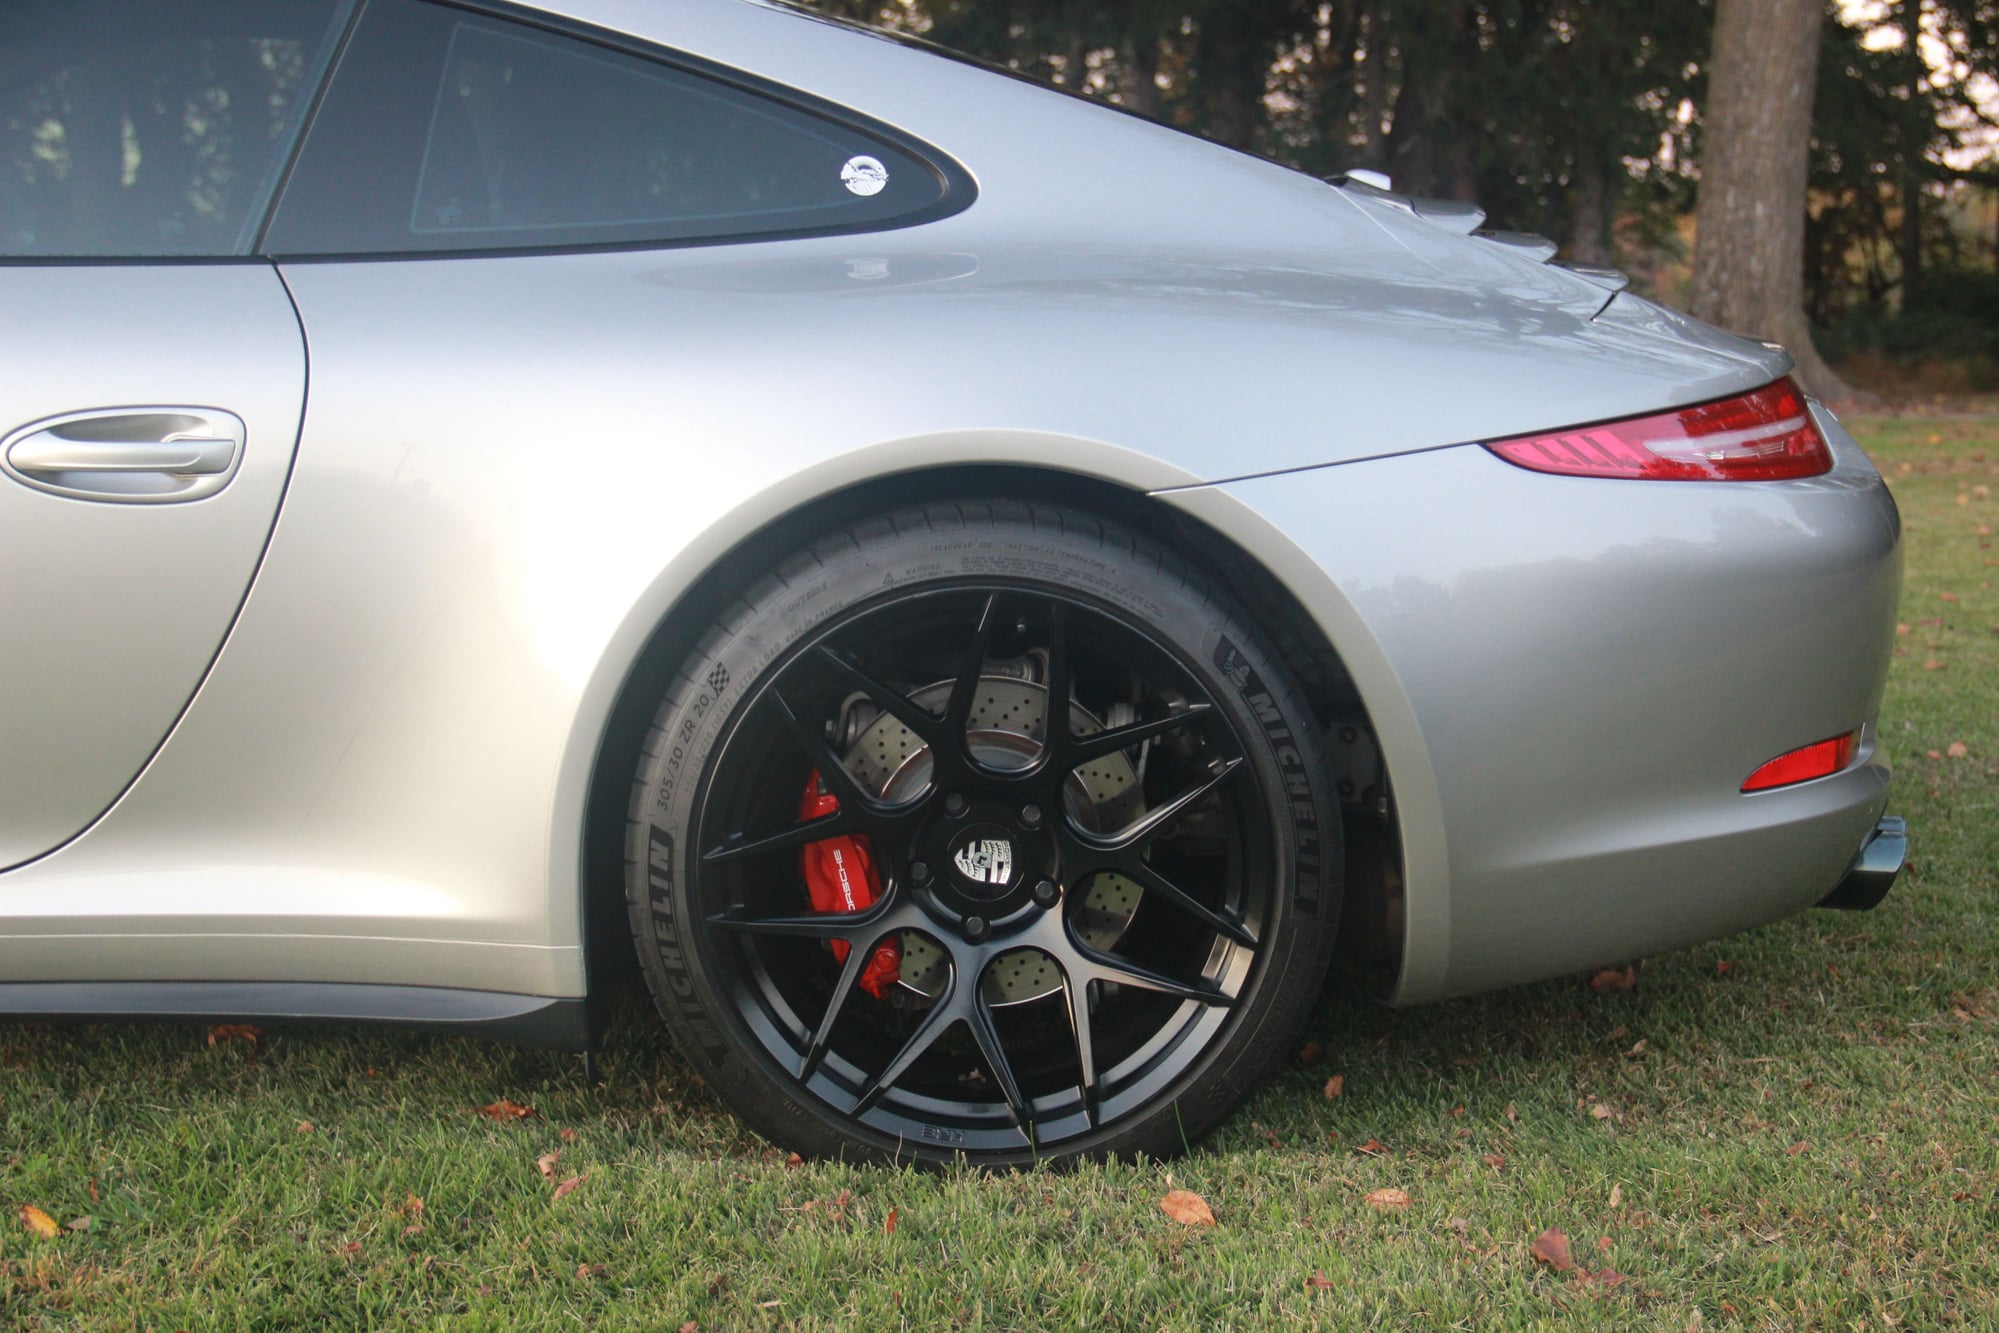
Brake sensor removal cable management clip removal Front brake line image Rear support bracket after it was removed Brake fluid that dripped during removal and re install. Dust caps to stop the leak after disconnection of the brake line Rear support Bracket mount to the Caliper removing the Anti Rattle clip Installing the Anti-Rattle clip Primed Paint comparesiion Painted Calipers decal location to tack down Brake bleed ref. completed Final config. Original color
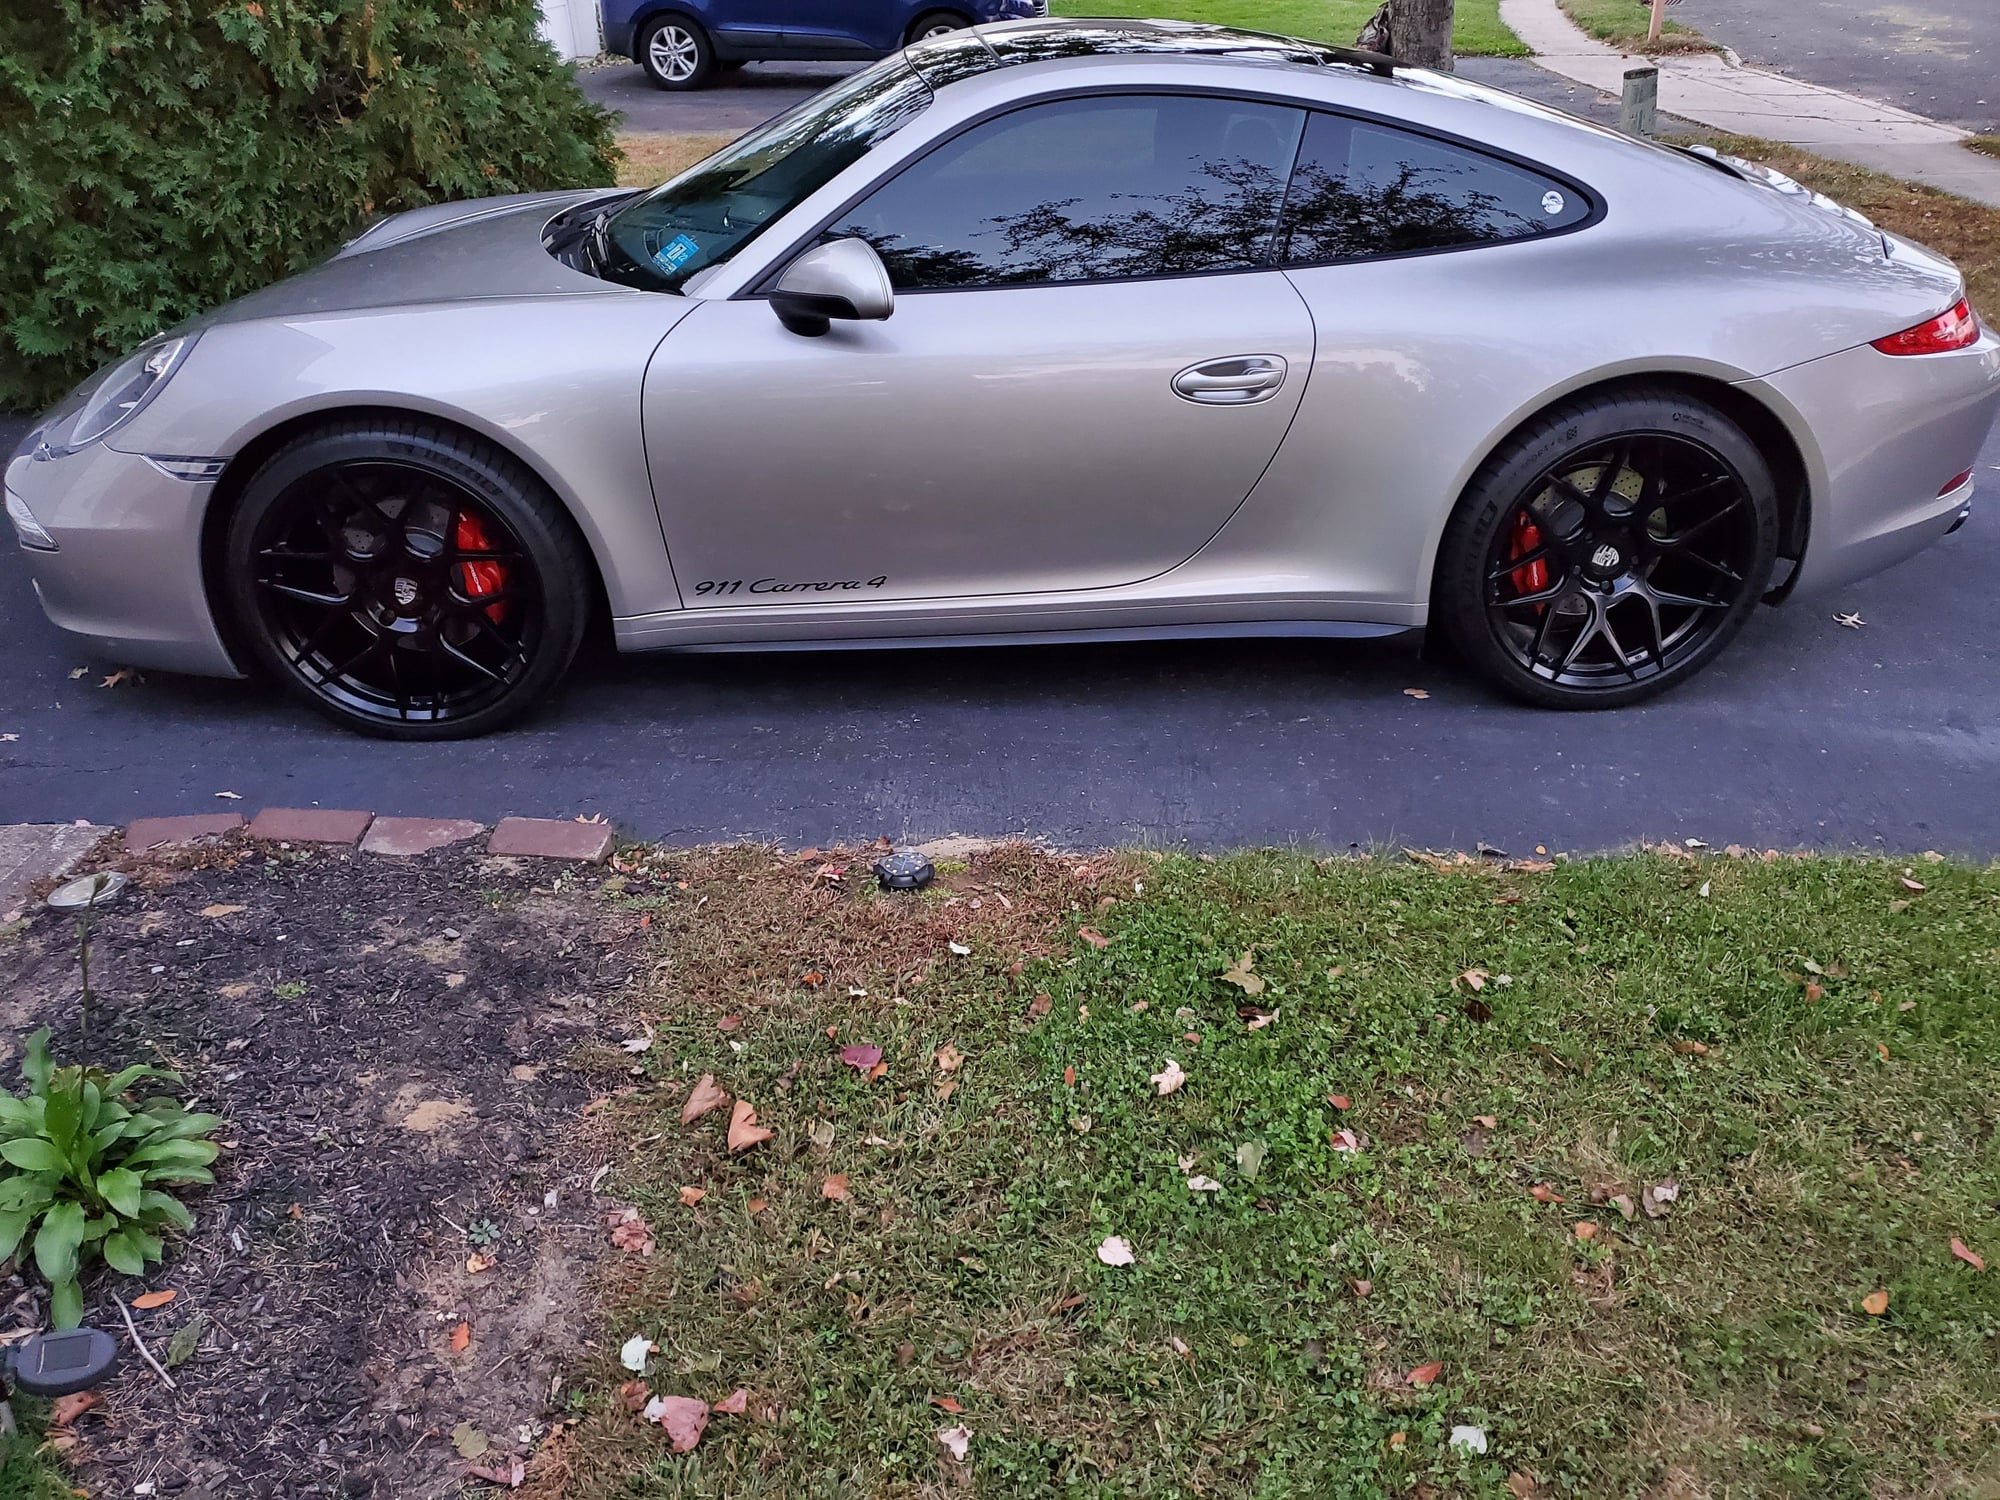
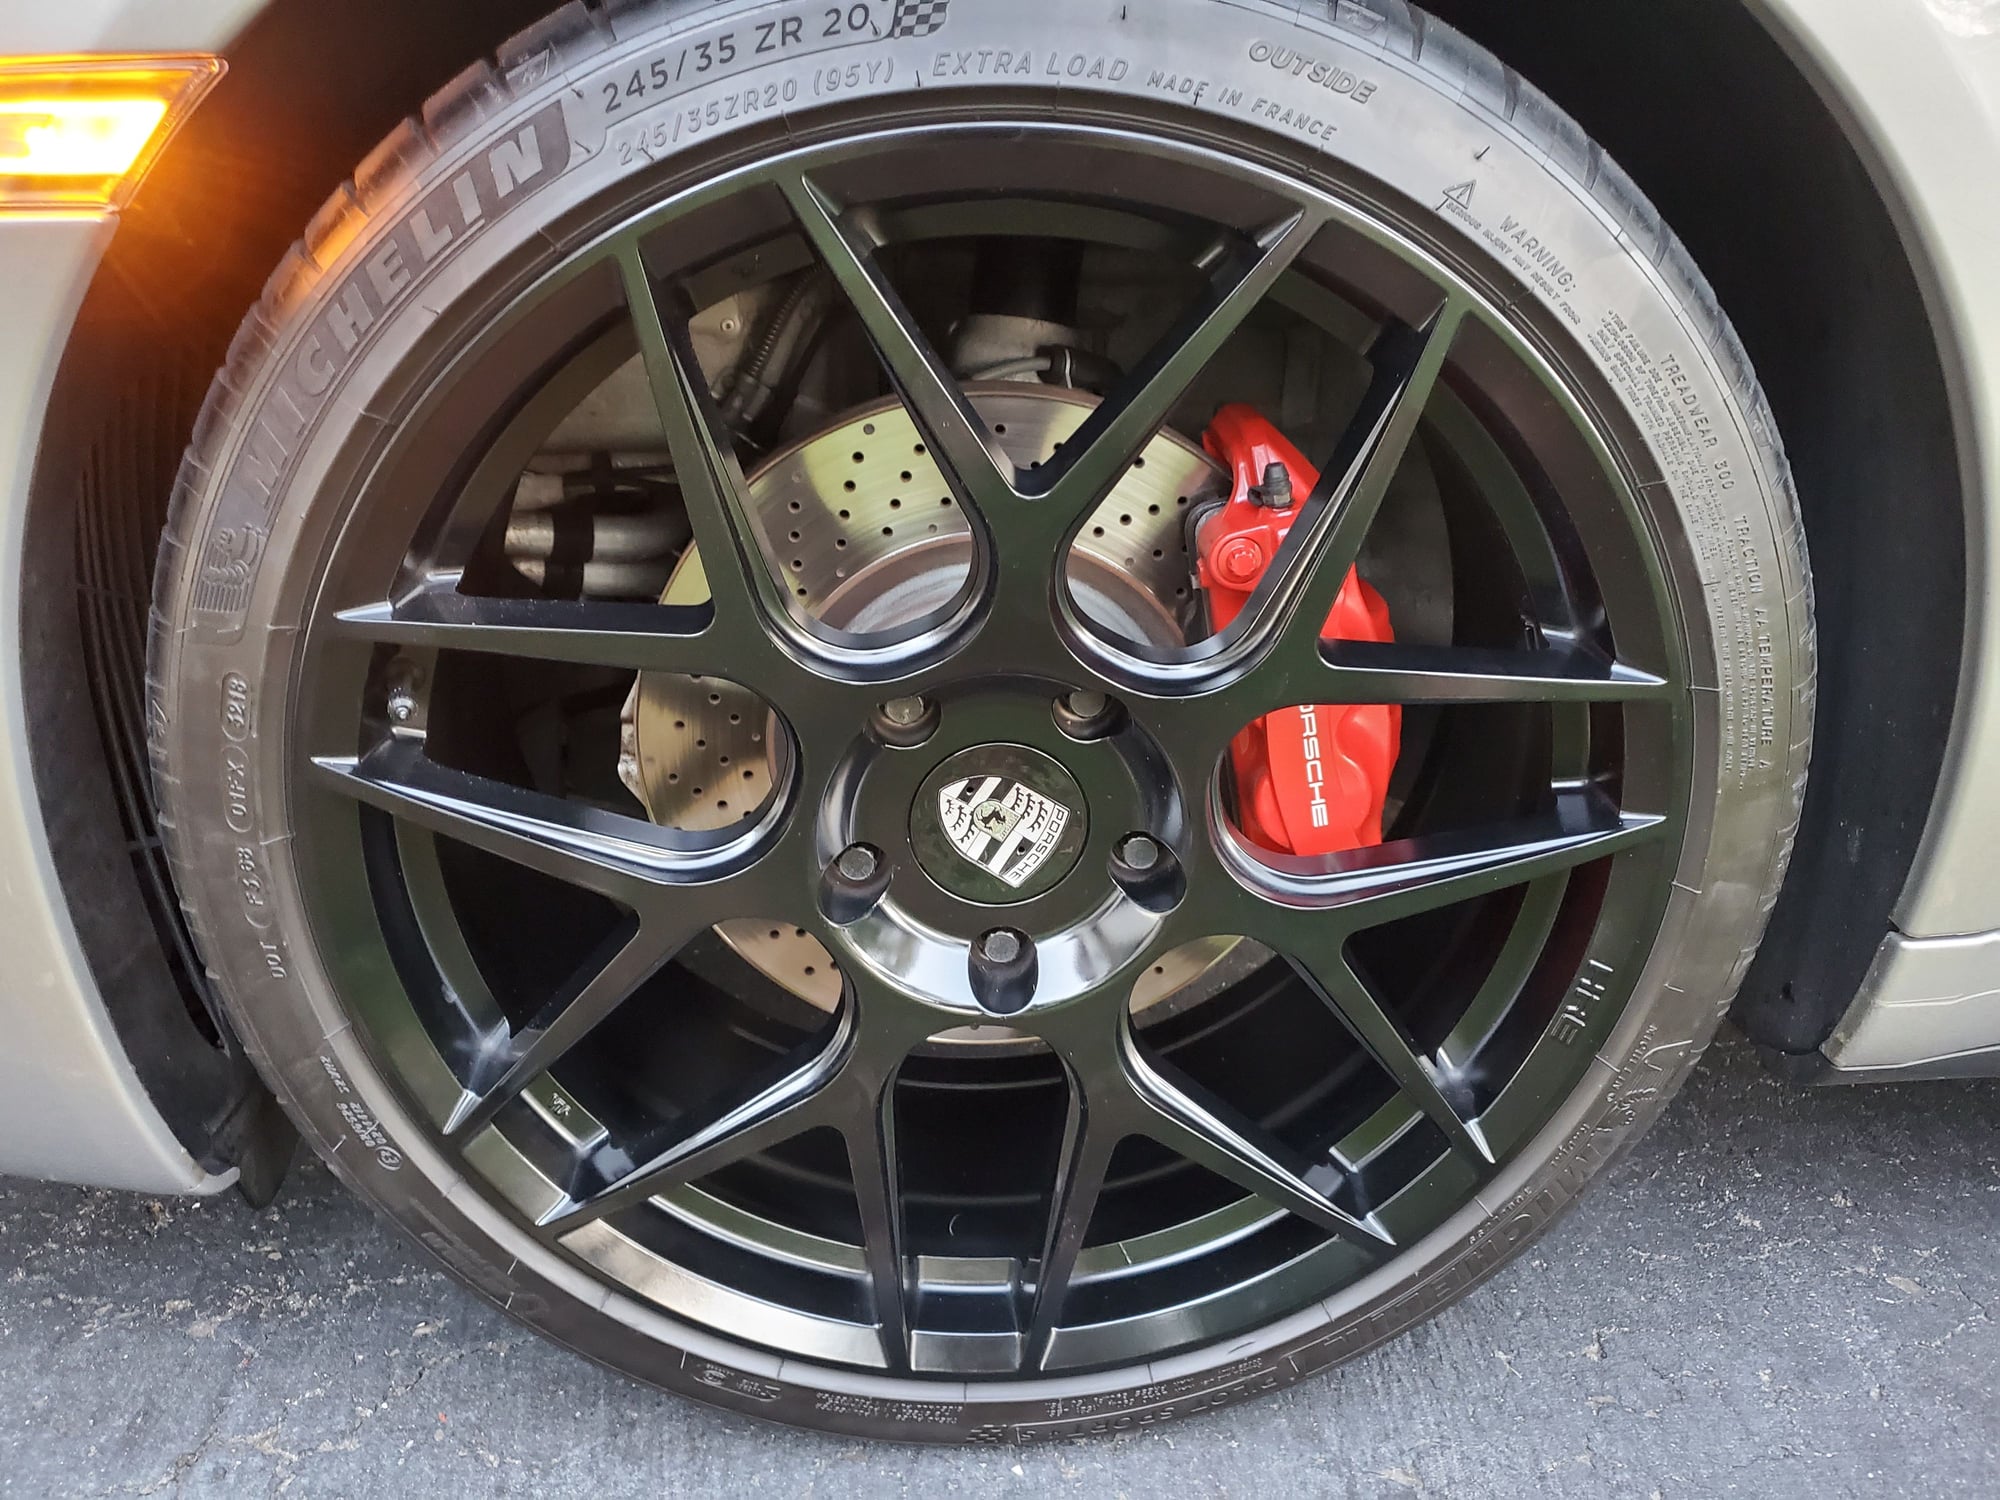
Much better presentation pic. Rear shot Madking area before Primer and paint
Last edited by PP13; 10-29-2021 at 10:03 AM.
Reason: forgot to add images
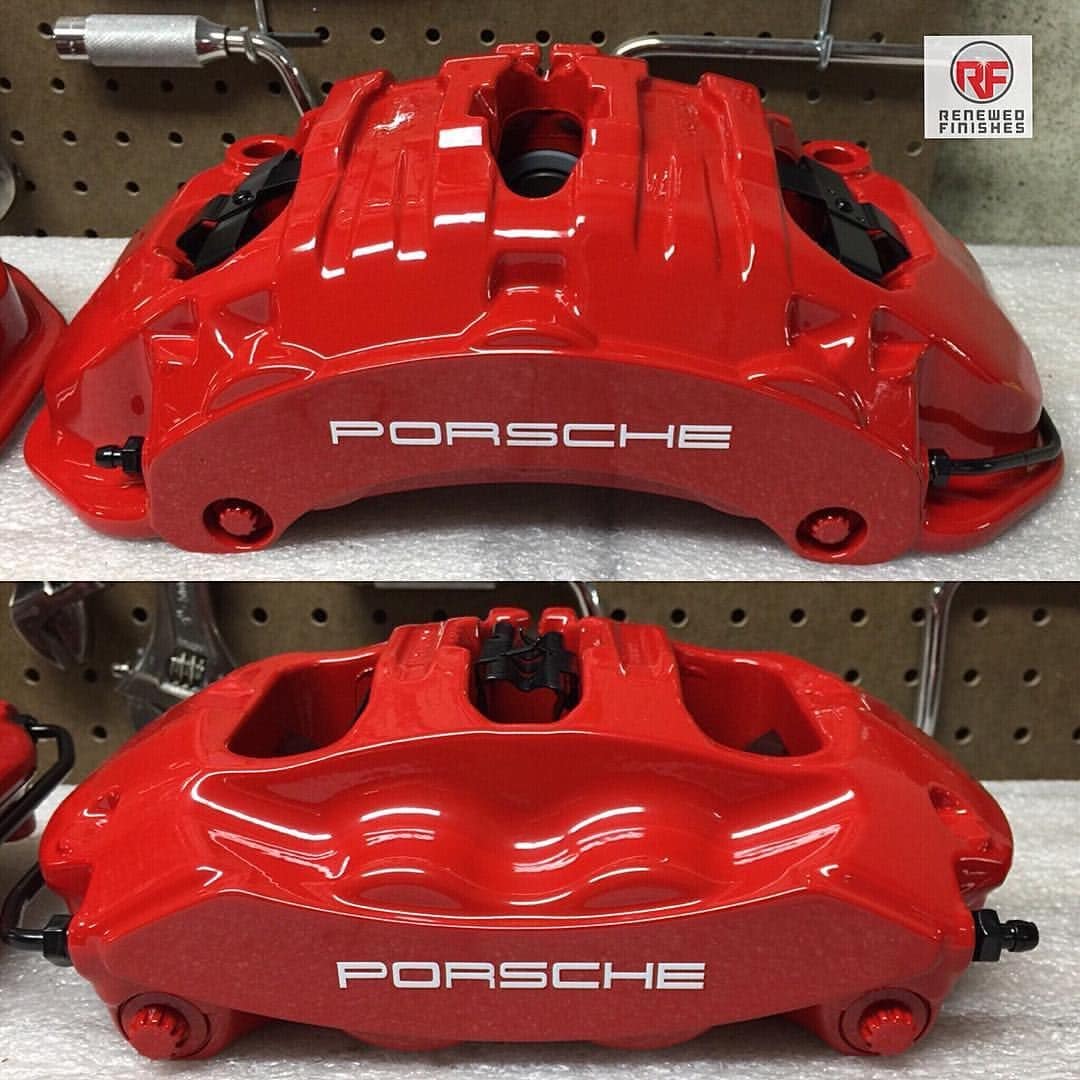
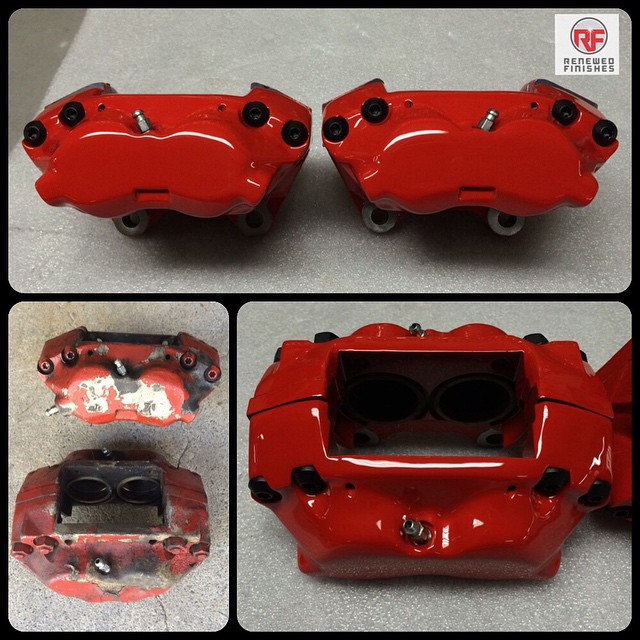
Thank you for the feed backs, and Lex where were you when I needed your feedback to paint the rotors black when I had everything already removed, Lol. Thanks for the link, I will look into that as well. I guess if you wanted them painted by a pro as Ironman88 had mentioned http://renewedfinishes.com, but not sure how much will that cost as you you need to consider that.
 10-22-2021, 01:15 PM