
955/957 Cayenne DIY: Front Rotors and Pads
 10-08-2012, 10:31 PM
#121

It looks like this guide also applies for a Turbo?
Also excuse my ignorance but how do you turn off the self leveling system? I am about to acquire my 05 CTT and was advised it needed rear pads.
Also excuse my ignorance but how do you turn off the self leveling system? I am about to acquire my 05 CTT and was advised it needed rear pads.
 10-11-2012, 07:13 PM
#124
Great thread!! thank you guys.. Ordered all the parts I needed for my 05 CTT
Ordered Zimmerman Coated Rotors all around for $356.10 shipped to my door
Ordered the rest OEM Genuine Parts from Sunset $451.35 +shipping(brake pads, hardware, sensors, 8 caliper bolts)
Should be around $850 when all said and done with my labor
Ordered Zimmerman Coated Rotors all around for $356.10 shipped to my door
Ordered the rest OEM Genuine Parts from Sunset $451.35 +shipping(brake pads, hardware, sensors, 8 caliper bolts)
Should be around $850 when all said and done with my labor
10-14-2012, 08:56 AM
#125
analyst
Rennlist Member
Rennlist Member
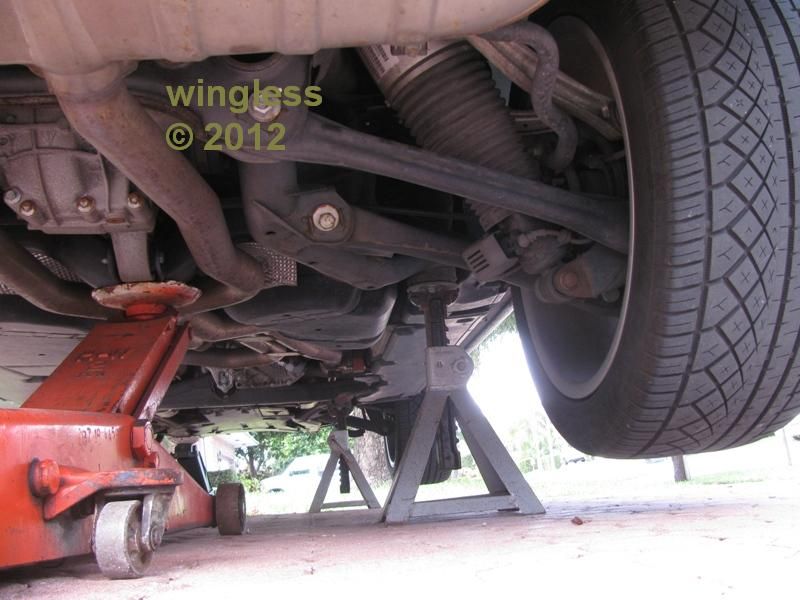
This is a great topic and was very handy when replacing the calipers and rotors on my 2004 Porsche Cayenne Turbo.
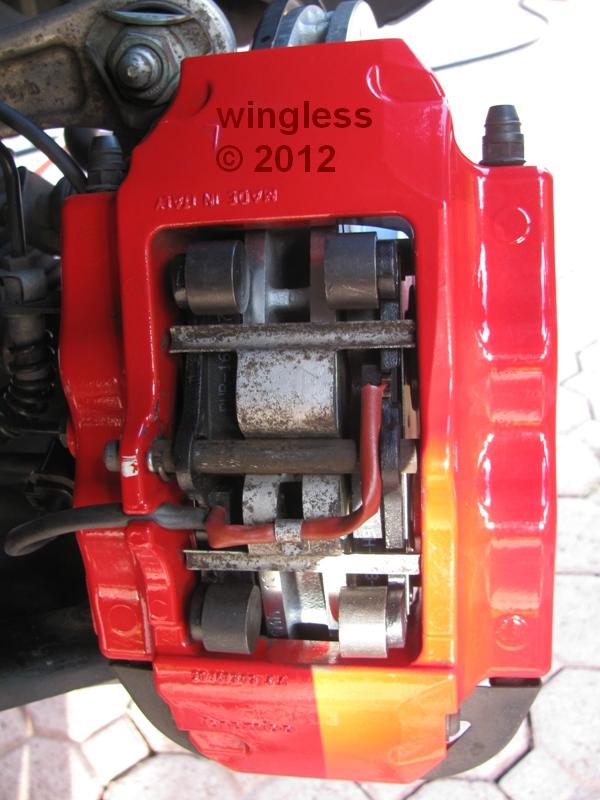
Here are some images from the replacement of my brakes.
The rotor, pads and sensor wire parts I used was this set from ebay.
The 5mm and the 16mm XZN triple square bits were purchased as a set from ebay.
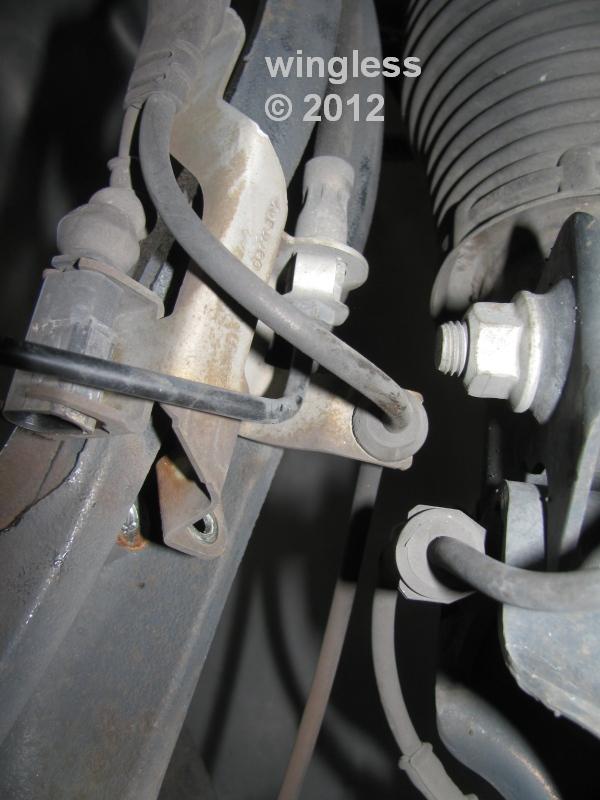
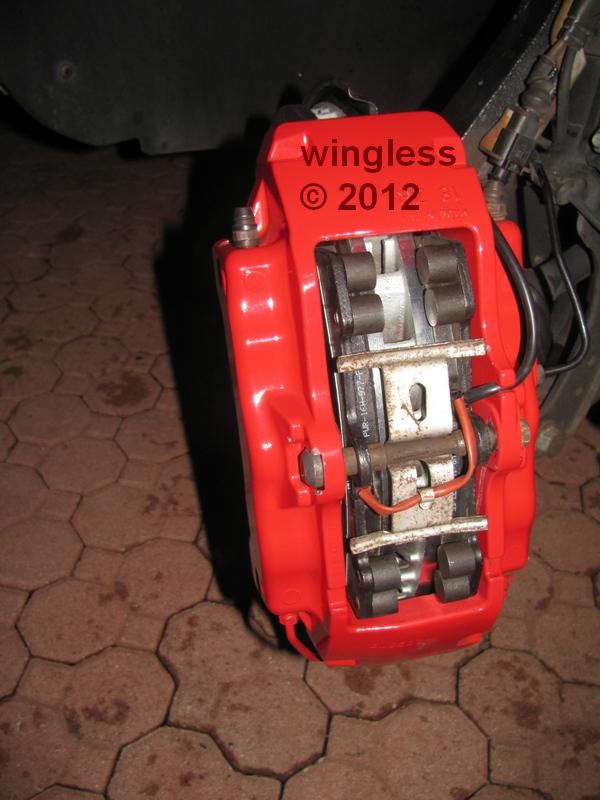
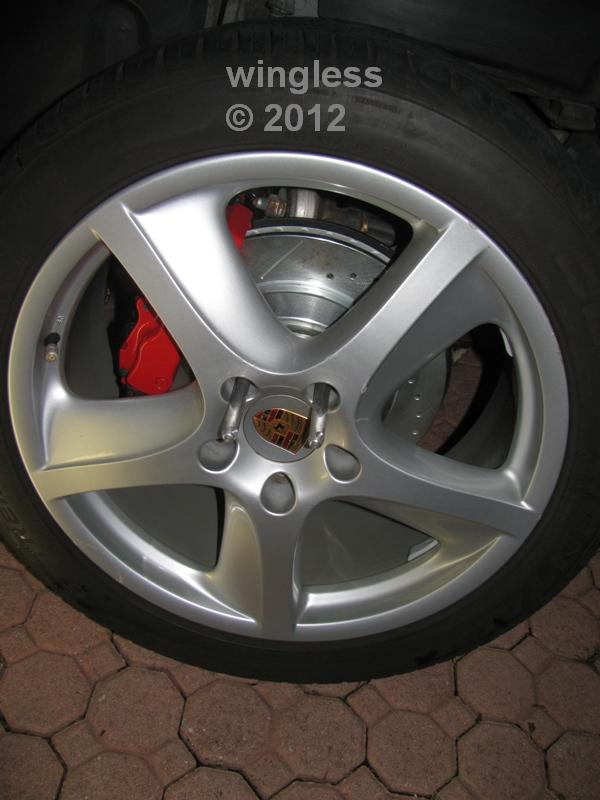
These are the fastener tools I needed for this service: 5mm XZN (rear rotor push plug cover); 16mm XZN (rear caliper bolt); Torx T50 (rotor retention bolt / pin); 8mm hex wrench (front brake line plate bolt); 21mm socket (front caliper bolt); 13mm socket (front caliper pad retention bolt) and 3/4" socket (wheel lug bolts).
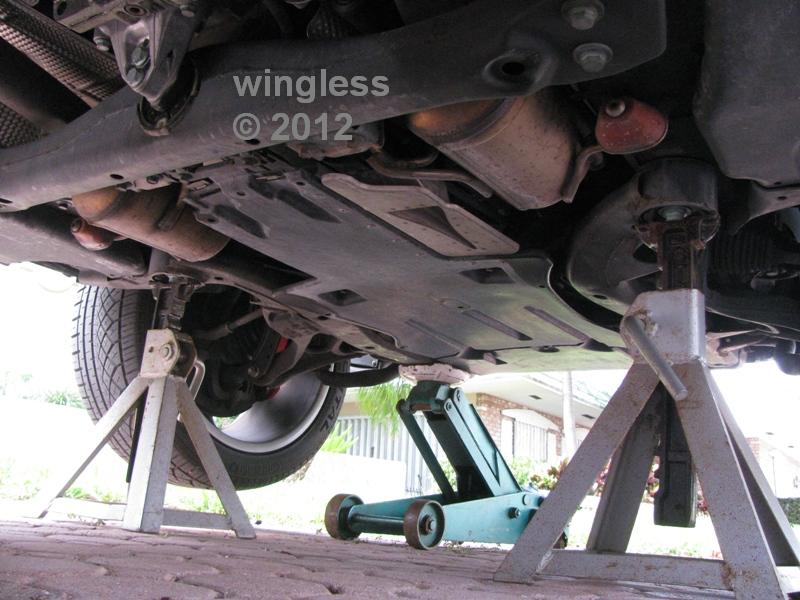
The other tools I needed were: a small screwdriver to release the catch on the sensor connector; needle nose pliers to remove the clevis pin clip from the rear brake pad retention; hammer and drift to remove pad pin; tool to compress caliper pistons; jack and stands; two wheel lug pins and torque wrench.
FYI, the pad retention pin moved w/ difficulty from crud, but moved very easily once sprayed w/ Simple Green. The Simple Green and a tooth brush were used to clean the parts before reassembly.
Rear Brakes Completed
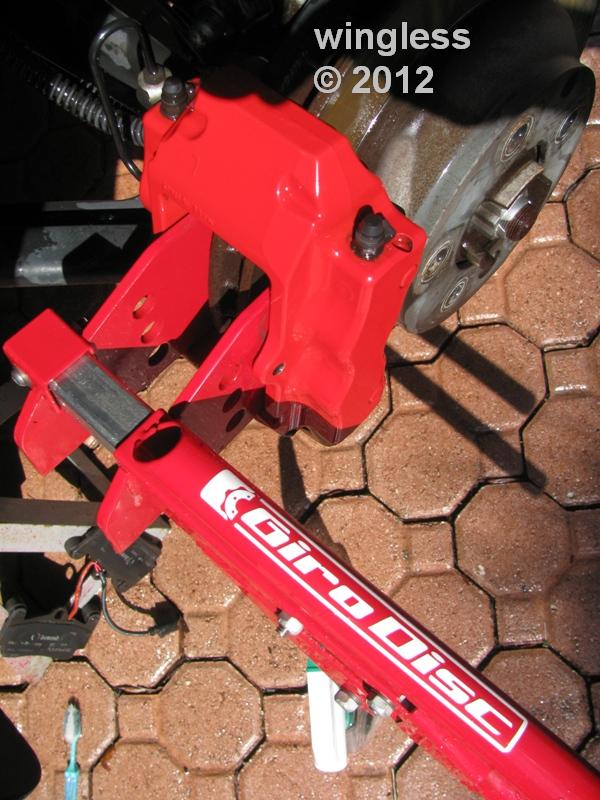
The Giro Disc Piston Spreader In-Use
This is a very handy tool. It works on calipers w/ one to eight pistons.
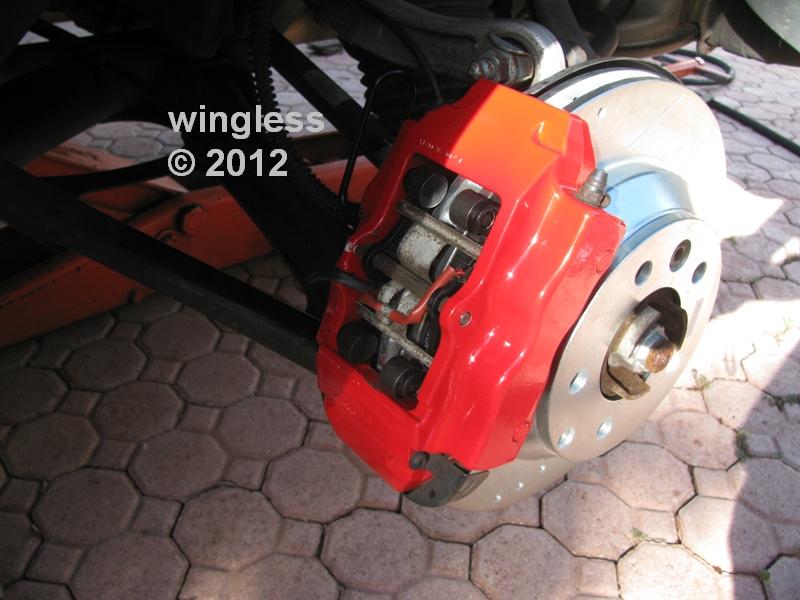
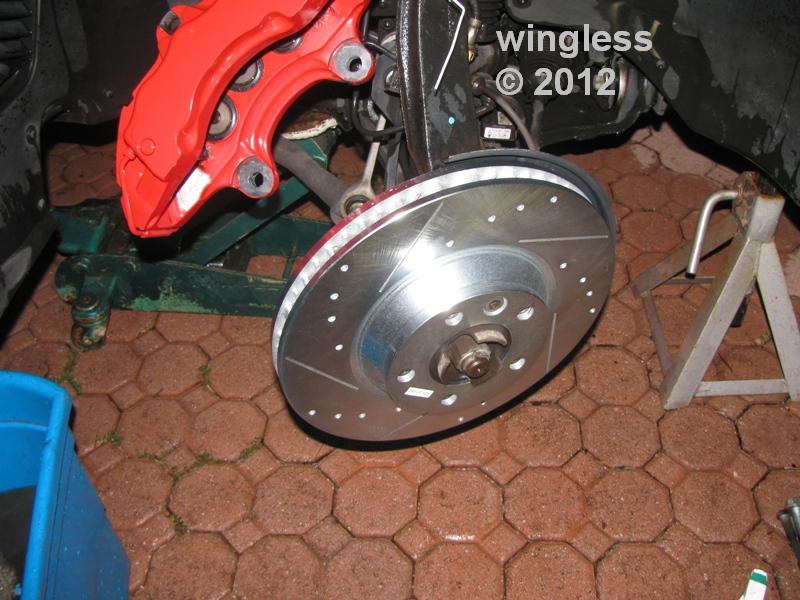
Front Caliper and Rotor Removed
Front Brake Line Plate Loosened
Front Rotor Replaced
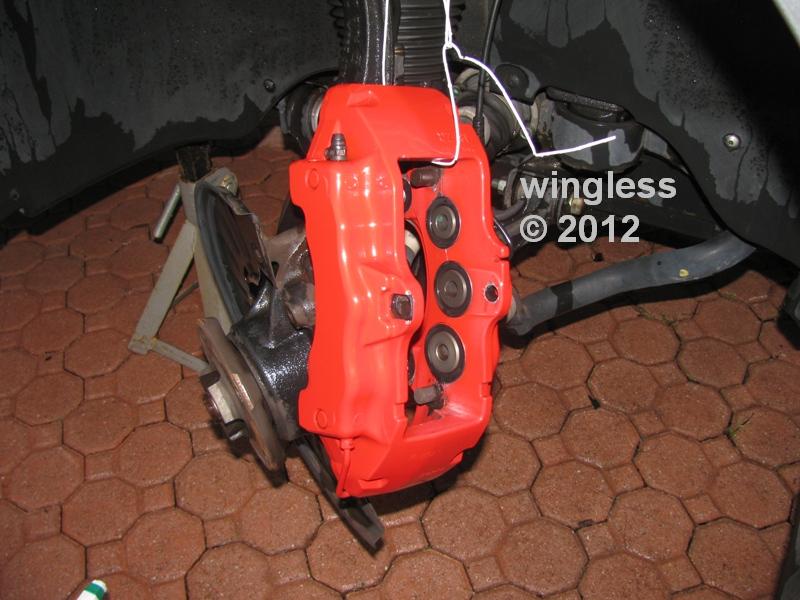
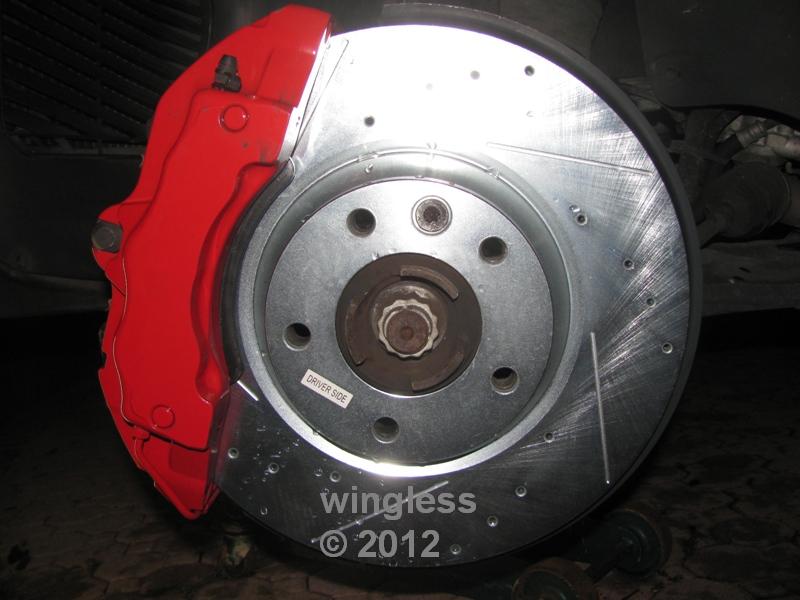
Front Brakes Complete
Two Wheel Bolt Pins (Night and Day Easier for Wheel Replacement Compared to One Bolt Pin)
Jack and Jack Stands In-Use
Front
Rear

Here are some images from the replacement of my brakes.
The rotor, pads and sensor wire parts I used was this set from ebay.
The 5mm and the 16mm XZN triple square bits were purchased as a set from ebay.
These are the fastener tools I needed for this service: 5mm XZN (rear rotor push plug cover); 16mm XZN (rear caliper bolt); Torx T50 (rotor retention bolt / pin); 8mm hex wrench (front brake line plate bolt); 21mm socket (front caliper bolt); 13mm socket (front caliper pad retention bolt) and 3/4" socket (wheel lug bolts).
The other tools I needed were: a small screwdriver to release the catch on the sensor connector; needle nose pliers to remove the clevis pin clip from the rear brake pad retention; hammer and drift to remove pad pin; tool to compress caliper pistons; jack and stands; two wheel lug pins and torque wrench.
FYI, the pad retention pin moved w/ difficulty from crud, but moved very easily once sprayed w/ Simple Green. The Simple Green and a tooth brush were used to clean the parts before reassembly.
Rear Brakes Completed
The Giro Disc Piston Spreader In-Use
This is a very handy tool. It works on calipers w/ one to eight pistons.
Front Caliper and Rotor Removed
Front Brake Line Plate Loosened
Front Rotor Replaced
Front Brakes Complete
Two Wheel Bolt Pins (Night and Day Easier for Wheel Replacement Compared to One Bolt Pin)
Jack and Jack Stands In-Use
Front
Rear
10-14-2012, 01:29 PM
#127
analyst
Rennlist Member
Rennlist Member
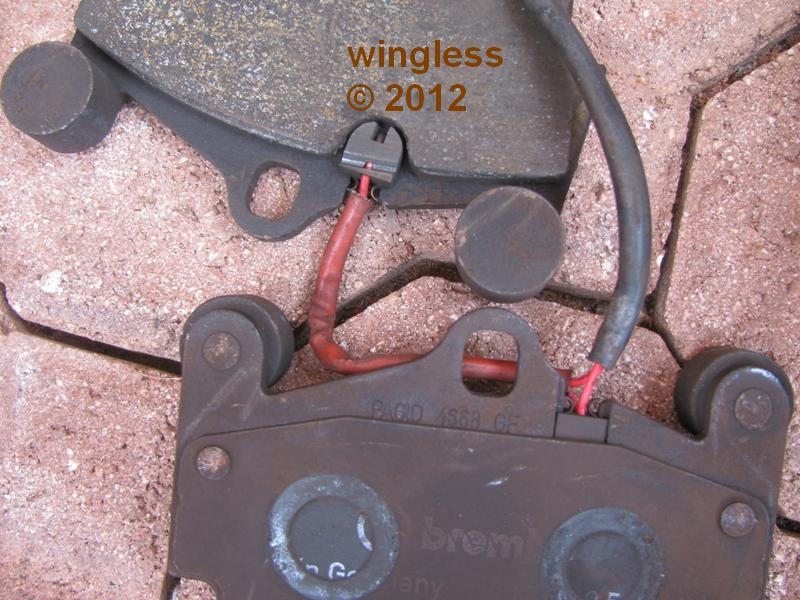
The sensor activation was well-conceived to ensure positive results.
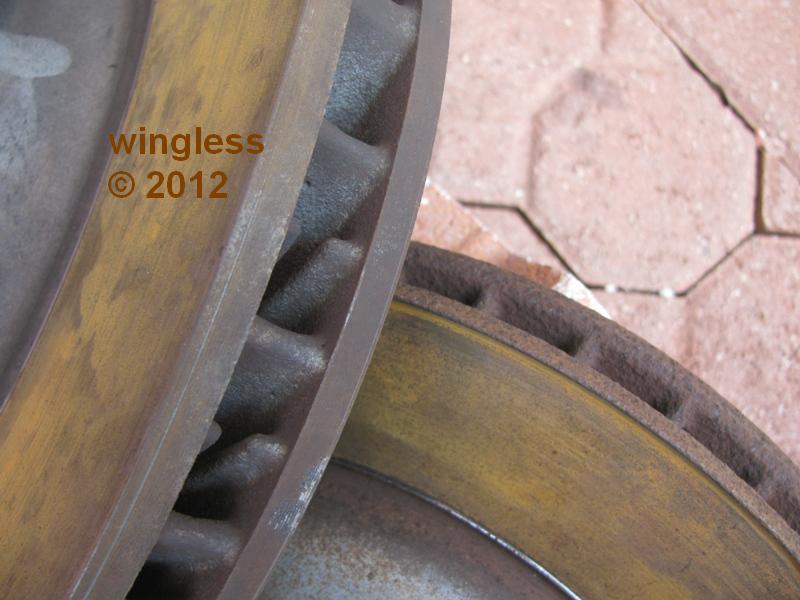
The pads do not wipe the entire rotor, leaving a small lip on the perimeter, created as the pad wears away the rotor meat.
That lip is used to cut a groove into the pad sensor, to activate the worn pad workshop indicator.
Pad Sensor Activated by Rotor Lip
Worn Rotor Lip
The pads do not wipe the entire rotor, leaving a small lip on the perimeter, created as the pad wears away the rotor meat.
That lip is used to cut a groove into the pad sensor, to activate the worn pad workshop indicator.
Pad Sensor Activated by Rotor Lip
Worn Rotor Lip
10-14-2012, 01:40 PM
#128
analyst
Rennlist Member
Rennlist Member
Playing w/ my boat...
Here is my 2,500W sound system. The people on-shore are dancing as we pass by. This is the 1,400W amp installation. This is the 400W subwoofer amp installation. This is the wi-fi Blu-ray installation. There are lots of other cool modifications I made to this boat.
The wife would "walk away" from me in her Cayenne Turbo w/o even trying if we were each driving. Now I have a new GT Mustang and that is not a problem anymore.

 10-14-2012, 06:39 PM
#131
analyst
Rennlist Member
Rennlist Member
10-14-2012, 07:32 PM
#132
Pepper Bartender
Rennlist Member
Rennlist Member
For me.. it isn't a boat.. it's a biz that has consumed me... in this "great" economy from politicos on both sides.. to trying to grow despite them.. Still have the Cayenne and the 996 Targa... both still "keepers" but 1 is still a PIG!

 10-14-2012, 07:47 PM
#133
analyst
Rennlist Member
Rennlist Member
10-14-2012, 07:50 PM
#134
Pepper Bartender
Rennlist Member
Rennlist Member