When you click on links to various merchants on this site and make a purchase, this can result in this site earning a commission. Affiliate programs and affiliations include, but are not limited to, the eBay Partner Network.
Has anyone successfully pried off their arm rest cover out there? I have a MY 22 and purchased a new cover with embossed crest. Trying not to break anything, thanks for any tips.
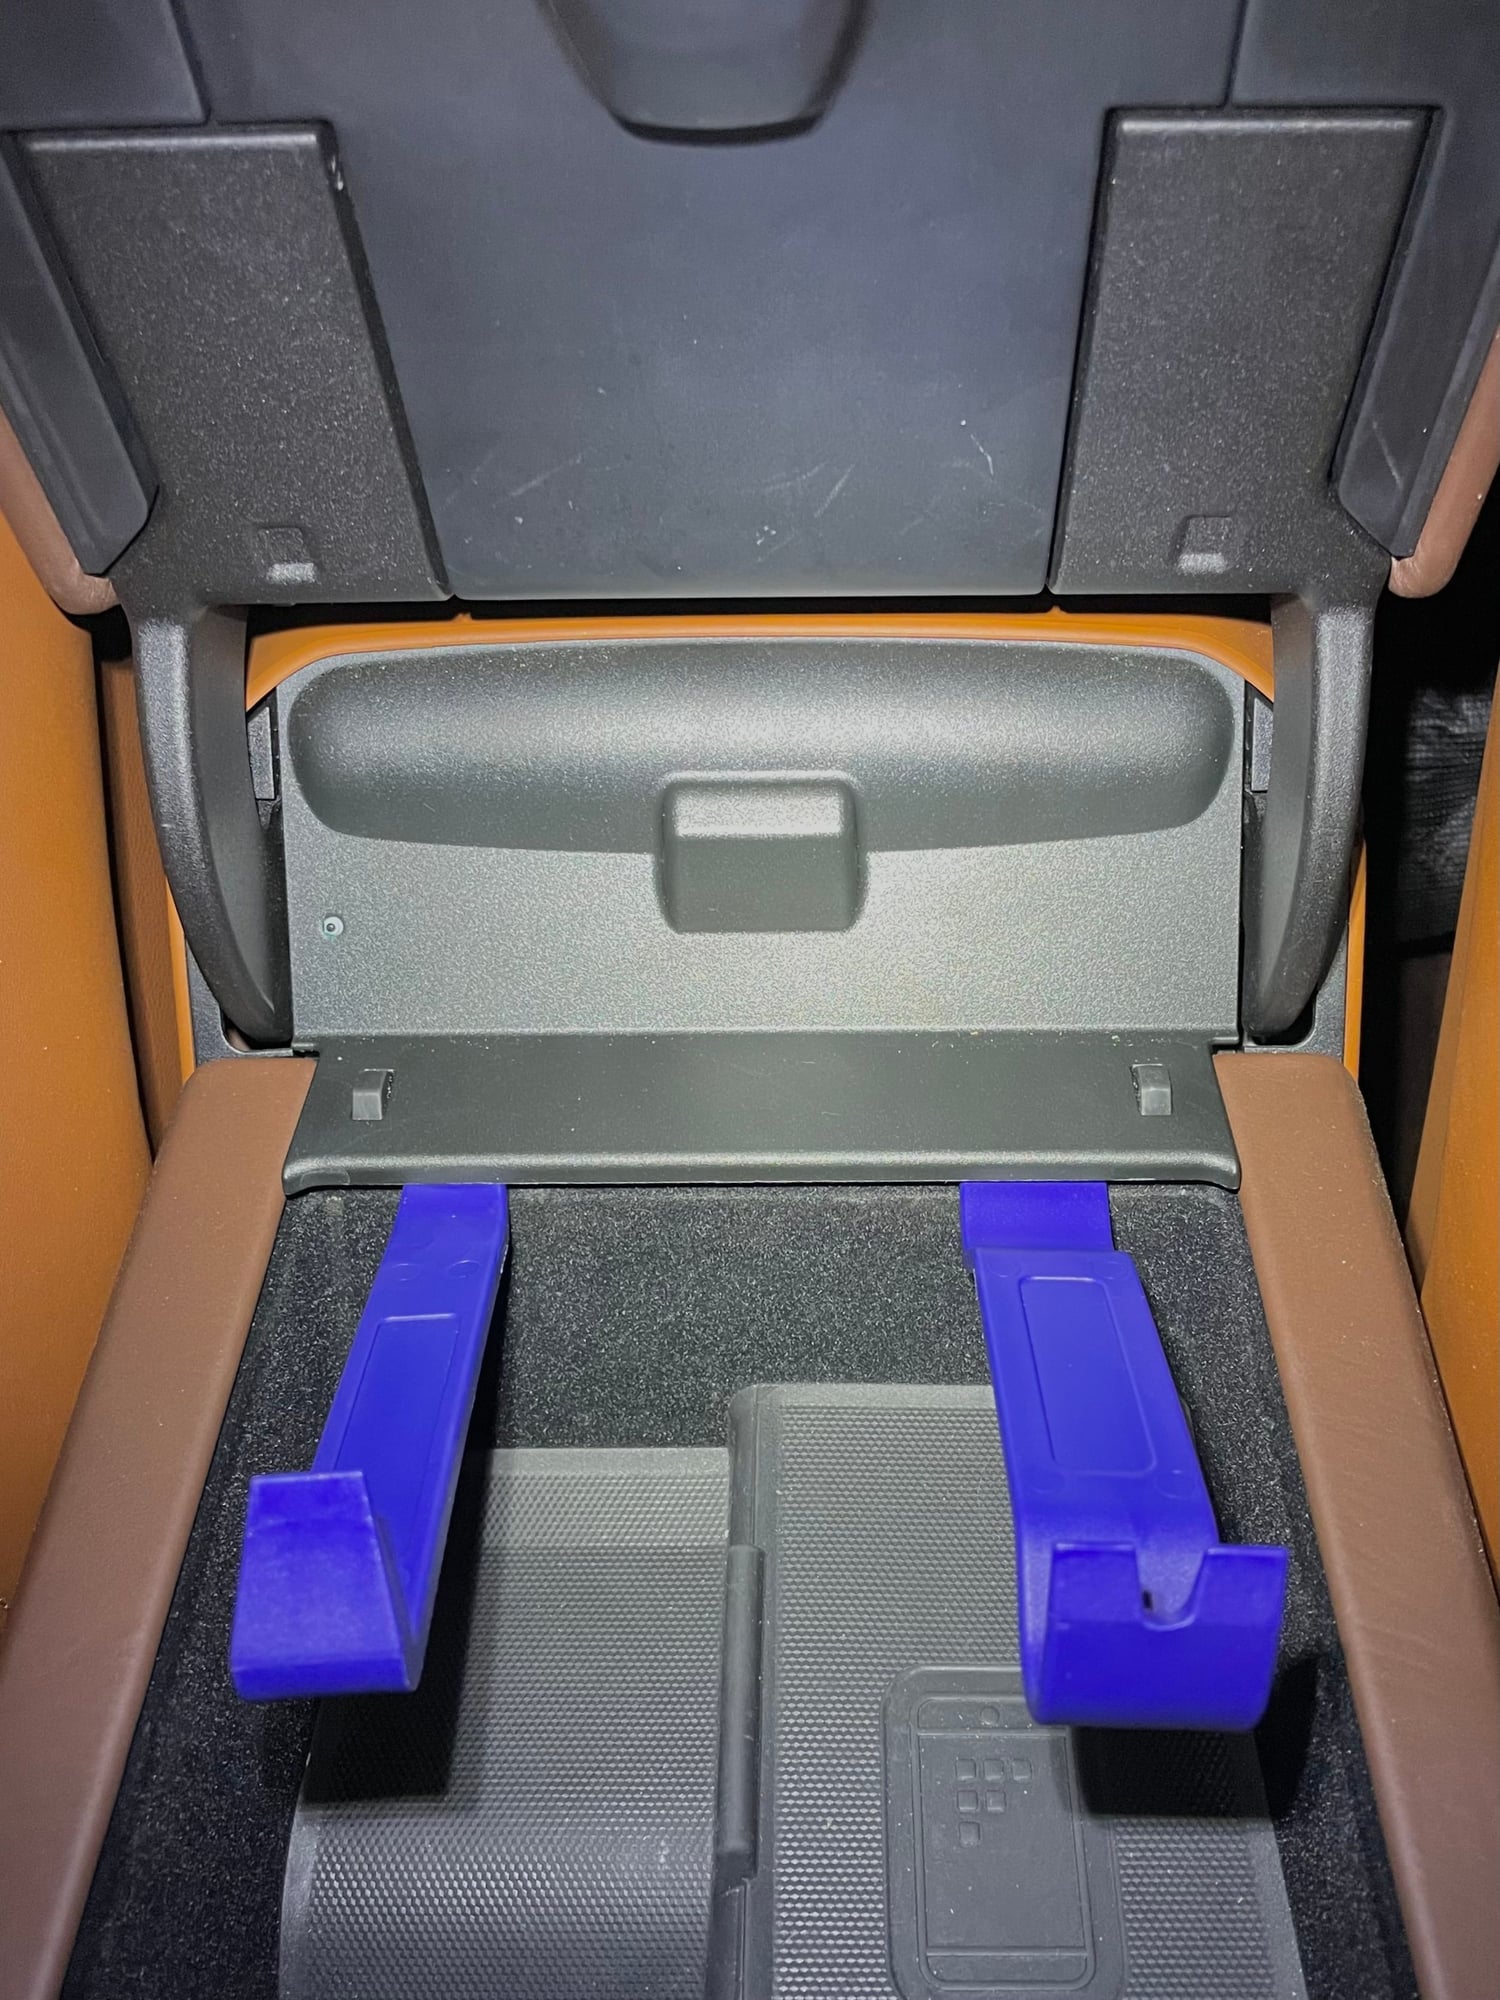
I’ll summarize: Lift the armrest to gain access to the trim plate. Use a trim tool in the positions shown below to pry the bottom of the trim plate up and forward. You can use just one trim tool — two shown for clarity.
Careful when removing the trim. There are small wires attached to the microswitch.
Remove the four bolts, circled. You may have to pry the rear ventilation console back to facilitate armrest removal. According to @mjamesp13 it is a tight fit.
I�ll summarize: Lift the armrest to gain access to the trim plate. Use a trim tool in the positions shown below to pry the bottom of the trim plate up and forward. You can use just one trim tool � two shown for clarity.
Careful when removing the trim. There are small wires attached to the microswitch.
Remove the four bolts, circled. You may have to pry the rear ventilation console back to facilitate armrest removal. According to @mjamesp13 it is a tight fit.
Thanks for sharing, the piece I bought from a dealer online is just the top cover that appears to snap on in some way. It doesn�t seem like you would have to unbolt the entire arm rest? I�ve tried a pry tool but with no luck yet.
In the photo it looks like 4 attachment points from the cover to the cover support/pivot arm.
Can you post several more well-lit and clearly focused photos of the new cover, showing the details of what appears to be the 4 attachment points? If there are no threaded fasteners, prying and un-snapping is the procedure to remove the cover.
Thanks for sharing, the piece I bought from a dealer online is just the top cover that appears to snap on in some way. It doesn’t seem like you would have to unbolt the entire arm rest? I’ve tried a pry tool but with no luck yet.
I didn’t realize you could buy just the top cover. That’s great news, as I scuffed mine and may need to replace it if it cannot be repaired.
May I ask how much the cover cost? That will help my decision whether to repair or replace.
Please keep us updated with any techniques you discover.
Until you provide us more photos, my guess is to start at the front (latch) side with two trim wedges between the cover and release latch. Twist the wedges to unsnap the two front clips, then either move to the rear and repeat the process, or simply slide the cover rearward with no usnapping of the rear clips needed.
Plan for broken clips in the process. This means you need to buy them in advance, after of course identifying the part number and a source. Or remove the cover, breaking clips in the process, then find and buy new ones.
If it was me I would take the embossed cover to all the dealers in my area and ask the parts guys to sell me clips. Who cares if they charge 200% markup? It's a $3 part (per clip).

 08-05-2023, 07:31 PM