When you click on links to various merchants on this site and make a purchase, this can result in this site earning a commission. Affiliate programs and affiliations include, but are not limited to, the eBay Partner Network.
So I took the plunge and hard wired my V1 Gen 2 using a mirror tap this weekend overall it was fairly easy to do but I always get a little nervous as the force it take to remove some trim pieces in this car. The guides posted above in the thread didn't help that much except that tap black to brown wire and look for a blue wire. With that being said below are my observations and what worked for me:
1: You need a set of plastic trim removal tool
2: Get a mirror tap kit that has different tap sizes (I ended up using two different sizes). I used the Radar Mount brand from Amazon (PN#: 4005201V for the V1) There are a few of these for the V1, not all have different connection sizes. This was 1/2 the price of the other brand, thought I would give it a shot to save $20 and it worked.
3: You don't need to remove the dome light. Don't even try to do that via the video link in this thread, it won't come out of the clips, I felt too much force was being applied.
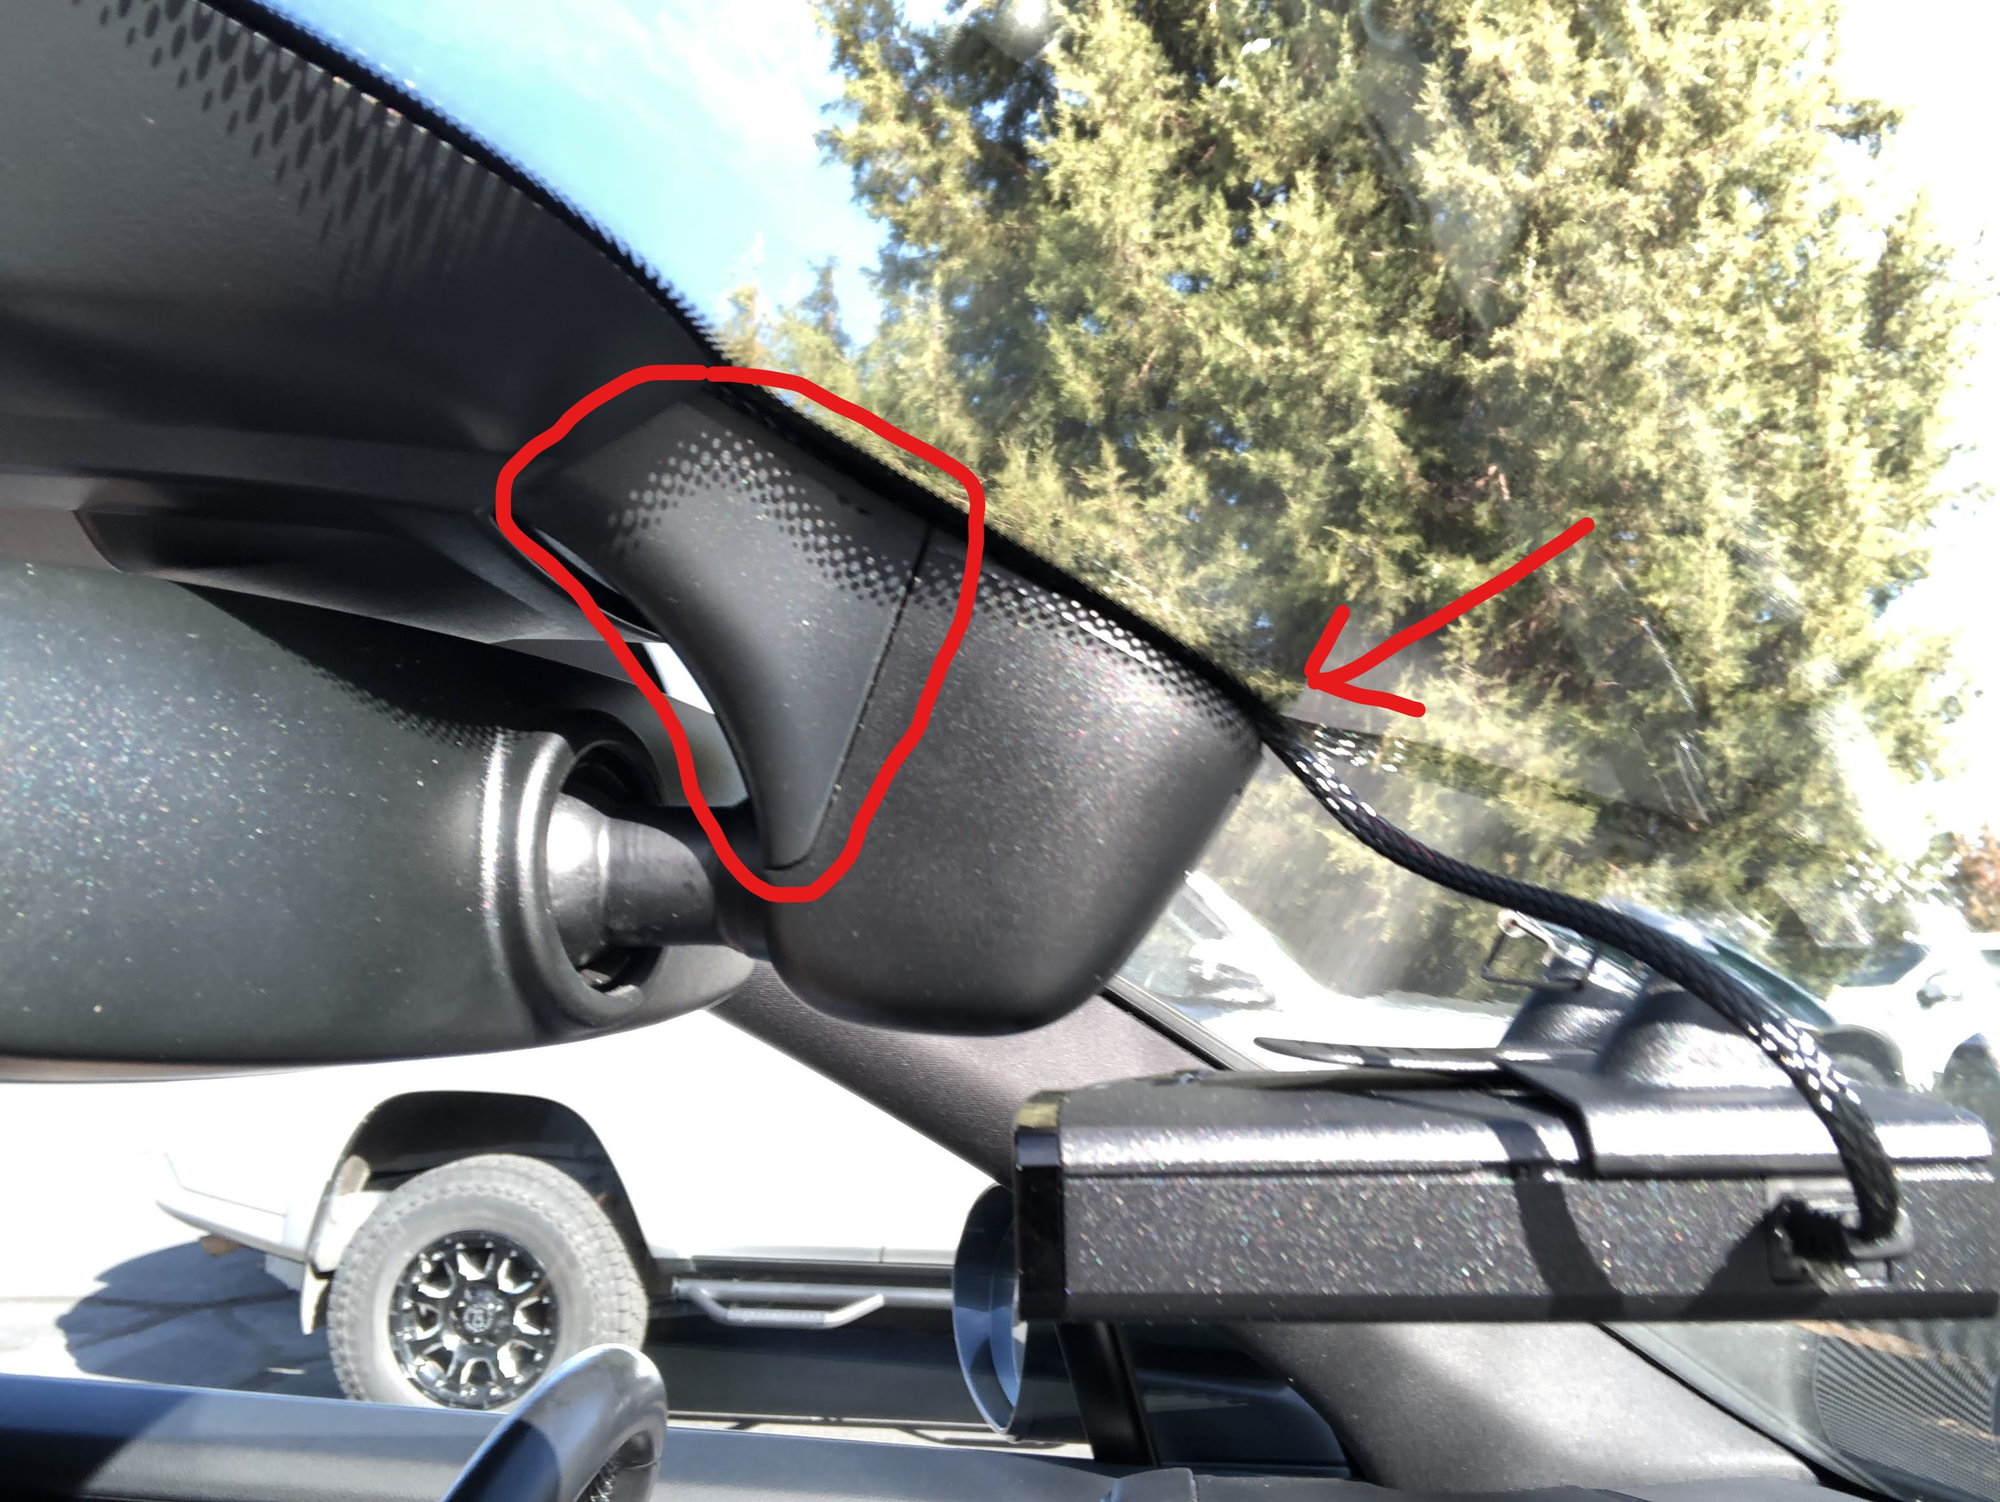
4: Start by removing the plastic trim right above the mirror, the one that houses the Passenger Airbag Light (see first pic below)
a: It took some force to remove. Just use a trim tool and work from the left side against the windshield over to the right. There are a lot of little bits that help keep it attached. You will have to slide it forward to the windshield to drop it down, at times I thought I broke it (maybe I actually did) and it hangs on by a red belt so it will just dangle once off.
b: You will need to unplug the Passenger Airbag Light connection to gain enough room. Just make sure you put that back in before you start the car otherwise it will through an airbag error that is easily rectified once you plug it back in and restart the car.
5: Remove the next piece of trim right behind the mirror (see second pic below).
a: This one is also a pain to remove. There is a rubber ring attachment that holds the right side onto the car inside the trim piece. I don't have a photo of it but it is attached a plastic piece and I couldn't pop the entire bit off so I had to stretch the rubber and just remove that.
b: I had a real hard time stretching this back on during reassembly, it started to tear so I stopped since the entire piece seemed very solid once it all snapped back together. I may order a new one but in 40 miles of driving it does not move or make a noise.
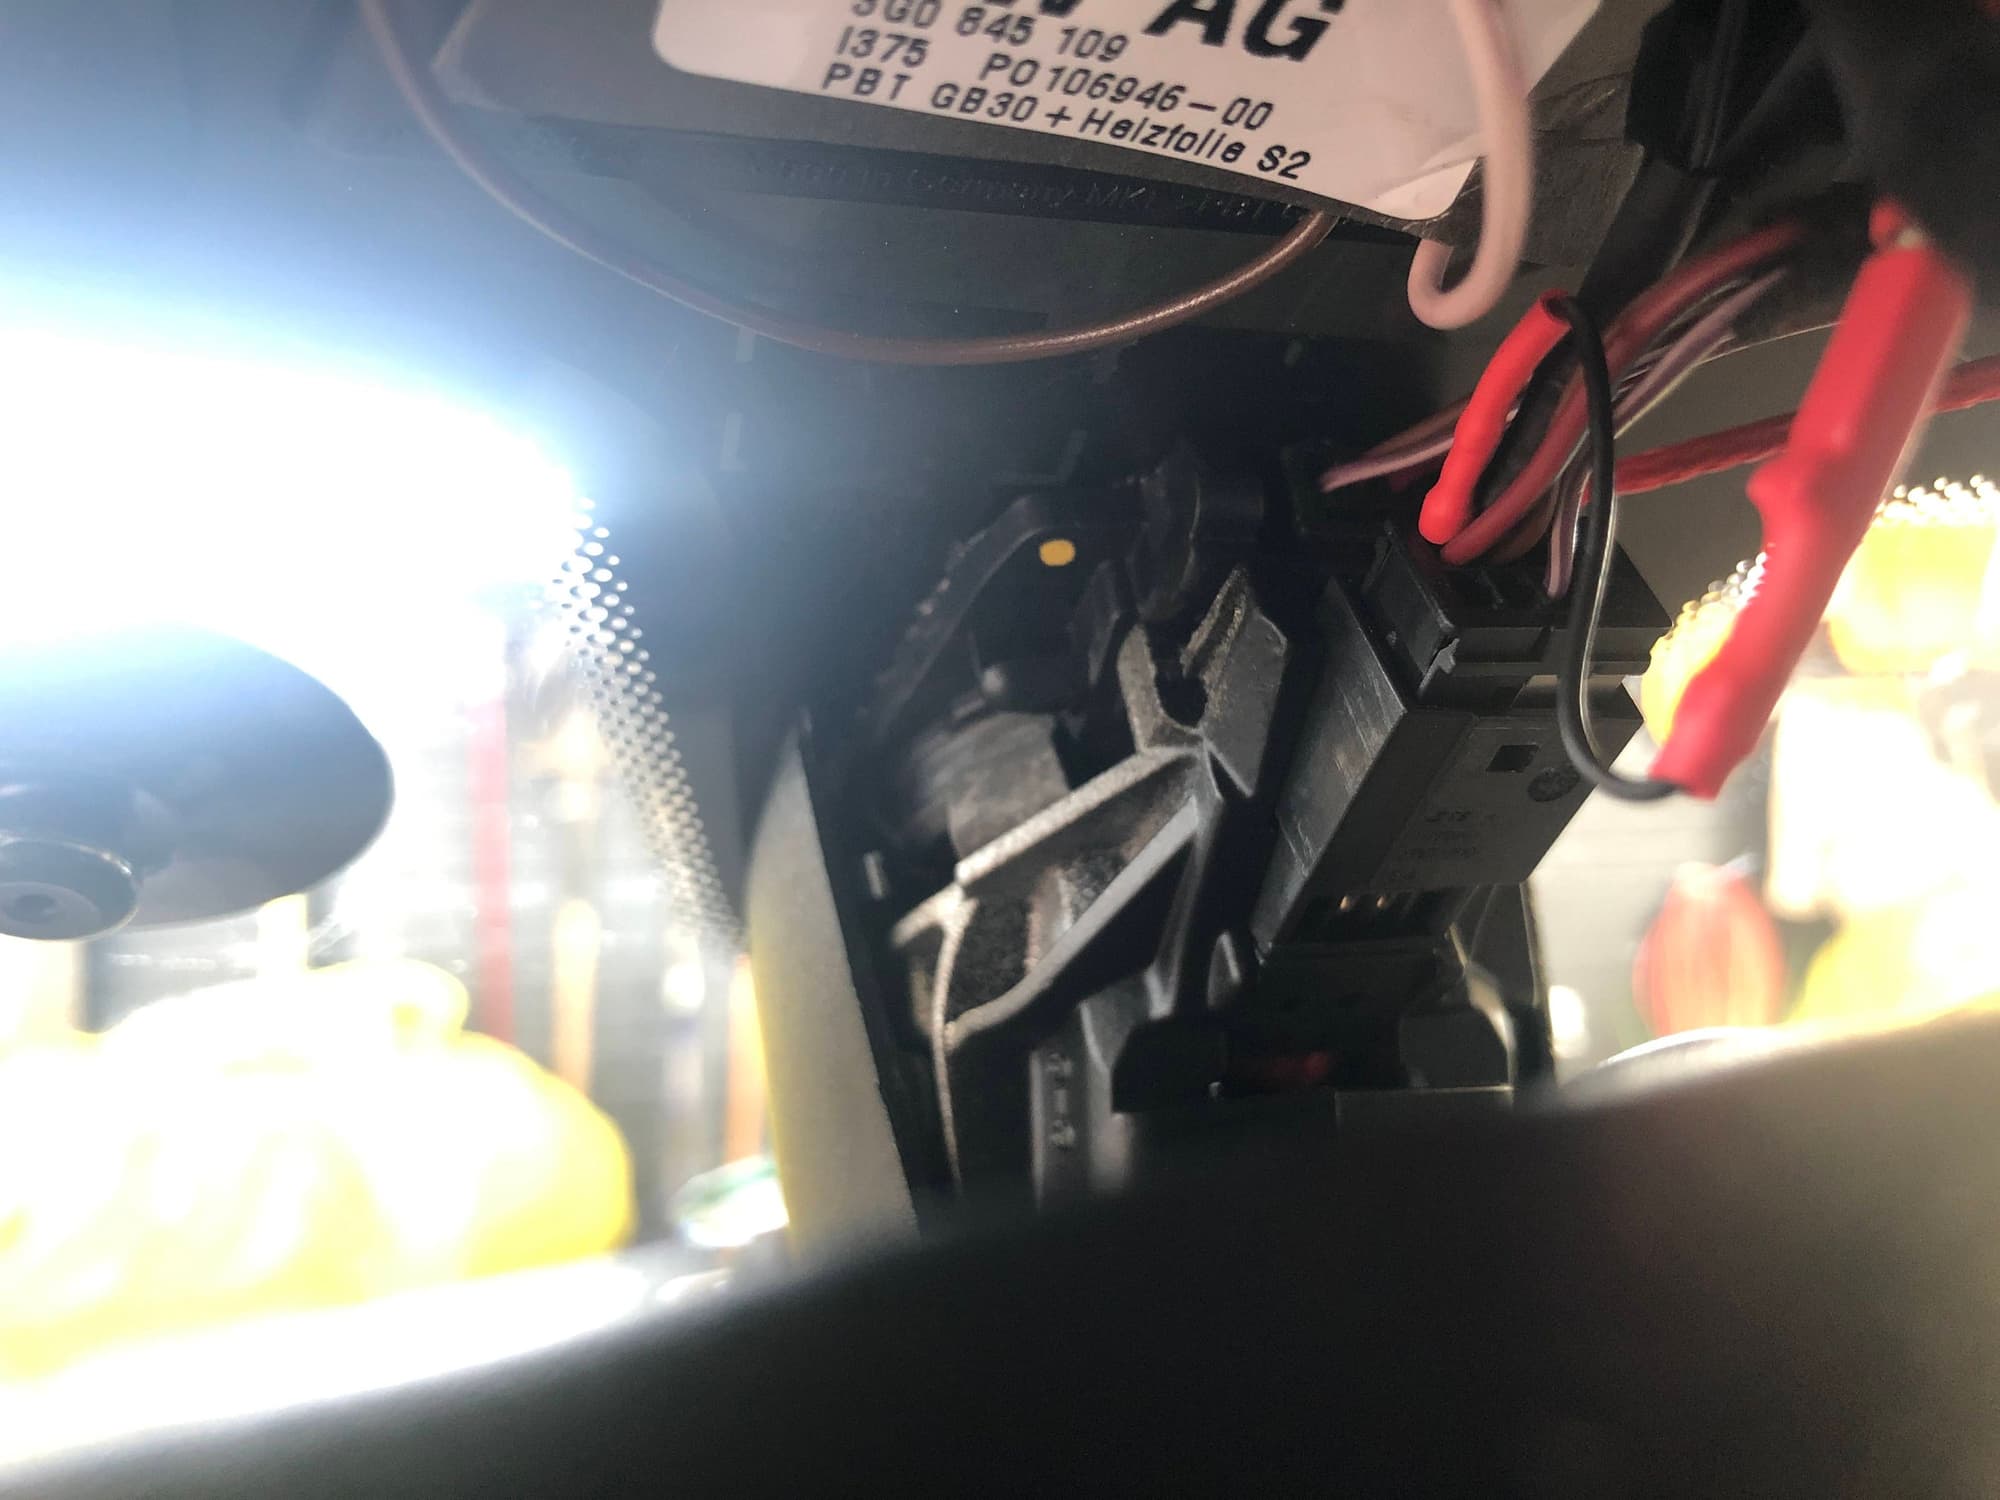
6: Once these pieces are off you will clearly see the connector smack dab in the middle with wires going up (see third pic)
a: I found it easiest to unplug the connector and work on it in front of the rearview mirror
b: There is a BROWN wire, tap this with the black connector (see fourth pic below), I tapped into it with the thicker of the tap connections as the thinner one kept falling out. I also tapped it on the windshield side of the wire. (see fifth pic below)
c: There is a RED with BLUE STRIPE wire right next to the brown wire that takes the red connector (see fourth pic below). I used the thinner tap here as it would not take the larger tap I had, again tapped it on the windshield side of the wire. (see fifth pic below)
7: Slip the RJ cable into the bottom mirror trim piece that was not removed, there is a rubber bit between the plastic and the windshield so the cable fits perfectly at the bottom (see second pic below)
8: Reassemble in reverse order and you are good to go.
I hope this makes sense and is helpful to someone!
do you have a video of removing this piece? I want to make sure not to break any clips. Thanks!
I know this is an older thread but I just want to say be very very careful removing things. My 2016 Cayenne was at the dealership to repair the rear-view mirror because the tension ring had come loose on the back of the mirror, and they cracked the windshield while working on this. Cost them a bucket of money since they had to replace the windshield and put on the 3M ceramic window film on their dime. Of course, while it was there, they figured out that the serpentine belt was due to be replaced given the odometer. Funny that they did not mention that when the Cayenne was there a month earlier for the 60k service. They had me in a loaner for over a week for this - their film guy was on vacation, so the film had to wait until he got back.
Well the radar detector works! But despite my best efforts, I broke the left clip that holds piece 22 (in the above diagram) to the roof. The part that is likely to break is attached to the car, not the piece itself. Does anyone know how to replace that clip? Surely it's not built into the headliner....
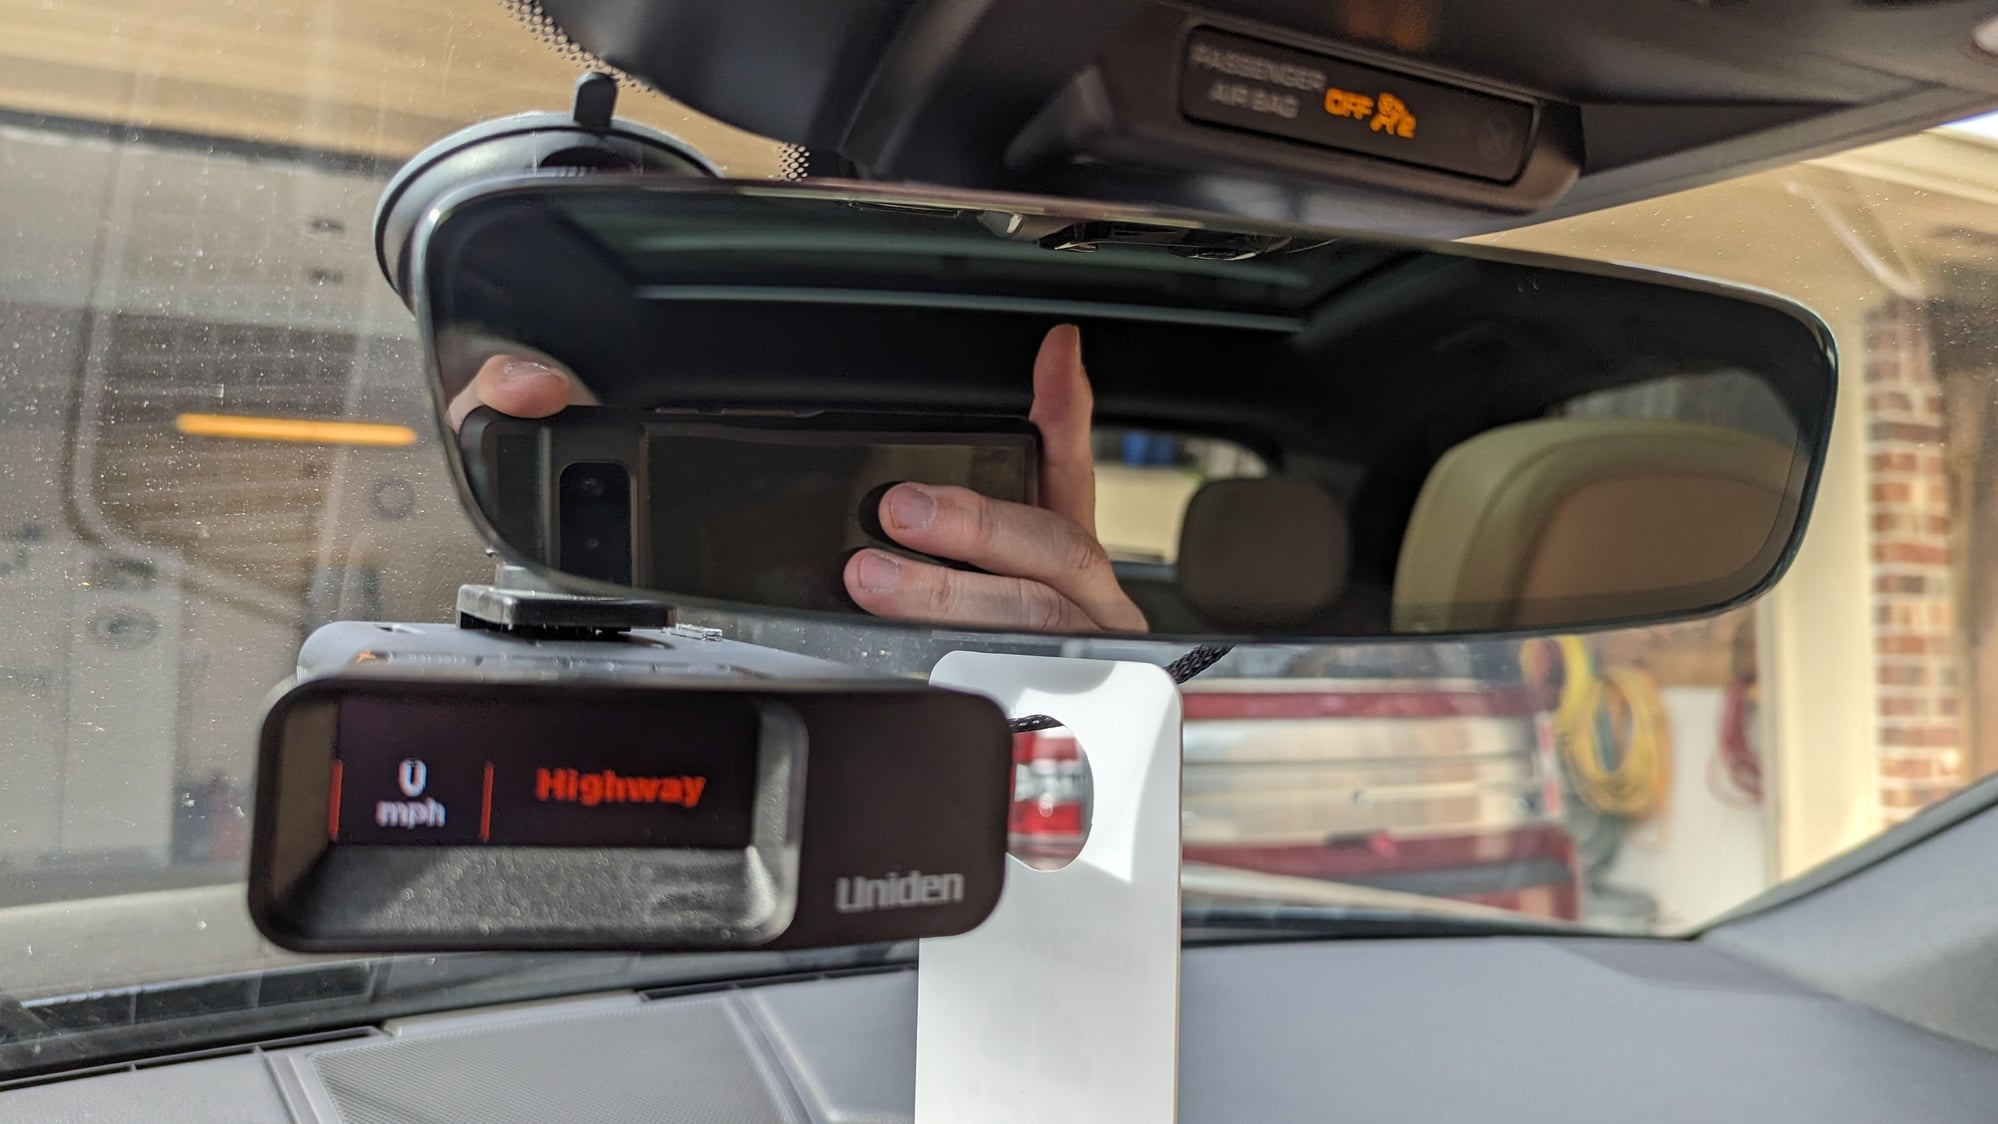
Not to revive an old thread but I just did this today and mounted my V1G2 on the passenger side cutout for the heated windshield (never optioning this again). I followed the guide pinned above and it works. Bigger black pin and smaller red pin. I trimmed the black pin slightly so it wouldn�t leave any metal exposed when tapped in.
For removing the black plastic piece I used the video below that was done on a 2018 panamera that I hope helps other people who are scared to pull hard�like me.
Just installed my power tap today. Plastic that snaps together is always a bit scary, but the excellent write-ups and pics (Thousand thank yous to A4EP) helped immensely!!!

 02-25-2023, 09:17 PM