When you click on links to various merchants on this site and make a purchase, this can result in this site earning a commission. Affiliate programs and affiliations include, but are not limited to, the eBay Partner Network.
Nope, still waiting for someone to help with some tips, how to remove the back rest. I tried to take it off but i am afraid i am gonna break the clips.
I've always got a lot of good information about my cayenne from here.
I have 2015 cayenne and there was annoying squeezing sound from the front driver seat. When I put the pressure to the seat with my back, there is some rubbing sound. Now it's getting worse. (Driver seat is more serious)
I've visited dealer and had it fixed. They say they did some taping to prevent the rubbing sound. but it didn't work.
So. I want to do it myself. But I can't remove the back panel. There are several keys there but I don't want to break it.
(There's some pics of the removing panel, but it was before 2015 model)
Please teach me how to remove panel safely.
Thank you.
Hey Khwan, checking in to see if you can tell us how to remove this panel. We don�t want to break the clip holders. Thanks!
Hi! I just had to remove my driver's seat backpanel (at least I thought so) and snapped some pictures.
Although I found this thread, I couldn't figure out how to remove two clips on top so I forced the backpanel and had to glue two plastic pieces back to it before pushing it back in place. Here are some pictures that might help in the future.
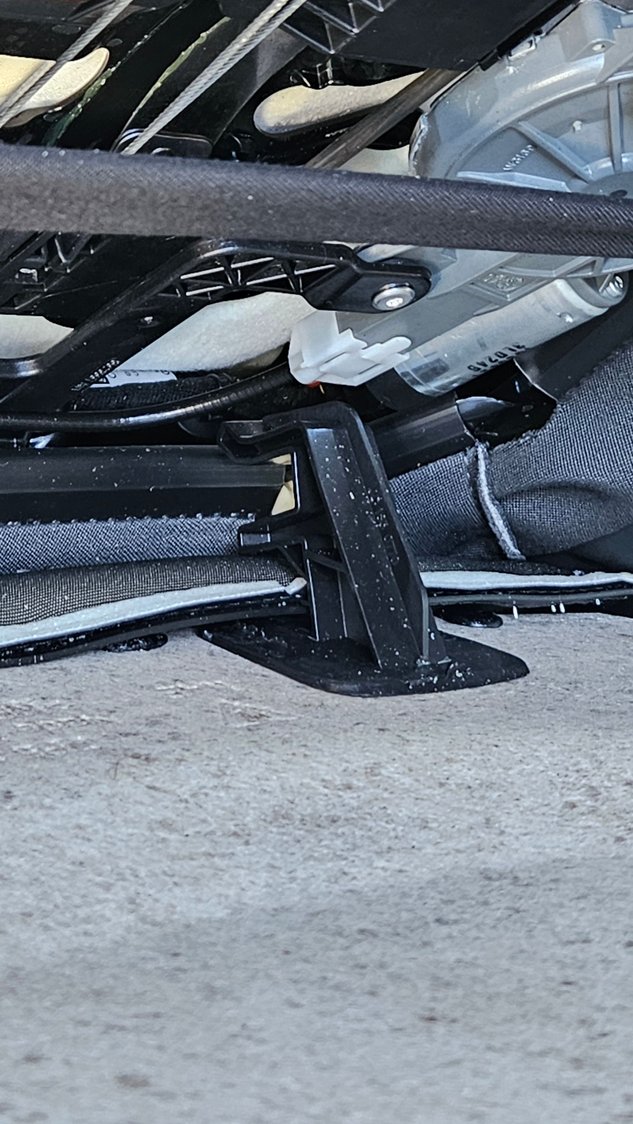
Just made an account to add my findings to this thread for anyone who finds this in the future. The lumbar in/out motor on my 958 was giving me issues and preventing the memory functions from working, so I decided I would take the risk and remove the seat back one way or another.
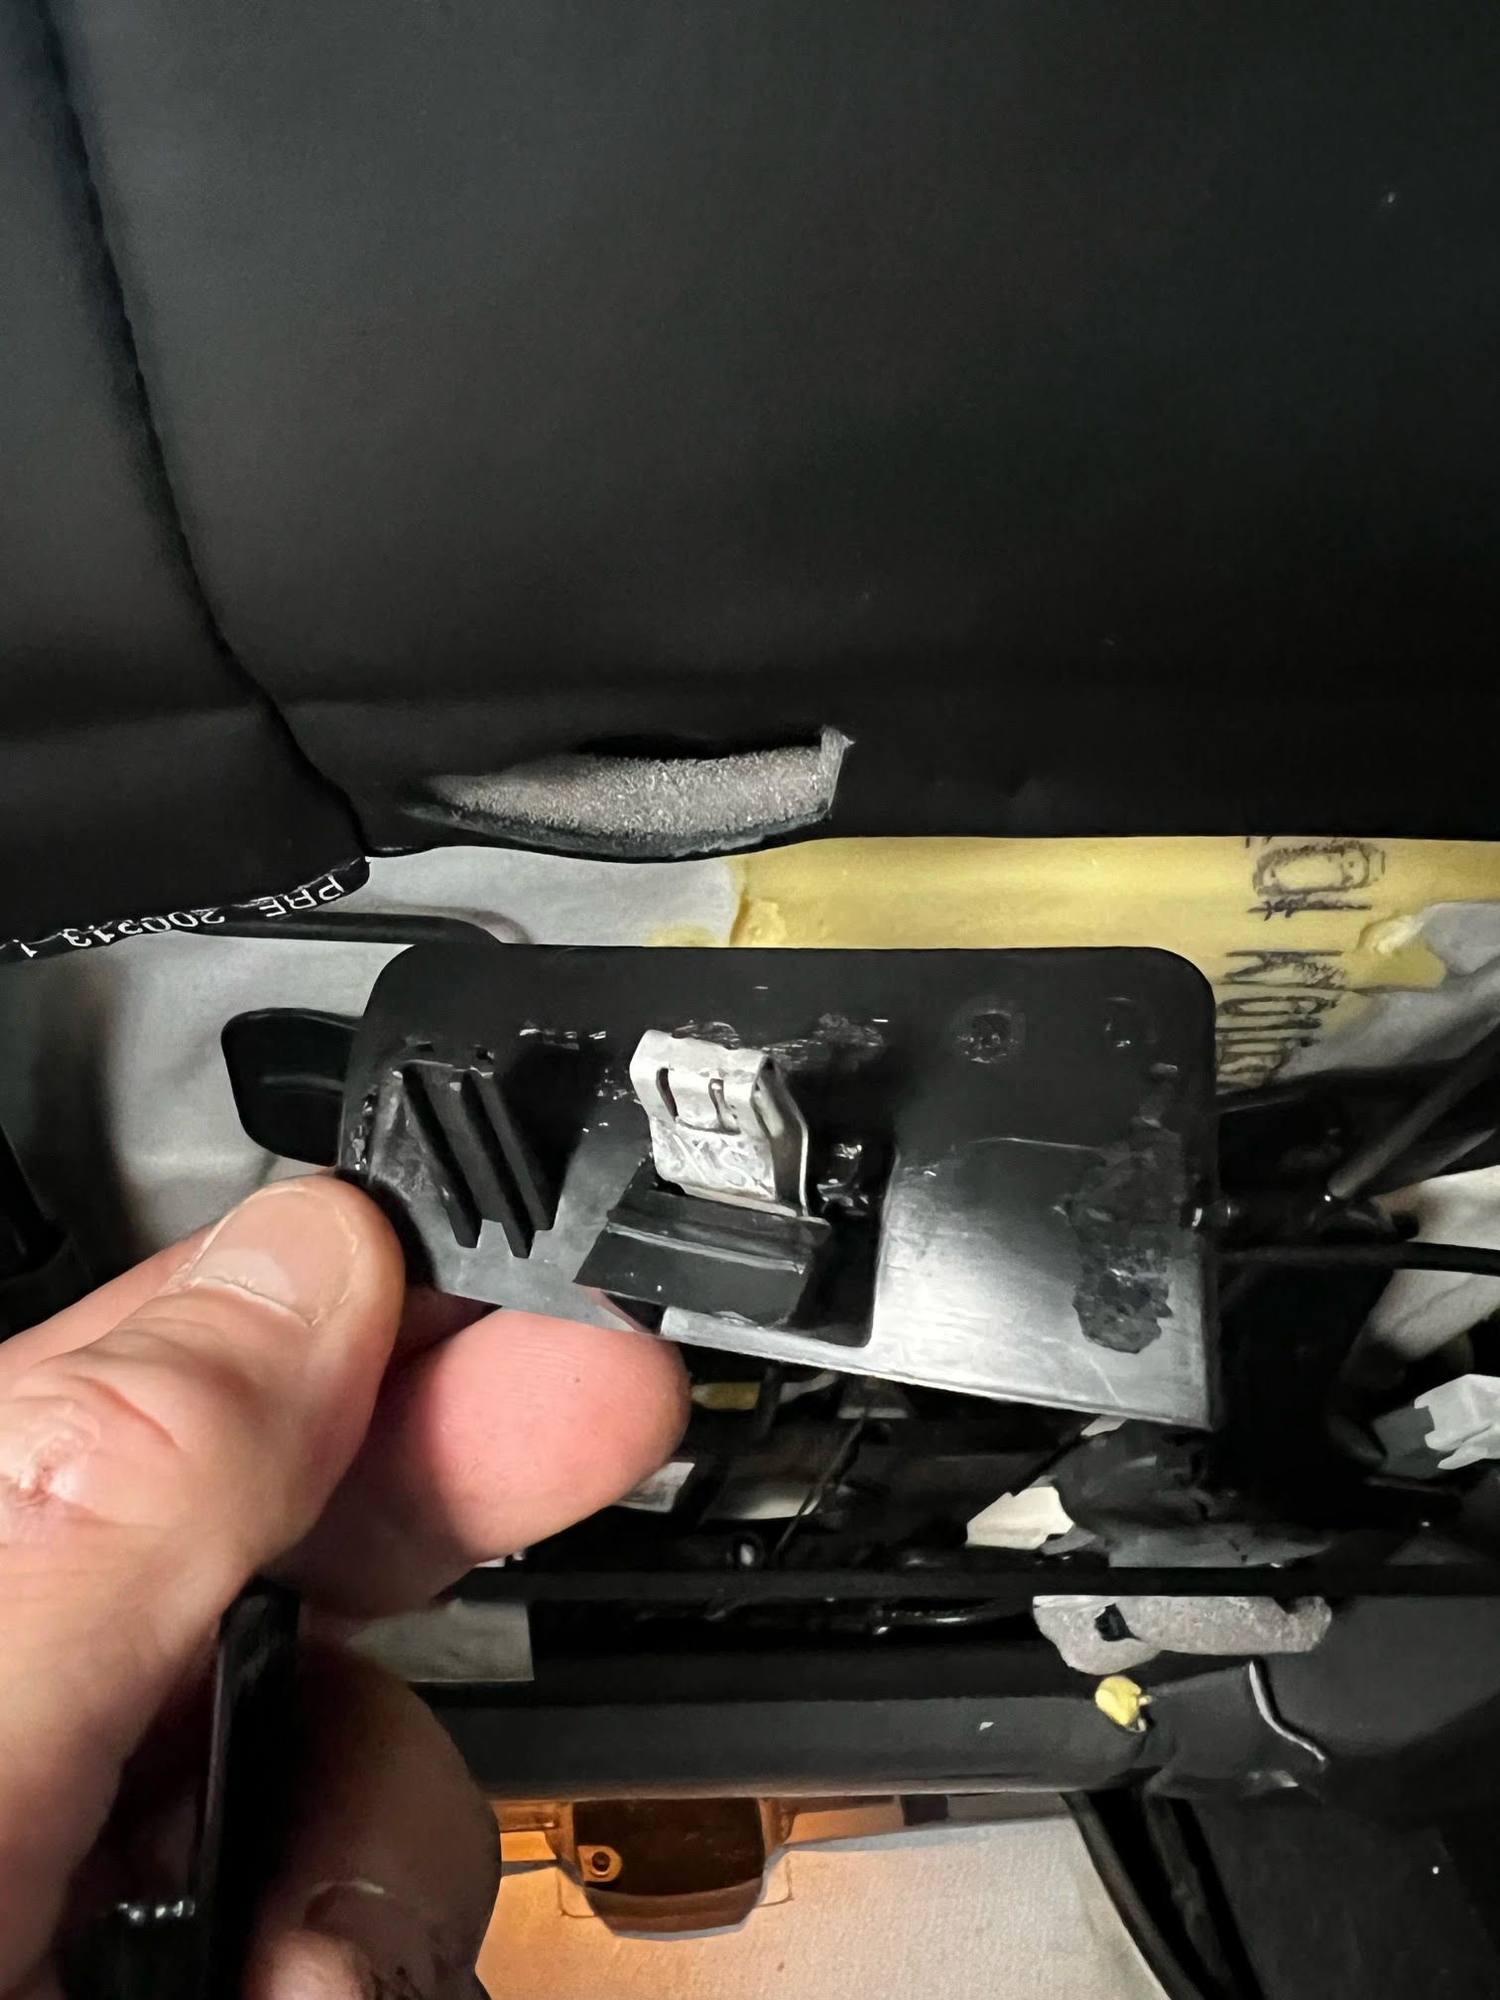
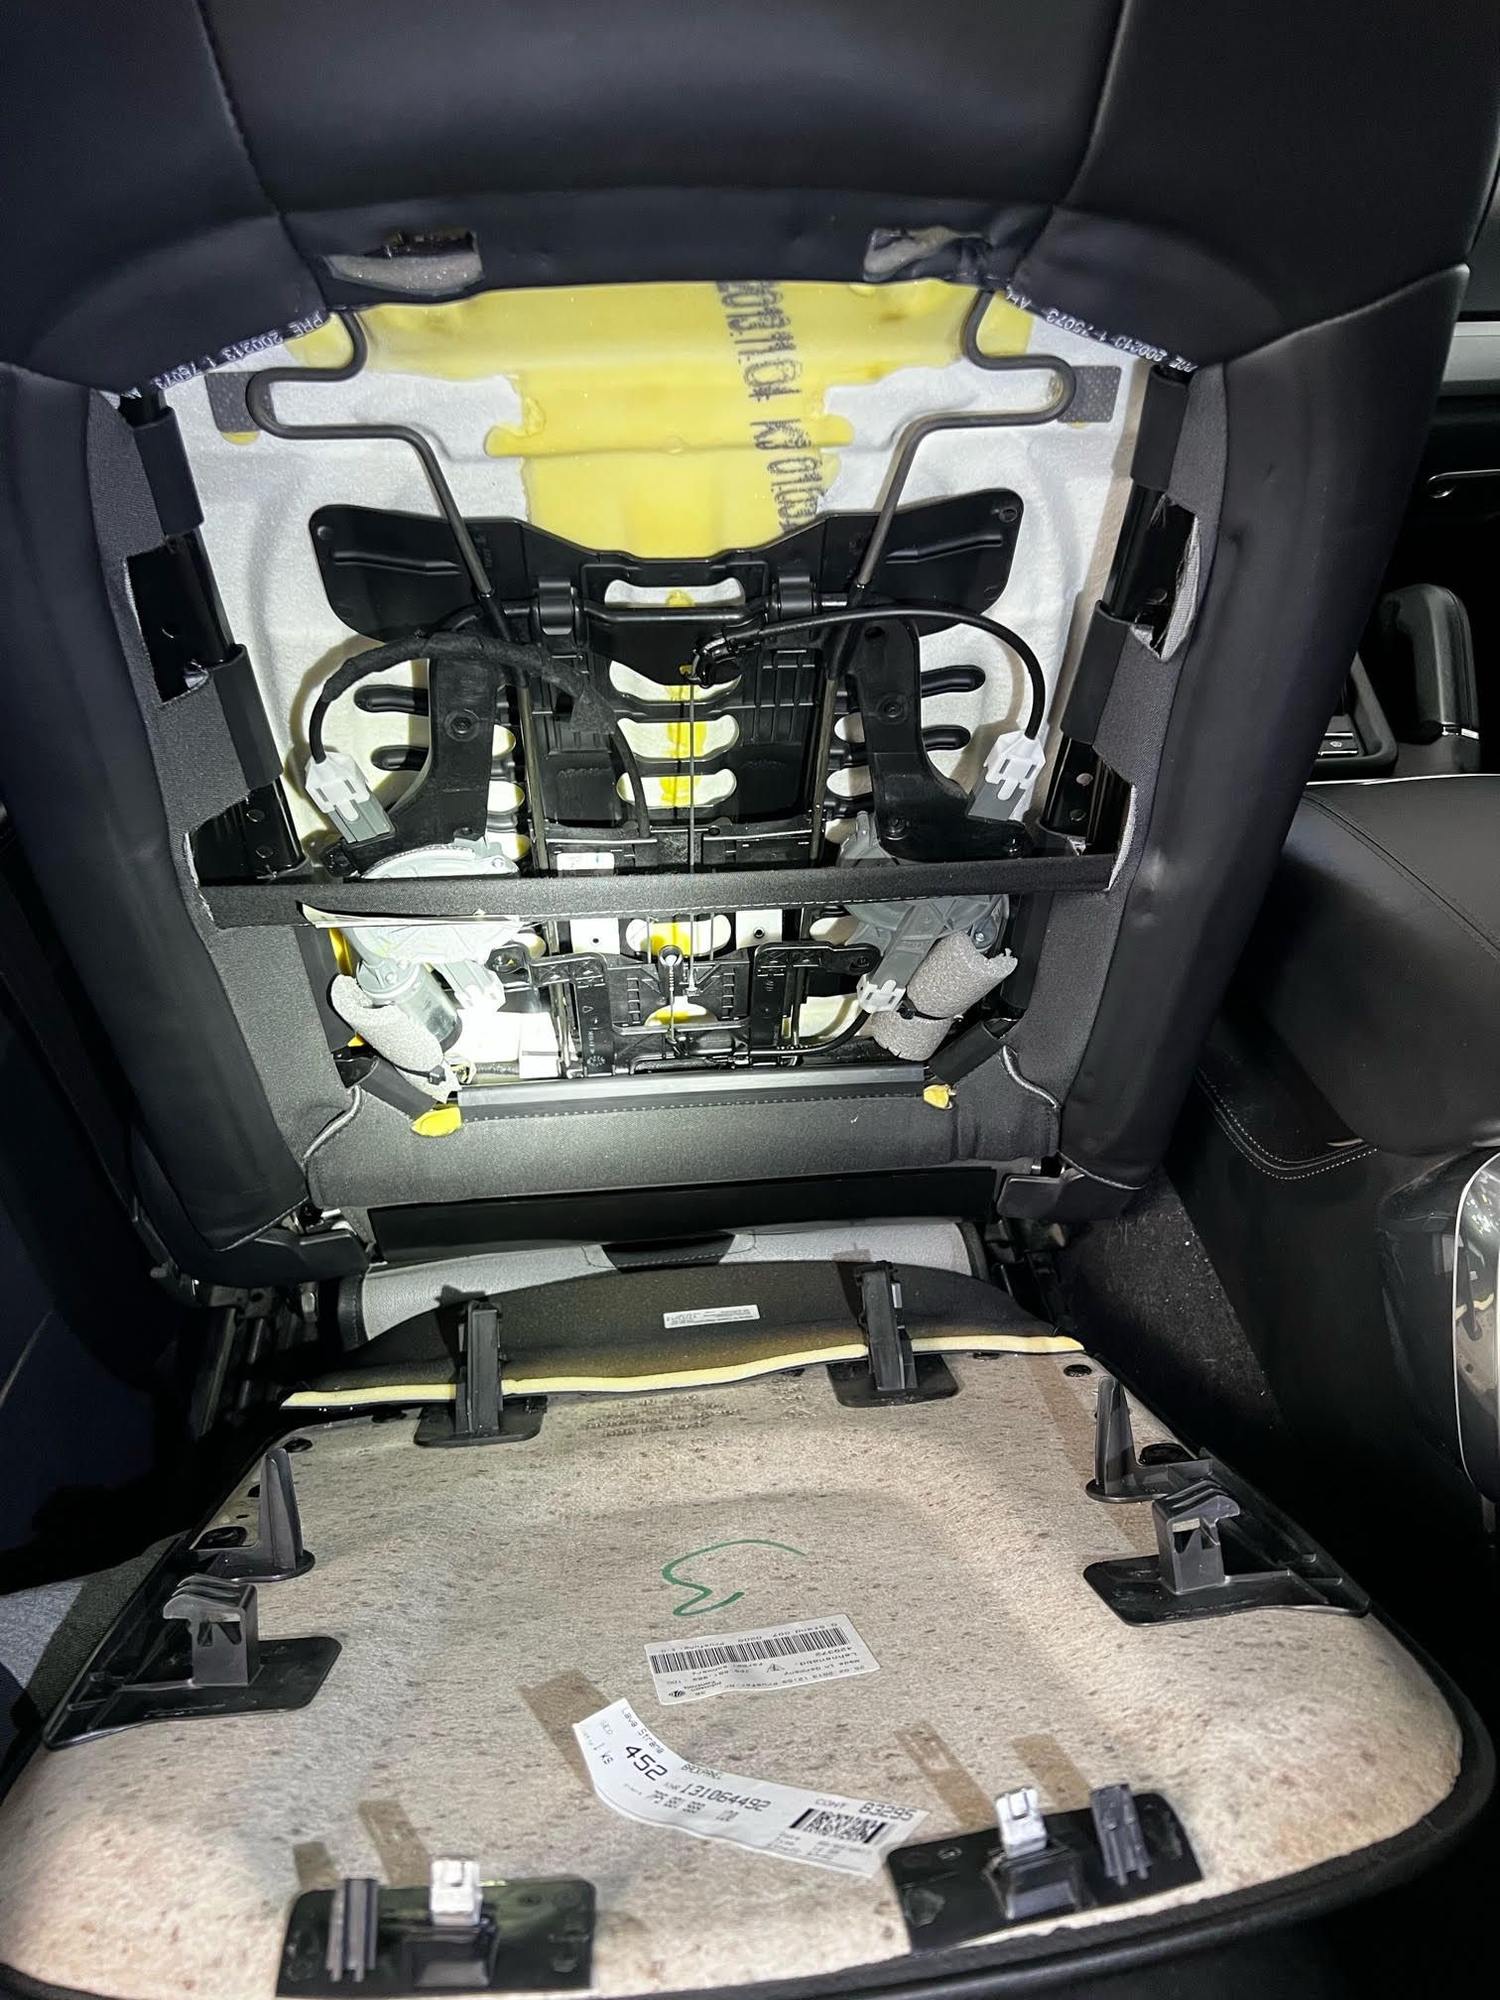
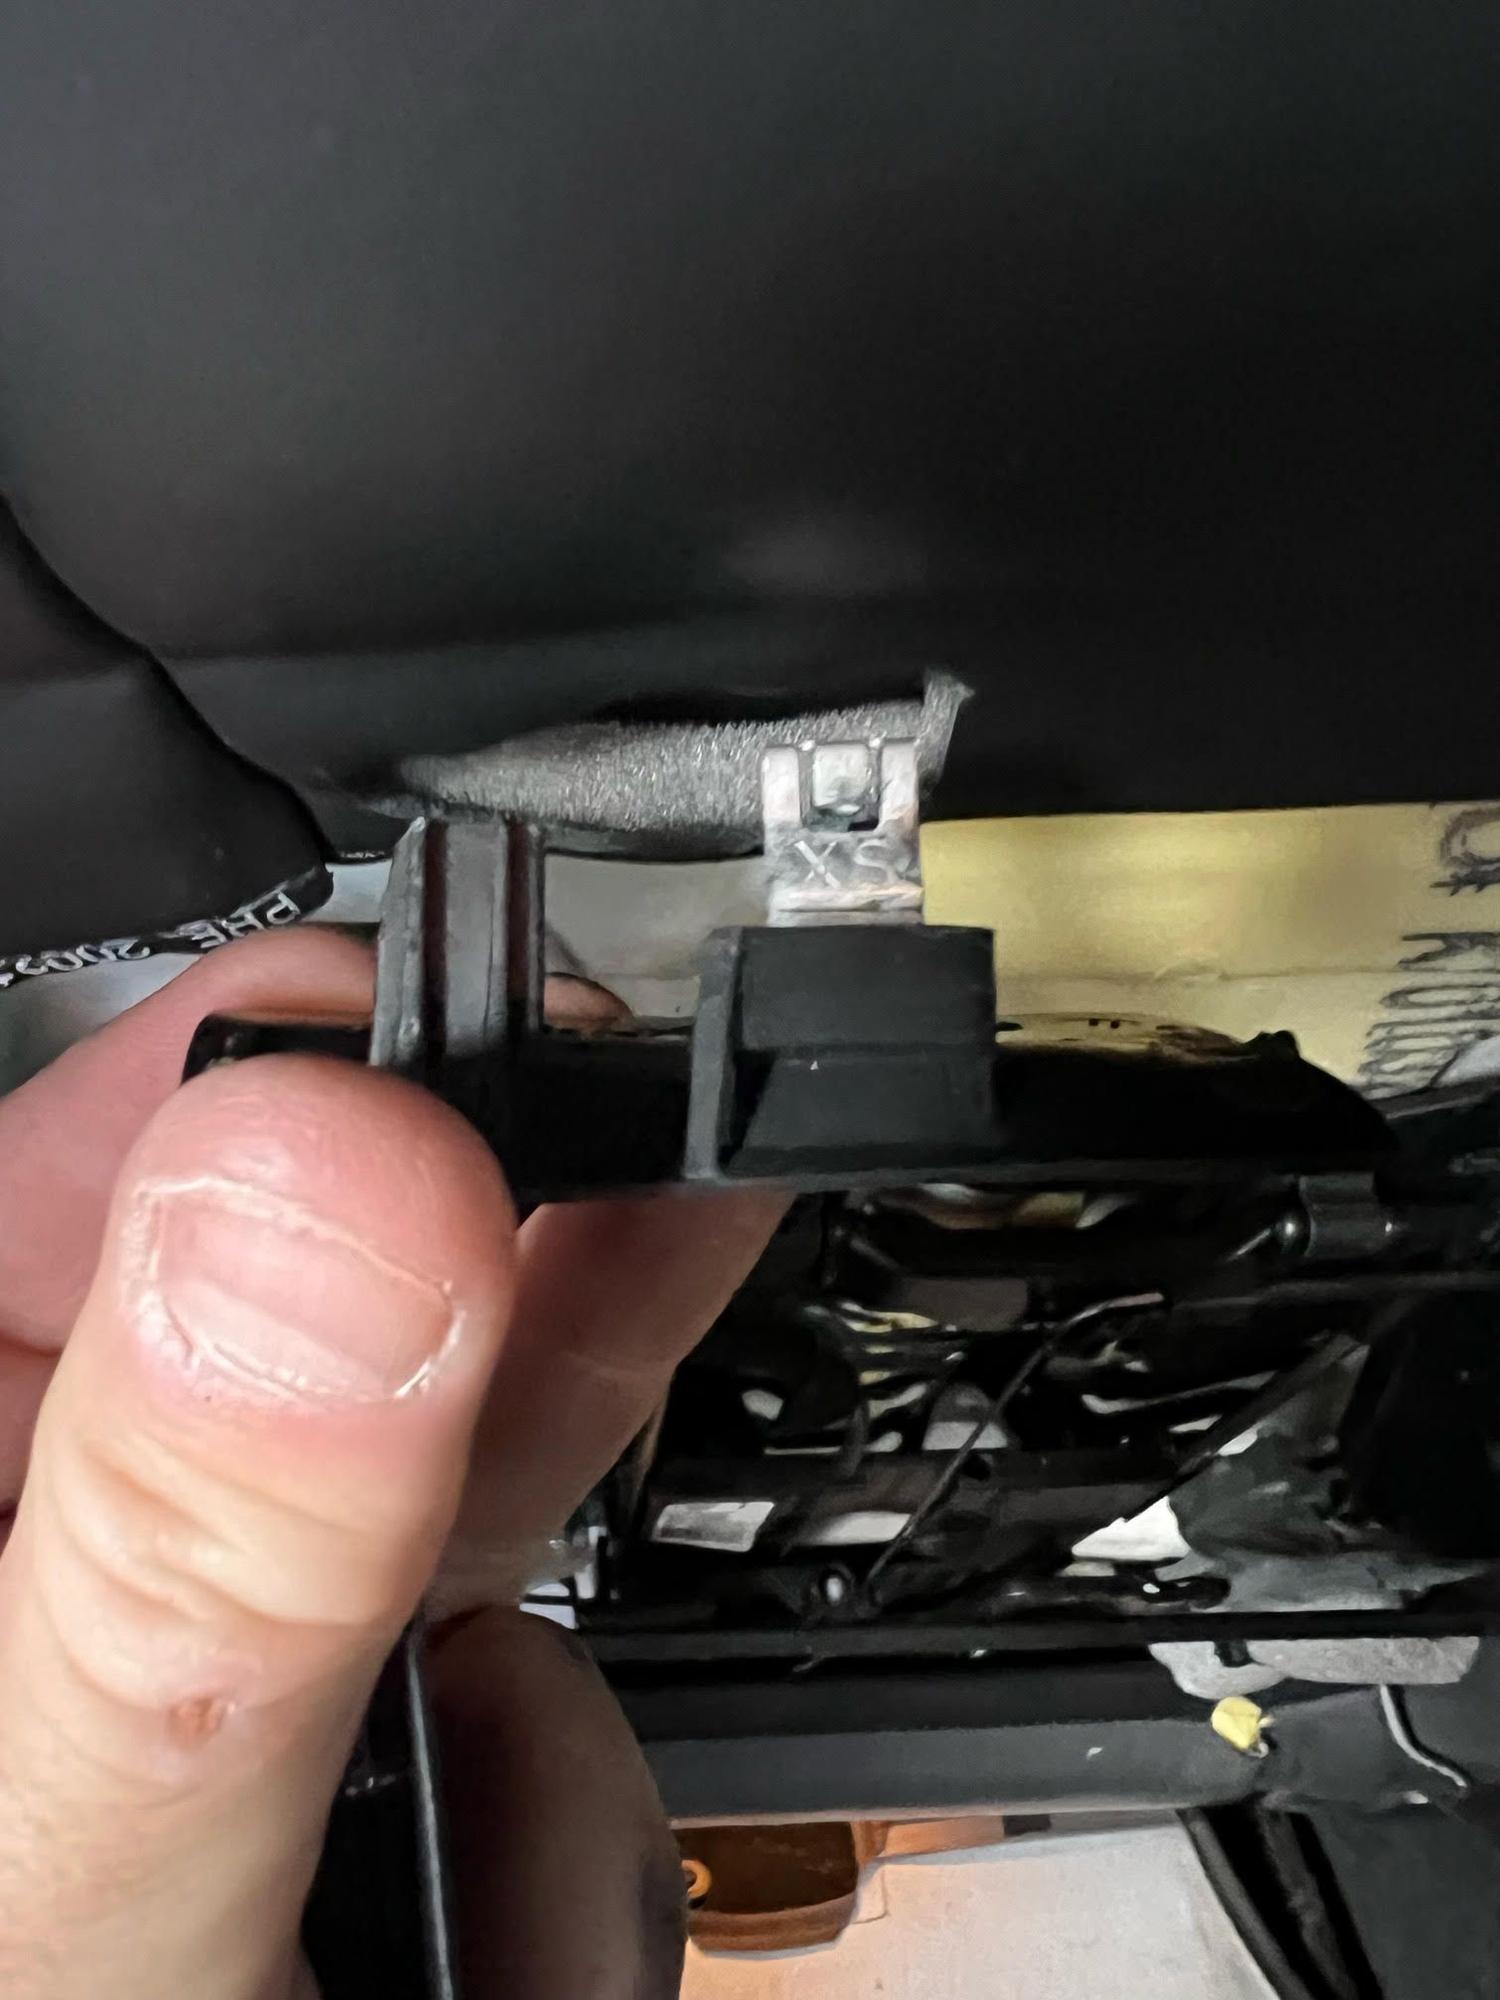
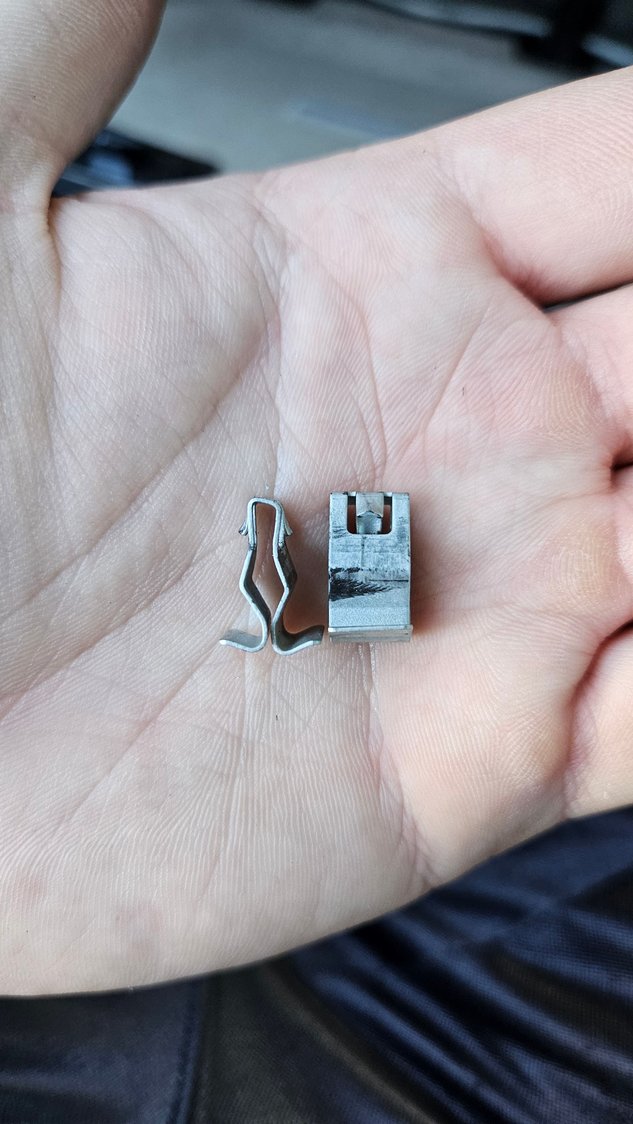
The 2 metal clips on the top of the seat back have 2 "stages" of being clipped in, the first is just like a normal push clip and the second is a hard stop that would damage them if you were to just pull on them. This can be seen in previous photos uploaded by @kenza . The first stage of popping them out only let's the seat back come away from the seat about 1/2" or so, once the seat back is pulled out of the first stage, you can slide the top of the seat back either left or right, while pushing the metal clip towards the center of the seat back. This will allow the clips to slide out of the top of the seat back one at a time. Repeat the sideways motion on the other clip in the opposite direction. After you slide the metal clips out of their holders on the top of the seat back, you can see inside of the seat fairly well and you will be able to see the 2 "L" shaped large plastic clips on the middle of each side. These can be removed by once again moving the seat back from left to right and gently pulling outward. Once the 2 side clips are released from the frame, the bottom 2 "hook" clips are released by just pulling the whole seat back upwards. There are also 2 elastic straps underneath the seat that hold the lower fabric onto the seat. Inside the 958 14-way adjustable seat. The inside of the seat back panel, you can see the 2 large "L" shaped clips on both sides in the middle, as well as the 2 large "hook" clips on the bottom. The 2 top metal clips, these are fairly maleable and can be bent back to the proper shaped with a screwdriver and pliers. The right top metal clip slides out of its holder to the left, opposite for the top left metal clip. Both of the top metal clips are attached to plastic that is glued to the seat back. I was careful to pry only on the plastic holder when popping the clips out of their first stage, so as to not rip the plastic from the seat back panel. The bottom "hook" shaped clips just hook around the lower part of the seat frame. The middle "L" shaped clips also just hook around the sides of the seat frame. These are the 2 areas that I pried on the plastic holders to pop the clips out of the first stage. You should be able to see the plastic holder easily if you pull the leather up and away with your fingers while sliding a screwdriver in. Here is the tip of the metal clip and the slot it goes into in the seat frame upon re-installation.
I apologize for some of the pictures as its a very tight space and difficult to photograph. I hope this post helps others at least understand how the seat back is attached to potentially find an easier way in the future.


 02-27-2021 | 02:31 PM