When you click on links to various merchants on this site and make a purchase, this can result in this site earning a commission. Affiliate programs and affiliations include, but are not limited to, the eBay Partner Network.
958 Cayenne Alcantara Headliner DIY-Removal, New Material, and Reinstall with Photos
Hi folks. I am a Mercedes guy, but I do headliners in the Atlanta area and someone with a 958 Cayenne reached out to me to redo his. I figured I would write up the whole process here, since I haven't found much online with regards to the 958.
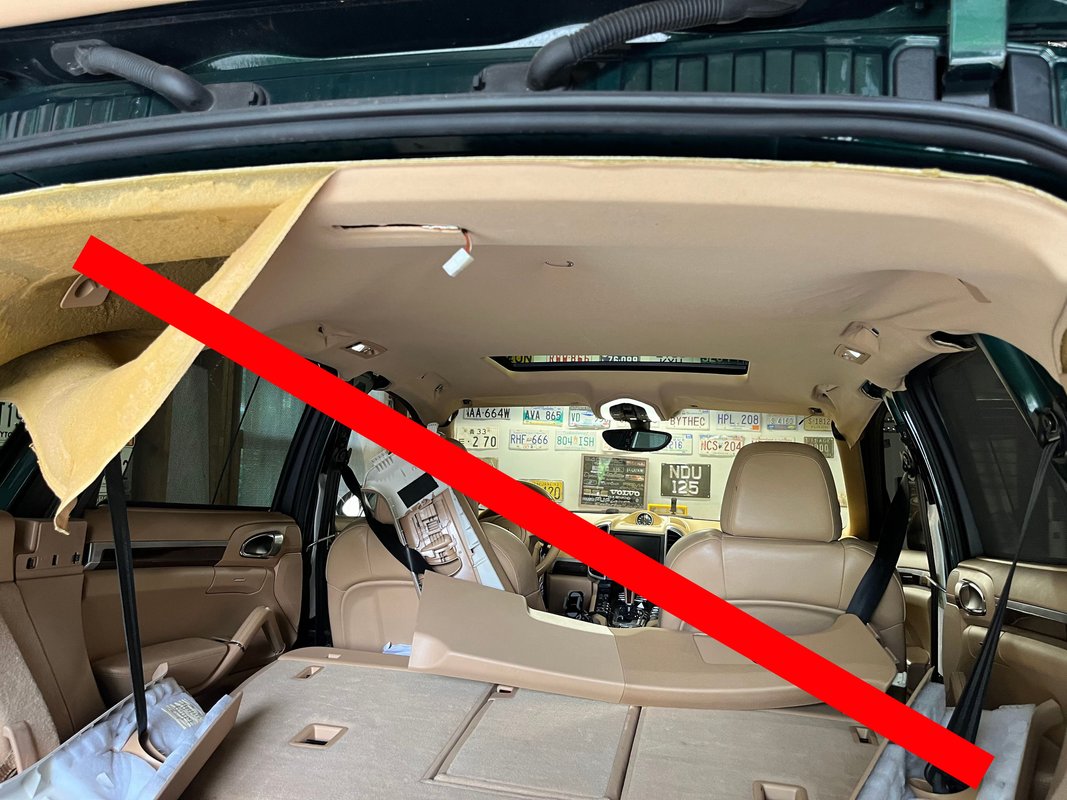
Anyway, in hot humid climates it's typical for headliners to start sagging anywhere in the 10+ year mark. To properly fix it, you need to remove the headliner, clean off the old material, and glue new material in place. This is a labor-intensive but inexpensive DIY prospect. It's also not for the fainthearted, since there's several places things can go wrong.
Tools needed:
-T30 Torx driver
-Metal pick or small flathead screwdriver
-Trim removal tool (plastic or metal, but metal is the way to go here.
-Fresh razorblades
-Fabric scissors or at least very sharp scissors
Materials needed:
-2-3 cans of 3M Headliner Adhesive or Permatex (you could also try 3M Super 90, though I have not seen how it holds up over time)
-3 yards of foam-backed headliner material (you can find this online or at a local upholstery supplier, price ranges from $15-25 a yard)
Part I: Interior Disassembly and Removal of Headliner:
1. Before you start disassembling, fold down the rear seats and move the front seat headrests down all the way. You want to maximize the amount of clearance you have when you pull the headliner out.
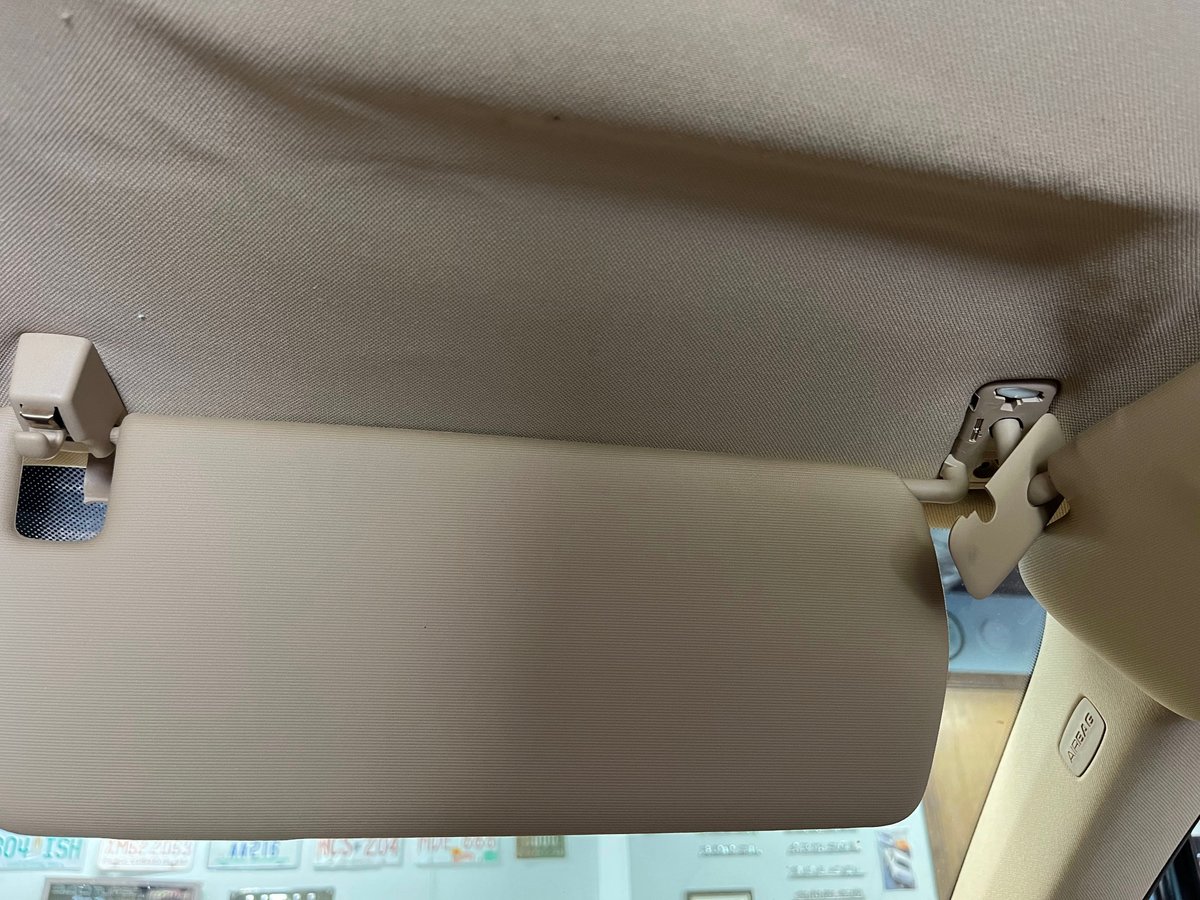
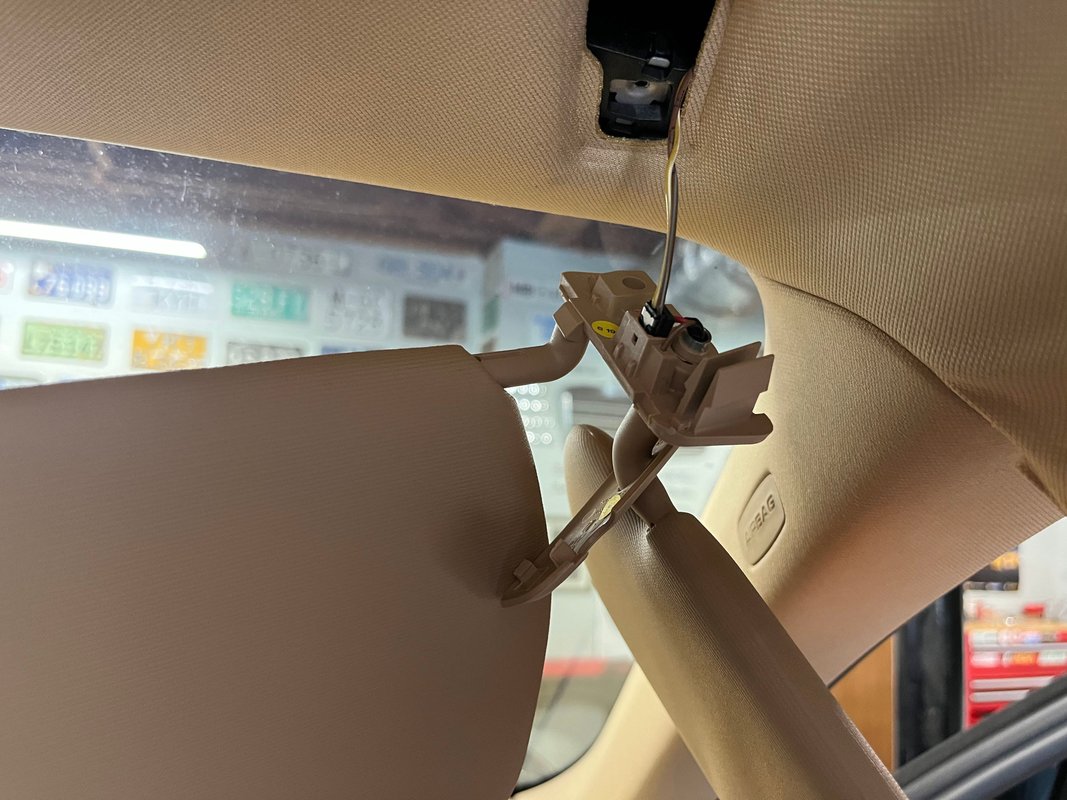
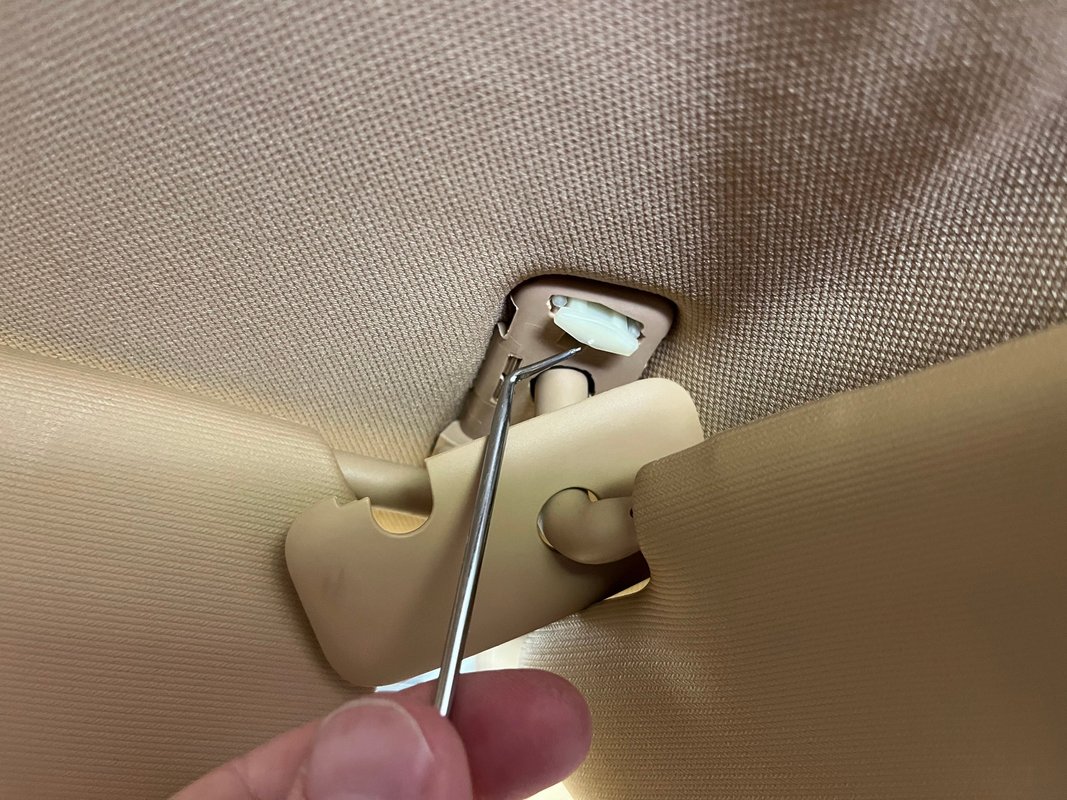
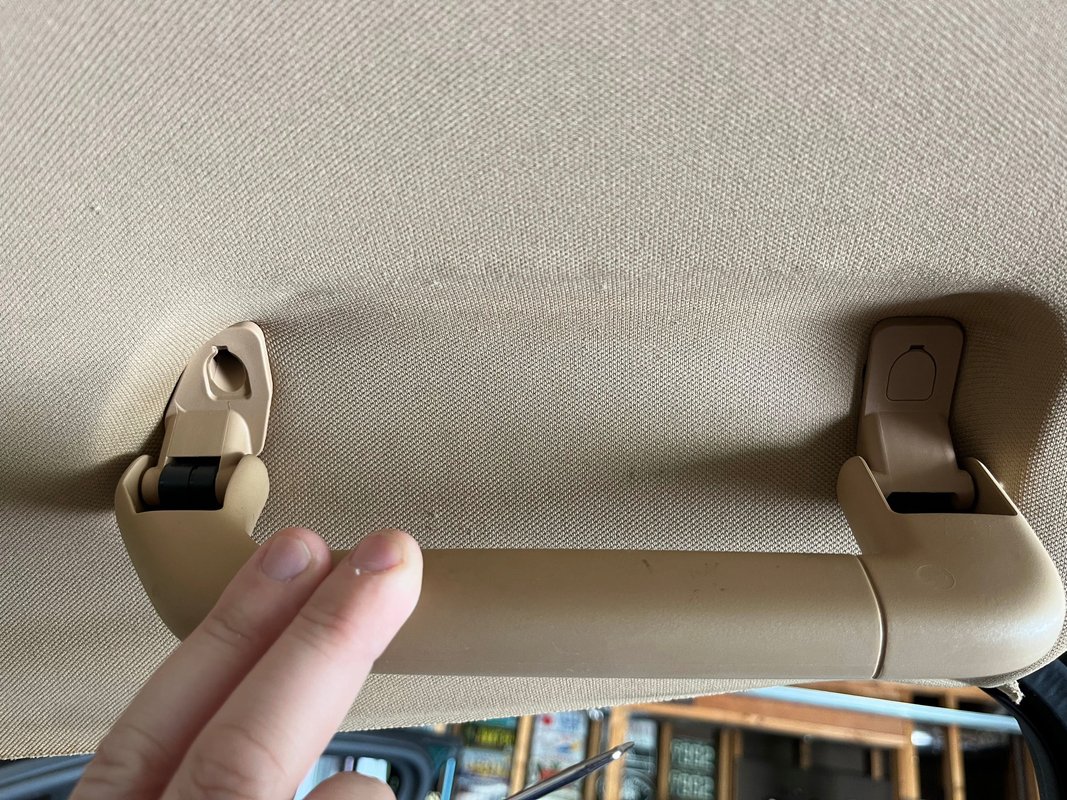
2. Starting at the front, remove the sunvisors. You'll do this by using the pick or small screwdriver to carefully pry the plastic covers off of the posts, revealing T30 Torx screws. There is also a white plastic retainer on the outside post you will need to remove. Once you have unscrewed both sides of the visor, pull it out and undo the electrical connector.
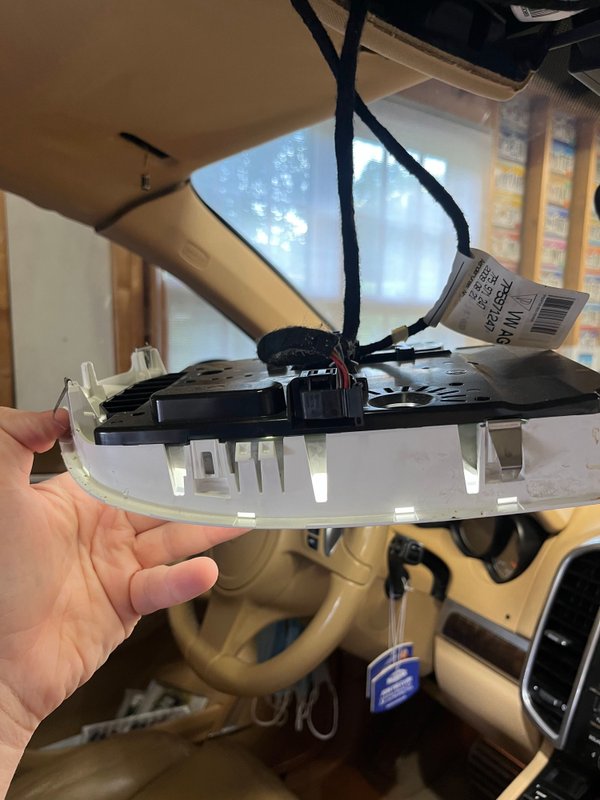
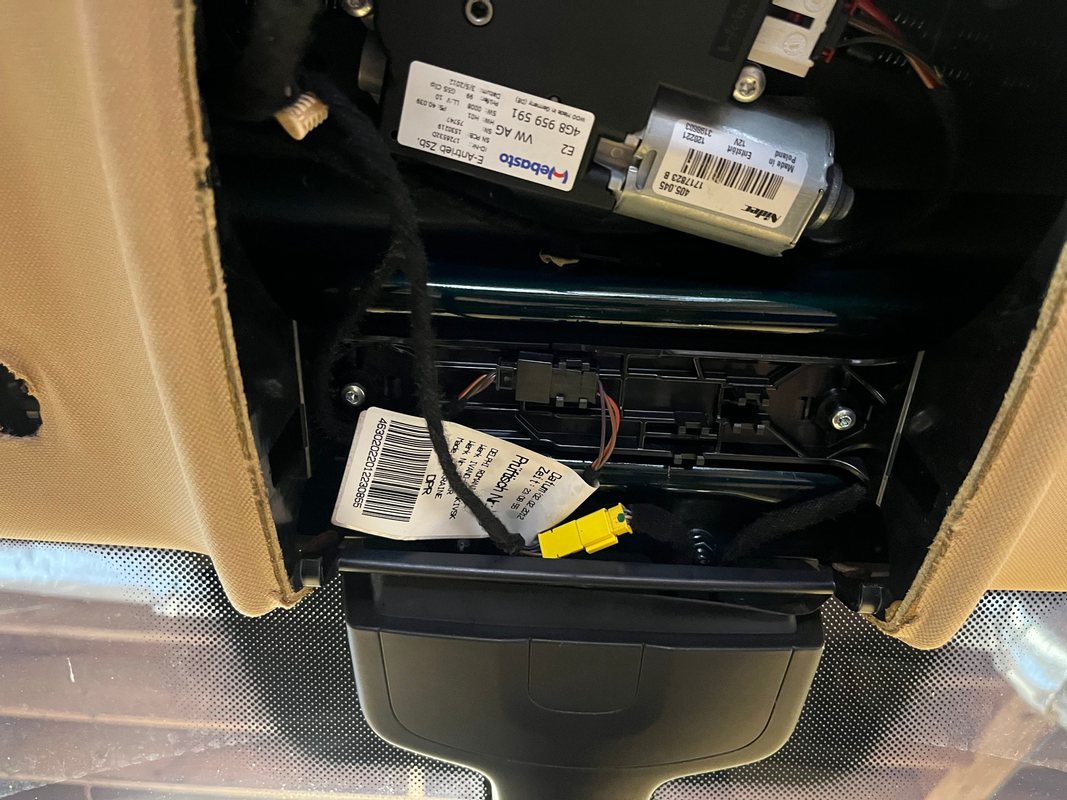
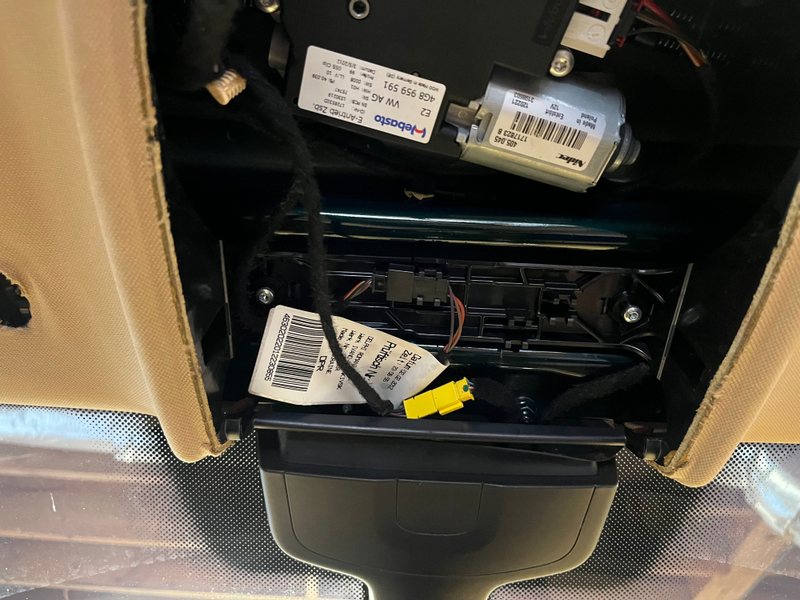
3. Remove the dome light assembly. Start by carefully prying the plastic trim ring on the windshield side. It is attached by small tabs all the way around the light. After this, choose one side of the assembly to stick the larger pry tool between it and the headliner, pushing away from you, and also gently pulling the assembly down. It is held by metal prongs at the front and rear. Once you get one side loose, move to the other side and it should pop out with some more coaxing. Disconnect the wiring going to it and the two wires connected to the mirror.
4. Underneath where the dome light assembly was, there are two silver T30 screws holding the headliner in place. Undo those as well.
5. If you are only redoing the headliner, you don't need to remove the A-pillar trim pieces all the way. Use the larger trim tool at the top of the piece and pry to the inside. It should pop out enough to let you remove the headliner from the front. (Sorry, I forgot to take photos of this step)
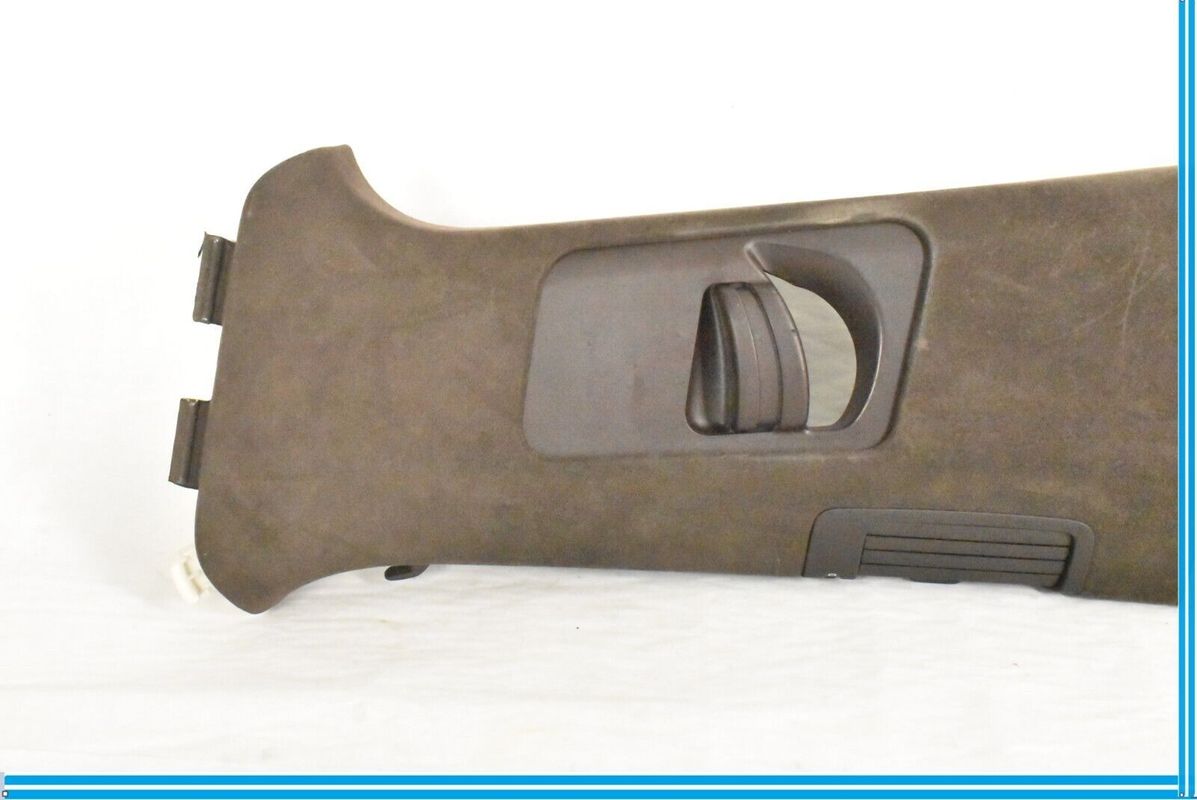
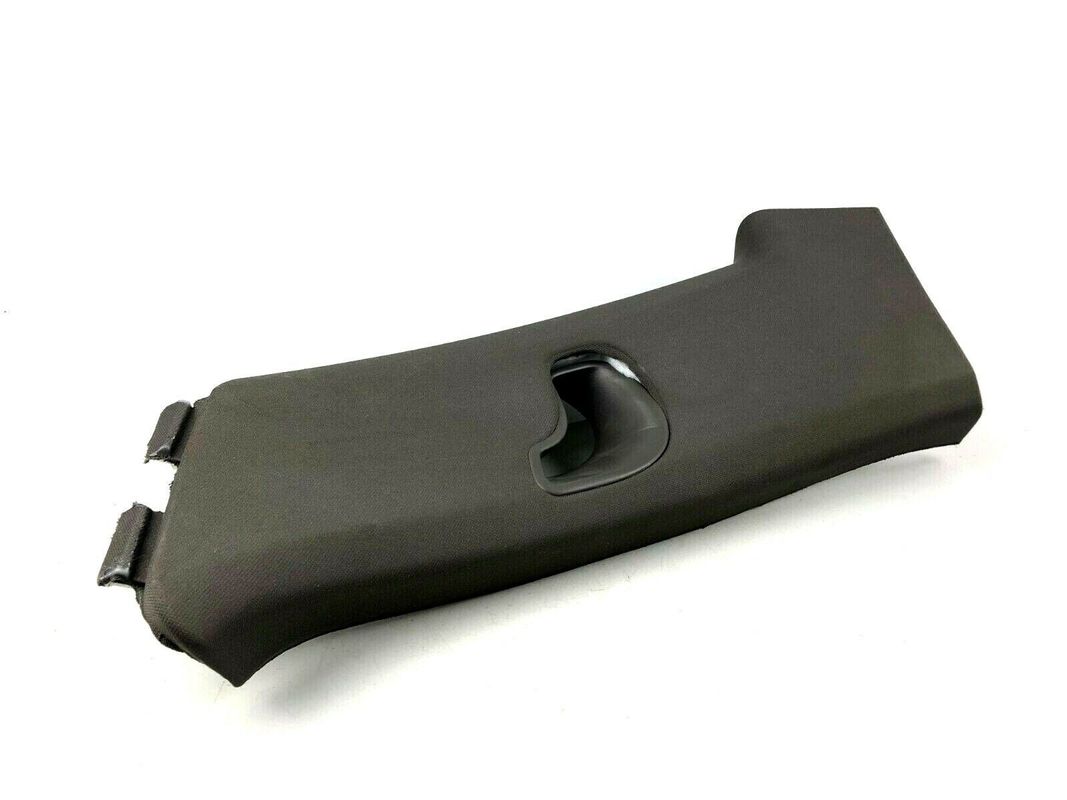
6. Remove the interior grab handles by popping off the plastic screw covers, then removing the T30 screws holding them in place.
7. The B-pillar trim has three tabs at the top that hook behind the headliner, metal tabs that hold it in the middle, and more metal tabs holding it at the bottom. Starting at the bottom, carefully pop out the tabs with the trim tool. Once they are all loose, pull towards the center of the car to release the other metal tabs. Then pull down on the whole piece to remove it. You can leave the seatbelt attached and lay it to the side.
8. C-pillar trims are held in place similarly. I also started at the bottom of these to pop the tabs out and pulled down to remove. They do not have the metal clips in the center like the B-pillars.
8. The D-pillar trim is also held in place with plastic tabs molded into the piece, and those go into metal tabs on the lower plastic piece. But you only need to remove the upper part. Again, pry starting from the bottom to pop these out of place. They are tethered to the body of the car with orange straps. No need to try and remove those.
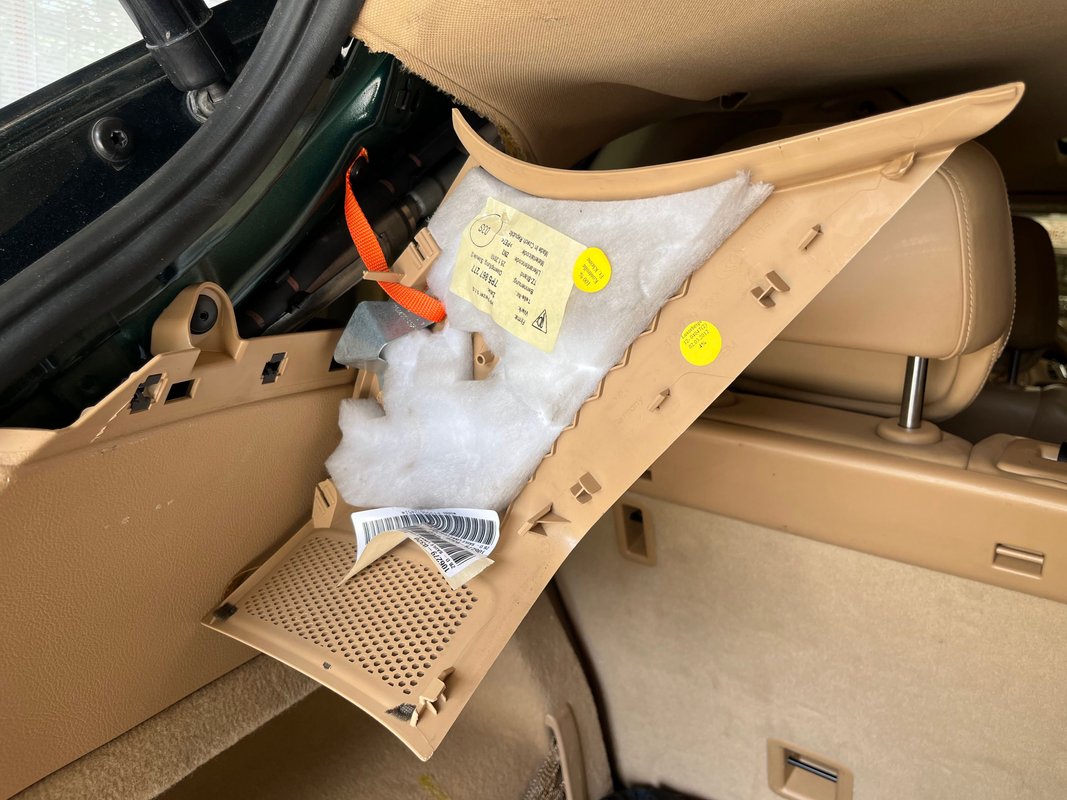
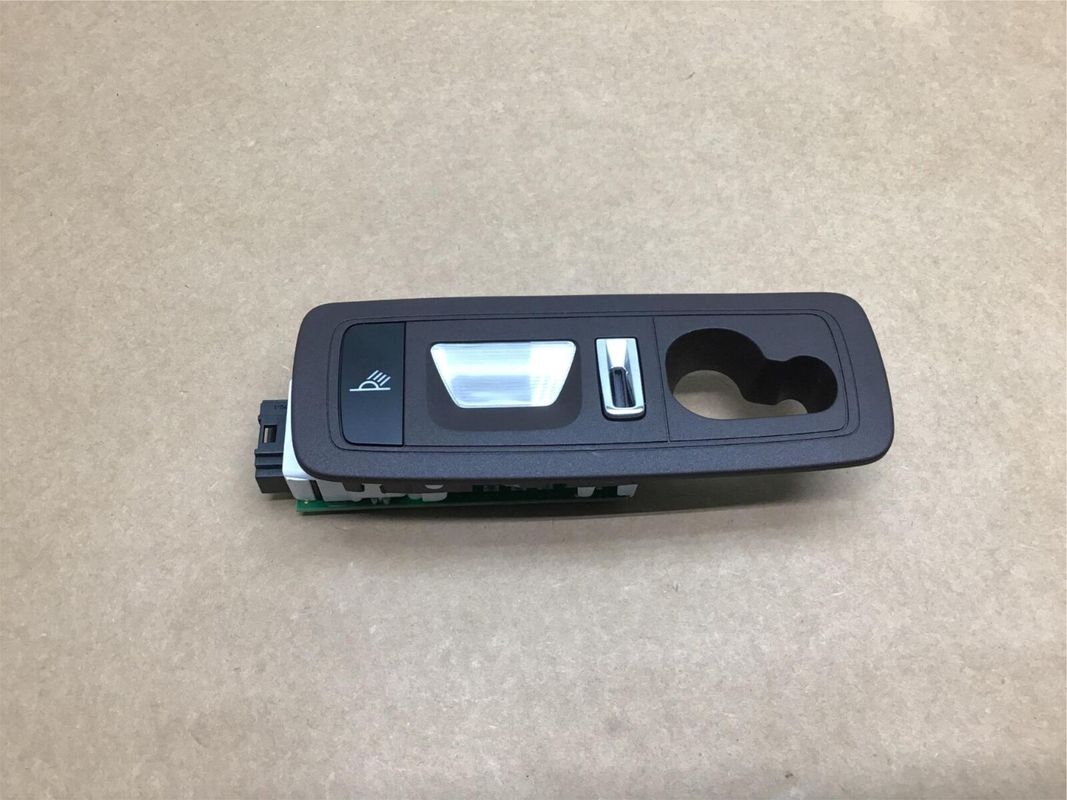
9. The rear seat vanity lights are held in by metal tabs around the corners. Push in on the bottom edge between the light assembly and the headliner to start releasing the tabs. Once the whole piece is loose, undo the connector and put the lights to the side.
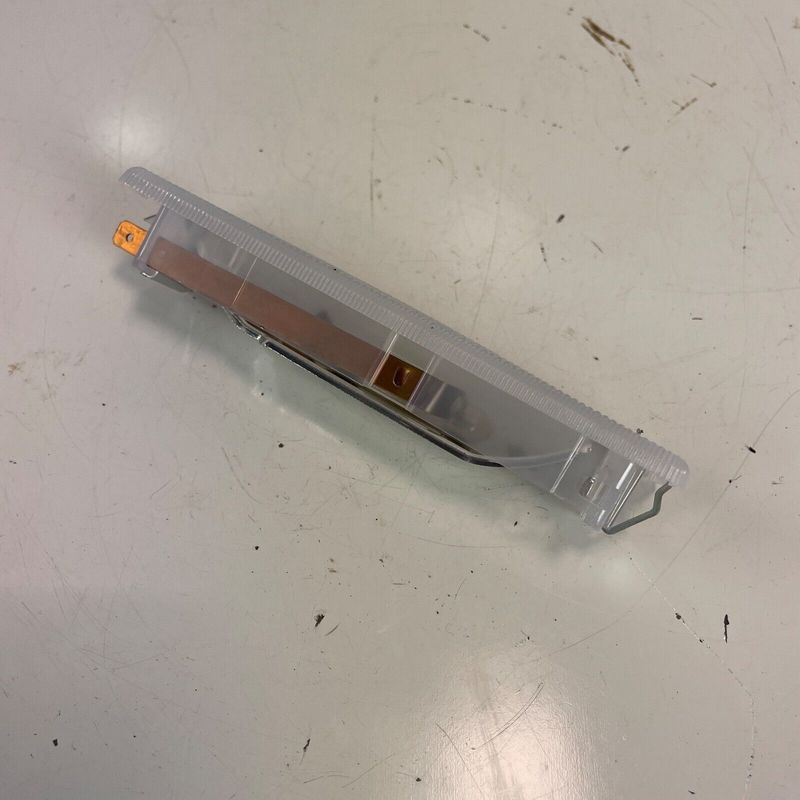
10. Remove the rear dome light by pushing in between the light and the headliner to pop it out, and undo that connector as well.
11. Now the headliner is nearly ready to remove. It is held in place in the rear of the car by a plastic tab and three small pieces of velcro. These will probably come off and can be reglued to the board after recovering the headliner. Pop the rear of the headliner out of place and move to the sunroof area.
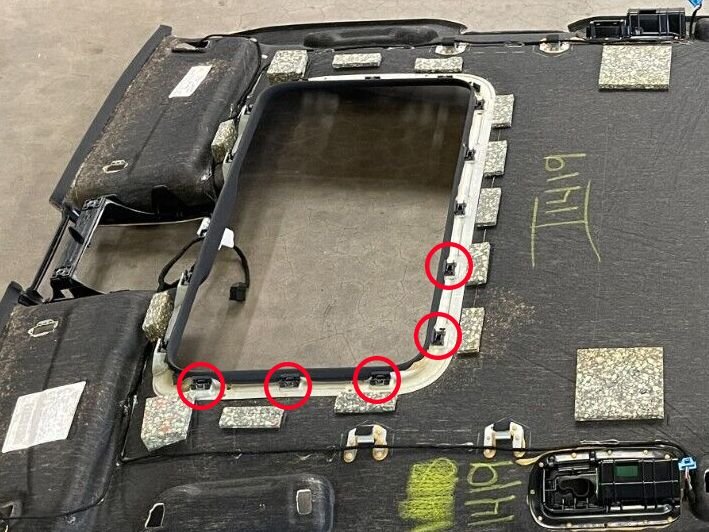
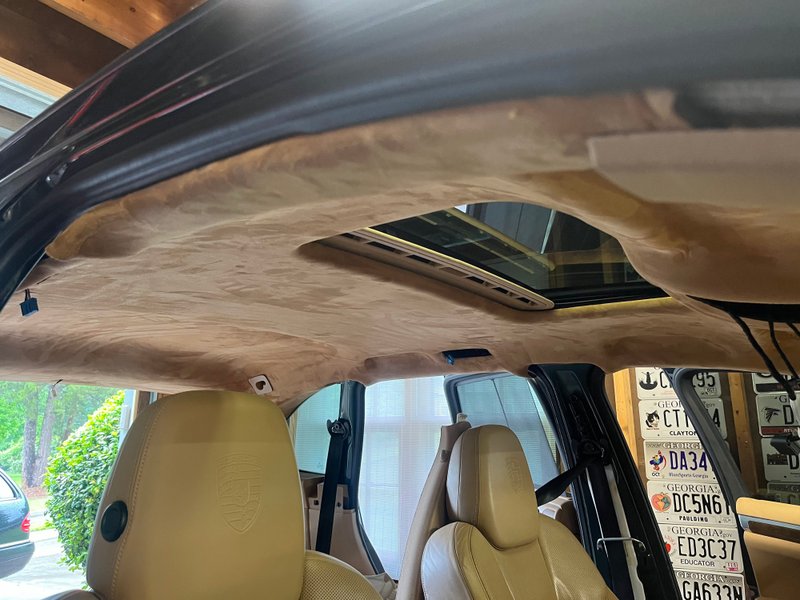
12. The headliner is held to a metal ring around the sunroof with a series of metal clips. These were in place pretty solidly, so it might take some effort to get the first one unclipped. You can use the larger trim tool to pry between the headliner and the metal part of the sunroof, careful not to bend it.
13. Now that the headliner is completely loose, you can pull it out the back of the car. You'll need to angle it sideways a bit for it to fit out the back and you will need to bend the front slightly. Watch for the corners as they will snag on the loose trim and seatbelts on the way out. It's good to have a second person to help with this part. With the headliner out of the car, you can move to the next stage in the process.
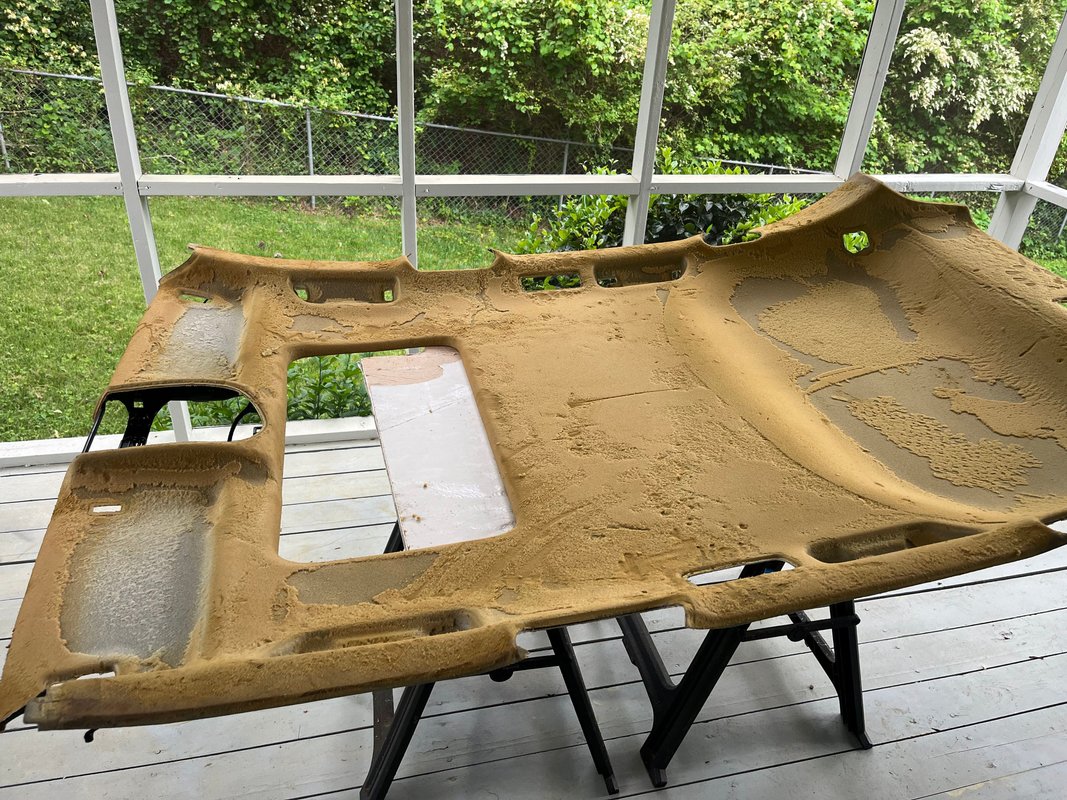
Now that you have the board out of the car, it's time to prepare it for new material. I have found that a good way to do this is with a small wire brush on a cordless drill. You could also use a large stiff bristle brush.
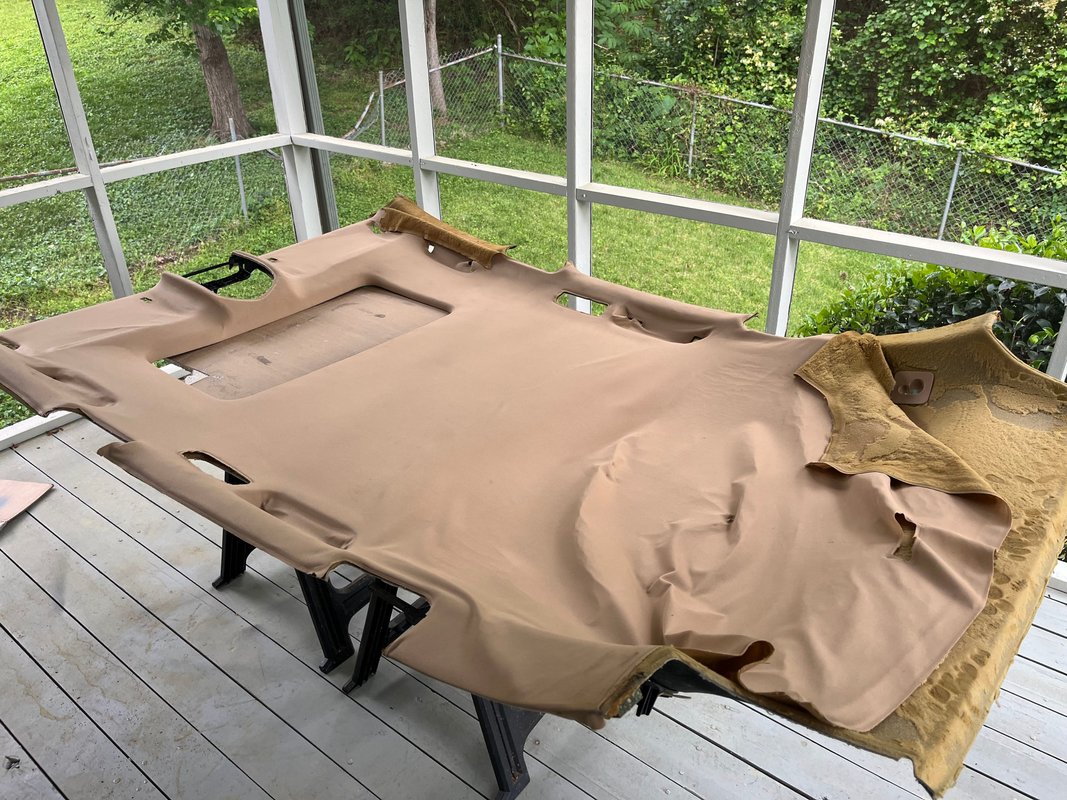
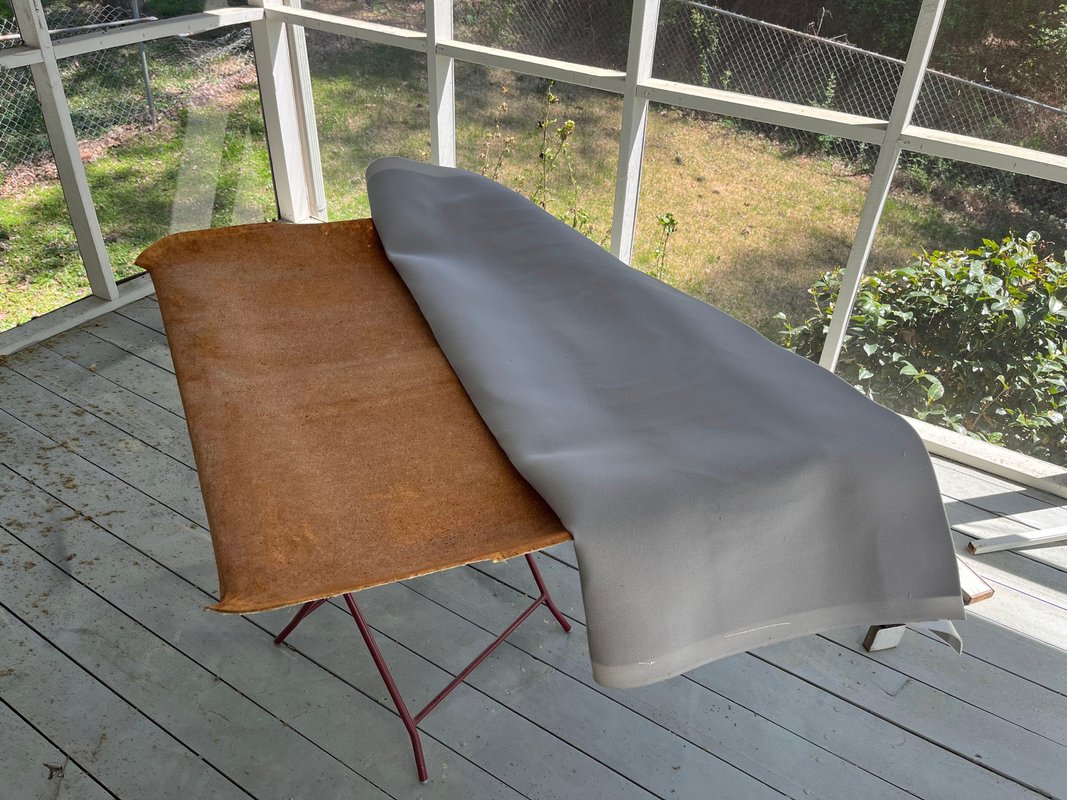
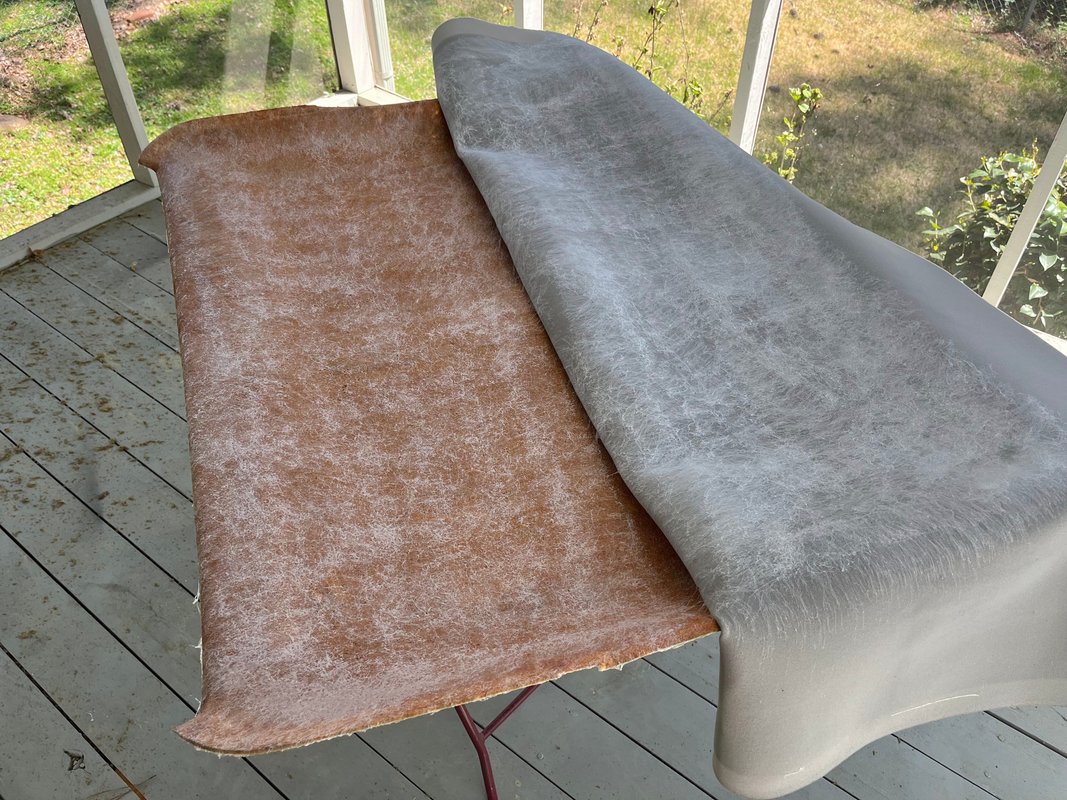
1. First, pull the old fabric off of the board. This should be easy if the fabric was sagging, since the foam underneath disintegrates and the glue loses its hold.
2. Now, use the drill to remove all of the old foam. Remember to flip the board over and get the foam around the edges. Once you are done with that, it is time to lay out the new material.
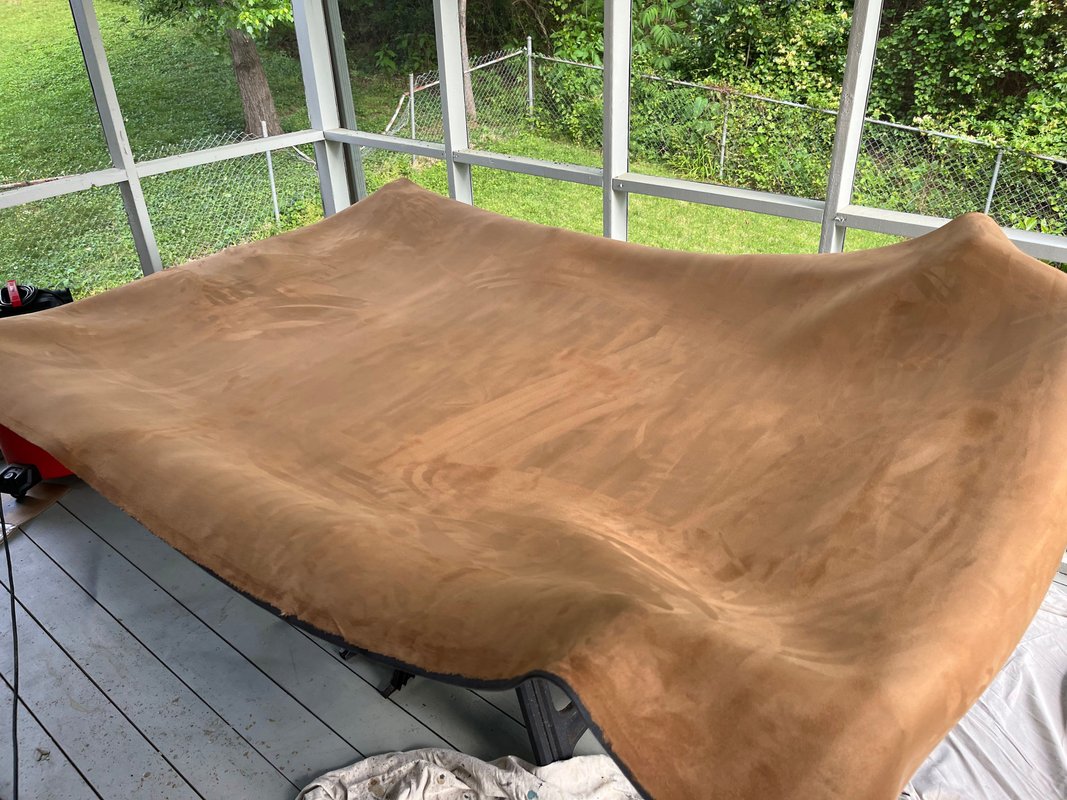
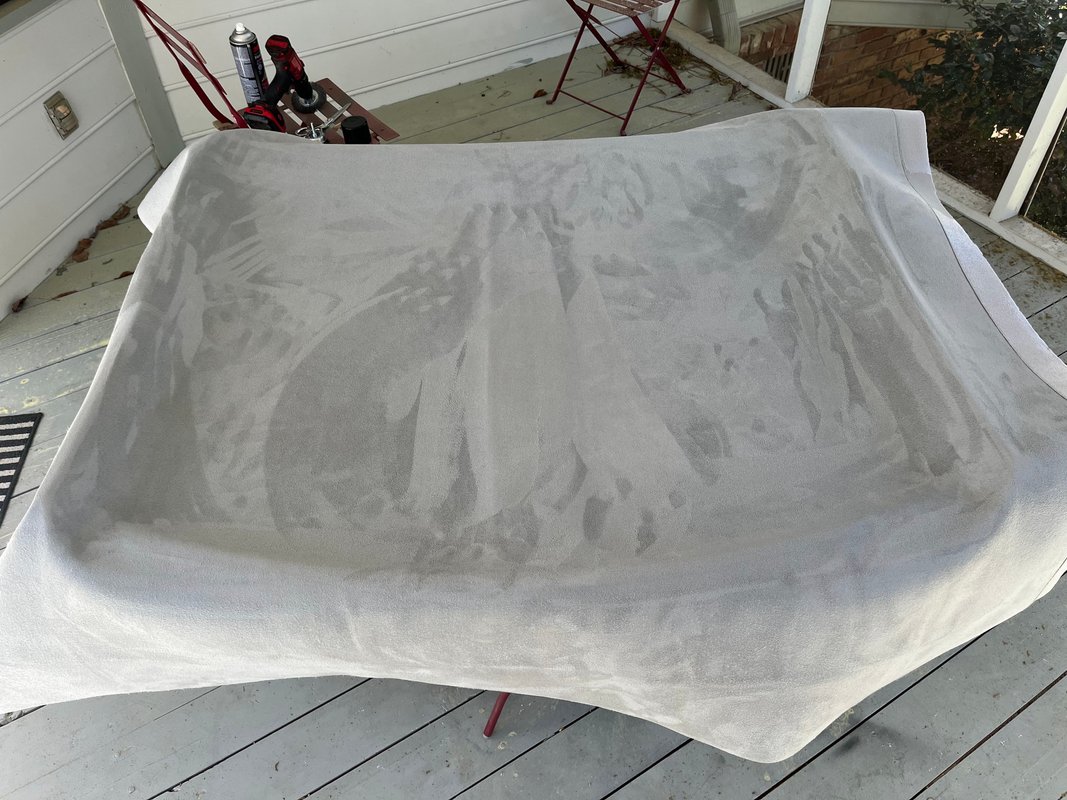
3. Here comes the fun part. Gluing the new material is a one and done thing. The best approach is to fold the material over about halfway down. Spray adhesive both on the back side of the material, and on the headliner board. You'll then need to wait a couple minutes for the material to become tacky. For this particular car, I started with the back section and did not glue the flat parts on the edges yet (since the glue will want to bond there too). Use your hands to smooth out the material going for the larger flatter areas first, then contouring into the curved parts. I do the handle recesses last, and unless your material is super stretchy, it probably won't go down in there all the way. (I'll add the photos from a previous job below to show you the process)
4. Once the material is all glued down, you can move on to the detail work of cutting out the recesses including the sunroof area. The sunroof is the toughest part to get right, but I have found that a method like pictured below (again, different car/job) where you cut long, skinny strips of fabric to stretch and anchor the corners, works pretty well.
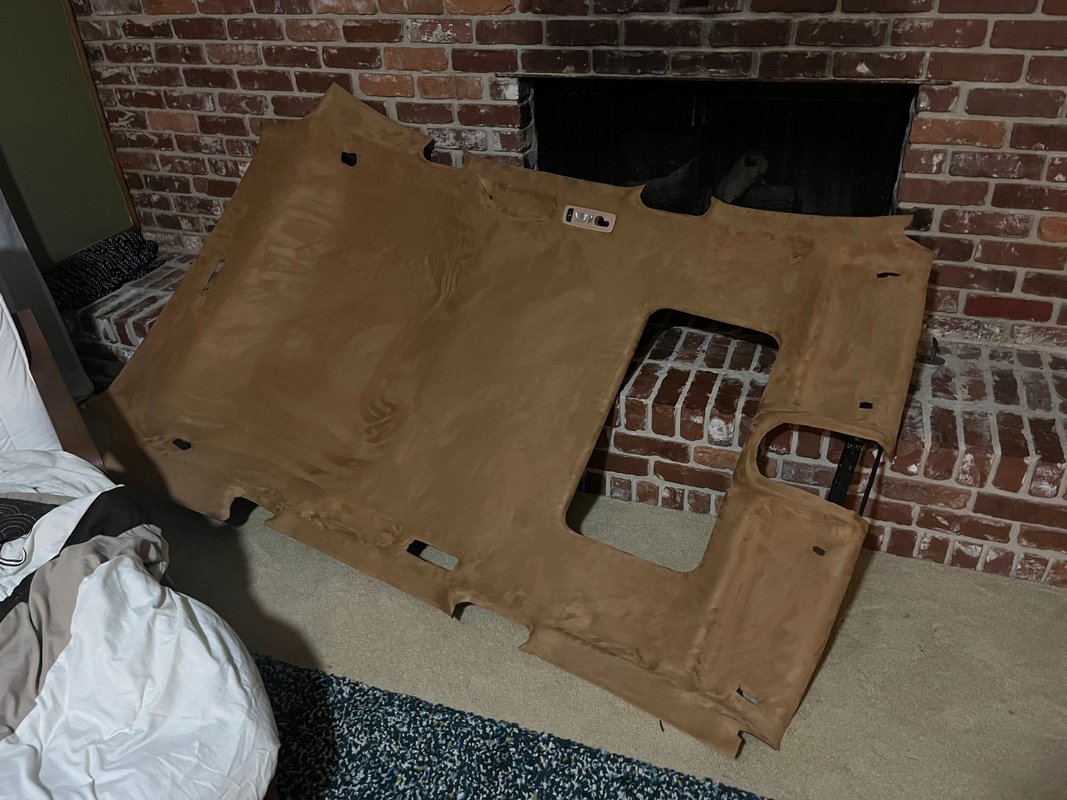
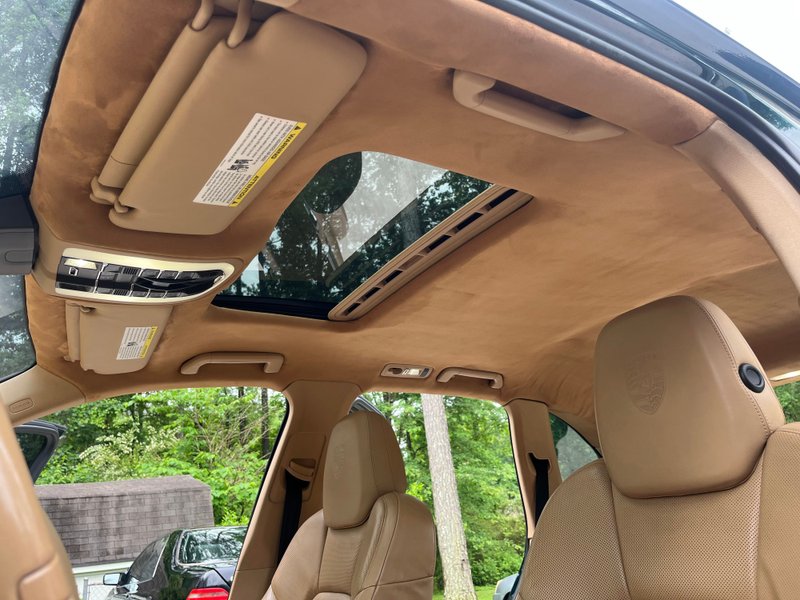
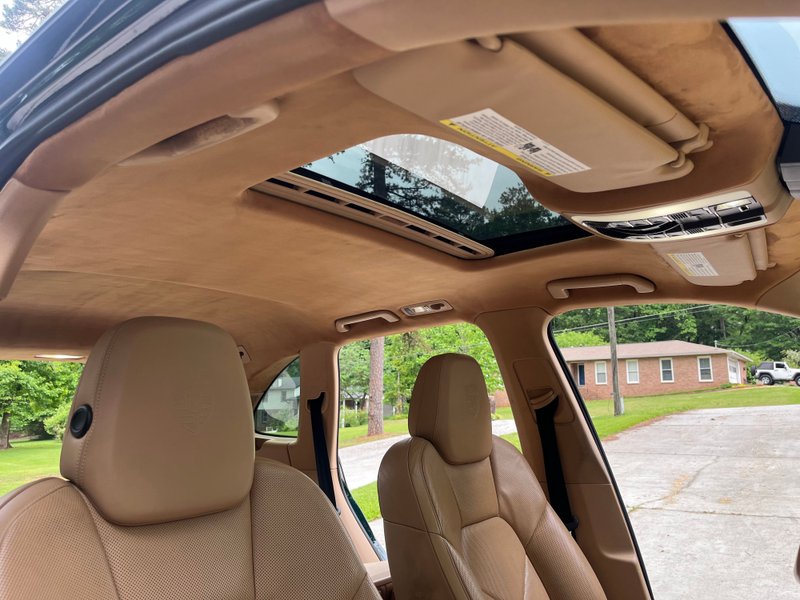
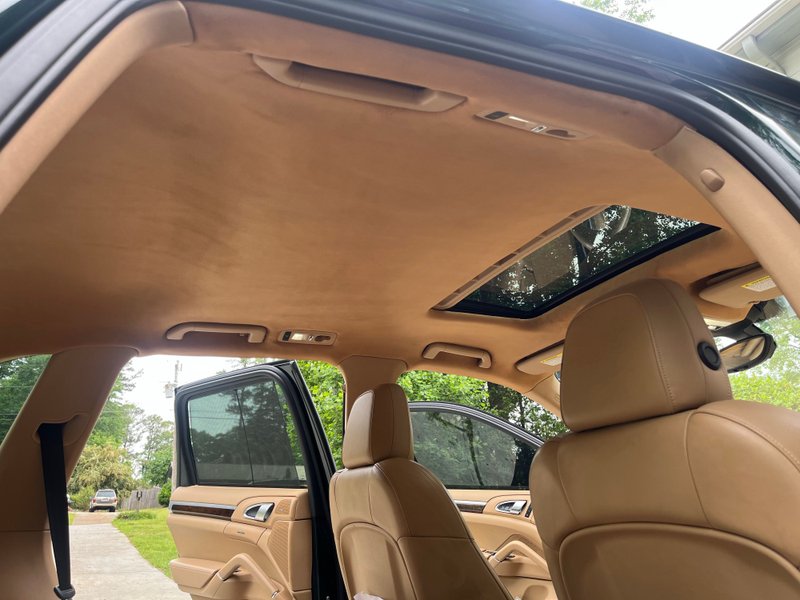
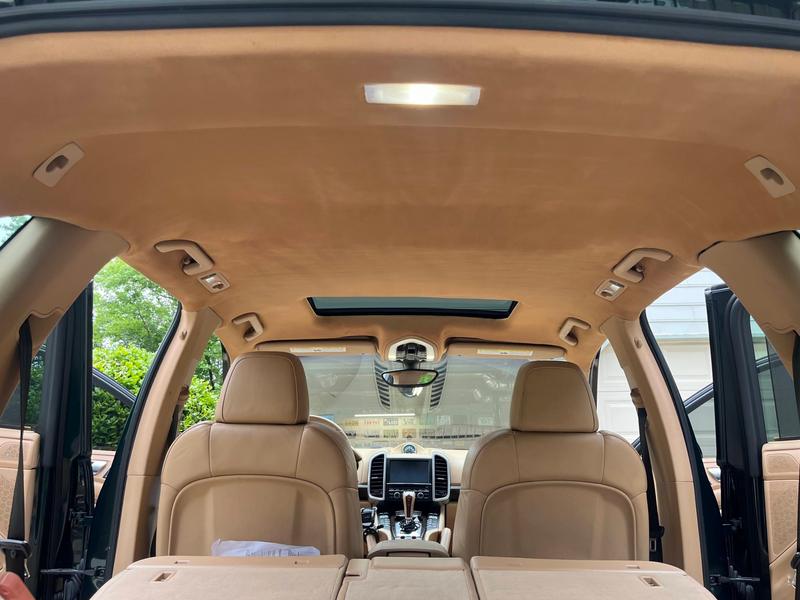
Finished, the Cayenne headliner should look something like this:
Nice write up. I wish I had this when doing the disassembly in Part I; there were only a few youtube videos to go off of. I am currently on what you have as Part II, section 2. Scrubbing off the old material.
Question for when laying on the new material in part II, section 3. Did you find yourself you had to put weights down and/or clamping down edges? I am doing this as a single person job, and I have heard some people do it in lieu of another set of hands. Probably easier to have another person hold edges for me but I do have clamps (not metal, with rubber edges). I am doing with regular woven fabric material (similar to OE in color and texture but is a rather Audi fabric and color; it's the closest I can find on ebay) so I am a little worried about wrinkles if I don't lay it down right the first time.
I was fortunate to find a complete alcantara headliner set and didn't have to remove fabric.
Did it myself on my old allroad, using a complete setup from an S6 avant. On the Cayenne, I left it to the pros and asked my indie to do the R&R. Love the alcantara!
Sorry for the late response. I would not recommend clamping because you'll create dimples where the foam is compressed, and since the glue isn't fully cured, it will just smash the foam basically. Best bet is to not soak the edges in glue, and wait until you feel the glue is super tacky on both surfaces to then smooth it with your hands.
That looks amazing. Great DIY and can ya post a pic of the adhesive spray you used.
Also, waiting on an install pic.
GREAT WORK!
sticky that Sh*t
For adhesive, I normally use either 3M Headliner Adhesive or Permatex Headliner adhesive. These have a slightly higher temperature rating than 3M Super 90 I believe. BUT, be sure to store them in a climate controlled place. They will loose their adhesive properties if stored in a place with big temperature variations (like a garage or shed)
Now that the board is ready, it's time to reinstall it. You can do this with two people or solo.
1. Guide the board into the car as far forward as you can (the d-pillar trim and seat belts will probably get in the way, so you'll have to do some shuffling around)
2. To start anchoring the board in place, I began with the sunroof surround. Make sure that you don't have any clips still stuck to the metal ring around the sunroof. I just use the palm of my hand to start pushing the clips into place, one by one, until it is secure and there are no gaps between the headliner and the sunroof frame.
3. At the front of the car, make sure the bolt holes for the anchor points are lined up, and screw the torx screws back in.
4. Move to the rear of the car and make sure the large black plastic peg is aligned with the hole near the center of the roof. This should snap into place. Don't worry too much about the velcro pieces, as the pillar trims will hold up the headliner plenty in the rear.
5. The rest of the installation is just a matter of refitting all of the accessories. A lot of times I will make the holes for the grab handles larger at this stage, since I don't want to go too far with the headliner out of the car.
Great write up. It may be in here and I just didn�t see it but, can anyone share what would be workable starting dimensions for the replacement material?
I�ve seen a lot of 58� and 60� wide material options. Assuming 60� is the safer bet or is that even wide enough? How long does it need to be?
Also if swapping to alcantara what did you all do with the pillars? Recover or just source alcantara replacements?


 05-04-2024, 03:26 PM


 Amazing work and mad skills. Looks fantastic!