When you click on links to various merchants on this site and make a purchase, this can result in this site earning a commission. Affiliate programs and affiliations include, but are not limited to, the eBay Partner Network.
Just did the upgrade as well, using the OP's parts list.
Overall nice kit. I did not use the "parking" light harness and tap.
Couple tips:
Take wheel off, access is limited. Remove most or all of wheel liner.
Use phillips stubby to remove old fog, the upper screw is hard to get to with inter coolers in the way. Once fog is removed, I used the fog hole in the bumper to connect the new harness to the fog harness. I wasnt able to get the new fog harness connector to click into the original harness, were you guys able to do it?. Some of the orange insulator is still slightly exposed. Its fully seated though. I connected the negative on the new harness to the brown wire in the original harness, new harness is labeled. Overall awesome kit with no aiming or adjustment needed.
Wheels off definitely helps with access, but you still need the wheels on the ground for aiming. That's an easier part of the process though. Mine were pretty close to where they needed to be aimed out of the box, but needed a few screw turns to aim them up just a tad.
As for the connector, this is definitely the one part that I think needs improvement. I had to reaaaally force the H11 adapter into the stock connector. I think I may have even taken it out and filed down a couple of spots on the DD connector to help it slide in a bit better.
Just did the upgrade as well, using the OP's parts list.
Overall nice kit. I did not use the "parking" light harness and tap.
Couple tips:
Take wheel off, access is limited. Remove most or all of wheel liner.
Use phillips stubby to remove old fog, the upper screw is hard to get to with inter coolers in the way. Once fog is removed, I used the fog hole in the bumper to connect the new harness to the fog harness. I wasnt able to get the new fog harness connector to click into the original harness, were you guys able to do it?. Some of the orange insulator is still slightly exposed. Its fully seated though. I connected the negative on the new harness to the brown wire in the original harness, new harness is labeled. Overall awesome kit with no aiming or adjustment needed.
I did this upgrade as well. I left them unadjusted and now I need to go back into it to adjust them.... I am really happy with the quality of the DD product and the light addition is superb.
Thanks,
Don't you love it when something doesn't specifically say it should work, but you're pretty darn sure that it will, and then it does?
Well anyway, here's a truly plug and play fog light upgrade for the 958.2, and probably the best OEM style lighting upgrade by far.
Man these look good! I had Diode Dynamics on a previous vehicle and they were the best. Disappointed there wasn�t one for our 958.2 Cayennes. I just installed Baja Designs Squadron Pro fogs on mine, pretty disappointed in them.
But, I saw your post the day after and ordered myself a set of these to swap in. Really prefer the more subtle OEM look and the sharp cutoff.
Wheel off installation has got to be the easiest way to go, but what about adjustment? Were you able to keep wheels on, vehicle on the ground and still get in there to make adjustment?
Thanks - this post is a life saver 👌🏼
I have not confirmed yet if adjustment is possible with wheels on.... I plan on looking at this in the next week. I am curious what OP or anyone else whom has done this mod says on this detail as well? Does the DD adjustment screw line up perfectly with the OEM lamp and perhaps you can adjust through the small hole in the bumper??? That would be ideal and really cool if it were possible....
I have not confirmed yet if adjustment is possible with wheels on.... I plan on looking at this in the next week. I am curious what OP or anyone else whom has done this mod says on this detail as well? Does the DD adjustment screw line up perfectly with the OEM lamp and perhaps you can adjust through the small hole in the bumper??? That would be ideal and really cool if it were possible....
Thanks,
I did the entire install with the wheels on the ground including adjusting. Adjusting has to be done with the vehicle in the driving position since you typically want to line it up with a good wall from 25� away to measure where the cutoff needs to be. Diode Dynamics has a guide on their website somewhere (and maybe a video too) on how to aim them to SAE standards.
I actually didn�t realize there was a hole in the bottom until I cleaned out my inner bumper areasince my vehicle spent its early life in Saskatchewan getting lots of snowy mud packed in there! I only recently discovered that hole so I�m not sure if it lines up with the DD adjustment screw or not. If it does, that makes life a lot easier! If not, I was still able to just turn the wheel all the way in, remove three or four of the fender liner screws to pull it back enough and hold it against the tire. Gives enough room to stick your arm in there with a small Phillips head to turn the adjustment screw. DD makes these with OEM mounting locations in mind so it wouldn�t surprise me if the adjustment screw is in the same location as factory since most other vehicles probably have access points for adjustment screws as well.
I replaced the fogs a few days ago, no adjustment needed - they�re right where they need to be. But, when I had the vehicle up for an oil change today, I noticed the holes to access those adjustment screws.
Pretty simple install and adjustment, they look great!
FYI:
I was able to confirm, the factory bumper holes DO NOT line up with the adjustment screws on the DD LED upgrade units.
For adjustment on the ground the best solution is one side at a time, turning the wheels all the way, removing 3-4 torx screws that hold the fender liner in, bend fender liner back and hope the tire holds it out of the way while you squeeze your hand in and adjust them... Put is all back together and move to the other side.
Shame that didn�t luck out! But yes, this is what I had to do. Turning the wheel in gets you a bit more elbow room to adjust it while on the ground like this. Still not a tough task, but you might get your forearm a little dirty.
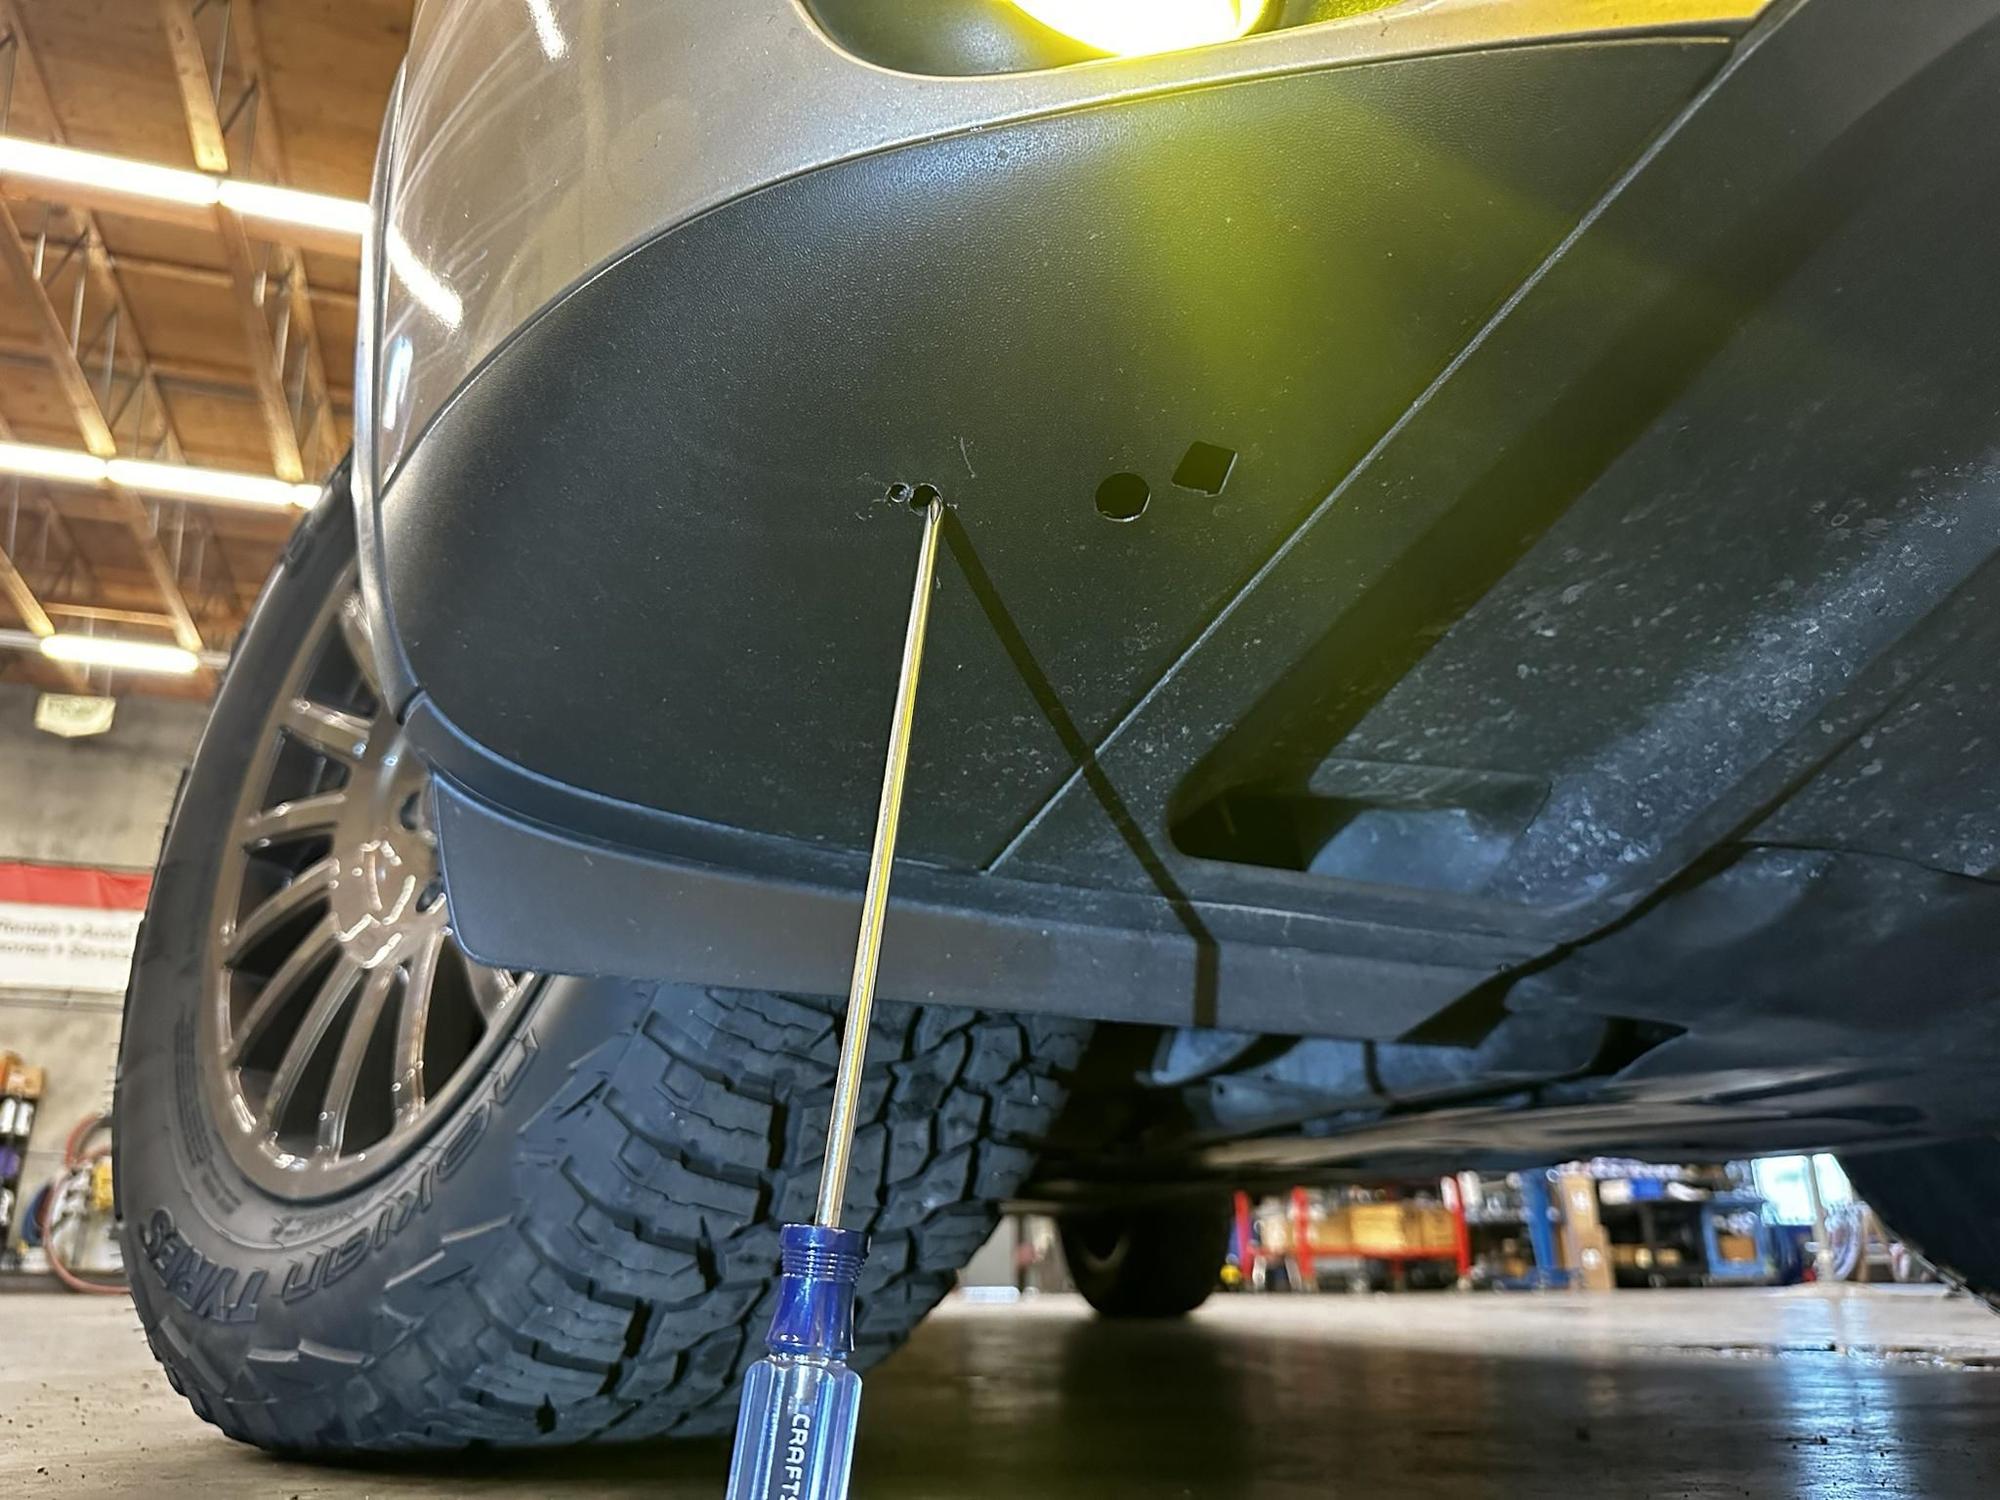
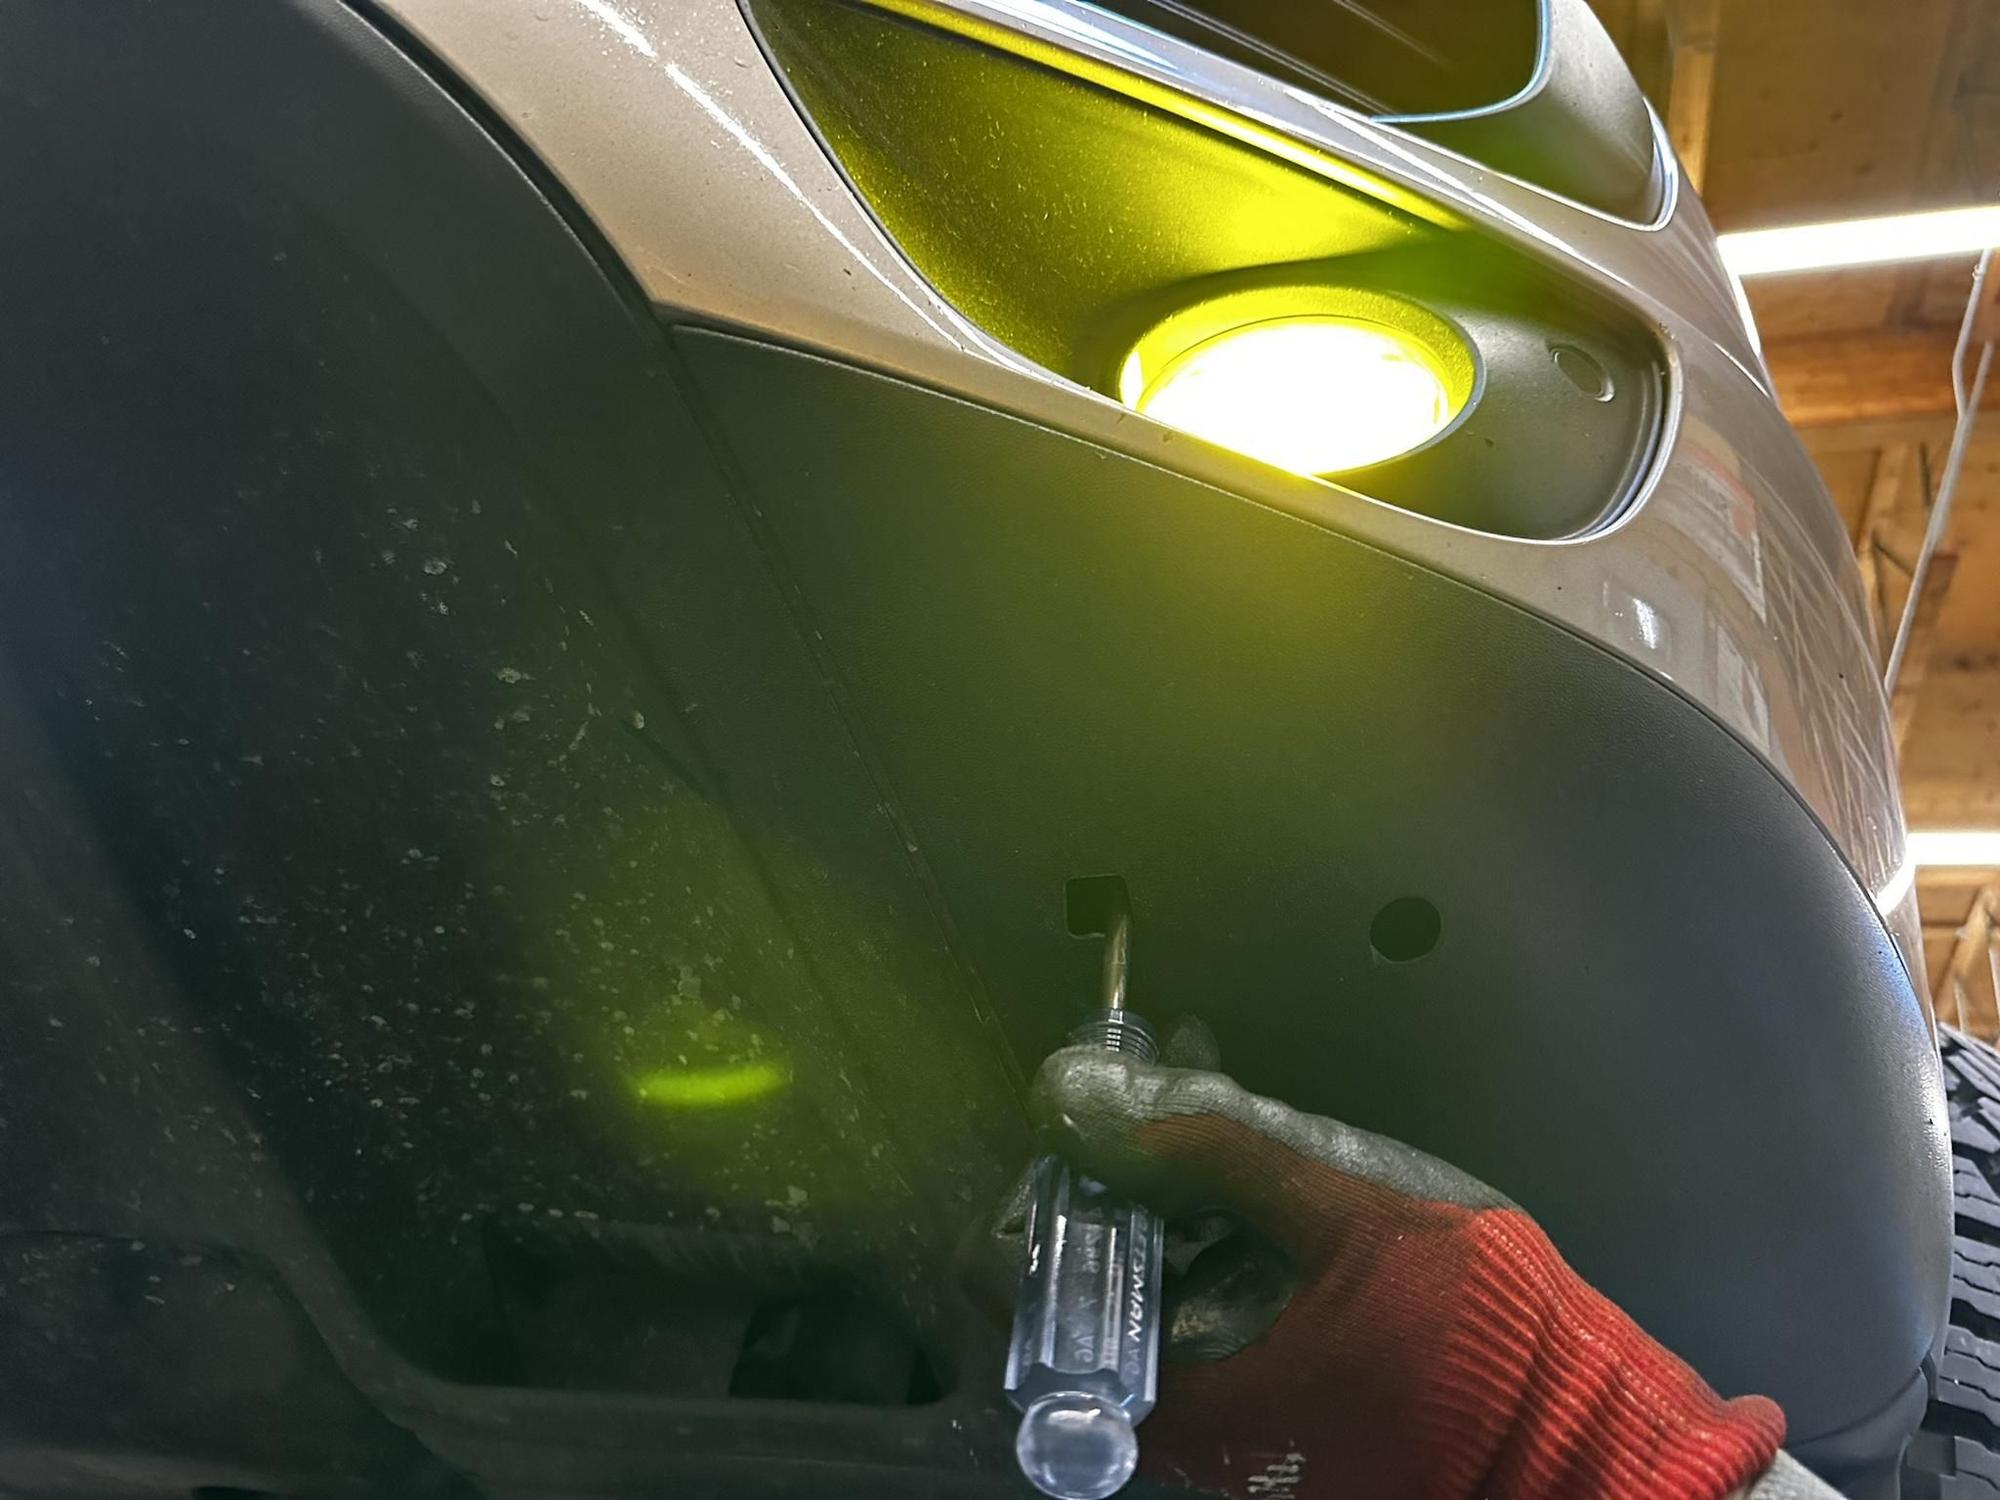
So after a long road trip, I decided my fogs needed to be adjusted down just a tad. Decided to dig into it and just give it a try through bumper holes. To my surprise, the driver's side holes actually DO line up in a way that the DD fog lights can be adjusted from bottom.
Square hole is used to access the adjustment screw, and the round hole on the right can be used to shine a light into the bumper so that you can see where the screw is.
Now the puzzling thing is that the passenger side square and round holes do not line up in any way that would allow for adjustment. Perhaps the factory fog lights have a LH and RH lamp assembly in which those adjustment screws line up with their specific side? I don't know, but that would be even more puzzling considering how cheap and widely used the OE Valeo lamps are on various vehicles around the world. Anyway, I decided to use the power of Milwaukee to fix that.
Now, my square hole on the passenger side is for might light source, my round hole is for peeping through, and my newly drilled hole is for a long Phillips screwdriver to reach the adjustment screw. It's not the prettiest, but frankly it'll never be seen either. So I personally don't see much reason against drilling a new access hole. Especially since the time taken to drill the new hole is even less time to unscrew the 4 torx screws needed to access through the fender liner. Now any future adjustment will be as easy as can be
Thanks for sharing your research here.
Is it possible to measure where the new hole is from the back and inside seams? Id like to drill to adjust as I think mine are a turn or two too high from the factory as well.
Thanks for sharing your research here.
Is it possible to measure where the new hole is from the back and inside seams? Id like to drill to adjust as I think mine are a turn or two too high from the factory as well.
Kind of difficult without a good reference point to measure from, so I tried to measure this in the most relevant way I could think of.
The red dot here on the ruler is what I’ll consider as the starting reference point, the inner and frontmost corner of the square access hole on the RH side of the vehicle. The blue circle is exactly where the circular cutout is underneath the ruler. Starting at the reference point of the red dot, draw a 3.5” imaginary line that is tangent to the frontmost edge of the circular access hole, and you reach the green dot which should be your new access hole drill point.
Started with a smaller bit like a 3/16” that’s less likely to walk. Good enough to make a nice pilot hole, and then I followed it with a 3/8” bit that opened it up nicely. Plenty of hole to allow for some wiggle room for a long screwdriver that’s most likely going to be 1/4” diameter.
Another way to measure in more of the XY, if you wanted to follow that seam up from the air dam: go 6" up, and then 3 7/8" over. Mark a dot there and make sure it lines up around 3.5" from the other reference points and it should be good to go. Doesn't need to be exact by any means. I frankly could've just gone with my original pilot hole that I made there and also would've been fine.

 12-07-2023, 12:18 PM


 Perhaps the factory fog lights have a LH and RH lamp assembly in which those adjustment screws line up with their specific side? I don't know, but that would be even more puzzling considering how cheap and widely used the OE Valeo lamps are on various vehicles around the world. Anyway, I decided to use the power of Milwaukee to fix that.