When you click on links to various merchants on this site and make a purchase, this can result in this site earning a commission. Affiliate programs and affiliations include, but are not limited to, the eBay Partner Network.
I used to be big into modding and customizing, I completely restored a MK1 VW Rabbit, had a MK6 GTI with a ton of mods but don�t plan on doing much to this. Probably just Euro tinted tail lights and clear side markers and possibly an exhaust.
My main concern at the moment is updating the center console firmware tot he most recent version. I don�t think the previous owners ever updated it and it�s a 2011. Doing some searching around but can�t seem to find anywhere to buy the update disc.
I've got oil rotors, pads and TC fluids from FCP as well. Plan is to change TC with every oil change to keep it happy. Nice to know it only cost you $15 to ship that oil back. You're in NJ, right?
On the rotors/pads/sensors I was thinking of getting new ones too. Mine started squealing for some reason. I can't imagine the shipping cost for these crazy heavy rotors though. Might just give them to a buddy to drop them off at FCP, glad they're on the east coast.
Yes, I'm in NJ.
I might have to return the front rotors. Finished the front driver side last night and noticed that the Textar pad sits higher than the Sebro 350mm slotted rotor. Compared the rotors and noticed the original on our 2014 base is 14" (360mm) in diameter. Damn it. The pads I bought were made to fit 350mm so not sure why both installed wouldn't work.
The rears were fine. Got those done and did the brake fluid flush.
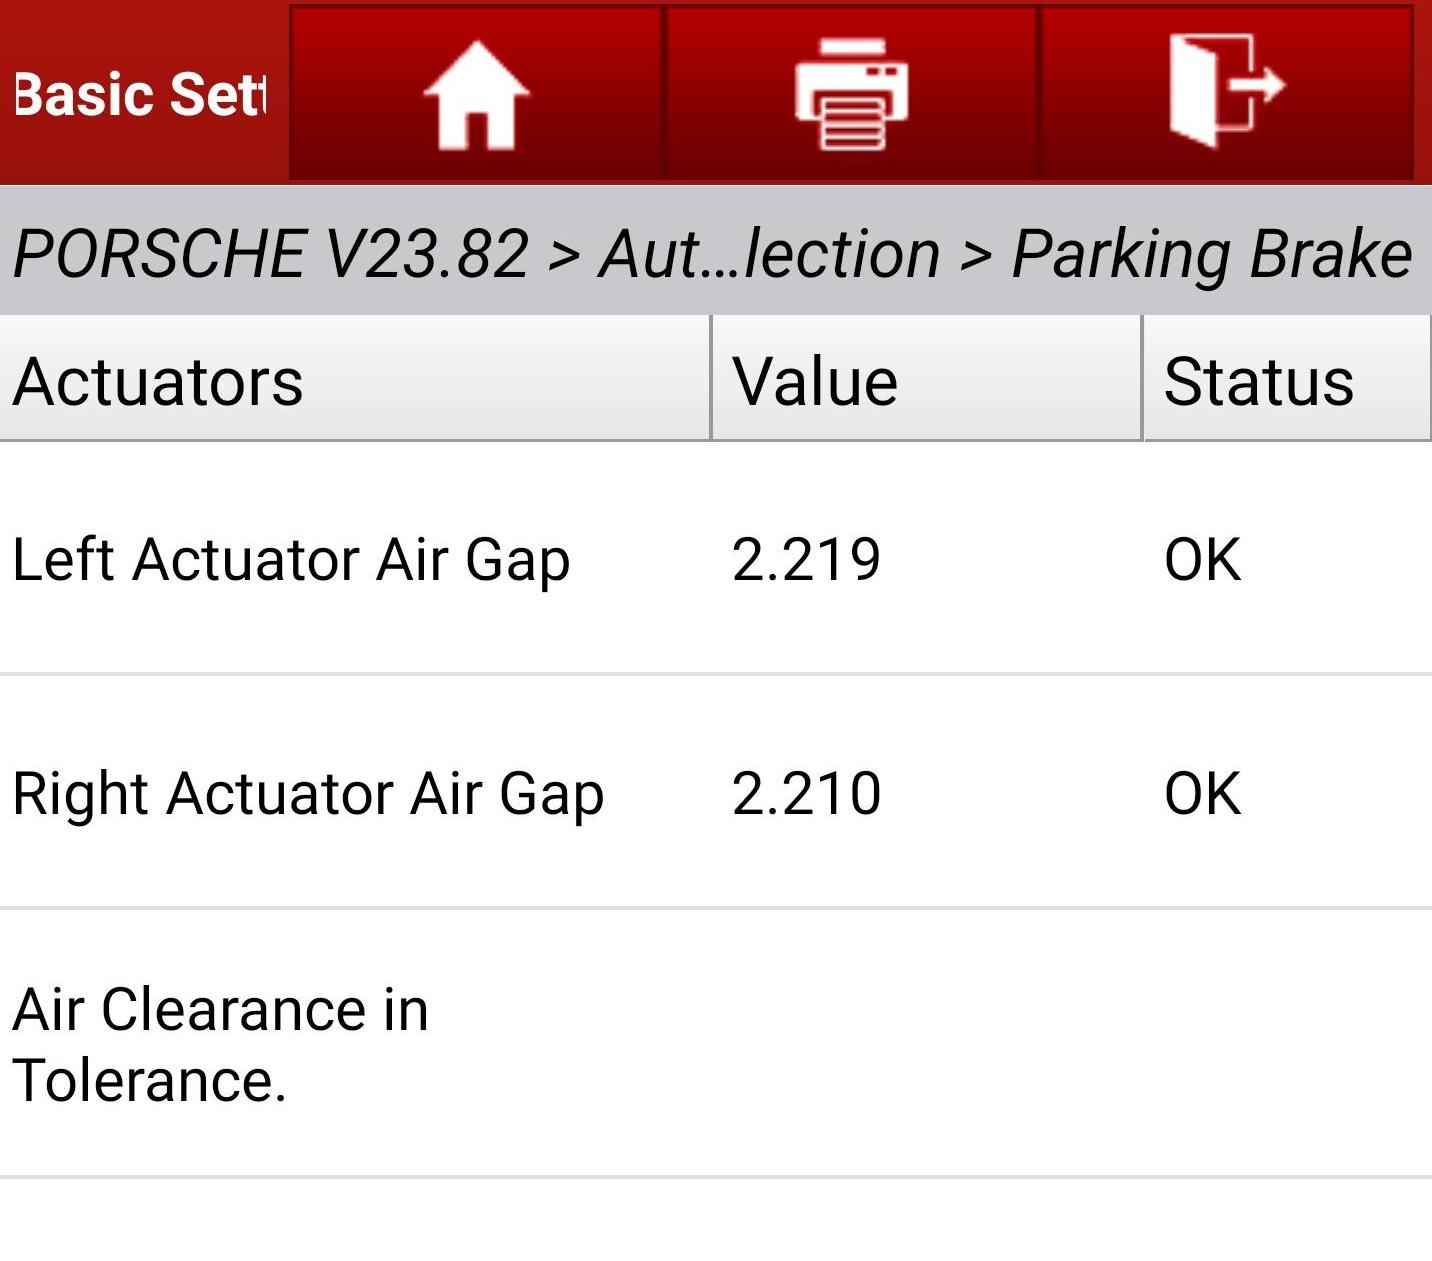
I received my replacement front rotors and pads in 360mm today. Arrived home and knocked out the fronts in 1.5 hours. With the new rear rotors, I had to adjust the parking brake shoes. Used my scanner to help me with that. Easiest parking brake adjustment ever with the x431, no guesswork.
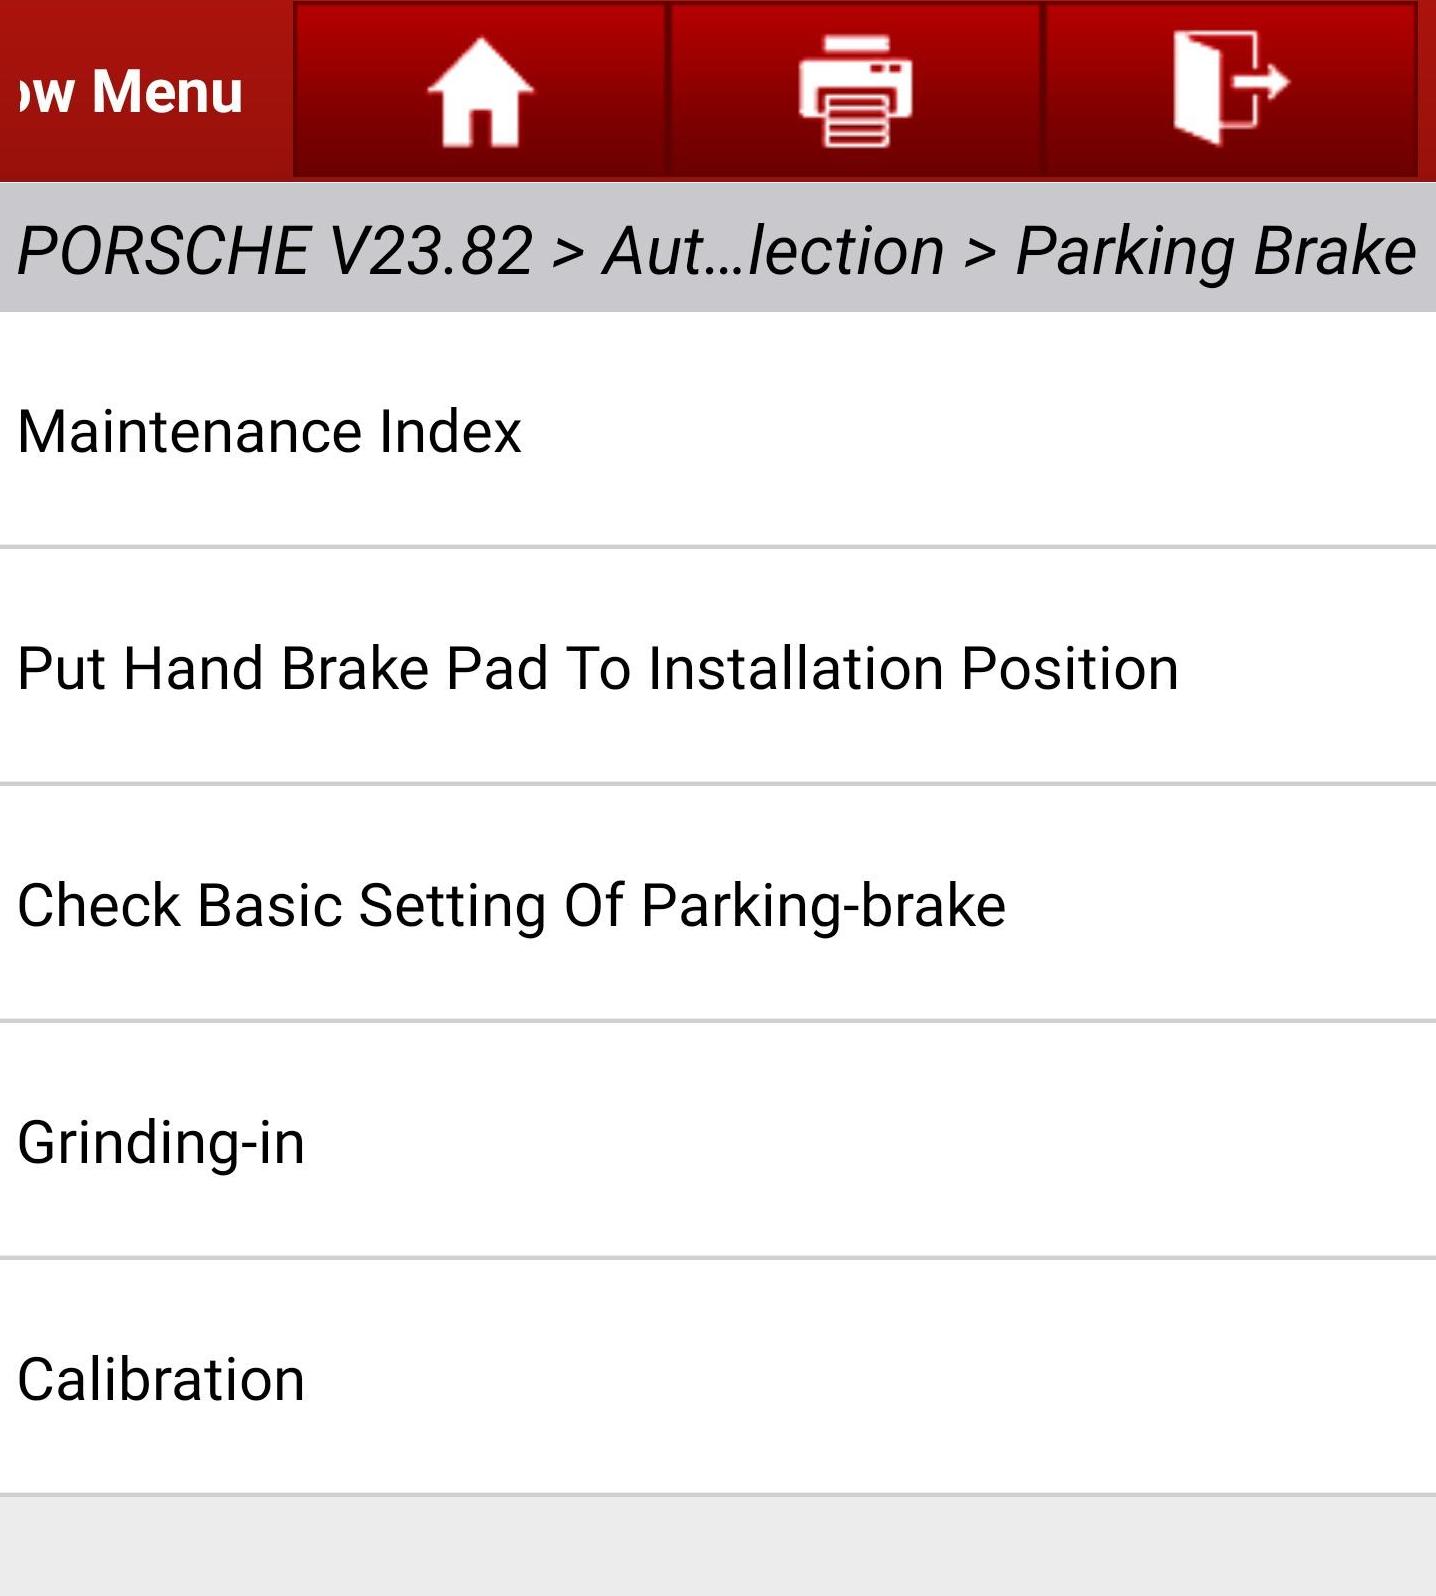
Guide to parking brake adjustment:
Select "Check Basic Setting of Parking-brake" under Parking Brake>Special Function
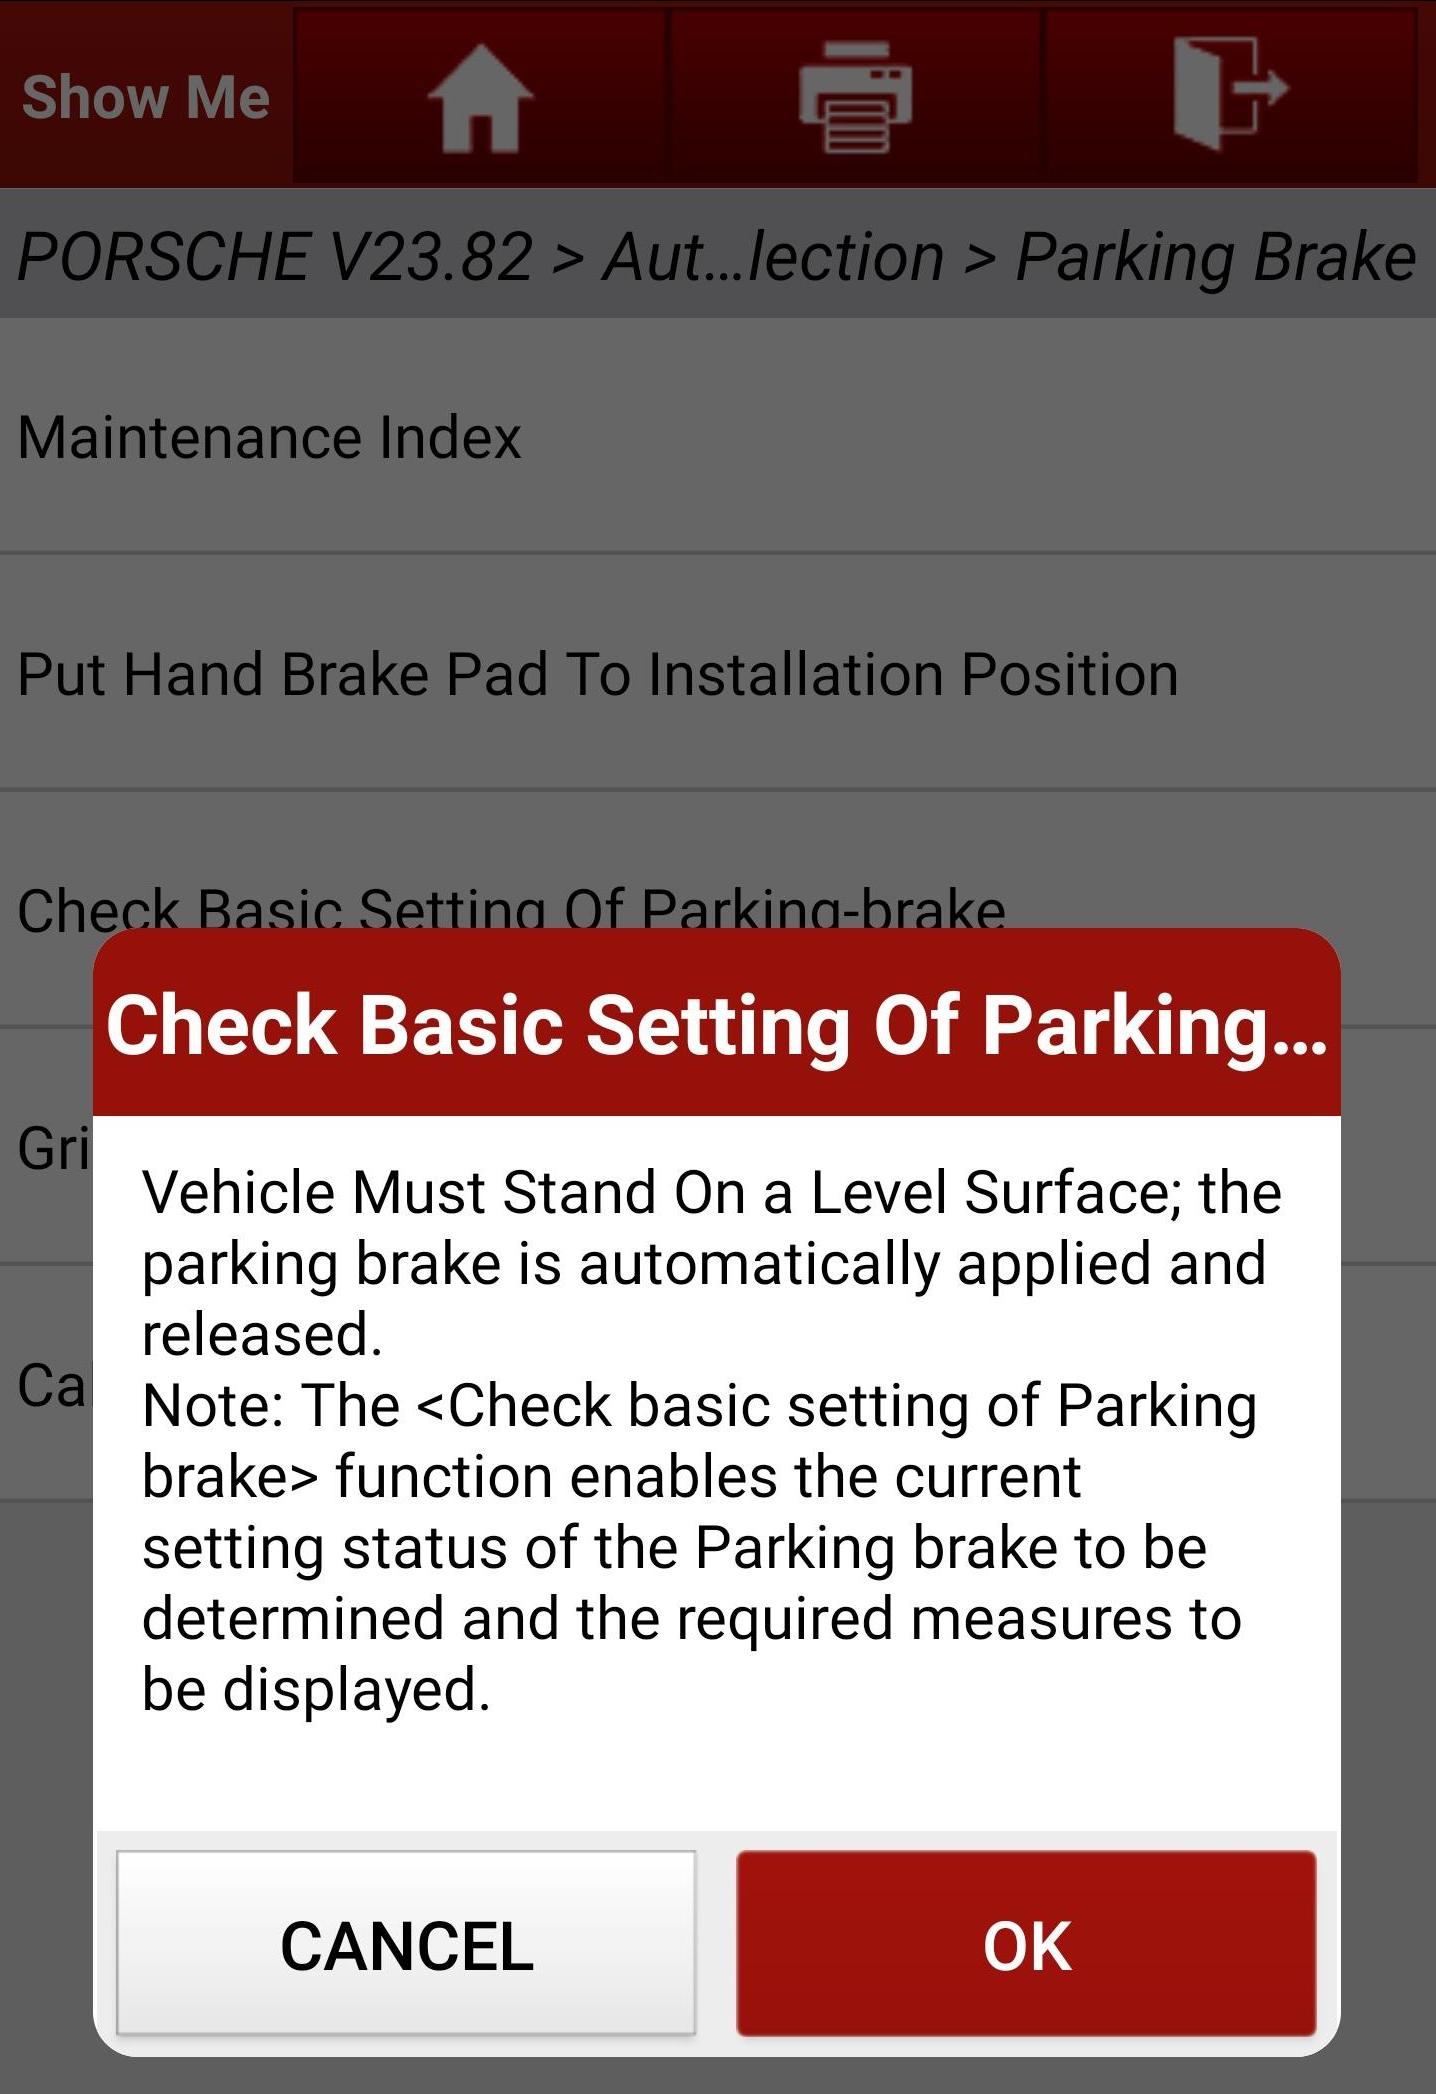
Only applies if you have the wheels on. I had mine on jack stands so just selected OK.
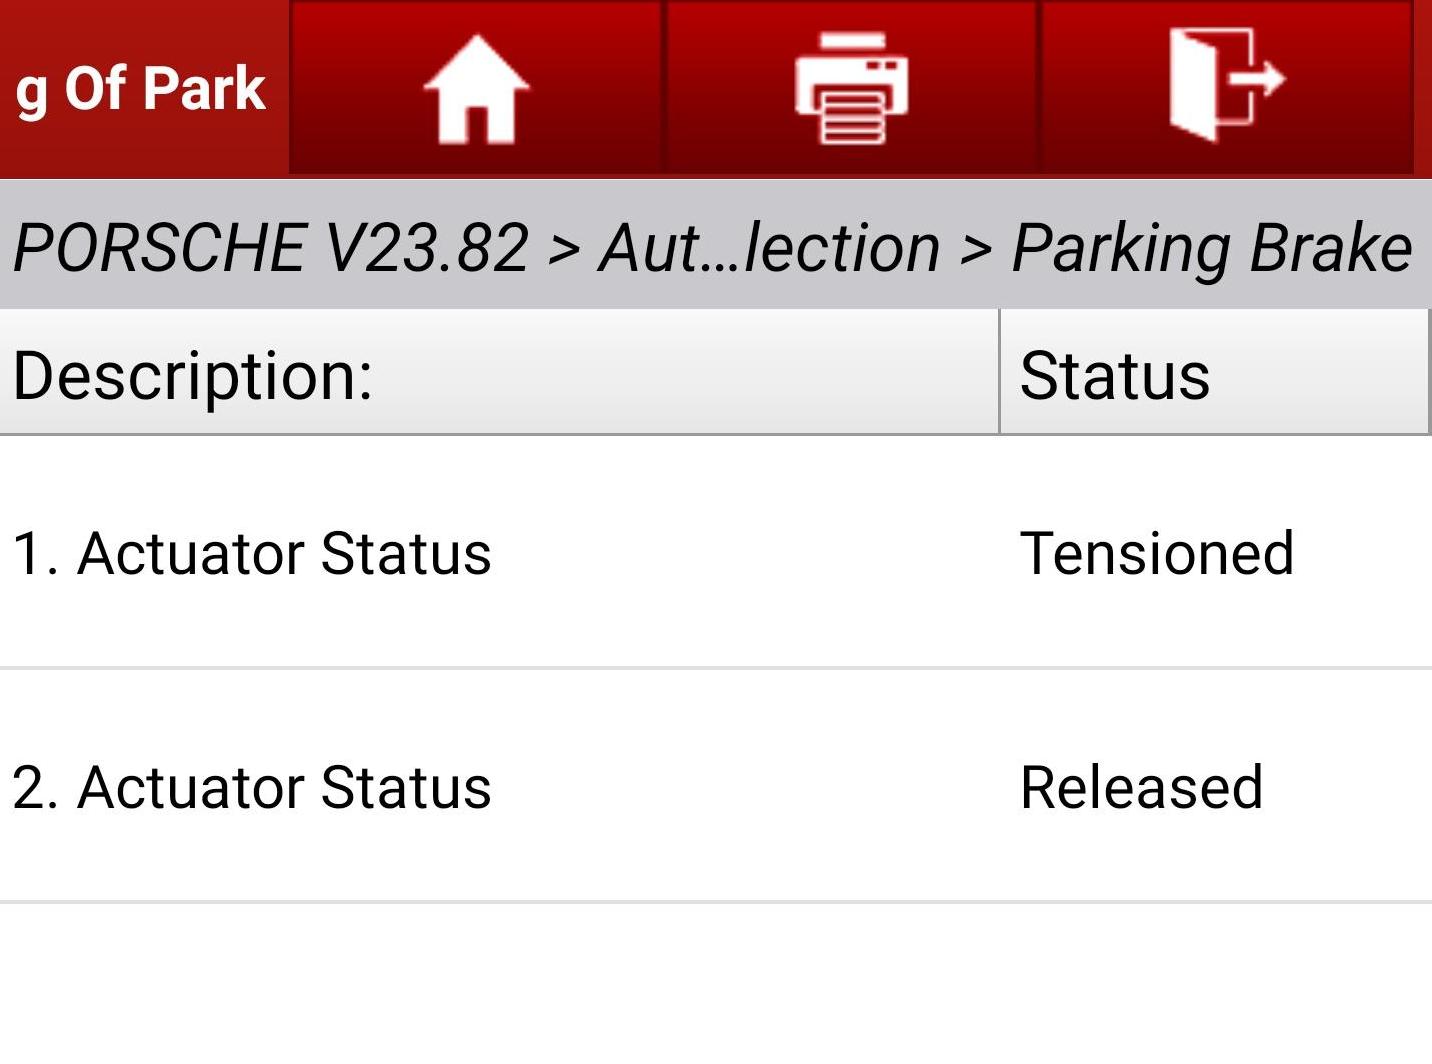
It will apply then release the parking brake.
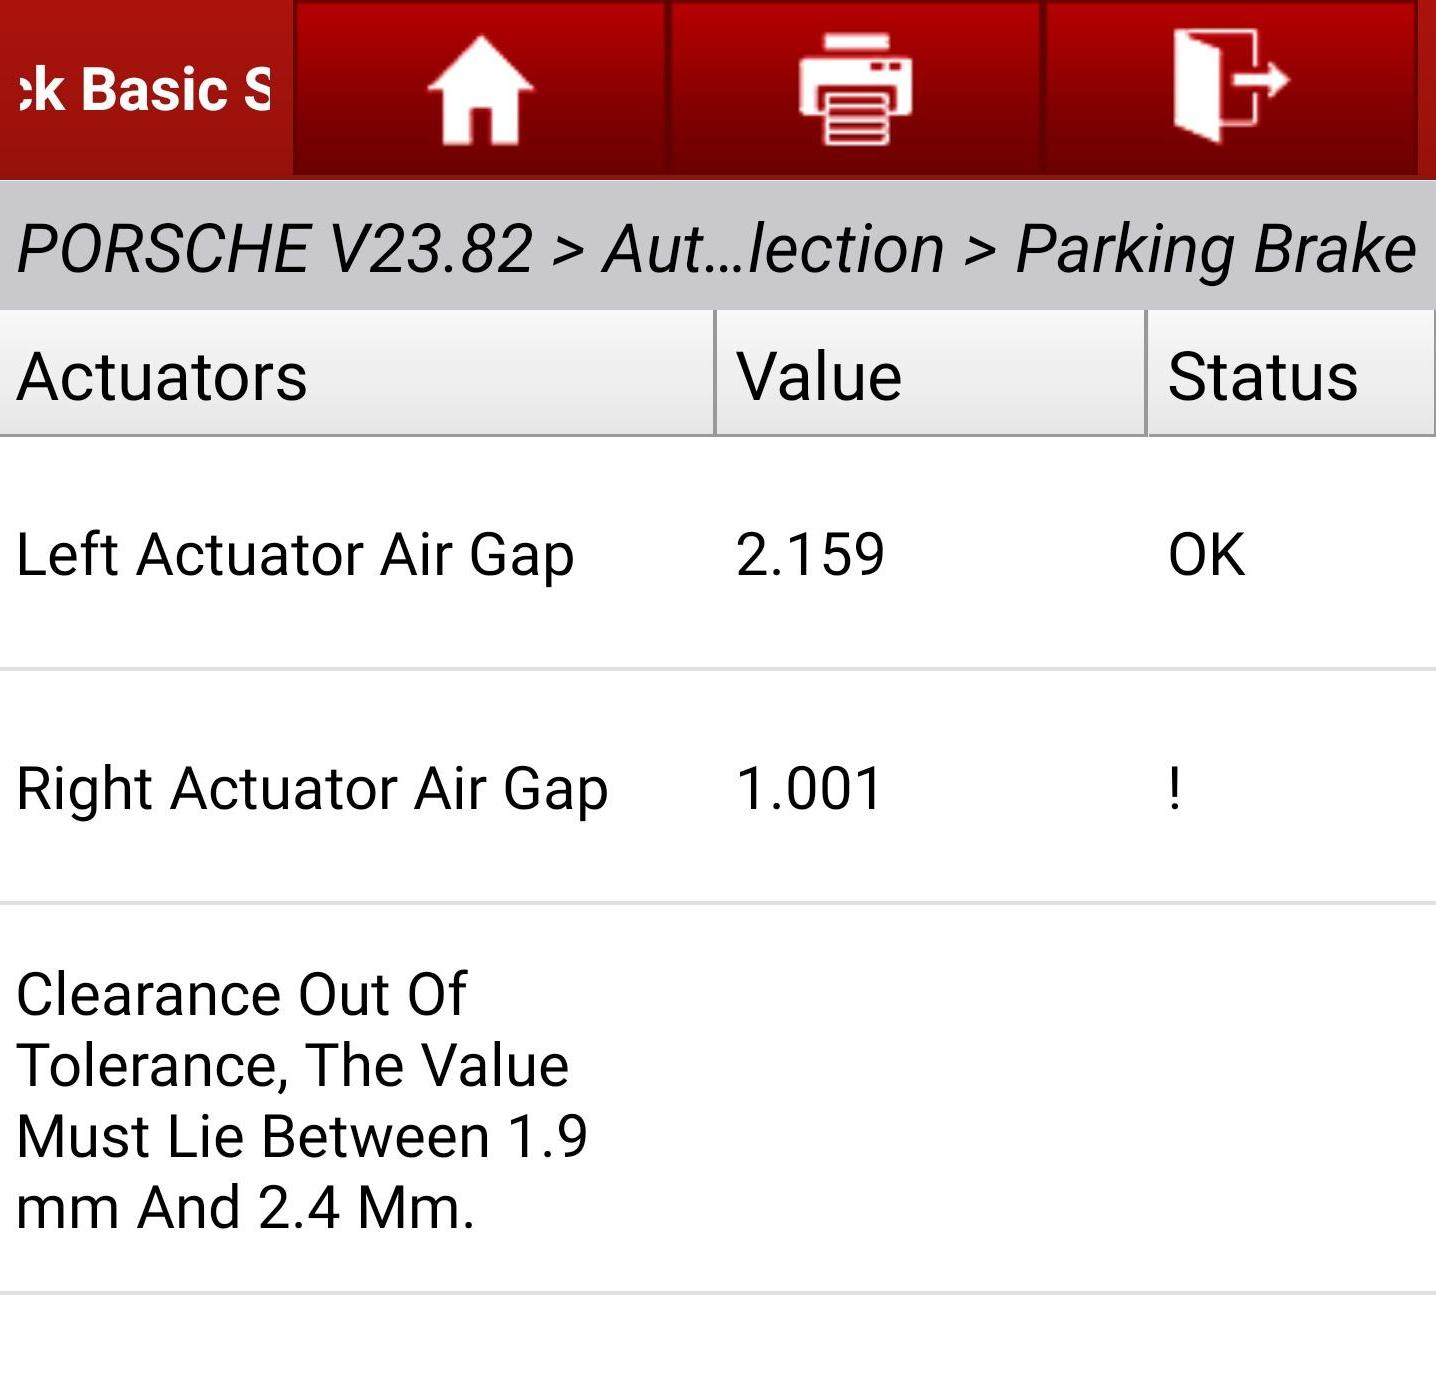
Shows you the measurement. Use a flat head screwdriver to adjust the parking brake star adjuster. You'll need to remove the screw with a M4 triple square socket. Adjuster is located roughly at 3 o'clock on rear right and 9 o'clock on the rear left side. Turn towards the front to tighten and the rear to loosen.
You'll need to Select "Check Basic Setting of Parking-brake" and measure after each adjustment. I aimed for 2.2mm
This was my second time doing the parking brake adjustment. The first time was due to me erasing the default coding. You can read more about it here
9k, you should make a small DIY for us. I don't know if we moderator to add it to the DIY section. I have read a couple horror stories about people messing up their parking brakes with a calibration tool so I have stayed away from it. I think you might be the first I have read about doing it correctly. Good job.
9k, you should make a small DIY for us. I don't know if we moderator to add it to the DIY section. I have read a couple horror stories about people messing up their parking brakes with a calibration tool so I have stayed away from it. I think you might be the first I have read about doing it correctly. Good job.
Just a heads up when checking your parking brake via a scan tool. Just like you would do on a car with a manual parking brake you should activate it a few times before making an adjustment. To exercise the moving parts.
I ran the first test on my CTT and it showed I was out of spec on the right side. Not concerned I ran it again and they both were in spec and close to the same gap measurement. I ran it about 5 more times and the stayed even and in spec.
That's a good point. It didn't occured to me since I have a sloped driveway and owning 1 car that is a stick, I always use the parking brake.
The gaps were consistent when it measured for me.
On a side note, the correct procedure to apply the parking brake is:
Come to a complete stop with foot applied on brake.
Shift to neutral.
Apply the parking brake.
Release your foot off brake pedal and let car settle into the parking brake shoe.
Shift into park.
If you ever find the shifter is hard to shift out of Park, it's because there's weight on the prawl. Doing it the way above, the weight is guaranteed to be on the parking brake instead of the shifter prawl.
I agree. It drives me crazy when I see a friend use "Park" as the parking brake. I try to explain to them the needless strain they are putting on the pawl.
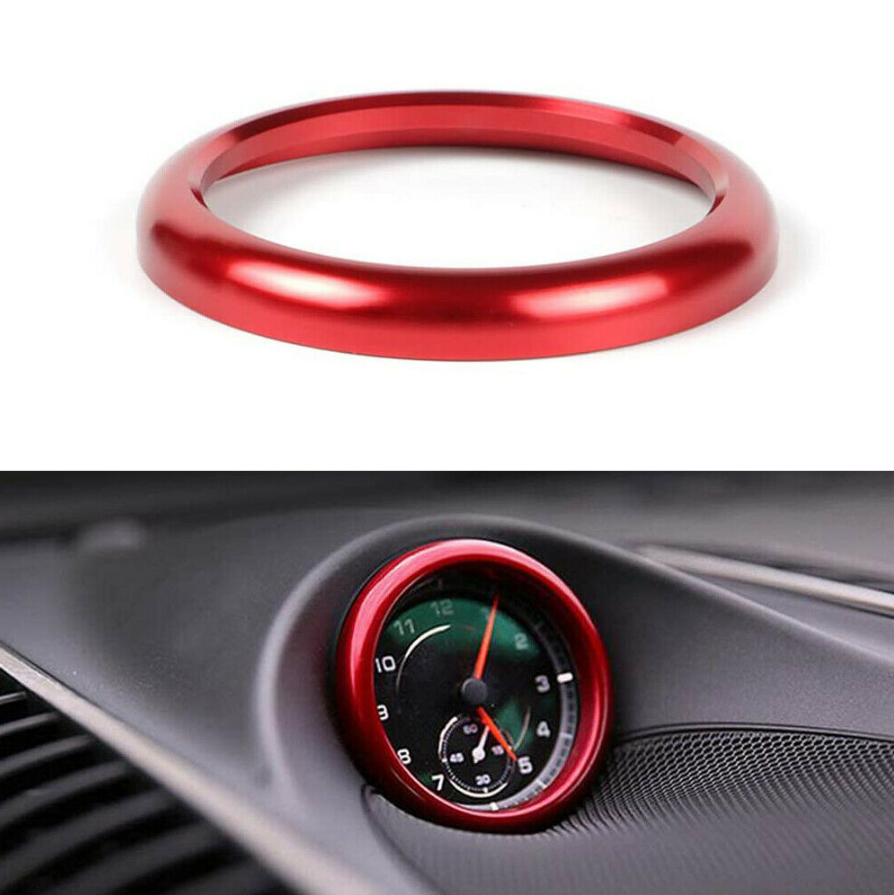
Just bought one of these, to match the red dummy key fob. I understand the red adds eight horsepower.
$15 on ebay.
Wonder if I need PIWIS to integrate it...
I did think for a hot second that I might wrap the vents in red rather than black, but, um, no. Would really like them wrapped in leather, but $20 in wrap and a couple of hours of fiddling versus $1800 for for leather covered vents...I don't think so...
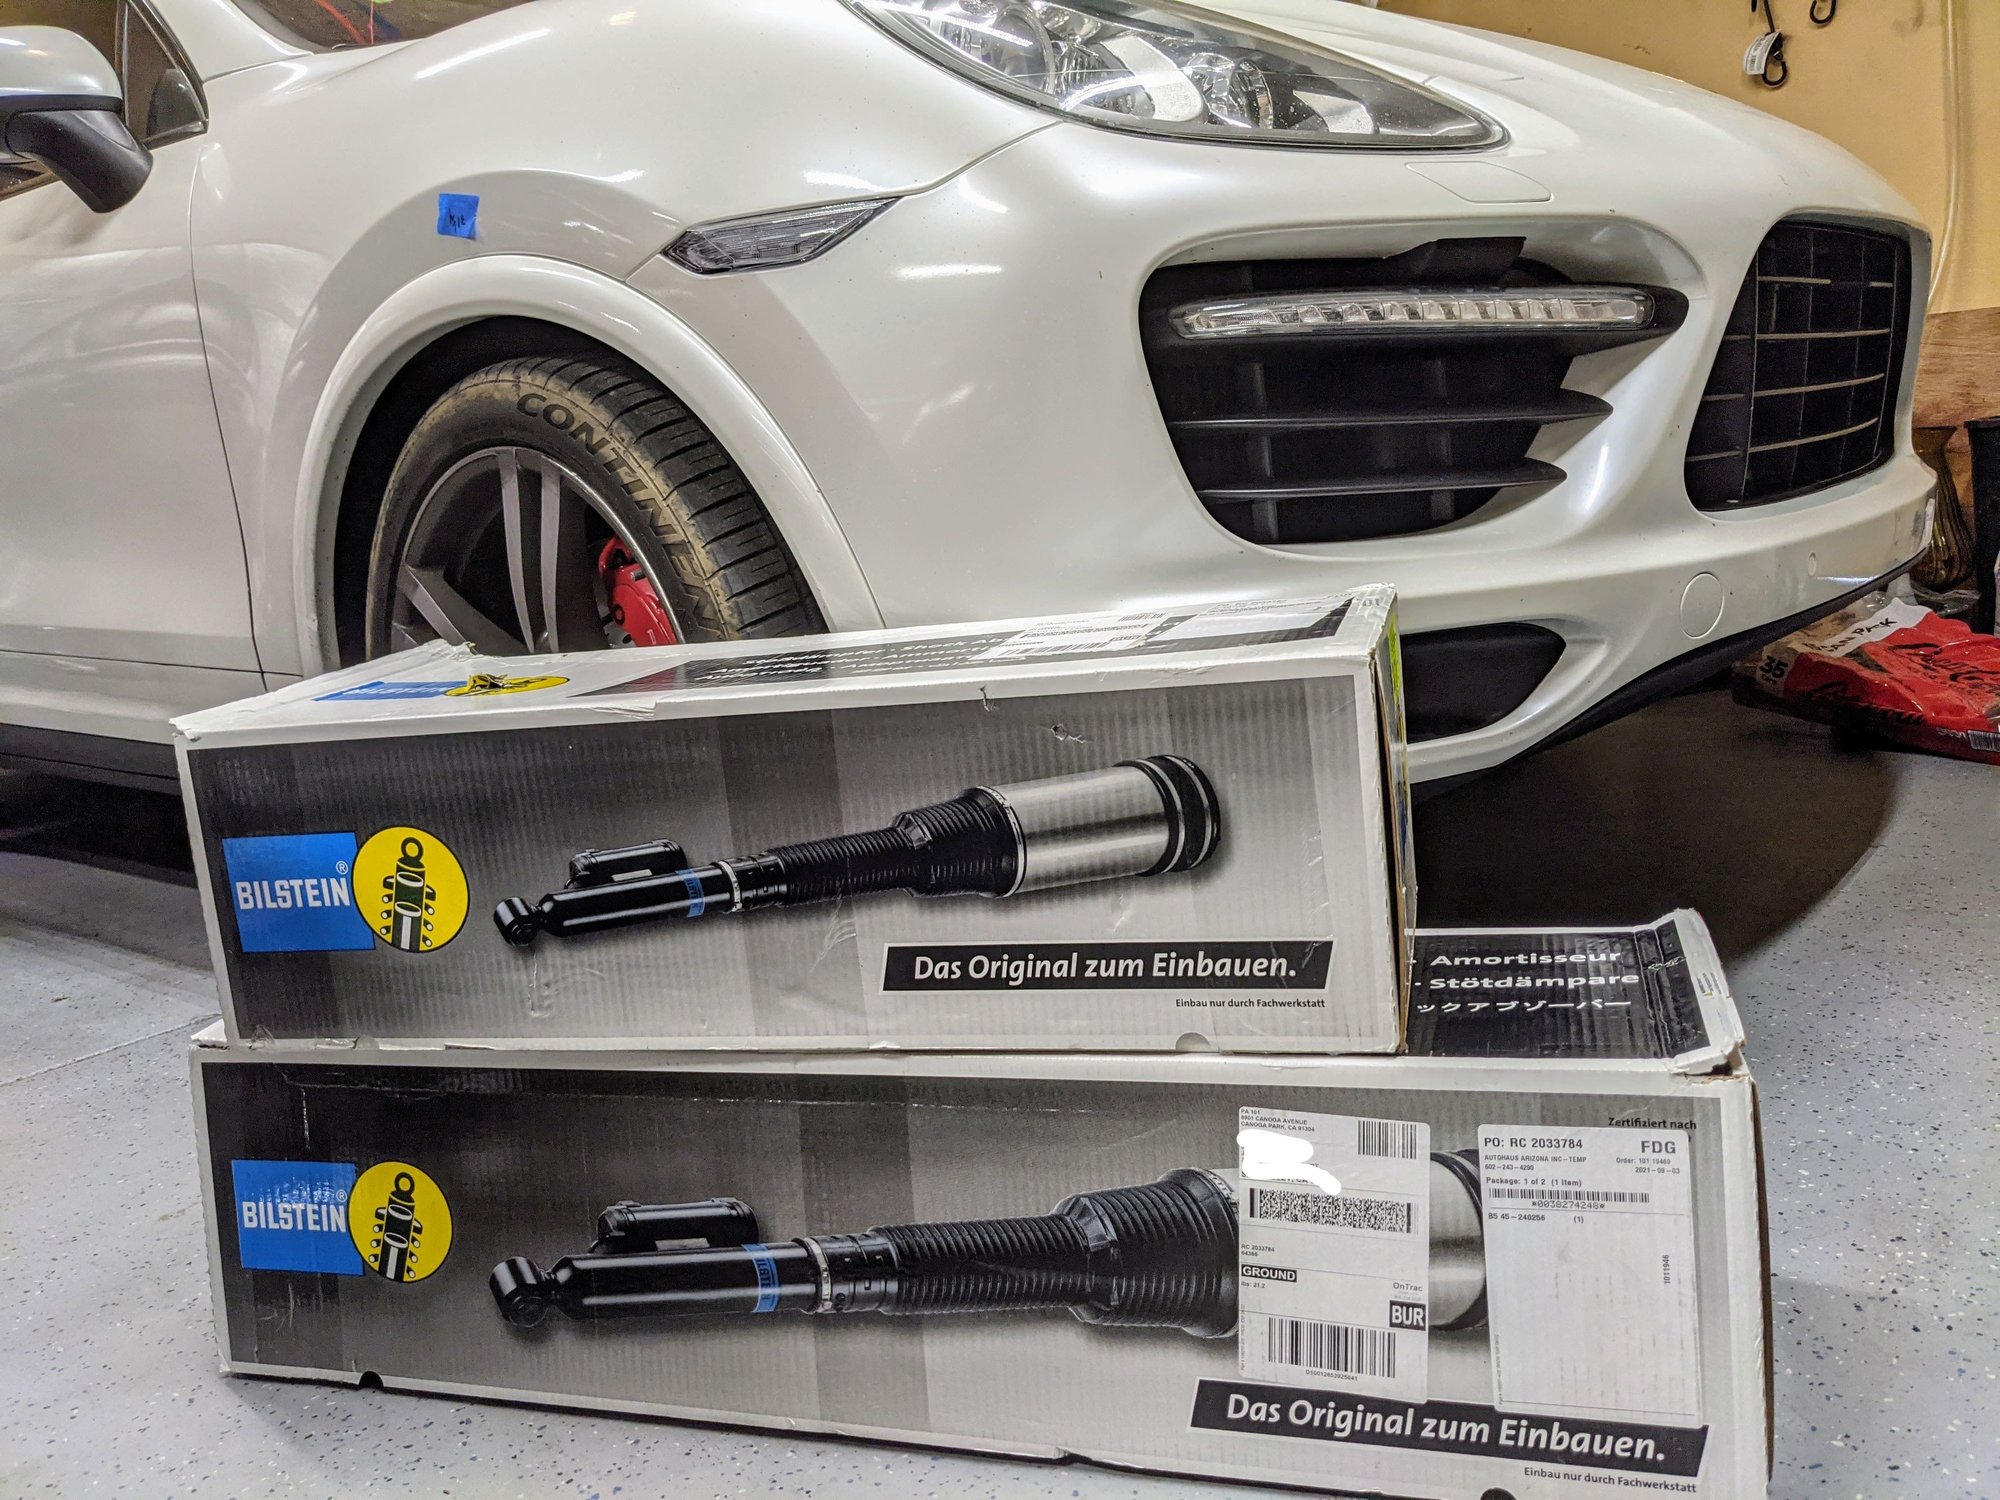
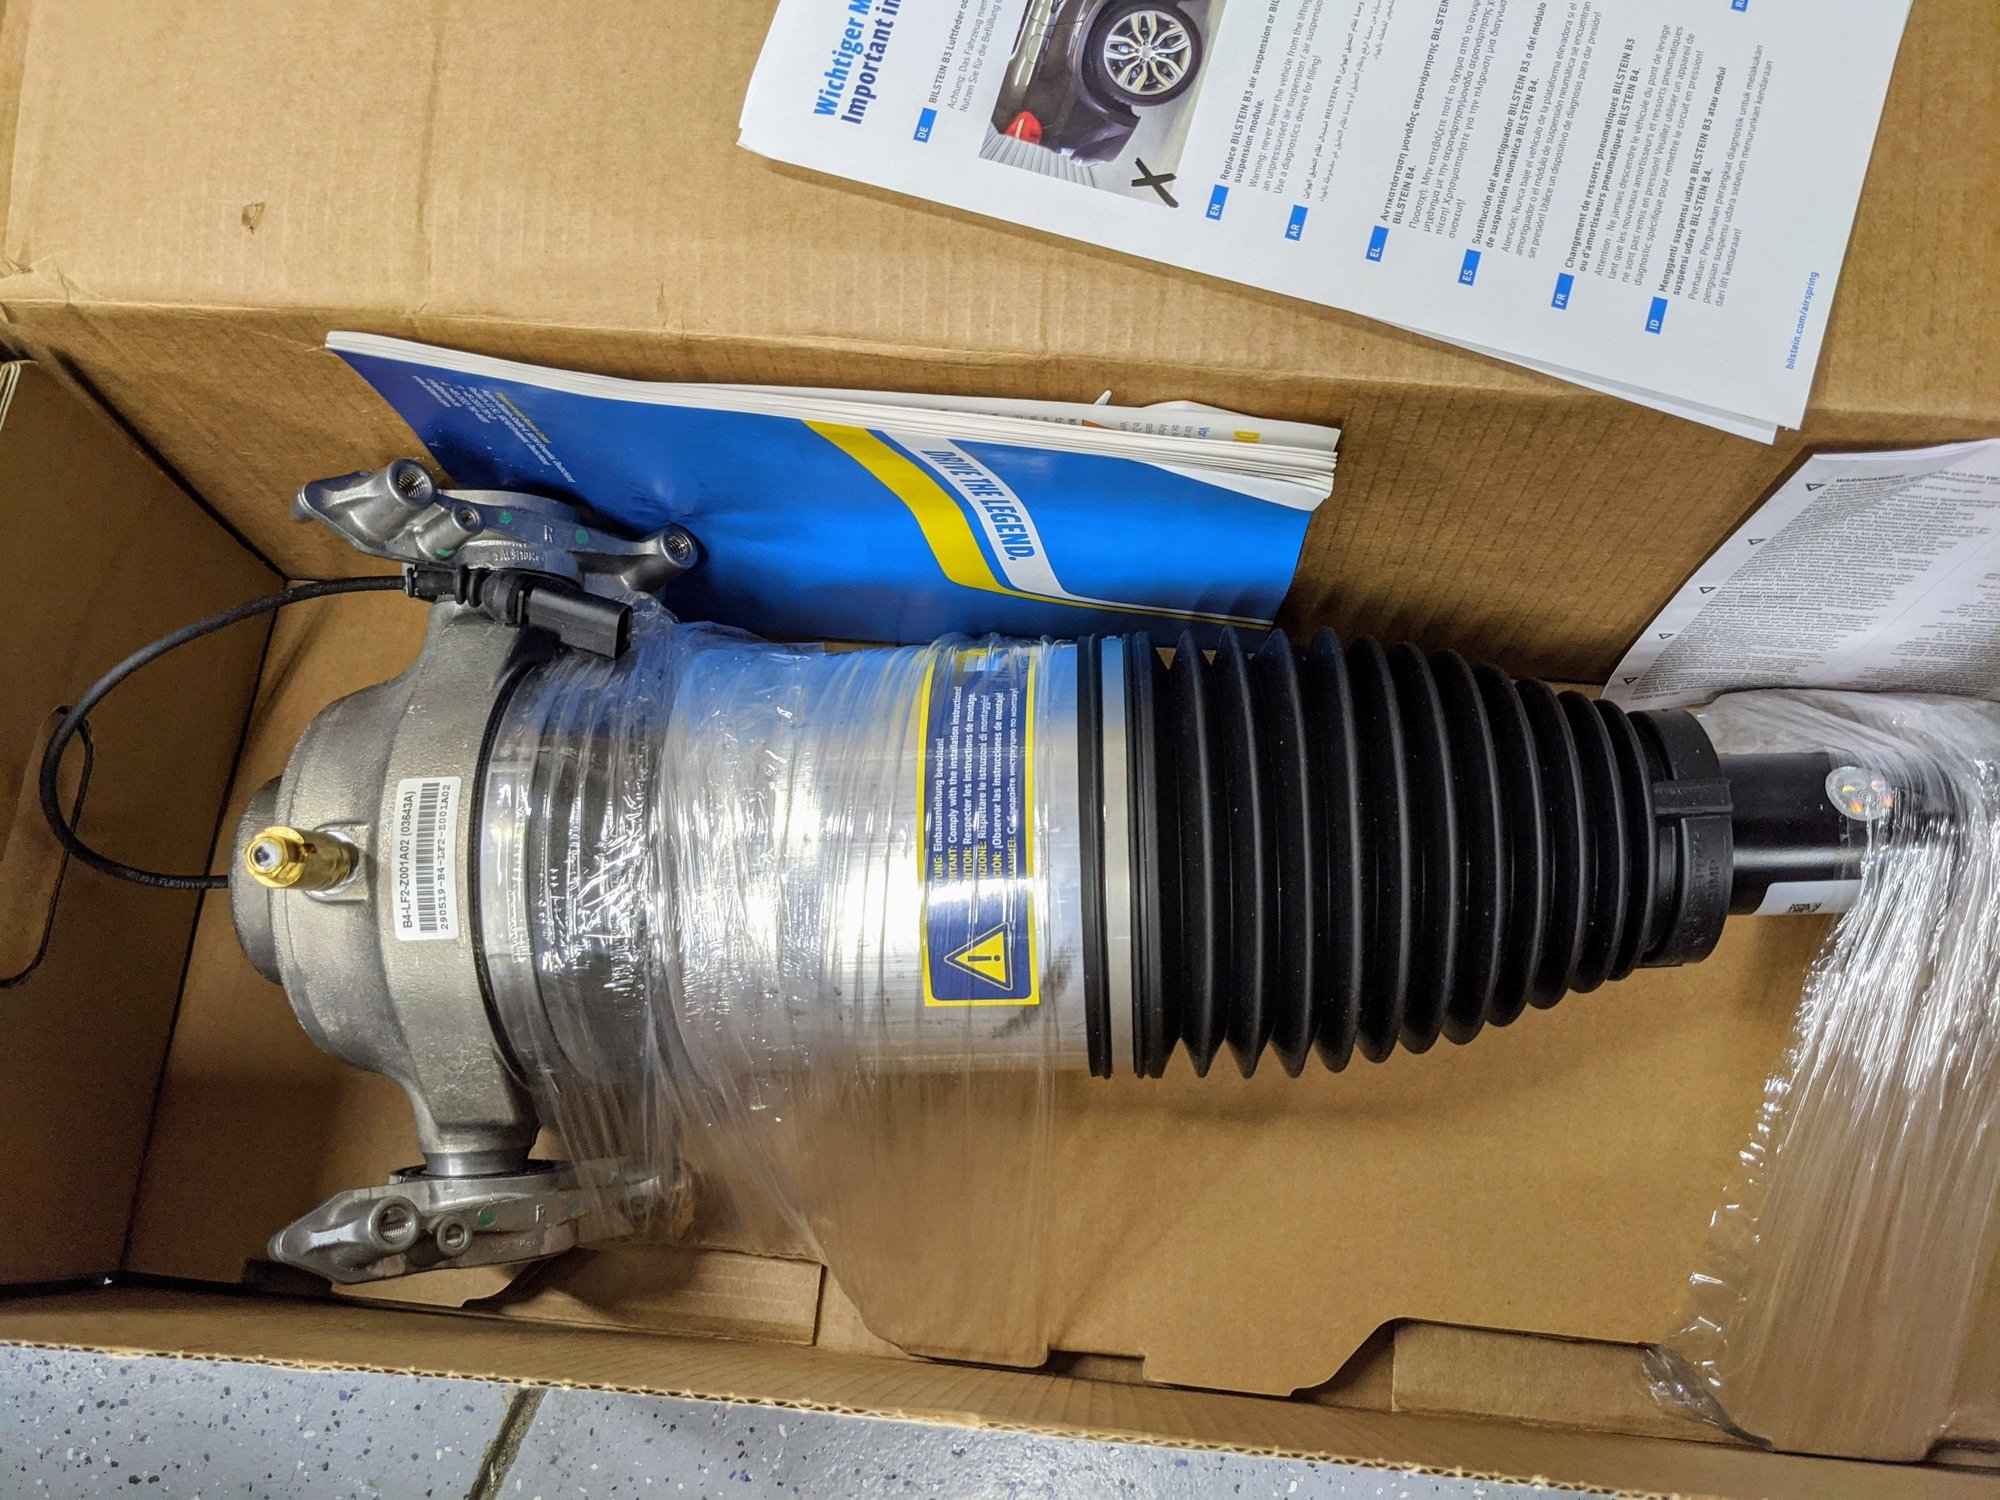
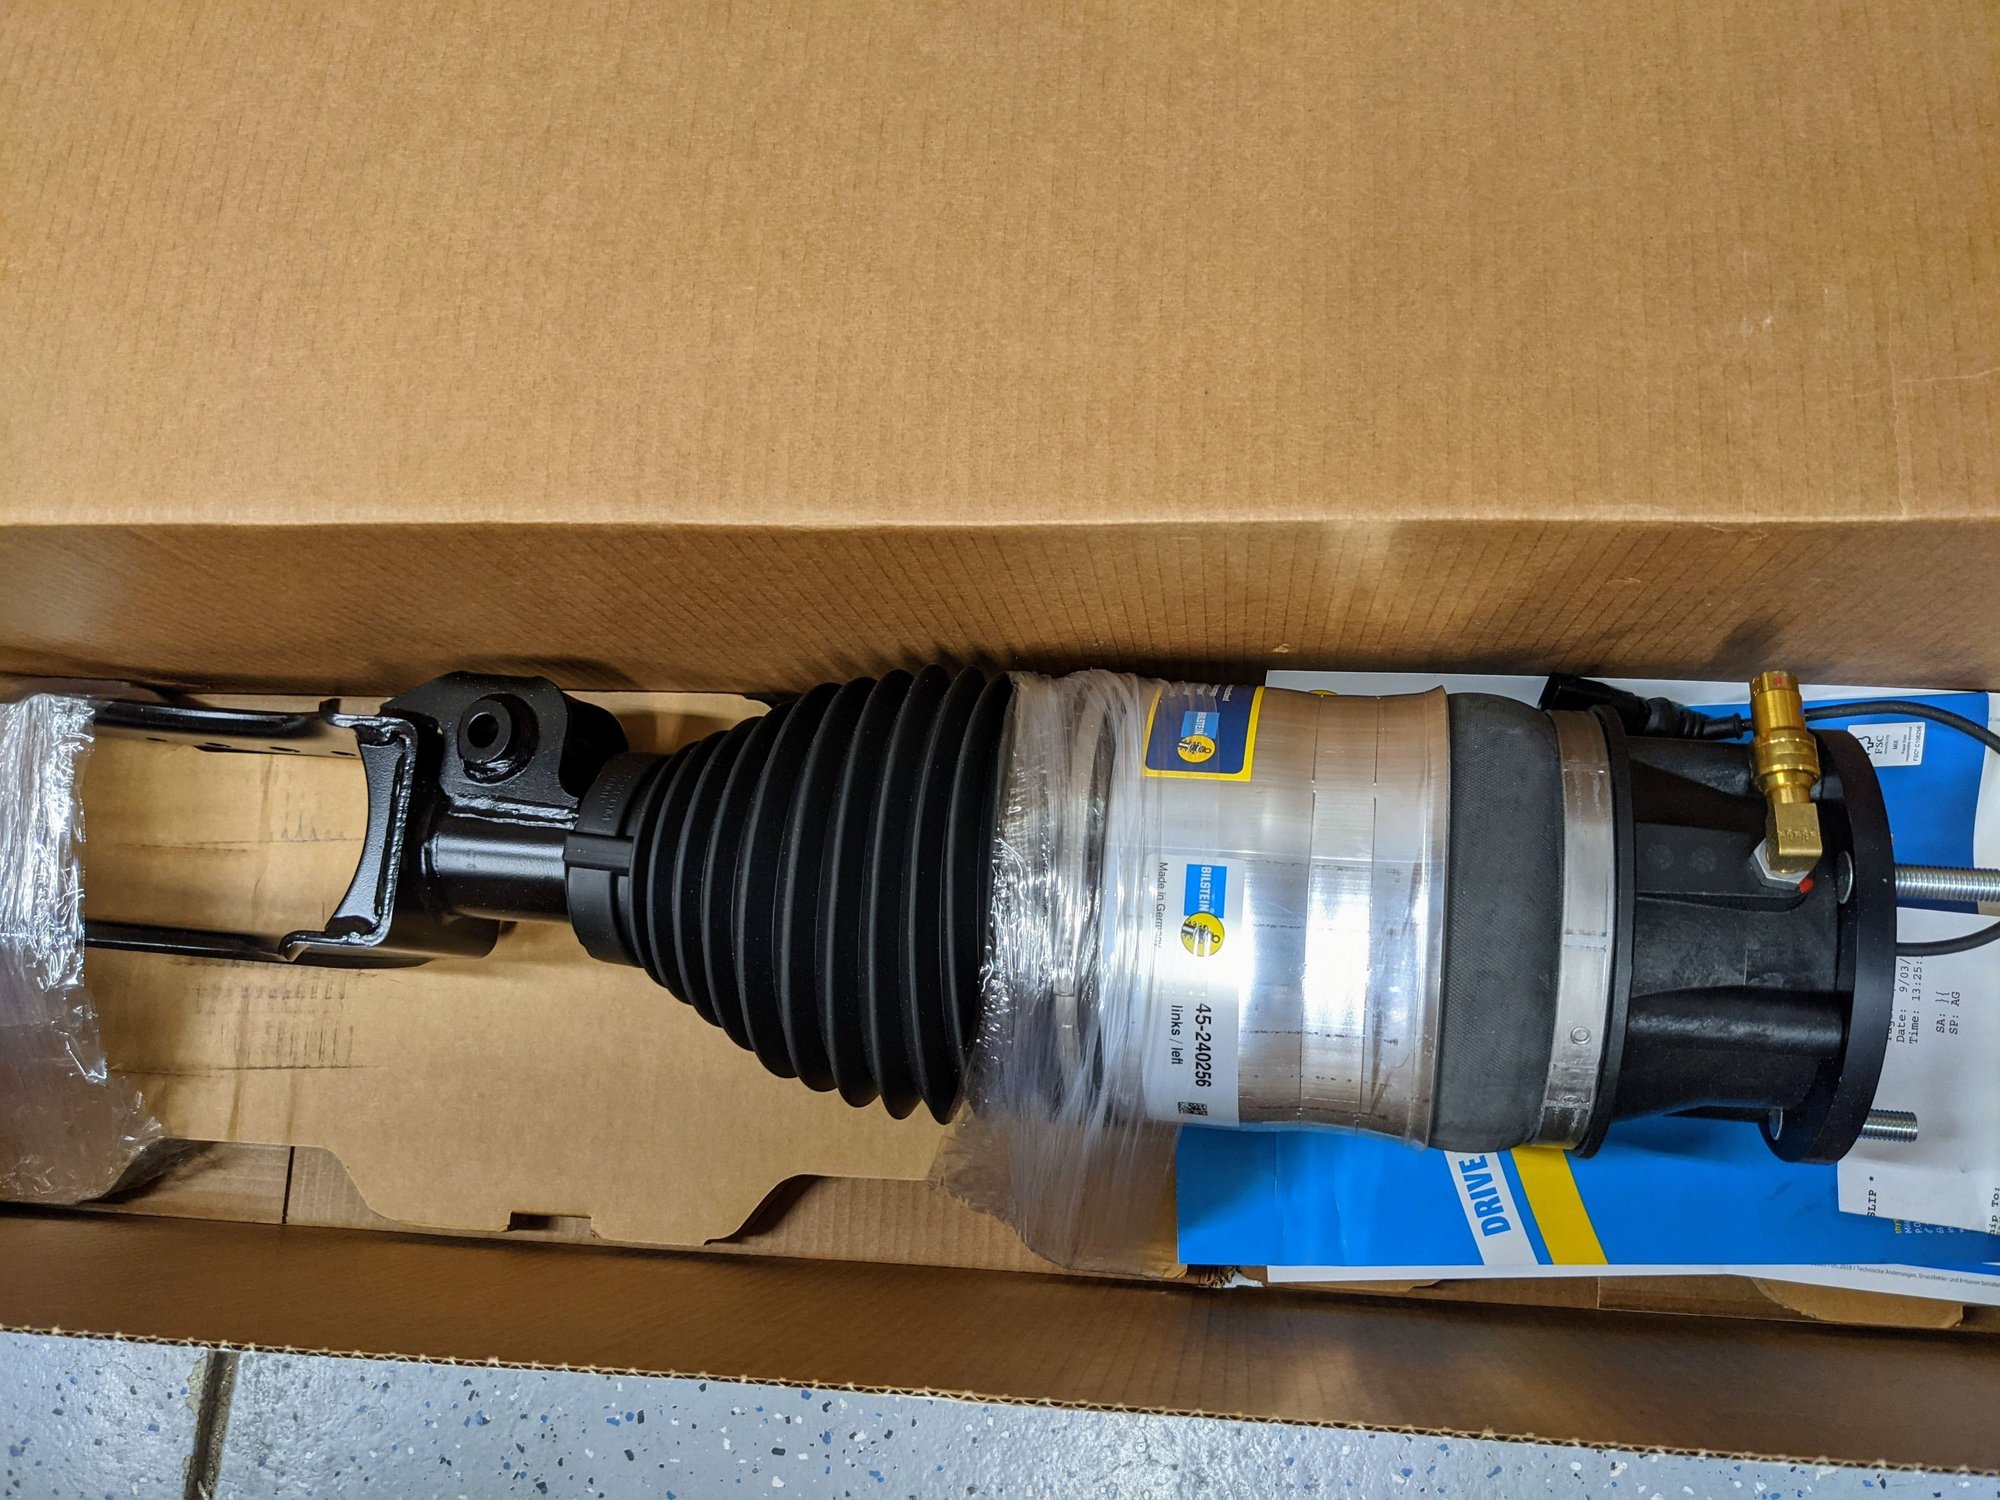
Sitting by the mailbox waiting for the other 2 air struts, compressor and valve block to arrive.
suspension replacement time
Jay, is there anything you need in terms of getting this job done. I've down all four on mine and have everything one would need to complete the job. Computer, speciality tools, nitrogen tank, etc... I'm also off all week. Sending you a DM.
just saw that you can't receive private messages. Let me try on to leave you a message on your friends page.
Left you my phone number on your visitor page. Reach out.
Last edited by RAudi Driver; 09-07-2021 at 11:38 AM.

 08-29-2021, 11:45 AM


 Thanks 9K.