Single Door Trim replacement
#1
The wife noticed that the drivers side Titanium door trim, the one that extends from the door handle to the rear of the door, had a number of dents in it from the previous owner.
Does anyone know how simple or hard it is to buy one piece from the dealer and install it yourself? Do I need any special tools?

Does anyone know how simple or hard it is to buy one piece from the dealer and install it yourself? Do I need any special tools?

Last edited by CaptJim; 02-25-2014 at 09:27 AM. Reason: Adding a PIC
#3
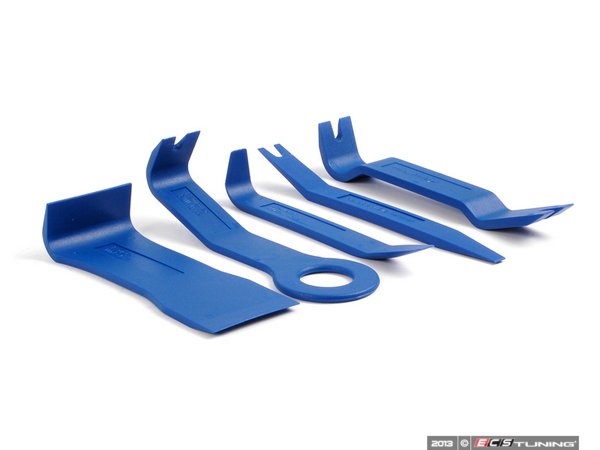
From what I remember, that part just snaps into place with several clips. It can be removed by very gently prying on it with a non-marring plastic tools. Like the ones shown below. If you looking to replace that piece we can get it for you, it looks like it's Satin Aluminum (9555550890062W). For more information Click Here.


#5
I guess you did this job previously. Well, I just ordered the trim from ECS, but I didn't get any glue. Well see what happens when it all arrives, bought some wipers and other maintenance stuff.
#6
Mine started to peel back nearest the seat, and my kid snagged it with his jacket - and off it zipped.
Trying to decide if I can re-bend and glue back on, or buy a new one. How much was the replacement?
Trying to decide if I can re-bend and glue back on, or buy a new one. How much was the replacement?
#7
Click on the big red "Click Here" above in the ECS post. I compared it looks like a good price.
Click Here
Trending Topics
#12
Was it just that the aluminum pealed of the mount with the four pins that clip into the door. I will take some pics an post them when I do the work.
#14
Yes the aluminum is glued/taped onto the plastic backing. The plastic backing contains the tabs which clip into the door panel. The new piece does come with both the aluminum and the plastic backing.
#15
All Finished, here are the Pics I promised. The tools helped, I could have used a screwdriver, but didnt want to damage the door.
Before, notice the plastic backing and the ****.

I lined up the new one and marked with a greese pencil where the **** were.

One Clip came out with it, but just pop'd it back in the door.


All Finished 3 minutes.

Before, notice the plastic backing and the ****.

I lined up the new one and marked with a greese pencil where the **** were.

One Clip came out with it, but just pop'd it back in the door.


All Finished 3 minutes.


