When you click on links to various merchants on this site and make a purchase, this can result in this site earning a commission. Affiliate programs and affiliations include, but are not limited to, the eBay Partner Network.
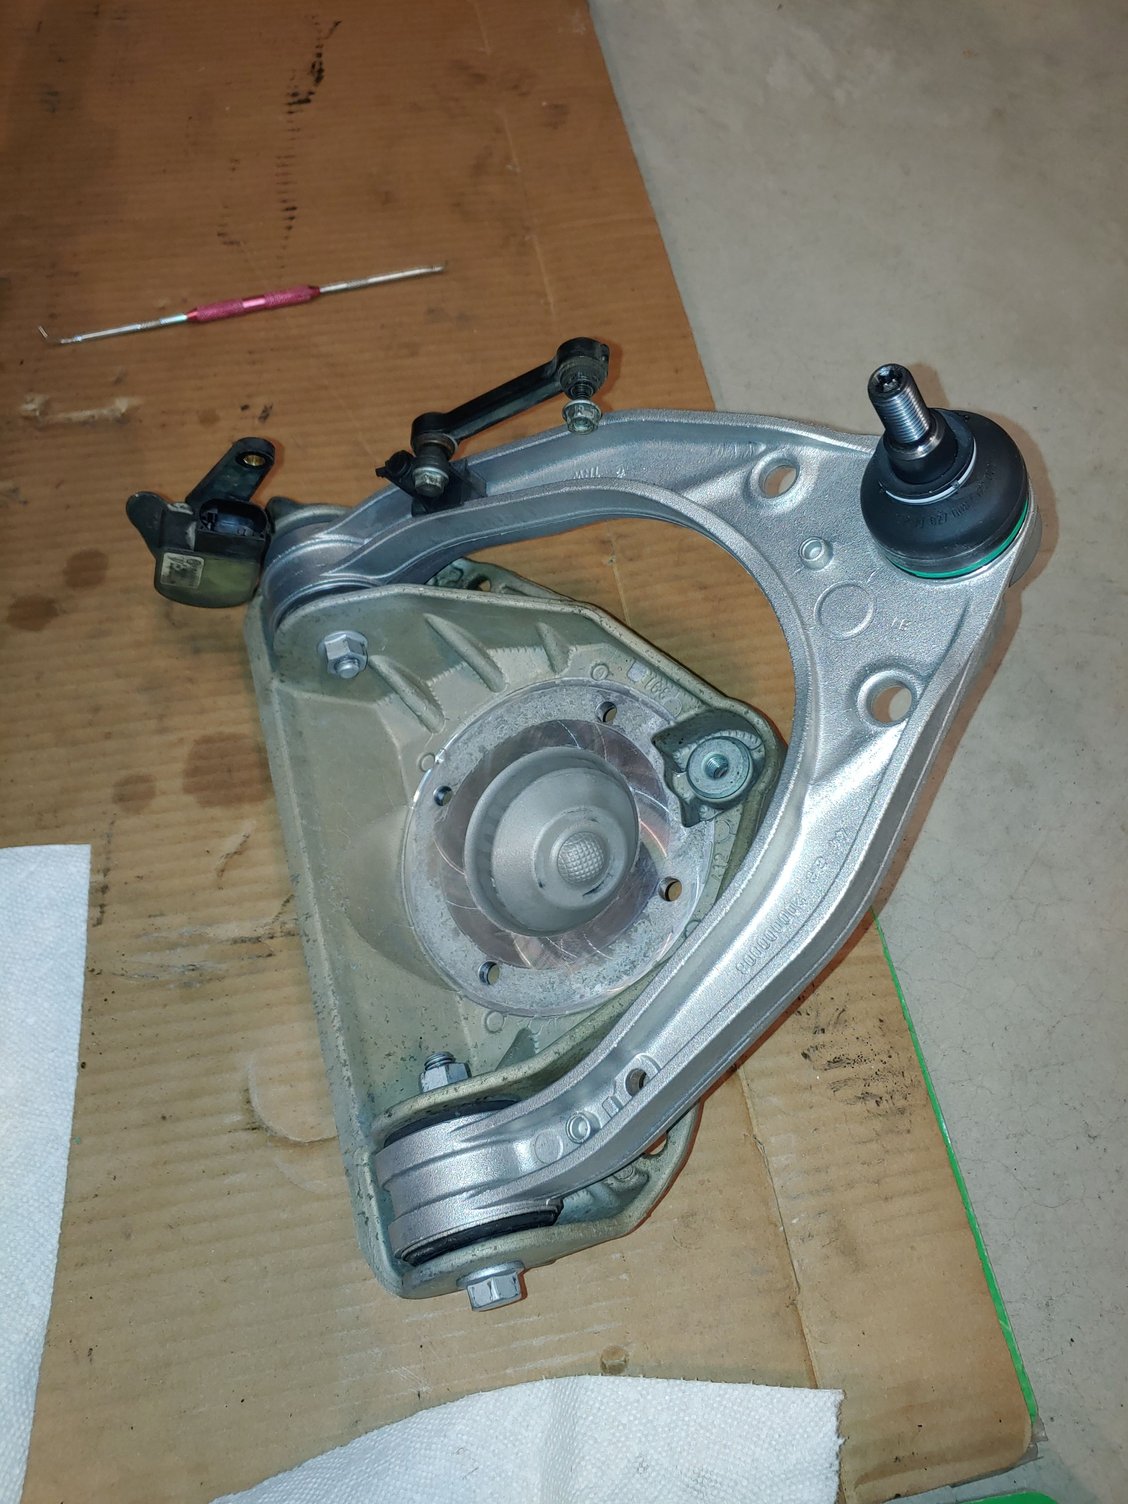
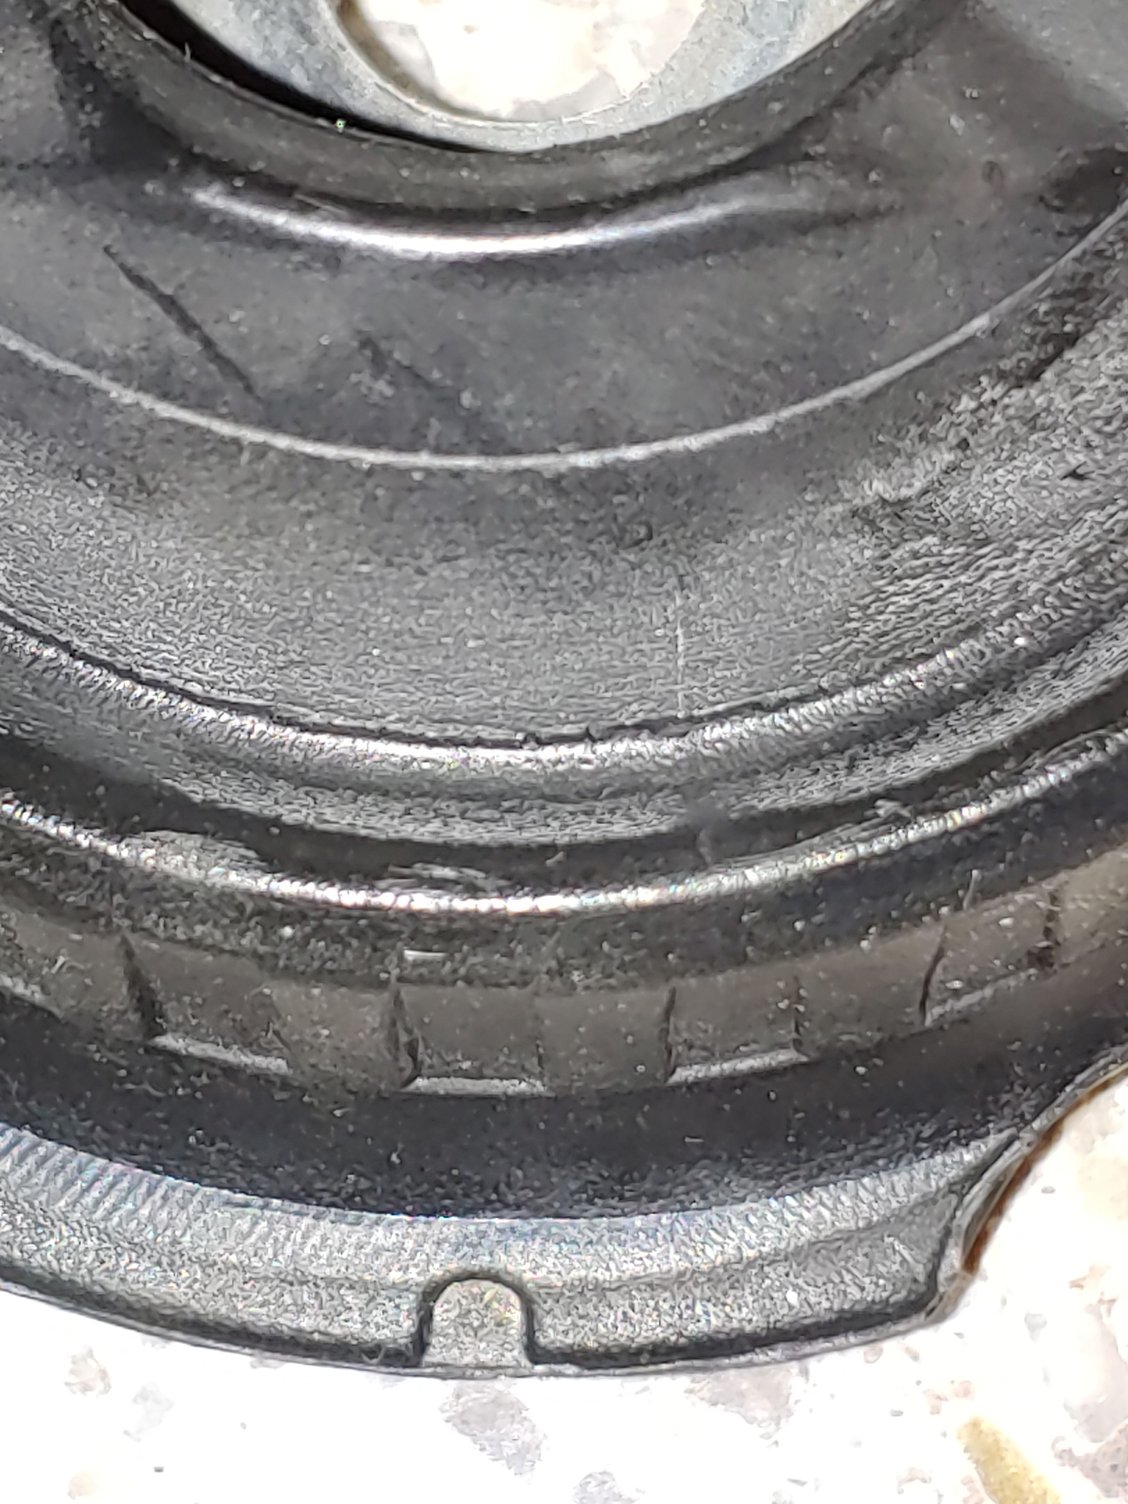
It's likely where the molten aluminum was poured into the cast. You should not need to grind anything off to fit the arms to the car - you need to bend the ball joint shaft off to the side as far as it will go, insert the end into the hole in the hub, then shoehorn the rest of the CA into place as you lower the shaft further into the hub. You can start with the CA angled off to the side, then twist it towards the subframe once the BJ shaft is in.
It's likely where the molten aluminum was poured into the cast. You should not need to grind anything off to fit the arms to the car - you need to bend the ball joint shaft off to the side as far as it will go, insert the end into the hole in the hub, then shoehorn the rest of the CA into place as you lower the shaft further into the hub. You can start with the CA angled off to the side, then twist it towards the subframe once the BJ shaft is in.
I got the mevotechs but trust me dude I had that ball joint in every which angle. Wasn't going in because of that nub. I am betting this is where the metal is poured for the casting as well but since I was taking off the entire knuckle anyways bc I decided to do my bearings while I was that deep it didn't make sense for me to try grinding it
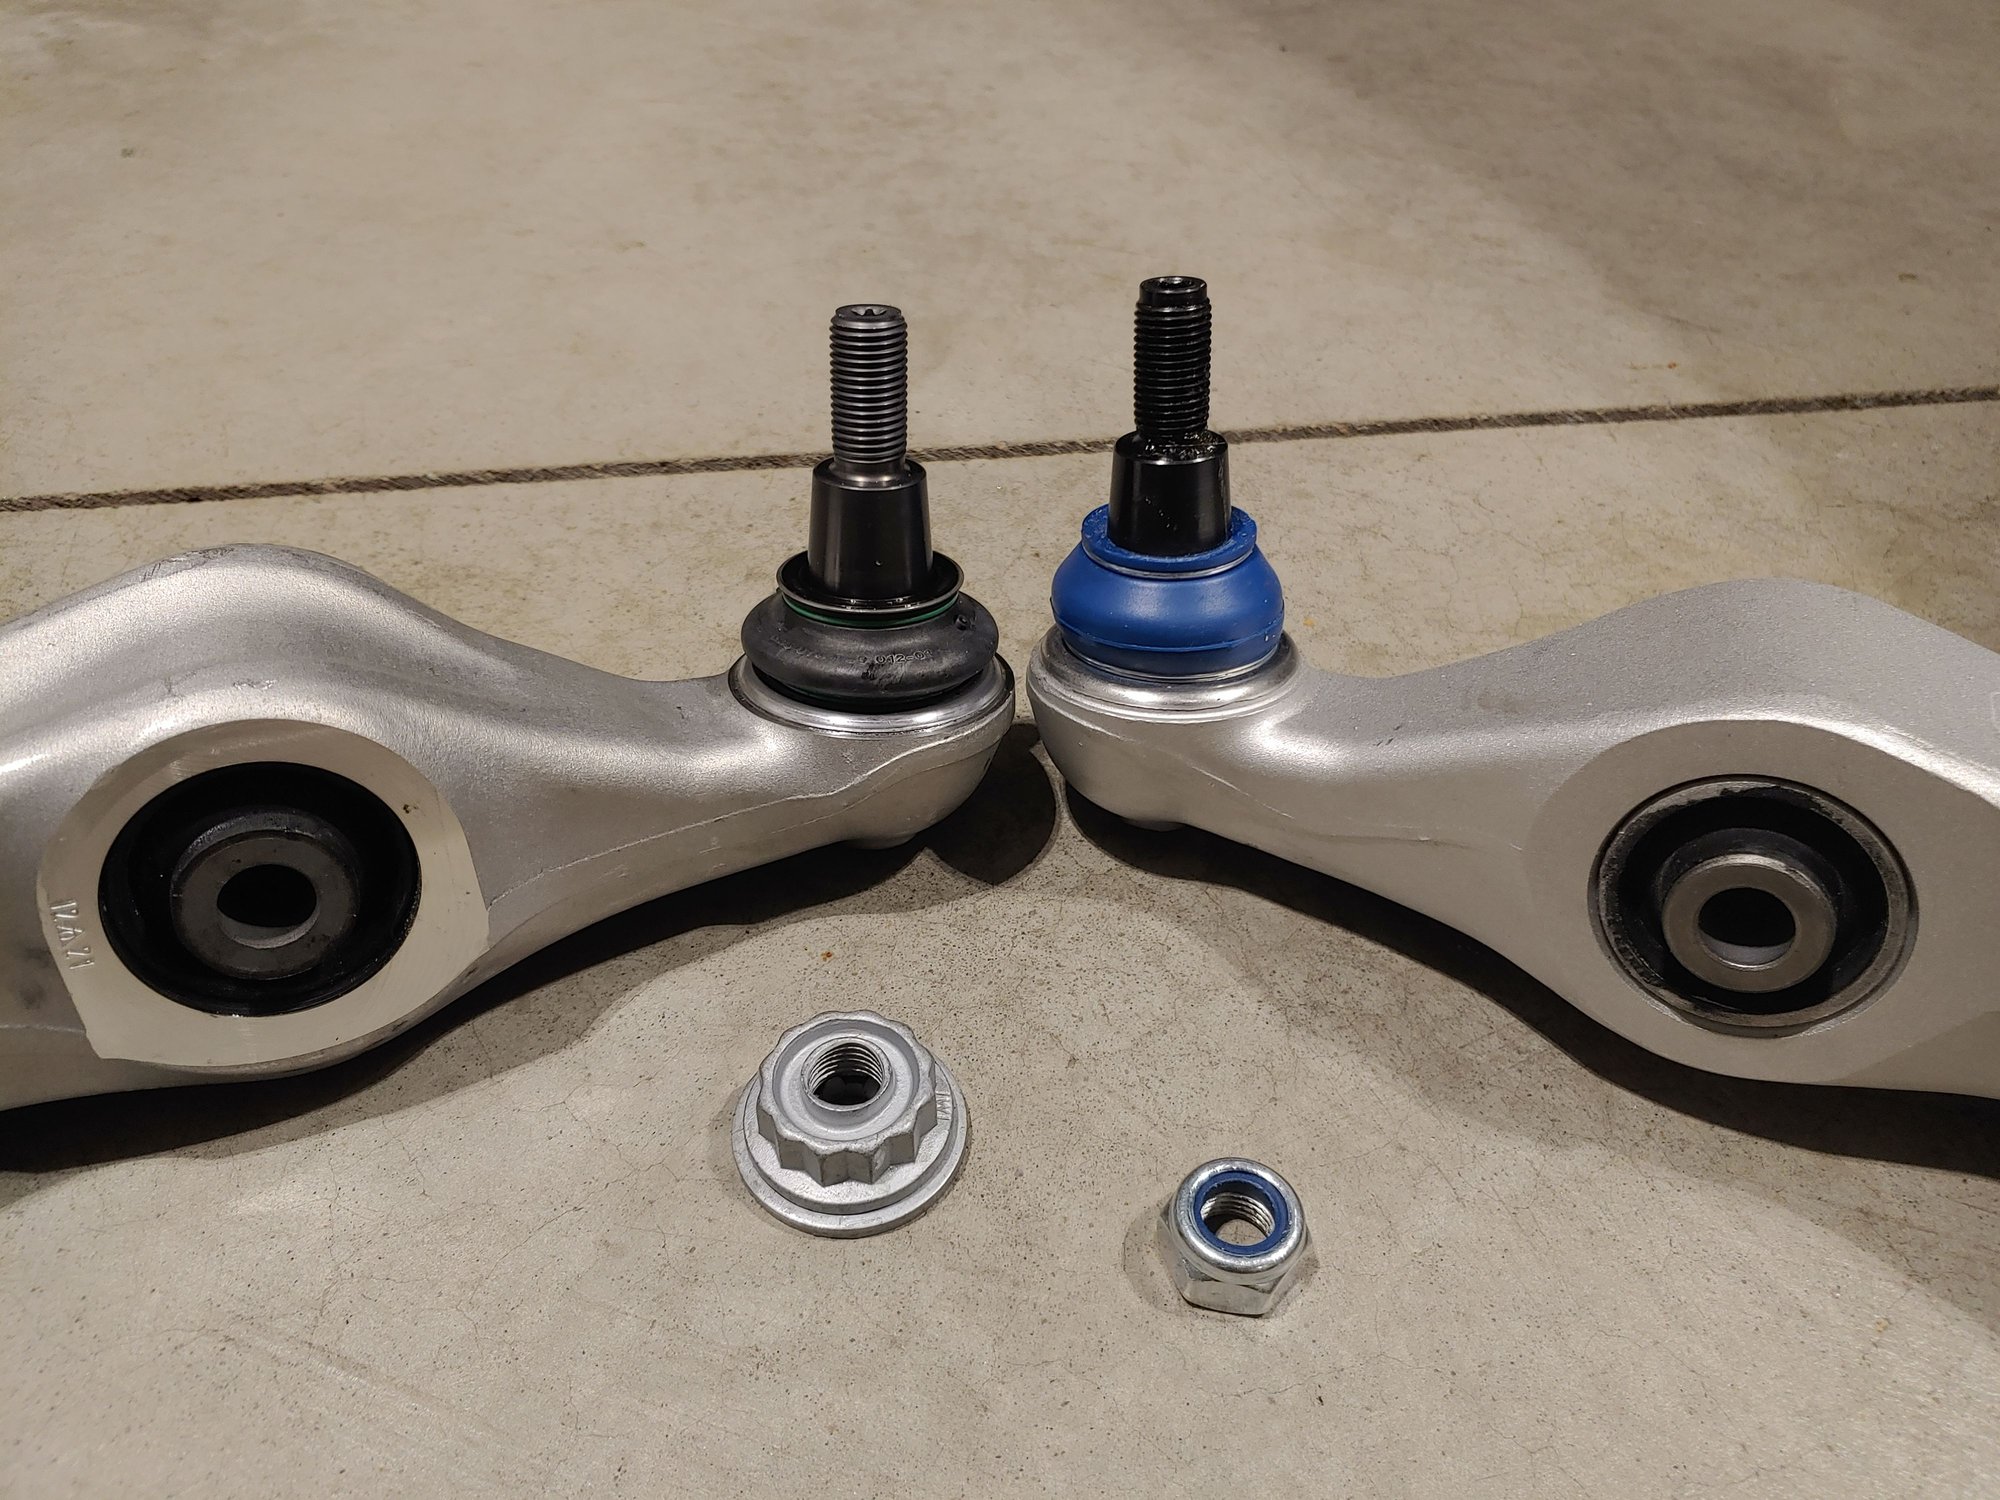
As I assummed, Mevotechs are about 0.25in taller then the Lemforders. Also, the left Mevotech arm was ltaller than the right one, so poor quality or manufacturing control. Or as mevo explained to me, parts get updated and i mayhave received one old and one new arm, but i ordered 2 sets from 2 places and all 4 arms where different.
Lemforder left, Mevotech supreme right. Note other differences in shape and size of the arm nut, etc.
lemforders are OE part, i noticed the porsche, audi, vw logos or part numbers ground off the arms.
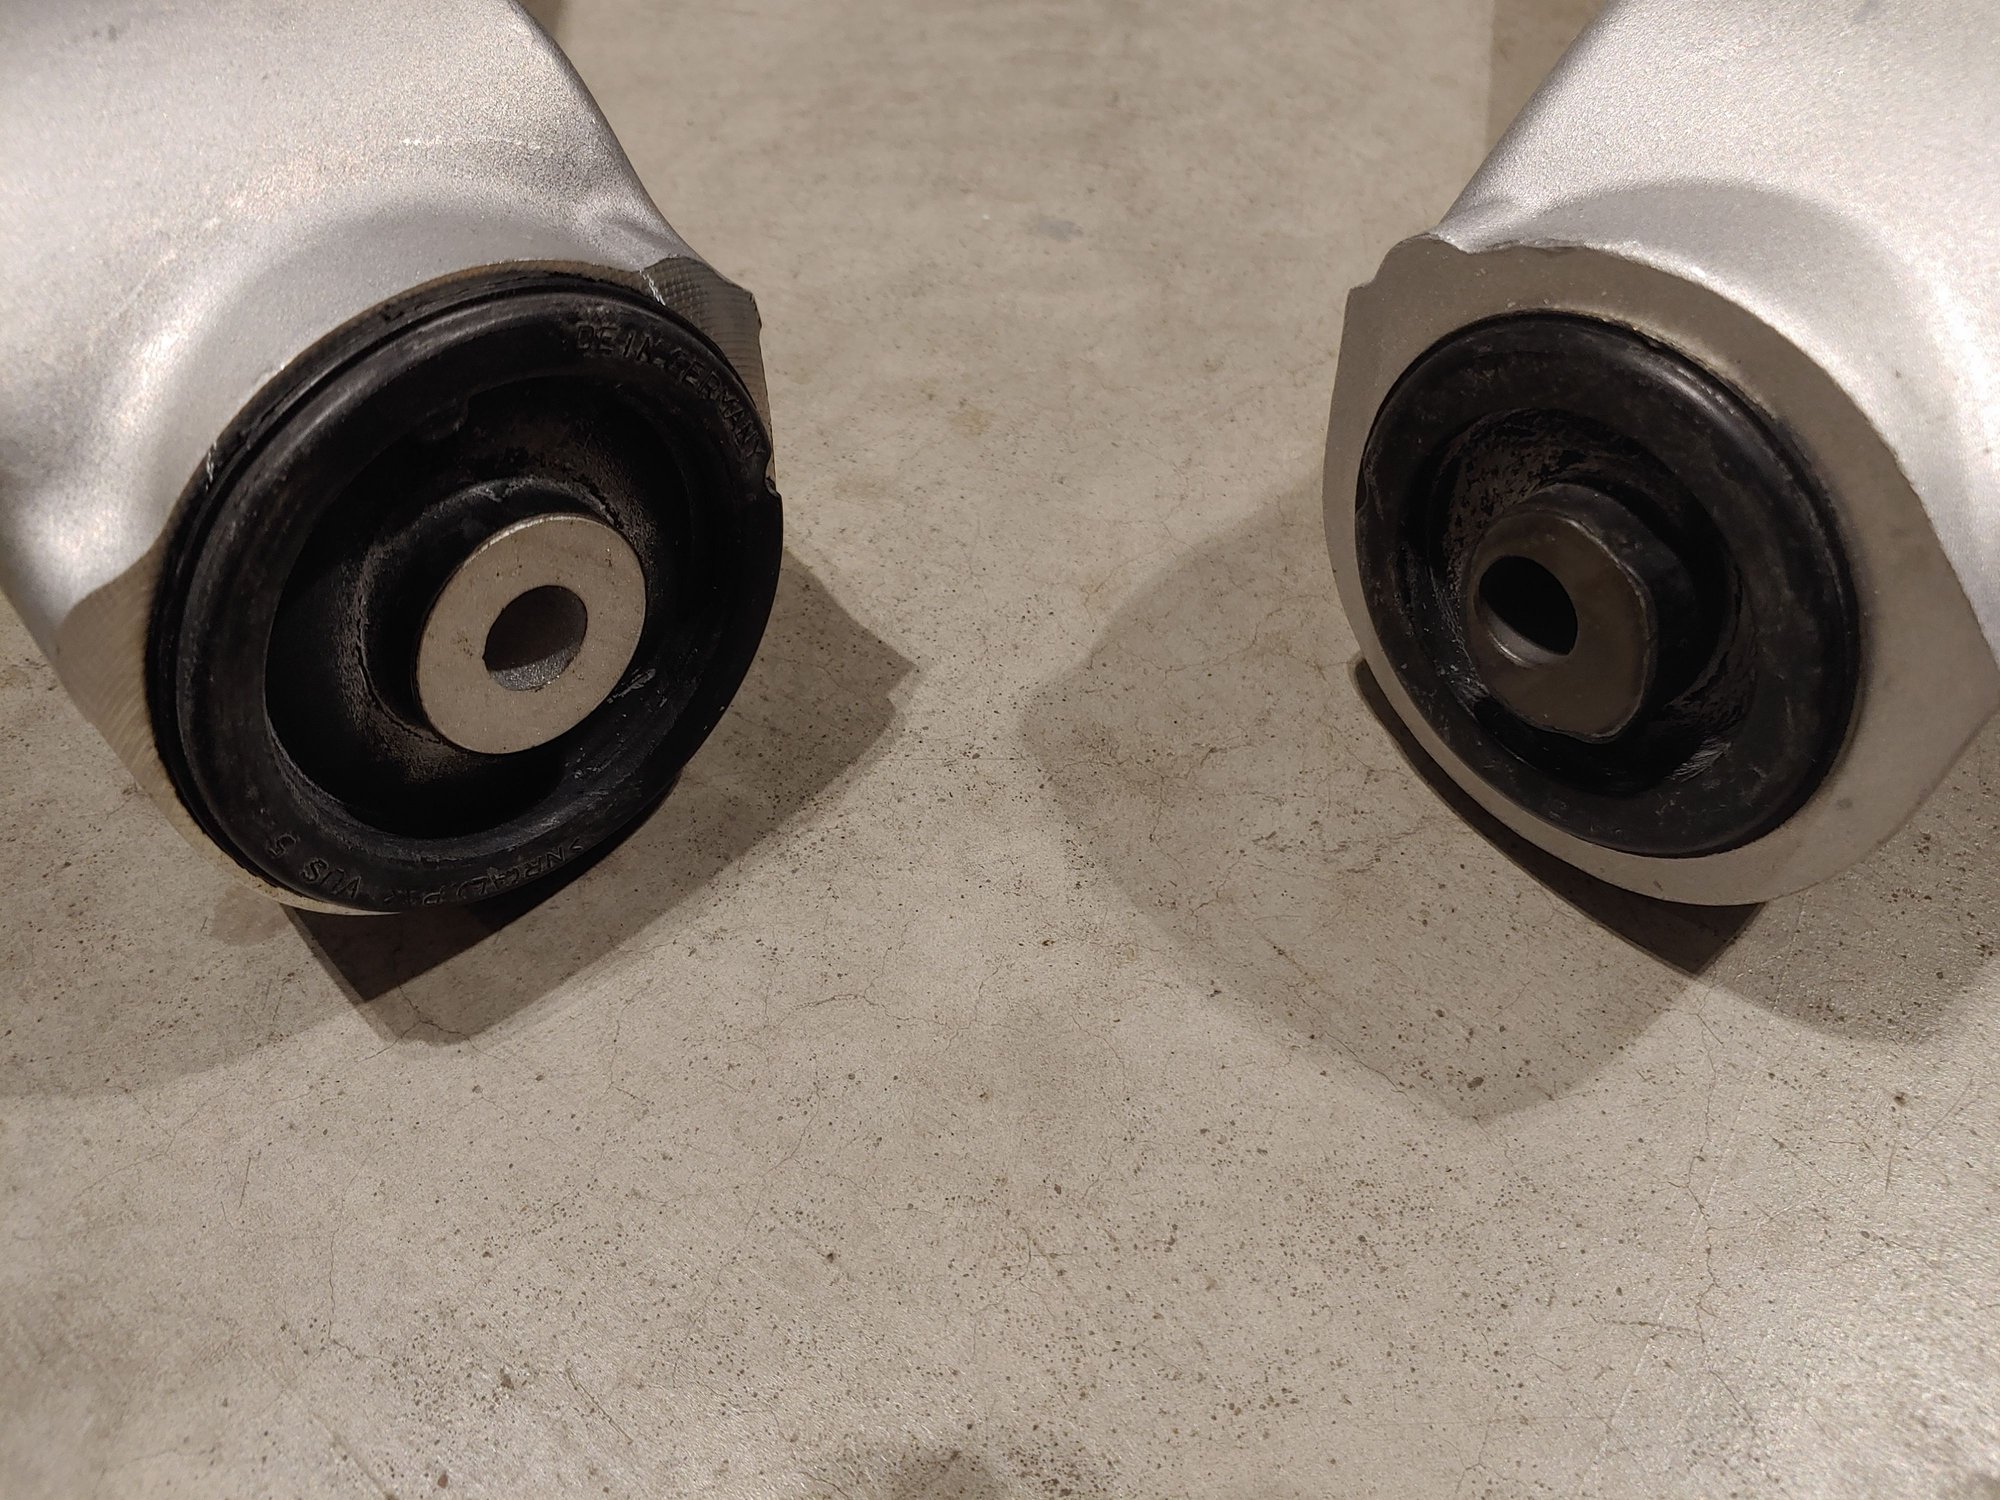
Lemforder left Mevotech supreme right. The aluminum arm at the large bushing is the same diameter on the outside, but the hole size and bushing is smaller on the Mevos, like the original porsche steel arm size. Bet they use the same bushing steel to al to save cost. Plus mevo has asymmetric bushing and center bushing metal collar.
As mentioned before, maybe 0.25in is enough to cause fitment issues. And i remember someone saying they reordered another mevo and it worked, just like i experienced, they have quality control. Update and stock issues.
Last edited by Corvetteboy6988; 09-11-2021 at 12:52 PM.
As I assummed, Mevotechs are about 0.25in taller then the Lemforders. Also, the left Mevotech arm was ltaller than the right one, so poor quality or manufacturing control. Or as mevo explained to me, parts get updated and i mayhave received one old and one new arm, but i ordered 2 sets from 2 places and all 4 arms where different.
Lemforder left, Mevotech supreme right. Note other differences in shape and size of the arm nut, etc.
lemforders are OE part, i noticed the porsche, audi, vw logos or part numbers ground off the arms.
Lemforder left Mevotech supreme right. The aluminum arm at the large bushing is the same diameter on the outside, but the hole size and bushing is smaller on the Mevos, like the original porsche steel arm size. Bet they use the same bushing steel to al to save cost. Plus mevo has asymmetric bushing and center bushing metal collar.
As mentioned before, maybe 0.25in is enough to cause fitment issues. And i remember someone saying they reordered another mevo and it worked, just like i experienced, they have quality control. Update and stock issues.
Whats the price on the lemforders, you think its worth the small differences? To be honest looks kinda like the same bushing size just larger lip, not sure if the asymmetric bushing is a good or bad thing.
$300 vs $200
yeah, not positive on the bushing, just sent the mevos back, but I was checking to make sure it wasn't just the lip of the bushing that's different, if you look, they actually both have about the sane lip thickness, just different diameters. Spread the stress out over a greater area, should be better with the bigger bushing.
considering i got 2 left and 2 right mevos. And each one was different, other than lthe obvious eft and right differences, i think the extra money is worth it for the Lemforders. You can tell the arm is just finished nicer, machined at the bushings, etc. Can only imagine then the ball joint and bushing are higher quality. Also nice, the rubber boot over the ball joint has an integrated metal ring on the top, so when its up ageist the hub its not rubber to metal.
who knows, they might last the same at the end of the day.
Just ordered set of MOOG units, part numbers RK620456 and RK620457. I was looking to get Centrics based of J'sWorld review, but passanger side seems to be backordered online.(Carid, RockAuto, SummitRacing)
MOOG is well regarded for precise quality, I will report back when I get them in.
Installed the AL Lemforders mentioned in my previous posts, ZERO issues with installing, and no need to move the axle or grind the nub. Ride, and handling is much improved, and clunking over bumps nearly gone. Shuddering and jitters with speed completely gone
Still need to do upper control arms and upper strut mount next to finish the job.
My servotronic rack was replaced at the same time as Indy saw a leak and heard clunking noise also coming from the rack. My 3rd party warranty covered rack and LCA's. I feel most of the improvements are from the new LCAs.
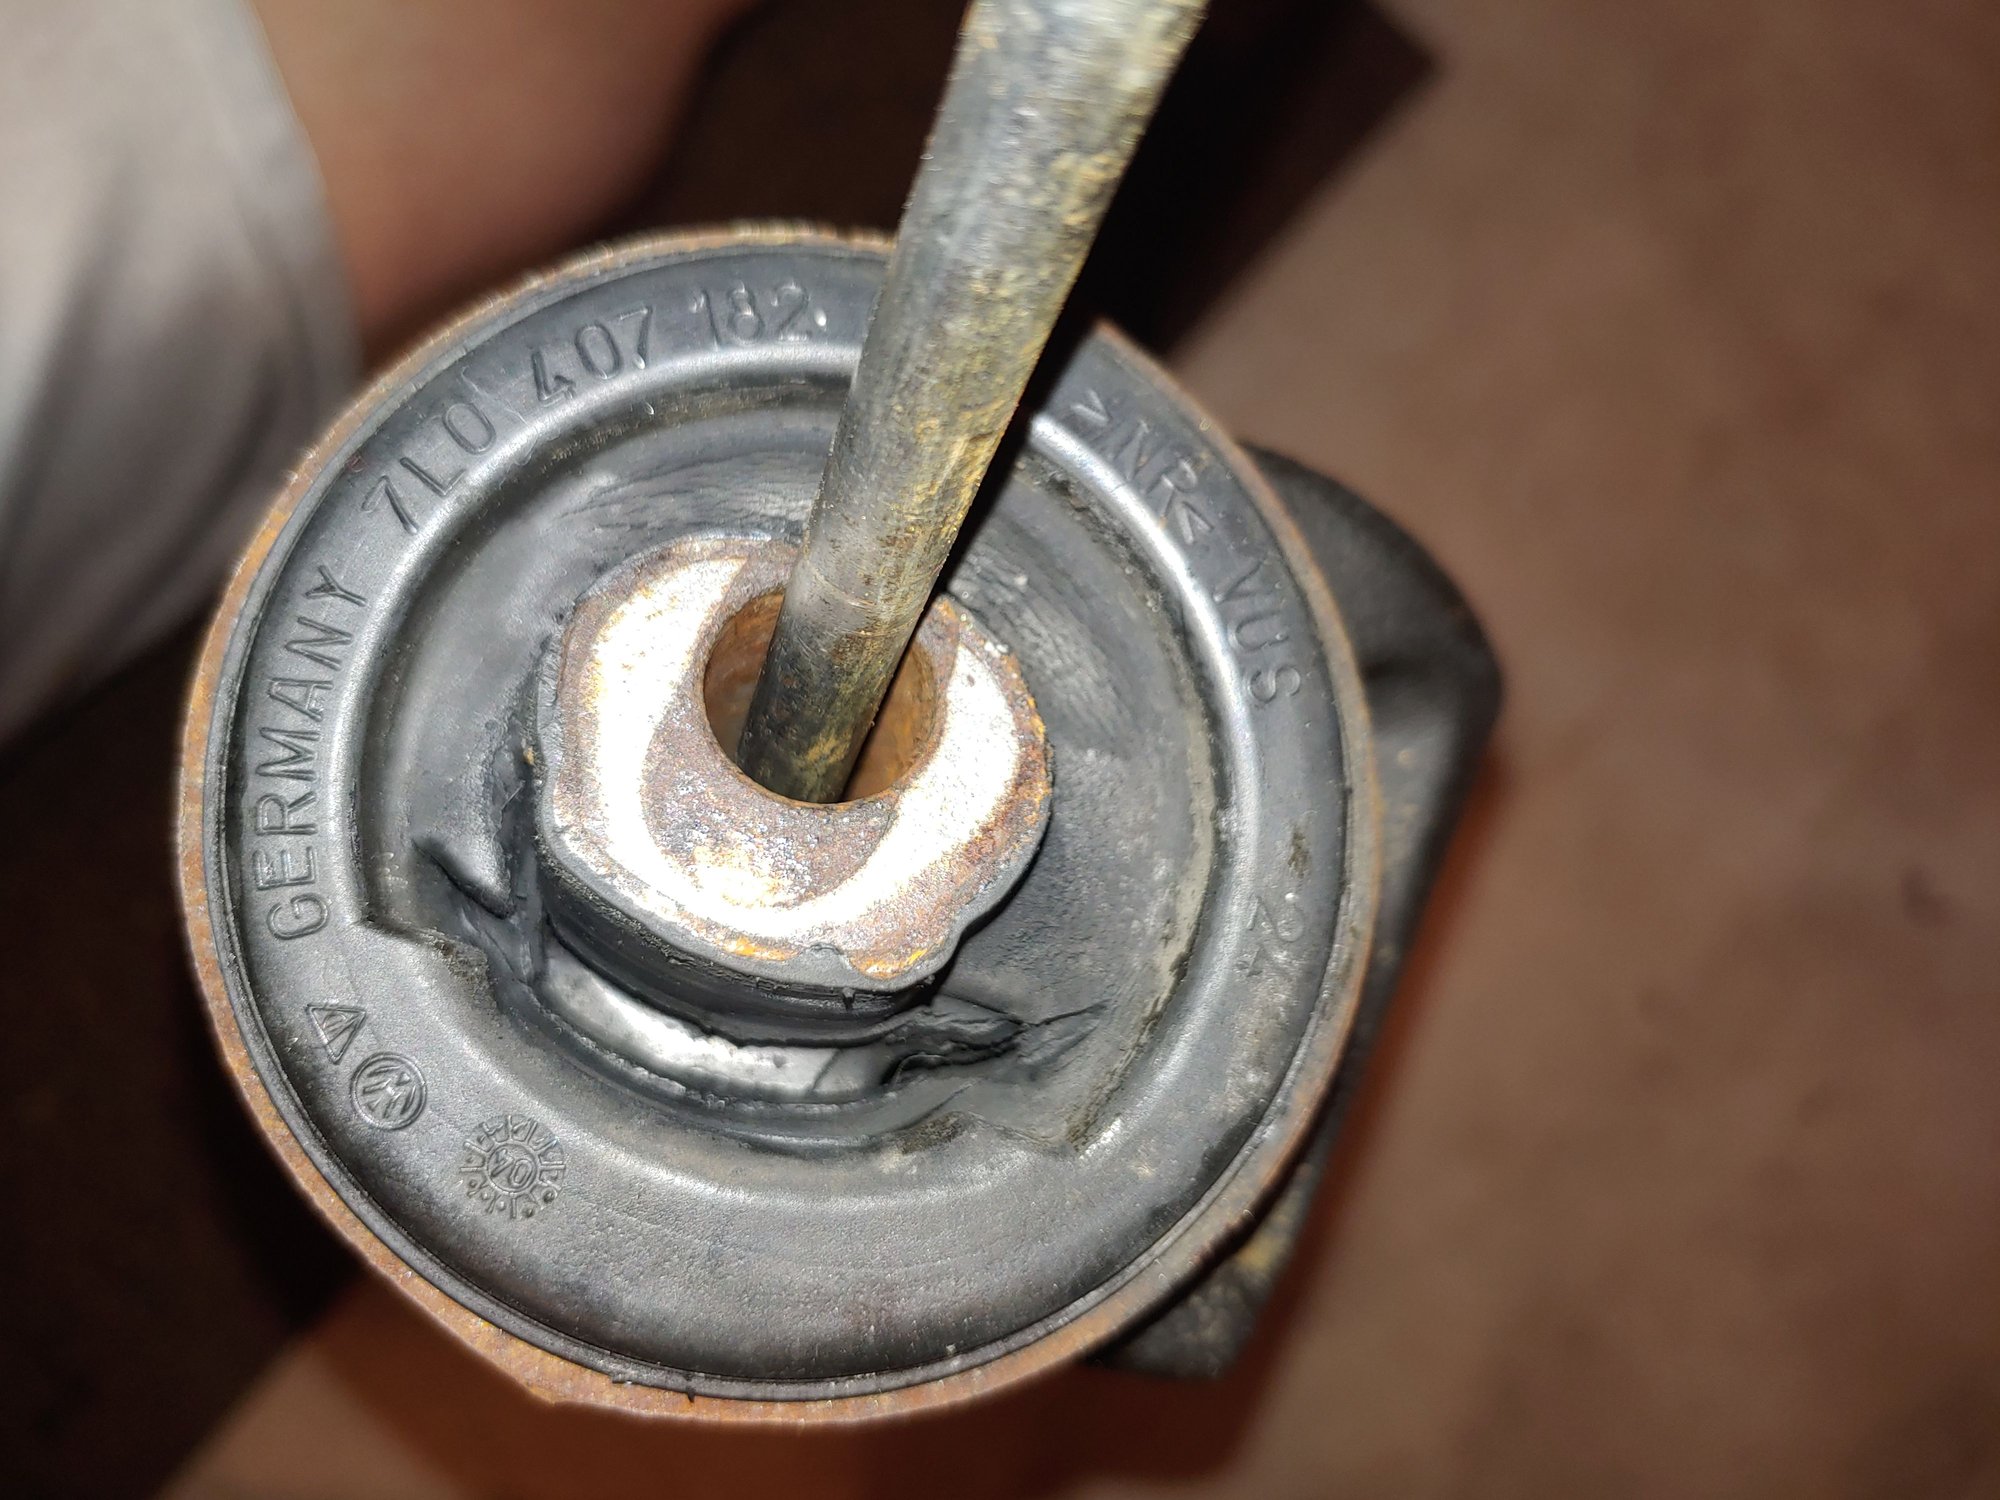
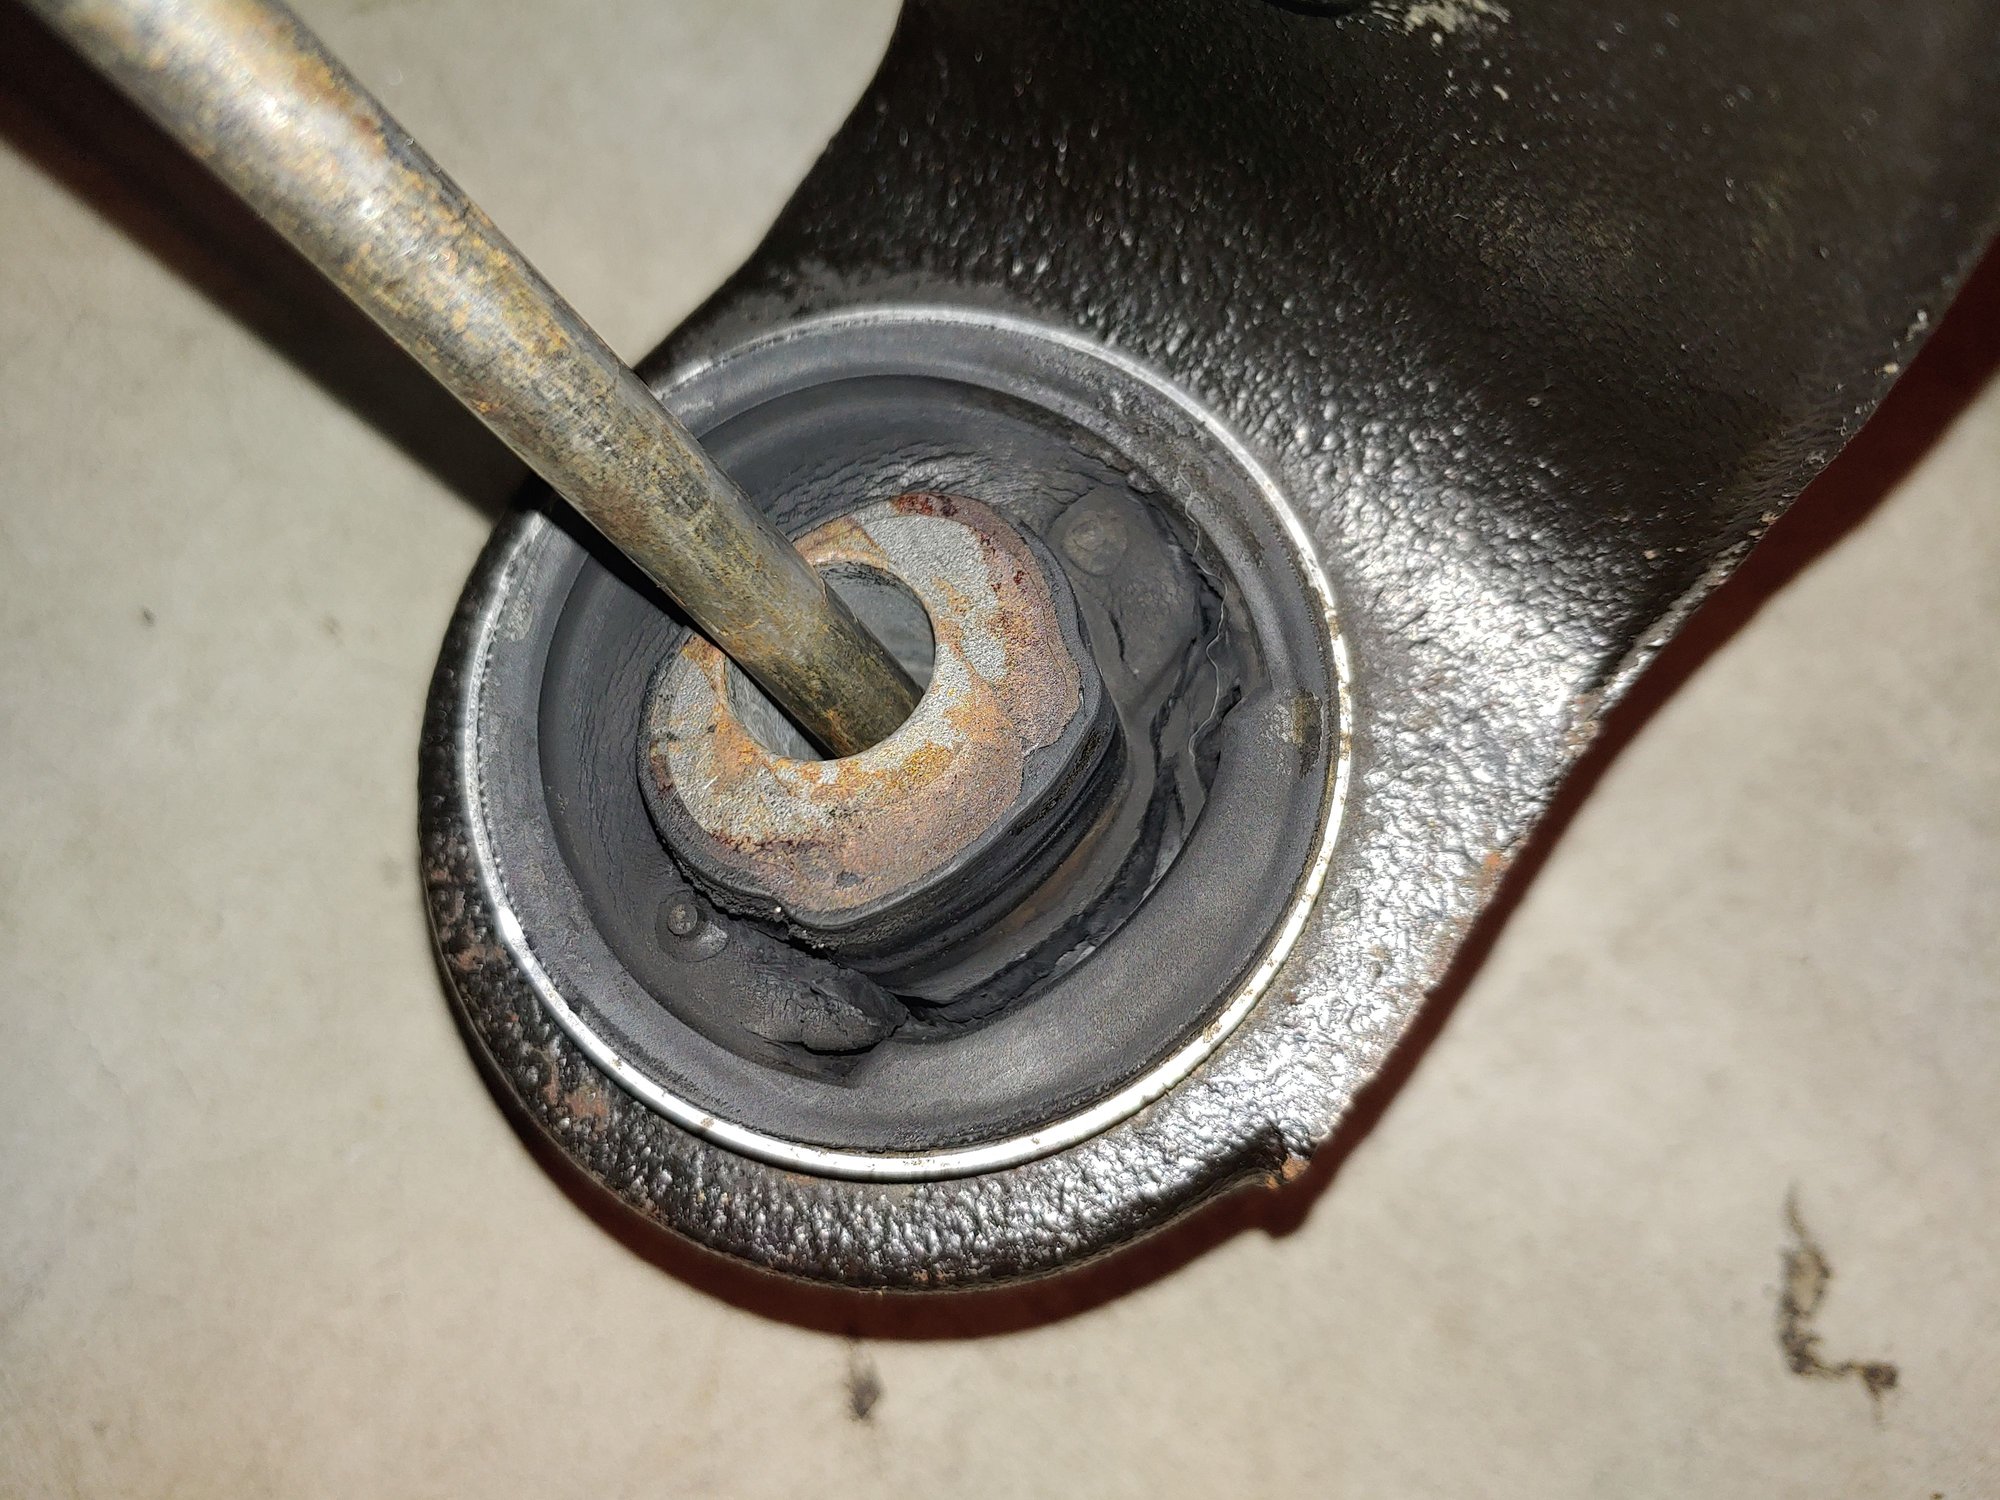
See pics, typical turbo tears in large rear LCA bushings. All other bushings in arms where fine. Passenger side ball joint looser than the drivers, but no noise.
This is a mush do repair for any Gen1 at this age. I currently have 78K, but think its more age than miles. And actually i noticed the clunking and looseness in the front end 2 years ago around 60k, but Porsche dealer said, all good, nice and tight. Idiots. The rear bushings where already torn back then, Im 100%.
BTW, finished doing the uppers too, both sides both bushings torn. Got TRWs, identical to my originals.
replaced the upper strut mounts while apart, and the air strut top oring, make sure to clean up the whole upper al strut mount while out and to ensure a good seal. Used the Porsche lub on the oring. Used my Milwaukee impact wrench to get strut top nut off no problem, but not sure how your supposed to torque to 44 ftlbs. I wrapped gorilla tape around the shaft, held it with vise grips, and could only manage 30-35 before slipping. I tried a rubber strap wrench, holding the shaft directly, duct tap wrap was the best. I Used blue thread lock and hit it with the impact gun to make sure it won't loosen. This was the toughest part of the job for me, trying to hold the shaft and tighten the strut nut enough.
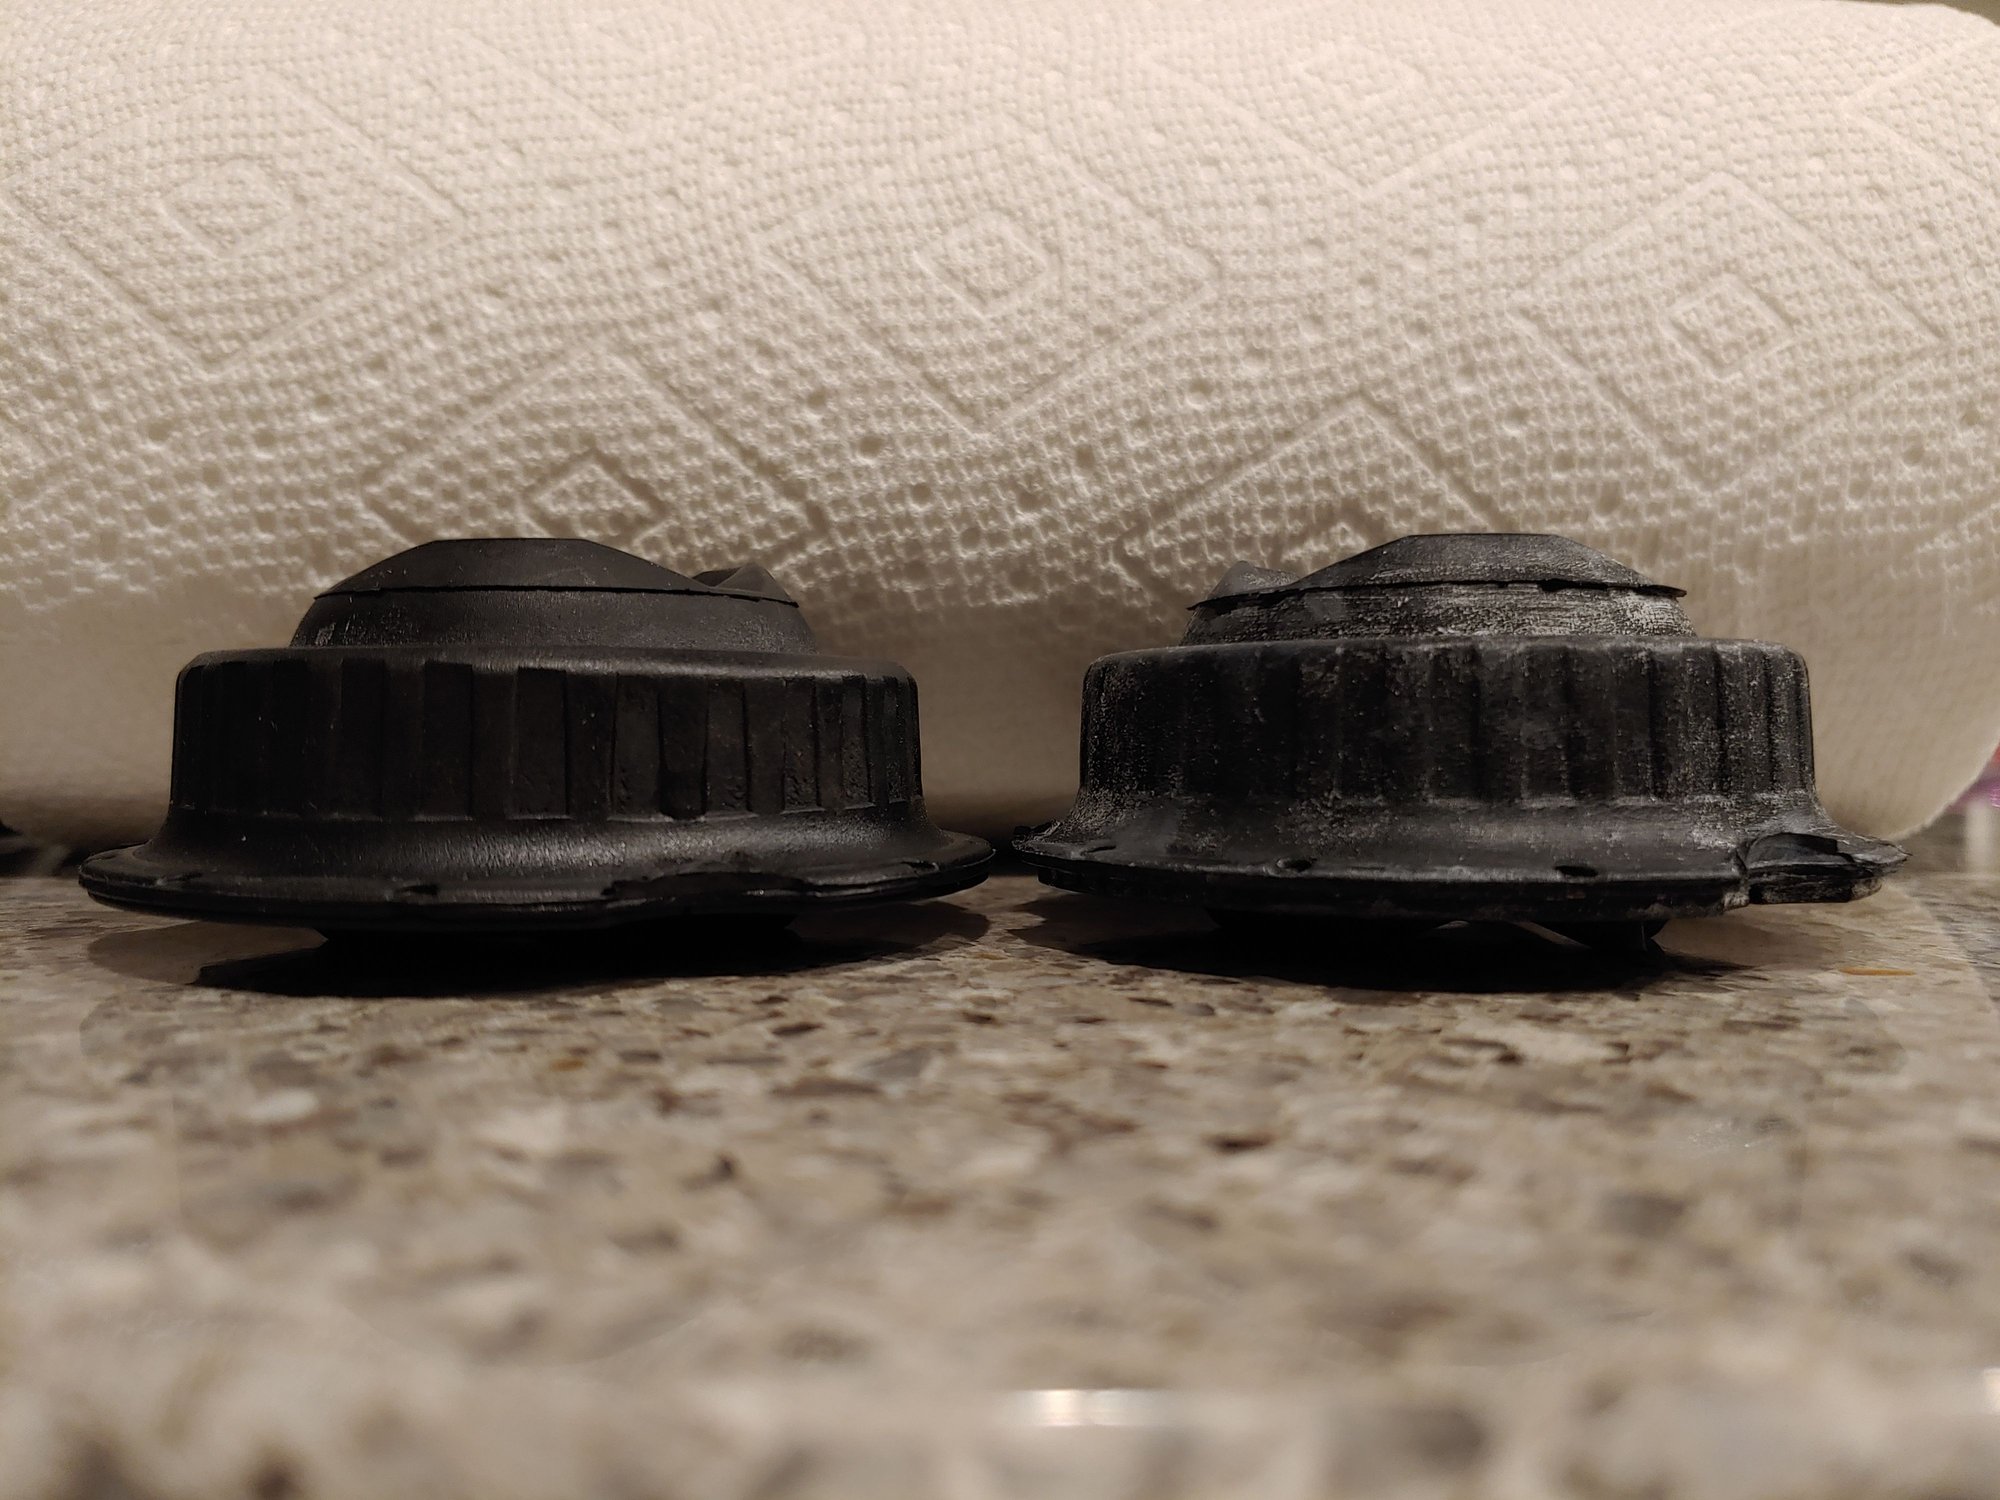
my upper strut mounts were starting to crack, 79k miles. Plus, they are compressed compared to the originals, so make sure you do them. Left pic is old one, right new one. The upper oring was flattened too so reuse is questionable.
Feels so much better now, solid over bumps, no shuddering at speed, hefty and a tank like the pig she is. Handling is a bit more precise, but the nvh and ride is the biggest improvement, no junky front end feel anymore.
Last edited by Corvetteboy6988; 11-29-2021 at 11:48 PM.
Great info- thank for sharing. I need to tackle this job soon. There is no clunking at all, but the handling isn't nearly as precise as 50k miles ago and the rig doesn't seem as settled at higher speeds. The PO replaced the LCAs and tierods at 65k and I have 120k on the P!G now. I suspect that all the bushings and ball joints need to be refreshed.
I noticed symptoms as soon as 60k, your right in that window (and so was the PO), and think thats the time to start checking to see if its time to replace the front components/bushings. Im hoping, and pretty confident these new aluminum LCA's with the solid rear bushing will last longer than the OE CTT hollow/fluid filled ones. Issue is, the uppers seem just as week, and there is no improved part as they already have solid bushings (other than going poly).
Perhaps the failing LCA damages the uppers over time, speeding up their failure, time will tell.
And you have to factor in age and environment as well, both which have a significant impact on the bushing life. Factor in the speeds, capability, weight, the stress from the height adjustable air suspension, etc. of the Cayenne, its just hard on the front end, so it is what it is.
Seeing how my upper control arms where totally separated at both bushings/connecting points, there is no question this impacts handling, allowing the whole upper arm to move longitudinally while cornering, braking, over road imperfections, etc. Mine where shifting so much fore and aft that just stabbing the brakes at parking lot speeds resulted in a clunk (arms hitting mount), just think what it does driving at highways speeds. At least the lower arms still had 2 other solid connections/bushings, albeit the rear bushing takes a lot of the forces.
If you where thinking of doing this repair on your own, it is totally do-able in your garage at home, if you have moderate skills. There are a lot of steps especially to do the upper control arms, strut mounts, but nothing is truly difficult for a DIY. Just take you time, have the right tools, keep track, take pics of everything if needed, and follow the great write ups/videos that are on this board and others.
Expect some hickups as you learn with one side, then the other goes much quicker.
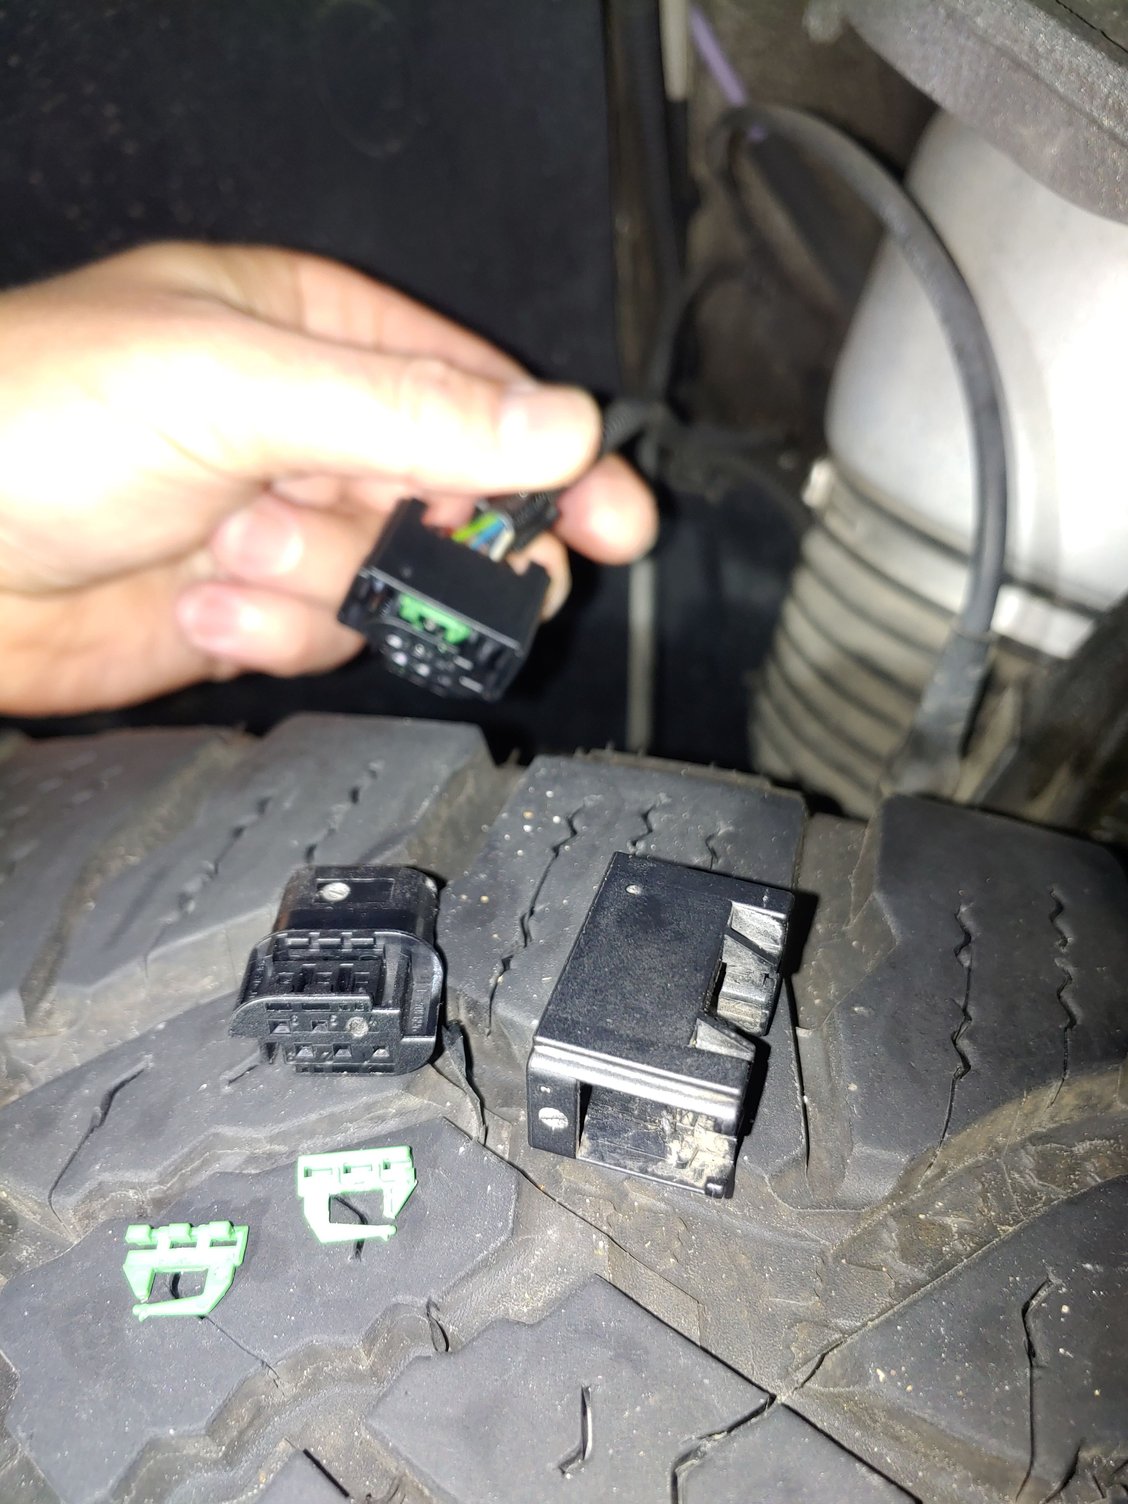
The only other issue I had was on the driver side air strut 6 pin harness connector. Upon removal, due to age and being brittle, one of the locking tabs broke when trying to press it to take off. I simply put it back on and wrapped the plastic connector with electrical tape in the mean time to hold it on. Later, I order a new 6 pin connector, removed the old one, undoing the built in locks, and pulling each wire out separately and reinstalling them into the new connector. 1st time I have ever done this, no splicing required with how these connectors are made to take apart. Most if not all the other electrical connectors on the pig are similar, so if you ever damage one, its easy to replace just the connector itself with zero wire cutting and splicing.
Last edited by Corvetteboy6988; 12-01-2021 at 09:52 AM.
I bought the air strut female end at ECS tuning along with removal tools to release the internal wire terminal locks. For what it is its not cheap. With the OE number below a porsche or vw or audi dealer could order from them. This one is an OE part.
6 pin (took some research to figue this one out, didn't even bother with the dealer, they would have been clueless).
ES# 421456
OE# 7M0973119
I should have taken a pic of it when the individual wires were out, each has a locking terminal metal end, with a ribbed rubber gssket/seal behind it as the primary seal for each wire, then there is a secondary seal around the whole female end inside the connector. Once you remove the green locks, you can pull the wires out. The unused terminals, 3 in this case, they are numbered on the connector and wires are color coded to keep track, have a blue plug/seal you need to pull out and transfer over to keep debri and water out.
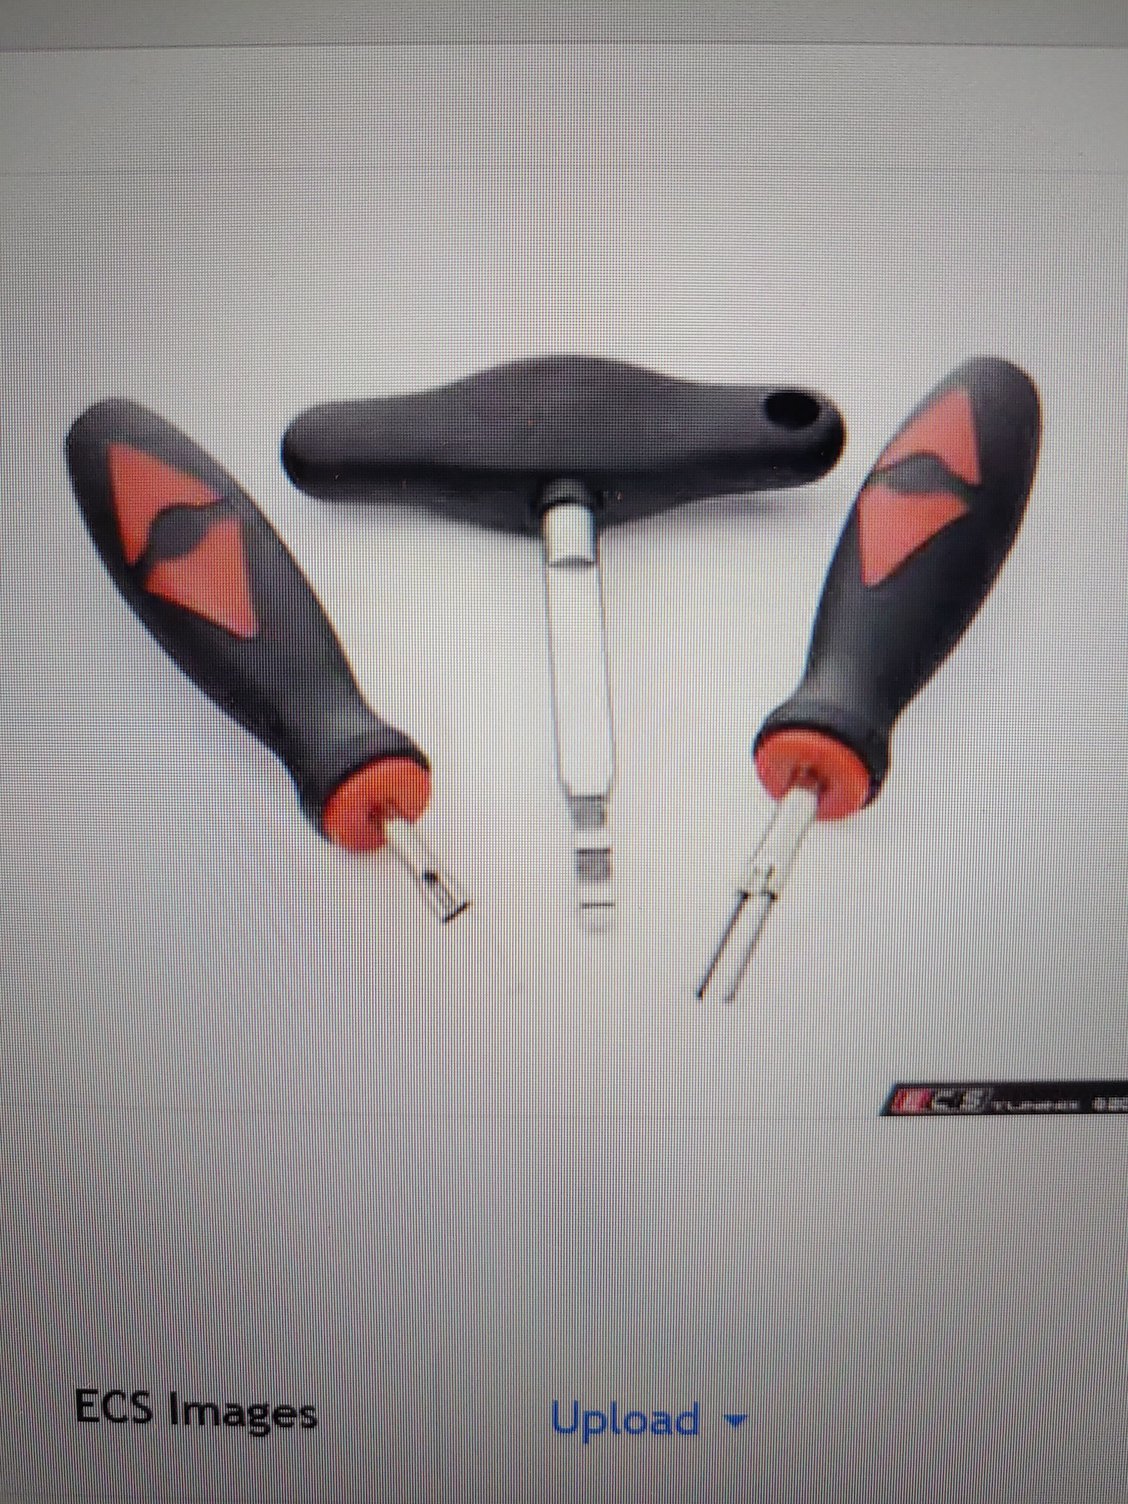
Harness Connector tools Schwaben (you could use a real thin stiff wire, but these worked real easy.
ES# 3504783
Manuf# 025682SCH01A
Last edited by Corvetteboy6988; 12-01-2021 at 04:28 PM.
Thank you for taking to time to prepare a thorough and comprehensive answer.
I was able to use the part number on google to find a couple of suppliers.
I am sure that in the future this post will be helpful to a number of people.
Last edited by Joefus; 12-02-2021 at 02:10 PM.
Reason: corrected a typo


 09-07-2021, 11:05 PM