When you click on links to various merchants on this site and make a purchase, this can result in this site earning a commission. Affiliate programs and affiliations include, but are not limited to, the eBay Partner Network.
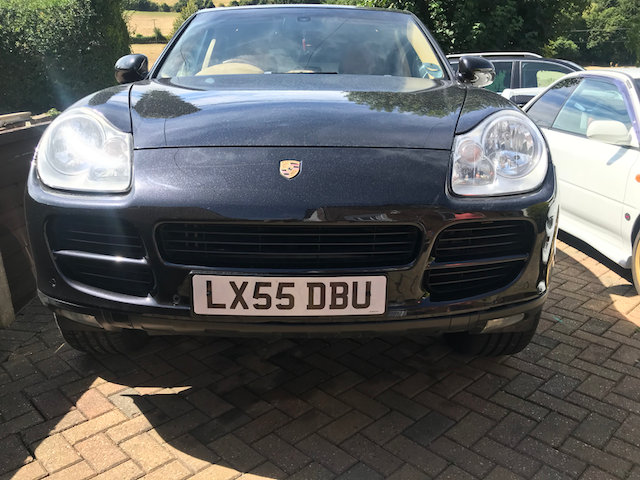
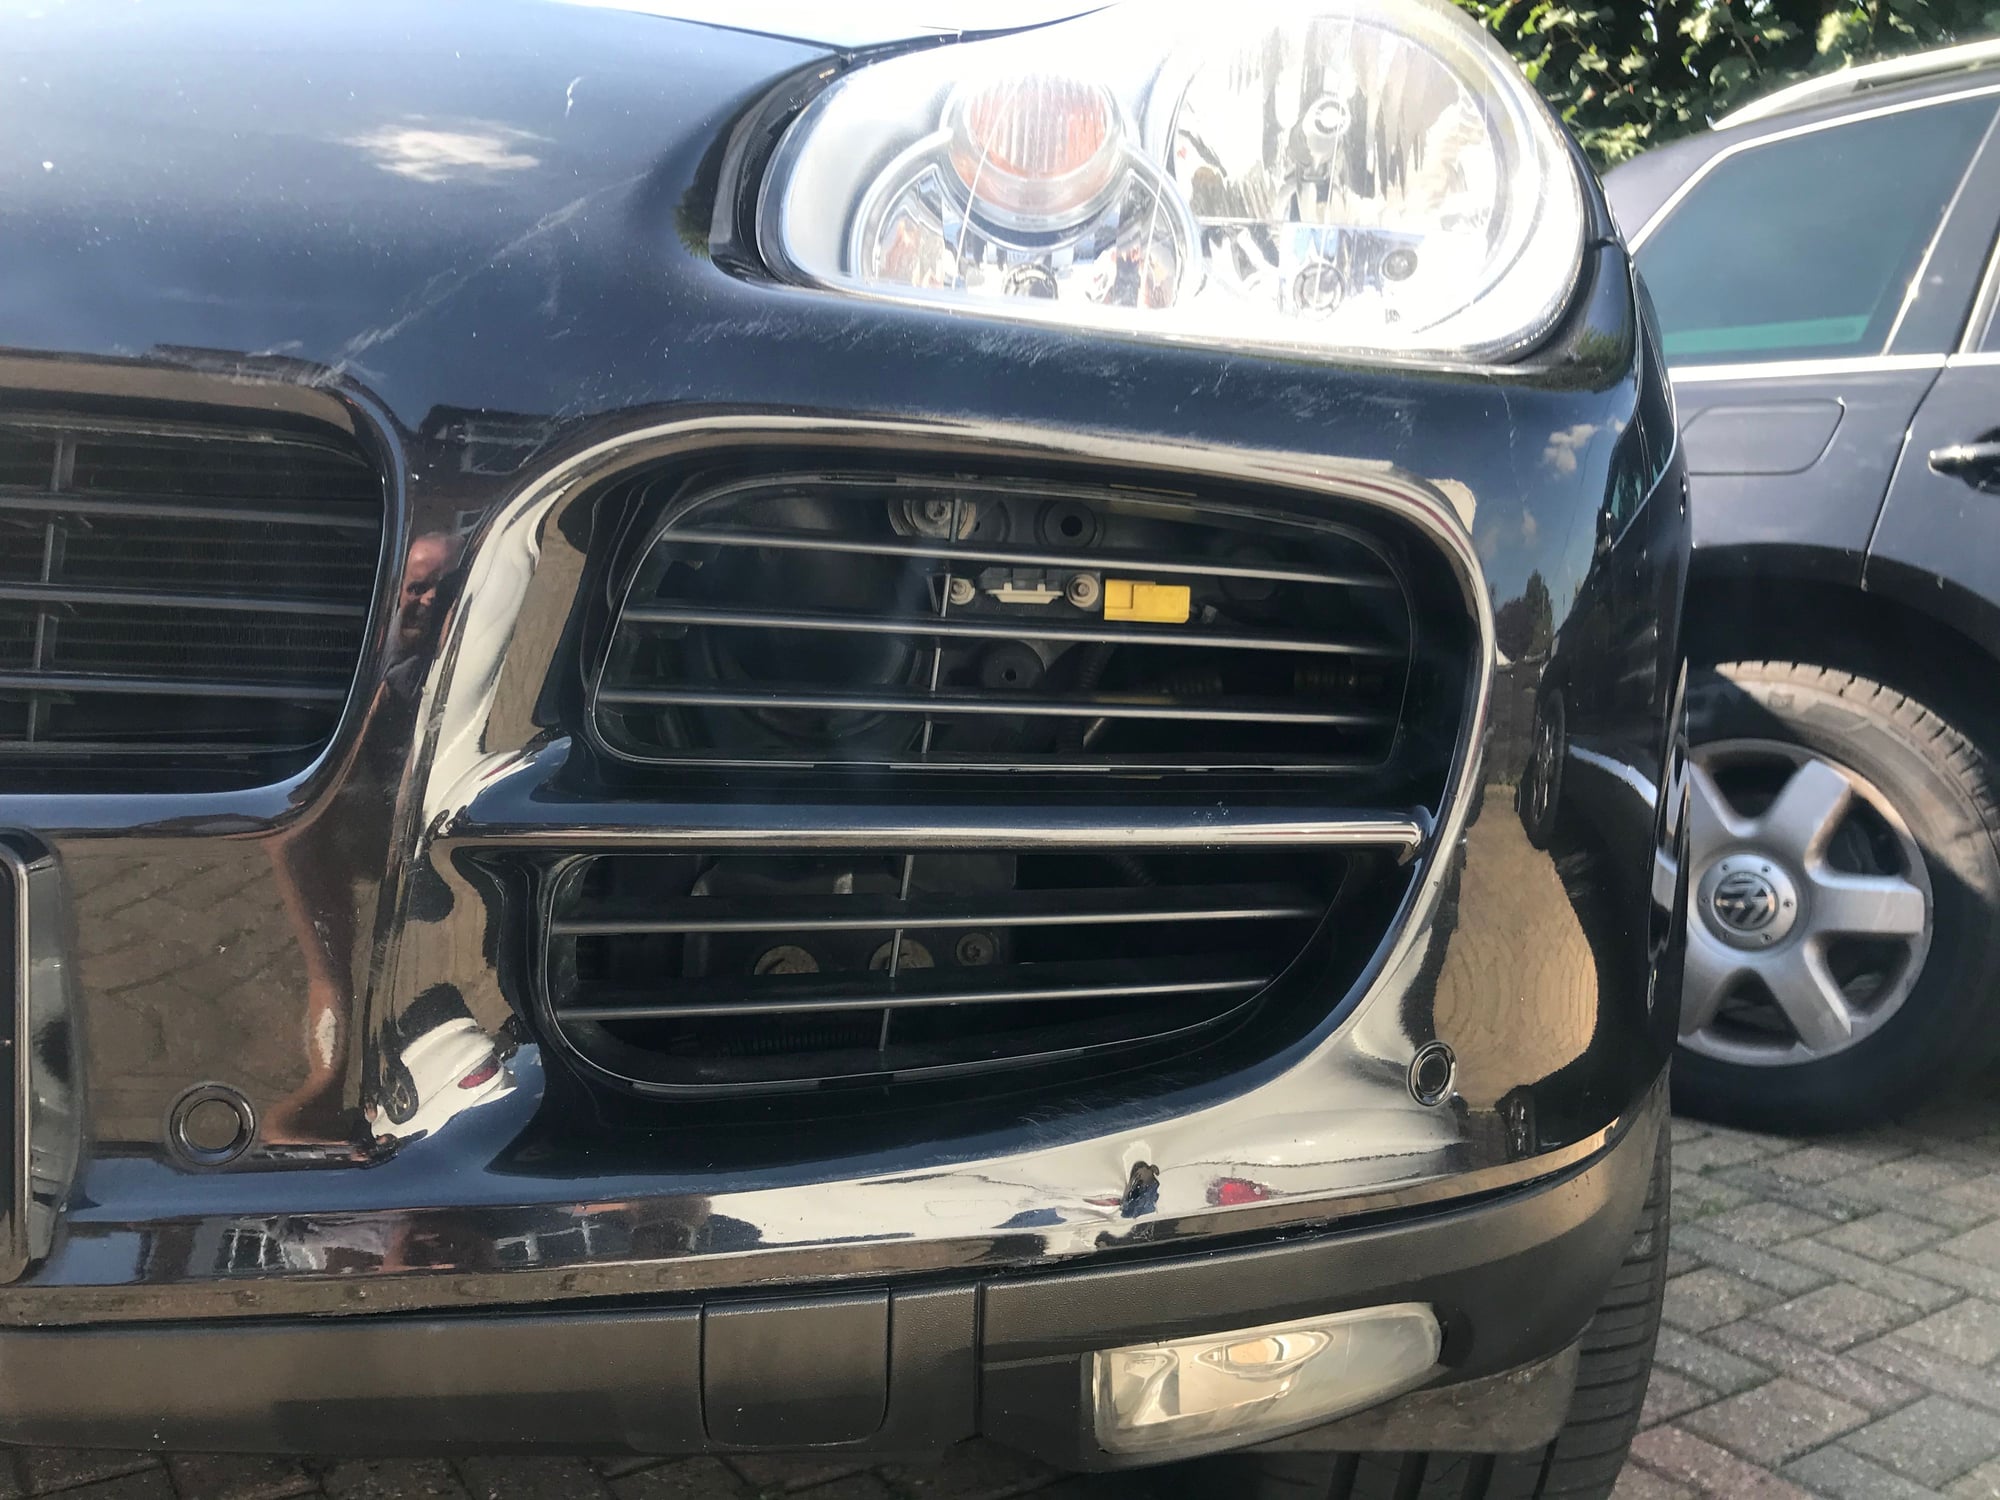
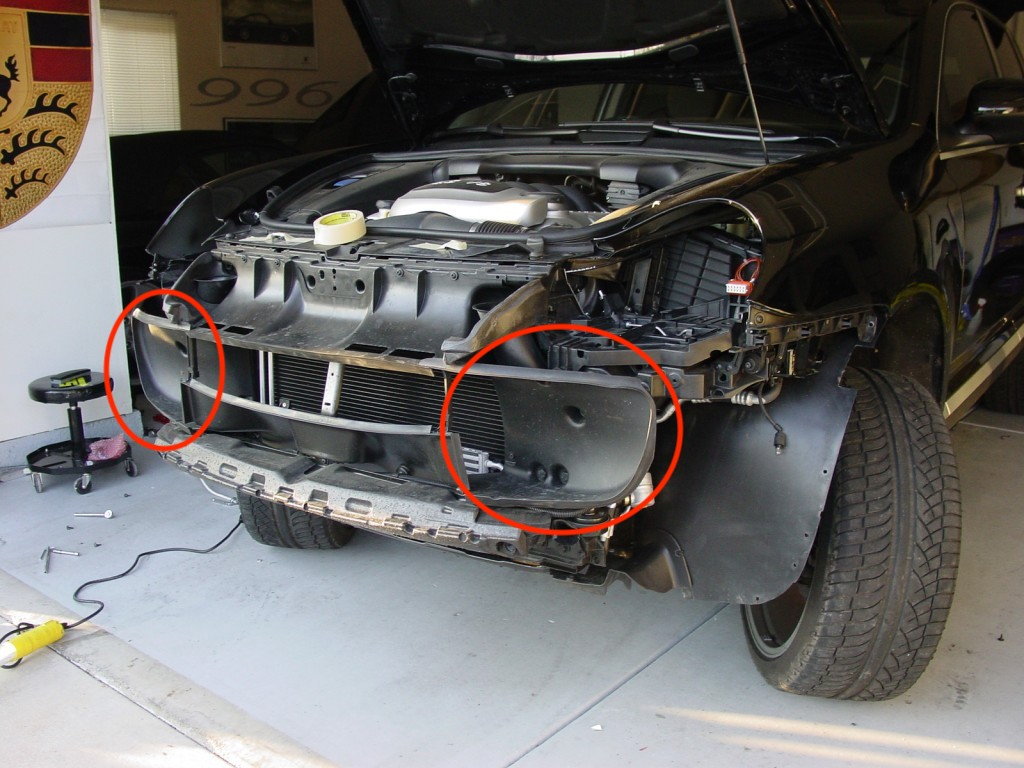
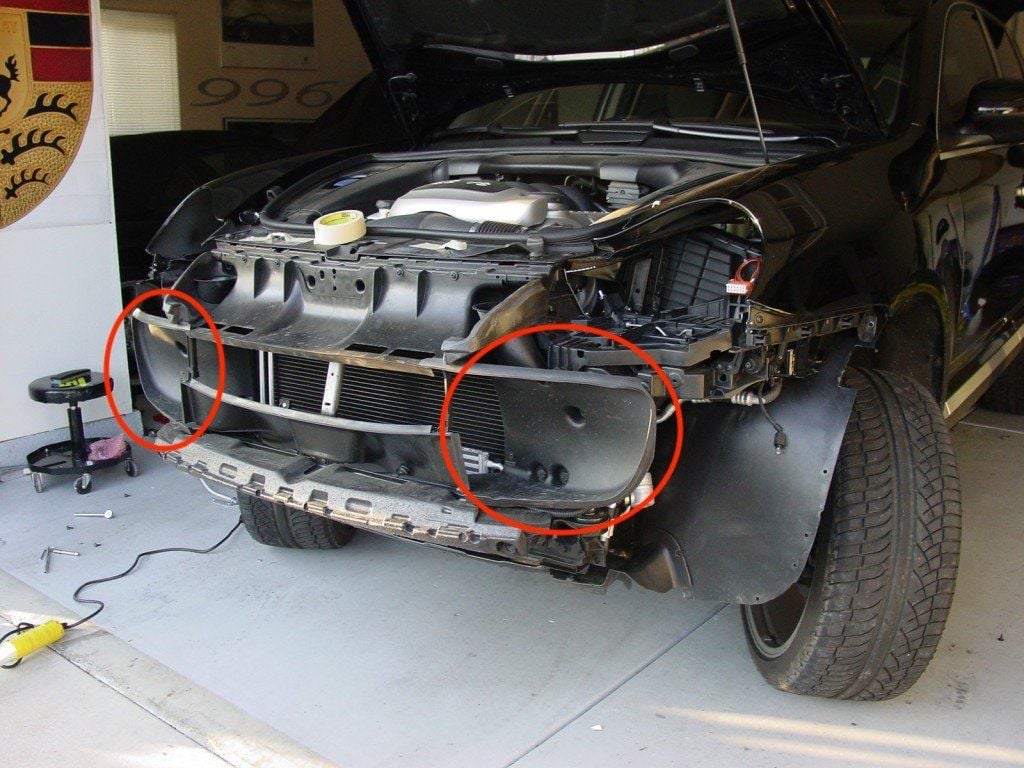
When we got the car it obviously had a front edge shunt to the passenger side ( UK) and someone had simply replaced the front bumper and badly ! The shut lines are bad and a lot of stuff seems to be missing from behind the bumper. Now looking through the uploaded diagram below I cant see the parts that are missing to order.
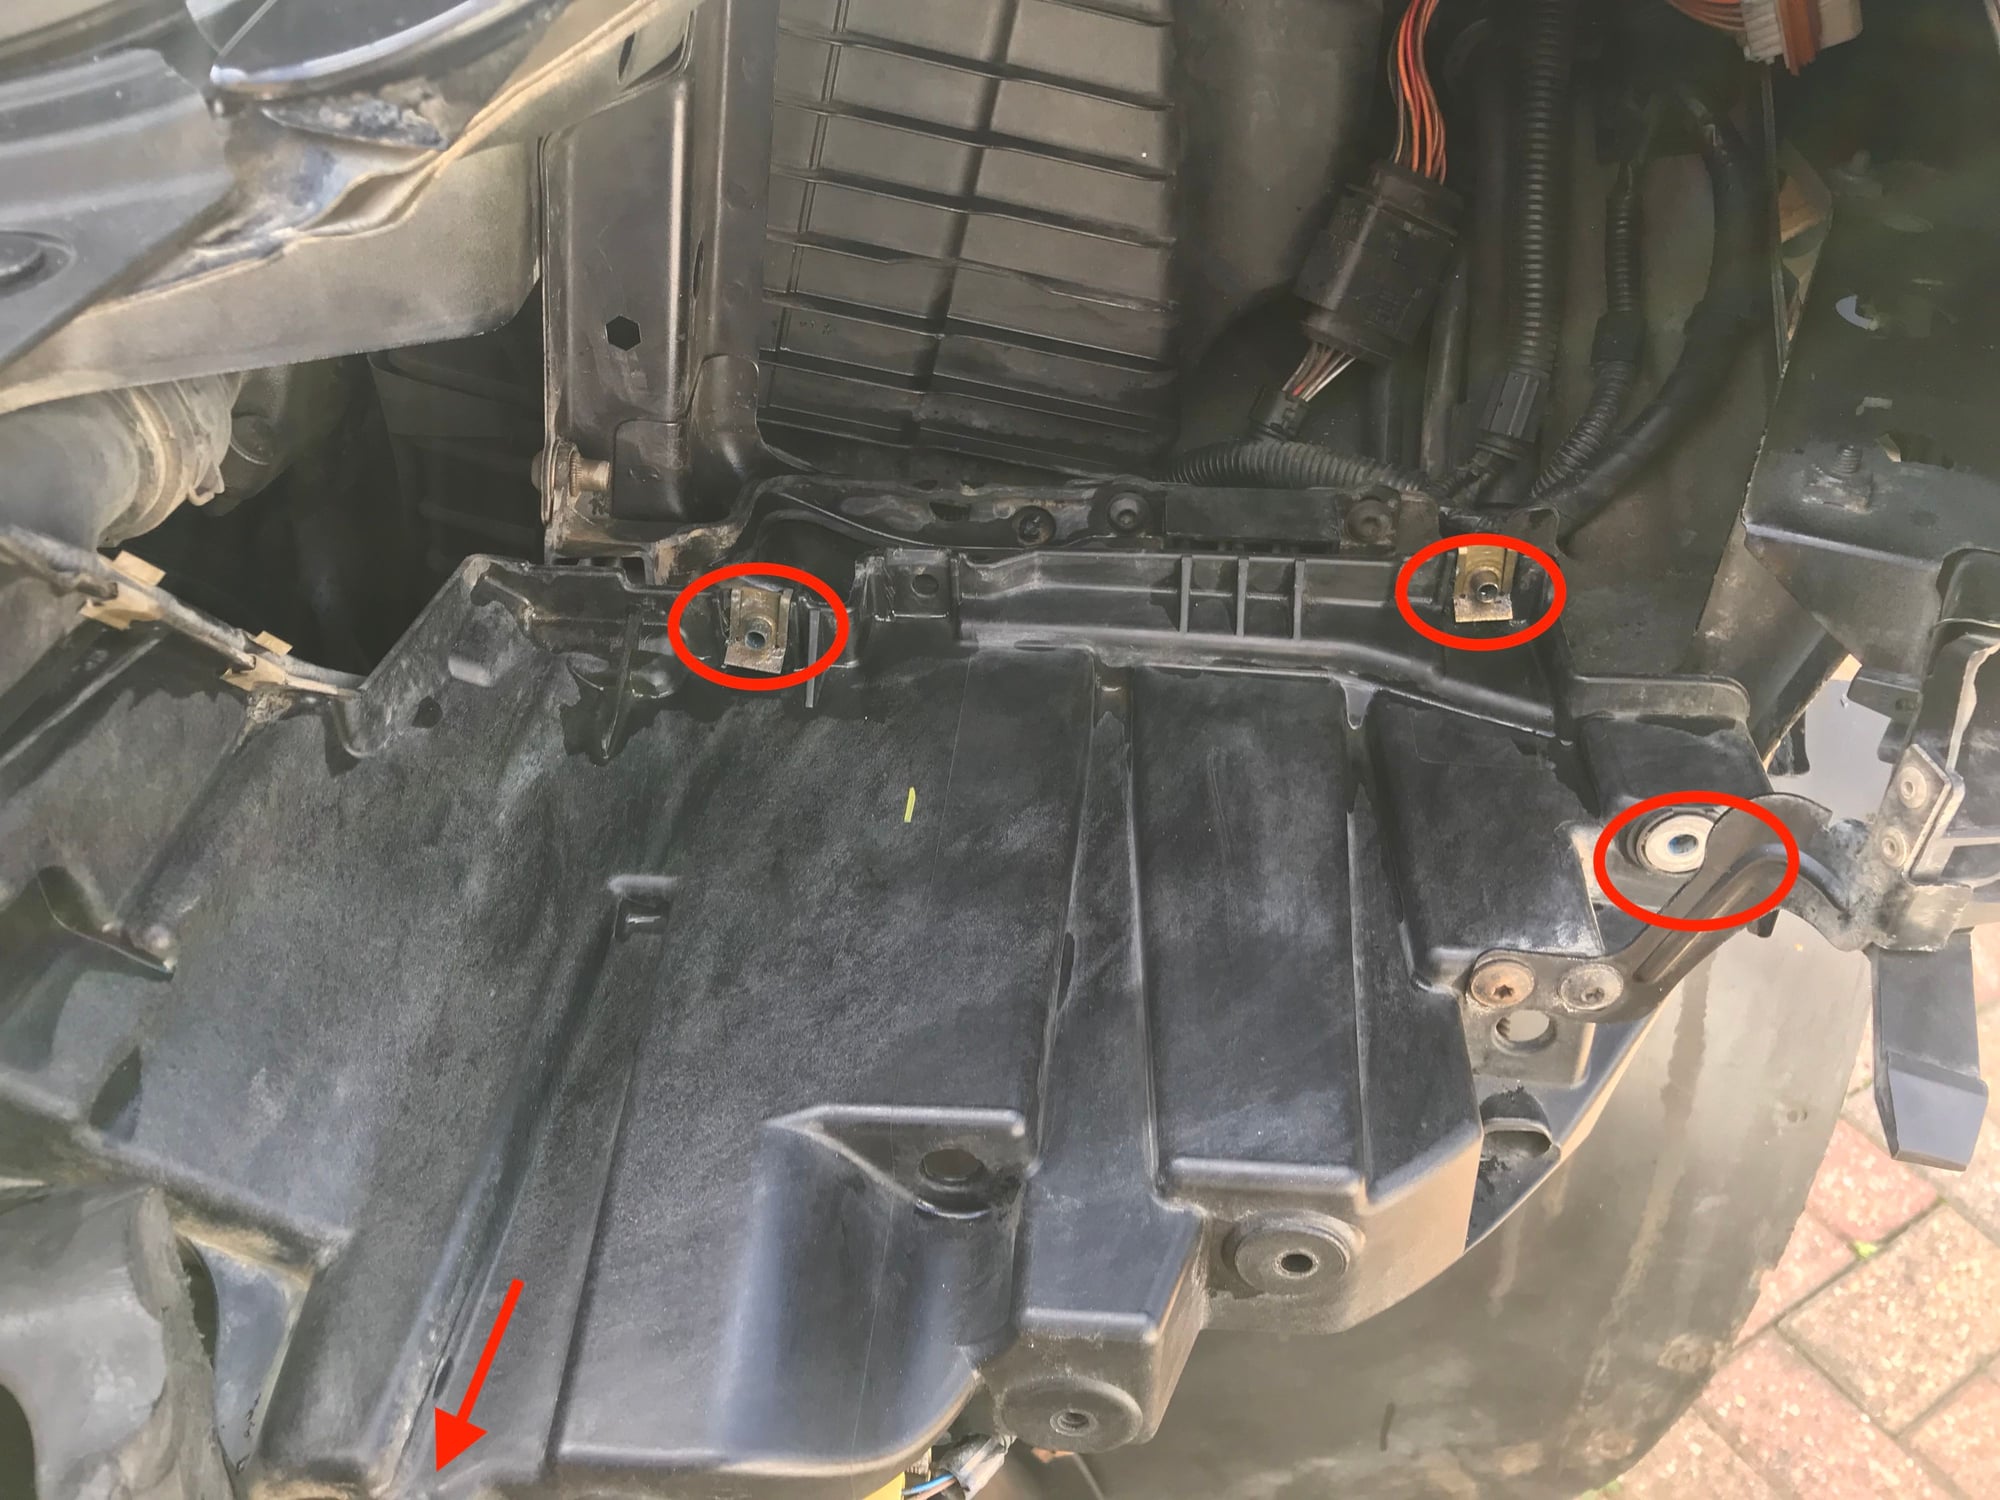
It is clearer in this picture which I have circled in RED. Hopefully someone can point me in the right direction
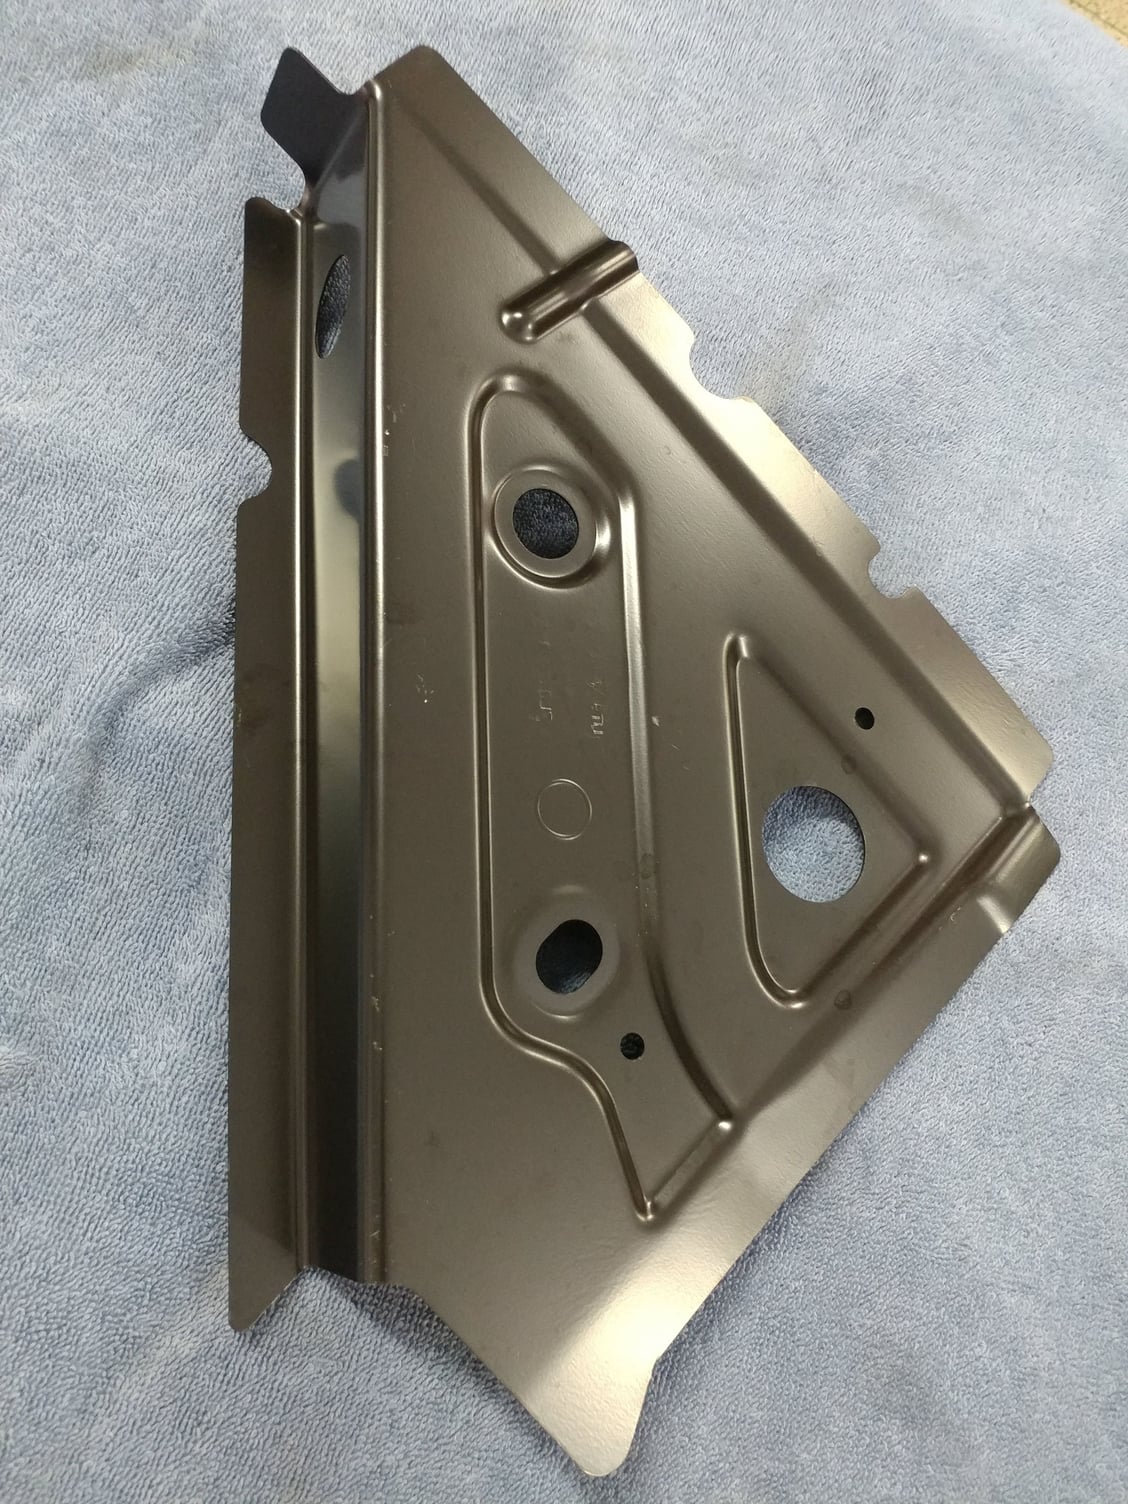
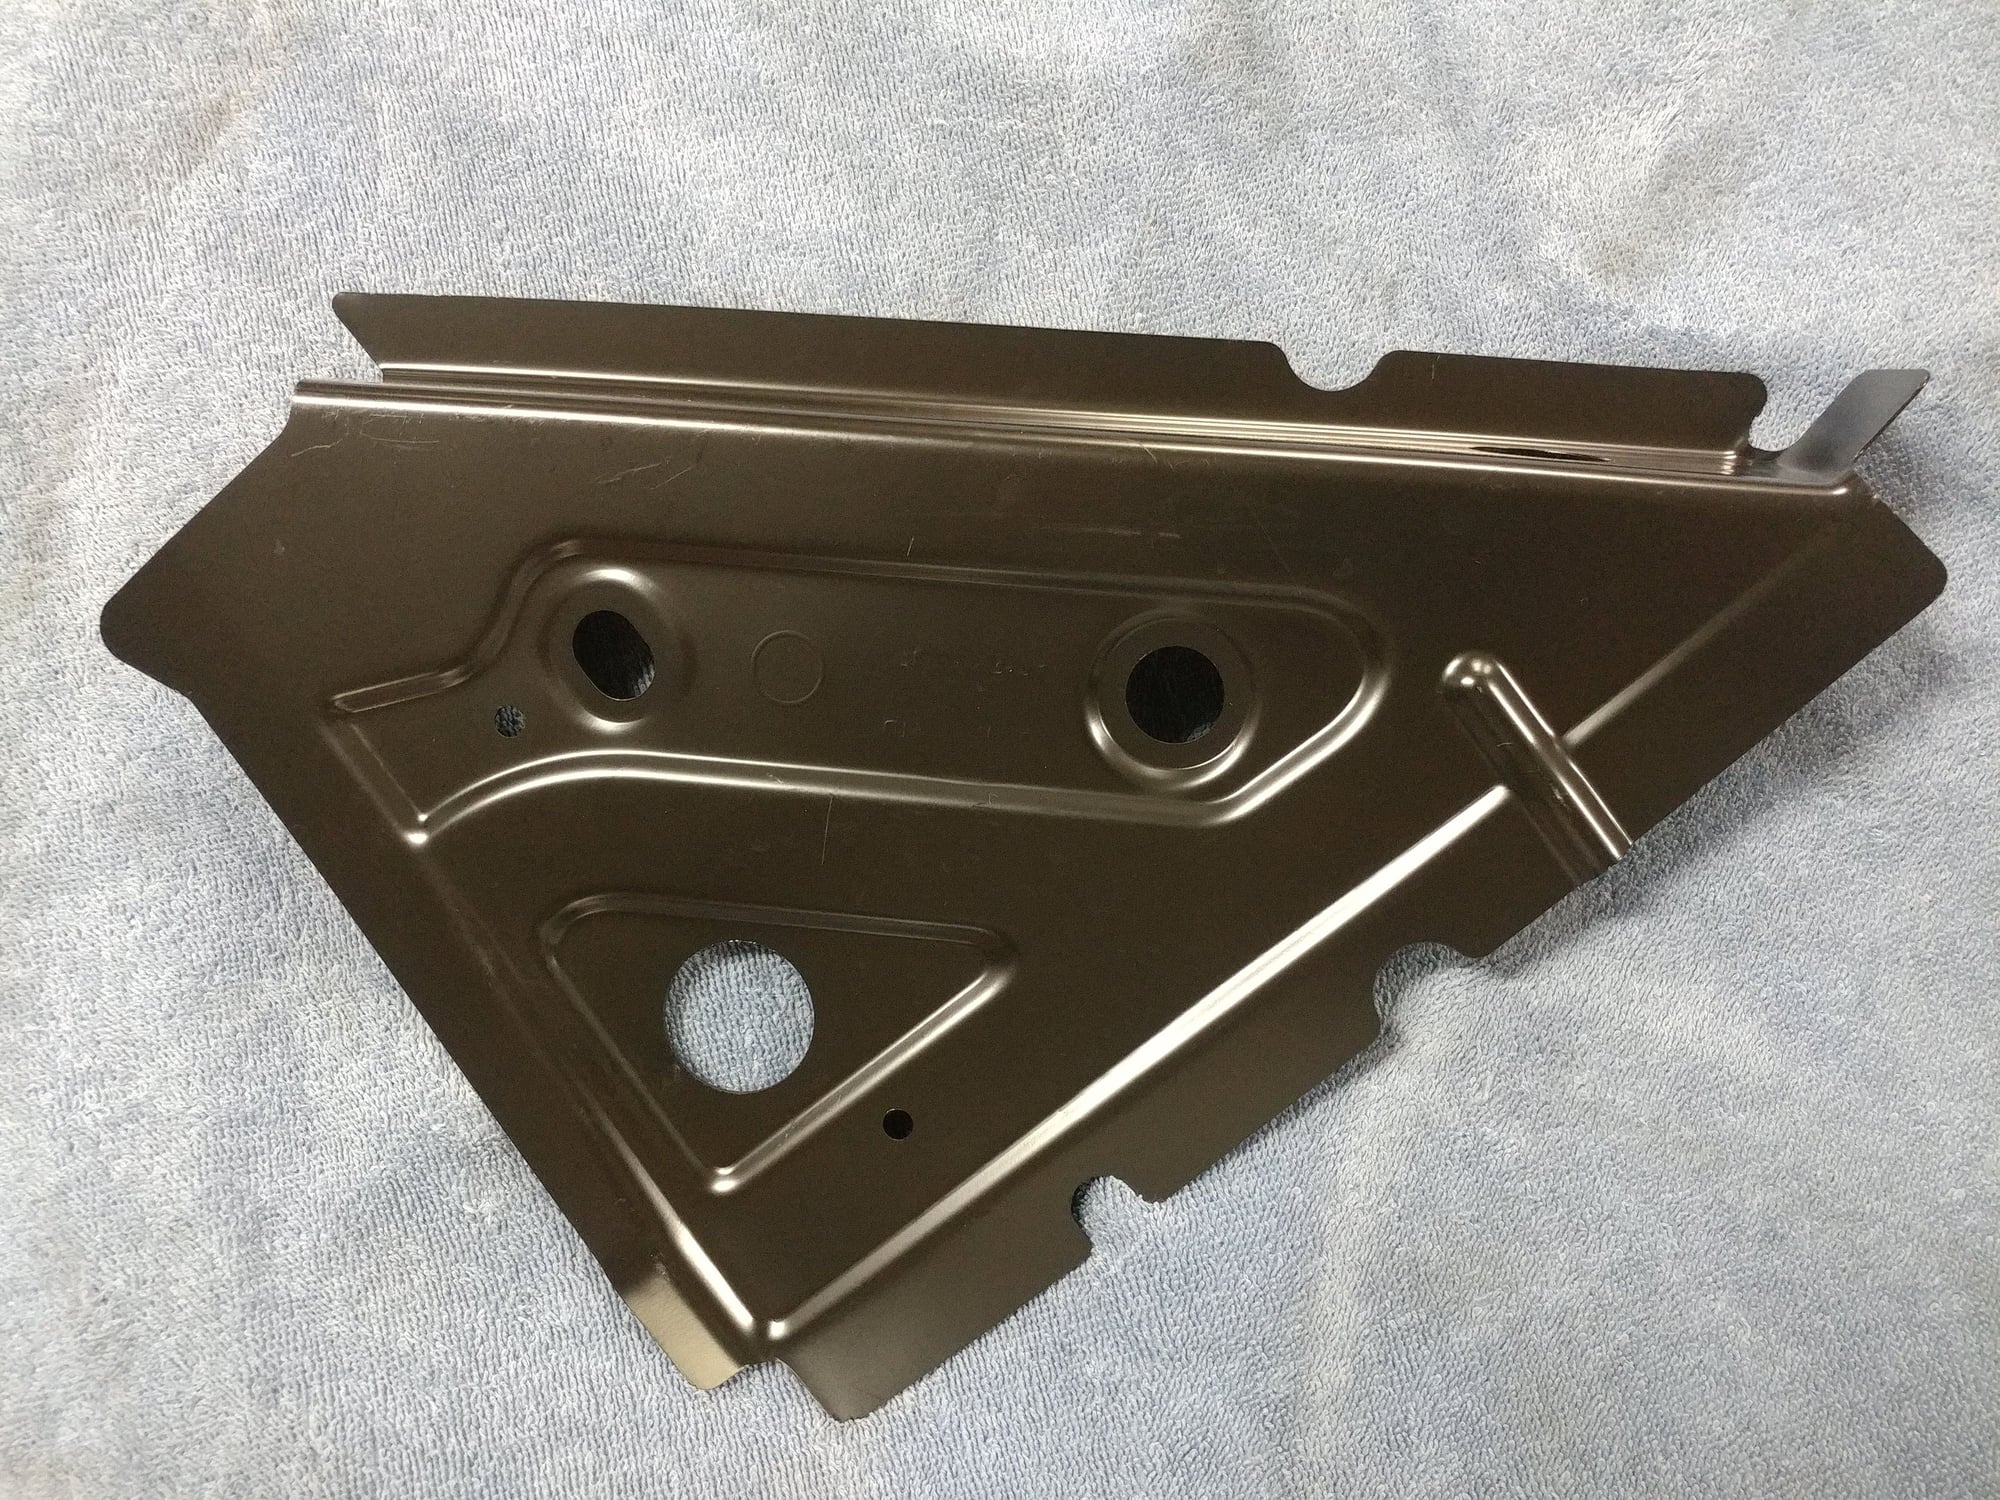
Secondly the person who repaired it was not only related to Steve Wonder, has missed out the tray for the passenger side headlight tray.
My question is : does this headlight bracket/tray need anything else to attach to secure it ?
Last question, in this picture there is a plastic lower bumper section that houses the fog lights but again it was badly fitted. When we took off the rear bumper we can see that there are metal clips that secure the plastic lower section to the bumper. I assume it is the same on the front. I cant seem to find them anywhere . Again need your help, it is much appreciated
Year and model? I have a bunch of front parts leftover from my 09 Turbo S widebody build - metal supports, intercooler intake ducts, fog light , etc if any of those are needed and cross over
Hi, thanks for the reply and link to your horn upgrade. Bizzarly I thought every 955 was the same behind the bumper but it seems not. The intact part I can see is the same as the photo I posted with red circles around them. But in your photo and dozens of similar ones, the air ducting or whatever it is called, is like yours with airflow onto the radiators. I dont understand why they are different .
On mine there are two large bolts and then a smaller phillips screw at the top ( you can see that in the picture with the red circles) but on yours there are no signs of these large bolts.
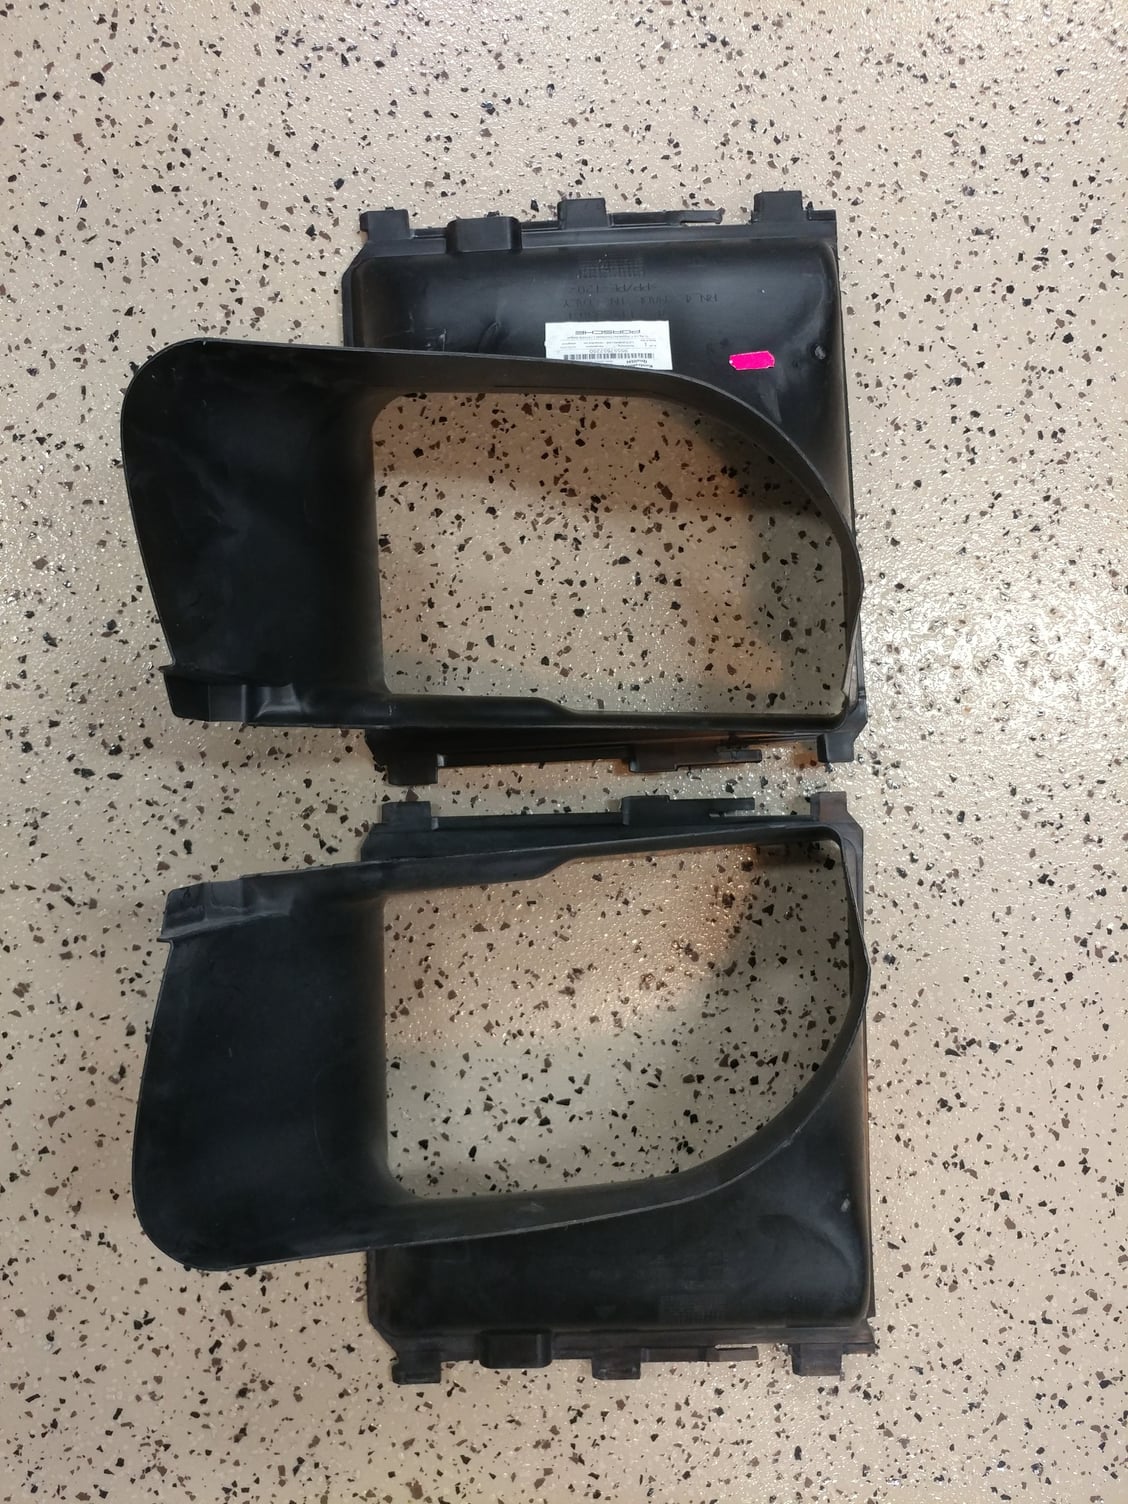
The turbo has those air ducts flowing the air to the intercoolers on the sides. On the non-turbo models, the plastic ducts flows the air back into the center radiator duct.
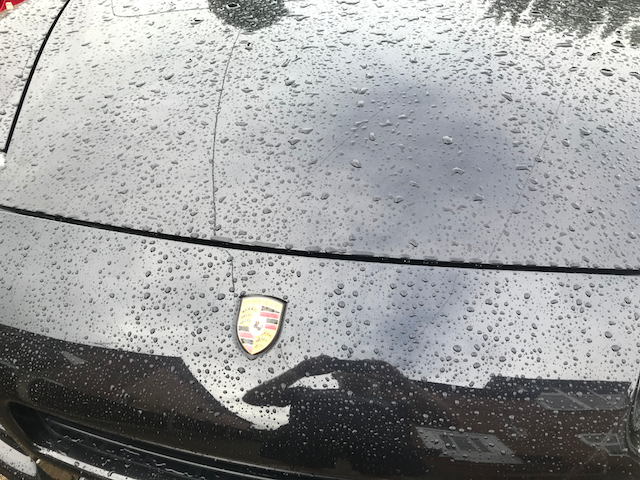
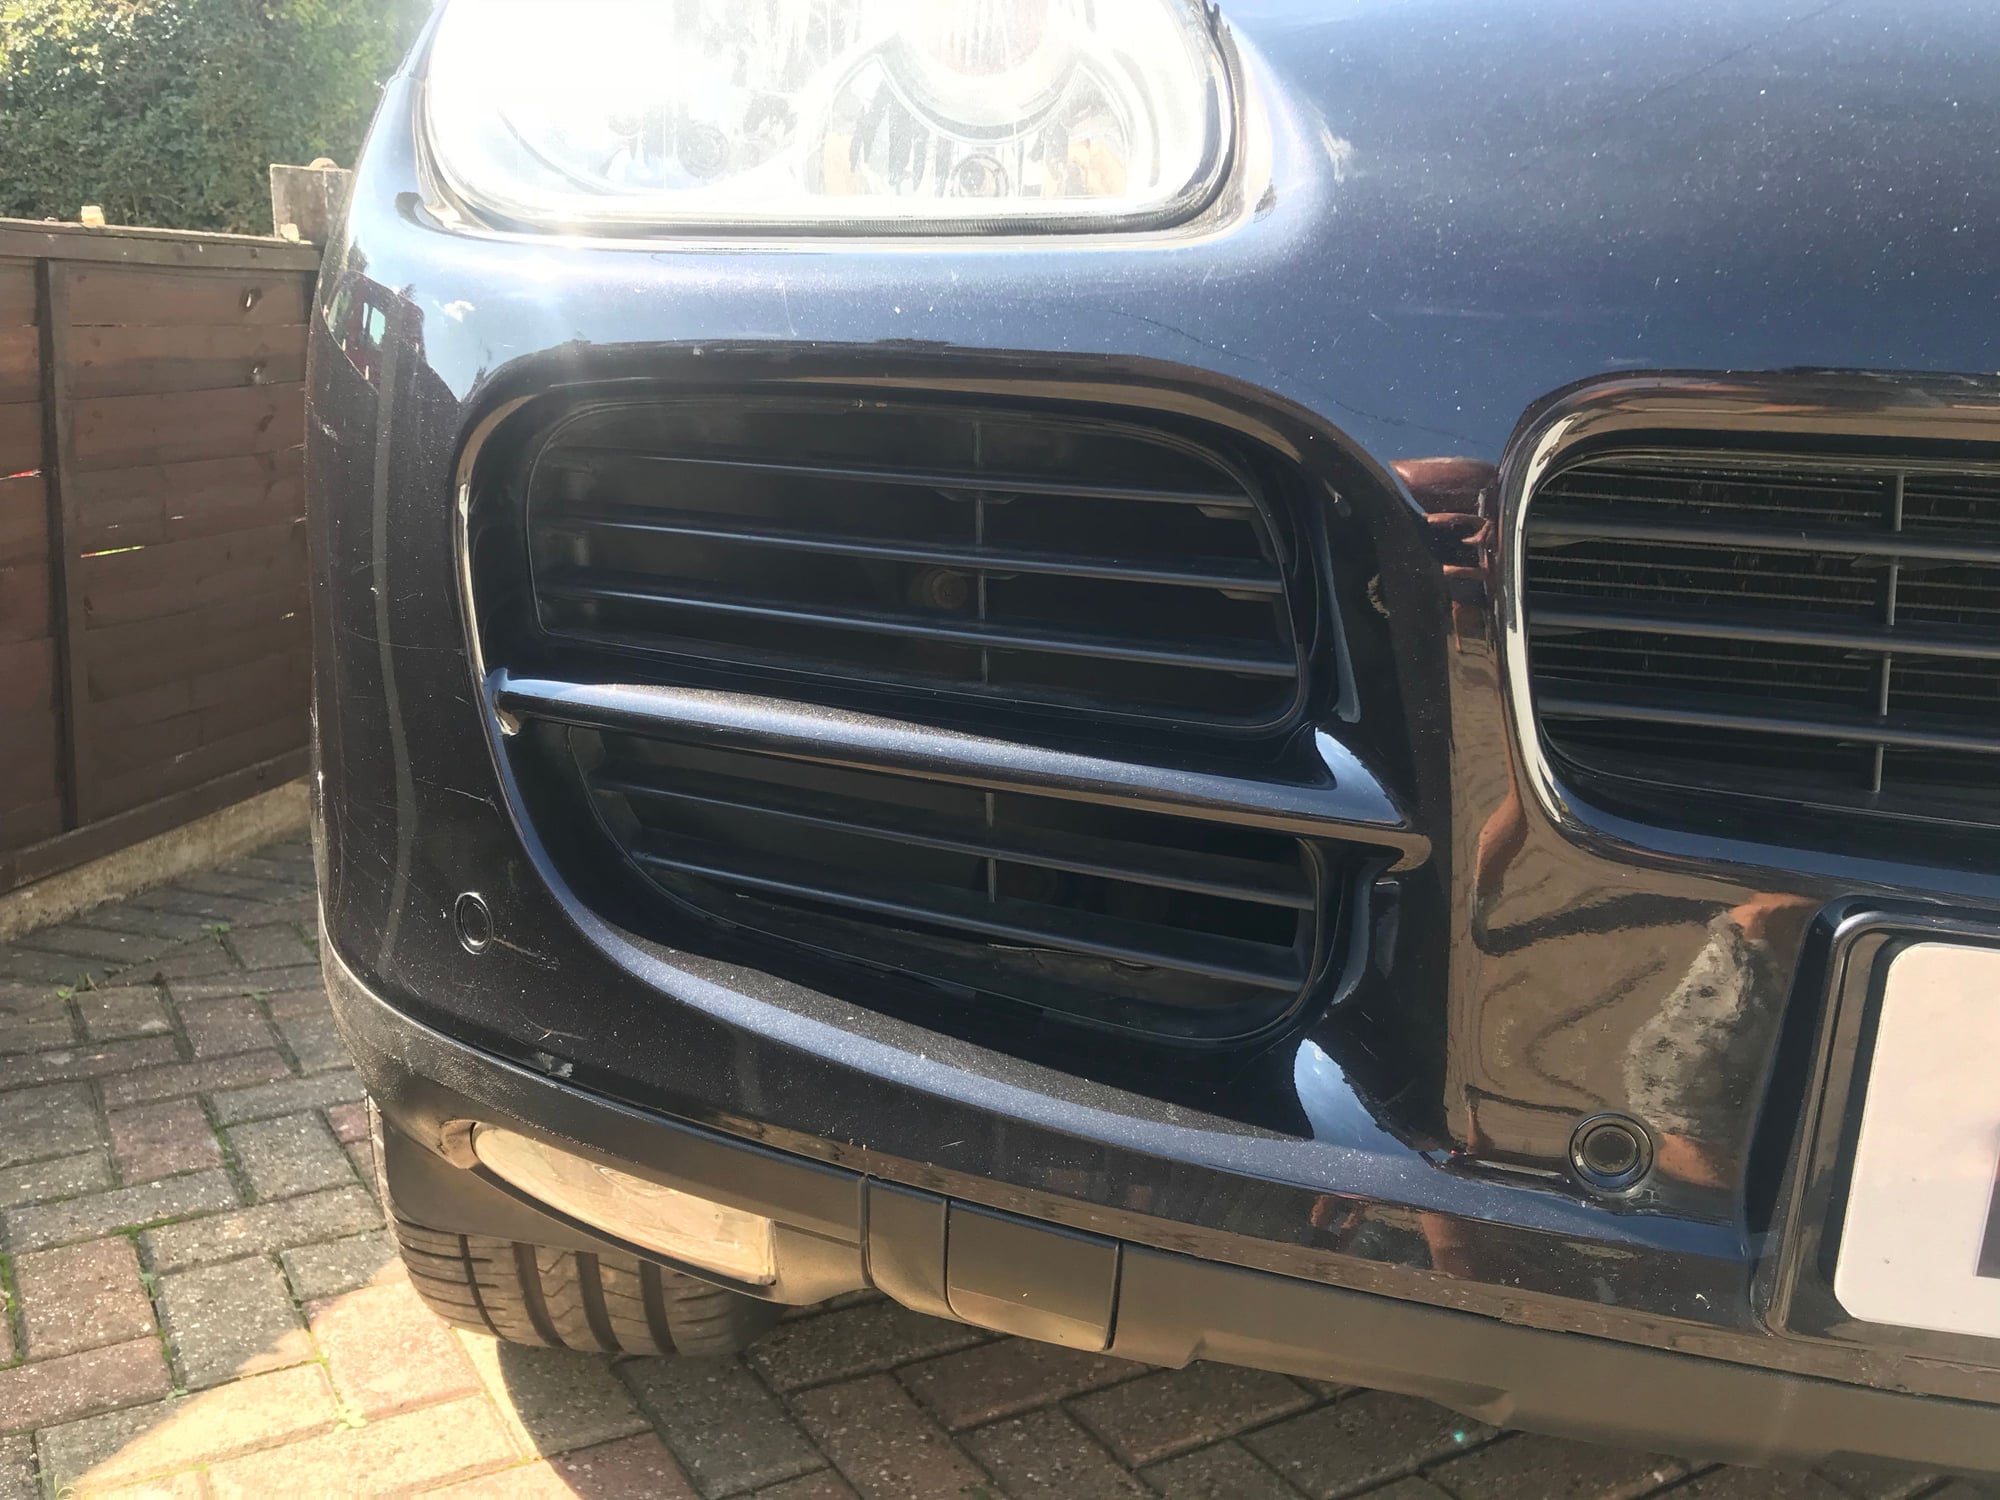
Well as it was sunny ( rare for the UK), we decided to taker her front end off Just really to see exactly what was behind, what was missing and also to work out why the hell there was an awful shut line gap between bumper and bonnet.
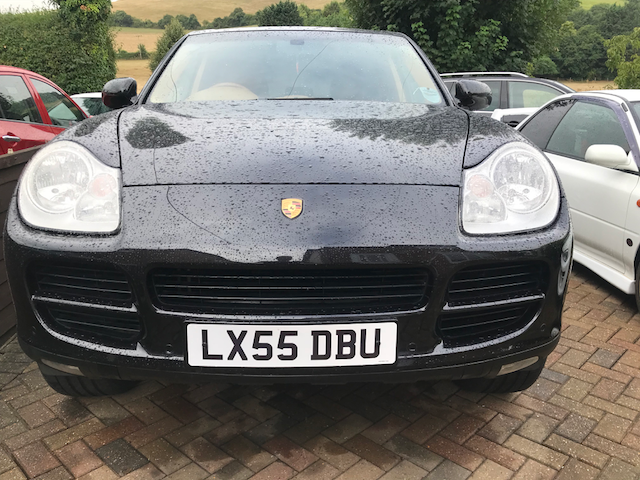
To give you an idea how bad this is it when we first bought the car. Now I am no expert on Porsche but I dont think you are meant to get your whole finger in there !
Anyway got the girl up on axle stands and got ready to see what was what.
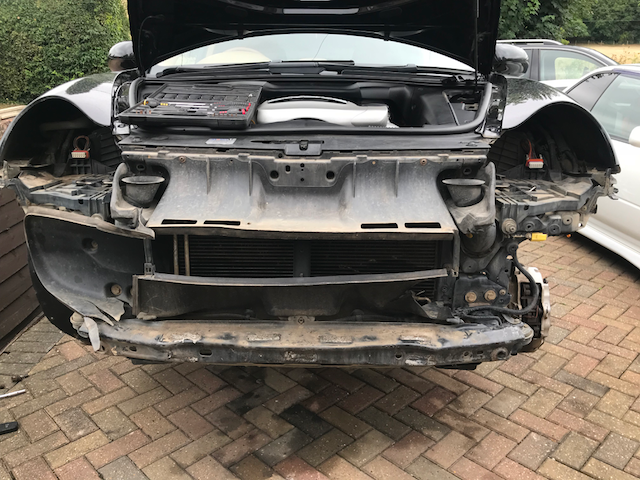
Pelican tech guides say 1 hour to remove. We took off the arch liners, wheels as well so that make it a little longer but we did it in 62 mins so not bad. Here she is looking a little naked without anything to cover her modesty.
As you can see the damage to the front end meant a lot of stuff was either broken, missing or had been badly repaired. We counted the following broken . The driver side air duct ( non turbo) duct, the central lower air duct , the headlight tray passenger side and the passenger side guide rail (this is what the bumper mounts onto at the side ). We also found a ton of missing hex bolts and screws, massive amount of broken plastic parts and a lot of dirt and grime. So being the resourceful types, my wife and I set about cleaning every single bit and also patching up the parts that were broken until we can order replacements. So you go from dirty and broken to clean and a liberal use of gaffer tape
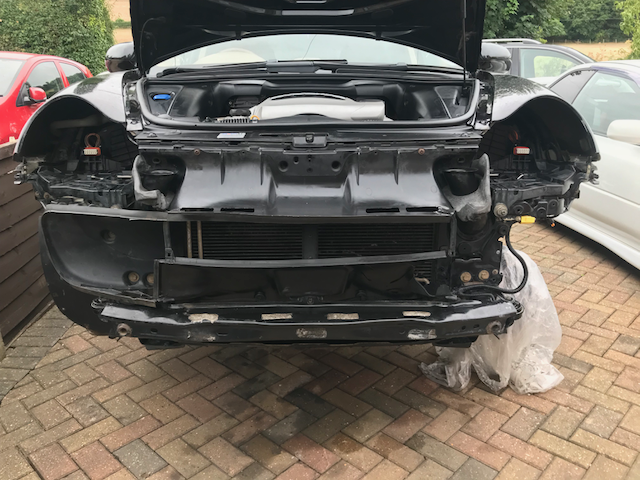
Fixed the shonky repair job on the bumper and now the lower plastic trim fits , found out one of the locating lugs at the top of the bumper was bent back so got a heat gun on that and bent it back.
Cleaned the bumper behind, found some spare hex screws and popped the bumper back on. The result ?
Well the shut line is certainly better LOL
and the bumper now fits so all in all not a bad job we think. Parts on order and now we know how to remove the bumper we can do that another day. Excuse the rain, normal service has resumed here in the UK
Looks a lot better. By the by, I was in West Sussex for my job for two months not long ago. Great weather while I was there!
Went down to Brighton many weekends. Also Bournemouth and Bognor Regis (saw lots of other sites too of course).
Cruised around in a gorgeous black Mercedes GLA200d. Very comfortable vehicle.
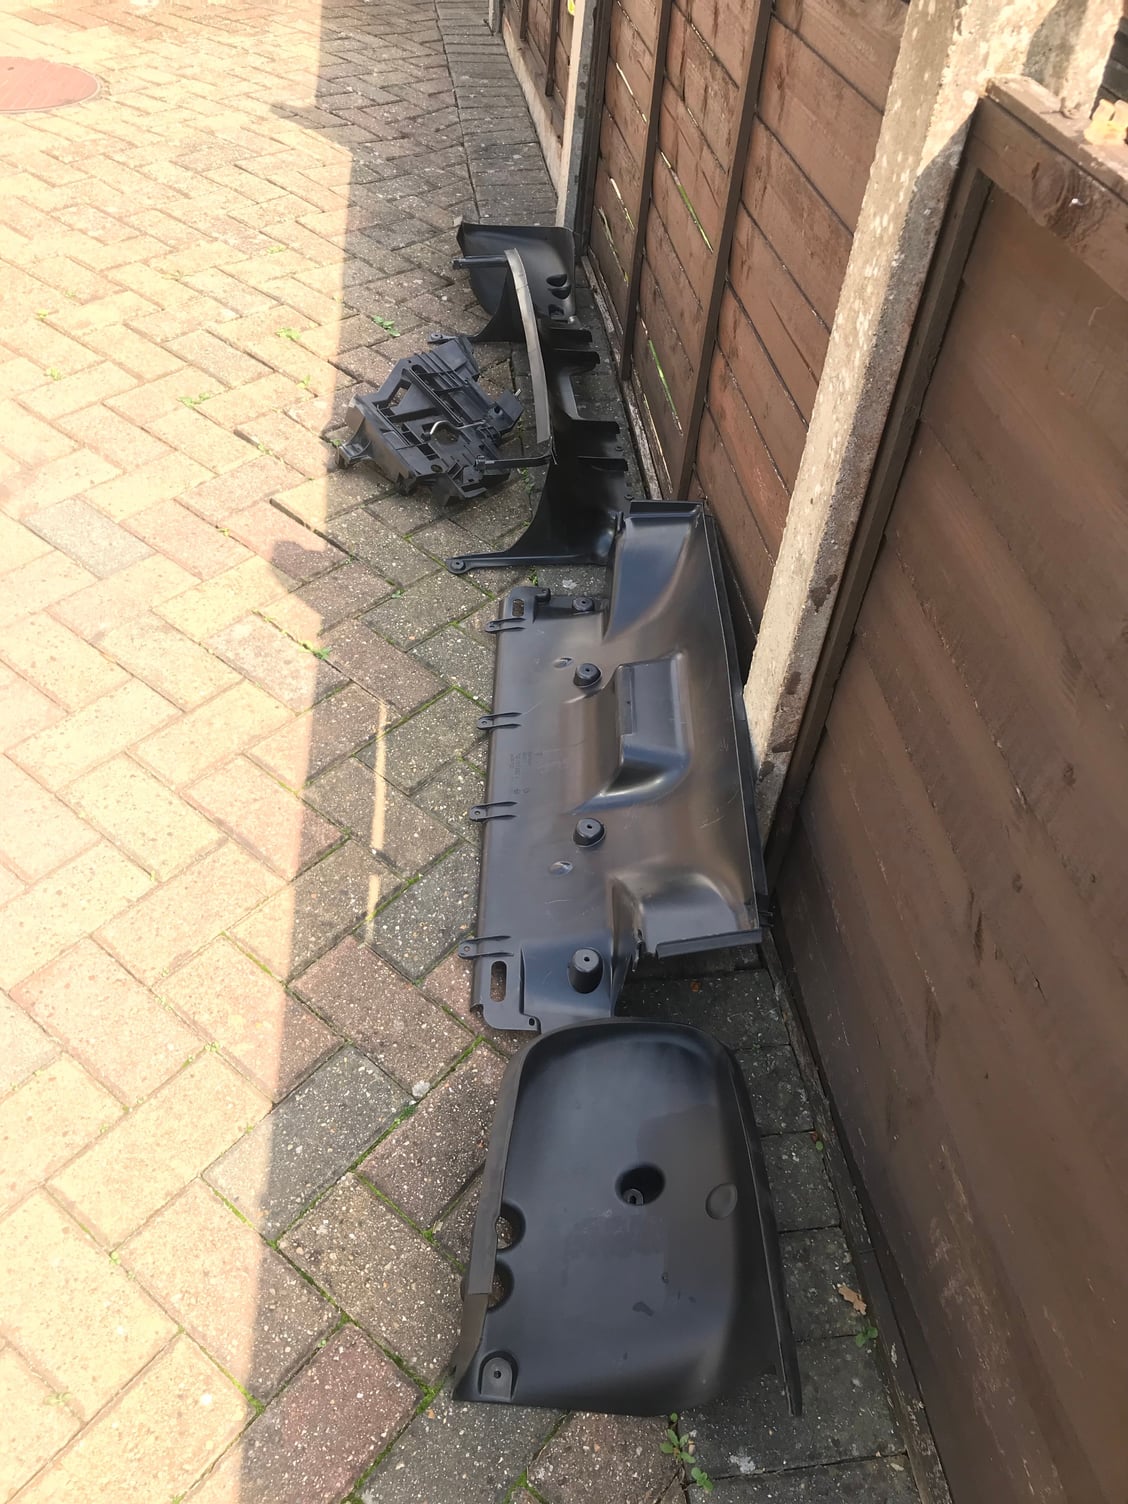
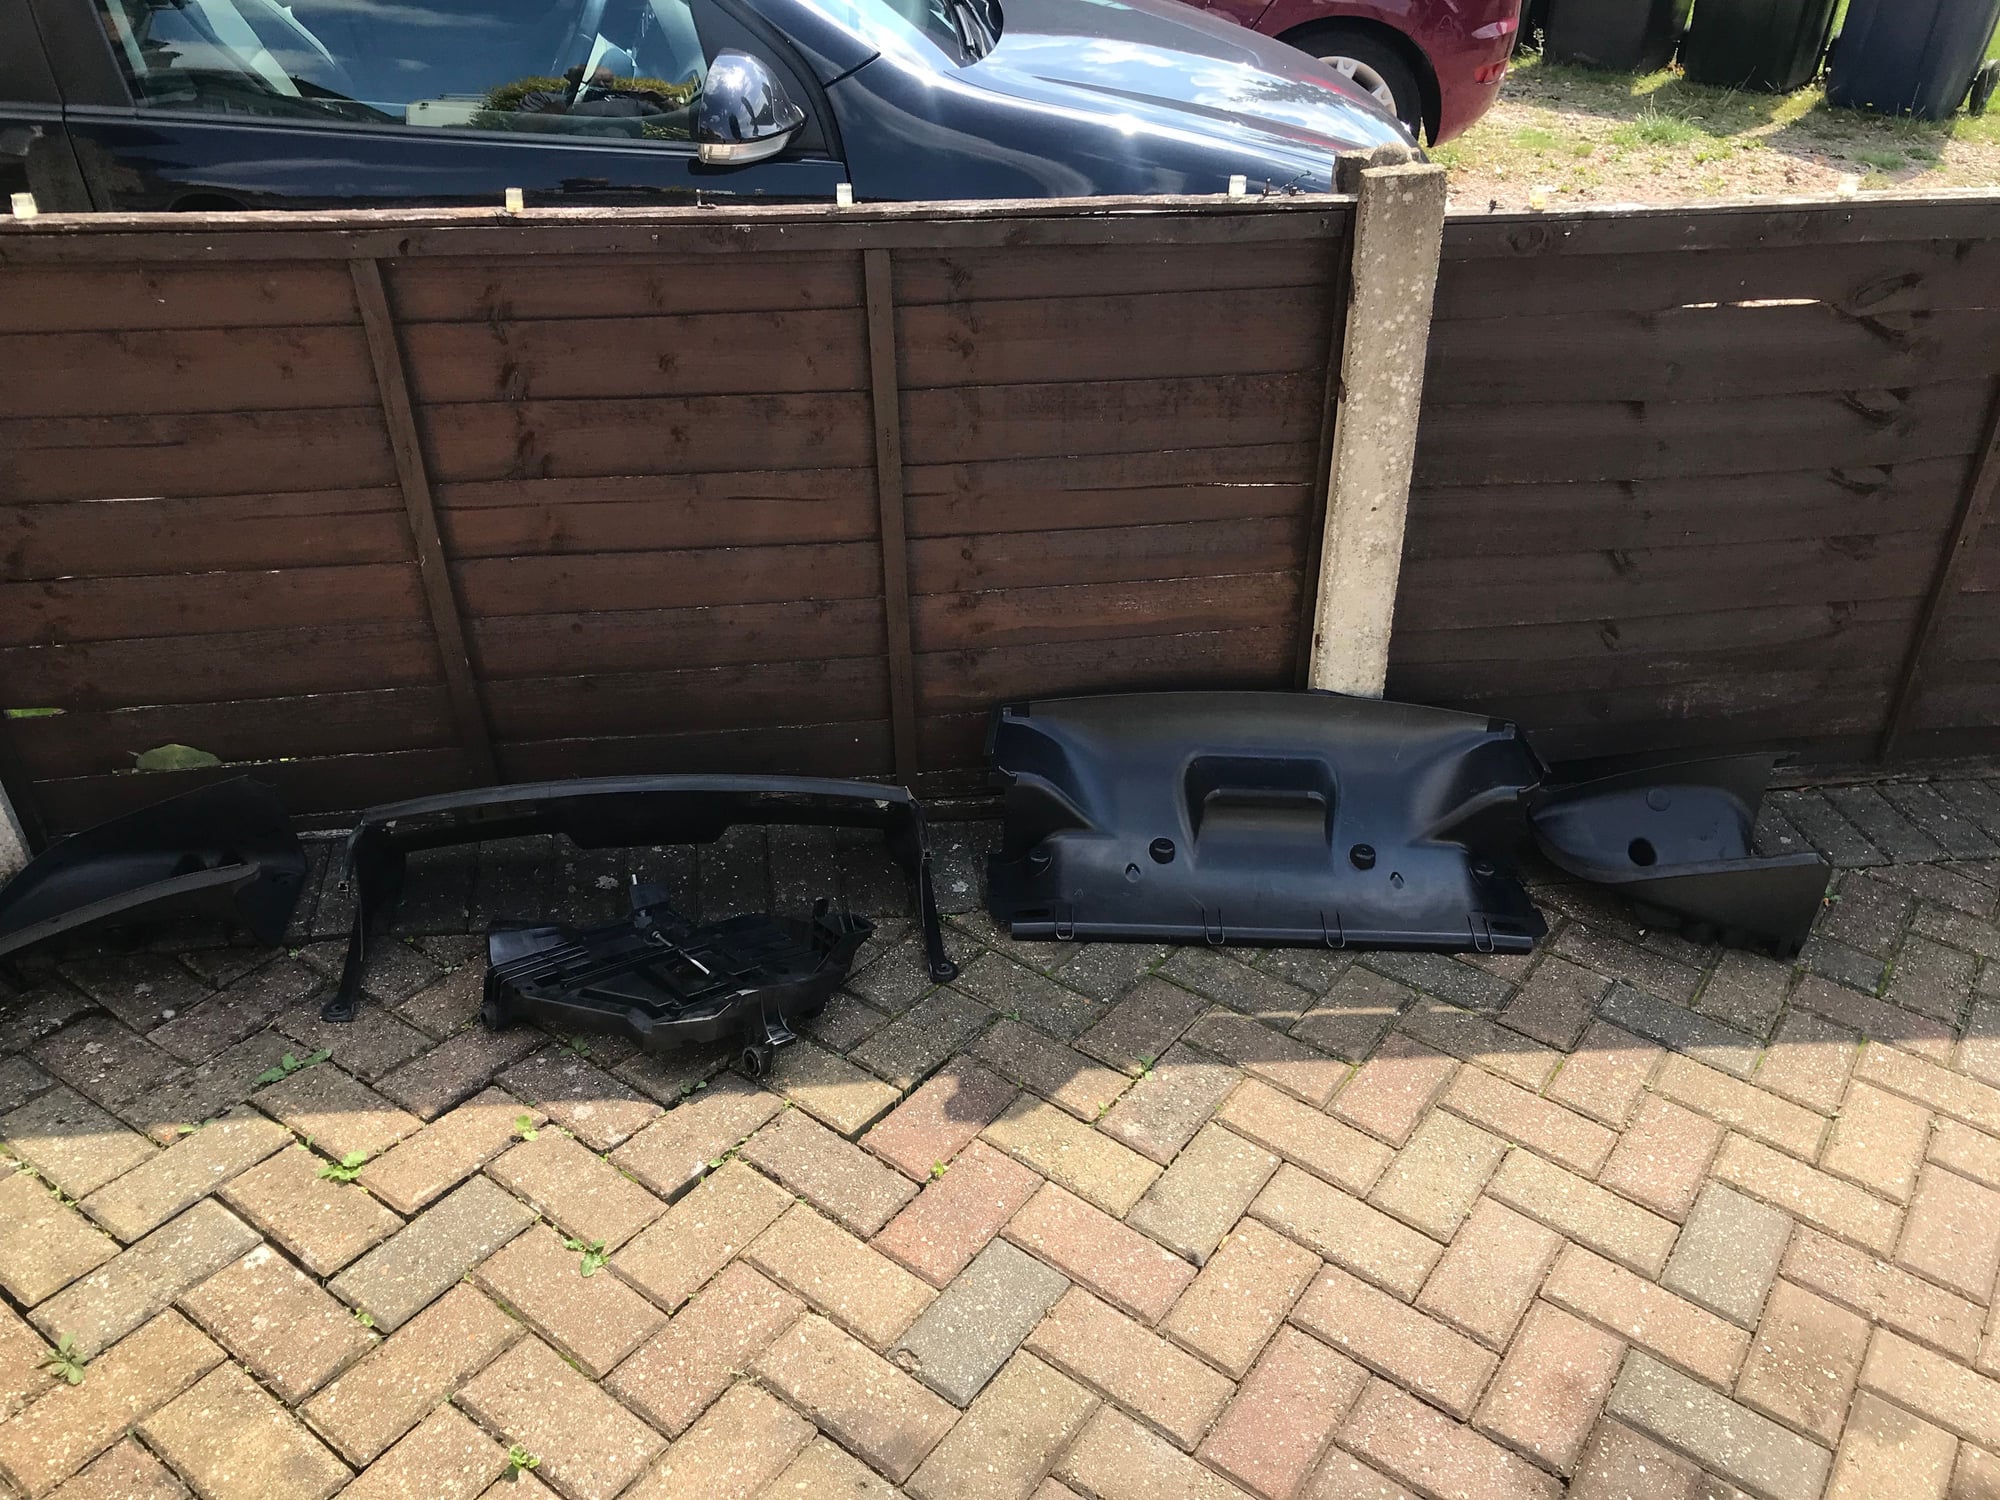
Had to order a few things to replace the broken parts and when they arrived we set about removing the bumper again and removed all the broken/missing plastic parts.
This is what we replaced
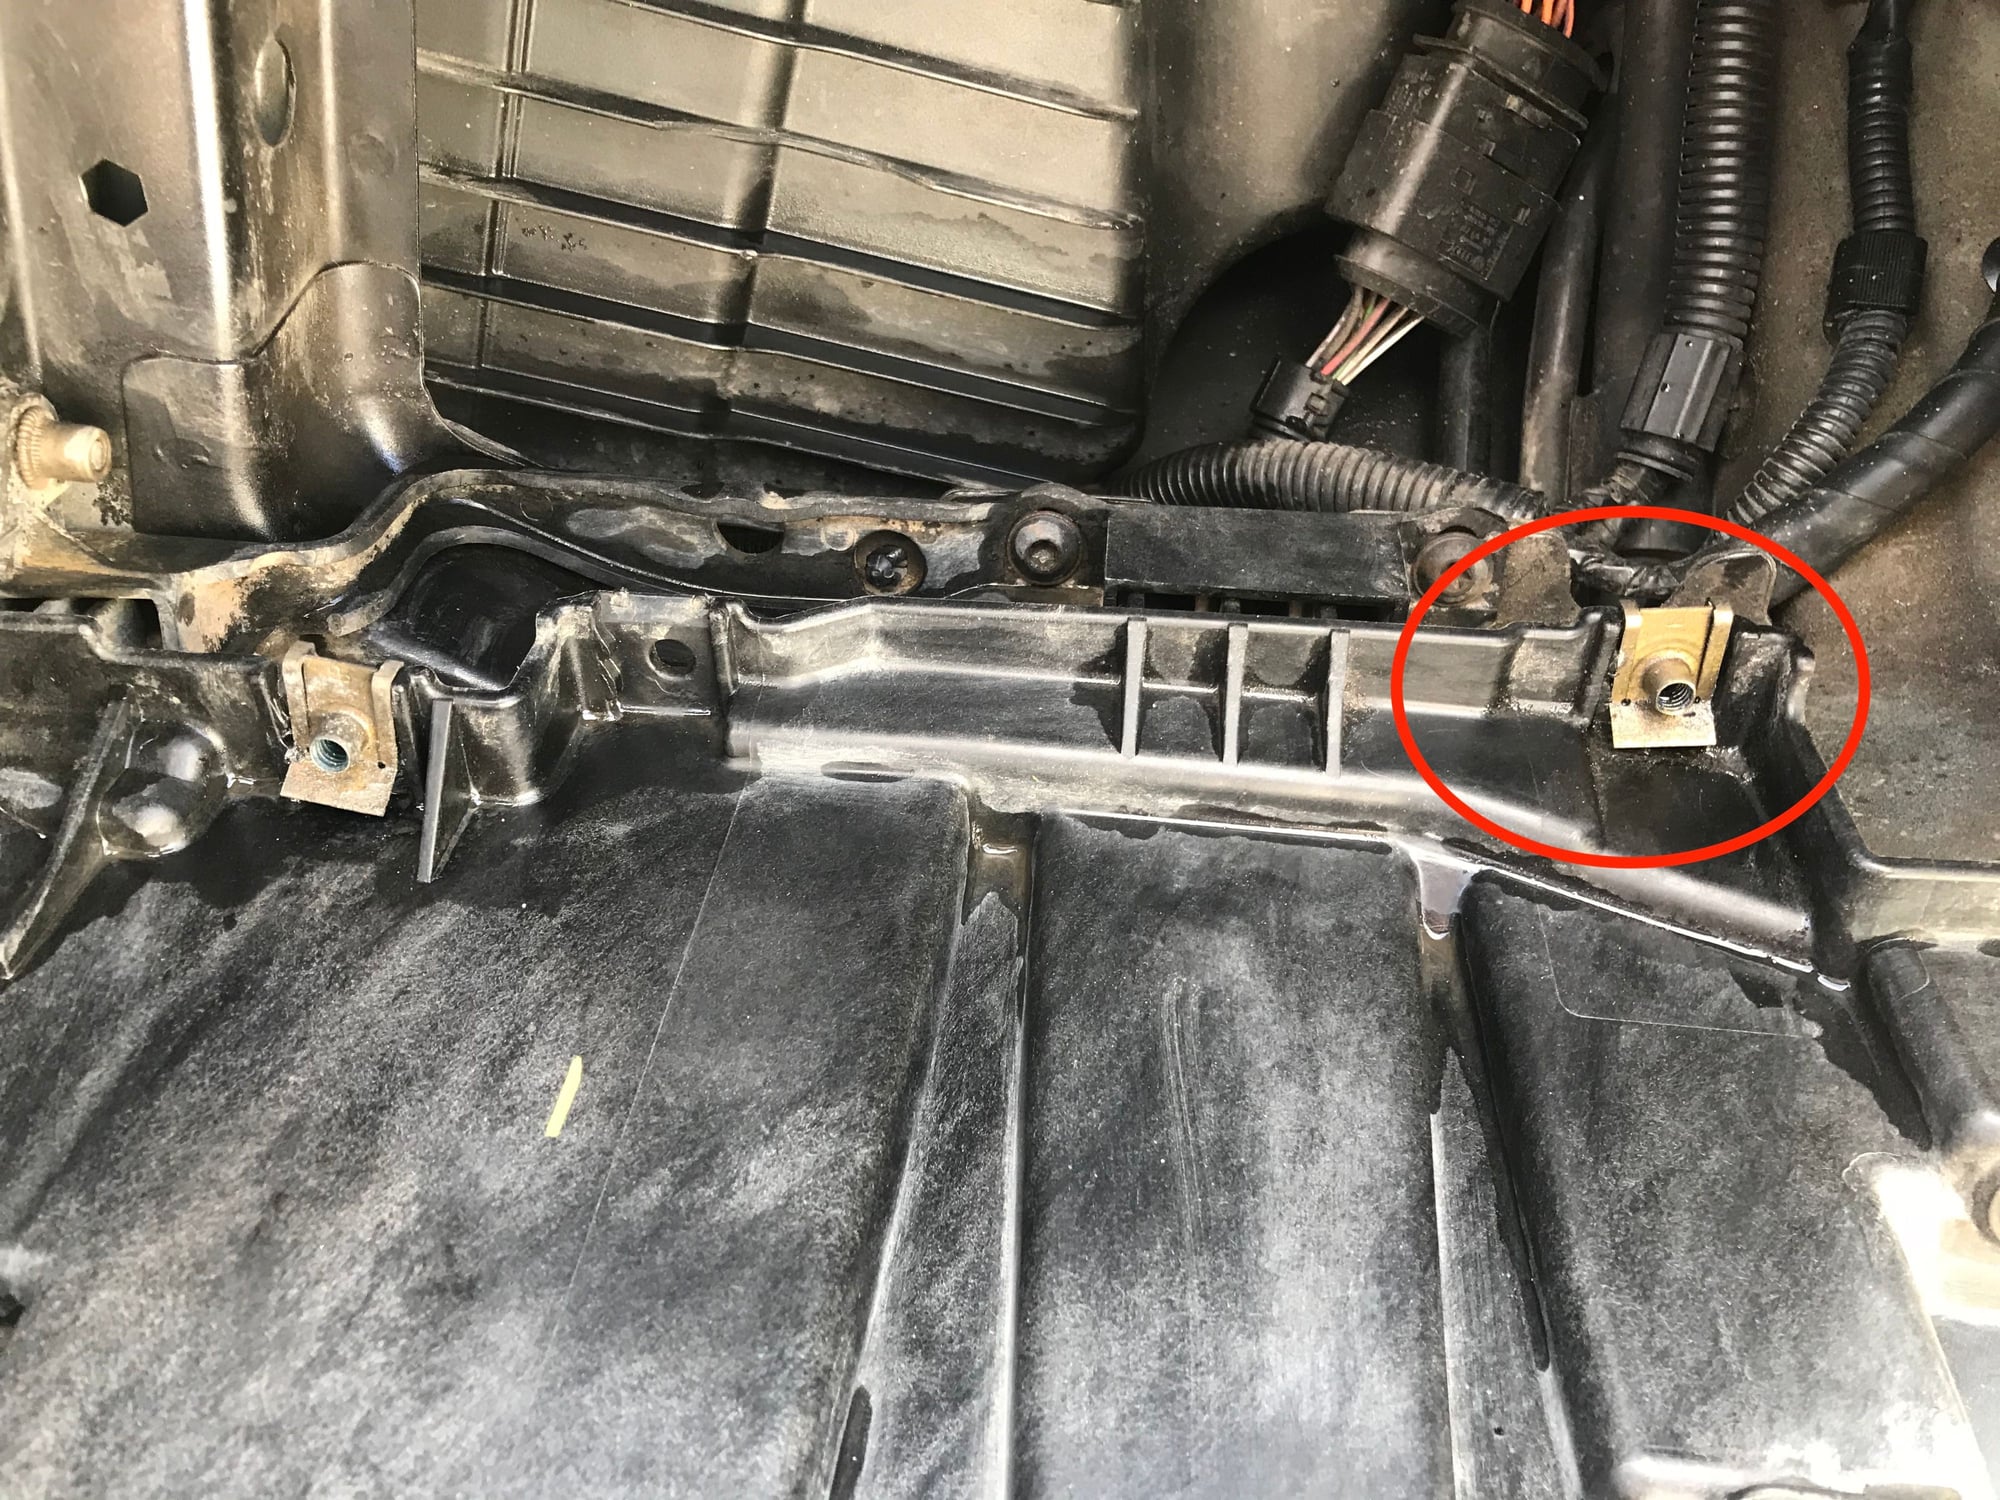
All the airflow ducts and centre section pretty simple to go on but the headlight tray is an absolute bastard to remove and replace. There are four bolts that hold it on, three are accessible but there is one that is a nightmare to fit
These are the four locations
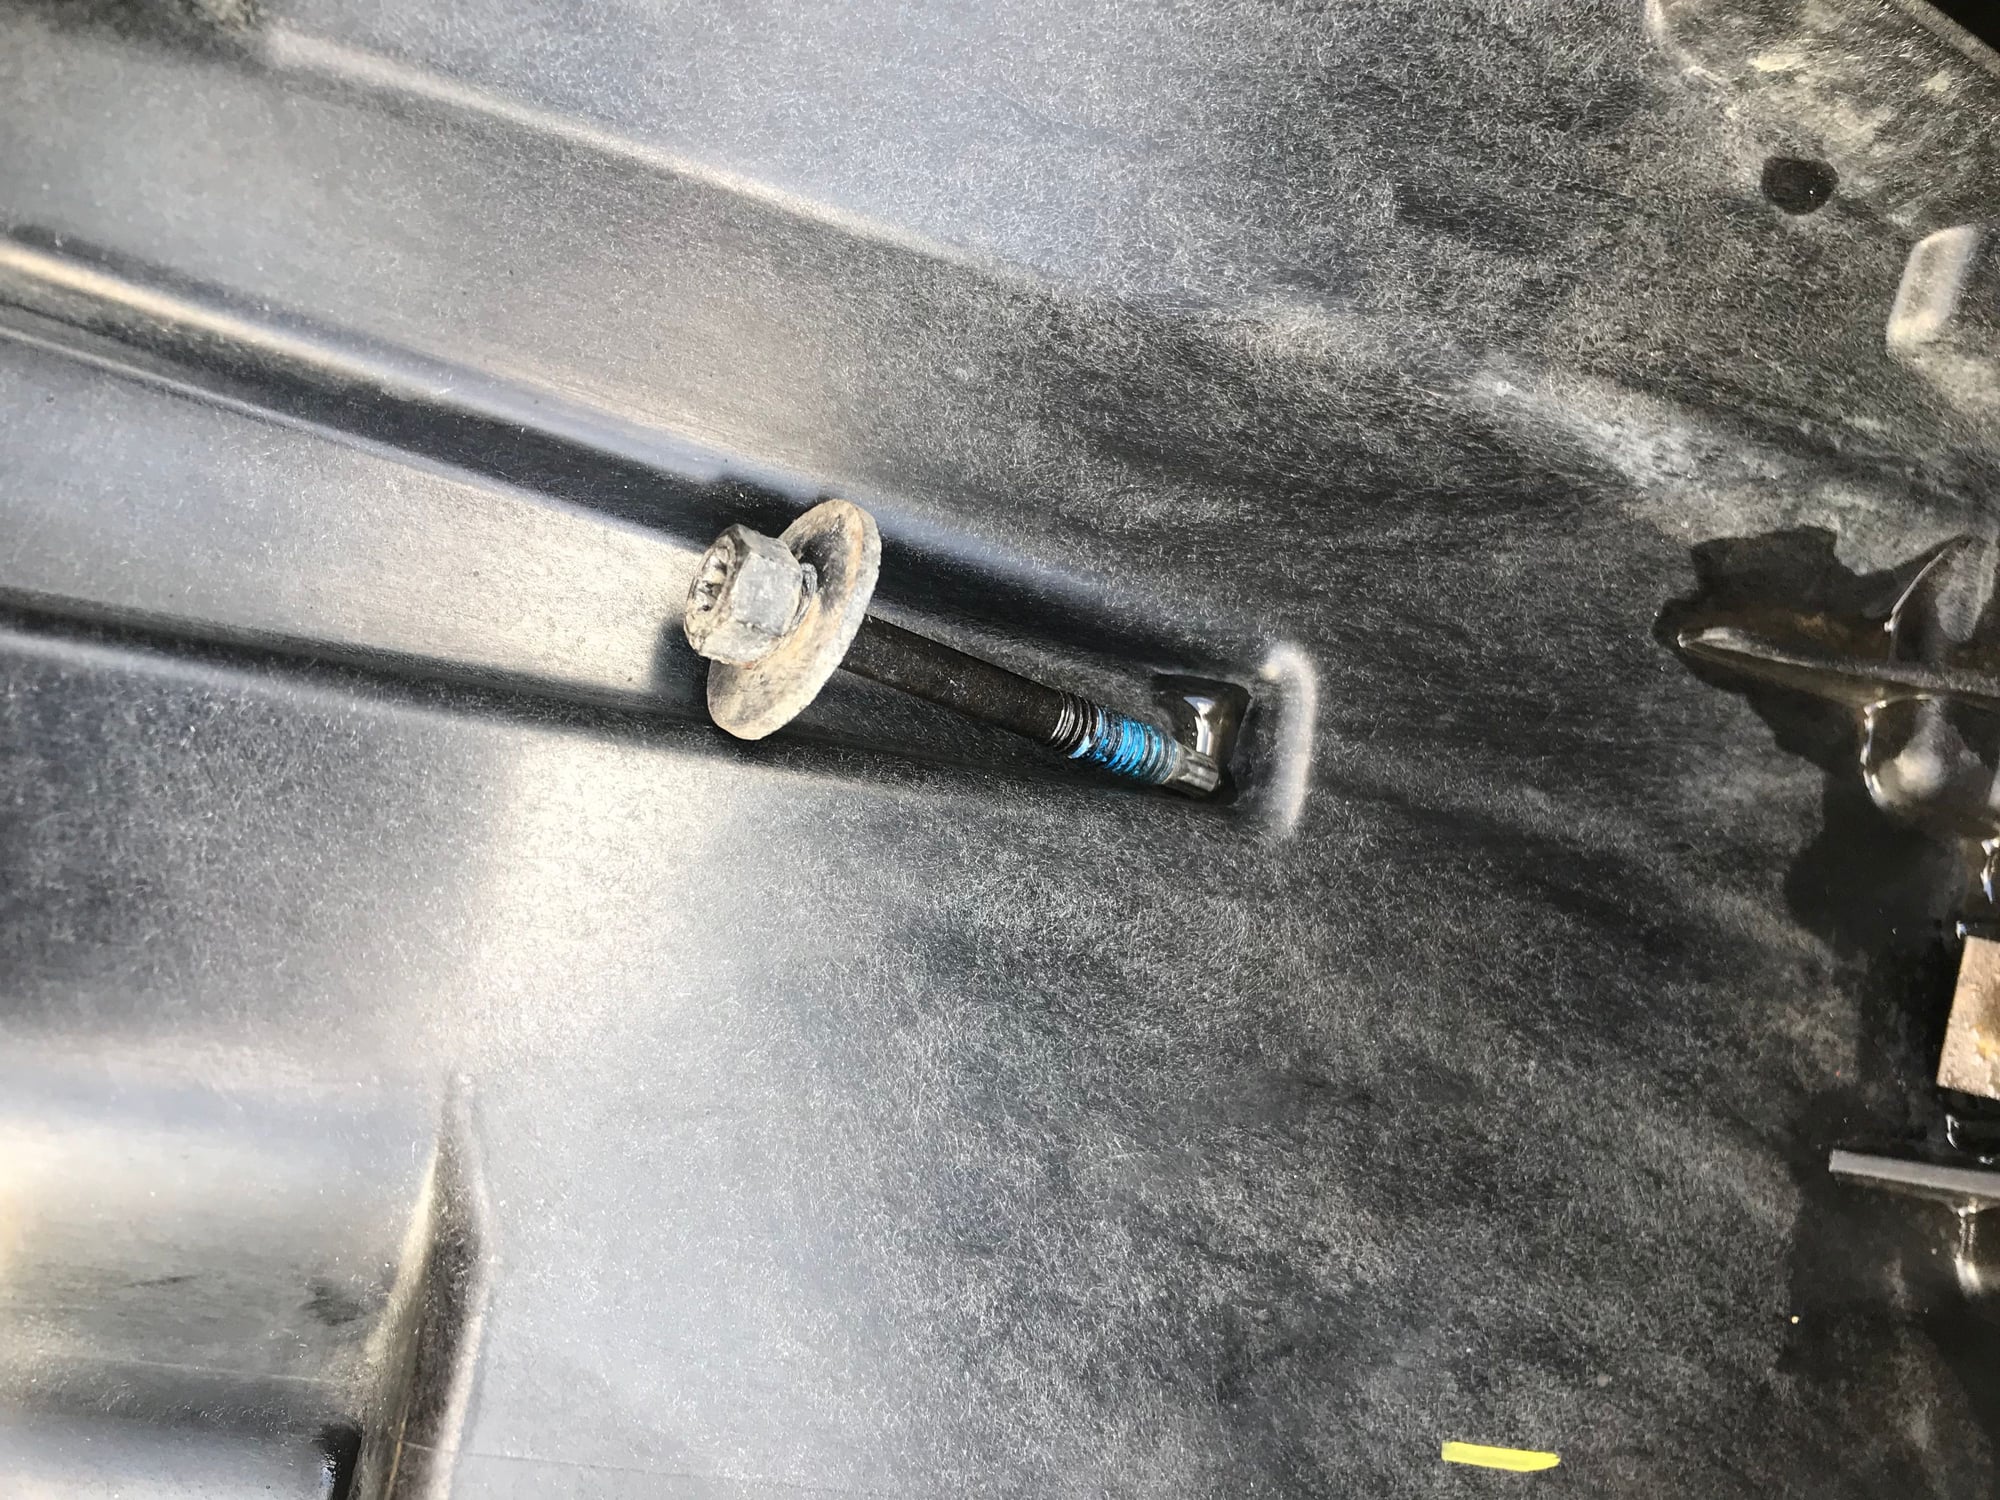
and this is the one that is impossible to get at without tiny hands or removing the wing (which as it is riveted on is a non starter)
the bolts
Its a shame that the majority is hidden but essentially you go from this
to this
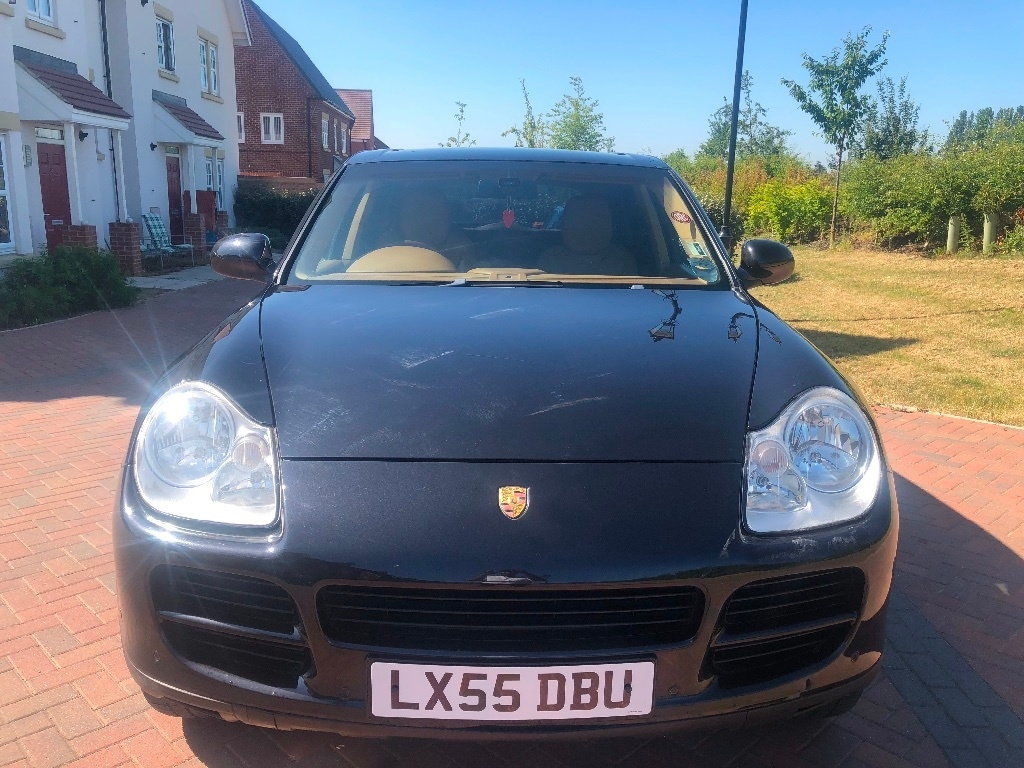
Next time we take off the bumper it will be to remove the badge to refresh the red as it is slightly worn and maybe look at some Xenon upgrades. Aside from that we will not be removing the bumper anytime soon !!


 08-06-2018, 04:34 PM


 Just really to see exactly what was behind, what was missing and also to work out why the hell there was an awful shut line gap between bumper and bonnet.