When you click on links to various merchants on this site and make a purchase, this can result in this site earning a commission. Affiliate programs and affiliations include, but are not limited to, the eBay Partner Network.
Just finished replacing all 4 of my air suspension pressure valves. Previous posts on the topic are accurate (thanks all!). A few notes from my replacement:
** I noticed that cheaper valves were available, but I have no idea of quality. Also, all the cheaper valves don't distinguish between front and rear valves, even though Porsche gives them different part numbers. Front and rear valves I bought look exactly the same, and I couldn't find any distinguishing numbers stamped in them. Maybe they have different pressure release ratings? The valves from Germany weren't terribly expensive and I received them only a few days after ordering.
Tools Used:
- 12 mm stubby open-end wrench to loosen hose connection. Easier to get stubby wrench in area to loosen/tighten hose connection.
- Volkswagen tool mentioned in post above (T10158/1 Air Suspension Pressure Valve Socket) and 1/4" ratchet. This tool is a must-have. You may be able to get the front valves off with some kind of pliers, but will be almost impossible in the rear. https://www.ebay.com/itm/Volkswagen-...72.m2749.l2649
- Small pick to remove old O-ring on hose connections to replace with new ones.
Process:
1) As mentioned previously, raise car to Special Terrain level and turn off automatic level control.
2) I was lazy/dangerous and only supported the frame at the wheel I was working on. Placed a jack at the frame support point closest to wheel being worked on. When valve is loosened and pressure released, that shock will shorten and jack will keep car supported. When pressure was released only the shock being worked on was effected, all others stayed raised. Recommend secondary support using jack stand for rear wheels, since you will be under the car.
3) Front valves are easy. Can be done without wheel being removed.
4) Rear valves require removal of the wheel. Easiest access to valve is from UNDERNEATH the car. On my first one I worked facing the wheel well, wrapping my arms around both sides of shock to reach the valve in back. Very difficult, even if you have long thin arms. About half-way through, I tried from underneath and realized that this is much easier way to access.
5) I left on the old hose connectors, since it was too difficult in rear to try and replace them, but did replace the O-rings. I was going to put a bit of lube on new O-rings, but they seemed to already be slick. Not sure if they were already prepped with something or just the rubber material. As such, I didn't use any lube on new O-rings.
6) After finishing each valve I lowered the jack a few inches from original position (when shock was full of air), but not enough for wheel to touch ground. Started the car and turned back on the level control. When shock filled back up with air, it raised car up enough to clear the jack. I figured this was a good way to make sure each shock is not damaged when empty (lowering wheel all the way to ground) or during refill (confusing level control because car is still jacked-up). Make sure all doors, hood, etc., are closed or level control will fault and not operate. You may have to wait 30 seconds-or-so for system to activate and fill the empty shock.
Replacing the valves seems to have fixed the problems I was having and air suspension faults. Next project is to restore the air compressor with BAGPIPINGANDY'S repair kit, new air dryer media, new metal fitting for air line that supplies on-board tire inflator (in case it's damaged), and replace air supply valve block. All parts purchased from eBay.
Excellent writeup! Thanks for pulling all the information together. It is ready for its own sticky!
One quick note- the German aftermarket valves referenced above that I bought are of excellent quality. My feeling is that they are as good or even better than the Porsche originals. I will be using the same source for my front units as well as other PASM components that I need in the future. No affiliation, etc..
I've got all my parts to "restore" my suspension air compressor (piston ring, O-ring seal, etc.) and a new solenoid valve air block. I figured I'd just replace the valve block while I was in there. My questions is, do I need to support all four corners of frame before unhooking air lines from valve block? I'm thinking that I do. If I put suspension in highest position, then lock out automatic control, I think that the valve block is what keeps pressure in each air shock. If I remove the air lines on the valve block, then the pressure will be released and car will drop. When someone only repairs/replaces the air compressor, the valve block stays intact (with valves closed) and maintains air in the shocks, so they can just lock suspension in highest position and not worry about it.
Is this correct? If so, I'll put jack stands under frame points at each corner of car before replacing the air valve block. I don't want the car to crush me, but I mainly don't want to damage the air shocks when all air is released and they collapse under full weight of the car.
Thanks!
I'm still scratching my head over why you're trying to avoid just supporting all 4 corners of the car. Its an extra 5 minutes of work to place them. Probably less time than it took to write that post. I feel like if you're asking questions like "Will it crush me or not?" in order to save a few minutes, you need to step back and re-evaluate what you're doing and why.
I'm still scratching my head over why you're trying to avoid just supporting all 4 corners of the car. Its an extra 5 minutes of work to place them. Probably less time than it took to write that post. I feel like if you're asking questions like "Will it crush me or not?" in order to save a few minutes, you need to step back and re-evaluate what you're doing and why.
Completed this job yesterday, and I did support all corners with jack stands (and it took about 5 minutes to place them). The intent of my question was to understand the system so I don't damage any of the suspension components. Yes, my wording was probably deficient. The "crush me" part was meant to be a joke and I realized later that folks would probably think I was more worried about the car than getting crushed. Car will only lower to stop-points in struts/shocks, not fall all the way to ground, and this decrease in space under car should be taken into consideration. I've been DIY working on cars for 30+ years, so am well aware of the safety basics like additional supports, working around gas lines, pressurized lines, etc., and I'm still alive. I'm not a 18-year old kid trying to find a quick way to do things (in fact, I'm a career engineer and have led Safety/OSHA, etc., teams at multiple different jobs). However, I'm always trying to find ways to eliminate unnecessary steps during repairs (NOT talking about safety steps), as I often discover after-the-fact that there was a "better way."
The thing I wasn't sure about with the Cayenne air suspension, was the level of support needed for the air struts/shocks to prevent damage from no pressure and over-extension. And, if the air block controlled air strut/shock air exhaust as well. Although not the best wording, the way I framed my previous question was hoping to get an answer on 1) do all corners lose air when block air lines are disconnected, 2) is basic support of frame enough, or should shocks be supported to a certain level. I don't have a full car lift, so always need to determine which areas need to be lifted/supported. After all, I don't want to lift/support the entire car every time I need to work underneath. In this case, yes it doesn't cost much time to place jack stands (which is what I did). However, the next time I do a similar repair, understanding the system could allow me to avoid unnecessary steps.
From your response, you appear to know how to do the repairs I asked about. I'm not sure why you chose to leave out any relevant knowledge in your response. As such, I'll let you list your experience with replacing the valve block, instead of posting mine (like I did for the air valve replacement). I'm sure your steps are more accurate... and safer.
For the benefit of others (based on my original question) - Yes, removing the air lines at the valve block does release all air and retract each shock. A jack stand placed under frame at each wheel will allow that position to drop slightly and rest on jack stand. Then, when job is completed and air system re-starts, car will raise off jack stands. I think this should prevent any damage to suspension from weight of car on un-pressurized struts/shocks.
Glad to hear that your project went well. Since I have not replaced a valve block, I didn't chime in with speculation, particularly in a situation that could be dangerous... my attorney thanks me for this! If others can chime in and fill in any gaps with their experiences on the component replacement, that would be great. The more info the better. If not, this thread gives someone with the same issues a great resource and a place to start.
I suspect our humble moderator Don, is on vacation, or he would get this set thread up with a sticky. Thanks to all that contributed.
i need one of these O rings for the air line that goes into the valve block. all i need is the little O ring. lol. have a leak and used soapy spray and undid the line and found a broken O ring. anyone know the part number or how i can go about getting one? just joined today. have a 2005 CTT.
And just a few Top Gear Top Tips for anyone doing this job:
- Do the fronts first. They are easy, and you'll get a better idea of what you're doing when you do the rears, which you'll do mostly blind.
- Air will escape both when you loosen the both pressure fitting and then the valve itself. Give time for the pressure to equilibrate when removing the valves. If you go too quickly, there will still be pressure when the threads are cleared, and the valve will become a projectile. While this is entertaining, I wouldn't recommend it.
- As everyone has said, make sure the car is well supported before doing each corner. You could really hurt yourself.
And one other piece of info: the o-rings on mine ('09 CTT with 90kmiles) looked as good as new. I'd be surprised if replacing just the o-rings fixes anyone's problem.
I'm very glad that it was helpful and many thanks to those that posted ealier with their experiences. I wonder how many owners have spent $$$$ at a stealer throwing parts at a simple (albeit blind, for the rear) repair... the valves are definitely wear items.
Quick question, I moved from California to Wyoming, air suspension was working just fine and when I got 1 mile away from my new base (6100ft altitude, left from sea level) my rear suspension crapped out and is now sitting at its lowest level. I read that the compressors tend to go out at higher altitudes so I bought a rebuild kit, it got lost in the mail and "should" be here today. So while waiting I bought 2 retaining valves for the rear and was going to work on those while waiting. I am using a lift and have the car lifted but still don't see how anyone can get the lines off of the rear air bags without breaking their arms.... Anyone have some pictures or a video of how they got in to replace those.
Also does anything else sound like it could be the problem? I took off the air compressor last week since the rebuild kit was supposed to be here the next day. It never came and since I am paying by the hour I put the compressor back on so I could raise the car and move it off the lift, now it won't raise at all. (The front was left in terrain mode at first, the shop I got new tires at put tires on too big but since I had to move I couldn't wait for different tires to come in so now I can't drive the car off the lift until it is raised some) No part of the car raises now with the compressor put back on. When I took it off the first time, the rear lines had no air come out from the control block near the compressor but the fronts had a lot of air. Like I said earlier now nothing will raise. So does this seem more like a compressor issue or would it still be able to supply some air?
Regarding the rear valves, my advice was to do the front ones first, or at least have a good look at them since they're easy to see, before doing the rear. Once you know what you're looking for and how things are attached, the rear isn't bad.
Hopefully someone else can chime in with advice about the compressor.
I fixed the compressor and it sounds tons better but there is definitely a leak somewhere close to it. Do you or anyone else know if the air lines on the passenger side are able to be accessed by lifting the carpet and floor panels on the front passenger side? The leak is coming from that side very close to the compressor, maybe that black line. If I can get to those lines from the top I wont have to wait until Friday to use the lift and hopefully have my car running sooner.
And one other piece of info: the o-rings on mine ('09 CTT with 90kmiles) looked as good as new. I'd be surprised if replacing just the o-rings fixes anyone's problem.
2008 V6 200k kms.
My o-rings looked new as well when I opened it up but I had a leak at the lower one. When I removed the o ring it felt more elastic than the new one. Does not feel as rigid but looks good aesthetically. Just something to note. Also had the bump stop slightly rotten and debris all over inside the bag. This is on the rear left side.
The right side leak is still not fixed. Awaiting parts (cheap Chinese made valve and connector). I suspect the leak is at the Voss connector (air line fitting referred to as here). I can feel it�s not gripping the plastic airline as tight when I screw in the connector. Did some research and there are actually 2 more inbuilt o rings in that Voss connector apart from the one you see externally. I was losing air at that strut only when the engine is running (normal height and doesn�t go higher than that - throws error) You can see it rise then immediately drops an inch (sports height). Then the compressor runs and it goes up again. Average 2-3 minutes per cycle. Height is maintained when engine is turn off and drops like only about half inch all 4 wheels after a few days. Voss connector / push in connector / air fitting
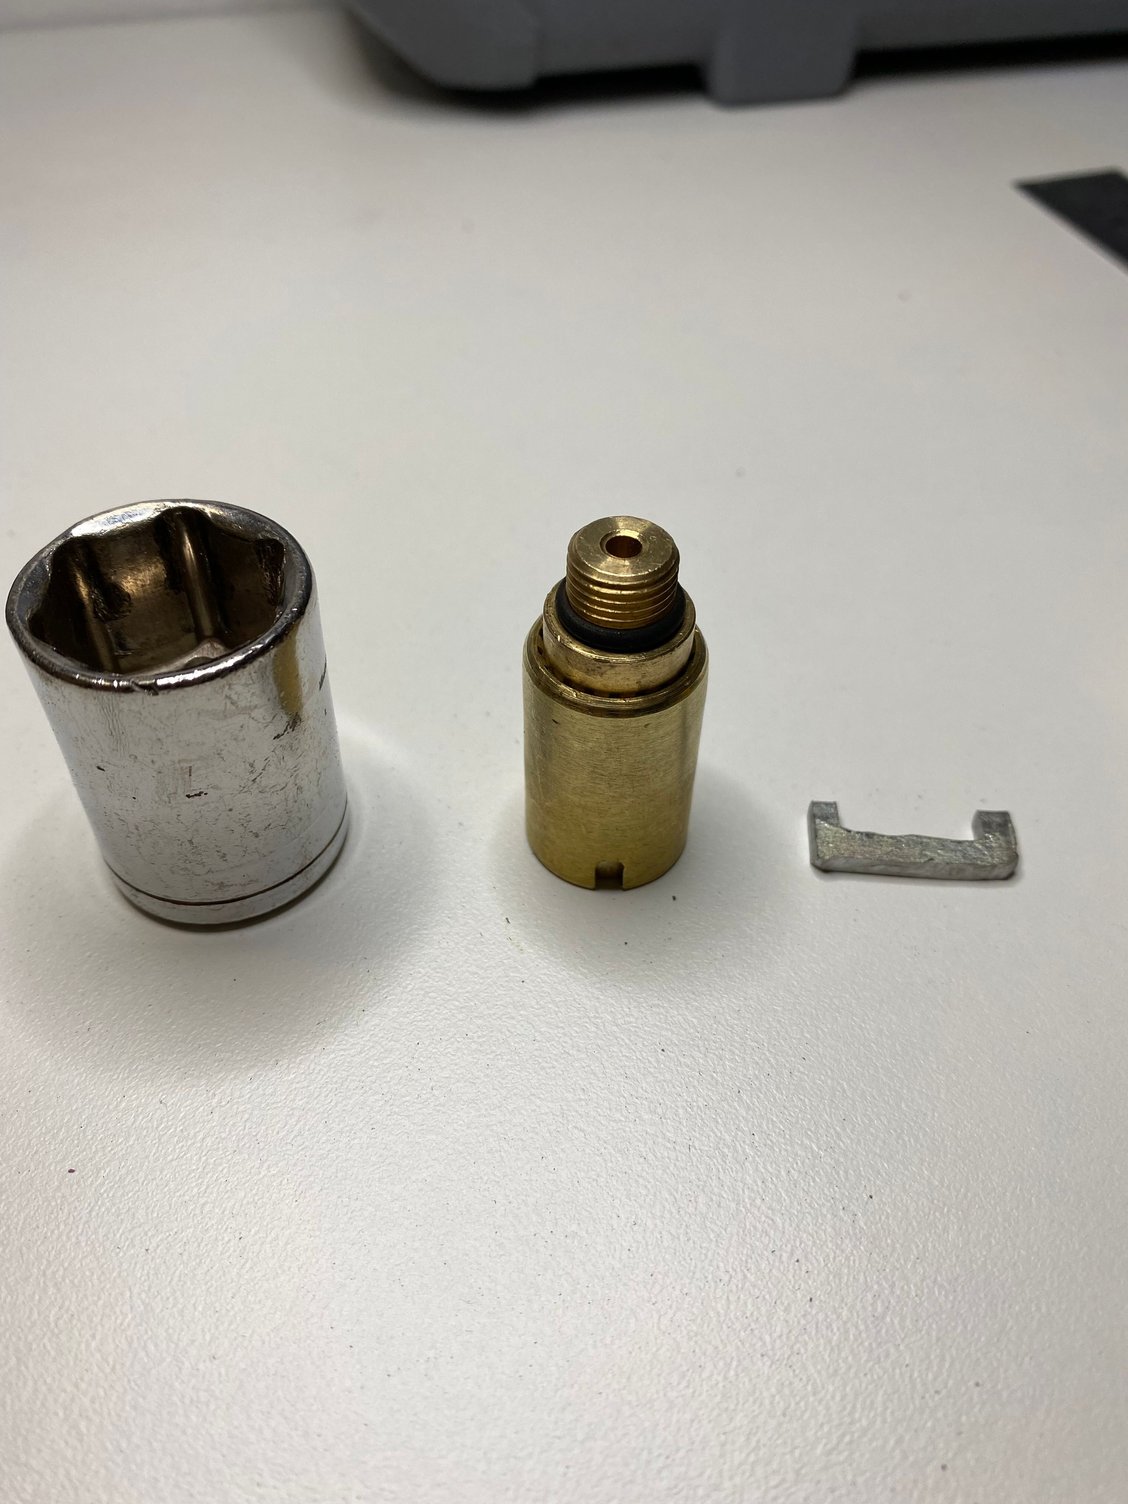
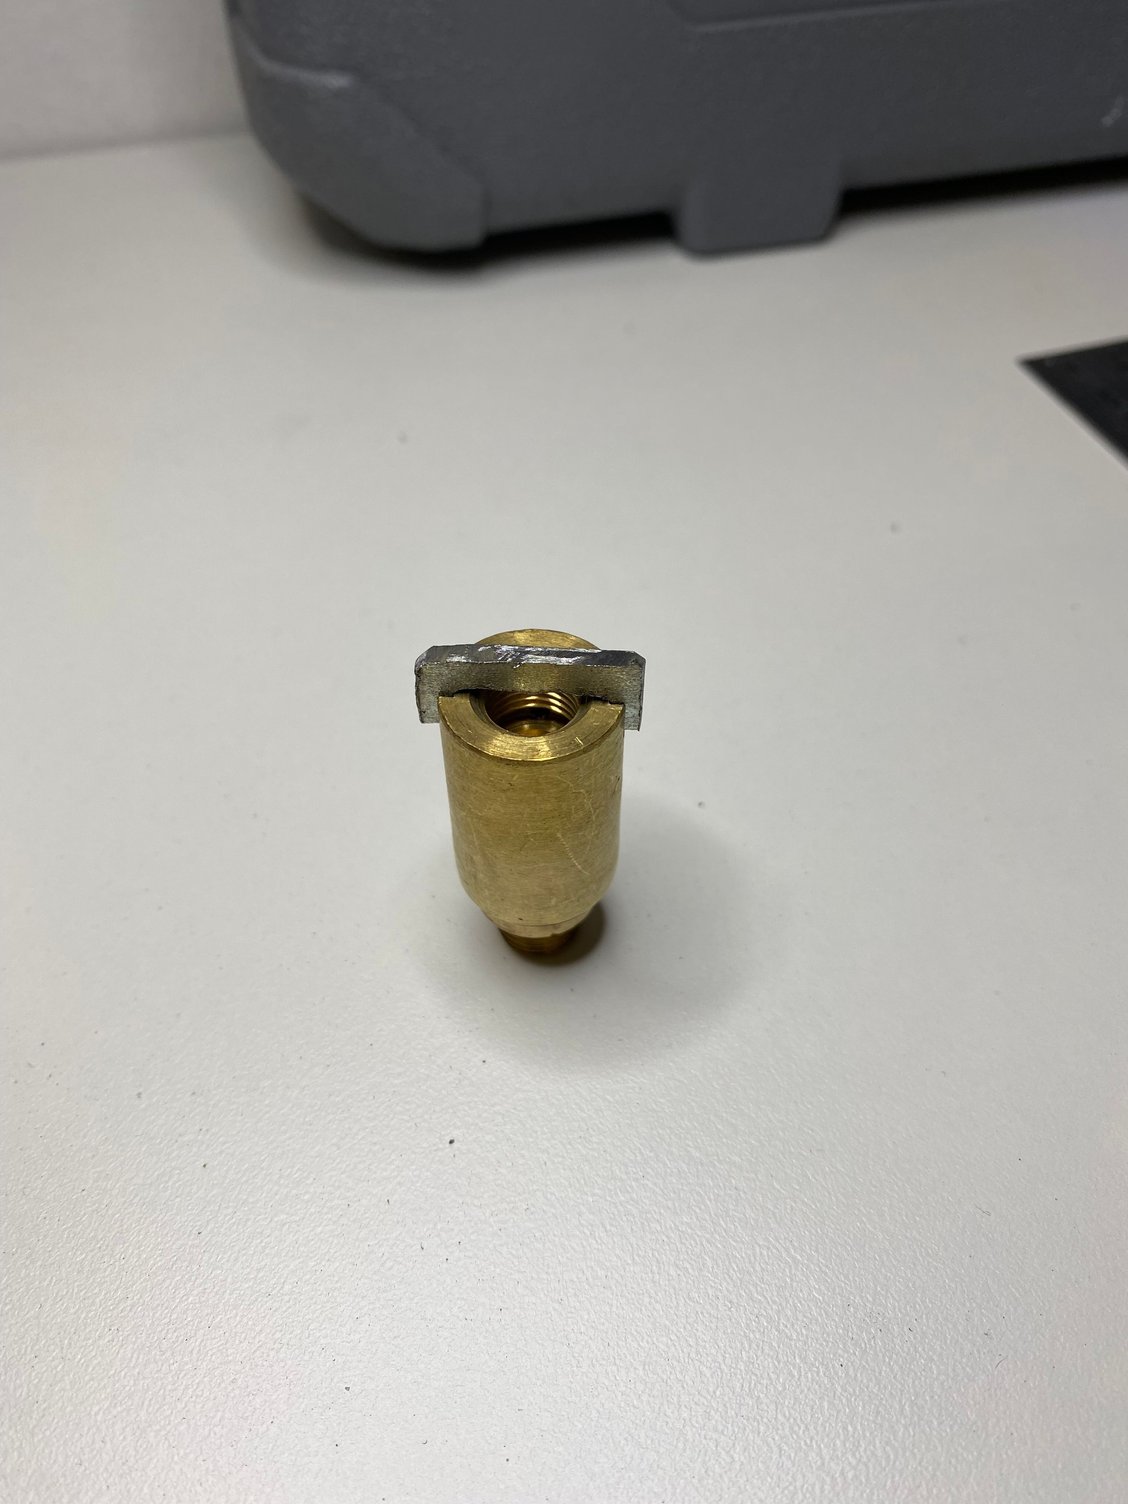
Thought I share my version of the special too I made. Difficult to get the Audi tool from where I am. Cut the U Shape bit from an old door hinge. The thickness matched the valve�s groove perfectly. The side of the U is about 4mm and the middle clearance is 15mm. Place it into a 19mm socket perfectly snug and now I have a special tool for this valve replacement job.


 09-03-2020, 12:21 PM