When you click on links to various merchants on this site and make a purchase, this can result in this site earning a commission. Affiliate programs and affiliations include, but are not limited to, the eBay Partner Network.
Actually -- I'm not sure this is true anymore. You might not have to print and/or make custom adapters rings for speakers any longer. I stumbled across this site the other day: https://rennspec.com/
Looks like they sell speaker adapters, wiring harness, etc. for many recent Porsche vehicles. Was thinking about replacing my shameful homemade 8" woofer adapters with a set of these....
Nice! I haven't seen this before. Very cool. They look like quality stuff.
So it seems like the 4.7uf capacitor for the Bose tweeter while appropriate for the Bose cheap tweeter, is likely insufficient for the Dayton ND20FB-4.
The smaller the capacitor, the higher the frequency will cut off. So by going with a larger capacitor, the tweeters will play lower frquencies. This is probably fine with the DA tweeters.
I think I used 10uF caps on my DA tweeters. I sized them at 10uF because of the target frequency I was going for.
Having the tweeters play lower frequencies isn't necessarily better for audio quality.
12uF should be fine.
I got the grills out by popping out the air vents and popping off the metal clip from underneath. I got the new tweeters in, and it really does make a difference. Very happy with this very affordable audio upgrade. Thanks for starting this thread and sharing the knowledge!
I got the grills out by popping out the air vents and popping off the metal clip from underneath. I got the new tweeters in, and it really does make a difference. Very happy with this very affordable audio upgrade. Thanks for starting this thread and sharing the knowledge!
Popping off the metal clip from underneath allows you to reuse it without damaging it? The Musicar video seems to show that method by they don�t reuse the Bose grills and instead replace with Burmester grills.
I left the front metal clip off & wrapped the plastic leg in felt tape to get it tight with no rattling. Easier to get the grill back off later without removing the vents again.
So I finally replaced 1 Bose tweeter. I twisted the front clip out with a long reach needle nose plier. This popped out and I was able to reuse it since it was not damaged.
I decided to use a polypropylene 12uf capacitor. These are considerably bigger than the cheaper electrolytic capacitors. I used a premade BMW wiring harness from AliExpress that was linked to in this post. I used the full length of the wire, approx 5”, to the cap and then used about 6” of new wire from the other end of the cap. I used gold terminal ends. Everything was soldered with lead solder and shrink wrapped. Referencing the driver side, there is a cavity to the left of the side of the grill area and towards the driver. This allowed the larger cap to be placed there and the longer wiring was needed for this. I wrapped all of the wiring and the cap with a fabric 3M tape from a Home Depot. I used a 1/2” foam that had PSA backing and folded a piece over on itself to allow the used of the silver W shaped spring that the Bose speaker used. This squished down well. Everything was replaced in reverse.
I performed a sound test with a Sarah McLaughlin CD since I had it handy and the audio quality of this cd has always impressed me. Going back and forth and left and right, the sound difference was noticeable compared the passenger side tweeter that has not yet been replaced. Sound is crisper, clearer and almost a bit louder. The fellow that recommended the polypropylene capacitor said that that the difference between caps is distinguishable. Based on the size of the Bose cap, I will guess that it is not a polypropylene. I’m not sure that I would perceive a sound difference between an electrolytic vs polypropylene cap.
In the end, this upgrade is a great value. Thanks to the OP for the suggestion and the write up. Thanks to everyone else with the various comments and tips and how they proceeded.
Well, since one tweeter sounded much better, I decided to replace the other. 🤪
Does it make a difference how the wiring is connected to the speaker terminals? The Dayton speaker has a terminal marked red. I’m not sure which wire I connected to that on the drivers side. Looking at the Bose factory speaker, they connected the wire from the R side of the female connector (looking at it head head with the T flanges located at the top) to the cap. I did the same with the driver side.
If the wiring is not consistent side to side will there speakers be out of phase? I’d rather not have to take out the driver side but will if the wiring must be consistent. Thanks for the help.
I ended up testing the factory wiring to the tweeter with multimeter and indeed the blue with black stripe wire is the positive. This wire went to the cap on the Bose speaker. I did the same and wired this positive wire to the red terminal on the Dayton speaker. Tested using the same audio and with all front, max treble and cycled between left and right. Everything sounds great.
Clearly we all appreciate audio differently and will change the settings to suit our preferences but this small upgrade has made a noticeable difference. Since I changed only one speaker and then a week later changed out the other Bose tweeter, it was an interesting way to hear the difference. Very cost effective option. And the dash has plenty of room for the Dayton Audio 12uf polypropylene capacitor as long as the wiring harness that you create is long enough.
If you have any doubts about this upgrade, you shouldn’t. It’s too affordable not too.
Well, since one tweeter sounded much better, I decided to replace the other. 🤪
Does it make a difference how the wiring is connected to the speaker terminals? The Dayton speaker has a terminal marked red. I�m not sure which wire I connected to that on the drivers side. Looking at the Bose factory speaker, they connected the wire from the R side of the female connector (looking at it head head with the T flanges located at the top) to the cap. I did the same with the driver side.
If the wiring is not consistent side to side will there speakers be out of phase? I�d rather not have to take out the driver side but will if the wiring must be consistent. Thanks for the help.
Yes, if you have the wiring backwards, the speakers go backwards. That will cause polarity issues.
Red is positive, black is negative IIRC.
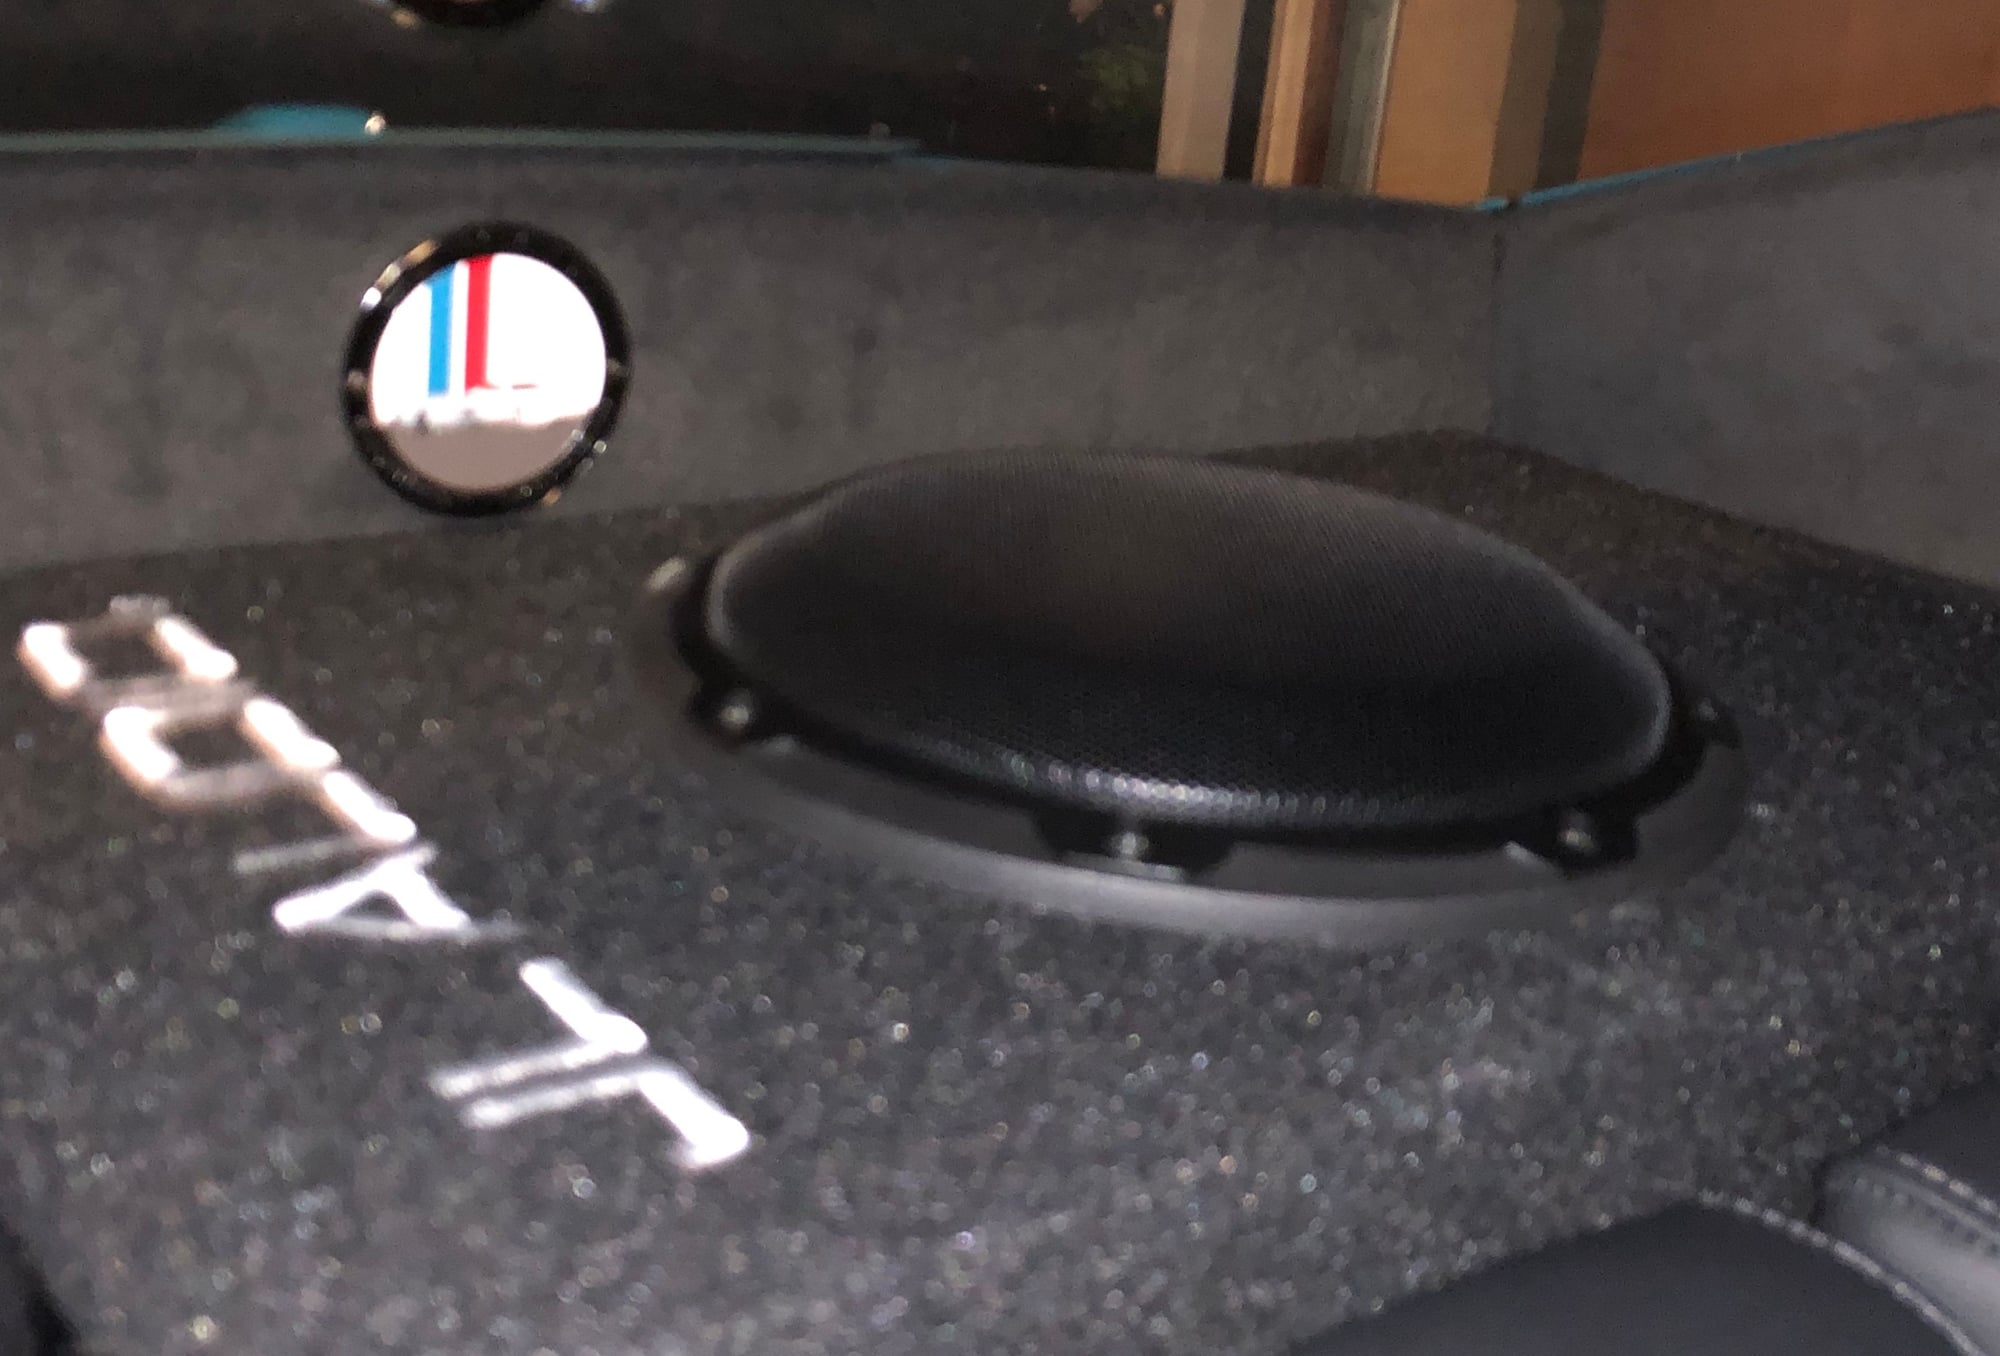
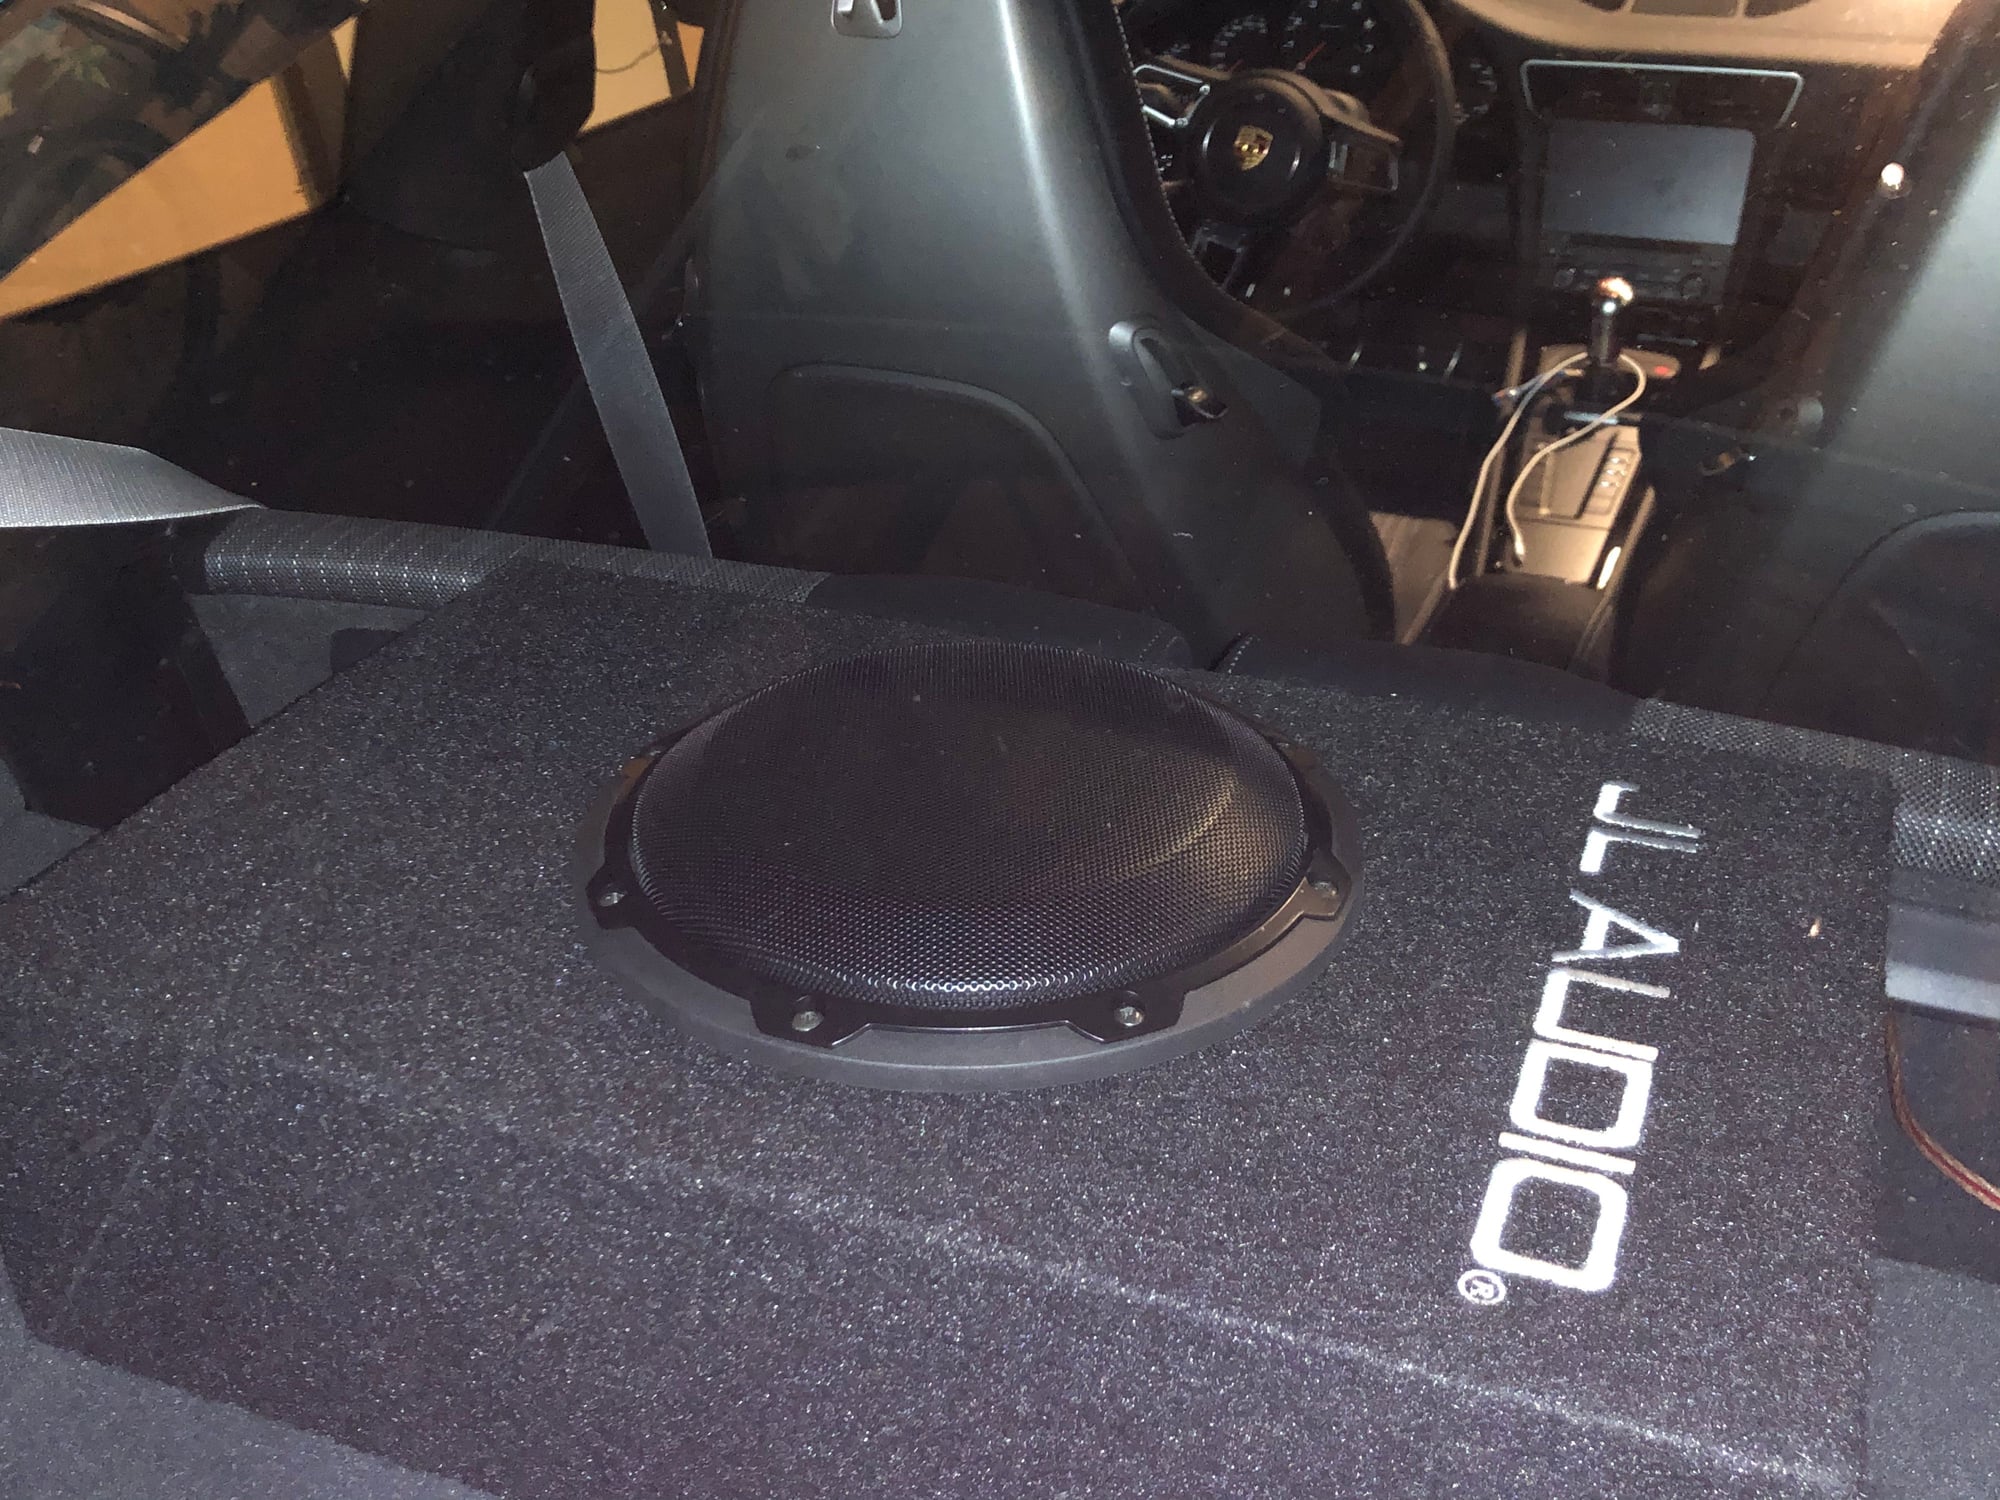
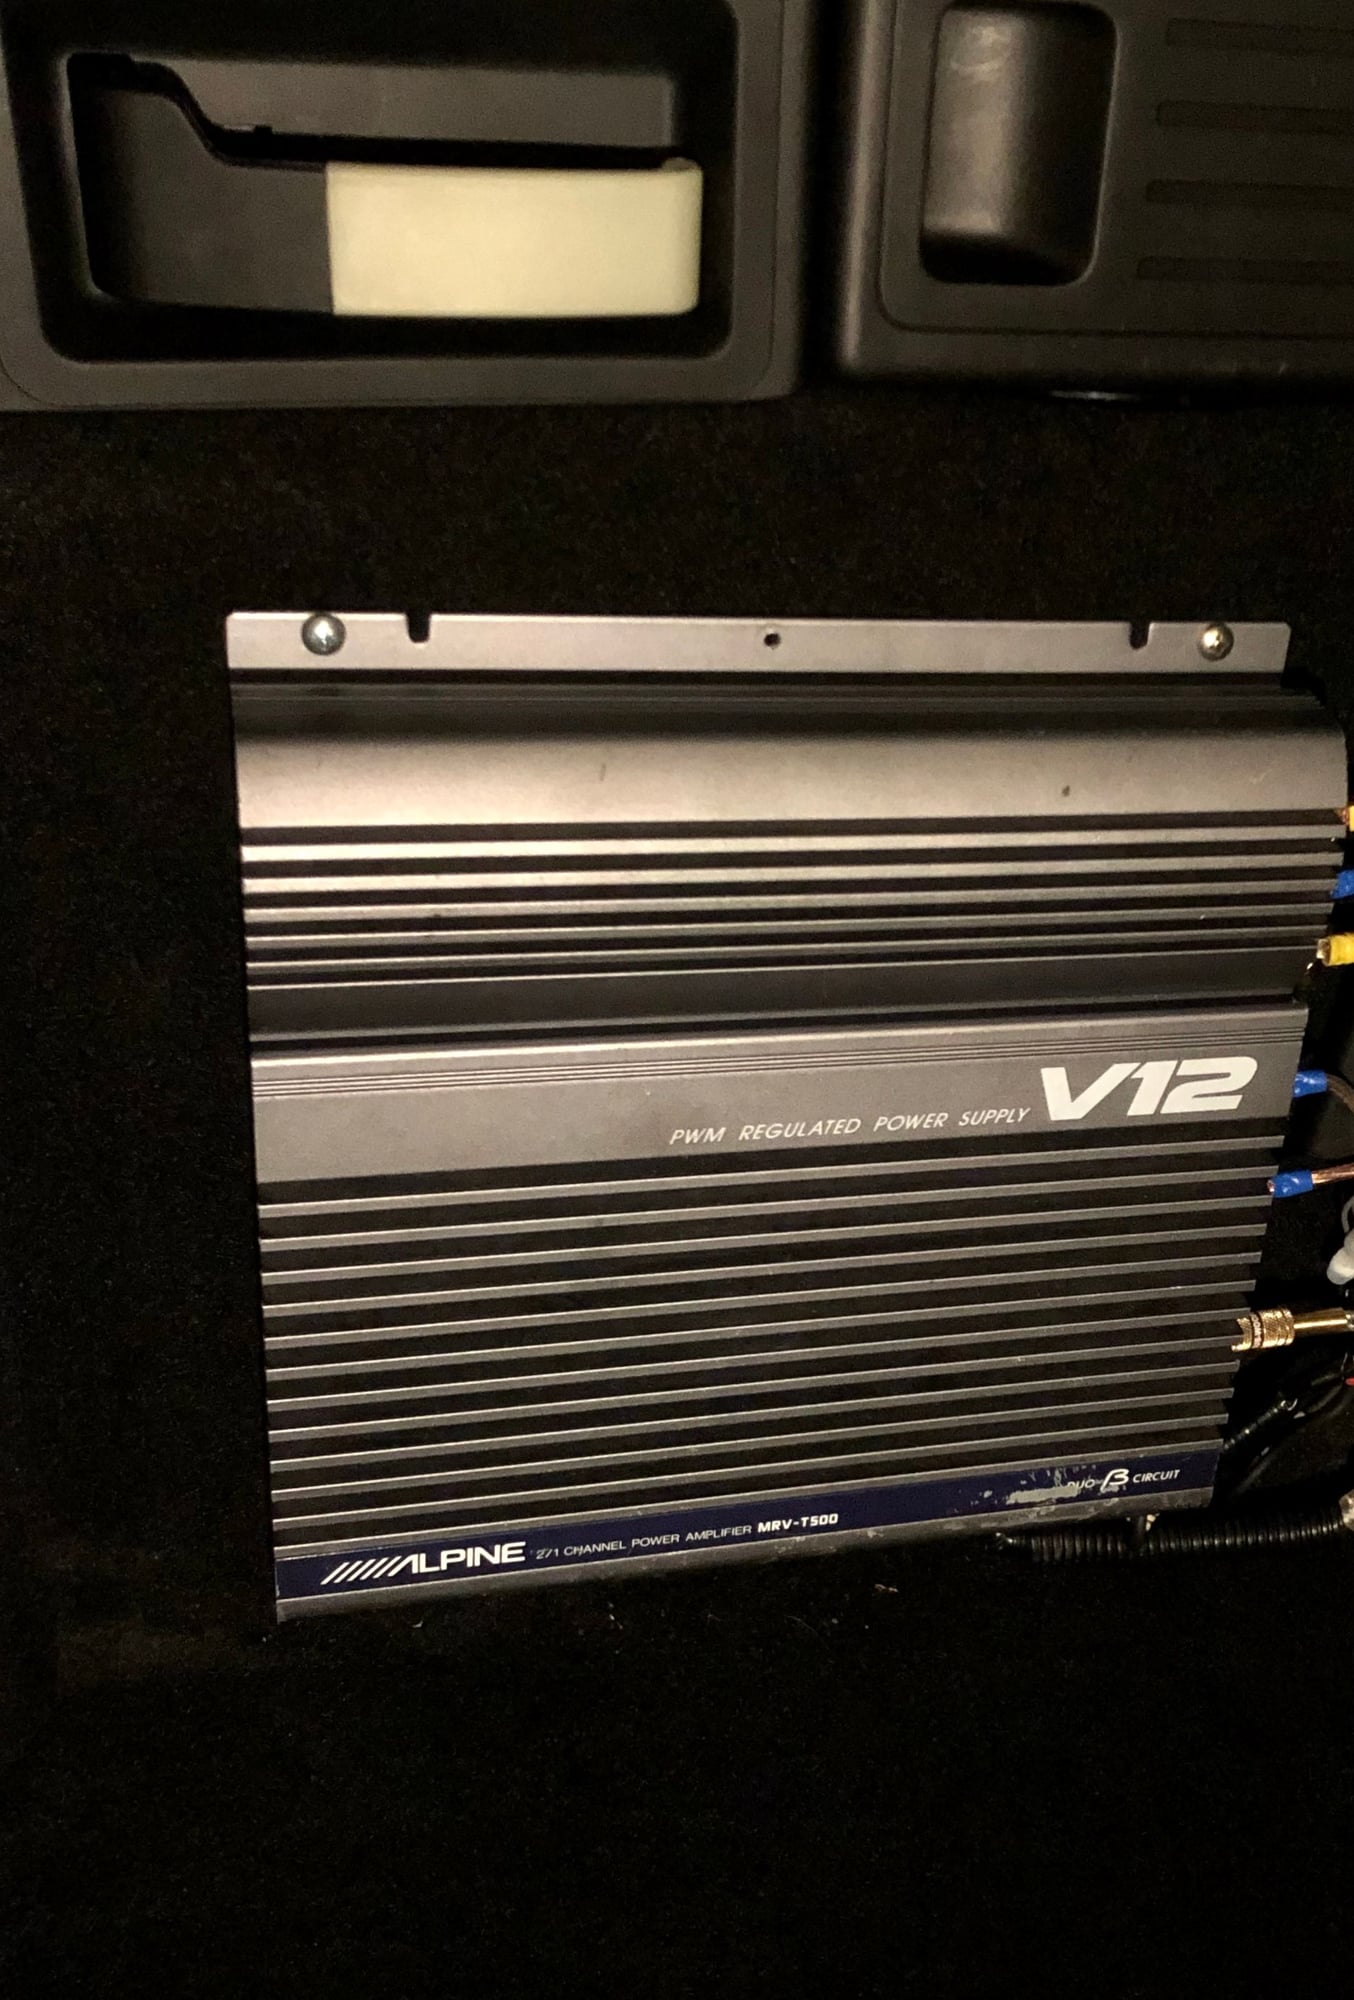
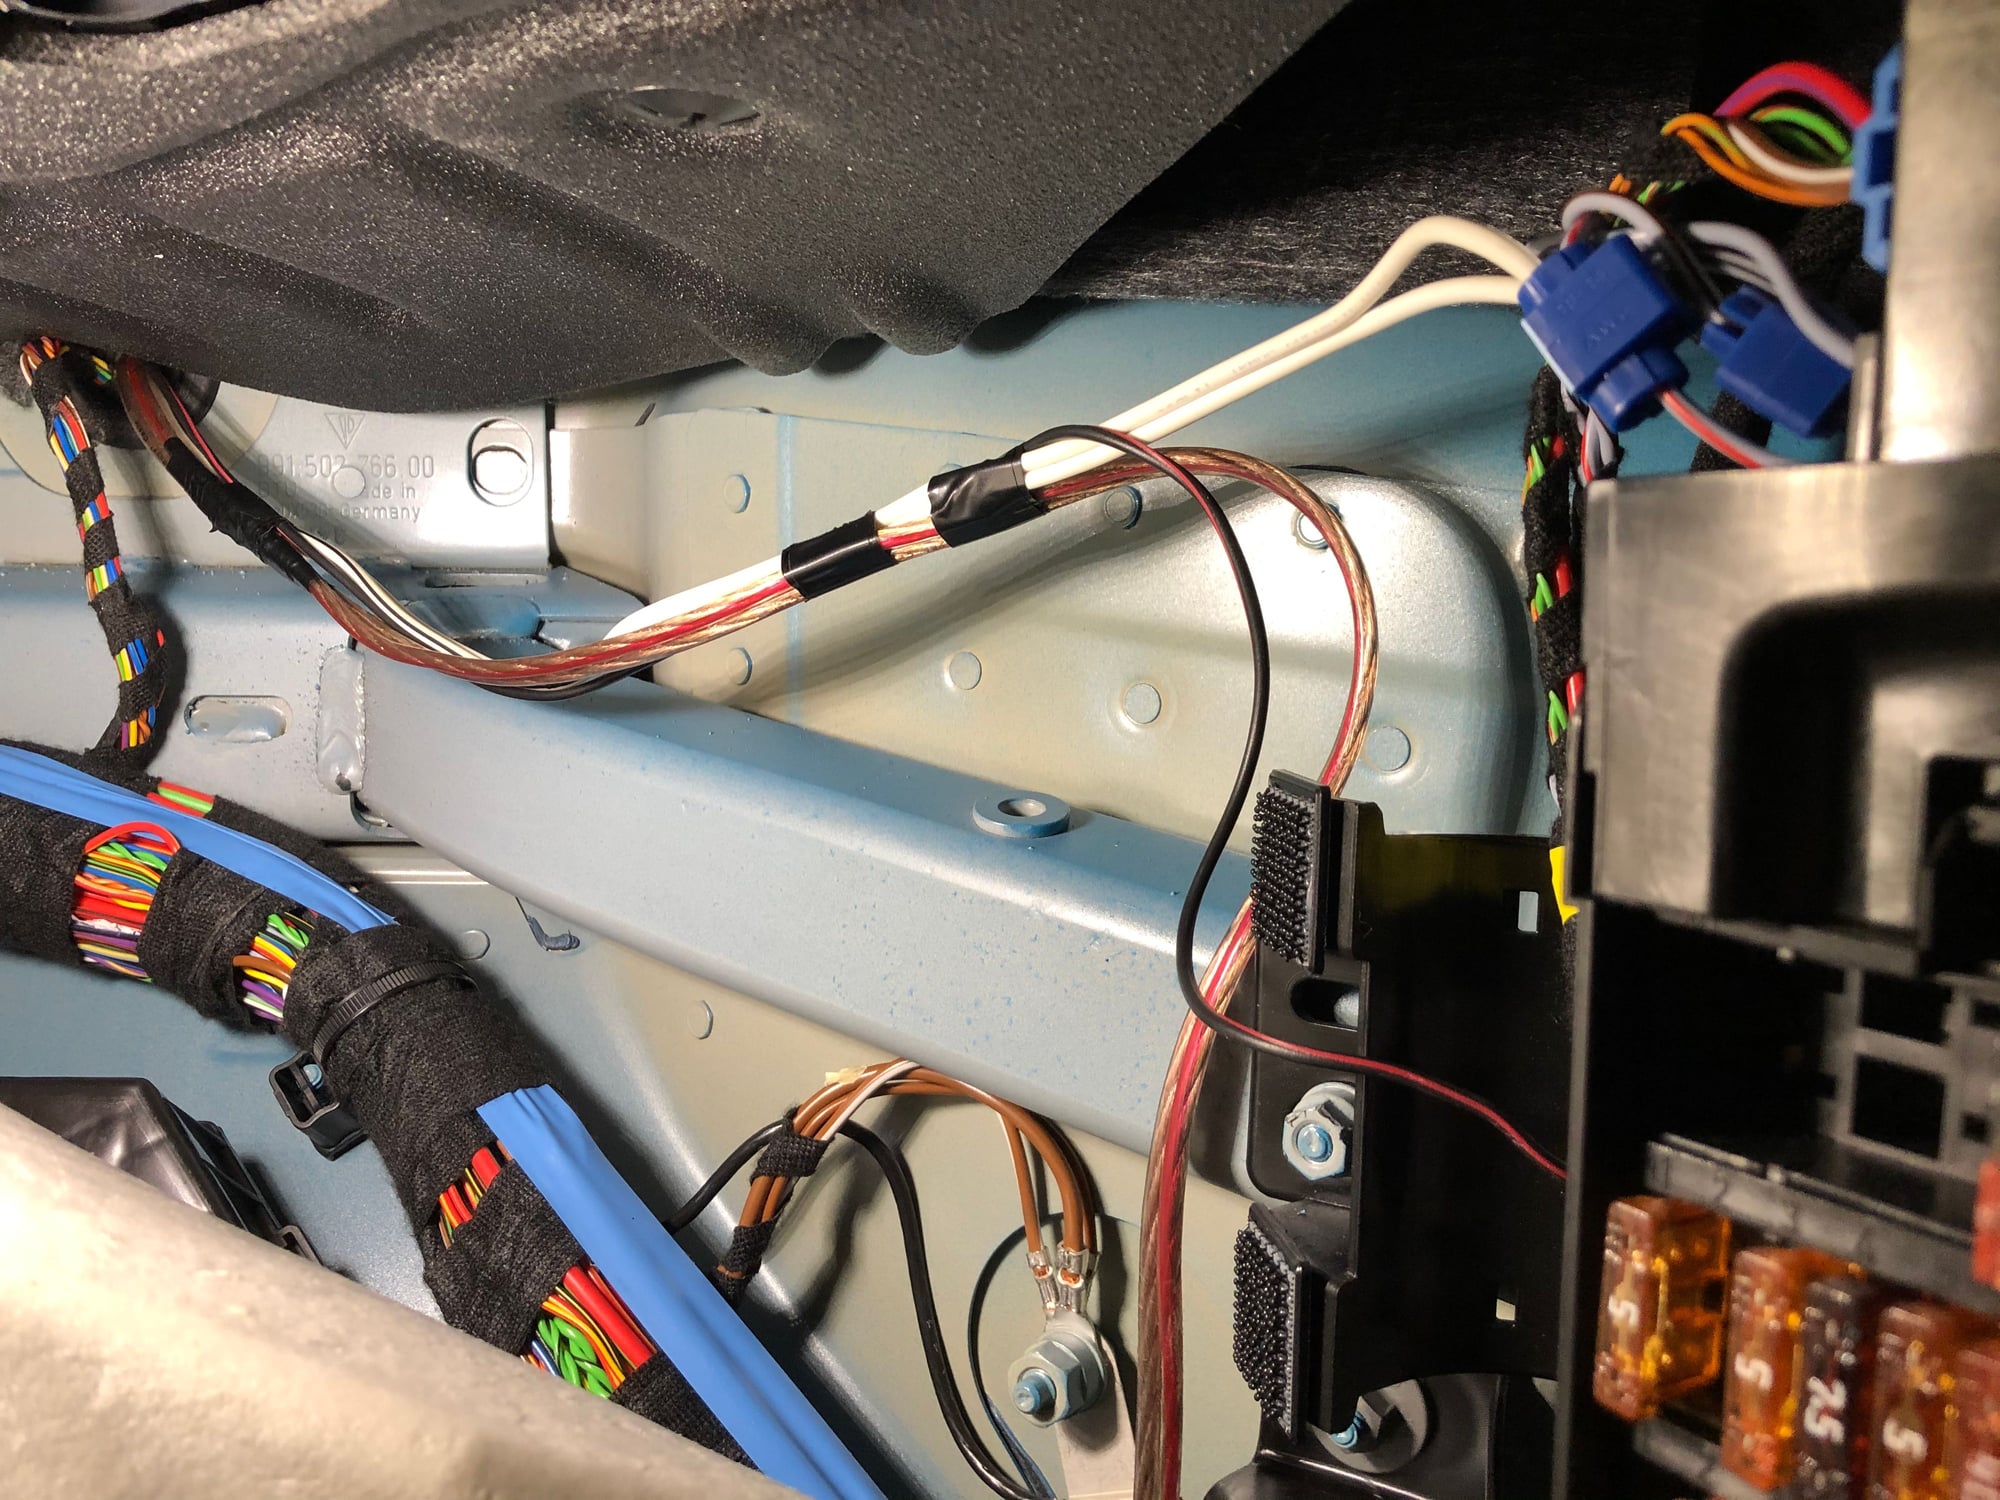
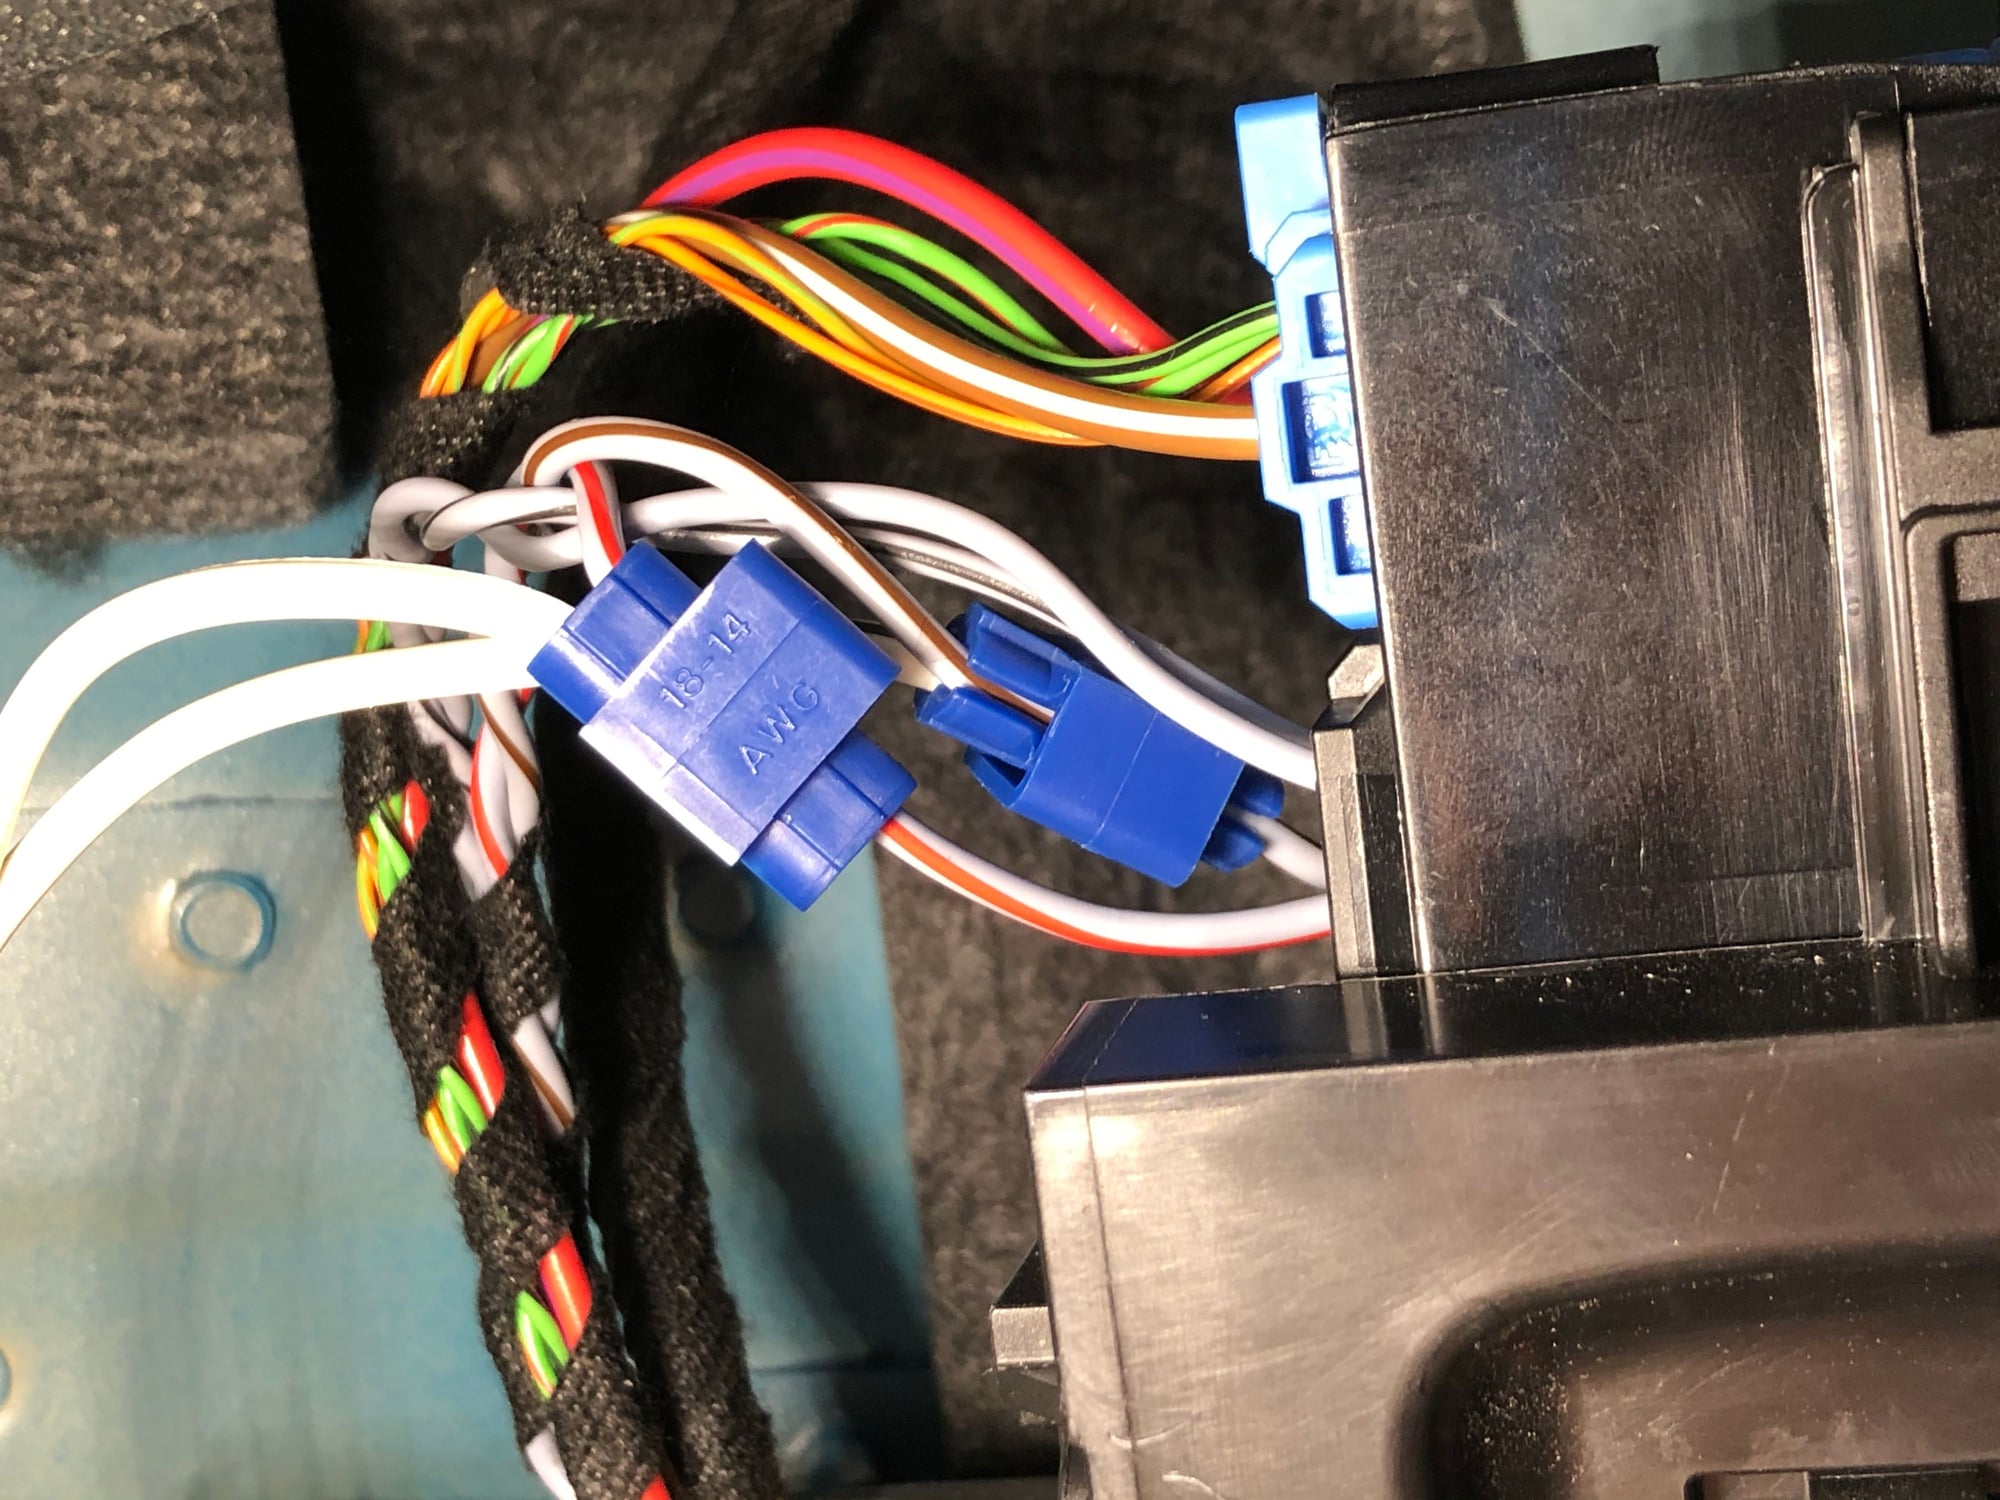
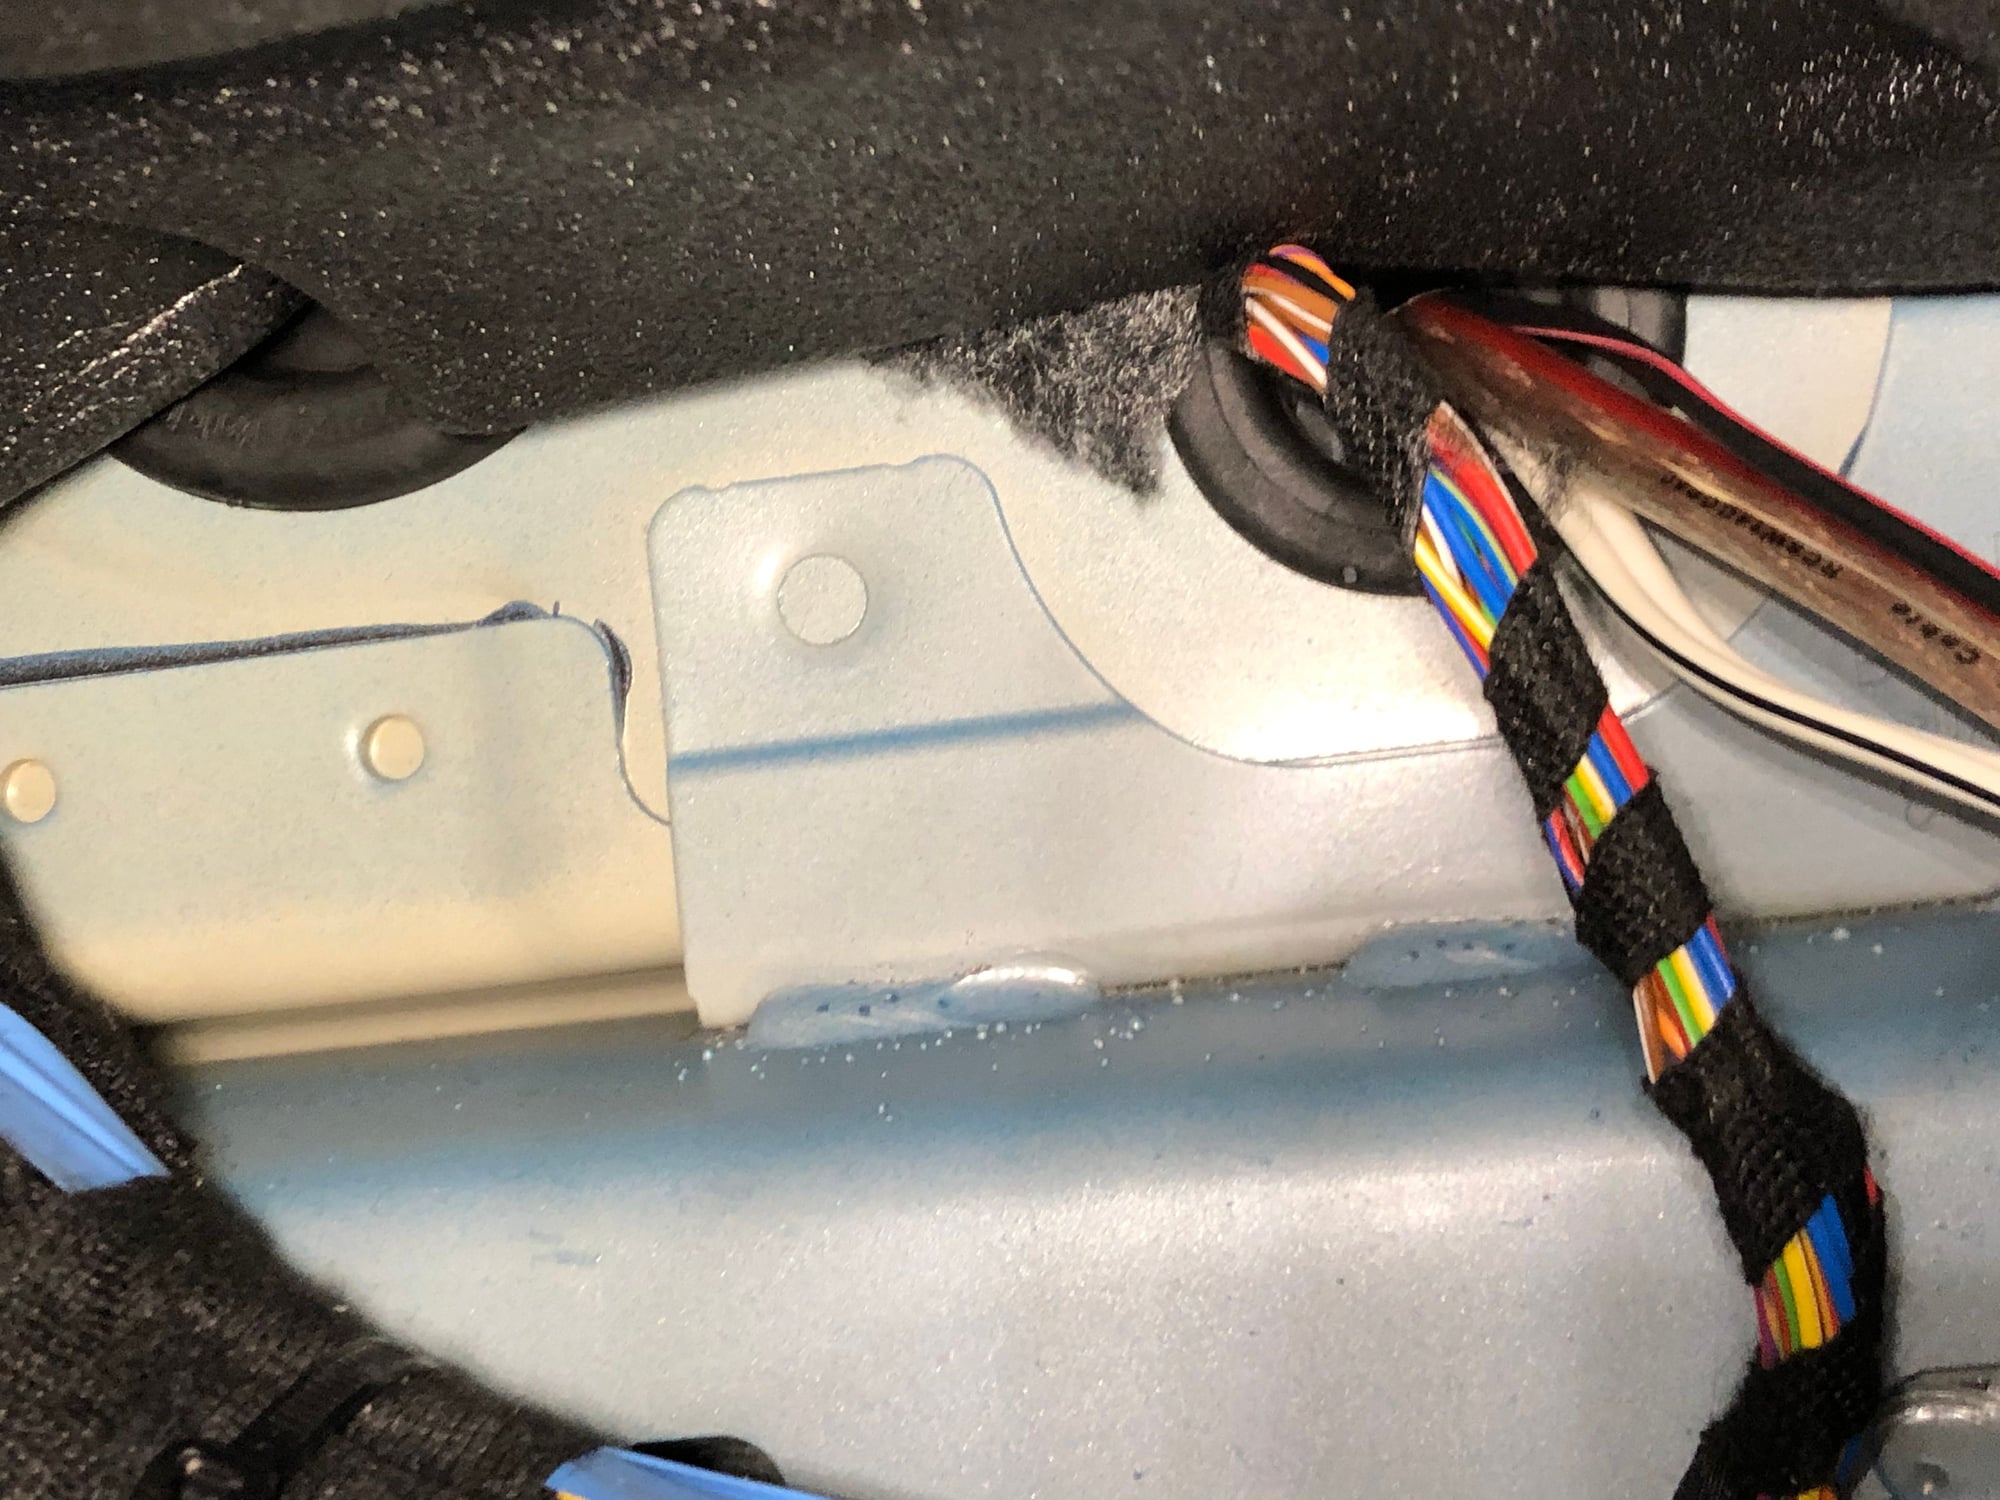
So I was extremely happy with the Dayton tweeter upgrade and I was determined to add in decent sub base for several reasons. Firstly the door woofers are struggling to provide mid base and deep base. Secondly I really wanted to alleviate using the BOSE DSP settings to boost frequencies which honestly becomes mushy distorted, unnatural sound. New settings use no surround or DSP and music has better fidelity and stereophonic separation. Fader -2 (rear bias, I know who would�ve thought but it takes the signal away from the cheap center speaker), Bass -4 to -5 (so the mid woofer and woofer can play loud and clean voices), Treble flat 0 to -1(with the stellar Dayton upgrade no need to boost treble.) I settled on the JL audio 8� ported micro subwoofer based on many reviews and very capable W3 high excursion sub woofer. The micro sub weighs about 19# and looks great on the hatch. I installed an Alpine V12 200watt amp in the boot for best weight distribution. I will include several pictures to show the key installation phases. Mount amp to thin board behind boot carpet and run wires to battery. Add PAC hi/low converter and tap into woofer +/- high level signal near fuse box (passenger foot well) run wires along passenger entry threshold and to the rear seat and to the sub. This addition is extremely affordable ($250 sub, $20 PAC hi/lo, 200 watt amp $100-200) it will complement the BOSE to an incredible new level and massage your back and rattle your fillings! JL Audio 8� micro sub ported version matches the black carpet nicely and is easily removable The micro sub weighs about 19# and is only 5� high it is securely mounted to the child seat restraint tabs on the deck via aluminum 2� bar stock across the two child seat mounts and 2 metal tabs that are mounted to the sub that slide under the bar stock so it can�t fly up into the passenger area. I used banana plugs for a quick and easy disconnect for the speaker wires for track days. Older Alpiine V12 MRV T500 50x2 or 200 watts bridged mono connected to PAC hi/lo level converter, weighs approximately 10# and does not take up much space Add-a-fuse was used on the passenger side fuse box for amp remote turn on and high level wire taps were used to get the door woofer signal for the PAC hi/low converter Close up of door woofer wires near passenger side fuse box and wire taps to get the high level signal Found the best soft rubber grommet under passenger carpeting to pass wires through the firewall to feed 12 gage subwoofer +/- wire, remote turn on lead and high level +/- woofer signal wires to PAC converter. No drilling just poked a screwdriver through next to OE wires and fed a coat hanger to pull the wires through. Close up of firewall showing where the wires come through. For the amp power I ran positive 8 gage cable with a fuse from battery positive into the fender and through one of the two oval rubber grommets behind the tow hook accessory. I ran the other wires through the second oval grommet with flapper. This was not a difficult sub woofer system installation and the results are just amazing. LMK if you are in the Thousand Oaks area and want to have a listen!
Spoiler
I'm looking for a spot to pass some wires through my firewall and can't find this grommet. Can anyone assist, I'm at a standstill! I don't see anywhere under the carpet on the passenger side that any wires are going through.
 11-29-2020, 11:32 PM