Did the LED's
 11-03-2012, 11:32 PM
#16
AutoX

Join Date: Nov 2012
Posts: 11
Likes: 0
Received 0 Likes
on
0 Posts
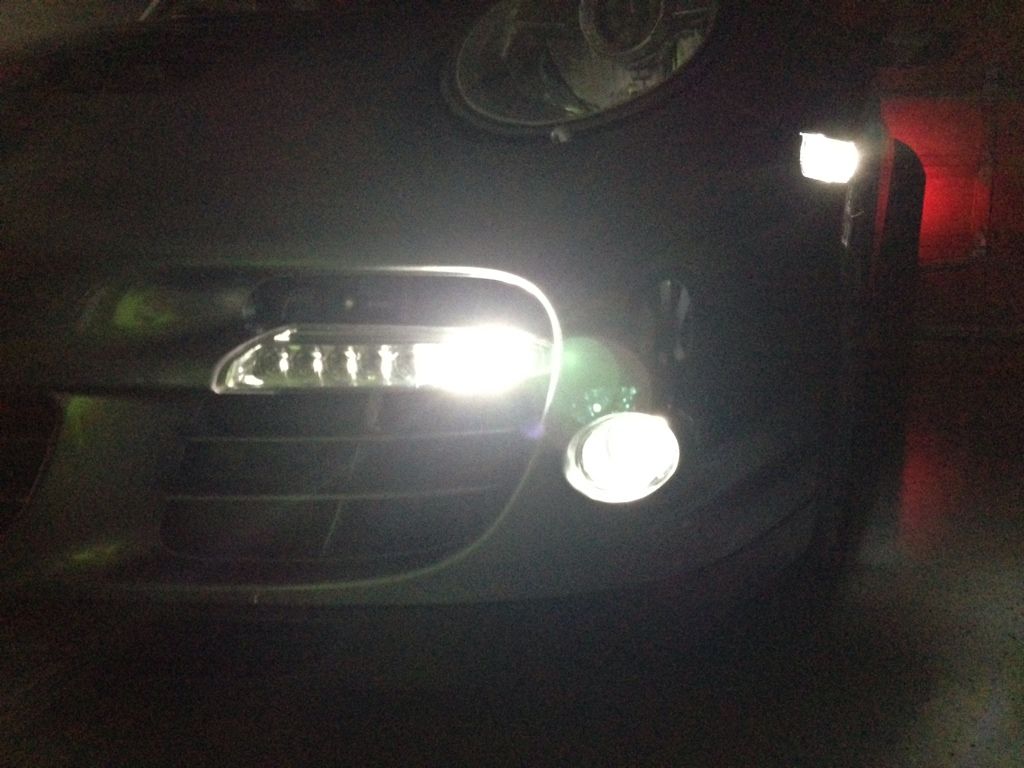
Here is a pic of the LED's in front.. The driving light and the side marker.. I thought the fog light bulbs came with the kit but it does not. i have ordered those and will install next week. I did the dome light and door lights and license plate lights.. I left the stock bulb in the engine compartment because the LED shuts off after a few seconds..
It looks really nice...
It looks really nice...
I would like to get a set as well.
Thanks!
 11-04-2012, 03:45 PM
#17
Drifting
Thread Starter
From Maxspeed Motorsports. Click the "lighting" link.. The kit does not come with the fogs.. You have to order those separately...
http://www.maxspeed-motorsports.com/997turboparts.html
http://www.maxspeed-motorsports.com/997turboparts.html
11-04-2012, 07:15 PM
#18
Burning Brakes
I just got finished with the fog lights and man are they a PITA.
The OEM set up has a long wire going from the bulb to a short wire in the housing and then a long ground wire from the housing to the bulb. This works well and makes installation easy because you have two long wire on each side and plenty of room to maneuver. With the LEDs you have to reverse polarity so you end up with two long wires on one side and a super short one on the other. This made it very challenging to insert and turn the LED bulb into place. I somehow got the passenger side bulb into place after about 15 minutes of play, but after nearly an hour struggling with the drivers side bulb I gave up and went to home depot, bought some crimp connectors and made my own 1" extension. Hooked that up and was done in 5 minutes
Highly recommend if you are buying these Fog lights pick up some of those crimp connectors and some wire just in case. will save you a ton of time
Art
 11-05-2012, 02:04 AM
#20
I just got finished with the fog lights and man are they a PITA.
The OEM set up has a long wire going from the bulb to a short wire in the housing and then a long ground wire from the housing to the bulb. This works well and makes installation easy because you have two long wire on each side and plenty of room to maneuver. With the LEDs you have to reverse polarity so you end up with two long wires on one side and a super short one on the other. This made it very challenging to insert and turn the LED bulb into place. I somehow got the passenger side bulb into place after about 15 minutes of play, but after nearly an hour struggling with the drivers side bulb I gave up and went to home depot, bought some crimp connectors and made my own 1" extension. Hooked that up and was done in 5 minutes
Highly recommend if you are buying these Fog lights pick up some of those crimp connectors and some wire just in case. will save you a ton of time
Art
The OEM set up has a long wire going from the bulb to a short wire in the housing and then a long ground wire from the housing to the bulb. This works well and makes installation easy because you have two long wire on each side and plenty of room to maneuver. With the LEDs you have to reverse polarity so you end up with two long wires on one side and a super short one on the other. This made it very challenging to insert and turn the LED bulb into place. I somehow got the passenger side bulb into place after about 15 minutes of play, but after nearly an hour struggling with the drivers side bulb I gave up and went to home depot, bought some crimp connectors and made my own 1" extension. Hooked that up and was done in 5 minutes
Highly recommend if you are buying these Fog lights pick up some of those crimp connectors and some wire just in case. will save you a ton of time
Art
How do you like them?
11-05-2012, 11:03 AM
#21
Burning Brakes
Well the fact that it took me 1.5 hrs and a home depot run I hate them

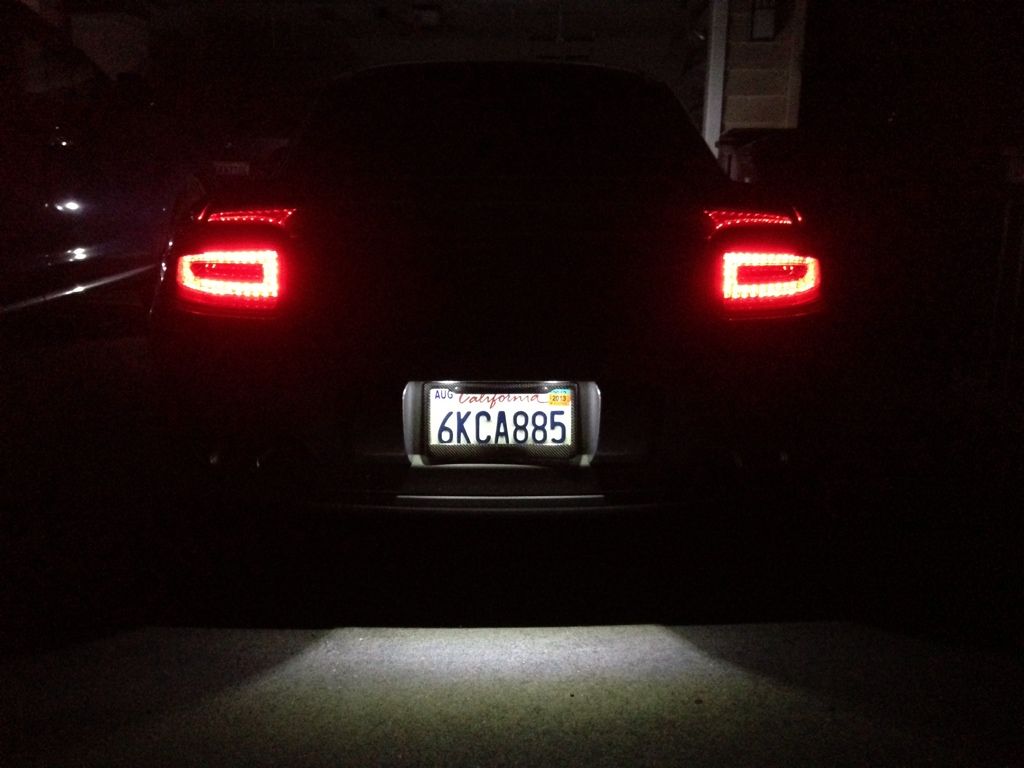
But after I got over it I think they look great and complete the look of the LED exterior conversion. I agree with you, these are definitely more for show vs giving a enough light to really be functional in serious fog conditions. But I bought them for the look and they do look great with the entire front LEDs on at night. and the license plate LEDs complete the set up as well. Will post a few pics after I upload them
 11-07-2012, 12:52 PM
#25
Former Vendor

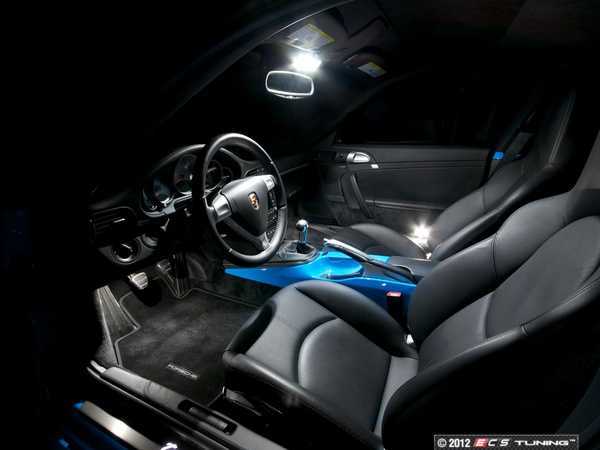
It looks great !! I would also consider a interior LED kit if you haven't already. It comes with all the necessary lights to transform your interior and a step by step install process. For more information Click Here.
11-07-2012, 02:55 PM
#26
Drifting
Thread Starter
Already done.. I mixed the OEM ceter "warm" light in the dome with blue LEDs for the map lights. I thought all LED was too much.. Really nice on the doors though..
11-07-2012, 04:39 PM
#27
Burning Brakes
Phillip, I to agree that the full LED interior looks a bit too much. I like your idea of doing the doors and keeping the center "warm". Can you share a pic of what it looks like with your set up?
11-07-2012, 05:06 PM
#28
Drifting
Thread Starter
Sure! I"ll post one tomorrow. What I did for the dome is left the center light (large) OEM "warm" and made the two map lights cool. I also kept the drivers side floor (foot well) warm. So the only "cool" light is the doors and the two dome LED's hitting the seats. You can try the dome the other way as well.. with the center "cool" and the map lights warm. It breaks it up and doesn't feel so "stark"
11-08-2012, 01:12 AM
#30
AutoX
Join Date: Nov 2012
Posts: 11
Likes: 0
Received 0 Likes
on
0 Posts
Just finished up the front lights. I skipped the fogs since everyone said they don't put much light out. Plus I don't drive with them on.
I'm loving the was they turned out!
Before and after pics below.
EDIT: I don't know why they came out sideways?
I'm loving the was they turned out!
Before and after pics below.
EDIT: I don't know why they came out sideways?