When you click on links to various merchants on this site and make a purchase, this can result in this site earning a commission. Affiliate programs and affiliations include, but are not limited to, the eBay Partner Network.
997 Turbo DIY stripdown and repairs. Advice needed please
Hi guys
As a follow on from my old thread, I have ended up removing the engine (on jack stands) and set about stripping the bad turbos off and replacing a lot of other stuff while I am there. This is my current progress, the engine is yet to be cleaned (by hand only), and yes, the inlet ports are now sealed off as the images were right after I had removed the intake.
I am attending to a few issues, namely rebonding the coolant pipes (they were not leaking) on the front manifold, replacing a leaking washer on bank one bottom chain guide, and replacing all the pipes I can while its all in bits. I am using Porsche oem pipes instead of the sharkwerks ones as we do not have the same issues over here as stateside with coolant elbows popping out of the OEM elbows fracturing (the ones right under the coolers) **I am told this by a very reputable porsche indy located near me**. But instead we have a lot of rain and salt on the roads so I am replacing all the main oil returns and most orings and pipes.
My question - Has anyone devised a foolproof way to vacuum test the coolant pipework BEFORE refitting the engine in the car?? It would be a real pain to have a leak on refitting it, and I can see how it could easily happen, as there are a LOT of pipes and orings.
I was thinking (of course this is when the engine is all built back up, as I am just ordering parts presently) just to block any open coolant pipes off, block off the thermostat side of the pipework (tape and block the socket where the engine bay coolant rubber pipe links in) , and then try and come up with some kind of adapter so I can use a vaccuum tester into the other main coolant port next to the PS pump
#
I would be most grateful if anyone has any wisdom to share on this, and any other potential gotchyas before I refit the engine when its built back up.
Yes, I have got my eye on a vacuum coolant test kit from ebay. It comes with expansion bottle adapter but that clearly wont be much help seeing as the engine is out of the car. It also has a cone shaped plug, so I was thinking of clamping that in a larger diameter coolant pipe, capping the other pipes off (anyone know where to get bungs??!!) and then for the large fittings that you plug the big coolant hoses in I will fit the hoses (that would go into the engine bay hardpipes) and from there I will then blank those off possibly with some rubber gloves stretched over the ends then taped off on the pipes!!
Can't see a nicer way to accomplish it but if anyone else has one, I am all ears!! thanks
+1 the Sharkwerks. Worth the wait or pay to expedite.
I have spoken to several porsche builders here who say they dont fit them as they never have any issues. I am not sure if it is a lottery as to what fails or is climate related, but the budget has been well and truly blown with all new turbos and massive parts list!, I suppose it does make sense to get the sharkwerks in while its all in bits... I just dont see me having any issue with the OEM ones; If the car is a keeper, yes to the sharkwerks, if I may ever sell it, hmm, I would stick with oem as I wouldnt see the money back.
I am currently cleaning up the front coolant manifold. I am struggling to find information on this -> the small geared pump thing. There are 4 or 5 torx bolts holding the plate on, and on the front side of the manifold is a small torx bolt which I removed.
From the parts diagram all I can see is 2 orings, one smaller and circular for the input wheel and then a shaped one I guess that goes inside.
Does the cover just prise of once it is unbolted? I did this and it is well on there... I dont want to damage anything applying heat around the case edge, as I am not sure exactly what is in there!!!
Anyone got any advice on this? thanks **the bolts are just hand wound back in so I dont lost them**
You have two internal pins that align the top cover. They are located at 2:00 and 7:00 o'clock when looking at your picture.
I use a sharp wood chisel/blade and tap the cover off (gently) at the 11:00 and 1:00 position. Rotate between the two. Do NOT mar or scrape the cover. I would recommend using a lightweight mallet or hard rubber mallet.
I have used a nylon blade in the past but as this car has aged, it has required a sharp chisel blade.
You can't pry it at an angle. Tap it so it releases vertical. It is also secured by silicone sealant>>it can act like it's stuck on/glued on.
Make sure that you mark the pump rotors. There is a top and bottom and side to side location
Do you have the service manual pages showing the instructions and details for assy?
Thanks kevin, that is a great help. It does indeed seem like its stuck on, so I will approach it as you describe. I do not have a manual that details this item sadly, or I would be in a much better place with it!!! I do have some wm�s but none that cover what I need to know for this area.
is there a bearing in there then as well? Does the single screw need to be out to take the cover off? Or does that retain the rotor so I should leave it in, until the cover is off?!
thanks again
Last edited by theanalyst; 07-20-2019 at 05:25 AM.
I have engine disassembly wm but it seems to bypass this area totally!! if anyone has the section with this in it would be most appreciated. I found this https://rennlist.com/forums/996-foru...ump-cover.html , mine wasnt leaking and is in perfect condition. I see it is called the turbo scavenger pump (secondary?) , which way does it flow oil? from bank two to bank one direction? or vice versa? anyone know.
Will have another go at seperating it! WIll mark up parts positions
Last edited by theanalyst; 07-20-2019 at 07:44 AM.
The elbows failing is not geographically influenced - they all do it. I'm in New Zealand with an ex uk car and mine failed. Get the sharkwerks elbows.
100% no questions about this. And it�s the outer left elbow that fails the most. I have video of mine under pressure with the airlift tester. Clearly see the �slight� leaks. Will
post shortly once I find it.
100% no questions about this. And it�s the outer left elbow that fails the most. I have video of mine under pressure with the airlift tester. Clearly see the �slight� leaks. Will
post shortly once I find it.
thanks, that would be cool. I havent removed the coolers yet but I won't be surprised to see some signs of crustyness around those elbows!
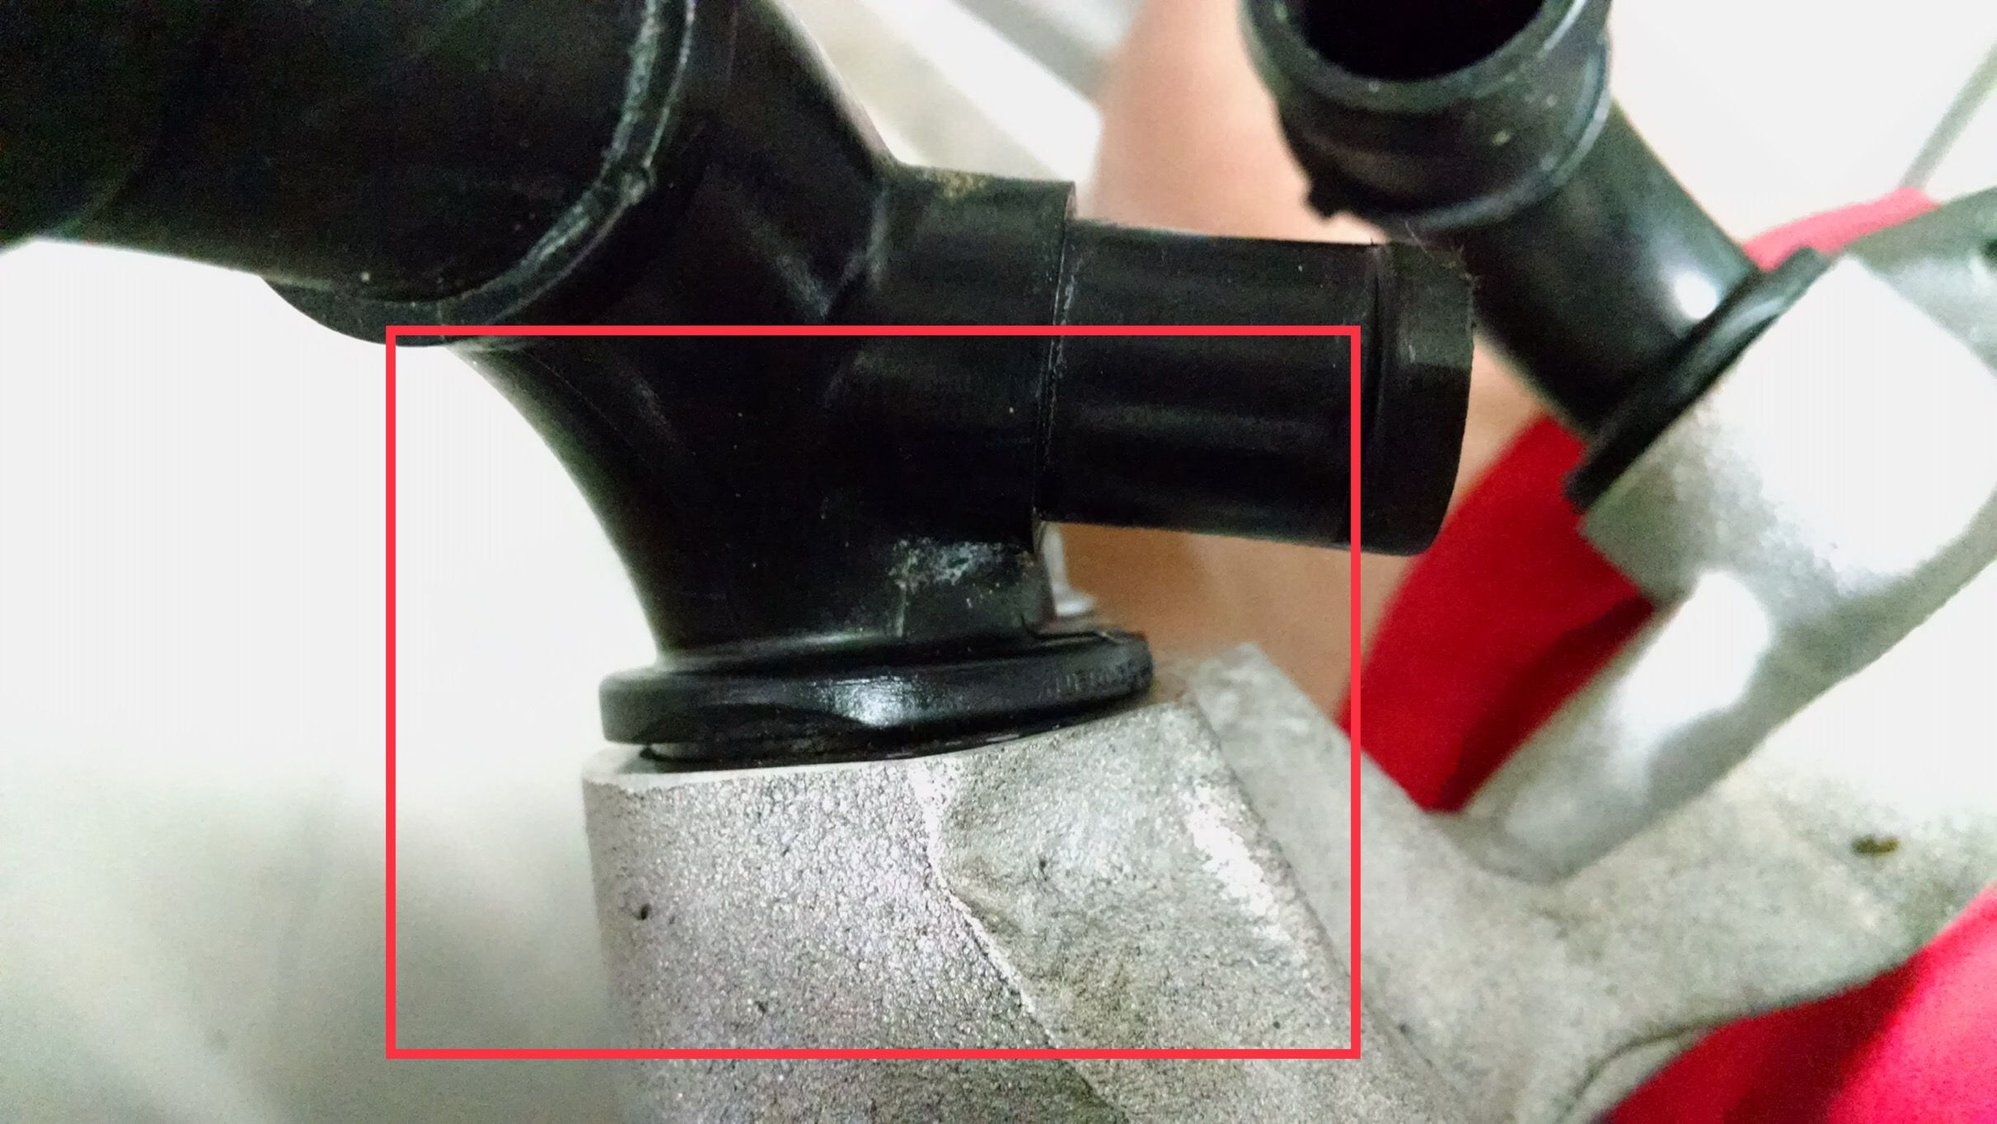
This small leak would �not� produce any evidence on the garage floor anywhere! The only evidence is small white crystallized spots under your car around the engine and exhaust. The leak was due to the plastic fitting being dislocated slightly from the housing. See below.
Untouched fitting as found when removed from engine! It was leaking thru that small space. I would spend the $ and purchase all three and install them. Once anyone with this 997.1 Turbo begins to smell coolant, it�s downhill from that point. Expect a big bill for the work. It is what it is. But...once fixed you will have a great car!
Thanks, great video! So far all of the fittings have been dry with no signs of leakage anywhere, except my lower coolant elbow that goes into the coolant front manifold and connects to the casing for bank 1, that was in a bad state but dry (loads of crust and build up of an old leak)
But then I never did a test on video like you. I do wonder if vacuum subjects the system to greater pressures though than normal coolant flow? Eg making an oring leak that was not leaking under coolant flow conditions?
I am replacing all three elbows under the coolers, will post some pictures up of what i find there. I am expecting delivery of my giant parts order on wednesday!
I wont be getting a big bill for the labour work, as I am doing it but I already got a big parts bill !!! Every oring, seal and coolant pipe/connector on the engine and all turbo pipes, new turbos, and both main oil returns.
Hopefully Kevin can help me out with the WM section I need to rebuild the turbo scavenge pump...
this forum is great. Really appreciate all the input
Last edited by theanalyst; 07-20-2019 at 08:31 PM.

 07-15-2019, 10:38 AM


 if anyone has the section with this in it would be most appreciated. I found this https://rennlist.com/forums/996-foru...ump-cover.html , mine wasnt leaking and is in perfect condition. I see it is called the turbo scavenger pump (secondary?) , which way does it flow oil? from bank two to bank one direction? or vice versa? anyone know.