When you click on links to various merchants on this site and make a purchase, this can result in this site earning a commission. Affiliate programs and affiliations include, but are not limited to, the eBay Partner Network.
"... & any rubber O-ring, gasket or hose that would be a pain to get to with the engine in"
I also forgot I have cup cables to slip on, a fuel filter and will probably do the WP , aux pump during the engine/trans's absence. Someone suggested the expansion tank, but that looks pretty good.
if you need the parts numbers list for the hoses I have it just let me know.
also there is a company that has the o ring kits....it covers every o ring and gasket on the engine
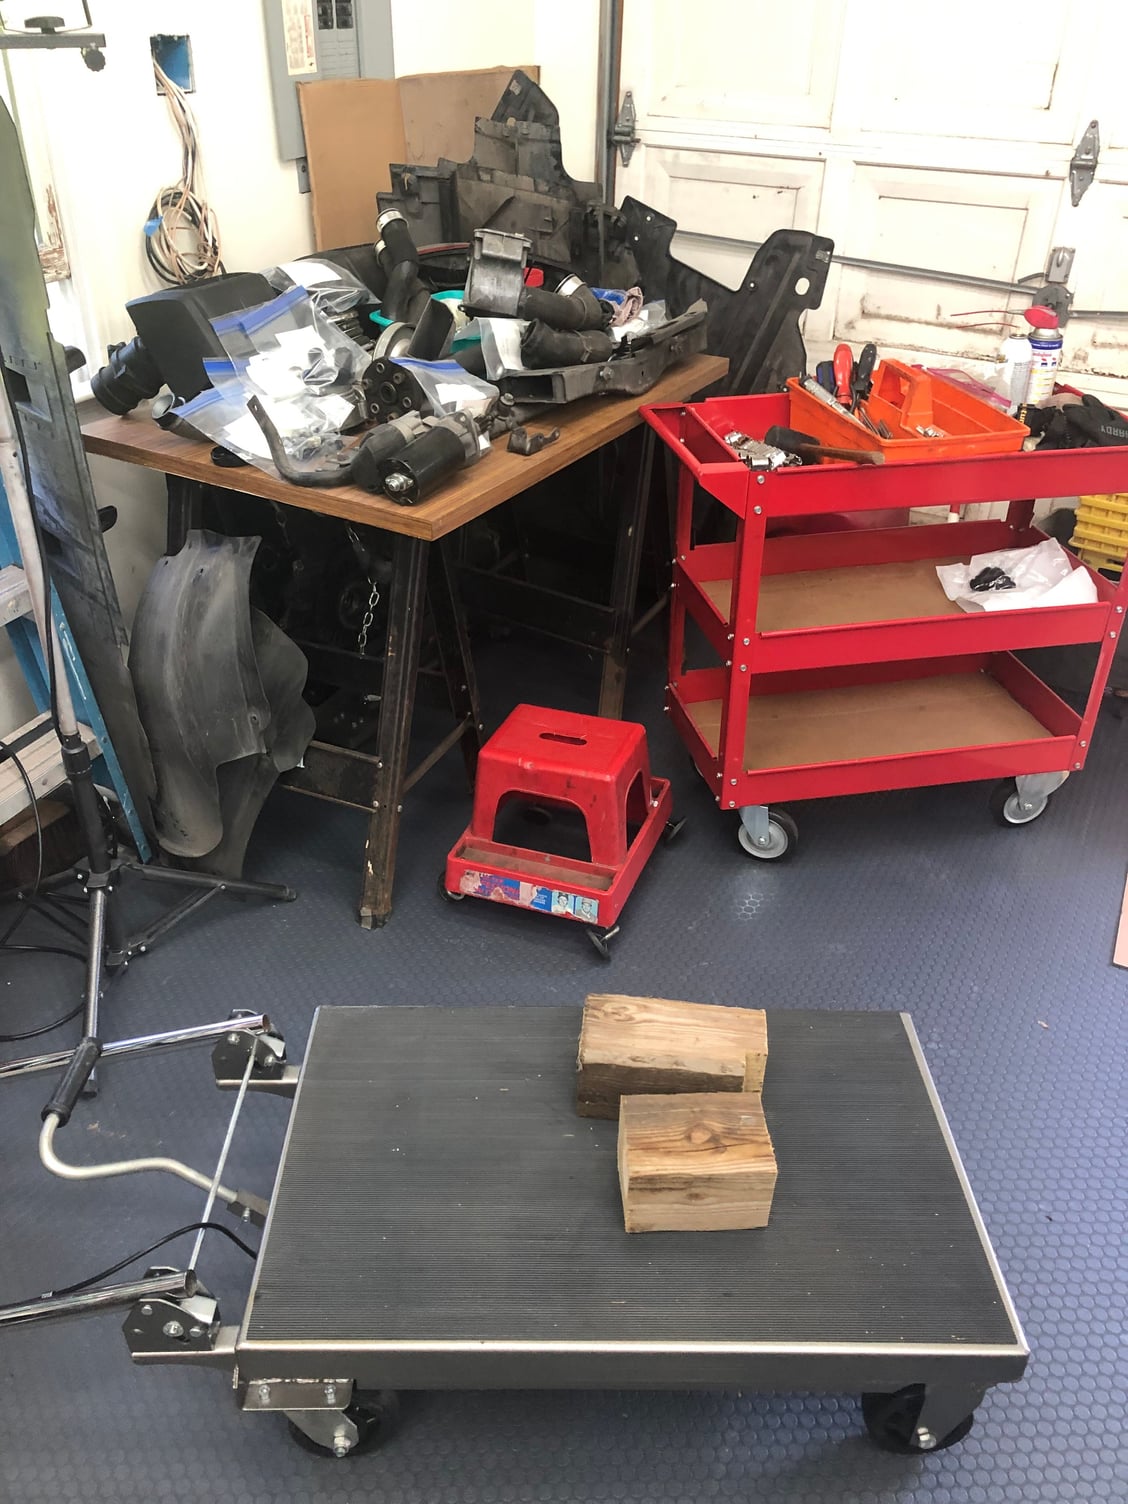
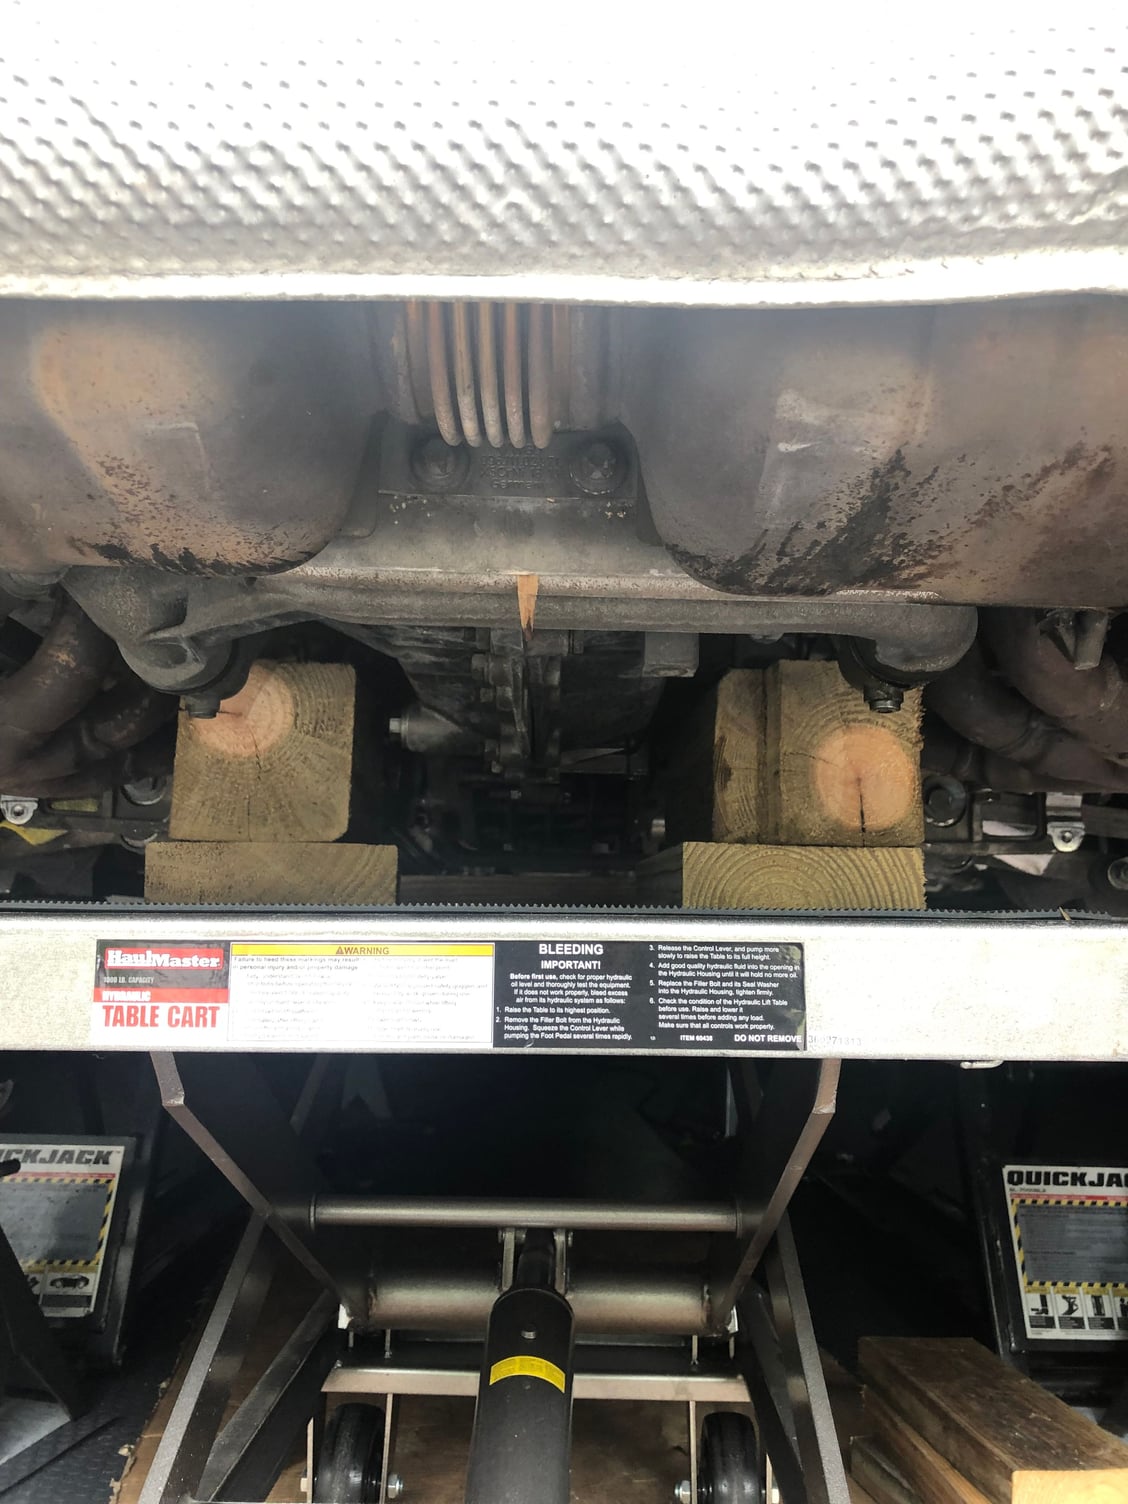
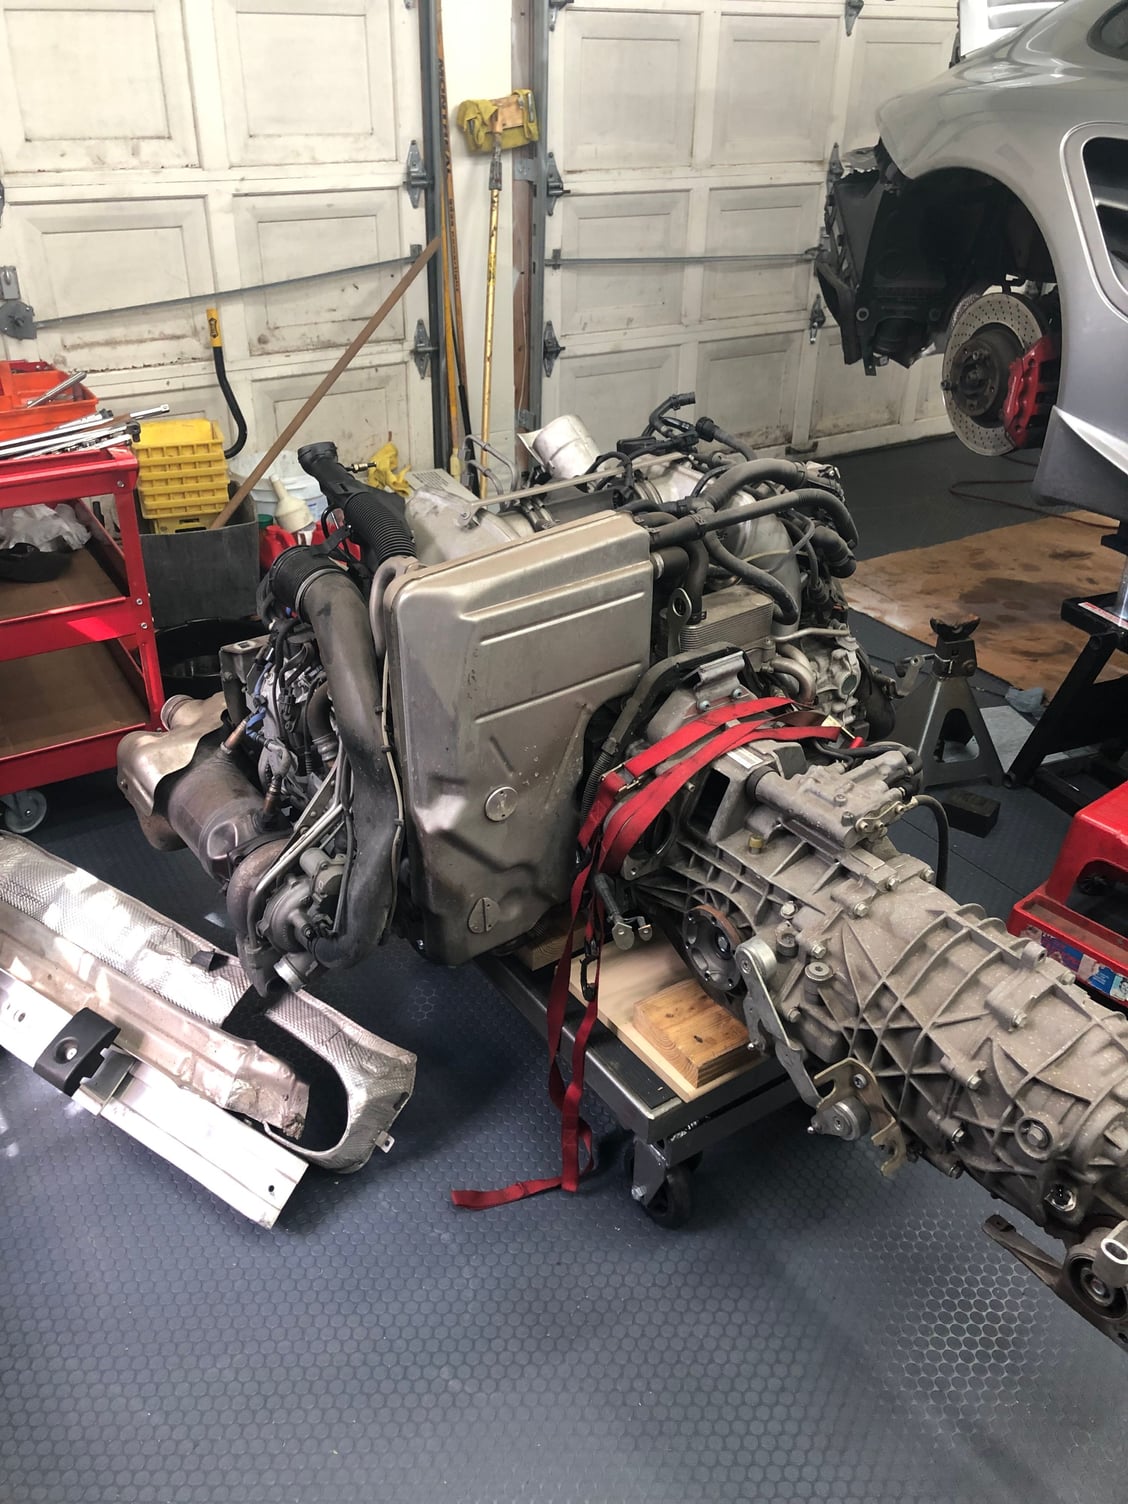
1. On the table is everything you need to take off the car in order to drop the engine.If you look close you will see the baggies and labels for the various bits removed. I did this when I removed and rebuilt my UrS6 engine a few years ago and it really is the only way to go. I have a pretty good memory, but not that good. I also took some photos where it made sense before removing stuff so I could see how everything was oriented. that is another good technique to keep things moving along smoothly on the re-install. In the forefront is the modified Harbor Freight platform lift with the two blocks cut to Atc's specs (thanks !). To the right of the table is every tool I used to remove the stuff on the table. Having a WM is also very helpful.
Some notes:
A. When removing the AC Compressor (lines intact) you need to remove or get ready to remove the PS Pump & tank. The WM says nothing about that.
B. I used a come along strap to pop the cardan shaft off after I unbolted it (don't forget to replace that piece of rubber connecting the shaft to the front diff)
C. The car pukes antifreeze when disconnecting. Unless you have a huge tub it will splash around. I put some cardboard and had to de-antifreeze my left shoulder when I pulled the first big pipe near the transmission
D. I kept the Pentosin spillage to a minimum by first popping the cover on the pump tank and getting everything out of there I could, then used rags and containers to catch the rest.
E. When you replace a missing small nut on the starter to solve your mysterious no start issue, remember that you used a frikkin' SAE nut!
F. And one comment about tools, make sure you have an ample set. I used a wide variety of sockets (torx, allen, 12/16 point, one huge *** torx for the axle/trans bolts - Audi used the triple square ones, not these - and handles/attachments - 3/8, 1/2 u-joints, wobble & regular extensions) , reverse torx (or whatever they are called, I think E-Torx or "another way to get me to spend more money on tools" sockets), hose clamp and release tools, pliers, open end wrenches (including 2 15's to get the slave pressure line apart), screwdrivers, a rubber mallet, the come along, my head lamp and shop light, some PB Blaster (not much) and a torque wrench to reattach the crash bar nuts
G. Oh, and most importantly I need to replace my now destroyed rolling seat (I lowered my old S6 on it). It lasted 30 years, so it doesn't owe me anything. One of the wheel legs finally gave out. For any NASCAR fans, you can see a young Rusty Wallace and Kenny Scrader on the side of it.
QUESTION: What do you think the best replacement would be? I liked the little slots on either side I could drop nuts and tools in. I have a small coin mat covering the garage floor now, so it would need to roll easily.
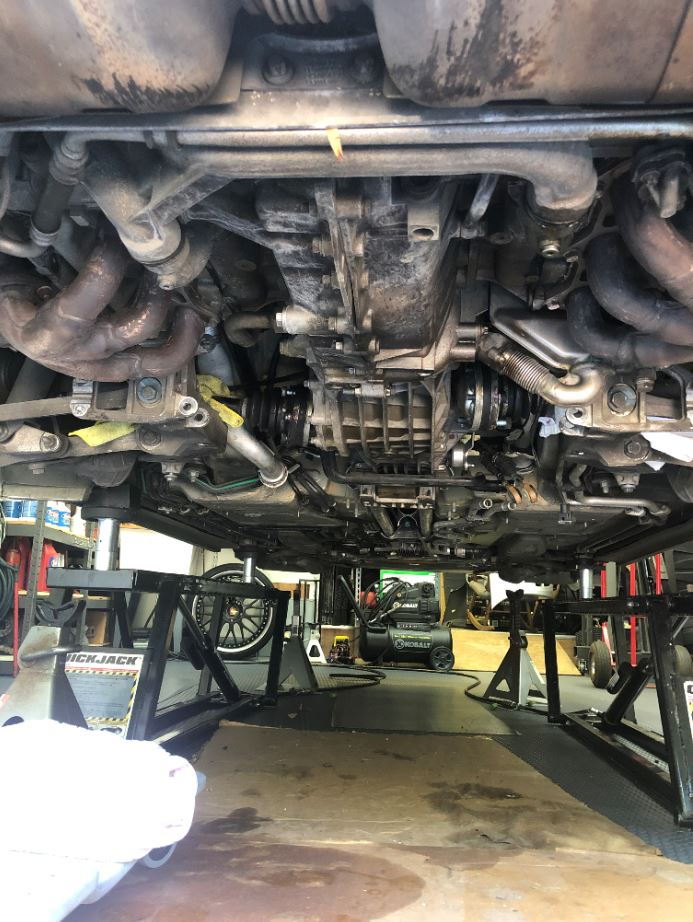
2. Engine ready to drop
A. I will be replacing the exhaust and dealing with the cams, so I will be removing the exhaust before dropping (hence the bumper being off) I will also drain the oil before dropping (Thanks Kevin for that advice)
B. The diff/trans fluids will be done when I break the trans case to see what the clutch looks like and do the work on the clutch hydraulics
C. You can see the SUV adapters for the QuickJack to give me the height I need
D. I also spread out some old cardboard so I didn't **** up the new floor too much (I used to do this with the nasty concrete floor, but it seems so much more effective now that the floor looks pretty nice)
3. Once it's out and I have purchased the parts, I will compile a list by job including where I got the stuff for anyone who might be curious.
Now to get to the last part. I spent about 8 hours so far (mainly me being paranoid and consulting every doc I have have 3X and whatever I can find online) so I don't destroy a tiny little part that costs $1000 from my friends in Germany. I will probably have another two hours carefully lowering the engine. But first the oil needs to come out and exhaust need to come off. The next 997 engine I drop will go in about half the time! Kinda like doing brakes for the first time on a car. First side takes and hour and a half, second side is done in 45.
Ed, get some additional pieces of 2x4 cut them to about 12 inches. These will need to be placed to support the transmission. You will also need adjustable straps to keep the engine secured. Both engine and transmission are about 800 lbs.
Couple of surprises/changes in strategy (wouldn't be working a specific make/model for the first time without them.)
1. I decided to do the exhaust with the engine out since I didn't want to buy some curved wrenches just now (though I would be making a trip to the store soon). I sprayed all the bolts and got the bottom 4 on the turbos loose pretty easily.I did pull the aftermarket tips. What a bitch for such a simple part. Just a pain to get in there and pry (though I am sure there is a tool for that).
2. There was another big coolant hose on the passenger side near the wiring harness connector that I did not see mentioned in the WM.Makes sense since this engine is very Feng Shui.
3. I needed a new tool - 18mm deep sockets (I am not sure how I survived working over 40 years on cars, boats, jet skis, motorcycles, small engines and anything else that needed attention that I could take apart without them). I am now the proud owner of a set of 3/4 & 1/2 deep sockets.
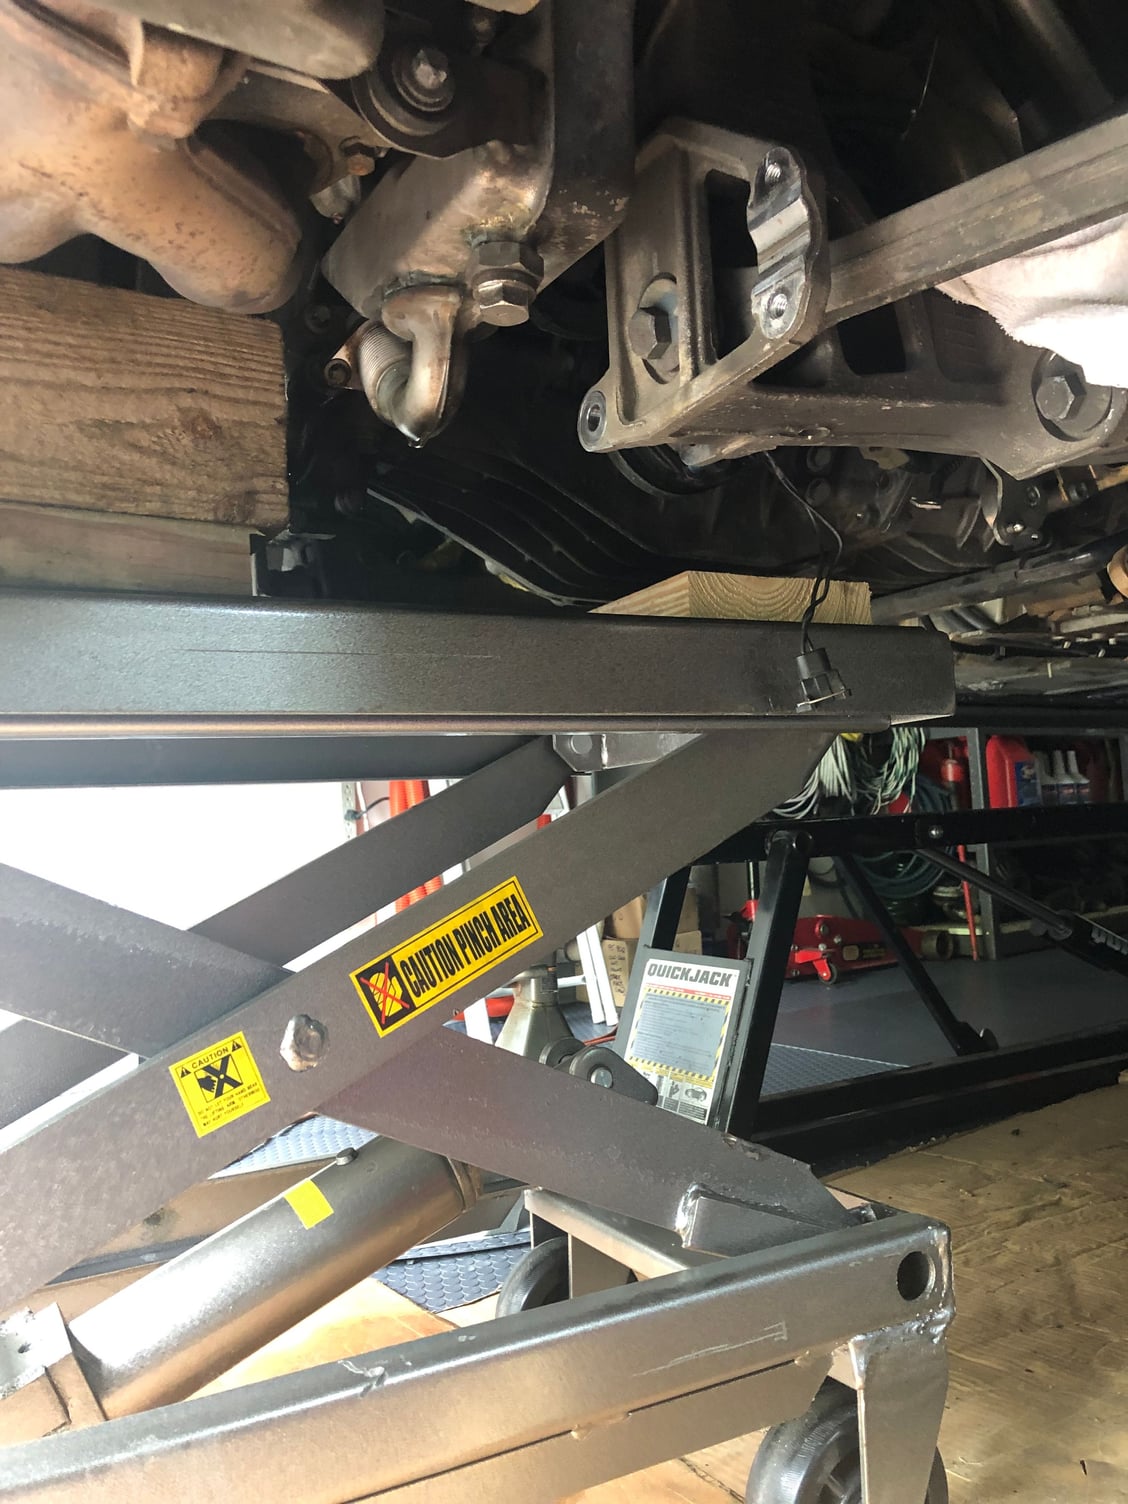
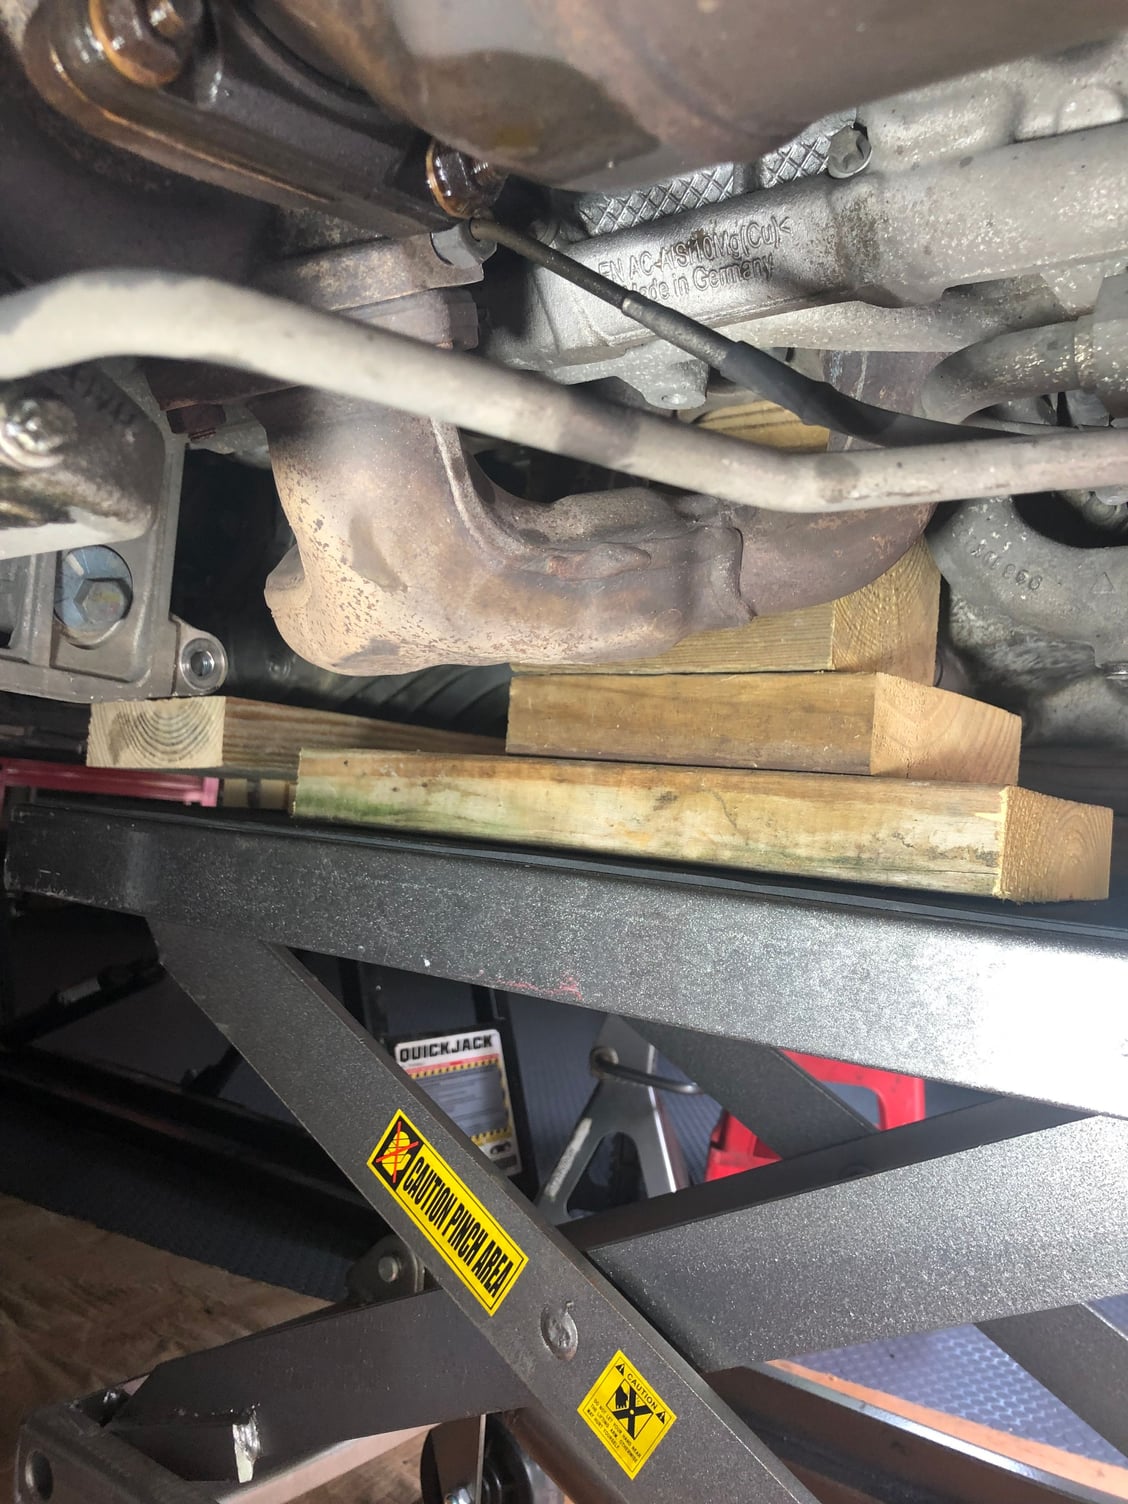
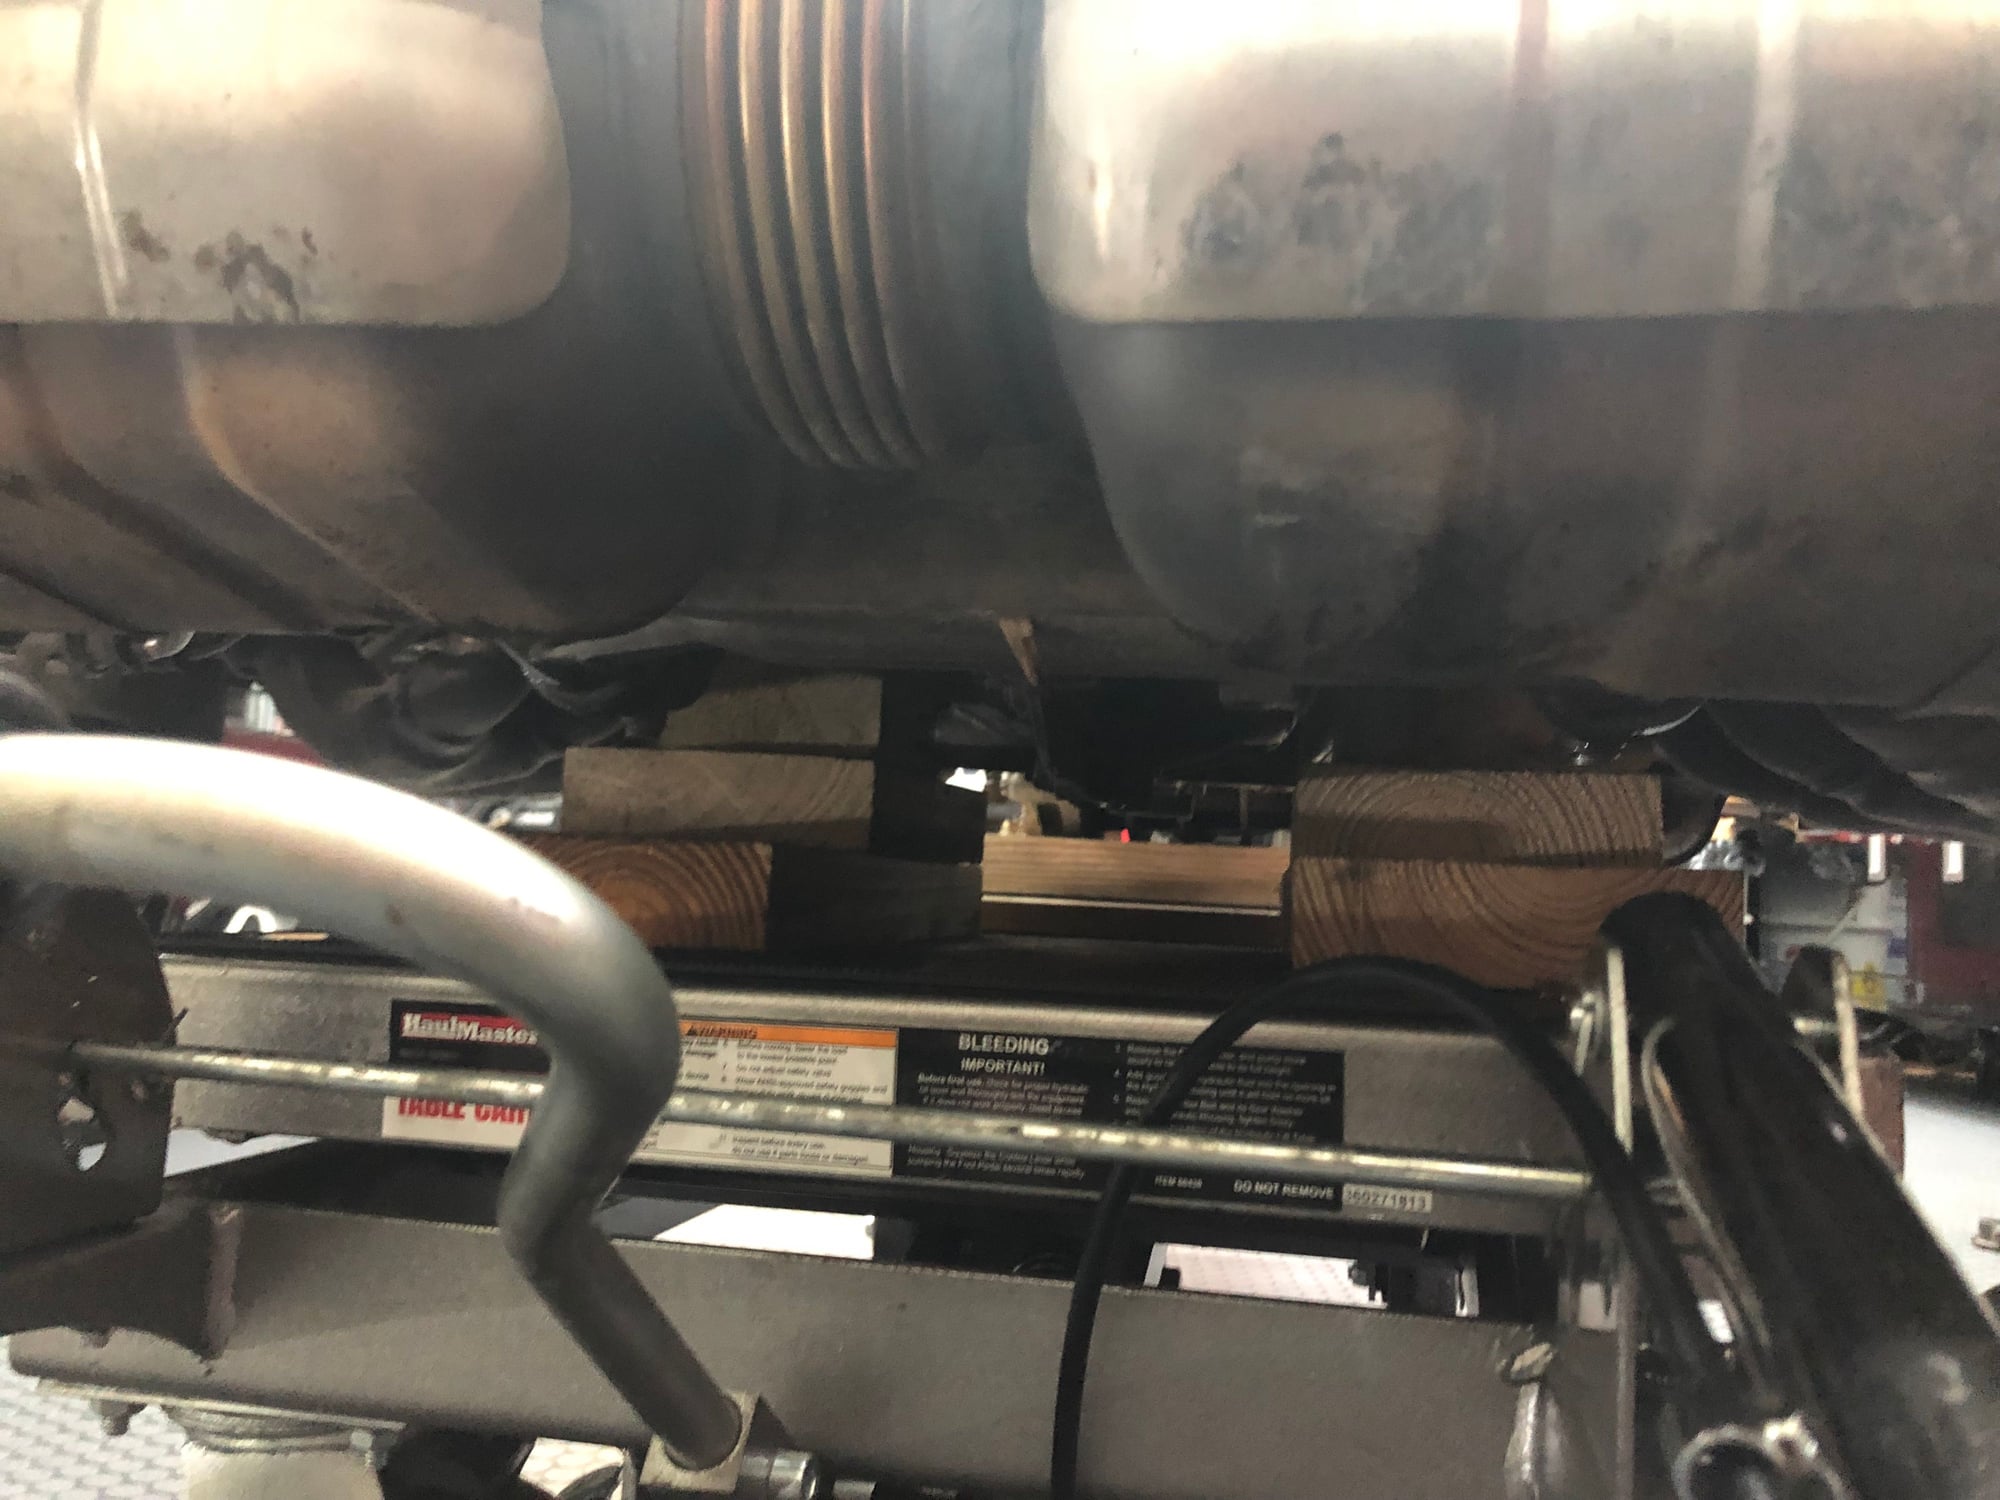
4. As Atc mentions, you will figure out how the blocks go when you start moving the platform into position. The notched block is on the passenger side and has the notch facing the rear to allow for a connection on the engine block to clear. The block on the driver's side fits in between the couple of fittings to the front and rear of it's nook. I used a 3/4" shelf and a 2x6 for the transmission. The key is getting the engine on the platform back far enough to have the rear axle outputs sit on the front of the platform. Once I get the exhaust off I should be able to raise the handle. I also used more block because I was concerned I would be resting on the engine block if I did not and the trans was engaging the wood block before the 4/4's were engaging the engine block. This probably why needed more height (see below).
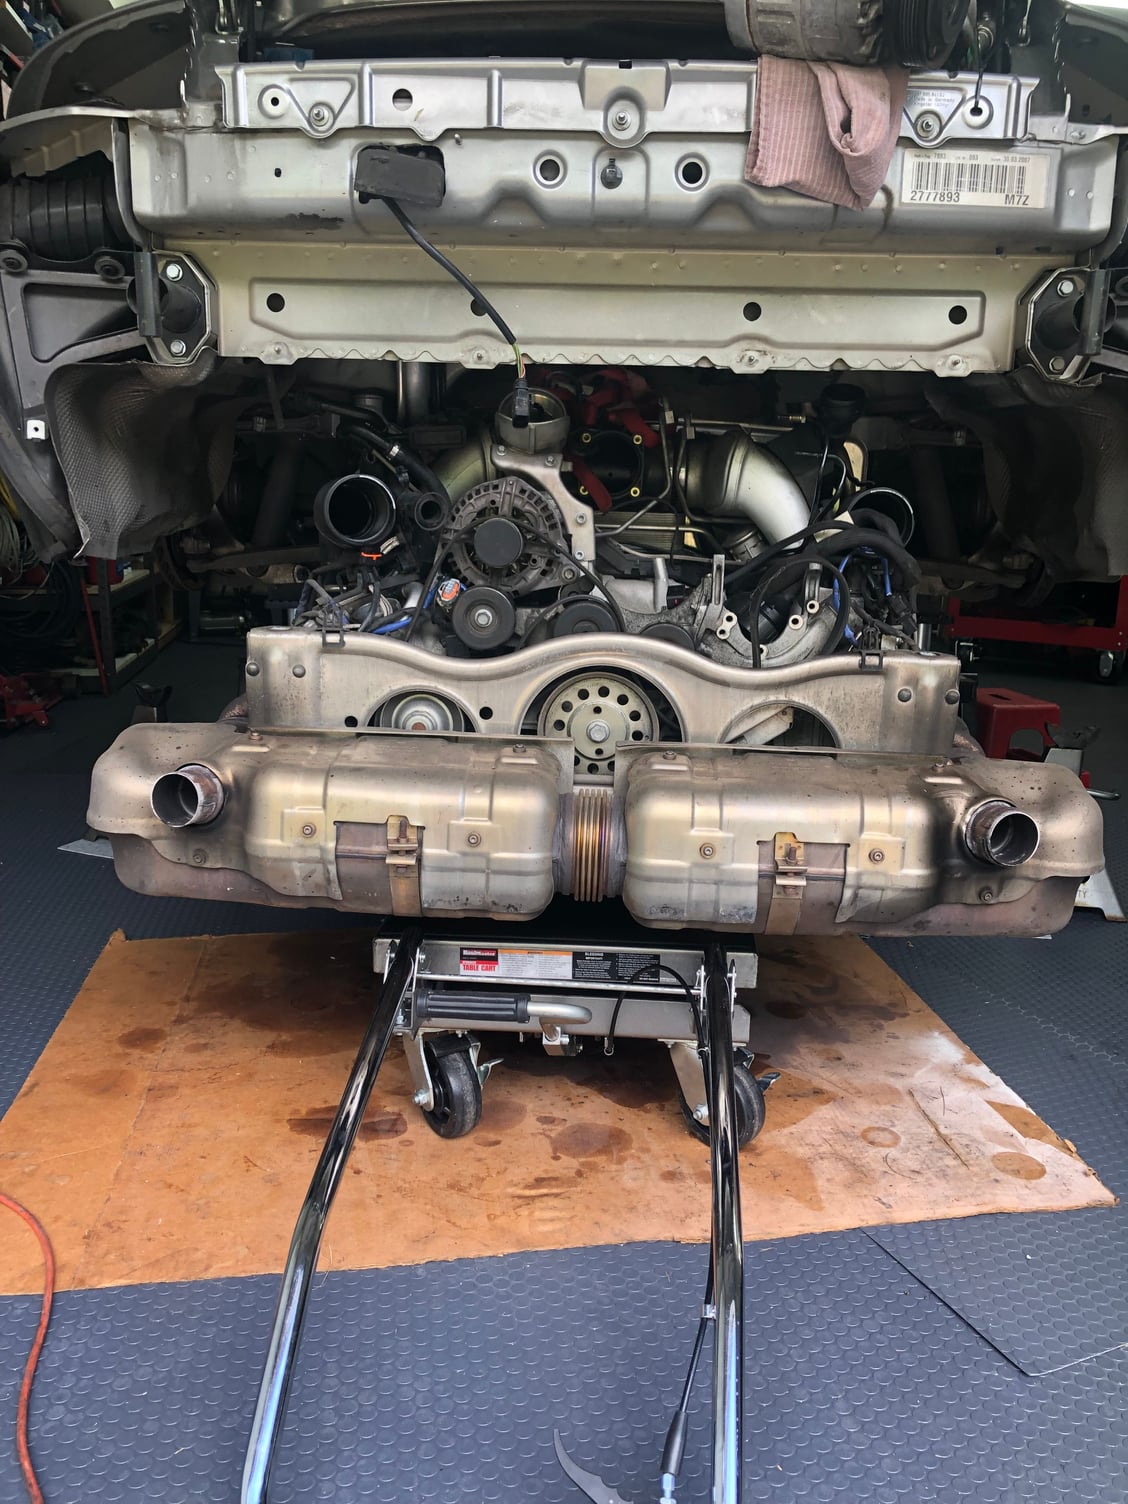
3. I was 2" short on the QuickJack. I am pretty sure my additional 2x6's caused this (added about 3"), but I really didn't want any engine sitting on the platform. I used my engine hoist to some straps around the rear cross body piece (removed the flimsy shelf above the heat shield - I had removed the rear bumper crash bar and heat shield already) and slipped a couple of hockey pucks above the SUV adapters and that gave me what i needed once I removed the oil filter cap (it was very close). I know that probably wasn't the preferred approach and I was very concerned about screwing up that body area but an inspection after the lift showed no obvious signs of bendage. Pic is after I raised it.
4. As I was lowering and raising and lowering and raising to see what was what, I made sure nothing else was in the way and found two other fuel connections that, again, weren't really detailed in that section of the WM (or I missed it). I must have looked like a freaking bird or something bopping up and down and around checking for anything hanging up. While there I did decide to remove something else not apparently mentioned: the hard pipes that connect coolant across the bottom of the trans. The driver axle won't make it by without getting rid of that. So that along with the exhaust tips, crash bar, heat shield and hose have been added to my pile of parts. I have to start a new table for what I remove from the engine, which will be substantial.
So next is dismantling what's on the engine (and trans) to do the various things I need to do. First will be an inventory then search for the best quality/price for parts. I am not a Meyle or other crap aftermarket buyer just to save a buck, but I spend the time to find the best I can. While not always successful I think I have been pretty lucky at finding the right suppliers. I have a nice discount at my local P dealer so I will get a bunch of stuff from them. The SM has offered (if the timing works out, no pun intended) to lend me the tool needed to re-install the cams. They have never pinned them and don't have anyone they have used for that. Being in SE PA I am sure there are a couple of guys who have done this before and know what they are doing when re-installing, but I think I am going to opt for the DIY approach rather then hauling it up on to a pickup and driving it somewhere.
Some final thoughts: It took me about 14 hours total to do this because I am paranoid about screwing something up. I am sure the next one will be easier (just like my UrS6 engine). The good thing was that there really were no major issues and I think dropping this thing was no worse than lifting out the AAN from the Audi. Be cognizant of the rear height. You need at least 38 3/4" above the floor to the bottom of the metal trim across the bottom of the engine bay once the crash bar and shield are removed if you are using the Harbor Freight platform lift (with the extra 2x6's under the 4x4's).
1. I probably didn't need the 2 extra 2x6's (one would have been plenty):
2. Removed the exhaust. Do they intentionally make those straps little torture devices on purpose? Got lucky with the nuts/studs on the turbos, all but one came out complete with the nuts and I used one of those puller deals (can't remember the name and I am too tired to look it up) for the remaining one. Will use all new hardware when I install the Kline. Also pulled the rear engine brace.
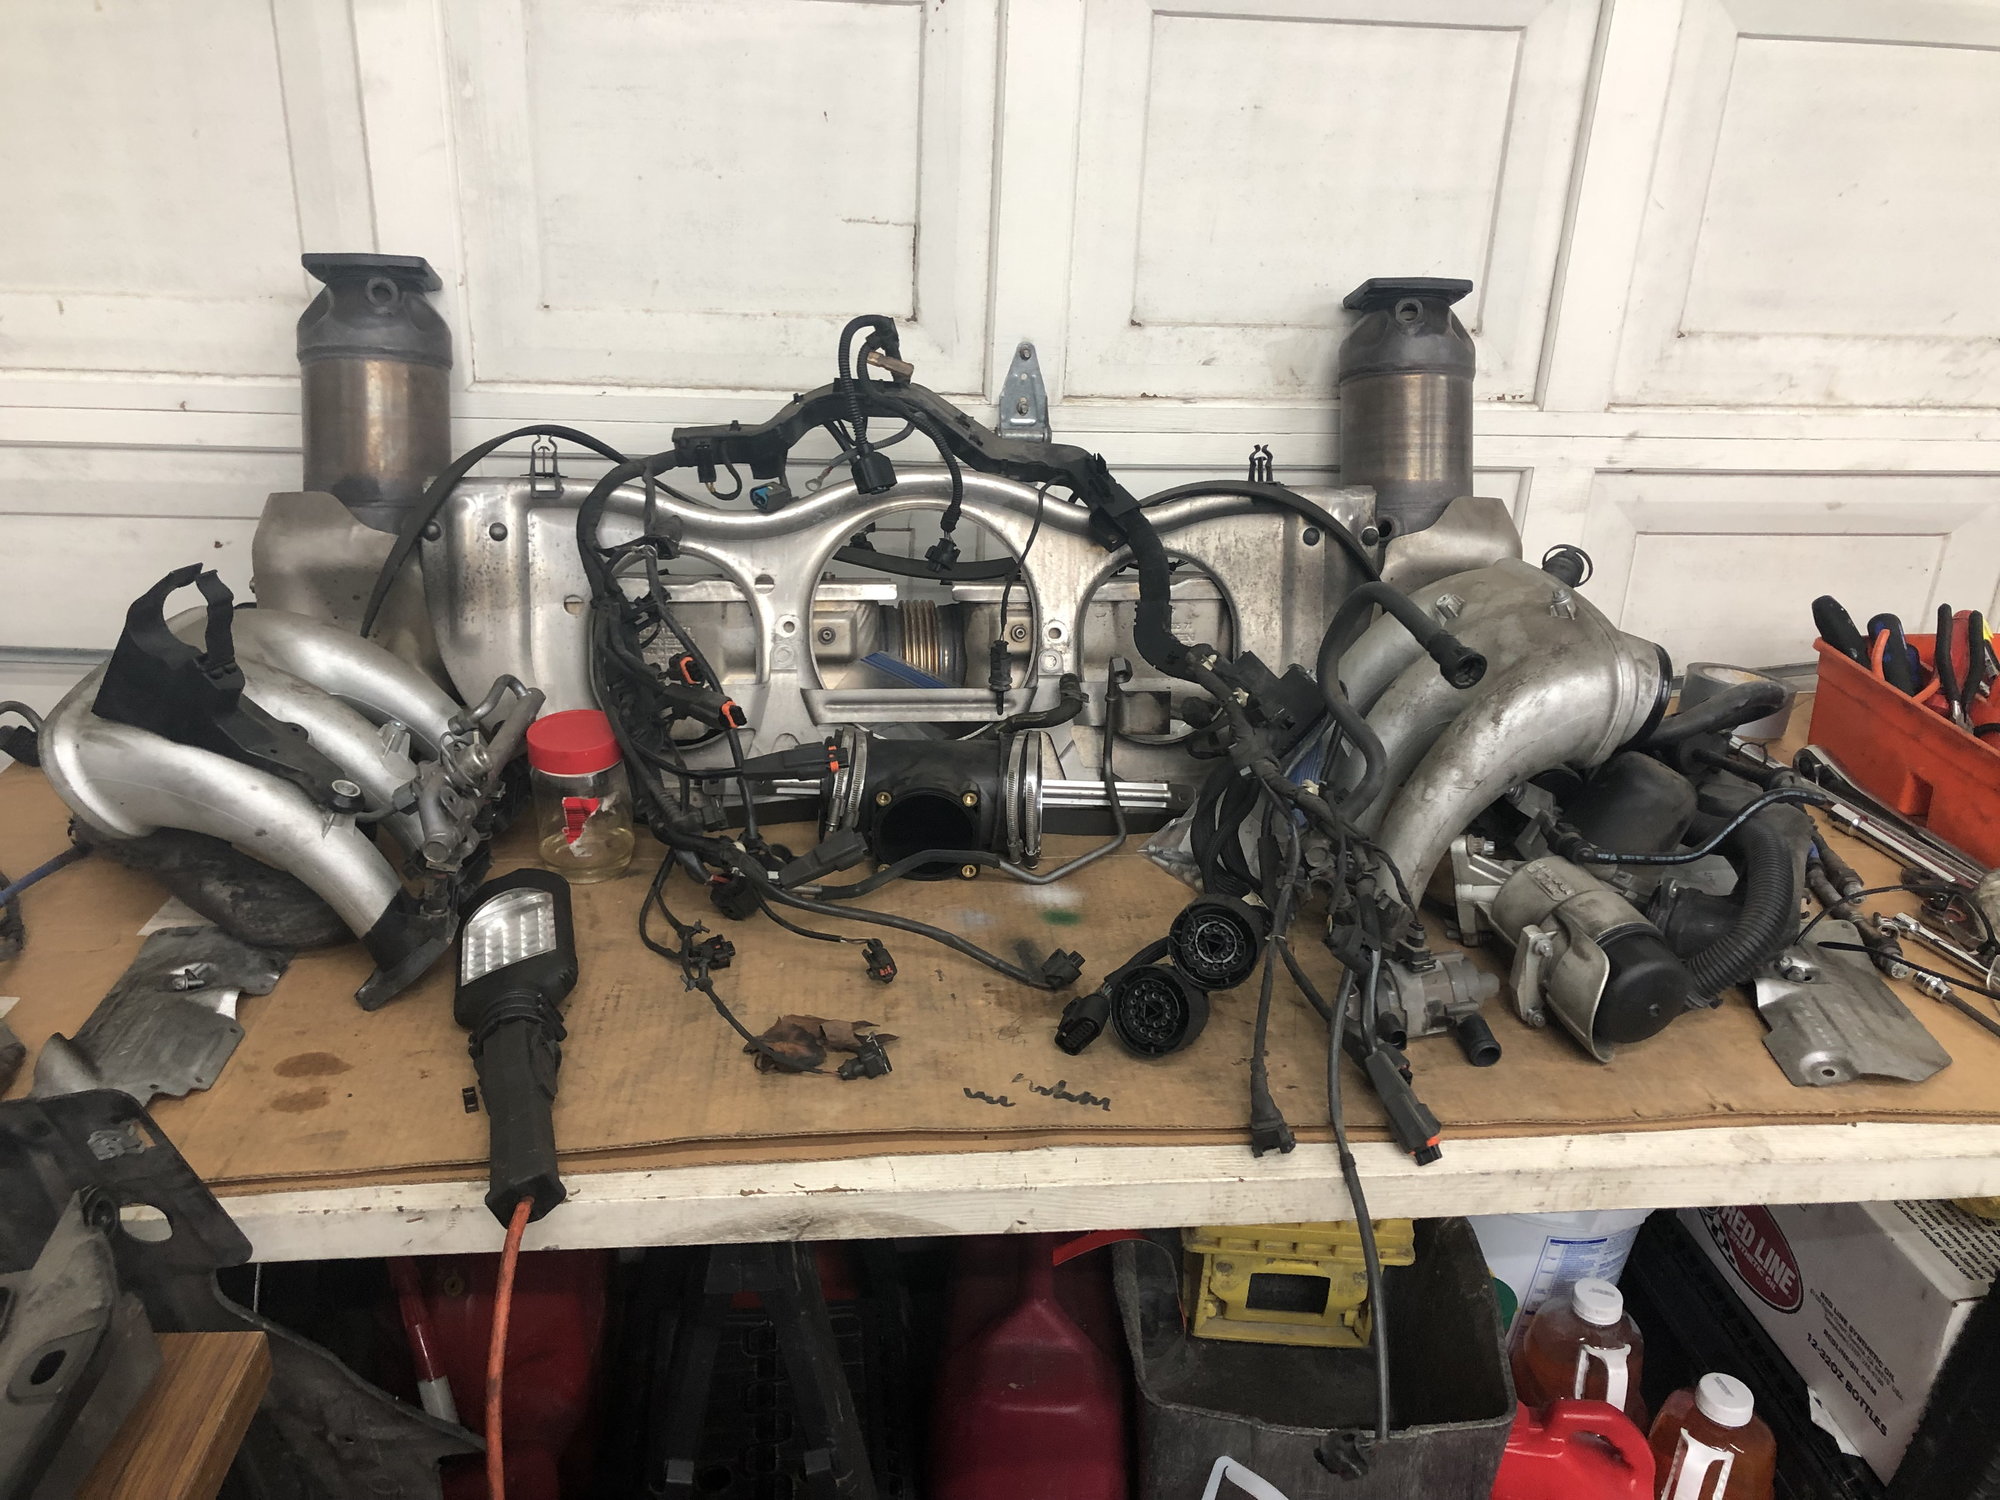
3. Pulled a bunch of stuff off the top of the engine:
A. Generator
B. Oil Filter Housing
C. Secondary Air Pump
D. Coil Shields
E. Wiring Harness
F. Intake Plenum
G. Bunch of air type hoses
H. Intake Manifolds
Set up another "table" and put the stuff left and right and center to make it a bit easier on re-install. I took copious amounts of "what it looked like before I hacked it up" shots so I would have a better chance of routing everything correctly. Unlike the AAN, once this puppy goes back in, I am not going to get a chance to re-route much.
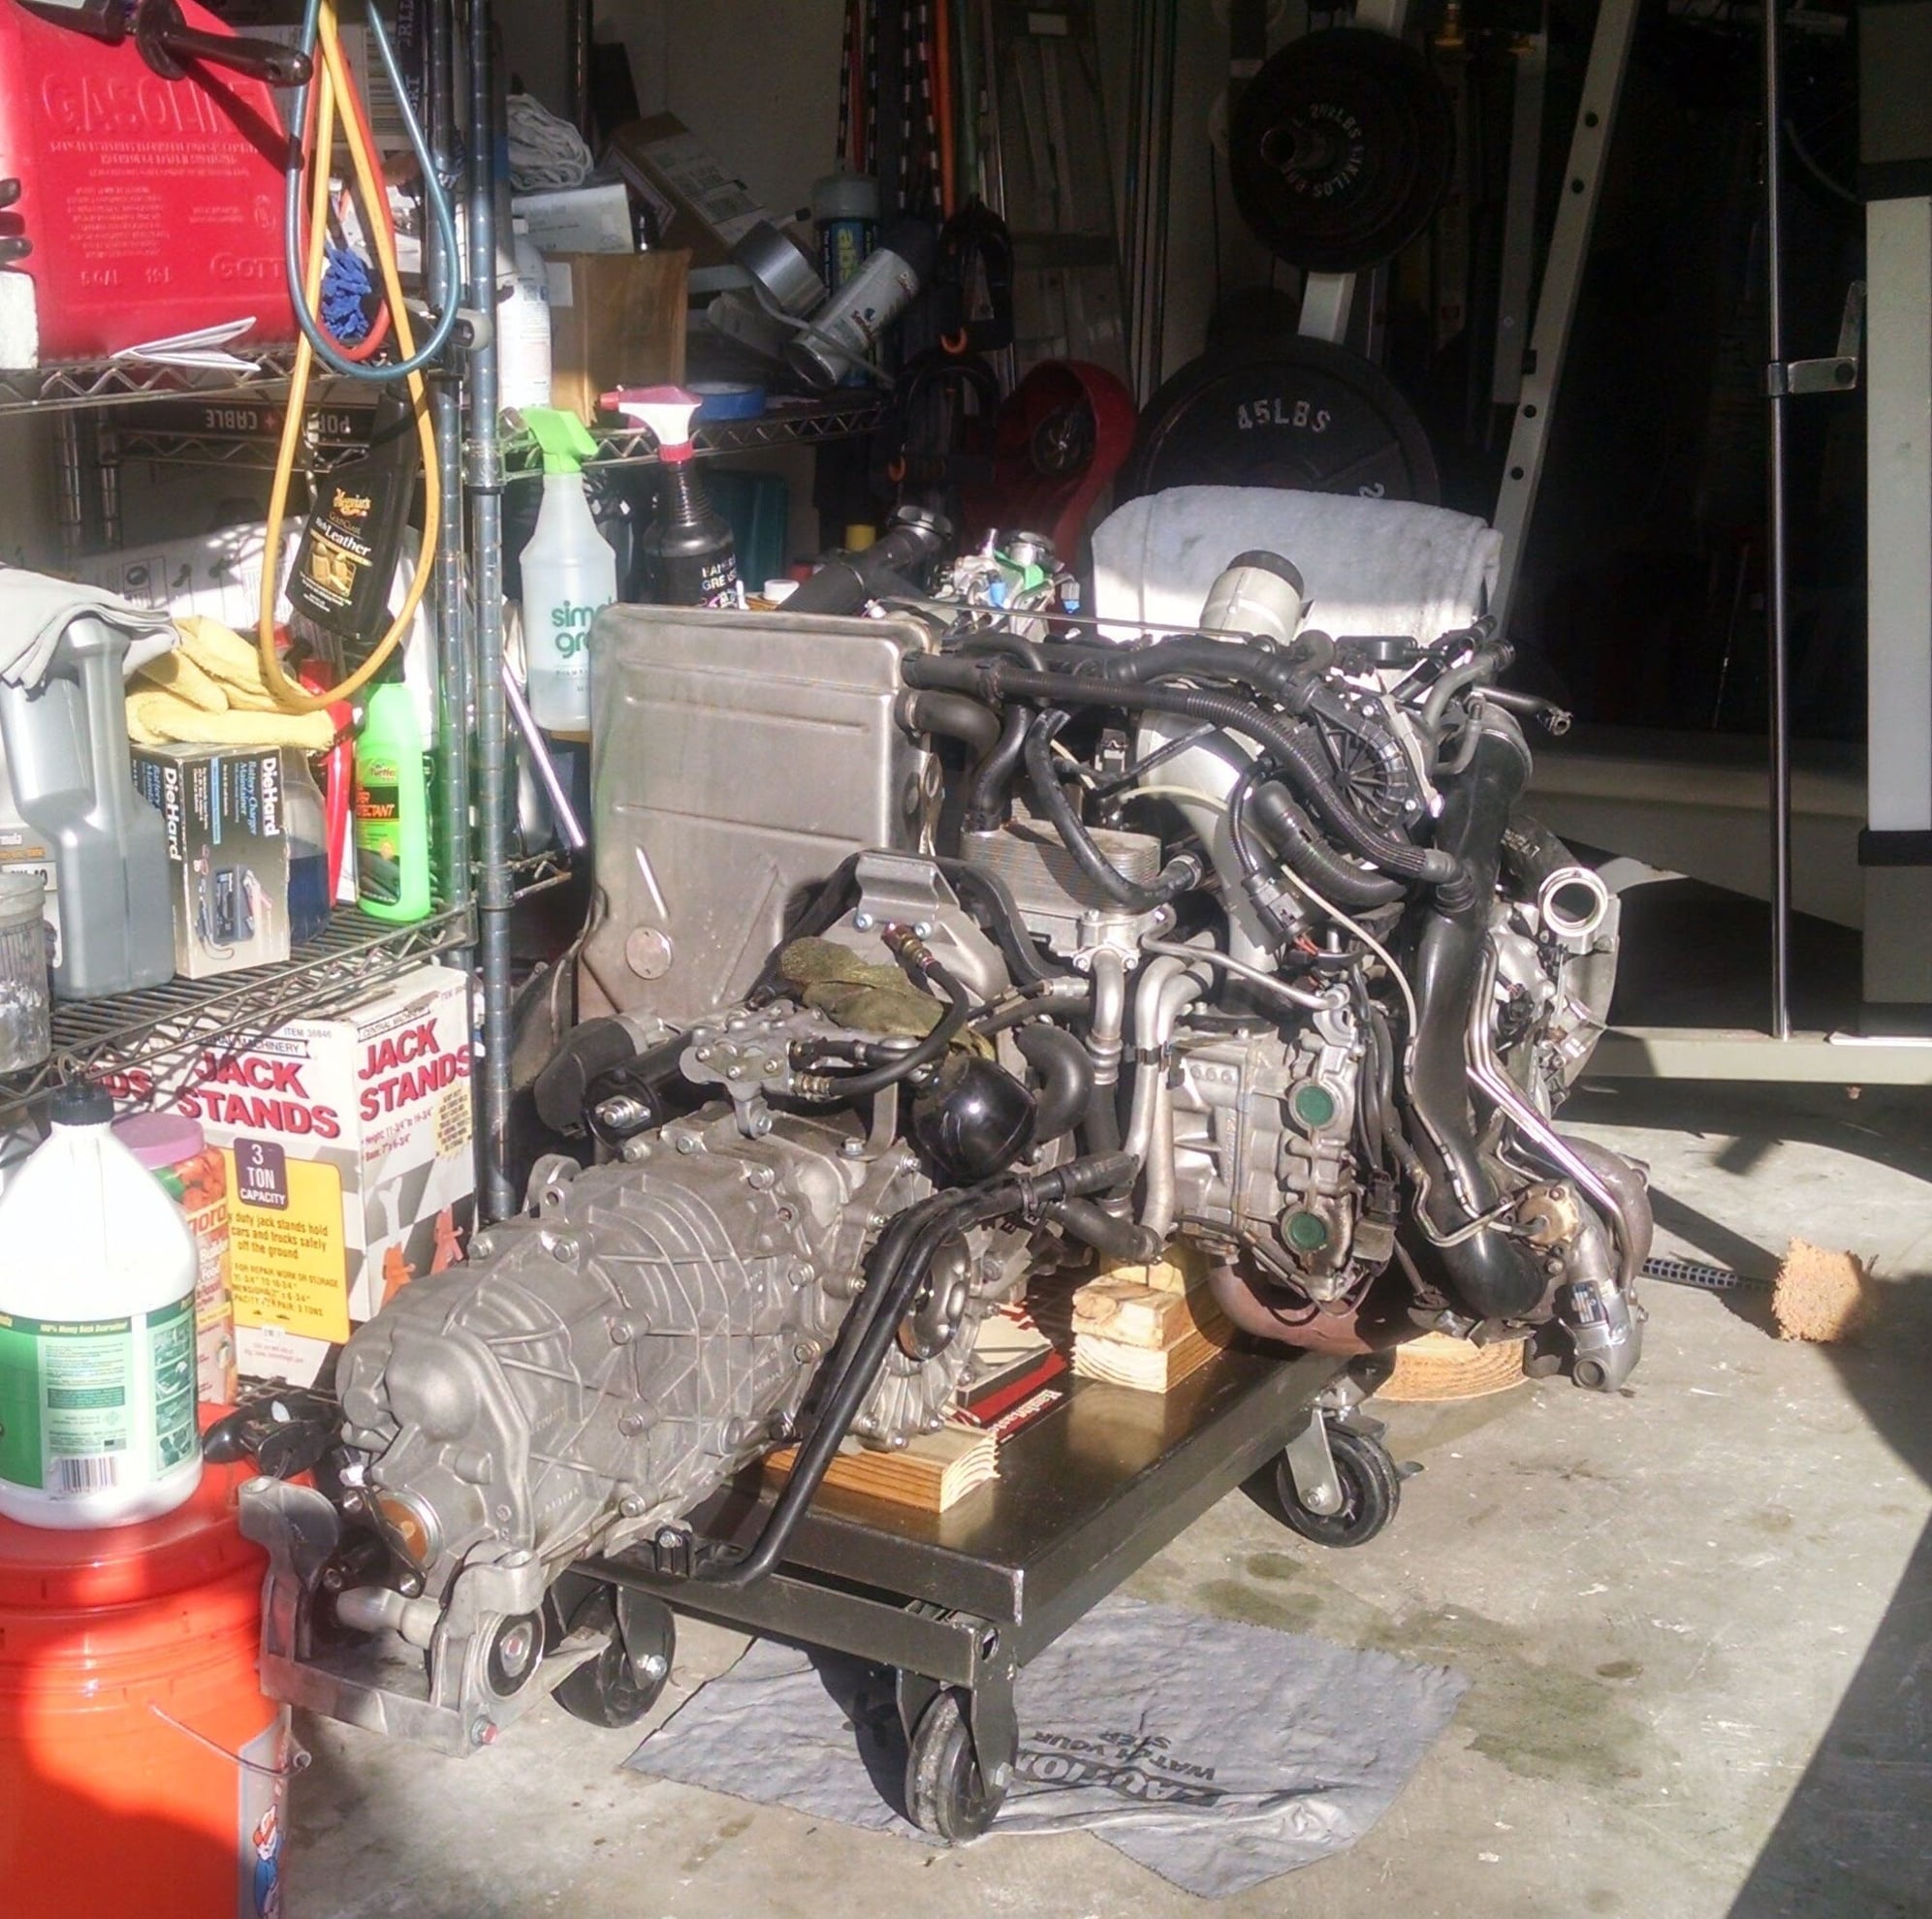
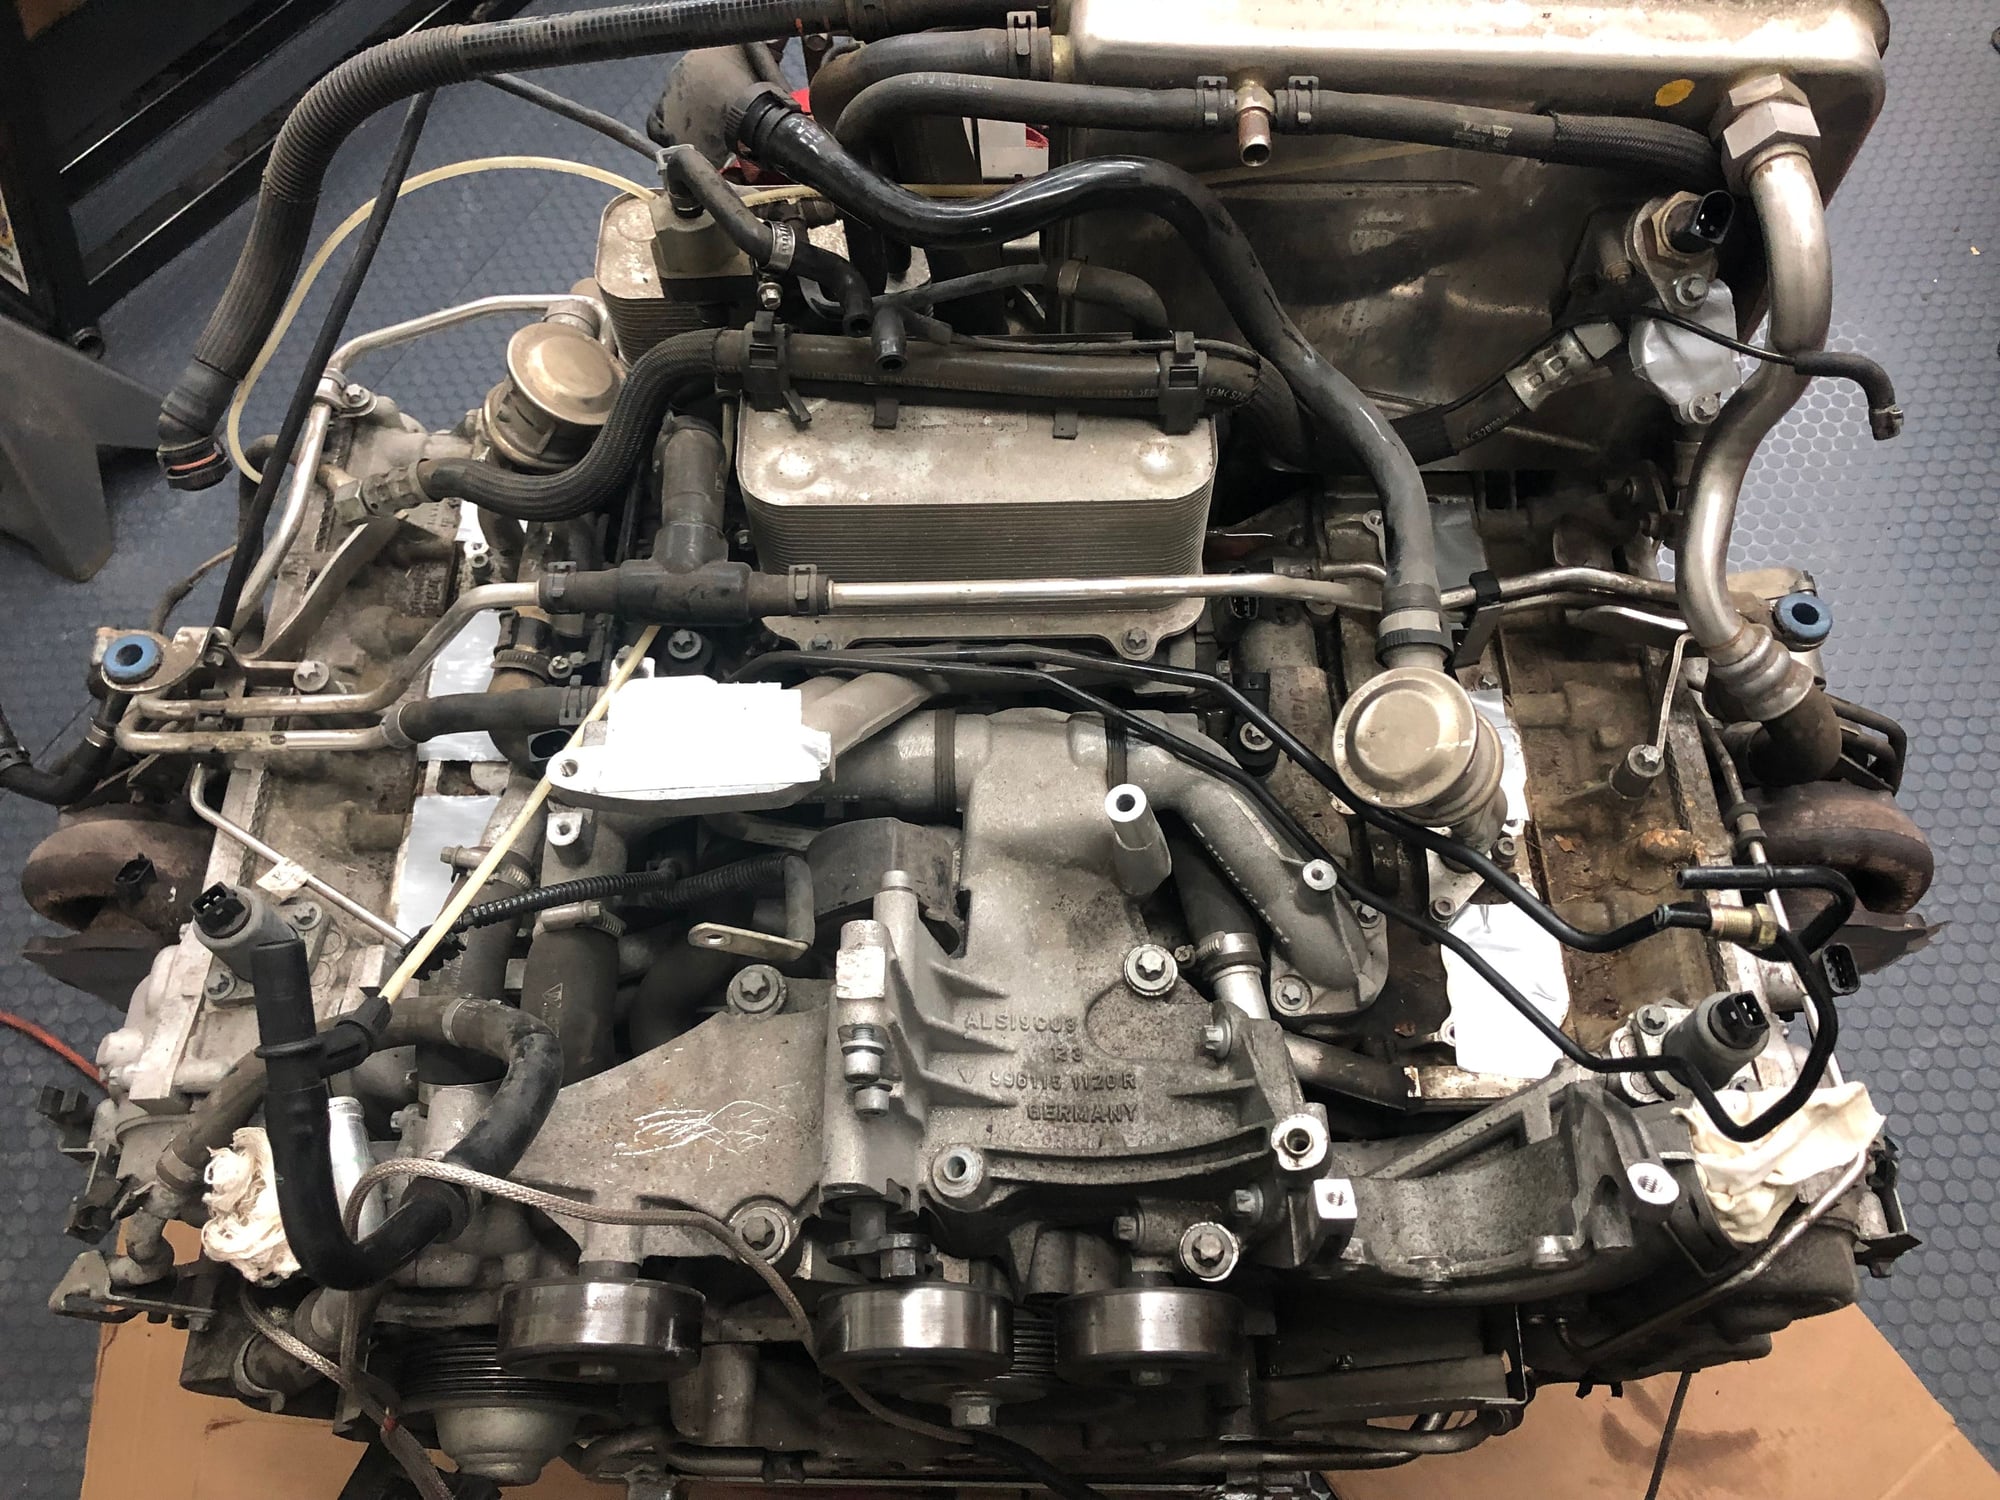
Much cleaner engine, though this car sat outside at some point as evidenced by the few leaves on the table above and some pine needles or other crap sitting on top of the block. Not too bad for an 11 year old car:
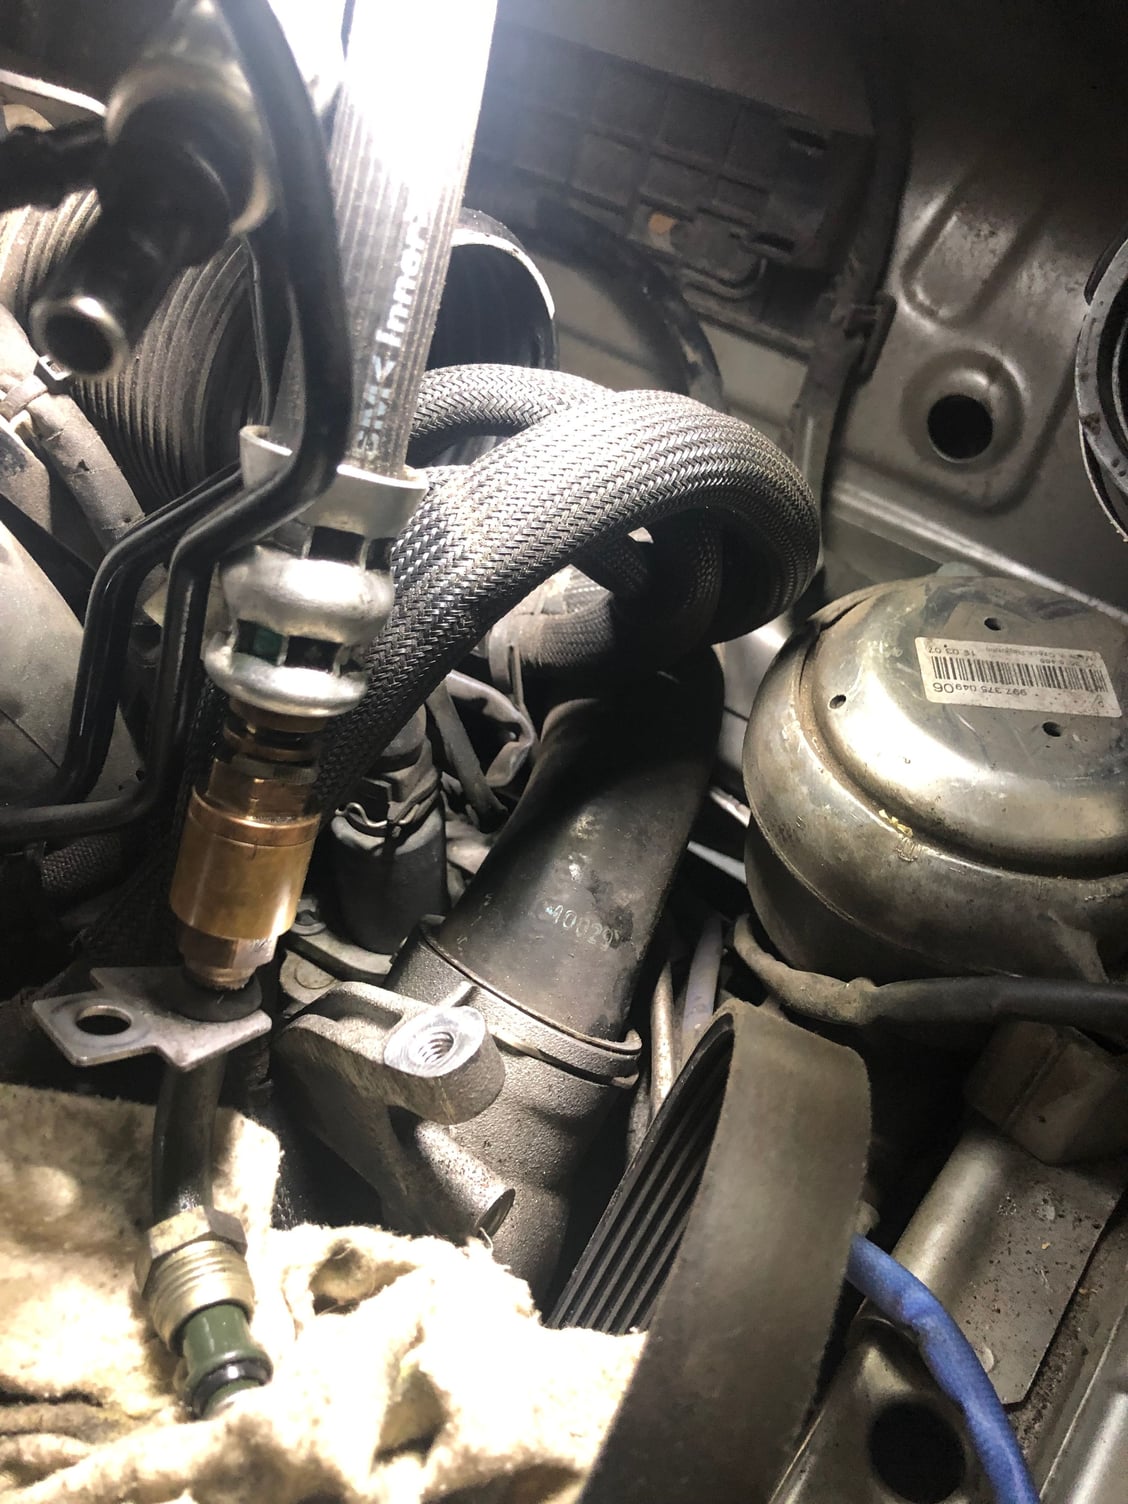
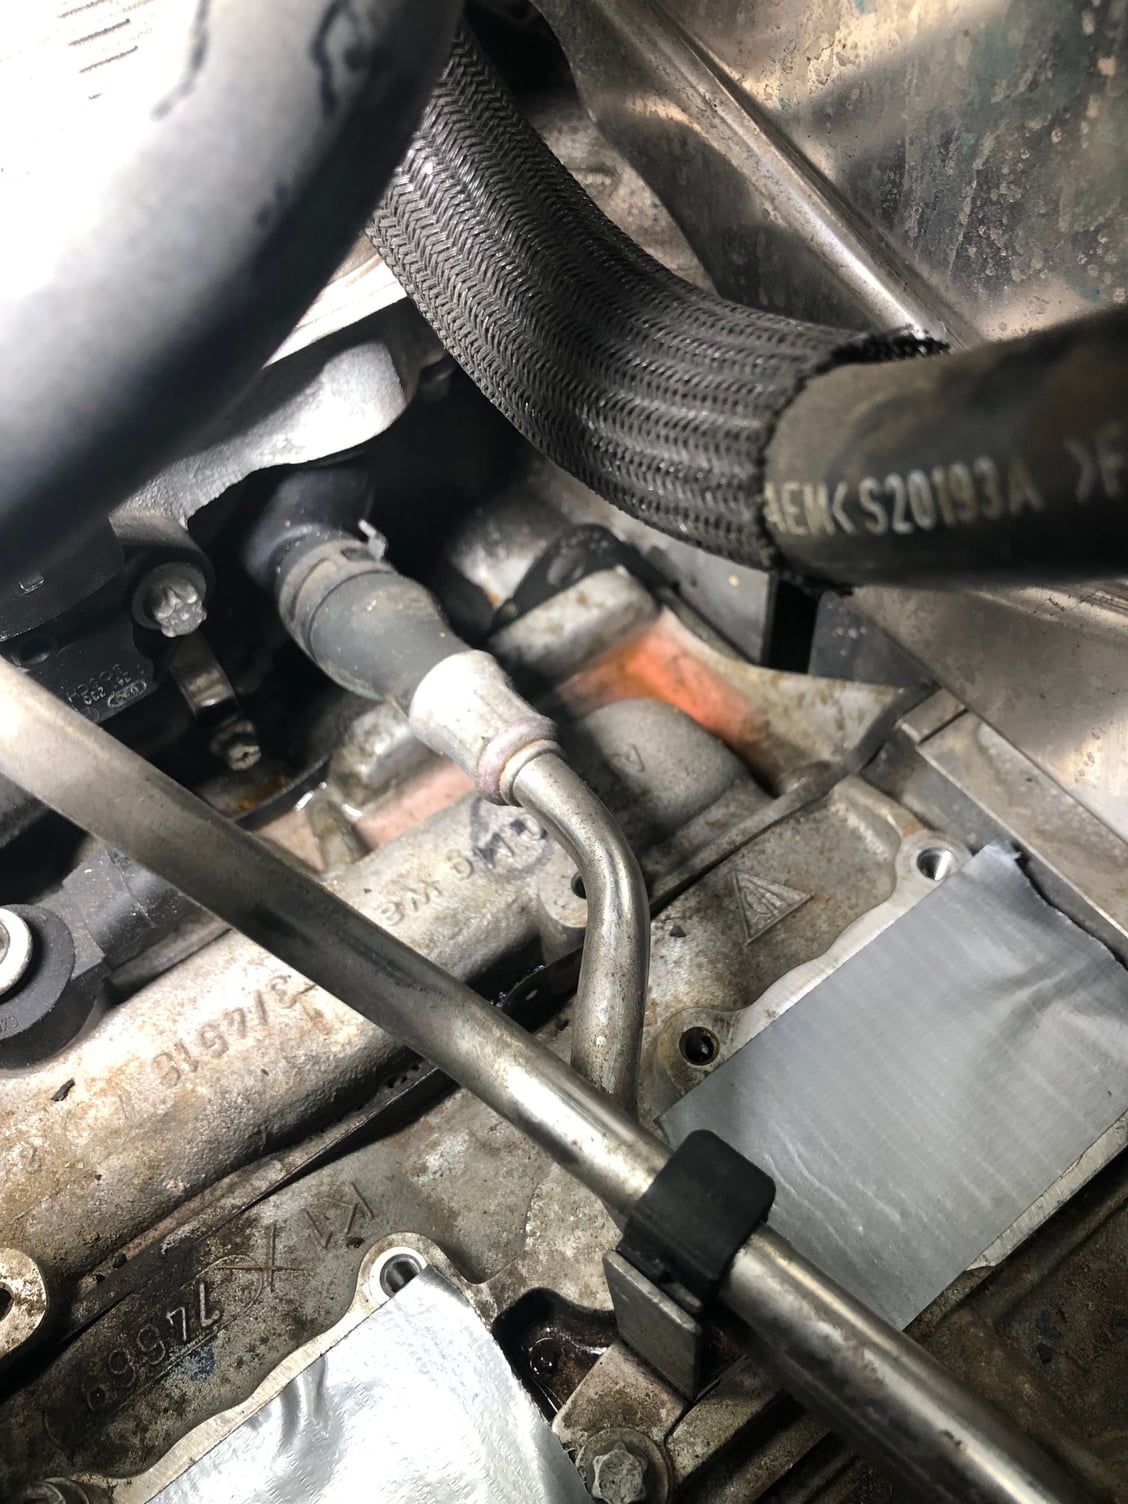
And finally the source of the leak, passenger side right below one of those high quality plastic elbows:
I think I am pretty close to beginning the identification of all the parts I will need. I started a hand written list but will probably make a spreadsheet so I can scare the crap out of myself with how much all this little stuff will cost. Won't get much done tomorrow, but I should make some significant progress over the weekend.
great pictures. Keep posting please. I would change the spark plugs and put new ASNU Injectors. If you plan to substantially bump up the power, then a 800cc injectors would be ideal. However you would need a tune if you switch to 800cc injectors.
In the middle of creating the parts spreadsheet. Cripes what a pain. I "think" I have all the hoses for the cooling/heating that I have to replace, but I need to verify them to be sure.I have to go back over the WM and get all the "replace" fasteners and add them to the list.
I will be doing sparks and coils, but no injectors at this time. If I get a tune, it will be like the ECU chips on the UrS6 and will be a stage whatever that doesn't require bigger turbos, injectors, etc. I will leave that for the next engine drop when I am bored and have nothing better to do.
No puff of smoke, but I will be maintaining the actuators that get rusty. I think I can get to those check valves pretty easily. I may give them a look.
Once I have gone over the list some more, I will attach the spreadsheet here in case anyone has any comments.

 06-10-2019, 03:01 PM