
Pin. vs. weld vs. oem vs. other?
 06-25-2014, 01:15 AM
#61
Drifting
Thread Starter
Thanks Alan. I'll find out Thursday. I'll def update thread.
 06-26-2014, 05:09 PM
#63
Drifting
Thread Starter
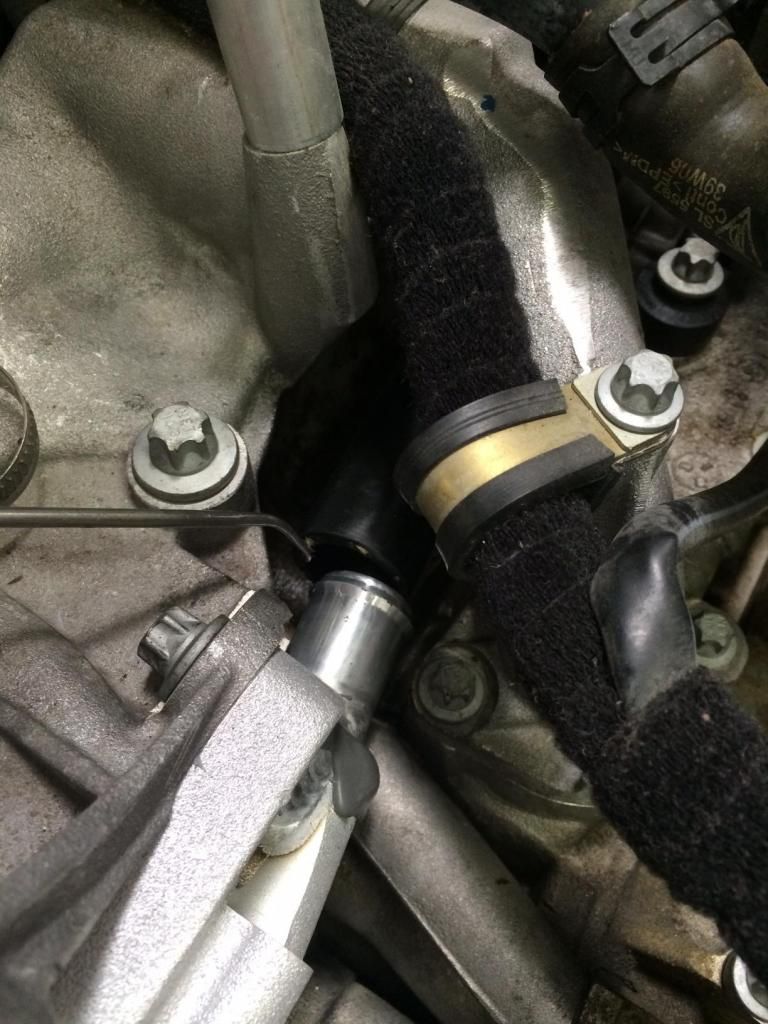
Perfect welds. For clarifications. He ment adding jb weld on outside after welding if I wanted to to cover up. If you look at second picture the welding did not penetrate insert which is a good thing so no leaks from there. I added jb in outside for reassurance. I feel very confident 
06-26-2014, 06:05 PM
#64
Rennlist Member
Looks good. I thought you were going to put JB Weld on the tube and then insert it prior to welding. I think that would have been an issue. However post welding on the outside no issue. A little extra insurance as noted.
06-26-2014, 10:36 PM
#65
If you have access to some dye penetrant, do some basic NDT (none destructive testing) looking for pin holes in the weld and cracks in the casting- did you pre-heat the cast body?
06-27-2014, 12:10 AM
#66
Drifting
Thread Starter
By the way, to answer your prior question. Yes one hose blew out. The remaining 5 were a cake walk removing them. A few seconds on a torch is all it took. My car has been pampered by 2 PO, no track time. It also has been pampered by me, haven't even had a chance to wear out a set of tires !
 06-27-2014, 09:41 AM
#67
For what you are doing any make would do. We use Ardrox consumables. suggest water washeradler.
Spray in lid then brush on to save mess. 10 minutes dwell time.
ask if you want more information/ assistance
cheers
Jay
Spray in lid then brush on to save mess. 10 minutes dwell time.
ask if you want more information/ assistance
cheers
Jay
06-27-2014, 10:05 AM
#69
Rennlist Member
Thinking about getting this done over the winter. I'll probably just go with the pinning method sharkwerks suggested. Any thing else you guys recommend checking/servicing on a low mile 7.2rs while the engine is dropped?
edit: nevermind just saw the whole thread dedicated to this question!
edit: nevermind just saw the whole thread dedicated to this question!
Last edited by hotwired; 06-27-2014 at 10:20 AM.
06-27-2014, 06:29 PM
#70
Drifting
Thread Starter
Thank you for the information. Do you have a link where this can be purchased / get more info. Can't find anything on google.
Thinking about getting this done over the winter. I'll probably just go with the pinning method sharkwerks suggested. Any thing else you guys recommend checking/servicing on a low mile 7.2rs while the engine is dropped?
edit: nevermind just saw the whole thread dedicated to this question!
edit: nevermind just saw the whole thread dedicated to this question!
For those whom are interested in tackling the project. I do have a brand new (sealed) water pump housing for sale. I had it as a backup just in case the welding went all jacked up. They retail for over $1200 new. Make me an offer.
06-27-2014, 11:45 PM
#71
Google: NDT consumables South Florida and you will get loads of hits. Don't worry to much about manufacturer as the GT3 welds and tanks aren't being inspected to any code I would guess?
A company carrying out NDT services may be prepared to sell you the consumables (normally about ~$17 per can/aeorsol)
Get a pre clean and red dye- water washable (visible -(non fluro)) and developer (white contrast) aeorsols.
Clean down with pre-clean - brush on red dye and leave to dwell for 10 min's - if very hot you may need to reapply the red dye so it doesn't dry out. The dye is pulled in by force (capillary action)
Wipe clean with lint free rags and if required lightly mist water on and wipe again to remove the visible red dye as best you can - warning don't flood with water or spray under pressure dirt as you will wash out any dye in a crack (cast body next to weld area called the HAZ (Heat Effected Zone) or pin whole (normally found in the start stop area of a weld).
Lightly coat the test area with the white colour contrast spray and leave for another 10 minutes to develop (if you watch during this time you may see the dye start to bleed through - only needs to be light to cover of white contrast and think of this as a blotting paper to pull the dye out of any cracks or pin holes, these will appear as pink or red (depending on how deep/big the defect is). If you get an indication but you are unsure if it is a relevant indication and not just some dye held in some geometry like a weld toe or casting rough surface - lightly wipe with a slightly damp cloth just the area or concern and lightly spray with the white contrast spray and watch again for another 5-10 min's.
If you photograph any indications and post I will tell you if they are relevant or not.
Same process for your SS tanks you are building - note only get chlorine free / SS safe consumables. And depending on scale you may have to do the welds in manageable lengths.
Happy to help.
Thanks
Jay
06-28-2014, 12:16 AM
#72

Thank you for the information. Do you have a link where this can be purchased / get more info. Can't find anything on google.
Just do whatever you feel most comfortable.
For those whom are interested in tackling the project. I do have a brand new (sealed) water pump housing for sale. I had it as a backup just in case the welding went all jacked up. They retail for over $1200 new. Make me an offer.
Just do whatever you feel most comfortable.
For those whom are interested in tackling the project. I do have a brand new (sealed) water pump housing for sale. I had it as a backup just in case the welding went all jacked up. They retail for over $1200 new. Make me an offer.
Last edited by atcbi5; 01-23-2015 at 10:53 AM.
06-28-2014, 12:21 AM
#73
Drifting
Thread Starter
Google: NDT consumables South Florida and you will get loads of hits. Don't worry to much about manufacturer as the GT3 welds and tanks aren't being inspected to any code I would guess? A company carrying out NDT services may be prepared to sell you the consumables (normally about ~$17 per can/aeorsol) Get a pre clean and red dye- water washable (visible -(non fluro)) and developer (white contrast) aeorsols. Clean down with pre-clean - brush on red dye and leave to dwell for 10 min's - if very hot you may need to reapply the red dye so it doesn't dry out. The dye is pulled in by force (capillary action) Wipe clean with lint free rags and if required lightly mist water on and wipe again to remove the visible red dye as best you can - warning don't flood with water or spray under pressure dirt as you will wash out any dye in a crack (cast body next to weld area called the HAZ (Heat Effected Zone) or pin whole (normally found in the start stop area of a weld). Lightly coat the test area with the white colour contrast spray and leave for another 10 minutes to develop (if you watch during this time you may see the dye start to bleed through - only needs to be light to cover of white contrast and think of this as a blotting paper to pull the dye out of any cracks or pin holes, these will appear as pink or red (depending on how deep/big the defect is). If you get an indication but you are unsure if it is a relevant indication and not just some dye held in some geometry like a weld toe or casting rough surface - lightly wipe with a slightly damp cloth just the area or concern and lightly spray with the white contrast spray and watch again for another 5-10 min's. If you photograph any indications and post I will tell you if they are relevant or not. Same process for your SS tanks you are building - note only get chlorine free / SS safe consumables. And depending on scale you may have to do the welds in manageable lengths. Happy to help. Thanks Jay
Last edited by F1CrazyDriver; 06-28-2014 at 12:44 AM.
07-02-2014, 03:43 PM
#74
Drifting
Thread Starter
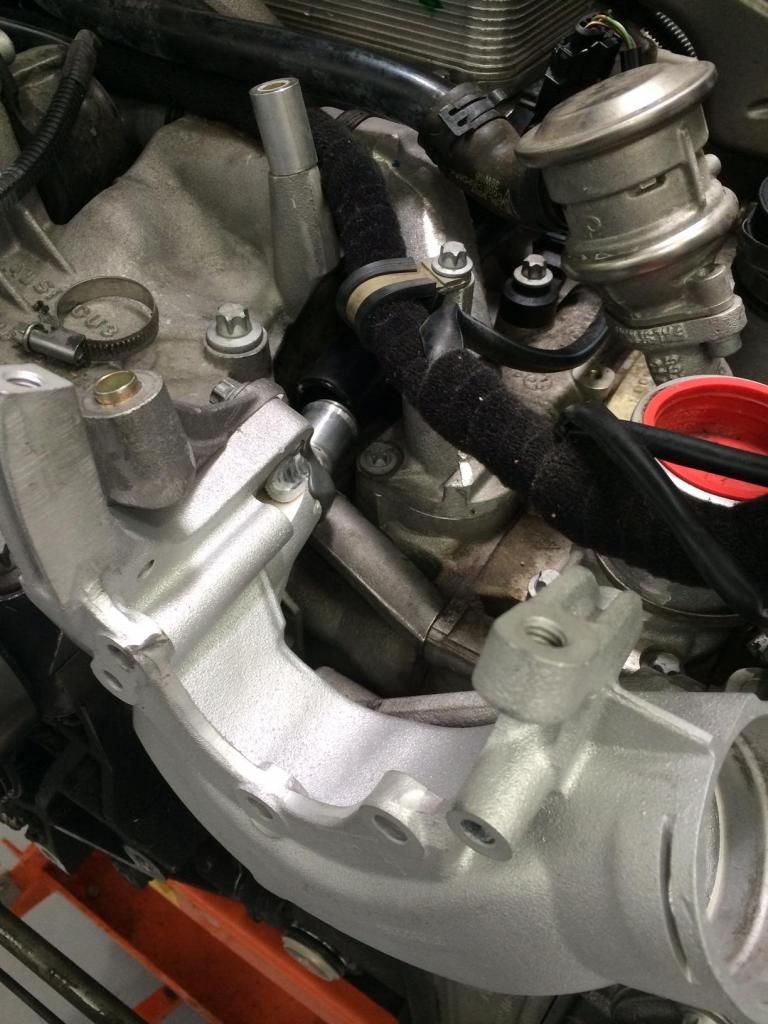
Update:
I would not suggest getting the inserts from : http://nyppd.com/all-parts/nyppd-all...e-911-996-997/
One of them is slightly too short. Need to get a longer hose.
That said. JB weld dried up very nice as you can see and parts clean make engine look new.
I would not suggest getting the inserts from : http://nyppd.com/all-parts/nyppd-all...e-911-996-997/
One of them is slightly too short. Need to get a longer hose.
That said. JB weld dried up very nice as you can see and parts clean make engine look new.

 07-23-2014, 07:48 PM
#75
Drifting
Thread Starter
My car is complete. BIG BIG thank you to Fremont Porsche. Gunther was amazing. He was perfectly fine with the tech taking off the parts and sending them to get Alodine/ sand blasted / welded as i wanted to eliminate this concern forever and ever. Now that the job has been done right and completed I can rest assure this will never happen again. Yokatane. Car is up and running-- purring like new.
While "there"
Replaced all hoses for new ones
Did a few seals just in case
Got all lines welded.
Did the sharwerks repellent of plastic hoses to metal
changed water pump
new belt
plugs were done 2k miles so no need
wiring was looked over for aging and replaced whatever connectors that looked meh for a 7 year old car
Took a close look at everything- everything checked out perfect.
Super healthy car!
Last edited by F1CrazyDriver; 07-24-2014 at 12:53 AM.