Money2536's Grey Black 997.2 GT3 RS Journal
#61
Rennlist Member
Thread Starter
Matt the front axle lift issue you mentioned in your latest video is most likely a faulty pressure switch or relay based on the things you described. Not a super expensive fix unlike how it used to be in the past (replacing the entire system) before this issue was further investigated finding the fault to be only minor. Keep in mind this was Porsche’s first attempt at a front axle lift so the system wasn’t perfect. Here is the link to a really good thread and video on this common issue.
#62
Standard alcantara **** which should still be available is: 99742407592A15
Note that the full alcantara one (with no carbon) is GT3 specific. The coloring on the shift **** cap is different than what you’d find in a Boxster/Cayman with an alcantara ****. The ones outside of the GT3 were a more shiny silver finish whereas the ones in the GT3 were more matte gray.
#63
Rennlist Member
I did a lot of what’s in that video and it went right back to sucking… imo I think the whole community will forgive a front axle lift issue on this car and it won’t devalue it. It still auto lowers after going ~30 but on-demand is a crap shoot. Realistically the only time I use it is when loading and unloading my car into the trailer.
Nothing like already being in the gate and trying to drive circles around the track parking lot doing 30 trying to get it to lower before my session and everyone is looking at me like I’m a crazy lost autocross driver.
Nothing like already being in the gate and trying to drive circles around the track parking lot doing 30 trying to get it to lower before my session and everyone is looking at me like I’m a crazy lost autocross driver.
Last edited by Wonderdan; 12-12-2022 at 10:51 PM.
#64
Rennlist Member
Thread Starter
I did a lot of what’s in that video and it went right back to sucking… imo I think the whole community will forgive a front axle lift issue on this car and it won’t devalue it. It still auto lowers after going ~30 but on-demand is a crap shoot. Realistically the only time I use it is when loading and unloading my car into the trailer.
Nothing like already being in the gate and trying to drive circles around the track parking lot doing 30 trying to get it to lower before my session and everyone is looking at me like I’m a crazy lost autocross driver.
Nothing like already being in the gate and trying to drive circles around the track parking lot doing 30 trying to get it to lower before my session and everyone is looking at me like I’m a crazy lost autocross driver.
#65
Rennlist Member
I almost did but it’s less inconvenient than I thought it would be… having it there for “crap I didn’t mean to take this entrance how do I get out of this parking lot” is nice. It really does reset 100% of the time… though if you delete you also have to code it out etc and back then I didn’t have a PIWIS II, I may tackle the issue again someday.
But it’s kinda like the front speakers, even the 3000 mile examples have the same issues.
But it’s kinda like the front speakers, even the 3000 mile examples have the same issues.
Last edited by Wonderdan; 12-12-2022 at 11:47 PM.
The following users liked this post:
Money2536 (12-13-2022)
The following users liked this post:
Money2536 (12-13-2022)
#67
For example, I even for something cheap like the seat belt adjuster cover you can save $20 ordering it from RosePassion (based in France, but really good prices, used them before many times): https://www.rosepassion.com/en/cover...ck-a03-P102704
The following users liked this post:
Money2536 (12-13-2022)
#68
Intermediate
In case you haven't found it yet, the tool is behind a door at the rear-left (passenger) bottom corner of the frunk.
There is a door hidden there on the vertical rear portion, at the left corner.
There is a door hidden there on the vertical rear portion, at the left corner.
Last edited by mariodesmo; 12-13-2022 at 08:17 PM.
The following users liked this post:
Money2536 (12-13-2022)
#69
Rennlist Member
Thread Starter
I needed to unbolt the seats in order to get the inside lap belt harnesses off, so I figured now was a good time to take the seats out and see what I'm working with. They looked pretty decent, but I wanted to remove the Ed Guard bolster protectors, inspect and clean the leather, and clean up the Alcantara. I'll have the video up shortly dealing with the entire interior.
Pulling the seats out was nice due to how light the buckets are. 25-30 pounds made it much less dicey to get them out on my own. There is a single yellow plug on the driver's side and an additional one on the passenger's.

I'd never taken the inserts out before. I was surprised how easy they come out. It's just simple velcro. The fabric had a few little spots, but they look pretty nice and clean. I wouldn't be surprised if they had been replaced at some point. The base of the driver's side had a bit of crunchiness, but they cleaned up really well. I find that if you do this periodically, it will stay like new longer.
This is what you need to clean the Alcantara.
Dupray Steamer: https://dupray.com/products/tosca-steam-cleaner
Sonax Alcantara Cleaner: https://www.obsessedgarage.com/produ...e1a5cf4c&_ss=r
Colourlock Brush: https://www.obsessedgarage.com/produ...2195c972&_ss=r
Towels: https://www.obsessedgarage.com/produ...9d5a56bd&_ss=r
Colourlock Sanding Pad: https://www.obsessedgarage.com/produ...2195c972&_ss=r
Steam the Alcantara. I like to use a steamer as you can control the amount of water on the fabric. You don't want to soak it. You just want it damp. Then I foam the brush and gently apply the Sonax cleaner on the entire surface of the inserts. You don't want to use any pressure or over agitate the fabric. You just want to get the cleaner into the fabric. The cleaning happens when you remove the cleaner not just putting the cleaner on. Follow with the steamer and wipe with a few towels attempting to remove as much cleaner and lifted dirt. I did two sets of passes with the steamer on these inserts. I let them dry overnight. Then I scuffed the fabric with the sanding pad. It will remove any crunchiness and reactivate the fabric. Trust me on this. Sanding it makes it magical.


The 12 year old seat belt receivers are starting to get a little chalky. They were clean, but needed a little something. Applying a little WD-40 does the trick to restore them.


Next up is cleaning the leather. The driver's seat is going to need repair in two spots. I'd probably just order the cover, but mine have the Porsche crest on them that would take forever to get.

You need:
Colourlock Brush: https://www.obsessedgarage.com/produ...u&_ss=e&_v=1.0
A bucket with water to rinse the brush off.
Colourlock Strong Cleaner: https://www.obsessedgarage.com/produ...1d3abdfc&_ss=r
Colourlock Leather Protector: https://www.obsessedgarage.com/produ...1d3abdfc&_ss=r
Colourlock Leather Shield: https://www.obsessedgarage.com/produ...1d3abdfc&_ss=r
Colourlock Sponge: https://www.obsessedgarage.com/produ...1d3abdfc&_ss=r
More Blue Towels: https://www.obsessedgarage.com/produ...9d5a56bd&_ss=r
It's good to have a few of these brushes, so I'd get two or three. You'll use them on all kinds of stuff. You first want to get the leather clean. Foam the Strong Cleaner onto the brush and cover the surface. Do one section at a time. Use back and forth and circular motions without pressure to deep clean the surface. Repeat this if necessary. You want the shine off the leather. Shine equals oils and dirt. You don't want that. I first cleaned the entire seat. Wiping each section dry with the interior microfiber towels. After cleaning, we want to treat the leather. Leather older than 3 years need two steps. First is Leather Protection. Apply in the same small sections and wipe flat with a fresh towels. If you leave any excess, it will dry streaky. I like to wait a few hours before applying the last step, Leather Shield. It goes on and wipes off the same as the previous step.


Time to remove the stickers. Get yourself some CarPro TarX: https://www.obsessedgarage.com/produ...1203aa32&_ss=r


After removing the stickers, I wiped down with CarPro Eraser: https://www.obsessedgarage.com/produ...88fd5b30&_ss=r
Drying Towel: https://www.obsessedgarage.com/produ...1b0c0e37&_ss=r

Then I applied a coat of Jescar Powerlock+. It's a Polymer Sealant.
Jescar: https://www.obsessedgarage.com/produ...ef5dde45&_ss=r
Adam's Applicator: https://www.obsessedgarage.com/produ...=5537269612575
Wax Removal Towel: https://www.obsessedgarage.com/produ...6c9736f4&_ss=r


Done! No sheen, just matte, beautiful leather. I put the inserts back in and then reinstalling in the car. I'll do a write-up and video once I get the leather repair products to fix to two worn areas.


Pulling the seats out was nice due to how light the buckets are. 25-30 pounds made it much less dicey to get them out on my own. There is a single yellow plug on the driver's side and an additional one on the passenger's.

I'd never taken the inserts out before. I was surprised how easy they come out. It's just simple velcro. The fabric had a few little spots, but they look pretty nice and clean. I wouldn't be surprised if they had been replaced at some point. The base of the driver's side had a bit of crunchiness, but they cleaned up really well. I find that if you do this periodically, it will stay like new longer.
This is what you need to clean the Alcantara.
Dupray Steamer: https://dupray.com/products/tosca-steam-cleaner
Sonax Alcantara Cleaner: https://www.obsessedgarage.com/produ...e1a5cf4c&_ss=r
Colourlock Brush: https://www.obsessedgarage.com/produ...2195c972&_ss=r
Towels: https://www.obsessedgarage.com/produ...9d5a56bd&_ss=r
Colourlock Sanding Pad: https://www.obsessedgarage.com/produ...2195c972&_ss=r
Steam the Alcantara. I like to use a steamer as you can control the amount of water on the fabric. You don't want to soak it. You just want it damp. Then I foam the brush and gently apply the Sonax cleaner on the entire surface of the inserts. You don't want to use any pressure or over agitate the fabric. You just want to get the cleaner into the fabric. The cleaning happens when you remove the cleaner not just putting the cleaner on. Follow with the steamer and wipe with a few towels attempting to remove as much cleaner and lifted dirt. I did two sets of passes with the steamer on these inserts. I let them dry overnight. Then I scuffed the fabric with the sanding pad. It will remove any crunchiness and reactivate the fabric. Trust me on this. Sanding it makes it magical.


The 12 year old seat belt receivers are starting to get a little chalky. They were clean, but needed a little something. Applying a little WD-40 does the trick to restore them.


Next up is cleaning the leather. The driver's seat is going to need repair in two spots. I'd probably just order the cover, but mine have the Porsche crest on them that would take forever to get.

You need:
Colourlock Brush: https://www.obsessedgarage.com/produ...u&_ss=e&_v=1.0
A bucket with water to rinse the brush off.
Colourlock Strong Cleaner: https://www.obsessedgarage.com/produ...1d3abdfc&_ss=r
Colourlock Leather Protector: https://www.obsessedgarage.com/produ...1d3abdfc&_ss=r
Colourlock Leather Shield: https://www.obsessedgarage.com/produ...1d3abdfc&_ss=r
Colourlock Sponge: https://www.obsessedgarage.com/produ...1d3abdfc&_ss=r
More Blue Towels: https://www.obsessedgarage.com/produ...9d5a56bd&_ss=r
It's good to have a few of these brushes, so I'd get two or three. You'll use them on all kinds of stuff. You first want to get the leather clean. Foam the Strong Cleaner onto the brush and cover the surface. Do one section at a time. Use back and forth and circular motions without pressure to deep clean the surface. Repeat this if necessary. You want the shine off the leather. Shine equals oils and dirt. You don't want that. I first cleaned the entire seat. Wiping each section dry with the interior microfiber towels. After cleaning, we want to treat the leather. Leather older than 3 years need two steps. First is Leather Protection. Apply in the same small sections and wipe flat with a fresh towels. If you leave any excess, it will dry streaky. I like to wait a few hours before applying the last step, Leather Shield. It goes on and wipes off the same as the previous step.


Time to remove the stickers. Get yourself some CarPro TarX: https://www.obsessedgarage.com/produ...1203aa32&_ss=r


After removing the stickers, I wiped down with CarPro Eraser: https://www.obsessedgarage.com/produ...88fd5b30&_ss=r
Drying Towel: https://www.obsessedgarage.com/produ...1b0c0e37&_ss=r

Then I applied a coat of Jescar Powerlock+. It's a Polymer Sealant.
Jescar: https://www.obsessedgarage.com/produ...ef5dde45&_ss=r
Adam's Applicator: https://www.obsessedgarage.com/produ...=5537269612575
Wax Removal Towel: https://www.obsessedgarage.com/produ...6c9736f4&_ss=r


Done! No sheen, just matte, beautiful leather. I put the inserts back in and then reinstalling in the car. I'll do a write-up and video once I get the leather repair products to fix to two worn areas.


Last edited by Money2536; 12-15-2022 at 11:21 PM.
The following 3 users liked this post by Money2536:
#70
Burning Brakes
The following users liked this post:
PHX (12-13-2022)
#73
Rennlist Member


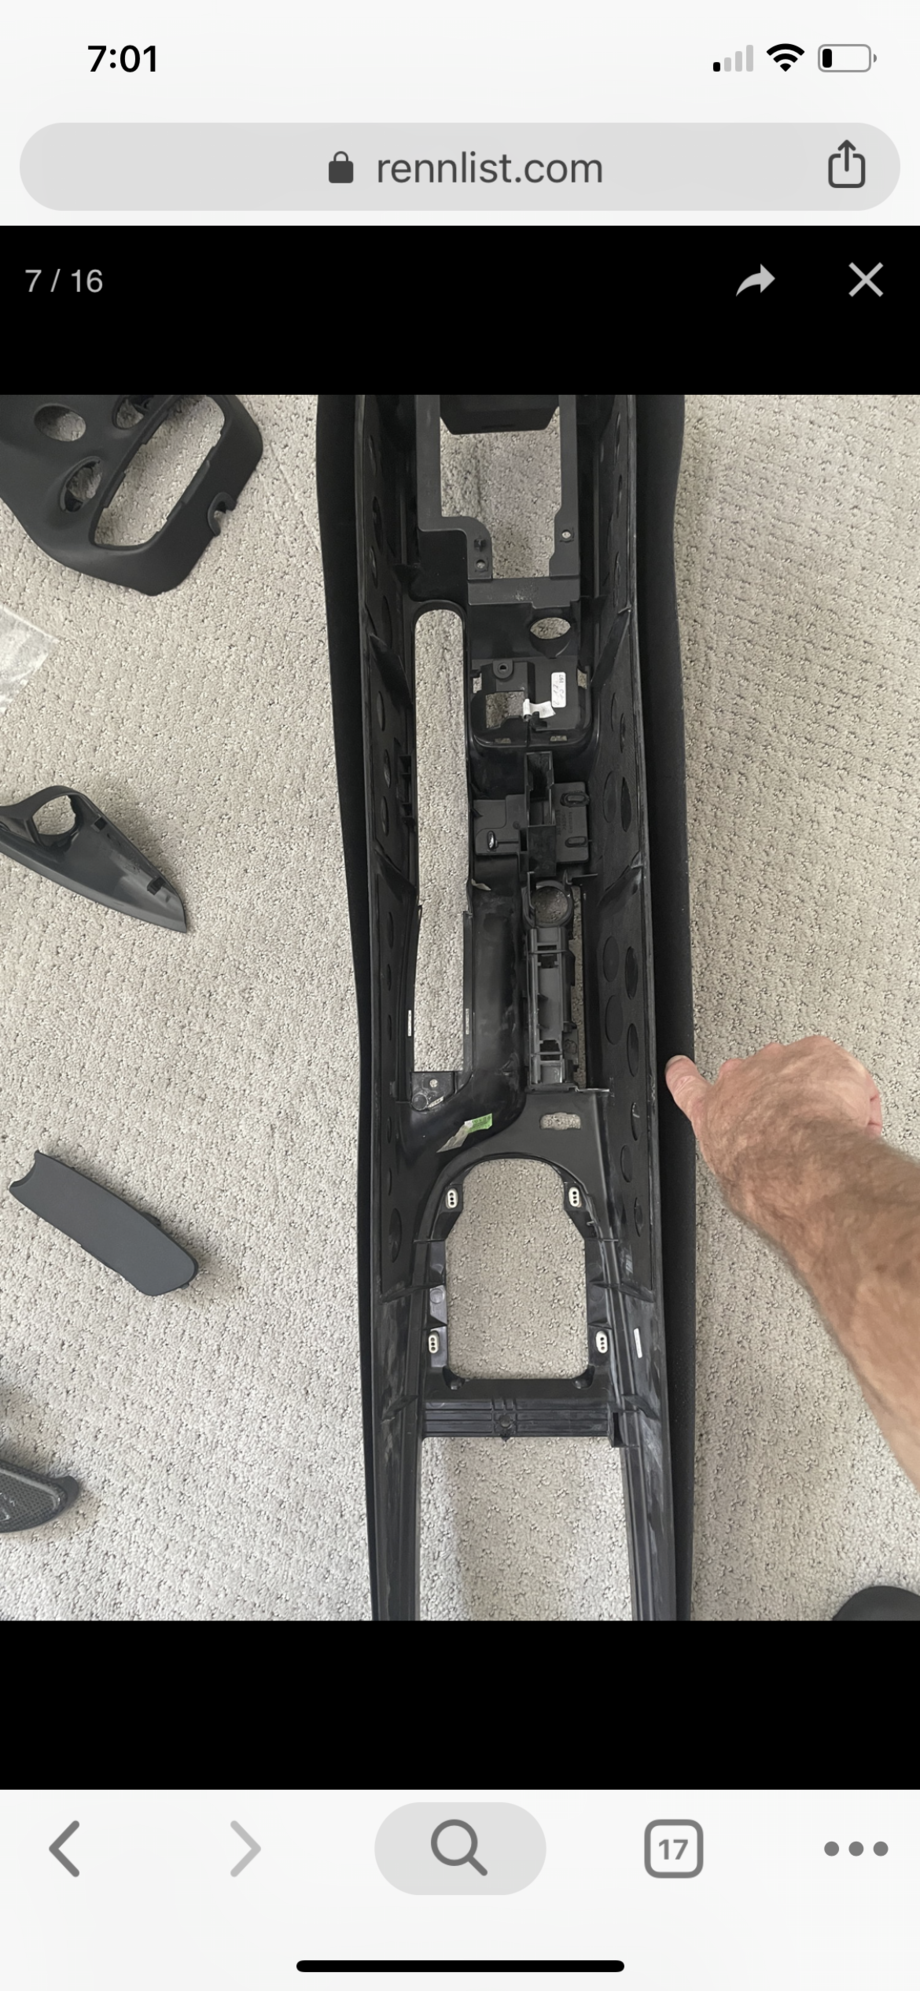
nvm I just realized the OE carbon center is just a crappy wrap.

Last edited by Wonderdan; 12-14-2022 at 10:07 AM.
#74
How did you repair the seatback bolster area? I remember in the walkthrough video you stated that it was completely through the leather and that you believed at the time that it was unrepairable? I'm interested to see how you went about repairing.
#75
It's not repaired yet. I would suspect the cleaning and conditioning Matt did with the seat made them less noticeable. The area(s) look a ton better in these photos than the video.


