When you click on links to various merchants on this site and make a purchase, this can result in this site earning a commission. Affiliate programs and affiliations include, but are not limited to, the eBay Partner Network.
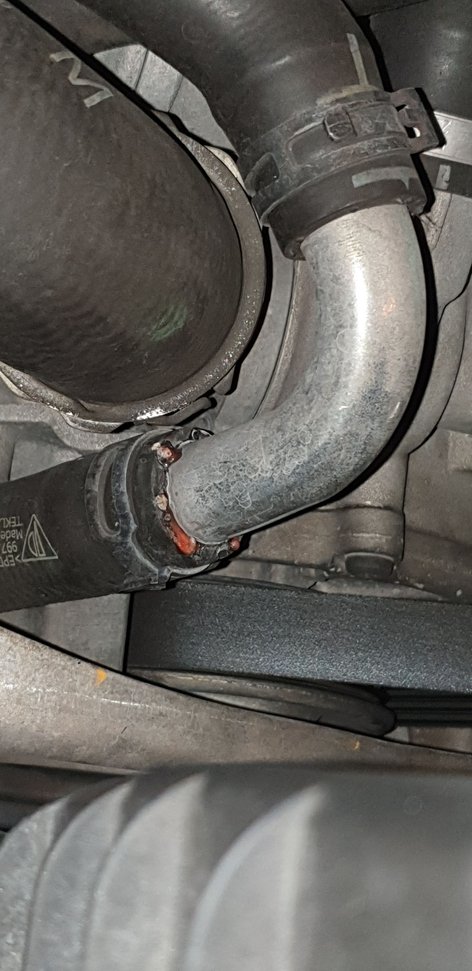
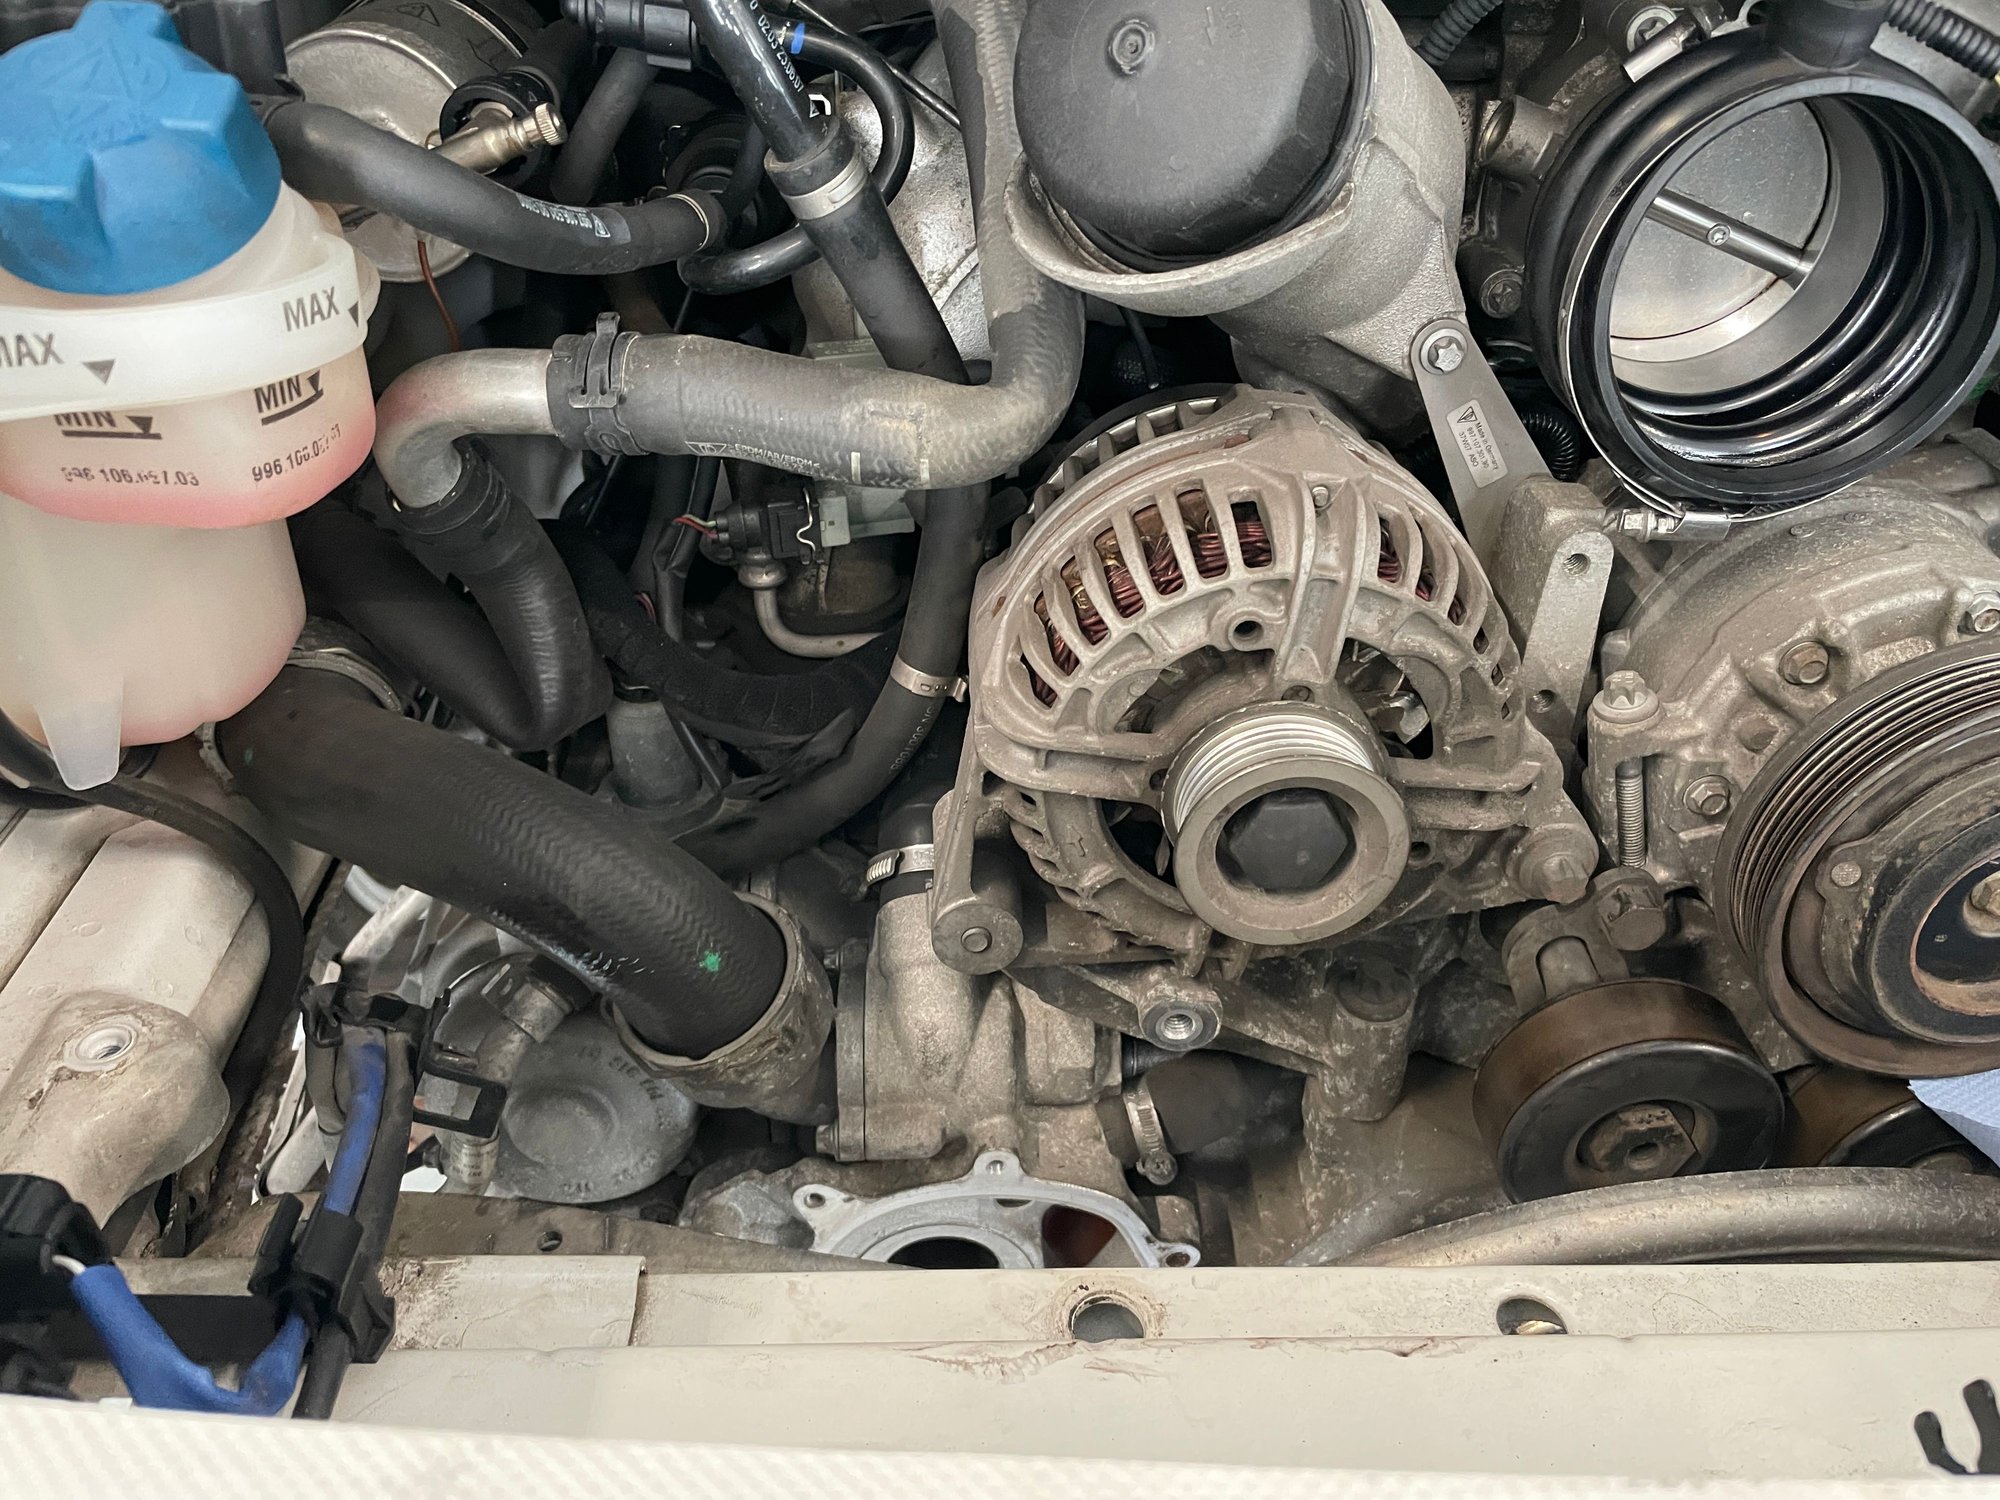
After I thighened the hose clamp on the waterpump the leak almost gone, but after a longer trip yesterday I saw wet coolant on this hose from the waterpump. I guess the plastic hose clamp is not tight. What can I do here? There are no partnumber in the parts list for that hose clamp. The elbow comes attached to the hose partnumber 99710625072
After I thighened the hose clamp on the waterpump the leak almost gone, but after a longer trip yesterday I saw wet coolant on this hose from the waterpump. I guess the plastic hose clamp is not tight. What can I do here? There are no partnumber in the parts list for that hose clamp. The elbow comes attached to the hose partnumber 99710625072
Originally Posted by norwegen911
Thanks. Can I thighten the stock spring hose clamp that has become too lose?
If I need to remove it, can I do this with the hose still connected to the pump?
Don't take this the wrong way, but your one post states your tightened up the hose clamp and the the following post you're asking questions that should have been apparent when you tightened up that hose clamp which is actually not able to be tightened. Our cars use these tension clamps and when they get loose, you have to replace them.
I was suggesting that you go to your local parts store and grab some worm drive hose clamps. However after seeing these two posts, I now want to suggest you take it to a shop and let them do the work or enroll in "You Tube University".
yes I thighten the hose clamp under the waterpump. And then I asked if it is possible to tighten this other type of clamp
ive just never seen this clamp before. And this one is not easy to grab. Its not a partnumber at porsche and the hose come with the elbow already installed with clamp from part store.
this was the biggest leak
Last edited by norwegen911; 08-17-2022 at 12:59 PM.
Ok cool. Now I understand. Apologies for any assumptions on my part. Did you get a new hose yet. If it were me, I'd get a new hose and clamps without a doubt. Even with the hose clamp fully tightened, the hose could be porous allowing fluid to seep through the layers of the hose.
1) Remove the Airbox
2) Remove the rear bumper
3) Remove the alu bumper beam with the heat shield (2x 16mm (?) bolt from the top 2x T25 screw)
4) Remove the left heat shield next to the left muffler (5x 10mm nut/bolt 1x T25 screw)
5) Remove the alu filler piece above where the bumper beam sits (4x 13mm flat nut)
6) Remove the 10 13mm nuts on the sides of the central silencer
7) Remove the left muffler (3x 13mm nut and one exhaust clamp + one vacuum hose)
8) Loosen the two 5mm hex bolts on the central exhaust clamps and remove the central exhaust part
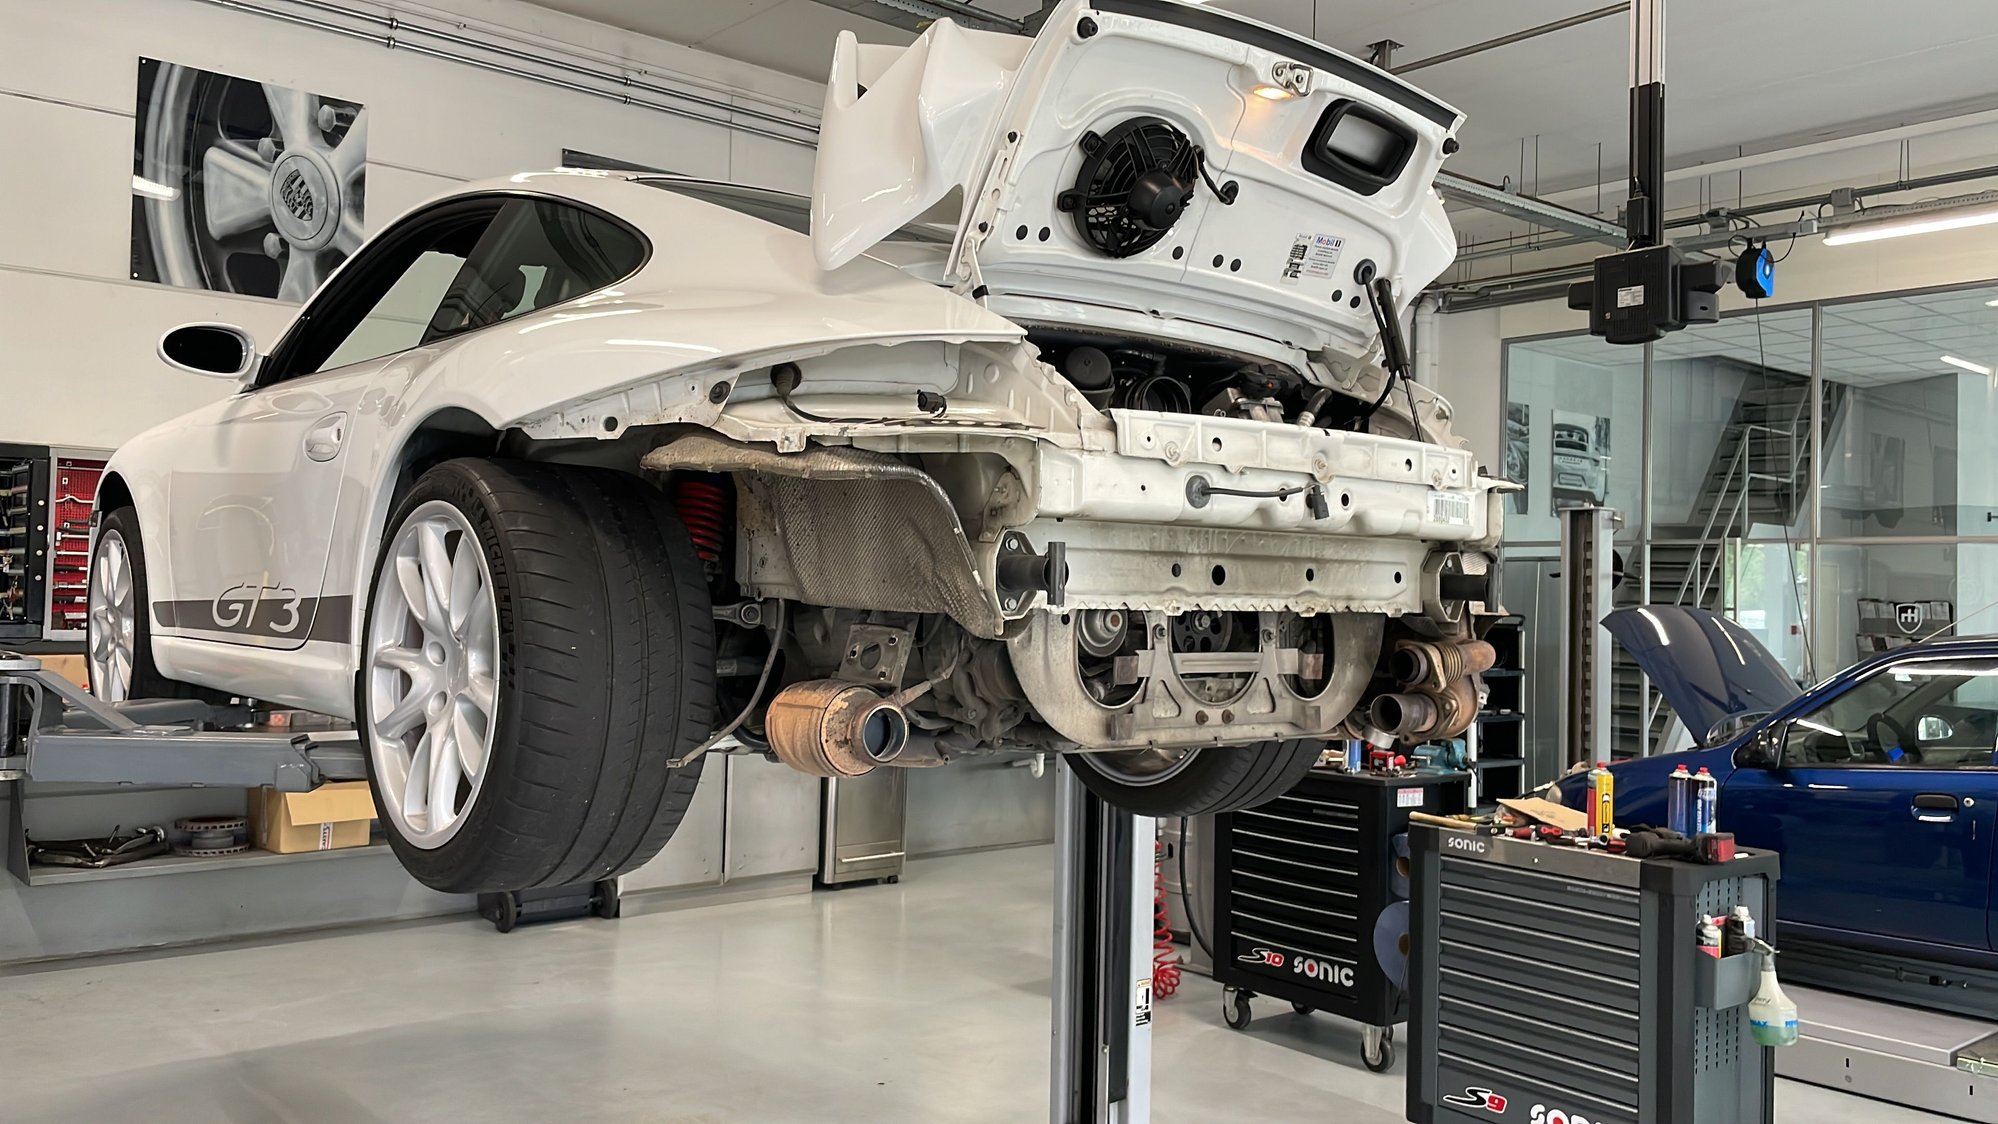
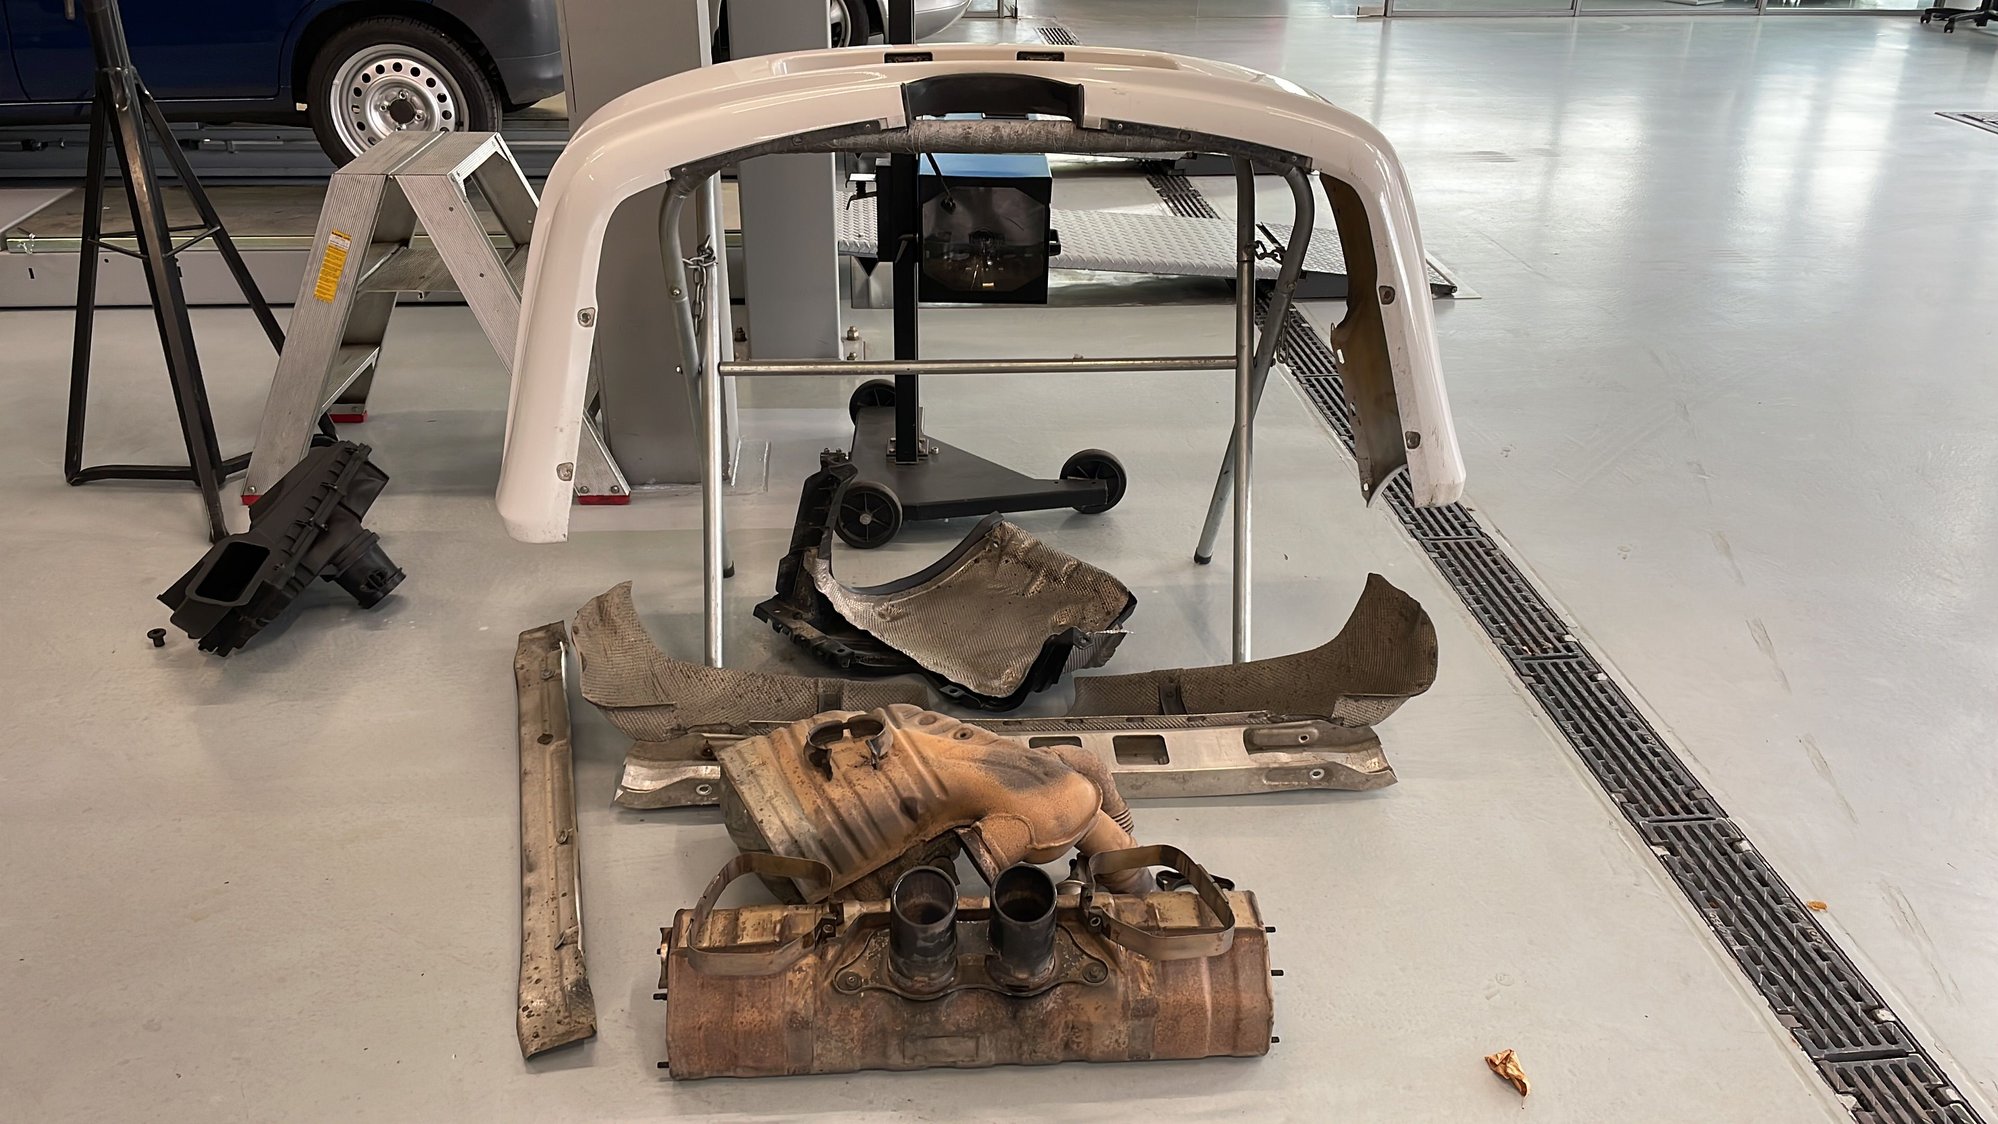
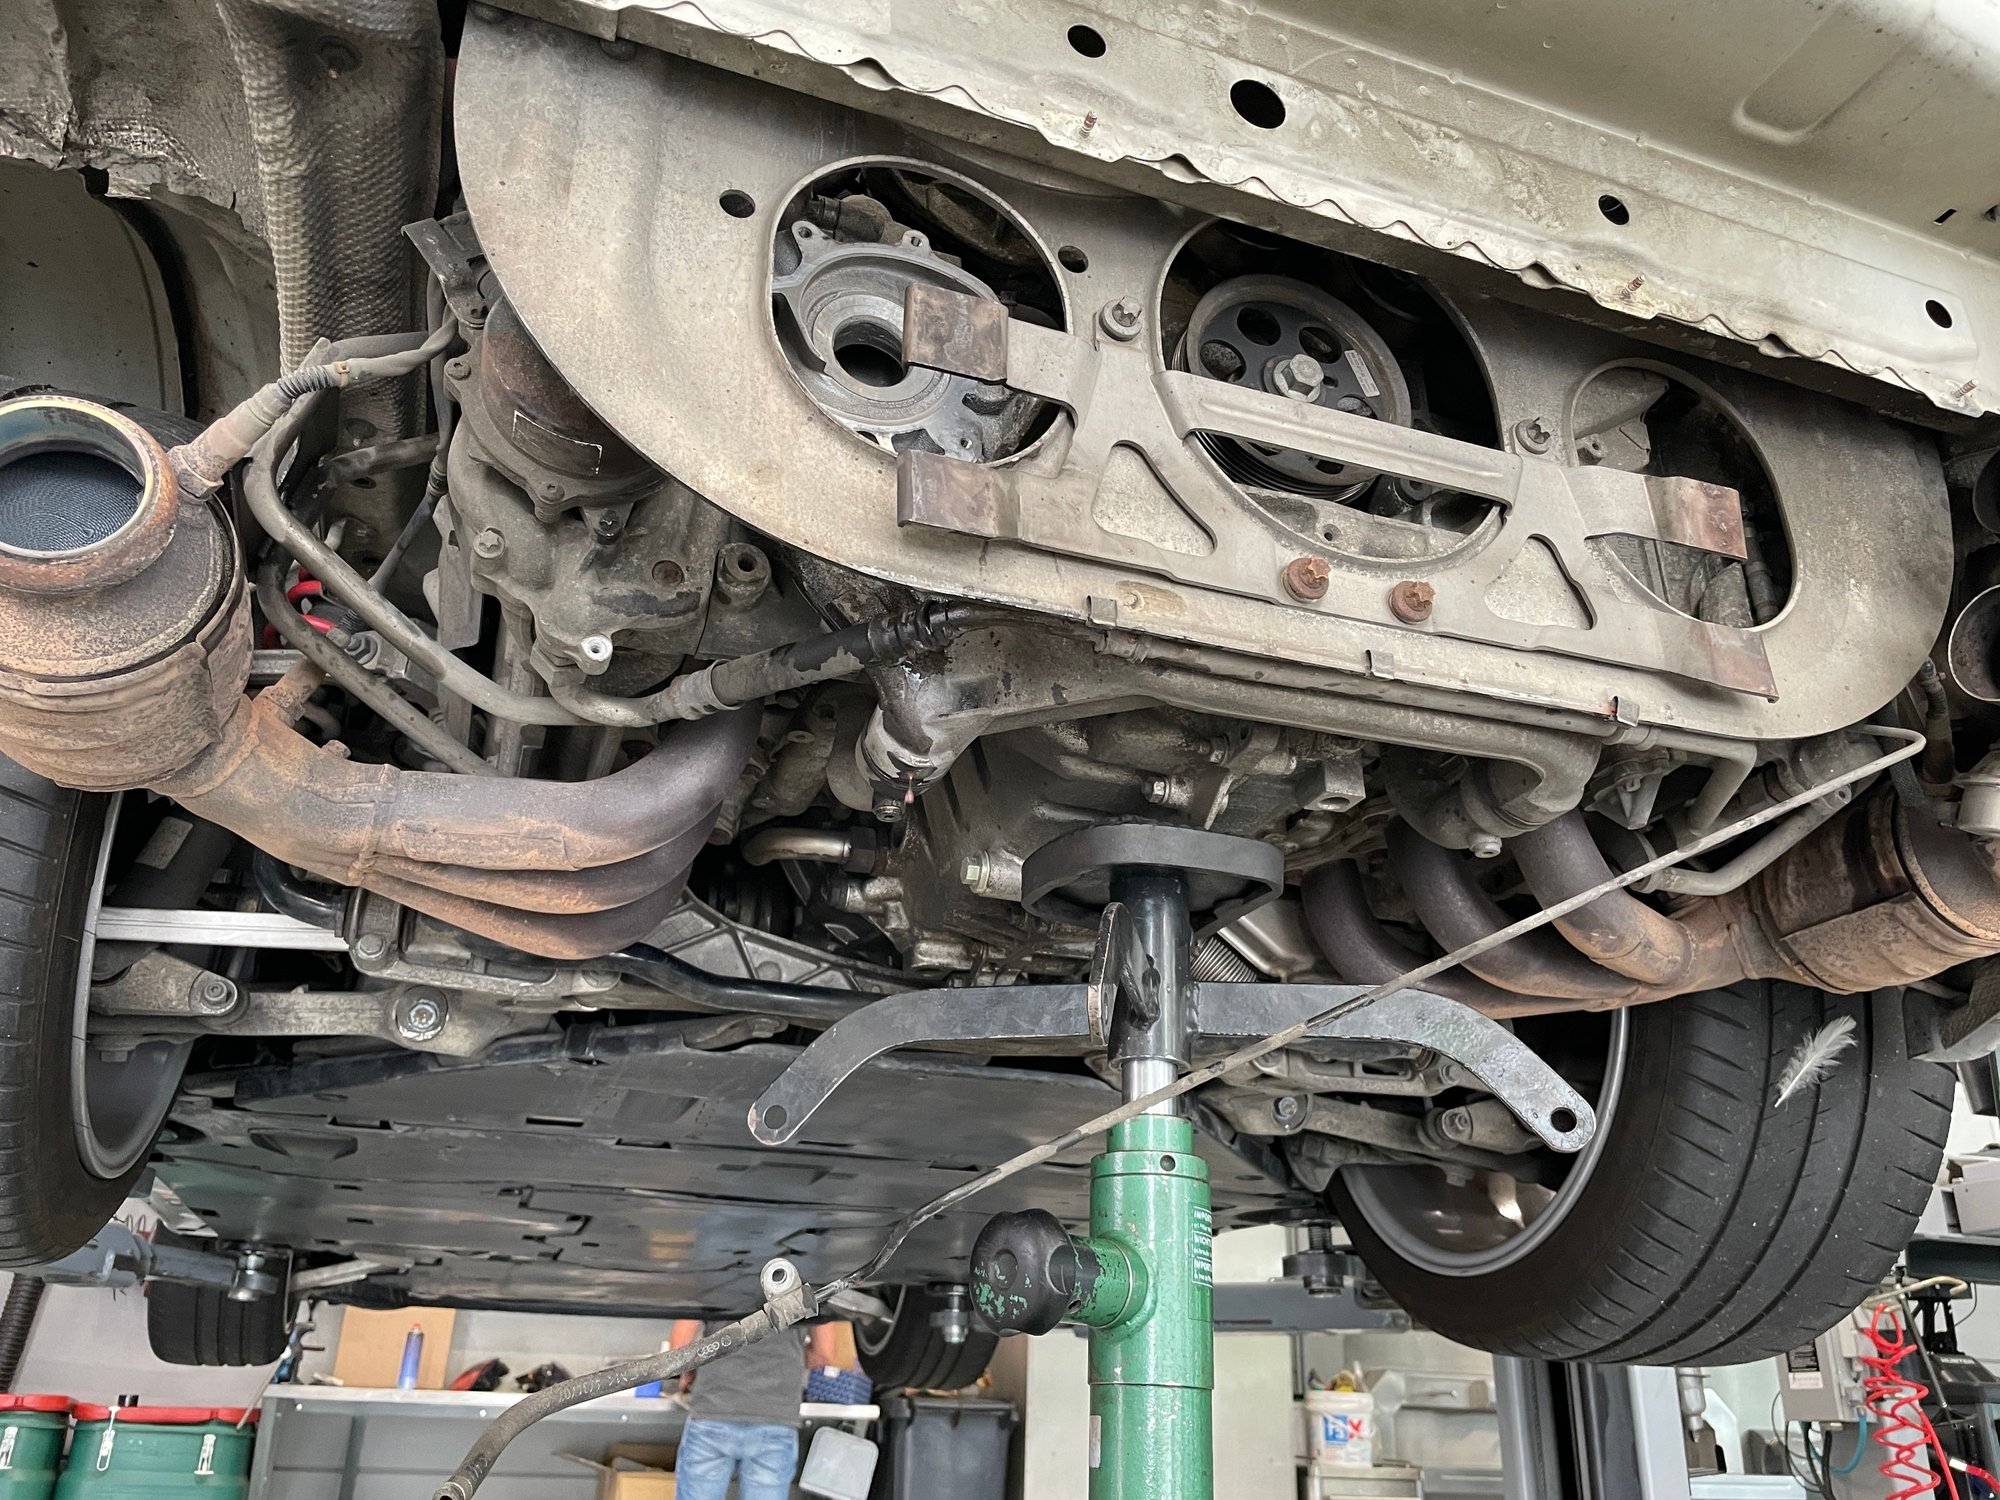
9) Your car should look like the first picture and all the parts in the second picture should be removed
10) Now drain the coolant, I removed the one drain plug on the bottom left side of the engine. Near the waterpump. A few liters of coolant will drain and coolant will rush out once you loosen the cap from the coolant reservoir
11) Use a 15mm socket on a ratchet to loosen the tension on the tensioner for the belt. Remove the belt (make a drawing of the way the belt runs)
12) Remove the lower rubber hose that connects to the waterpump. Only a few glasses worth of coolant will drain from there. Snake the hose up and tuck it away
13) Take your new waterpump gasket and trace the silhouet on a piece of cardboard.
14) Start to remove all the T30 bolts and put them in the cardboard piece you just made, now you are sure all bolts will go back in the hole they came from. Some are longer than others
15) Now the pump should be loose and the heat shield around it should be loose as well (and be in the way)
16) Put a transmission jack under the center of the engine
17) Remove the left motor mount (1x 16mm and 3x 13mm on top)
18) Loosen the lower two and left bolt that holds the engine carrier and exhaust carrier tot the engine (about 1.5 / 2cm)
19) Remove the one bolt that secures the vacuum hose to the engine and unclip the hard line from the engine carrier.
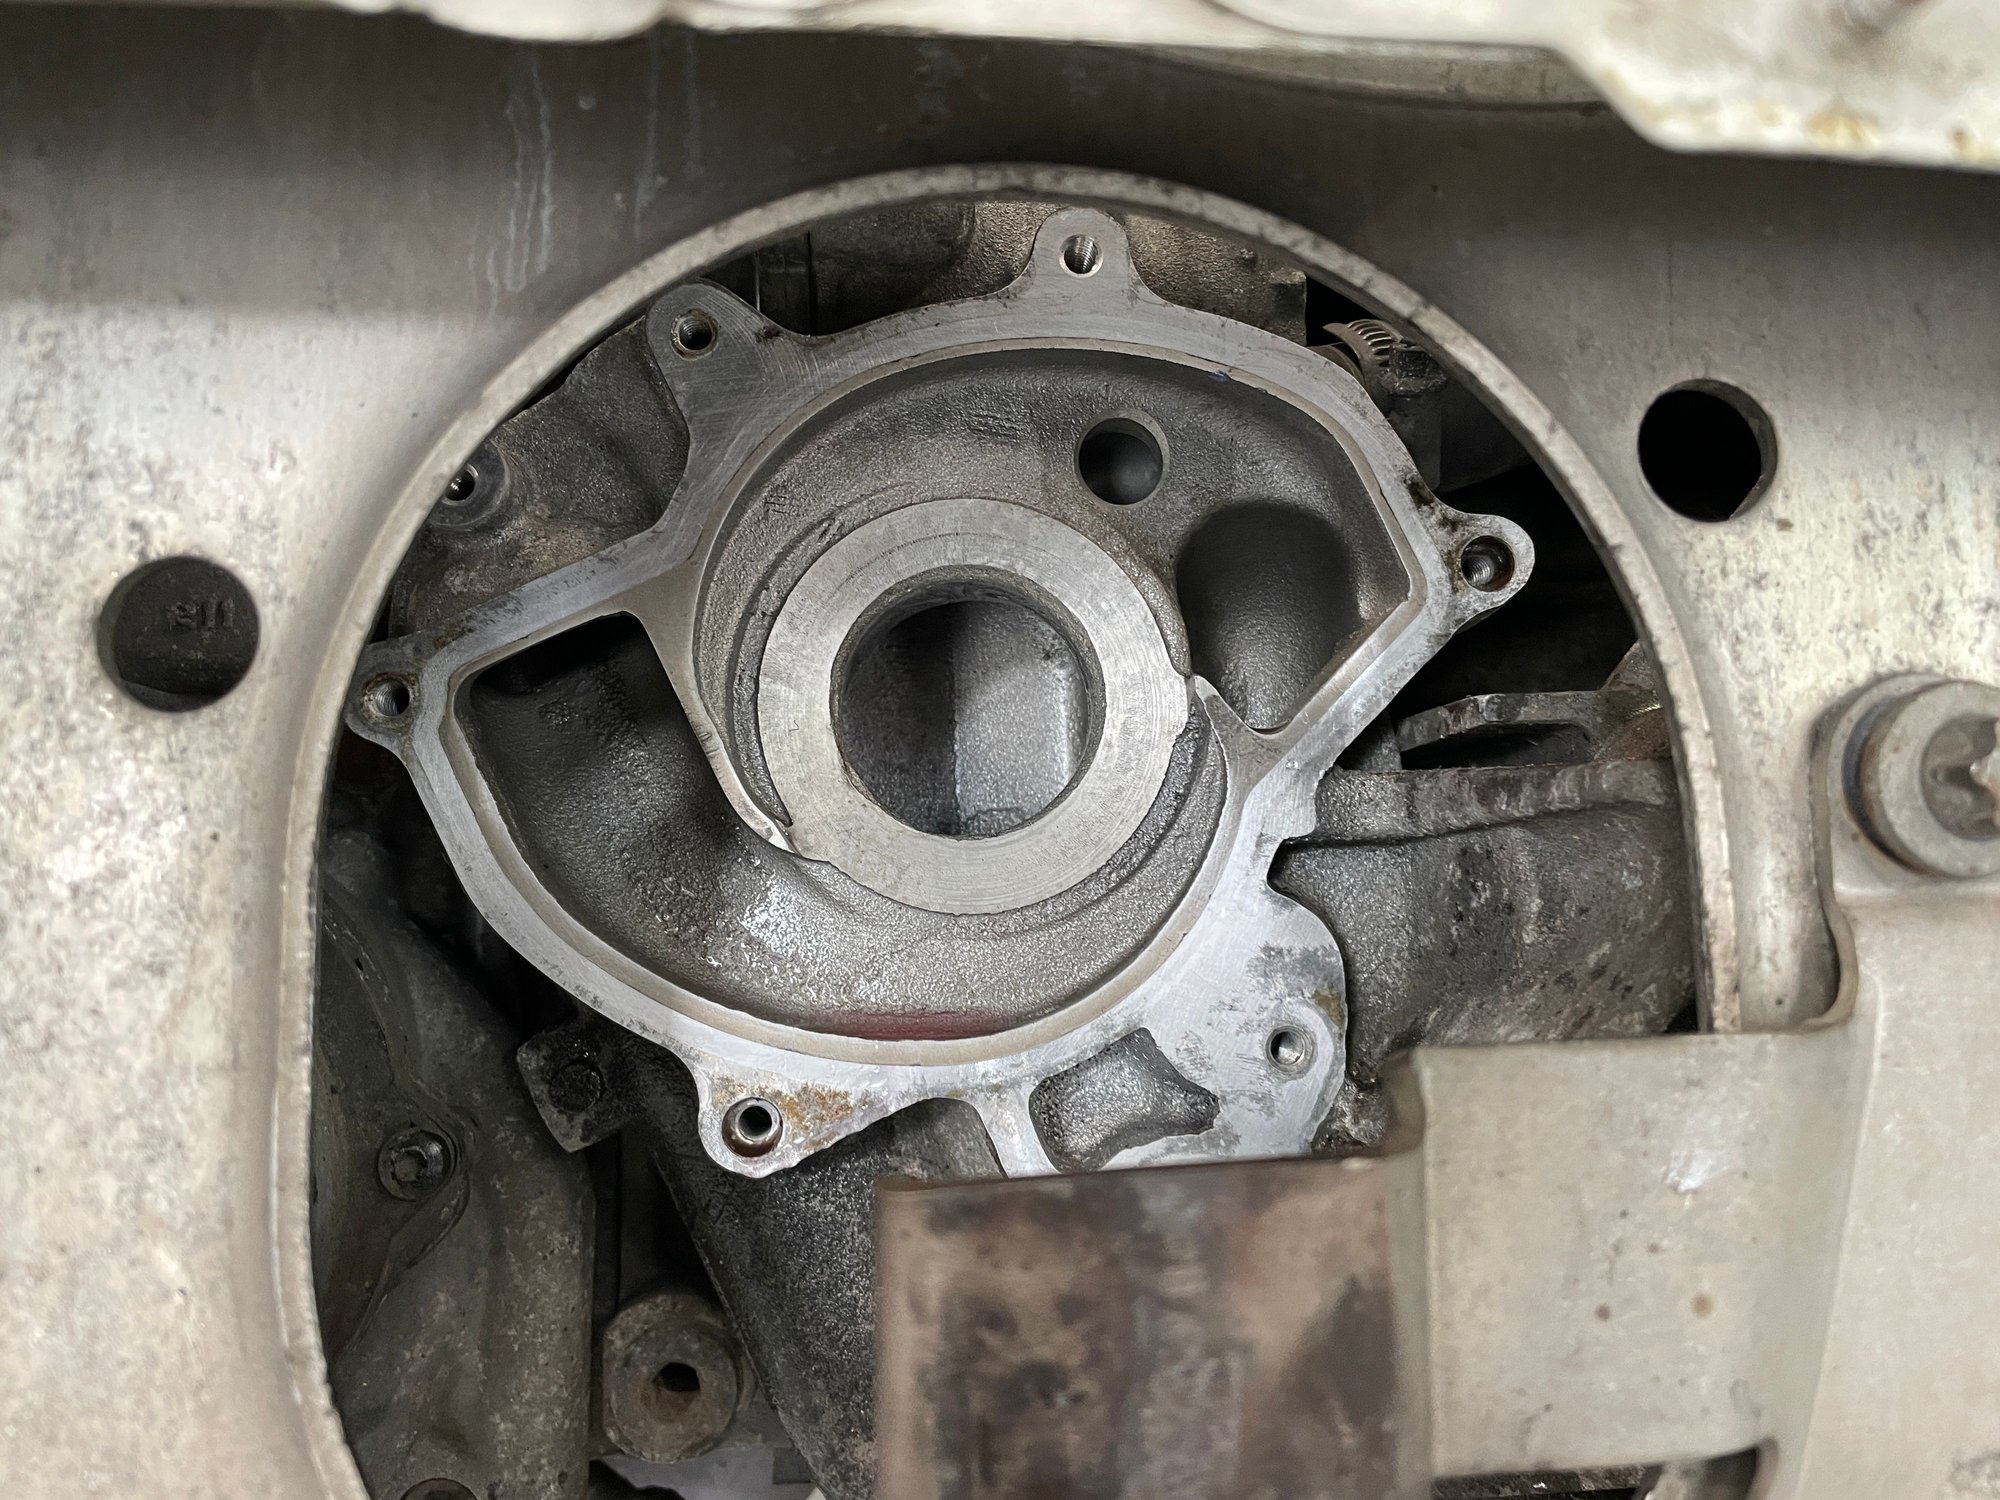
20) Pull the engine carrier plate back as fas as you can and wiggle the pump out to the bottom. (going to the top is not possible, even if you remove the idler. removing the pump is a two person job)
21) Put the new pump in and assemble in reverse order.
22) I filled the coolant back up after pulling the vent tab on the black part of the reservoir up. Everything I removed from the engine went back in plus about half a litre. (that I spilled on the floor)
23) Test for leaks and drive it like you stole it :-)
Parts removed from the car All the removed parts Pump out View from above without pump view from the bottom without pump Up and running again
Oh Boy.....on my list of winter projects. looks like I need to budget a little more time than I anticipated. I also have a new expansion tank to install at the same time. I'm wondering if I should replace the engine mounts since I'm driving a worn out .1 GT3 with 43,000 miles.
Changed the hose and water pump. And everything is now fine! Thanks for help guys
Now I need to sort out the rattle/clunk from left front 30-60 minutes driving. Porsche center cant find the problem after 2 times at workshop. They lubricated swaybar, no better.
1) Remove the Airbox
2) Remove the rear bumper
3) Remove the alu bumper beam with the heat shield (2x 16mm (?) bolt from the top 2x T25 screw)
4) Remove the left heat shield next to the left muffler (5x 10mm nut/bolt 1x T25 screw)
5) Remove the alu filler piece above where the bumper beam sits (4x 13mm flat nut)
6) Remove the 10 13mm nuts on the sides of the central silencer
7) Remove the left muffler (3x 13mm nut and one exhaust clamp + one vacuum hose)
8) Loosen the two 5mm hex bolts on the central exhaust clamps and remove the central exhaust part
9) Your car should look like the first picture and all the parts in the second picture should be removed
10) Now drain the coolant, I removed the one drain plug on the bottom left side of the engine. Near the waterpump. A few liters of coolant will drain and coolant will rush out once you loosen the cap from the coolant reservoir
11) Use a 15mm socket on a ratchet to loosen the tension on the tensioner for the belt. Remove the belt (make a drawing of the way the belt runs)
12) Remove the lower rubber hose that connects to the waterpump. Only a few glasses worth of coolant will drain from there. Snake the hose up and tuck it away
13) Take your new waterpump gasket and trace the silhouet on a piece of cardboard.
14) Start to remove all the T30 bolts and put them in the cardboard piece you just made, now you are sure all bolts will go back in the hole they came from. Some are longer than others
15) Now the pump should be loose and the heat shield around it should be loose as well (and be in the way)
16) Put a transmission jack under the center of the engine
17) Remove the left motor mount (1x 16mm and 3x 13mm on top)
18) Loosen the lower two and left bolt that holds the engine carrier and exhaust carrier tot the engine (about 1.5 / 2cm)
19) Remove the one bolt that secures the vacuum hose to the engine and unclip the hard line from the engine carrier.
20) Pull the engine carrier plate back as fas as you can and wiggle the pump out to the bottom. (going to the top is not possible, even if you remove the idler. removing the pump is a two person job)
21) Put the new pump in and assemble in reverse order.
22) I filled the coolant back up after pulling the vent tab on the black part of the reservoir up. Everything I removed from the engine went back in plus about half a litre. (that I spilled on the floor)
23) Test for leaks and drive it like you stole it :-)
Parts removed from the car All the removed parts Pump out View from above without pump view from the bottom without pump Up and running again
Thanks for posting......I followed these instructions and was able to replace my water pump, thermostat, serpentine belt, and expansion tank. I bought the water pump, thermostat, gaskets, serpentine belt, a gallon of Porsche coolant, and the expansion tank from a fellow Rennlister. Below are some tips and the "hiccups" I ran into.
The thermostat was wrong and the belt was about 1/2" too short. I tried to get a belt from Advanced Auto and it was the exact same belt I got from the Rennlister. No big deal, I went to the dealer and ordered the correct parts.
I removed the engine carrier all together for better access. I got the bolts out but ended up removing the center delete to reinstall the carrier bolts which get tightened to 48 ftlbs. This spec was hard to find (thanks Bxstr). I was able to remove the carrier without removing the center delete piping. But it wasn't possible to get it all back together without removing the center delete. I should have just done that from the beginning. I had never removed any part of the exhaust so I was intimidated but it was surprising easy.
The water pump was cut and dry. Access to the thermostat is very tight. I needed 1/4" ratchet, mid length extension, as well as a universal socket adapter. I used a plastic 1 1/4" plastic plumbing tailpiece to get the actual thermostat out of the housing.
I installed the serpentine belt before I had installed the engine carrier but had to take the belt back off 1 pully to get the bolts to line up for the engine carrier. I definitely recommend routing the belt while the carrier is off. It is tight in there.
Another tip is to remove the fuel filter to get the expansion tank out. I spent a lot of time trying to work around it and it sucked. Piece of cake, once I removed the filter.
I bought a coolant filler tool from the local Harbor Freight. I usually don't buy anything from them (except for a floor jack) but this seemed like something I would only use once every 10 years so why not. The thing came with 5 different adapters for the coolant tank, none of which fit. I returned it and ordered one from Pelican Parts that was about the same price, much higher quality, and fit the car. Worked like a charm. I mixed a gallon of coolant and a gallon of distilled water and was about a half a gallon short so I recommend have 2 gallons of coolant and 2 gallons of distilled water on hand. BTW, when I came up short on coolant I went to Advanced Auto and got a gallon of 50/50 premixed coolant for $24. Since it was "universal" I had second thoughts about using it so I decided to go to Porsche and get the real stuff instead. It was $45 and full strength so once I mixed it with the water it was basically the same price as the premixed from Advanced Auto (unlike the serpentine belt that was $20 from AA and $85 from Porsche). Ha!
Thanks again DLK for posting these instructions.
Last edited by my first 911; 02-12-2023 at 09:20 AM.

 08-14-2022, 04:57 PM