When you click on links to various merchants on this site and make a purchase, this can result in this site earning a commission. Affiliate programs and affiliations include, but are not limited to, the eBay Partner Network.
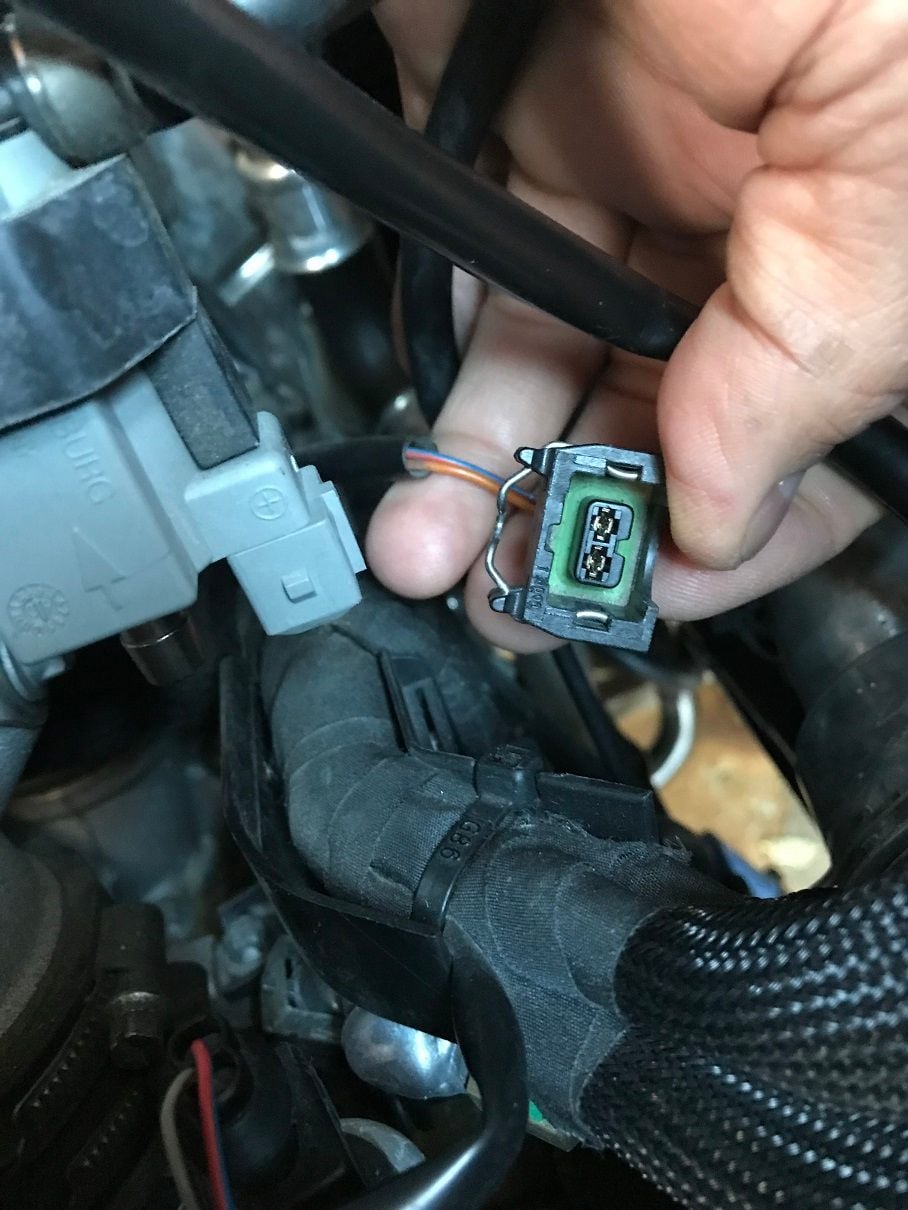
.. and here is a picture of the connector on the unit, when it STILL has the empty male-end connector still inserted in it...
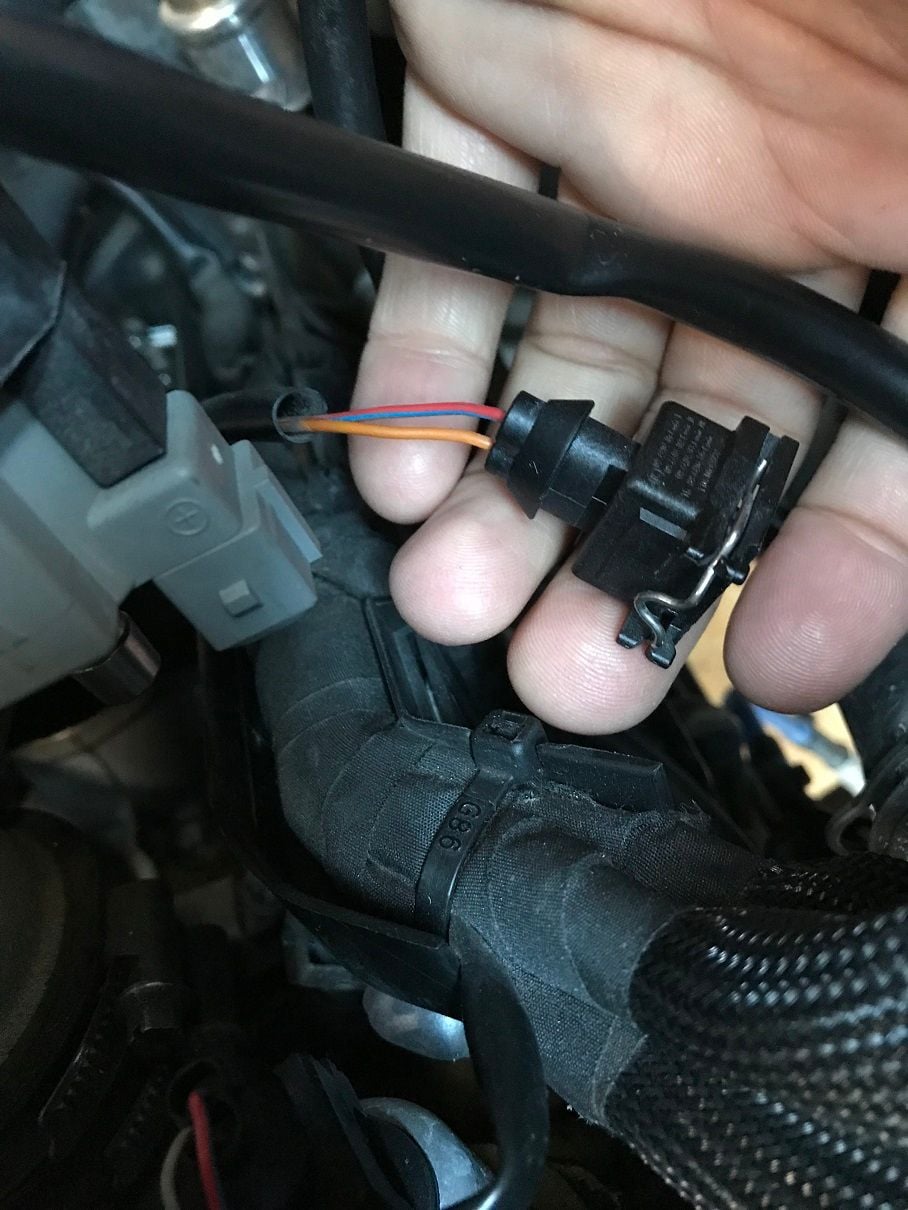
And finally, this is a pic of the end connector with the plastic insert removed....
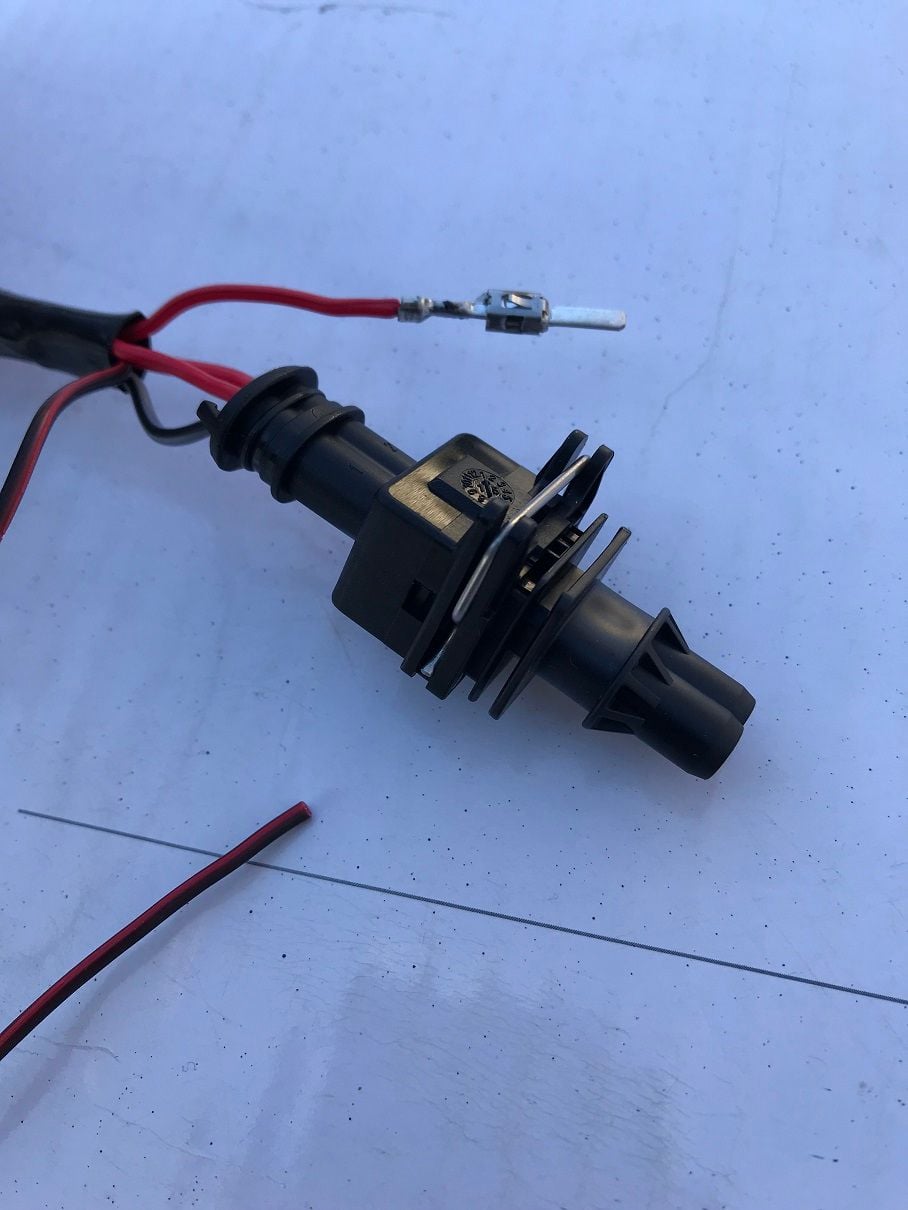
And then the next step is to determine which side the red/blue factory pin-out is on (left or right), and then utilize the empty male-end connector that I pulled out of your female connector,... and insert your alligator blade connector (w/ solid red wire) into it.... ensuring that it aligns with the original factory red/blue wire.
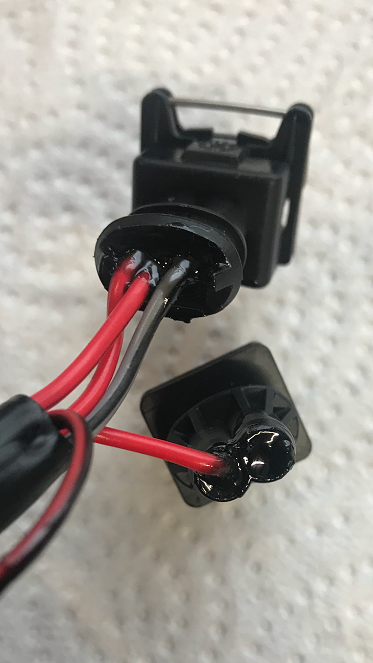
I'll let everyone know how it works out when finished. I think I will also use some liquid electrical tape to seal up the opening(s) where wires go into the plastic connectors,... ensuring no corrosion builds as water & road-dust-etc gets up in there after years of use.
The red wire with male pin needs to make contact with the red/blue wire in the original PSE connector.
Once you know the position, insert it in the male connector.
We cannot pre-wire the male connector because sometimes the red/blue wire is on the left side and sometimes on the right side of the original PSE connector.
I have been selling this PSE remote for many years and never heard of any problems due to corrosion.
I live on the water (salt & brakish), and come from a marine background as well. Having re-wired old boats, and installed marine sound systems,.. we get lots of corrosion around here (although a climate controlled garage does help).
Just being safe, and planning for many years of trouble-free operation to come.
Can't wait to try this out!! ... hoping it really calms down my Sharkwerks for those early morning warm-up starts with neighbors close by.
How come your unit had the male connector disconnected (with the exposed red wire)? As the pics/instructions show, it's a pretty quick installation shipped and there shouldn't have been any issues. It's an excellent setup-the only issue I have is after a few years the Carnewel sticker on the box curled up with heat
Otherwise flawless . Benefits include quiet cold crank so the neighbors don't freak out, quiet throughout the rev range when you want to listen to the drivetrain, brakes, suspension, tires, etc
How come your unit had the male connector disconnected (with the exposed red wire)? As the pics/instructions show, it's a pretty quick installation shipped and there shouldn't have been any issues.
Because, since there was no need for polarity on the factory vacuum solenoid,... Porsche sometimes had the red/blue wire from factory on the left side of the factory connector,.. and sometimes it was on the right.
Gert could not know for each individual car,... so he has to give the product to us like this, and have OWNERS determine which side the red/blue wire is on,.. and match it up.
Gert said the same thing above,.. just with a lot less words.
I guess when you got yours (years ago), you were just lucky that Gert had put it on the correct side for your car.
=Steve
Yeah, I guess I was lucky and it plugged right in!
Enjoy it, and remember to get a good ground point-
Got a good ground point - there is a nice little metal tab sticking up within 6 inches of the vacuum solenoid (over on the inner fender). It already has a hole in it perfectly ready for a lug nut to secure the ground. Just had to dremel a little paint off to make good connection.
Product works Perfectly!!
and here's a pic of the Liquid Electrical tape limited to just out near the opening where the wire enters each housing. Love that stuff. Just a drop & then hold the unit upside down & the liquid stays out near the opening...
Awesome 240Z. I had a '72 that I restored and I sold it to a real wheeler dealer. The following week in Autotrader I learned the buyer had an eclectic lot. Ferraris, Porsches and Corvettes, some really eccentric stuff and my 240Z. I still miss mine. JBO
Josh, you and I have the love for the same cars. I was trying to highlight Gert’s BMW car covers.
I had a ‘71 when I was young, early in marriage, ~30 years ago. I sold it since I had no room or money. When I came across this 1-owner Z a few years ago I bought her. I spent a new Boxter S worth of money on mods and restoration and here we are!
Awesome. It looks great, sounds great and they are easy to work on. Did you see the current EVO? There's a UK based firm that builds early Z cars using the Singer model. I still miss mine. JBO


 03-28-2019, 05:35 AM