

Damned AC buttons-- a fix???
 07-13-2017, 03:11 PM
#301

Bionic-is the dirt on that rag all from cleaning two buttons?
 07-16-2017, 07:12 PM
#302
UPDATE: So I purchased the buttons from Climarepair in the first batch, and was pretty happy with the results. Although not perfect, they were much better than the pealing OEM and from the drivers seat, I couldn't see the imperfections.
Well, six months later, one of the ***** stops working (stuck). I email John, and he sends out the new V2 switches right away. The finish is much nicer (but I never had a real problem with that-- and frankly didn't even notice the imperfections until others complained!).
Another interesting thing. V1 was noticeably smaller than V2 and OEMs. Not a lot , but noticeable.
I made the swap, and all is working. Looks great.
I haven't had any problems with the climarepair guys, they have been quick to respond to me. Personally, I like the idea that they came up with a solution that didn't require me to drive the car while disassembled or wait for a repair on the switches to drive the car. And I do love that they are a small business solving an annoying problem many of us had. Honestly ours is a fraction of a small market-- that they are addressing.
For those who didn't have the greatest experience, I expect that it is something they learned from (my issue came up much later than the others')-- like I said, they were great to me.
Note-- I am not an employee, friend, or in any way associated with them. I didn't get free buttons for posting. That's just my honest experience.
I do find it fascinating that there are 20 pages to this thread!!!
Last edited by ric-ko; 07-17-2017 at 04:31 PM. Reason: type-o
07-17-2017, 04:24 PM
#303
Nordschleife Master
no affiliation, but from the photos the V2 buttons look fine.
UPDATE: So I purchased the buttons from Climarepair in the first batch, and was pretty happy with the results. Although not perfect, they were much better than the pealing OEM and from the drivers seat, I couldn't see the imperfections.
Well, six months later, one of the ***** stops working (stuck). I email John, and he sends out the new V2 switches right away. The finish is much nicer (but I never had a real problem with that-- and frankly didn't even notice the imperfections until others complained!).
Another interesting thing. V1 was noticeably smaller than V2 and OEMs. Not a lot , but noticeable.
I made the swap, and all is working. Looks great.
I haven't had any problems with the climarepair guys, they have been quick to respond to me. Personally, I like the idea that they came up with a solution that didn't require me to drive the car while disassembled or wait for a repair on the switches to drive the car. And I do love that they are a small business solving an annoying problem many of us had. Honestly ours is a fraction of a small market-- that they are addressing.
For those who didn't have the greatest experience, I expect that it is something they learned from (my issue came up much later than the others')-- like I said, they were great to me.
Note-- I am not an employee, friend, or in any way associated with them. I didn't get free buttons for posting. That's just my honest my experience.
I do find it fascinating that there are 20 pages to this thread!!!
07-17-2017, 08:37 PM
#304
That's the trick! They look fine in the picture, then people post unstaged pics of the garbage they received, then seller accuses them of being the competition, then YOU get garbage, then seller says "you should have looked more closely at the photos" then seller admits he sent you "preproduction" garbage.
07-18-2017, 01:18 AM
#305
Nordschleife Master
That's the trick! They look fine in the picture, then people post unstaged pics of the garbage they received, then seller accuses them of being the competition, then YOU get garbage, then seller says "you should have looked more closely at the photos" then seller admits he sent you "preproduction" garbage.
07-18-2017, 11:35 AM
#306
I didn't take V2 garbage. Turned it over to my bank. Seller wouldn't put his money where his mouth is when I suggested he send me another set with a return shipping label and a refund guarantee in the event I got another "preproduction" set. Fool me once . . .
07-25-2017, 12:36 AM
#307

 07-25-2017, 04:43 PM
#308
Advanced
Time to share my story. I was one of the "early adopters" of the V1 switches, of course they turned out horrible. Was planning on opening a paypal dispute but had to leave on a last minute extended business trip. By the time I got back, I had forgotten about it.
I reached out recently, after finding out that they had been offering V2 replacements for customers who bought the V1 switches. I figured it was probably too late and a lost cause, but decided to give it a try anyway. To be fair they got back to me within a reasonable time, but said because it was over 6 months, they would send me the V2s, but I would have to pay the shipping & handling ($30). At this point it felt like I was being fed misleading information, where did the $30 come from? Their site clearly states free shipping, even on checkout, the most expensive rate was "Worldwide Flat Rate" at $5.99.
I decided not to take them up on their offer and chalk it up as a loss. I figured I'd try to fix the switches myself. Surprisingly they came out much better than I expected. Here are the steps I took in case anyone else wanted to DIY themselves:
1. Remove the old switches and with some rags, qtips and rubbing alcohol, strip away all of the rubber paint.
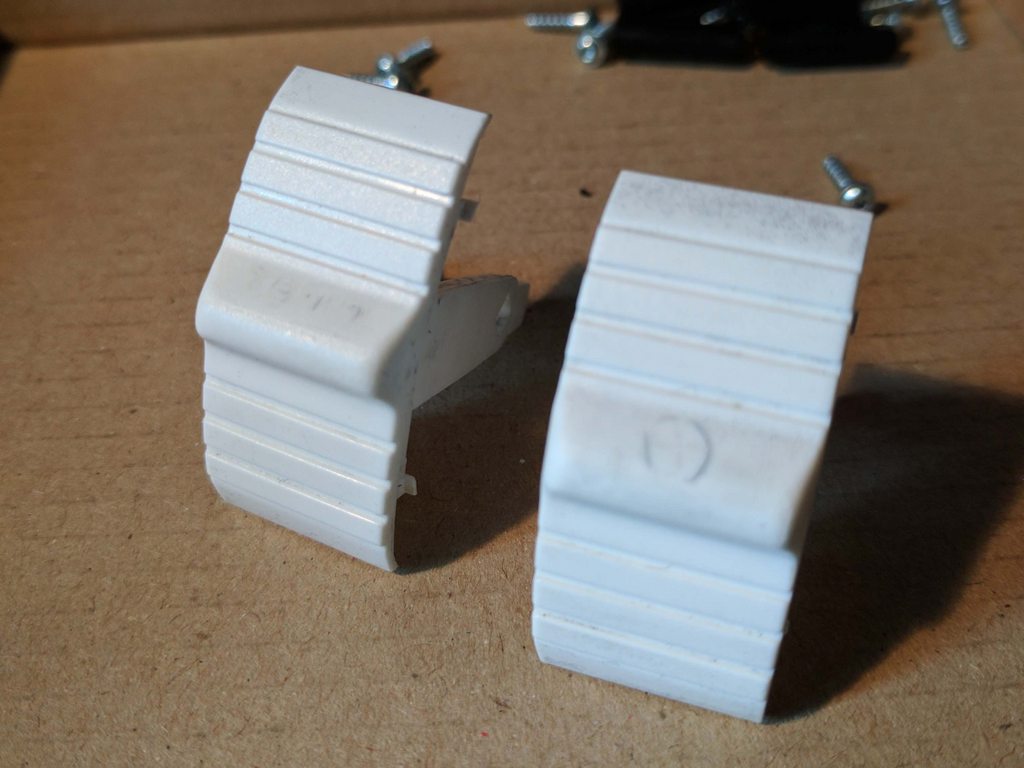
2. I decided against trying to preserve the glowing symbol/text on the switches as I didn't have any stencils or the patience to tape them off.
3. Pick up a can of Krylon Flat Black spray paint and apply a couple coats on the switches, making sure to get into the crevices.
4. Use a small light to shine through from behind to make sure the switches are evenly coated and there are no spots where the light can leak through. If there are, simply stick some black tape behind the switches to cover up the spots.
This is what the refinished switches look like compared to the awful Climarepair switches.
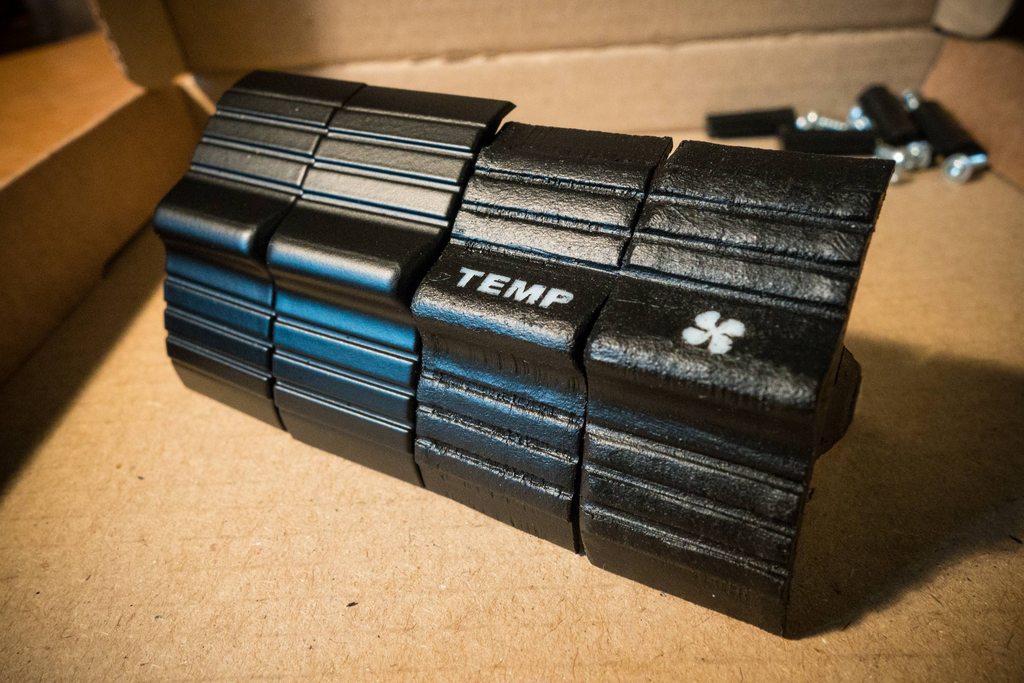
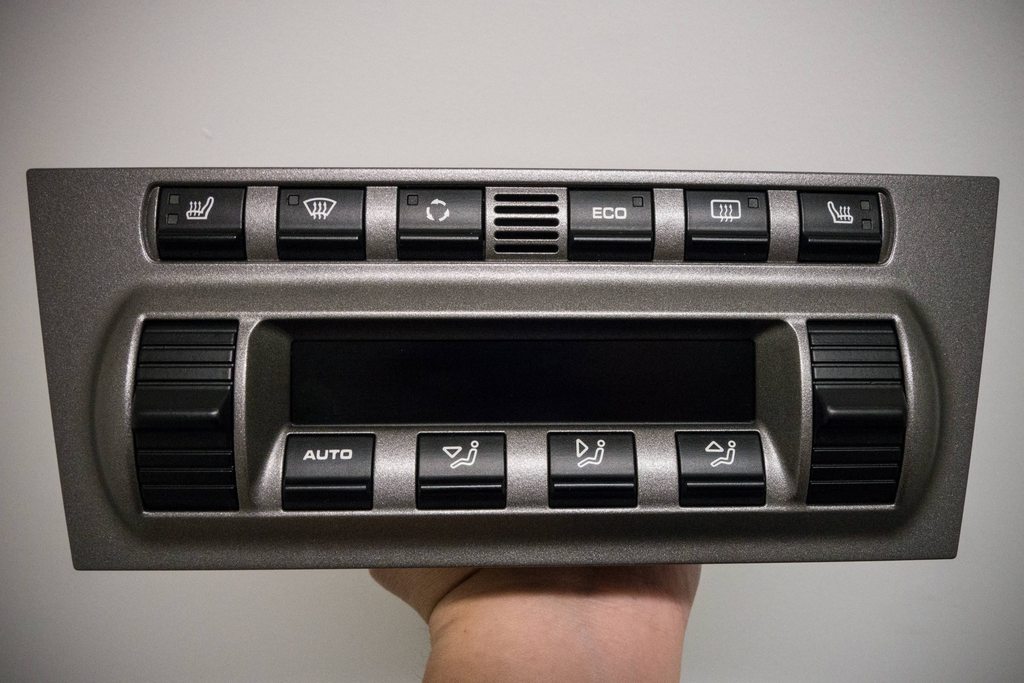
Heres another pic of the refinished switches reinstalled back into the climate control module. The flat black finish was practically identical to the other switches. Very happy with the result.
I reached out recently, after finding out that they had been offering V2 replacements for customers who bought the V1 switches. I figured it was probably too late and a lost cause, but decided to give it a try anyway. To be fair they got back to me within a reasonable time, but said because it was over 6 months, they would send me the V2s, but I would have to pay the shipping & handling ($30). At this point it felt like I was being fed misleading information, where did the $30 come from? Their site clearly states free shipping, even on checkout, the most expensive rate was "Worldwide Flat Rate" at $5.99.
I decided not to take them up on their offer and chalk it up as a loss. I figured I'd try to fix the switches myself. Surprisingly they came out much better than I expected. Here are the steps I took in case anyone else wanted to DIY themselves:
1. Remove the old switches and with some rags, qtips and rubbing alcohol, strip away all of the rubber paint.

2. I decided against trying to preserve the glowing symbol/text on the switches as I didn't have any stencils or the patience to tape them off.
3. Pick up a can of Krylon Flat Black spray paint and apply a couple coats on the switches, making sure to get into the crevices.
4. Use a small light to shine through from behind to make sure the switches are evenly coated and there are no spots where the light can leak through. If there are, simply stick some black tape behind the switches to cover up the spots.
This is what the refinished switches look like compared to the awful Climarepair switches.

Heres another pic of the refinished switches reinstalled back into the climate control module. The flat black finish was practically identical to the other switches. Very happy with the result.
 07-26-2017, 08:58 AM
#310
Nicely done. Amazing any company would ship those V1. They are worse than prototypes...
Time to share my story. I was one of the "early adopters" of the V1 switches, of course they turned out horrible. Was planning on opening a paypal dispute but had to leave on a last minute extended business trip. By the time I got back, I had forgotten about it.
I reached out recently, after finding out that they had been offering V2 replacements for customers who bought the V1 switches. I figured it was probably too late and a lost cause, but decided to give it a try anyway. To be fair they got back to me within a reasonable time, but said because it was over 6 months, they would send me the V2s, but I would have to pay the shipping & handling ($30). At this point it felt like I was being fed misleading information, where did the $30 come from? Their site clearly states free shipping, even on checkout, the most expensive rate was "Worldwide Flat Rate" at $5.99.
I decided not to take them up on their offer and chalk it up as a loss. I figured I'd try to fix the switches myself. Surprisingly they came out much better than I expected. Here are the steps I took in case anyone else wanted to DIY themselves:
1. Remove the old switches and with some rags, qtips and rubbing alcohol, strip away all of the rubber paint.

2. I decided against trying to preserve the glowing symbol/text on the switches as I didn't have any stencils or the patience to tape them off.
3. Pick up a can of Krylon Flat Black spray paint and apply a couple coats on the switches, making sure to get into the crevices.
4. Use a small light to shine through from behind to make sure the switches are evenly coated and there are no spots where the light can leak through. If there are, simply stick some black tape behind the switches to cover up the spots.
This is what the refinished switches look like compared to the awful Climarepair switches.

Heres another pic of the refinished switches reinstalled back into the climate control module. The flat black finish was practically identical to the other switches. Very happy with the result.

I reached out recently, after finding out that they had been offering V2 replacements for customers who bought the V1 switches. I figured it was probably too late and a lost cause, but decided to give it a try anyway. To be fair they got back to me within a reasonable time, but said because it was over 6 months, they would send me the V2s, but I would have to pay the shipping & handling ($30). At this point it felt like I was being fed misleading information, where did the $30 come from? Their site clearly states free shipping, even on checkout, the most expensive rate was "Worldwide Flat Rate" at $5.99.
I decided not to take them up on their offer and chalk it up as a loss. I figured I'd try to fix the switches myself. Surprisingly they came out much better than I expected. Here are the steps I took in case anyone else wanted to DIY themselves:
1. Remove the old switches and with some rags, qtips and rubbing alcohol, strip away all of the rubber paint.
2. I decided against trying to preserve the glowing symbol/text on the switches as I didn't have any stencils or the patience to tape them off.
3. Pick up a can of Krylon Flat Black spray paint and apply a couple coats on the switches, making sure to get into the crevices.
4. Use a small light to shine through from behind to make sure the switches are evenly coated and there are no spots where the light can leak through. If there are, simply stick some black tape behind the switches to cover up the spots.
This is what the refinished switches look like compared to the awful Climarepair switches.
Heres another pic of the refinished switches reinstalled back into the climate control module. The flat black finish was practically identical to the other switches. Very happy with the result.
07-26-2017, 01:51 PM
#311
Advanced

Join Date: May 2017
Location: Santa Cruz Mountains, California
Posts: 68
Likes: 0
Received 0 Likes
on
0 Posts
 07-26-2017, 03:51 PM
#313
Advanced
1. Removing the climate control unit from the dash:
2. Removing the front panel from the climate control unit:
3. Removing the switches from the front panel:
4. Reinstalling the switches back into the front panel:
In order to complete the job you will need the following Torx screwdrivers: T25, T20 and T6
Good luck!
07-26-2017, 04:07 PM
#315
This is what the refinished switches look like compared to the awful Climarepair switches.
Heres another pic of the refinished switches reinstalled back into the climate control module. The flat black finish was practically identical to the other switches. Very happy with the result.
Heres another pic of the refinished switches reinstalled back into the climate control module. The flat black finish was practically identical to the other switches. Very happy with the result.
Thanks for posting.