

A little weekend maintenance..
 09-15-2014, 12:21 AM
#1
Rennlist Member
Thread Starter
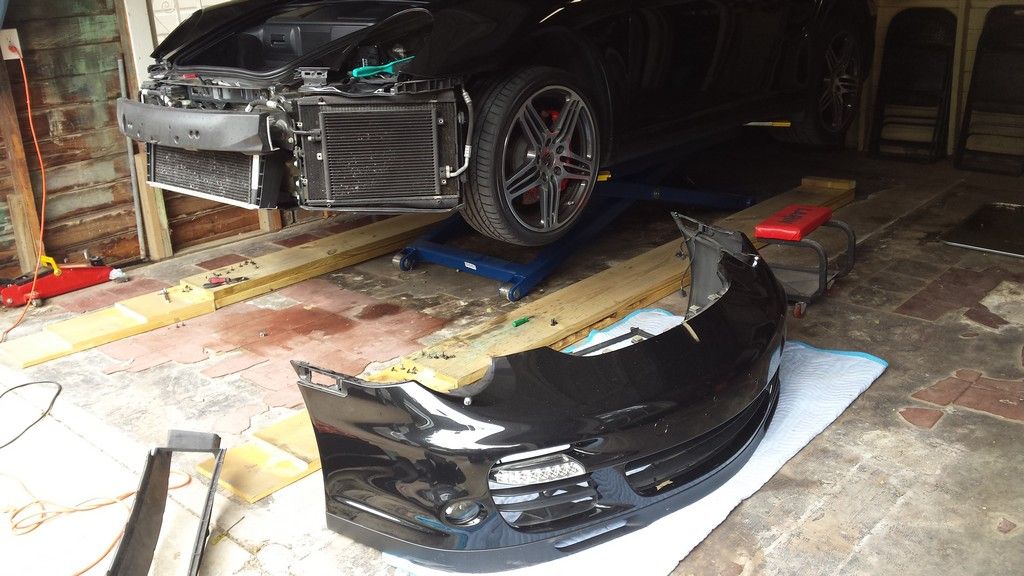
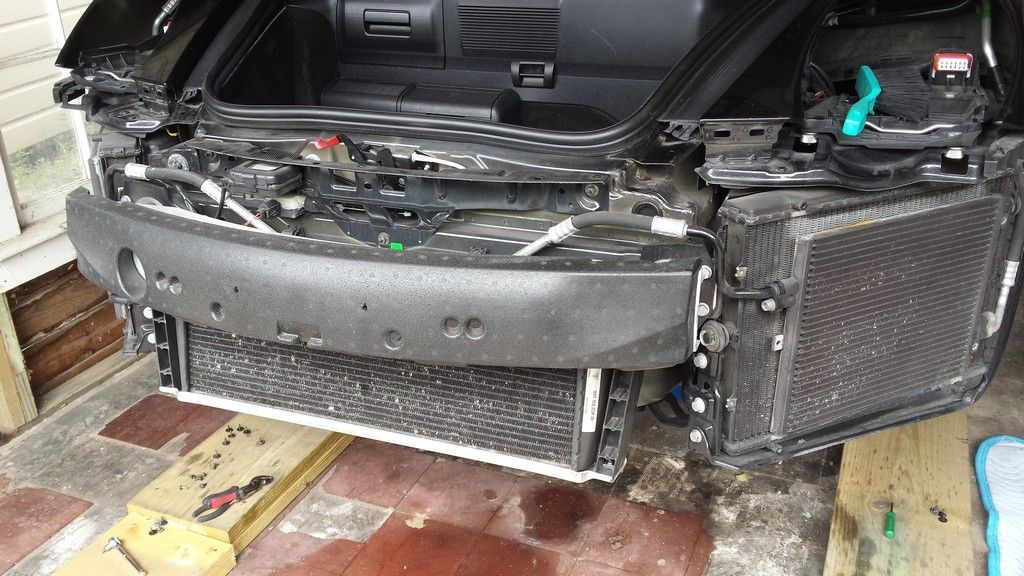
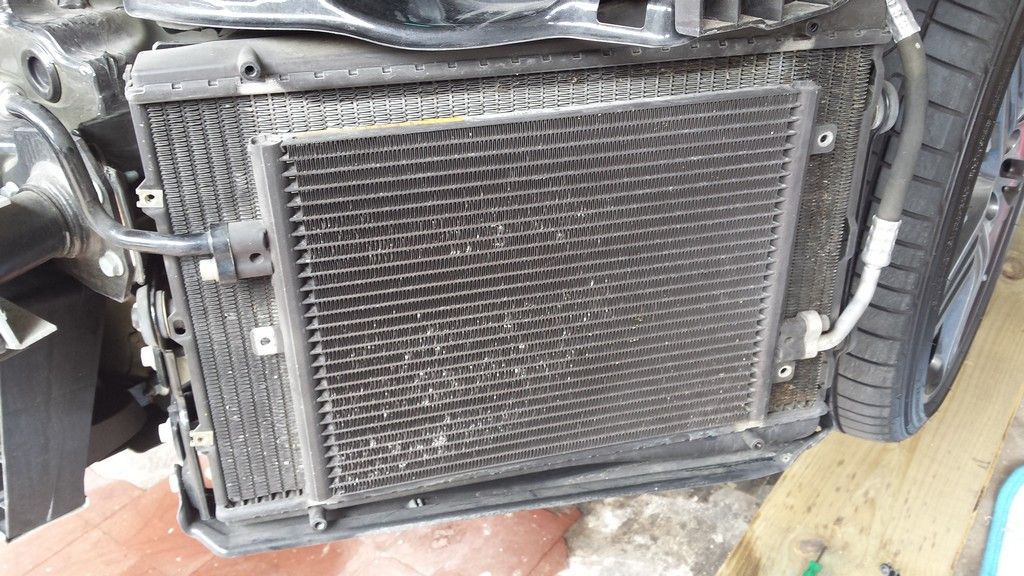
Had a chance this week to get some maintenance done on the car. I had been meaning to clean the radiator grills for a while now and finally got around to it this weekend.
I used the DIY found here to remove the bumper. (Thanks to the_rock/DC)
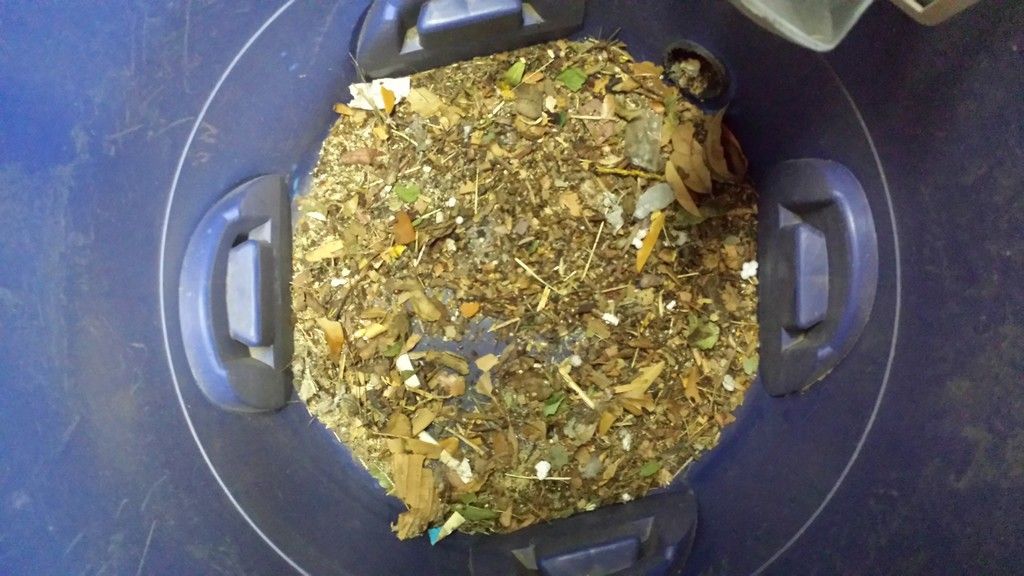
I was amazed at how much trash was behind there.. I should have taken a picture before I cleaned it all up, but I did take a pic of all the stuff I vacuumed out..
I used a combo of using a vacuum with a brush & compressed air from the back to assist..
From the looks of things, I�m not sure this had ever been done before..
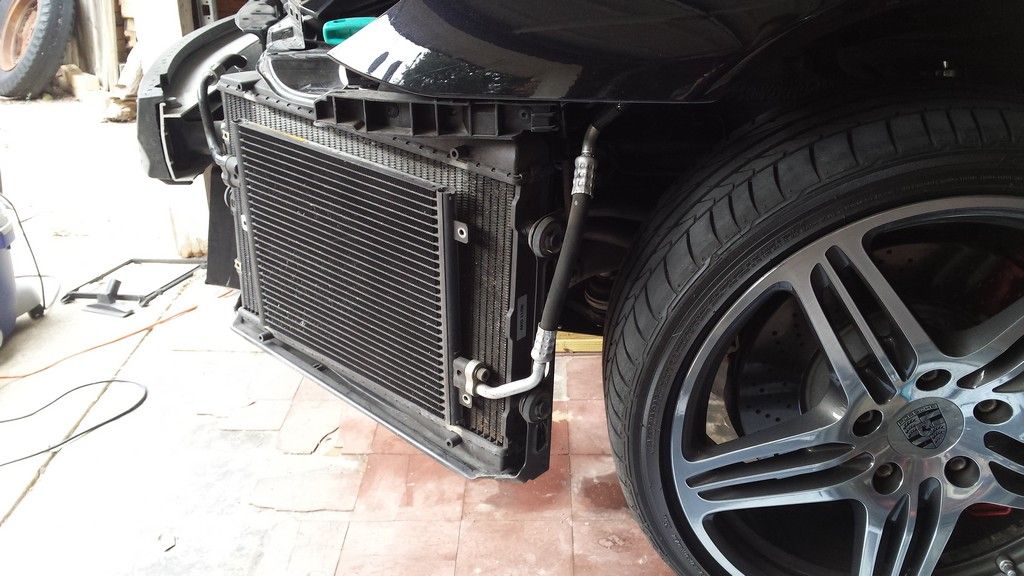
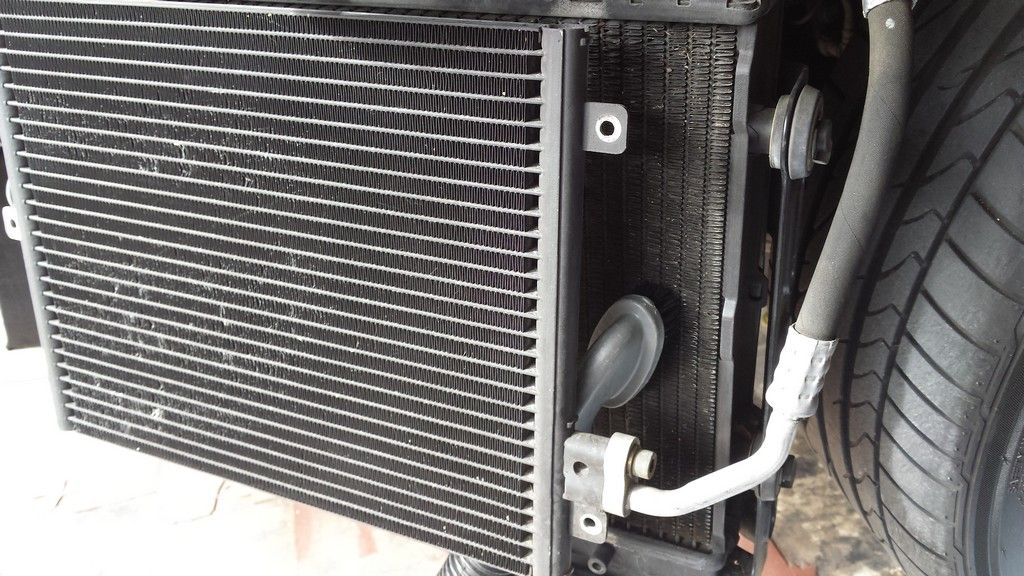
I also took the opportunity to detach the condensers and clean behind them.. I was amazed at how much trash there was still there even after a thorough cleaning � however it�s hard to get it all when the radiator & condenser are still together.
I also unhooked the center radiator so I could blow compressed air from the backside to dislodge all the tiny rocks.. The center radiator looks to be the most beat up from the 38K miles.
I�ve ordered a new wheel apron as one of mine is torn.
I enjoyed this project as I spent several hours cleaning things up � I know a tech would not spend as much time cleaning so I figured I might as well do it.
I also used this time to remove the headlight washers and paint the chrome tips black, as well as apply a liberal coat of Black Magic to all the black parts in the bumper that aren�t the easiest to access without it taken apart.
This has inspired me to tackle another project this fall..R&R of the spark plugs & coils and possibly a GT2RS intercooler upgrade. The plugs will be a bit more of a challenge on this car but my scissor lift will certainly help.
A brush attachment on my shop-vac helped tremendously.
What I got out of there..
I used the DIY found here to remove the bumper. (Thanks to the_rock/DC)
I was amazed at how much trash was behind there.. I should have taken a picture before I cleaned it all up, but I did take a pic of all the stuff I vacuumed out..
I used a combo of using a vacuum with a brush & compressed air from the back to assist..
From the looks of things, I�m not sure this had ever been done before..
I also took the opportunity to detach the condensers and clean behind them.. I was amazed at how much trash there was still there even after a thorough cleaning � however it�s hard to get it all when the radiator & condenser are still together.
I also unhooked the center radiator so I could blow compressed air from the backside to dislodge all the tiny rocks.. The center radiator looks to be the most beat up from the 38K miles.
I�ve ordered a new wheel apron as one of mine is torn.
I enjoyed this project as I spent several hours cleaning things up � I know a tech would not spend as much time cleaning so I figured I might as well do it.
I also used this time to remove the headlight washers and paint the chrome tips black, as well as apply a liberal coat of Black Magic to all the black parts in the bumper that aren�t the easiest to access without it taken apart.
This has inspired me to tackle another project this fall..R&R of the spark plugs & coils and possibly a GT2RS intercooler upgrade. The plugs will be a bit more of a challenge on this car but my scissor lift will certainly help.
A brush attachment on my shop-vac helped tremendously.
What I got out of there..
 09-15-2014, 02:30 AM
#2
Rennlist Member
That's an awesome weekend project, and cool scissor lift too.
My Indy shop recently cleaned my rads trying to track down a leak or source of what I consider excessive heat and I'm sure they didn't pull the bumper or do half as good as you did. I was in there with a shop vac getting the big stuff at least on Friday and think I may need to get in there like you did. Very thorough. Thanks for sharing the pix too.
My Indy shop recently cleaned my rads trying to track down a leak or source of what I consider excessive heat and I'm sure they didn't pull the bumper or do half as good as you did. I was in there with a shop vac getting the big stuff at least on Friday and think I may need to get in there like you did. Very thorough. Thanks for sharing the pix too.
09-15-2014, 09:55 AM
#3
RL Community Team
Rennlist Member
Rennlist Member
Nice work on cleaning those up !
I don't know if someone makes these for the turbo, but a great idea is to purchase and install one of the mesh screen kits that covers the openings that lead to the radiators. This way, most of the trash ends up outside the screens where it's easy to clean away and you also don't have rocks pinging off your radiator fins at high-speed which can bend them and eventually effect airflow through the radiators.
I don't know if someone makes these for the turbo, but a great idea is to purchase and install one of the mesh screen kits that covers the openings that lead to the radiators. This way, most of the trash ends up outside the screens where it's easy to clean away and you also don't have rocks pinging off your radiator fins at high-speed which can bend them and eventually effect airflow through the radiators.
Last edited by Petza914; 09-15-2014 at 09:59 AM. Reason: Photos don't show the screens so I removed them
09-15-2014, 10:31 AM
#5
Rennlist Member
if not, it looks easy enough to fabricate and still look great from the exterior. when i put in the 3rd rad. i also put in screens. granted i do a lot of track miles (i.e. much more stuff flying around than just on the street) but in addition to the other stuff i'm sure they have blocked, i now have a couple "big" dents in 2 of the screens. no telling what would have happened if whatever-it-was had hit the rads.
09-15-2014, 01:44 PM
#6
Rennlist Member
Thread Starter
That's an awesome weekend project, and cool scissor lift too.
My Indy shop recently cleaned my rads trying to track down a leak or source of what I consider excessive heat and I'm sure they didn't pull the bumper or do half as good as you did. I was in there with a shop vac getting the big stuff at least on Friday and think I may need to get in there like you did. Very thorough. Thanks for sharing the pix too.
My Indy shop recently cleaned my rads trying to track down a leak or source of what I consider excessive heat and I'm sure they didn't pull the bumper or do half as good as you did. I was in there with a shop vac getting the big stuff at least on Friday and think I may need to get in there like you did. Very thorough. Thanks for sharing the pix too.
Nice work on cleaning those up !
I don't know if someone makes these for the turbo, but a great idea is to purchase and install one of the mesh screen kits that covers the openings that lead to the radiators. This way, most of the trash ends up outside the screens where it's easy to clean away and you also don't have rocks pinging off your radiator fins at high-speed which can bend them and eventually effect airflow through the radiators.
I don't know if someone makes these for the turbo, but a great idea is to purchase and install one of the mesh screen kits that covers the openings that lead to the radiators. This way, most of the trash ends up outside the screens where it's easy to clean away and you also don't have rocks pinging off your radiator fins at high-speed which can bend them and eventually effect airflow through the radiators.
if not, it looks easy enough to fabricate and still look great from the exterior. when i put in the 3rd rad. i also put in screens. granted i do a lot of track miles (i.e. much more stuff flying around than just on the street) but in addition to the other stuff i'm sure they have blocked, i now have a couple "big" dents in 2 of the screens. no telling what would have happened if whatever-it-was had hit the rads.
09-15-2014, 09:08 PM
#7
Basic Sponsor
Rennlist
Site Sponsor
Rennlist
Site Sponsor
Great job saabin! Looks like you really took your time and thoroughly cleaned those coolers - what a difference.
Nice work.
Mark/Pelican Parts
Nice work.
Mark/Pelican Parts
__________________
Your Trusted Source For DIY and Parts
FREE SHIPPING over $99 click here
Porsche Parts | DIY Tech Articles | Facebook | Twitter | Instagram | YouTube | Promos
888.280.7799 | 6am - 5pm PST

FREE SHIPPING over $99 click here
Porsche Parts | DIY Tech Articles | Facebook | Twitter | Instagram | YouTube | Promos
888.280.7799 | 6am - 5pm PST
Trending Topics
07-29-2018, 08:46 PM
#8
Rennlist Member
Thread Starter
So I just did this job again, almost 4 years (and 17K miles) since the last time I did it. Not quite as much trash this time, I put some zunnsport grilles on about a year ago, so i'd like to think that cut down on some of the debris. I spent more time his time around straightening the fins and gently power washing the condensor and radiators. No signs of leakage at 54K miles.
This is an easy DIY that needs to be done at least every few years..
This is an easy DIY that needs to be done at least every few years..
07-29-2018, 09:01 PM
#9
Three Wheelin'
Pretty sure this has never been done on my 2009. The front bumper seems daunting. I am going to start researching though as it needs to be done.