When you click on links to various merchants on this site and make a purchase, this can result in this site earning a commission. Affiliate programs and affiliations include, but are not limited to, the eBay Partner Network.
Having lurked on this forum for a while and given not a lot back, I thought I'd write up my Qi wireless charger install. I'm not an expert in this sort of thing, so if anyone has any suggested changes to this please feel free to comment.
I've had a couple of phones with Qi wireless charging capability and I've often thought that having Qi charging in the car would be a great feature. Here's my write-up of exactly how I got Qi charging working in my 997 Carrera. This will likely work for all 997.1 and 997.2 models.
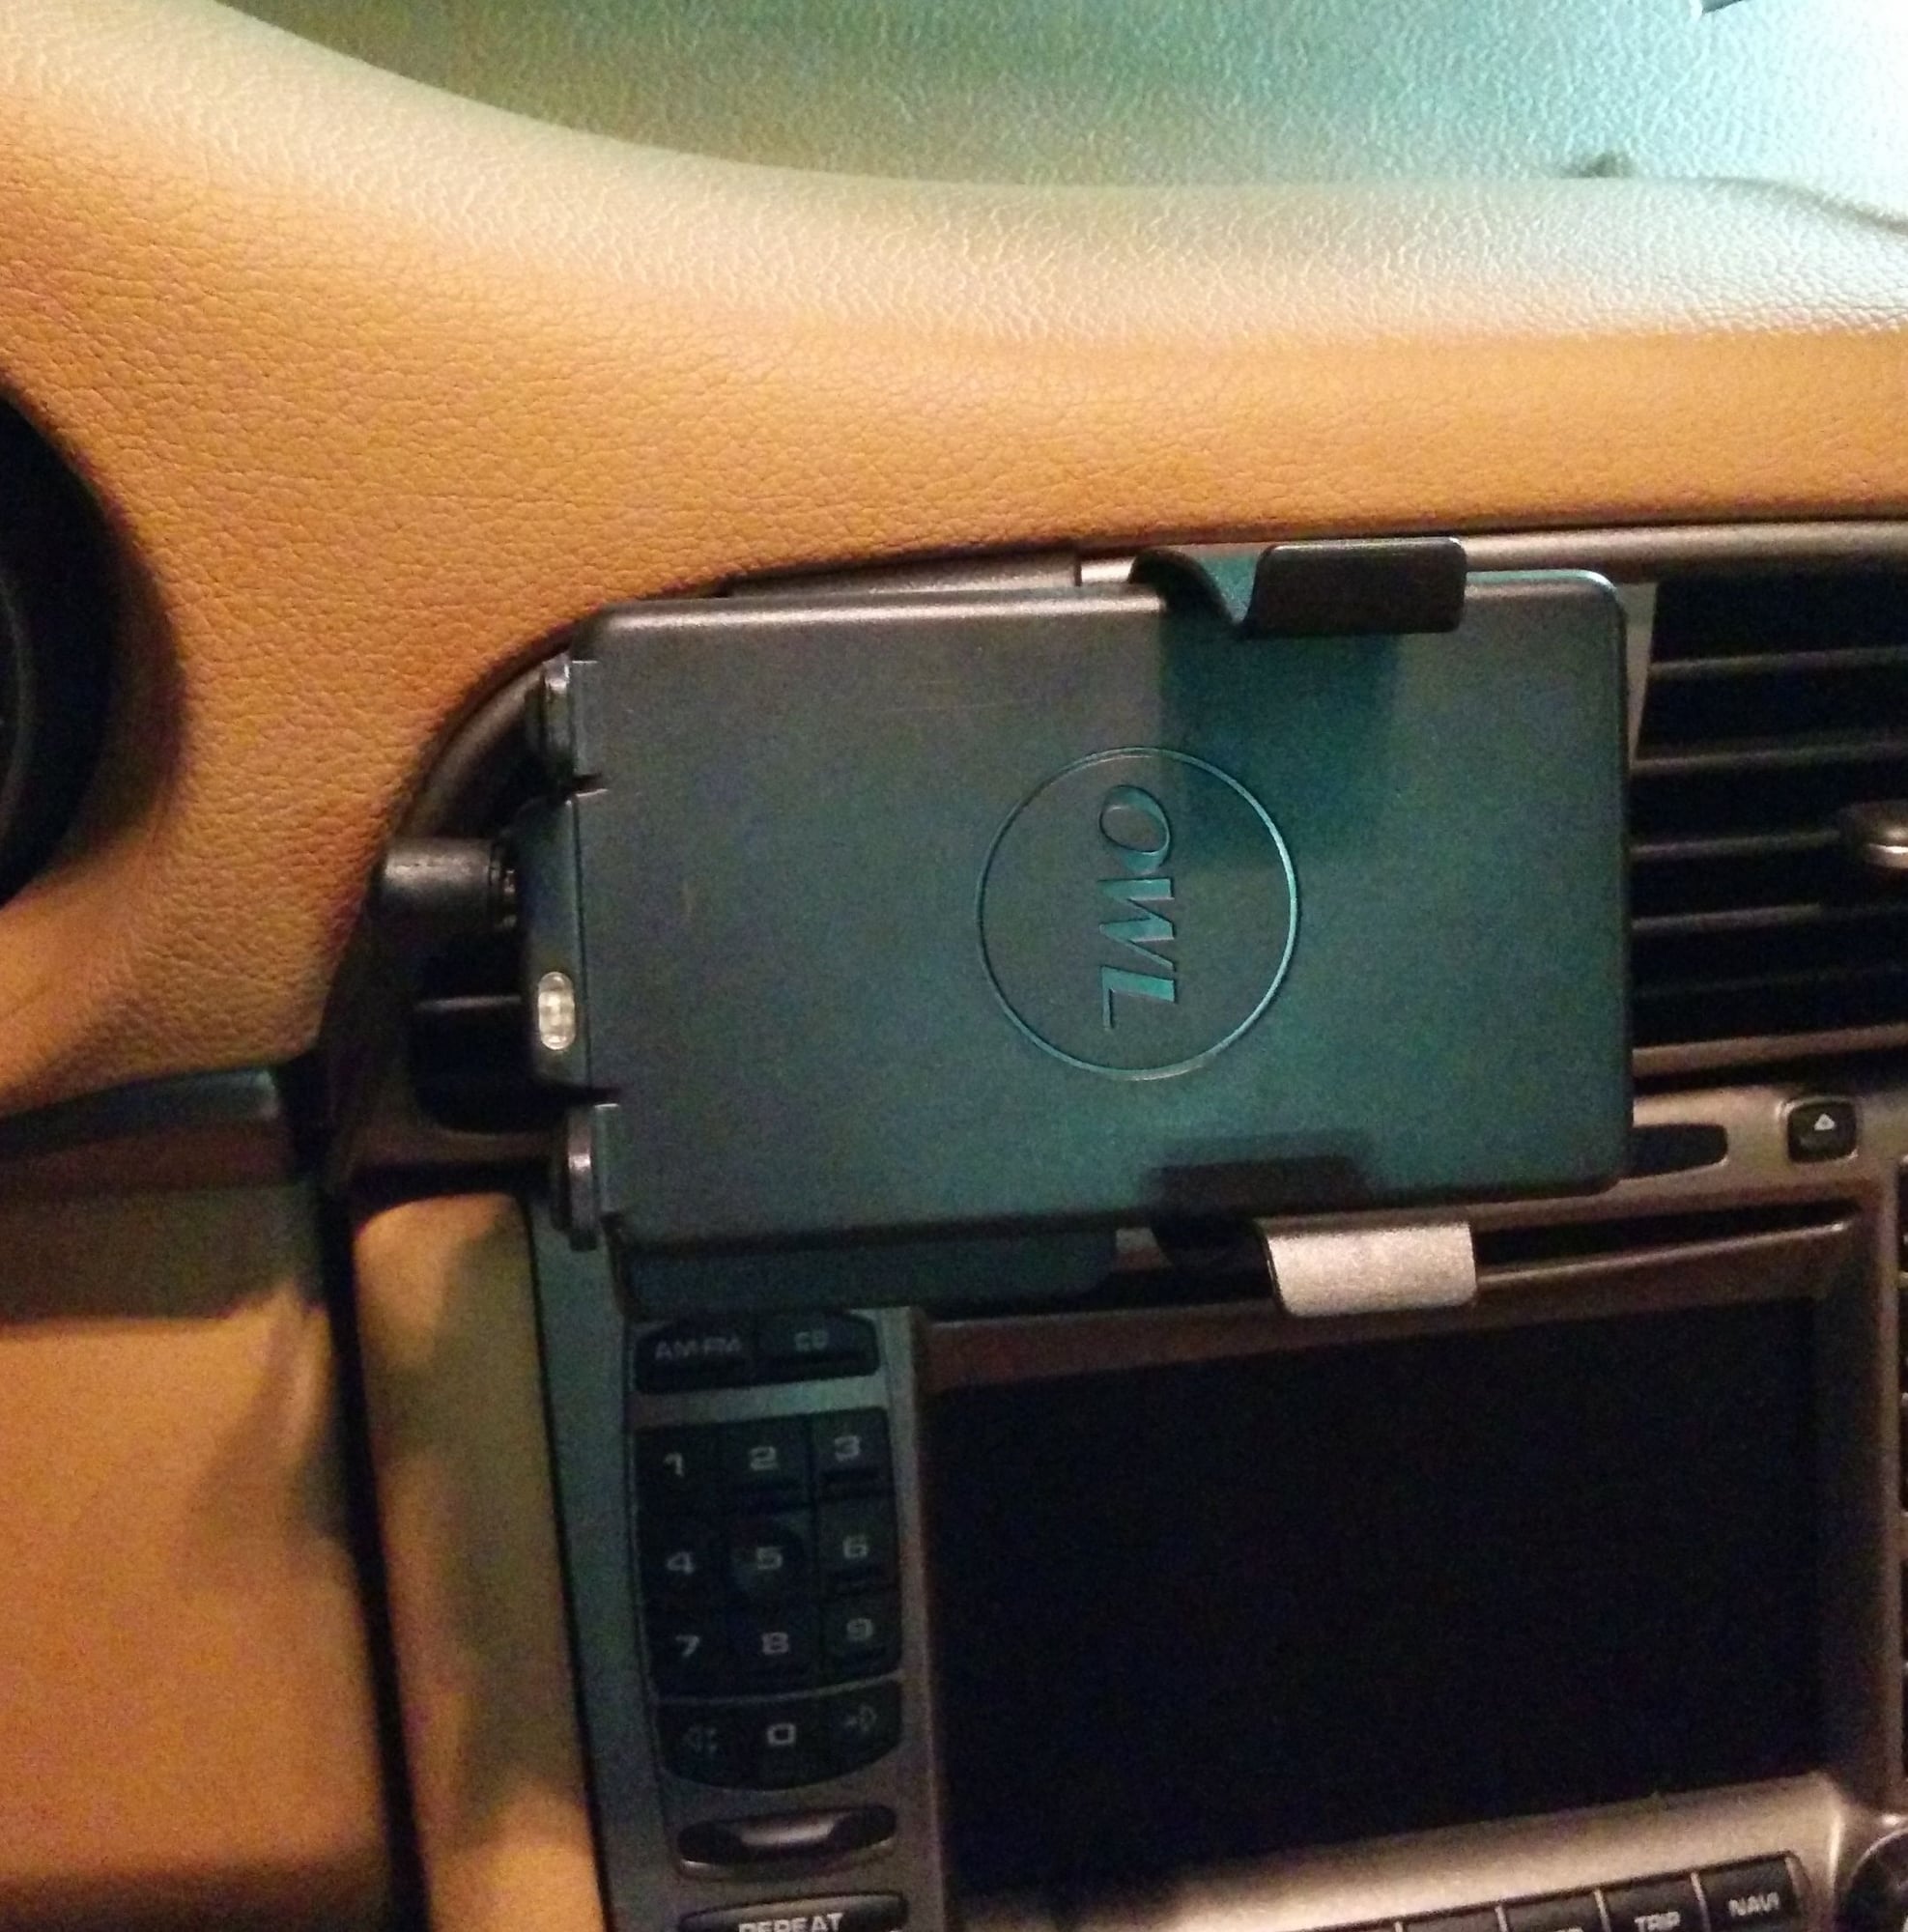
Normally I mount phones on the windscreen, but the 997 climate control doesn't normally put much cold air up there, and once it gets too hot your phone will stop charging. So I'm using a vent mount.
Things you should know up front:
Qi does not charge your phone as fast as plugging it in directly. It's probably a full 50% slower. If I run Google Maps with the screen on constantly, the phone still discharges slowly. But, man, it's easier to plug in.
Mounting the phone in the way I'm going to lay out makes it difficult (but not impossible) to access the flow on/off controls for the central dash air vents, and the hazard warning light switch.
The instructions here are for a left-hand-drive car - if you have an RHD car, you'll need to buy a different bracket and reverse some of the directions.
Things you need to purchase:
A Brodit ProClip center mount bracket (link to left-hand drive one - there's a different one for RHD), but you can't buy it directly from Brodit. You can buy it from ProClip USA, their distributor, for $29.99. This bracket fits tightly onto your left console air vent - you're supposed to use it to mount a Brodit ProClip mount, but we have other plans.
An OwlPad Qi car charger ($39.90). Get the one without any mount, as we're not going to need one. I can confirm that this charger works with Nexus 5 and Samsung Galaxy S5… those are the only phones I've tried in it but I can't see why it wouldn't work with others.
Some electrical connectors (just get a mixture of 'em)
Glue (I used Gorilla Glue)
Alrighty, enough of the internet shopping and time to actually do something.
1. Plug the OwlPad charger into your normal auxiliary socket and check it charges your phone okay.
2. Unpack the ProClip mount and wedge it around the air vent as per the instructions provided. Do not remove the cover on the sticky edges - this stuff welds the mount so hard to your dash that you could put a rope swing on it. Personally I never actually stuck the thing on - it wedges in there well enough that it's not going to fall off, and I don't want to break anything if I ever need to remove it.
3. We're going to glue the OwlPad charger onto the ProClip mount - while in the car, place the OwlPad charger on top of the mount to work out where you'd like it. Open the driver-side cup holder - it is going to come quite a long way to the left and you don't want to obstruct it. Orient the charger such that the little charging light is on the steering-wheel side - this makes the cable routing much easier, and it doesn't seem to matter (to my phone at least) which way up the charger goes.
4. Once you've worked out exactly where you want the charging pad on the mount, take the mount off the car and glue them together. There's probably some cunning way to screw them together instead but I couldn't be bothered and it hasn't fallen apart yet. You now have a reasonably solid Qi-charging mount. Celebrate with a drink. Let's add the power.
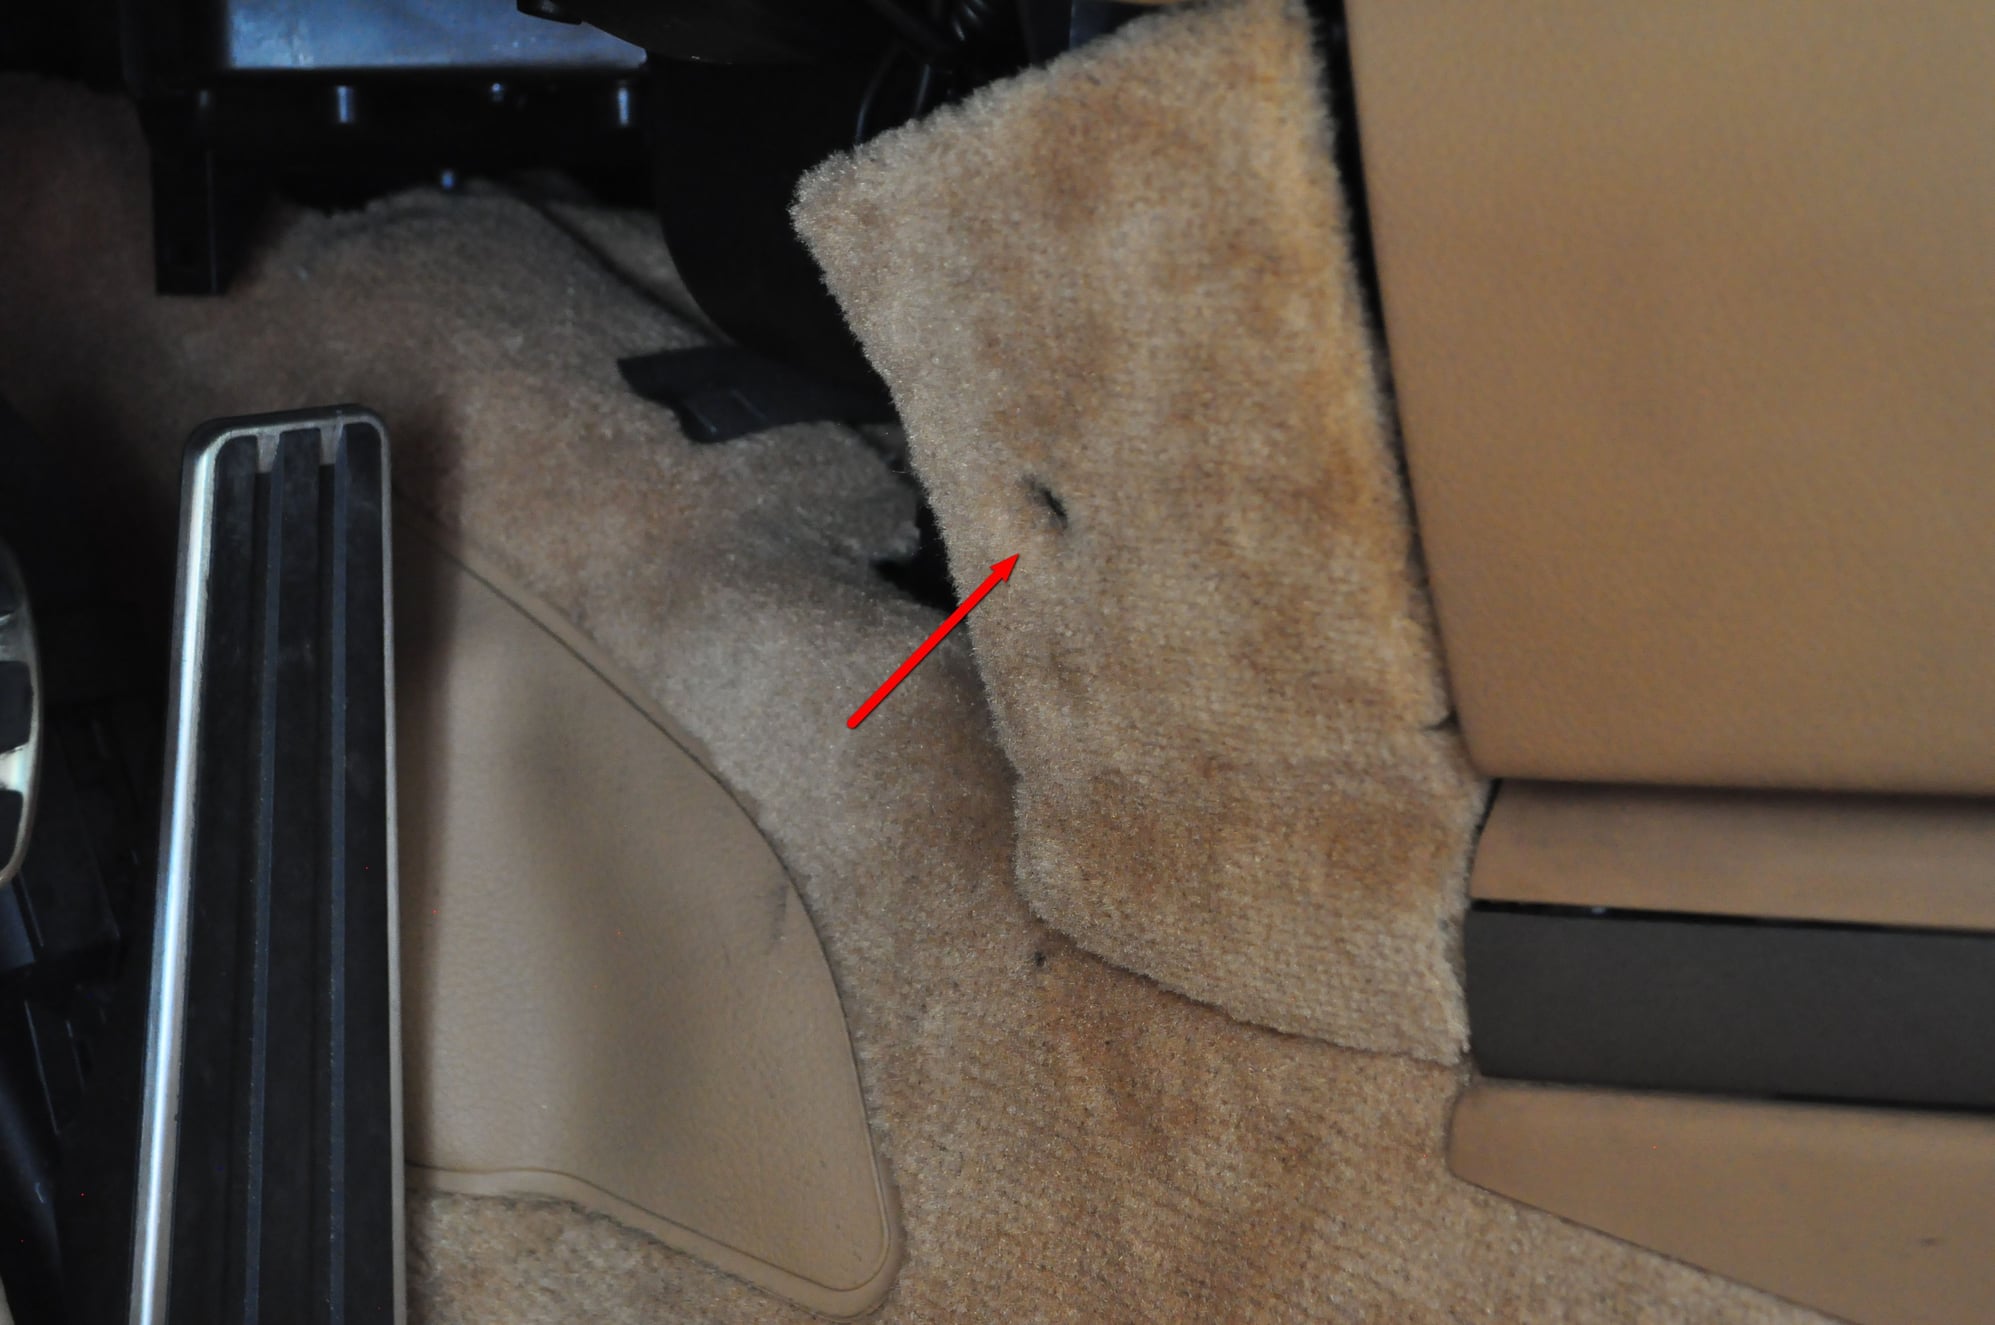
5. Take off the little square of carpet on the center console, by the driver's right ankle. Recessed in a little hole in the carpeting is a screw which requires a T30 Torx bit.
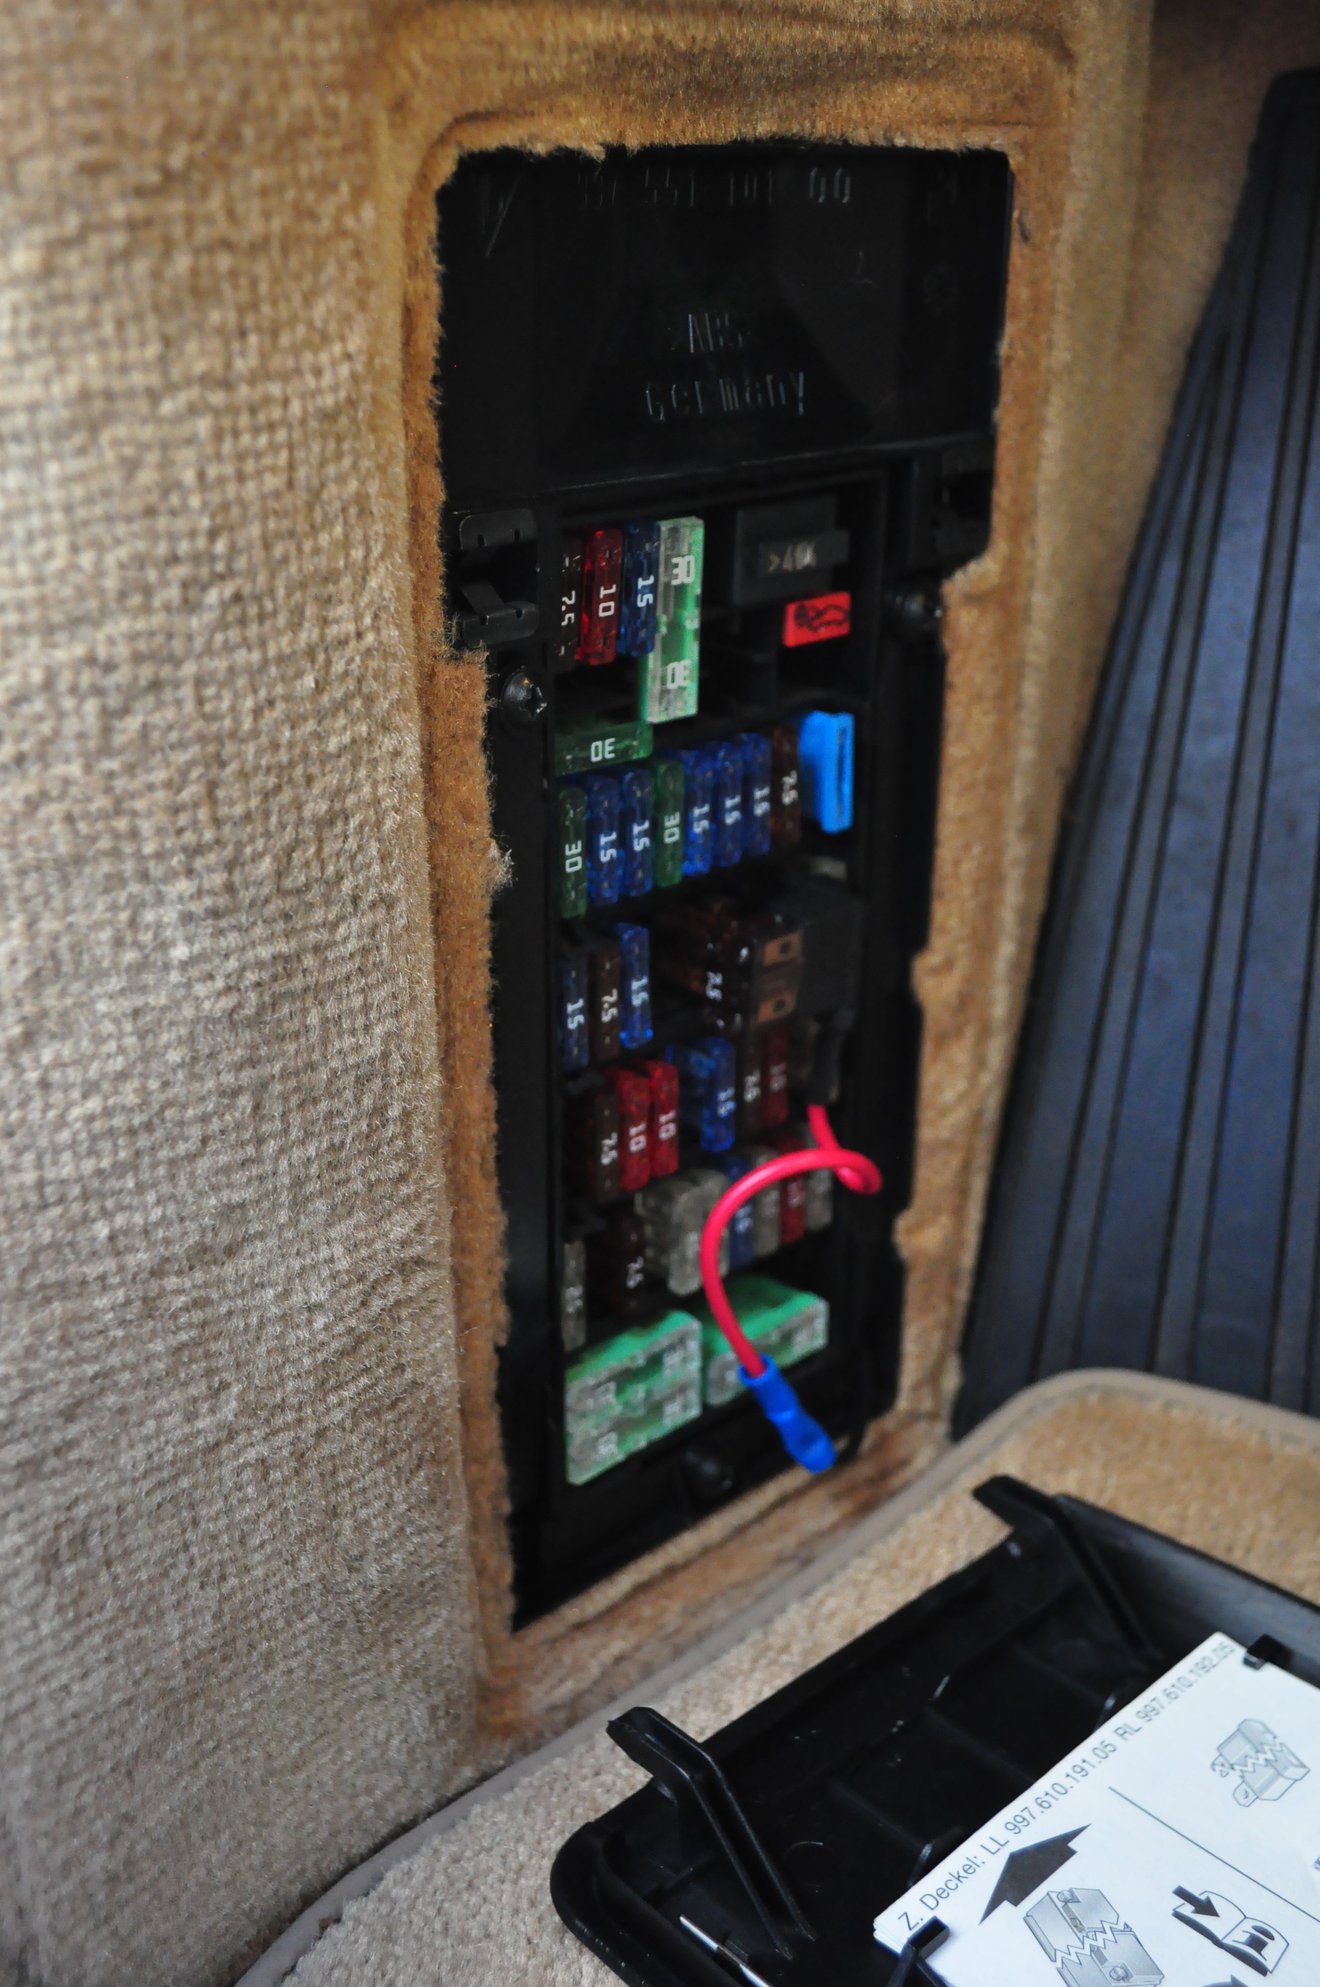
6. Open the fuse box (to the left of the driver's feet). Undo the three screws that hold the box in place. Find a 7a fuse that comes on with the ignition. A good one is B8. Put the 7a extra fuse into your fuse doubler, and piggy-back the chosen fuse. You should find that you're able to route the power cable from your supplementary fuse through the little clip holes at the bottom of the fuse box, and up through the back of the carpeted segment the fuse box lives in. Put the screws back in the fuse box. As you now have a live wire dangling around the place, don't bother turning on the ignition.
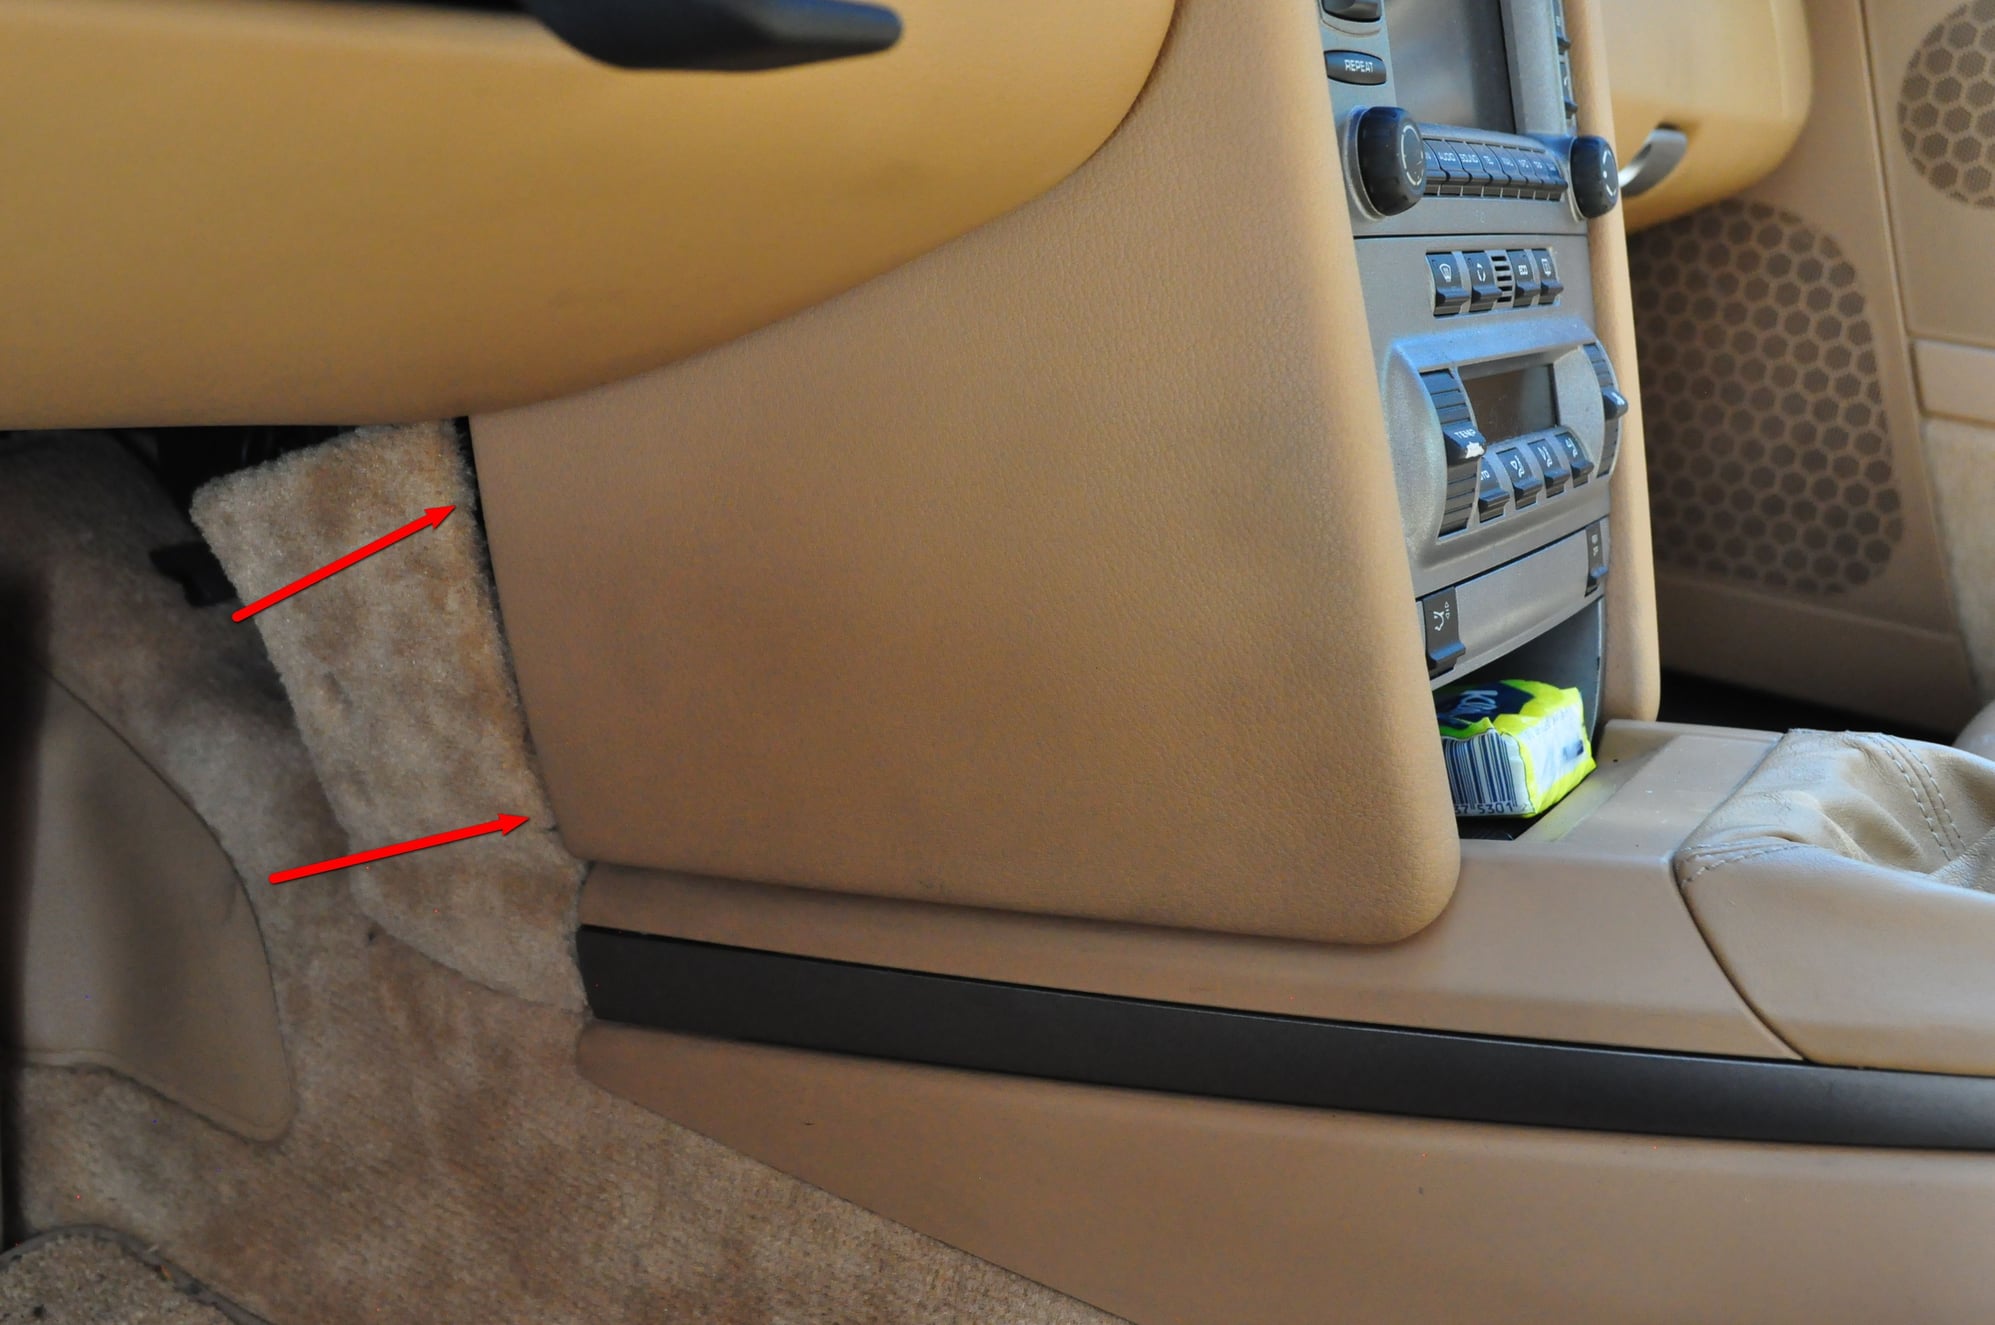
7. Undo two more Torx screws which hold on the little leather panel to the side of the PCM. The panel is held on by three clips and slides out towards the back of the car. The top clip, near the vents, might take a bit of yanking to come out. So it goes.
8. With a bit of fiddling, you should be able to route the small end of the charger power cable up into the corner above the leather piece of trim you just removed. It can be pushed behind the metal frame of the dash with just a small amount of swearing.
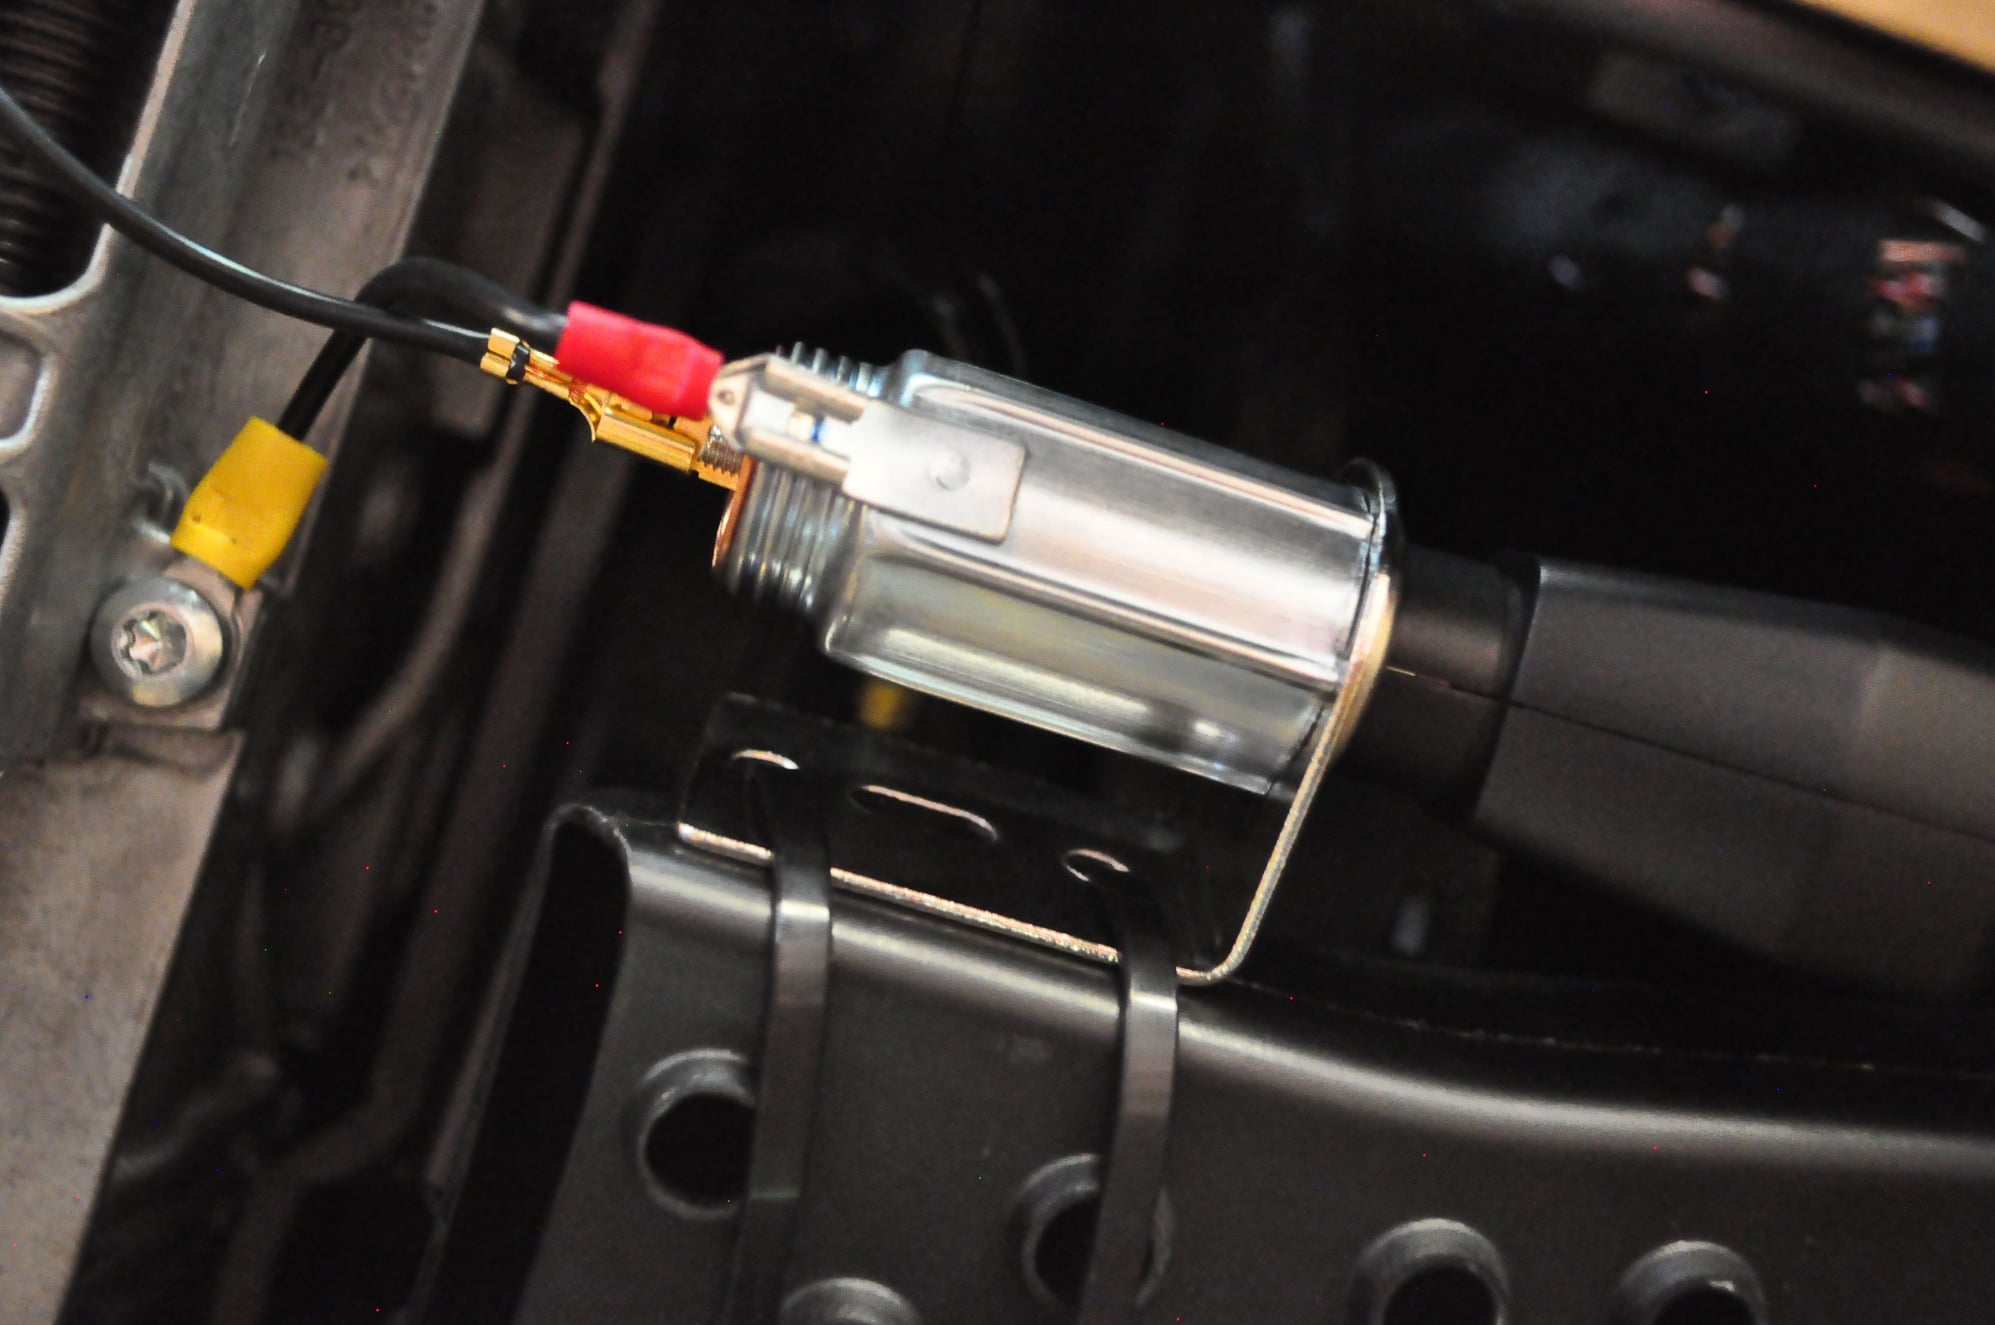
9. Join the large end of the power adapter to the auxiliary socket you purchased, and find somewhere to put them behind the PCM or inside the footwell. I ended up connecting them with zip ties to the plastic air vents at the driver's feet.
10. Put a spade connector onto the end of your wire that's coming from the fuse box, and connect it to the auxiliary socket.
11. Find somewhere to connect the earth wire. I never entirely understand these things, so I just undid the Torx screw that goes into the steering column and put it under there with a ring connector (as in pic above).
12. You're done! Have a nice beer. Or two.
If anyone comes up with improvements to this, I'll try and update the post.
Last edited by pugwonk; 09-09-2014 at 07:52 PM.
Reason: Adding "finished" pic


 09-09-2014, 07:15 PM